Blog
A little bit of anything and everything that's part of
creating, enjoying, and living a simpler life!
creating, enjoying, and living a simpler life!

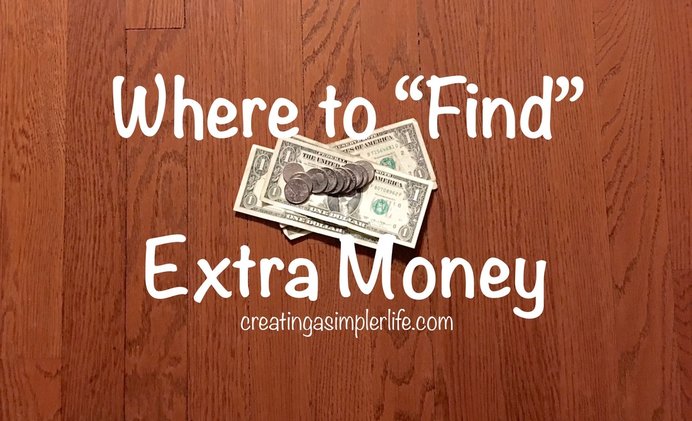
I know it is hard to believe, but most of us have extra money. It is just a matter of figuring out where it is lurking. If you pay attention every day to what you are spending money on, you will quickly realize how much more you really spend. For example, I purchase a cup of coffee every single day on my way to work. At $1.25 this really adds up over time. Working 5 days a week, for 42 weeks means I spend $262.50 per year just on my daily coffee! My husband does the same thing, but he works about 48 weeks a year for a total of $300.00. Right there is more than $500 per year we could easily be saving if we just started making the coffee at home. So lets take a look at where you might be able to 'find' a little extra money in your life!
Decrease or Eliminate Unnecessary Expenses
Here are a few ideas...
Earn Extra Money A few ways you might be able to do this...
Hopefully this helps you find a little extra money in your life!
Please share any ideas you have for coming up with extra money! Sincerely,
0 Comments
Great! You are starting to use essential oils and are on your way to holistic health and wellness. But did you know that the therapeutic benefits of most essential oils will deteriorate if exposed to sunlight, heat, and/or air? The oils need to be stored properly to prevent them from deterioration and preserve their aromatic qualities. But don't fret...properly storing the oils is simple!
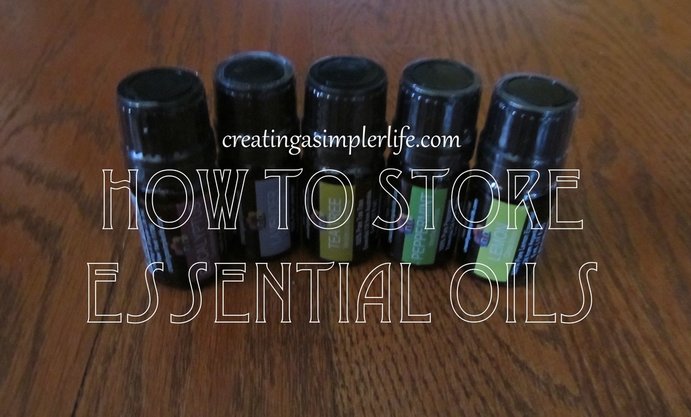
If you blend your own oils the same rules apply for storage! Be sure to buy quality amber glass containers that will seal appropriately. You can see the wooden case I use to store many of my oils in the pictures. This was actually a wooden cast that was being thrown out that I repurposed. With a few shelves added in, some paint, and elastic stapled across the inside shelves, I now have a cool, dry, and dark enclosed box for all my oils! I added a handy little handle to the top to make it easy to carry wherever I need it. 

Thanks for visiting.
Check out our other essential oil tips, blends, and ideas on our Health & Wellness page! Sincerely,

It was recently that time again. You know, that time to turn the clocks ahead. I absolutely abhor doing this. Yeah, yeah, you lose an hour of sleep when you 'spring ahead' but for me, it's more than that. As I get older and older it just takes me longer and longer to adjust. I really started thinking about this last week as I was suffering daily and realized that changing the time is a really bad idea. Why should my body have to adjust twice a year to a time change? Who's idea was this and why? I knew it couldn't be good for my body, or anyones else's for that matter, so why on Earth are we still doing this? That's when I decided to some research and want to share why we should end daylight savings time.
How does daylight savings affect our health? First, daylight savings time basically gives you jet-lag! Web MD says that springing forward interrupts your circadian rhythm, otherwise known as your sleep-wake cycle, and well, this leads to all sorts of other problems. Here are a few of the problems this creates:
What states observe daylight savings time? Guess what? Not everyone is! Here in the US there are many states that no longer observe daylight savings because states are free to make their own choices regarding time! The states that choose not to are Arizona (most of it), and Hawaii. We have some overseas US territories that also choose not to observe and they are Puerto Rico, American Samoa territories, the Northern Mariana Islands, and the US Virgin Islands. It is my understanding that most countries in the southern hemisphere do not change their time either. Who started daylight savings time? Believe it or not, the Germans started it during World War I in an effort to conserve fuel. Many other countries apparently soon followed, albeit inconsistently, including the US. In the US it was put into consistent use during World War II, again as part of the war effort to conserve fuel. After the war there were periods of trial and error, but it wasn't until the 1970's that it became consistently used again and later became federal statute. Why did we start using daylight savings time? It appears it was all about fuel conservation. Apparently countries would be able to reduce the lighting demand thereby saving fuel for the war effort instead. In the US we had a major fuel shortage in the 1970's (this was probably true everywhere else too) so I can see the connections and understand why we made the changes. However, as a science person I was shocked to read that these changes were not originally based on any evidence! They had no proof that daylight savings time actually saved fuel! Not too long ago, I think it was 2008, someone finally did a study (read about that here) and basically they discovered that changing the time decreased energy use in the evenings, but at the same time it increased the need for more lighting in the mornings. It was basically a wash! Why are we still using daylight savings time? There are several reasons. Though they say most people don't want it (they have done surveys apparently), they also say that people think they are owed an extra hour of daylight. Ha! This is absolutely preposterous. They could get that extra hour simply by getting up an hour earlier in the morning! Changing the clocks doesn't change the amount of daylight, it simply changes when we get to enjoy it. That brings me to the farmers. Many people claim that they are doing it for the farmers but that is BS (yes, bull shit). The farmers don't need to change the time! They are going to do what farmers do: work from sunup to sundown to grow their crops. Period. Time has nothing to do with it. The last potentially reasonable explanation is that crime rates go supposedly go down. Apparently criminals love doing their dirty work in the darkness, so by changing the time, they don't get out and 'rob' as much. What!!!! Again, I am just going to state this simply...the amount of daylight and darkness does not change. It's just a matter of what time the sun rises and sets every day. I just don't get how this decreases crime. There is still the same amount of darkness for criminals to do their 'thing.' Unless of course they have set work hours, say like from 6 PM to midnight so that when we change the time those hours are decreased from a 6 hour work day to a 3 or 4 hour work day???? What am I missing here?
What did we learn from this?
What do you think?
Should daylight savings stay, or should it go? I would love to hear from you! Sincerely,
Sources:
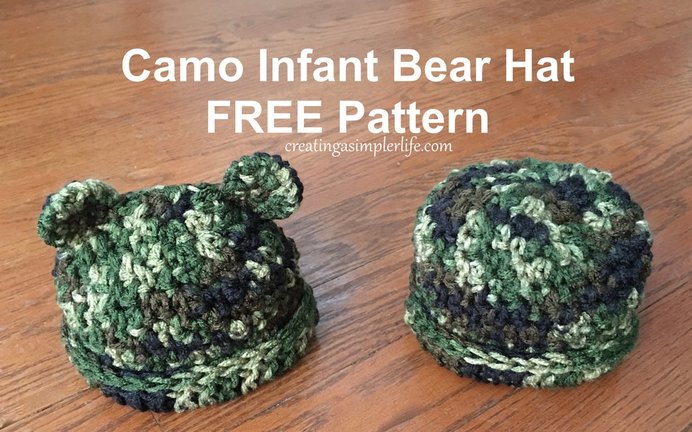
My niece is expecting! I couldn't be happier to become a great aunt! Little Bobby should be arriving this April and everyone in our family is so excited. As with most young mothers to be, my niece is already planning on having his newborn pictures taken by a professional. This is such a special event that it is planned out well in advance. In fact, the photographer has everything except the hat! And that brings us to this extra special FREE crochet pattern.
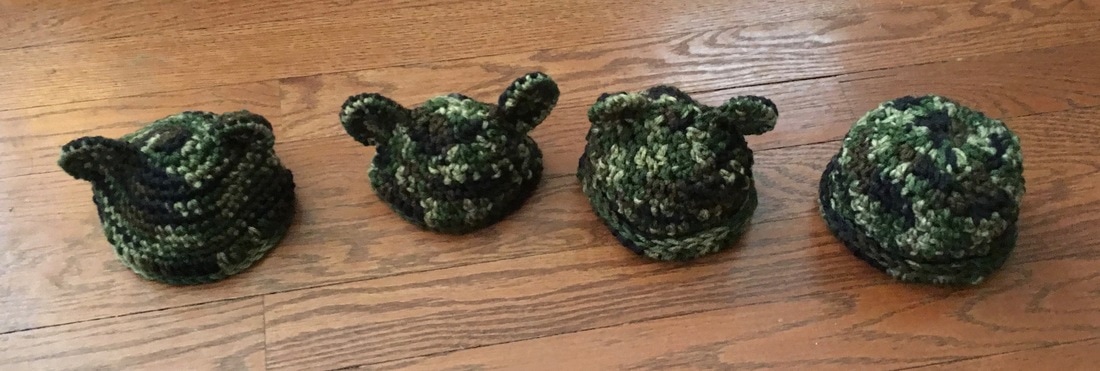
My niece texted me a picture of what she wanted the other day, asking if I could possibly make one for her. Of course I said yes and after several attempts at crocheting a cute little camo infant hat I finally settled on the pattern you see above (my other attempts are in the photo at the bottom of the page). I liked this one the most because you can't easily see the crochet rows making it look more like camouflage. This however does make the pattern a little more difficult. You really have to pay attention and count the number of rows as you crochet because going back and figuring out where you are is too difficult. The good news though is that you can finish the whole hat pretty fast! Definitely under an hour and it looks great with or without the ears :-) I look forward to adding a picture of my new great nephew wearing the hat after he is born!
Supplies:
Trial and error until I came up with a pattern I liked!
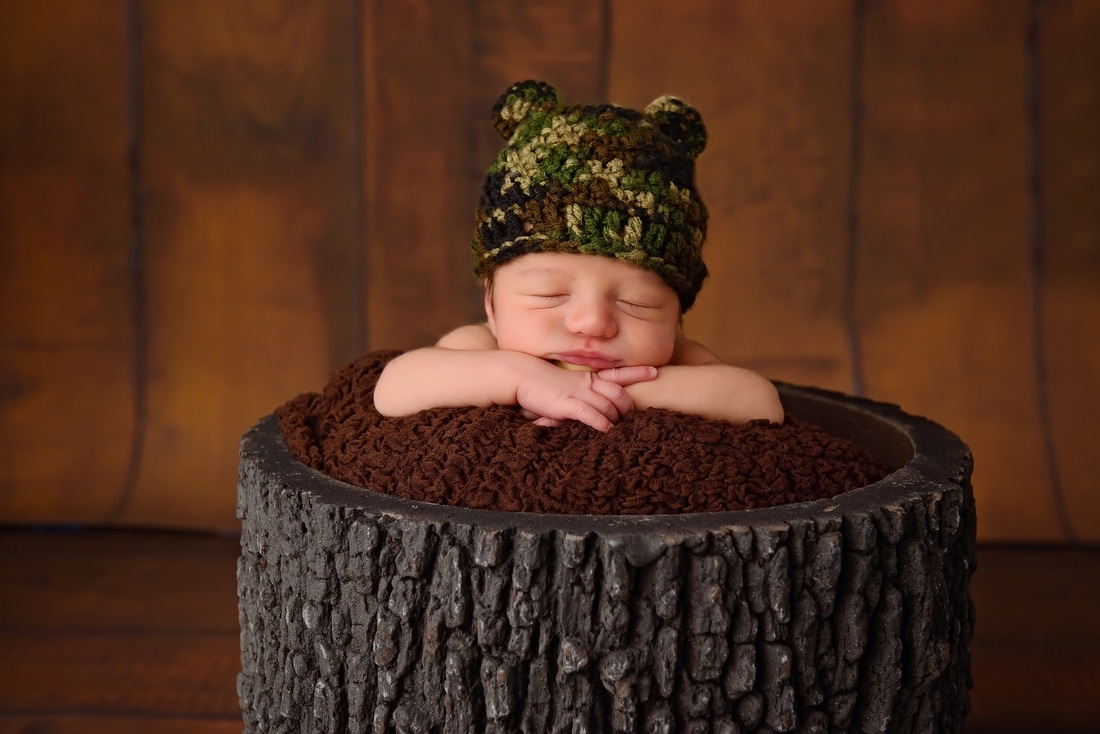
The hat is perfect on my sweet nephew :-)
Enjoy and thanks for visiting!
Check out all our other FREE Crochet Patterns and follow us on social media :-) Sincerely,
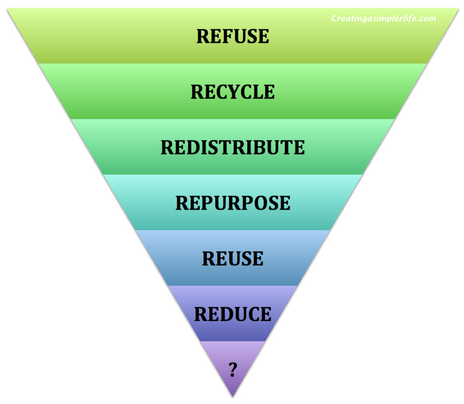
It doesn't matter who you are or where you live, it should be everyones goal to have as little household waste as possible! With a little work and a lot of creativity it is possible!
Practice these basics in order from top down and read about how to maximize each one to the fullest at Zero Waste Household.
Enjoy this FREE Recycling Chart (below) to help with recycling as much waste as possible.
Click on the picture of the chart below to download and print! It is an 8.5" x 11" pdf file :-) 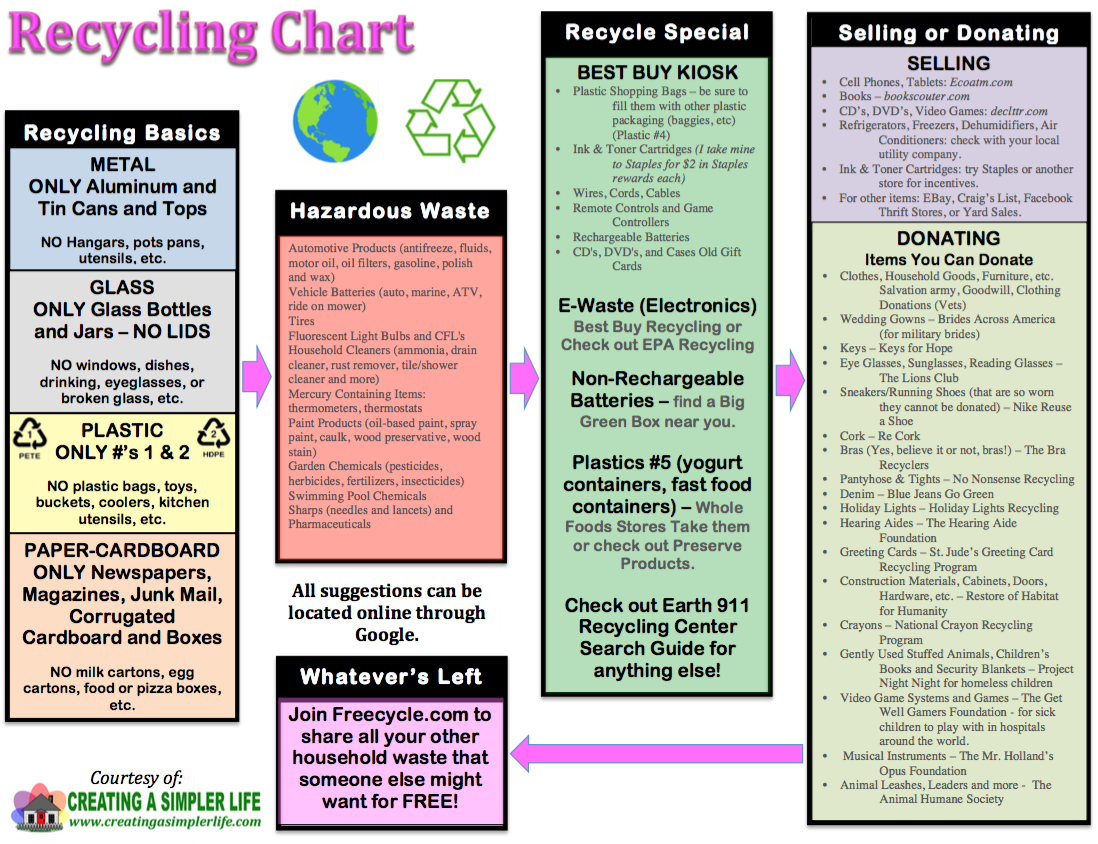
Read more about having a Zero Waste Household.
Thanks for visiting :-) Please follow us on social media! Sincerely,
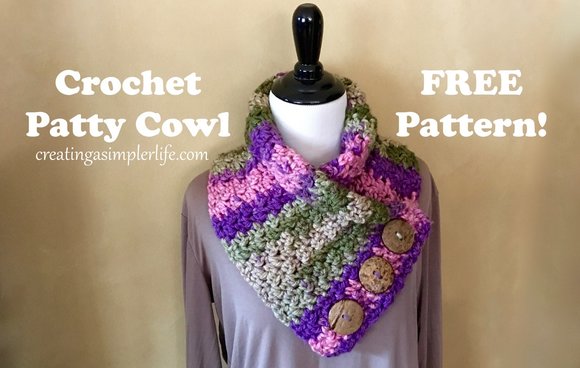
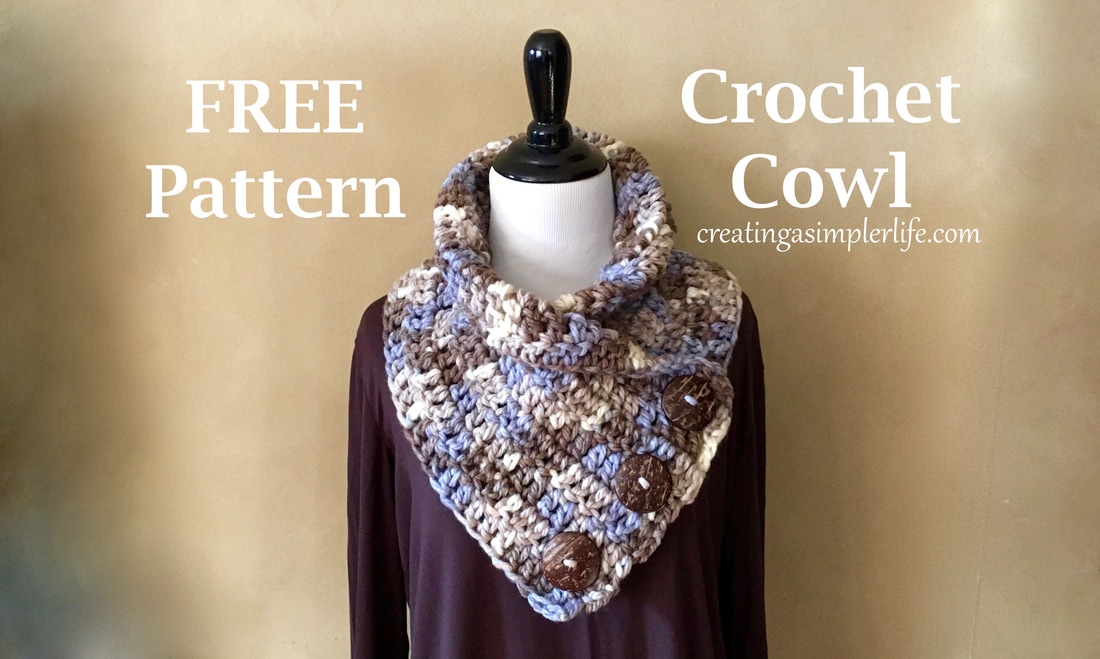
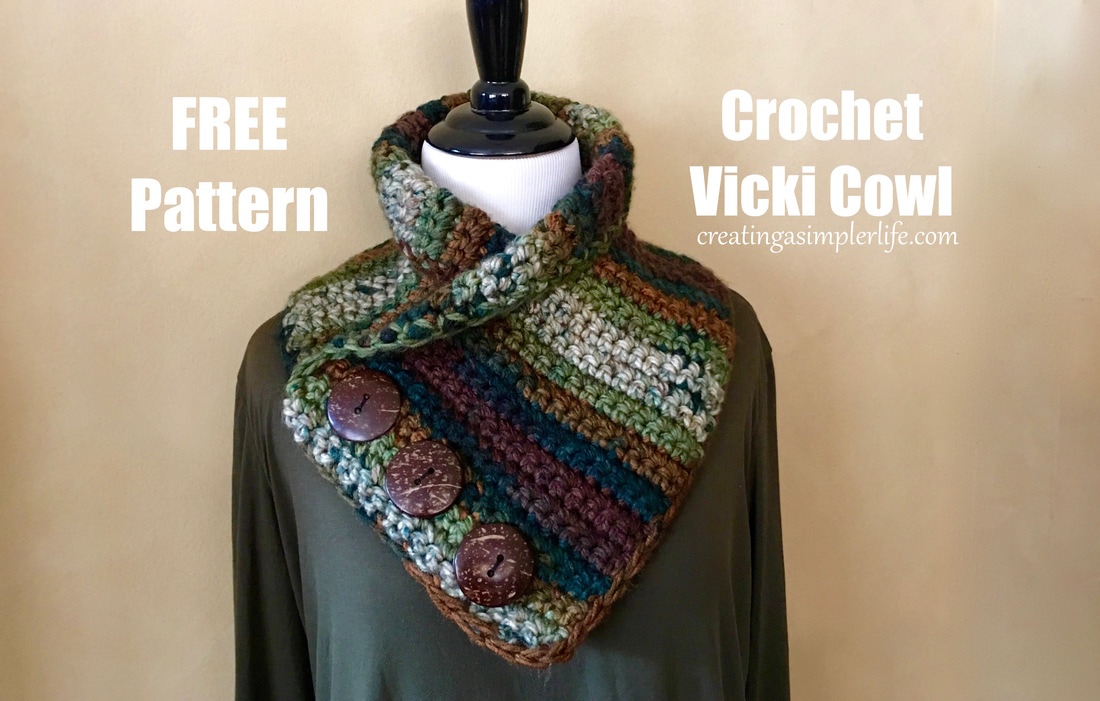
This lovely cowl is named after my friend Patty who I really have to give a lot of credit to. She is pregnant (yea!) and she decided to learn to crochet so she could make her own special baby blanket! What better reason could there be to learn how to crochet? Anyway, she was doing a new stitch I had never tried and of course I had to figure out how it was done and what it would look like! So I used this simple new stitch and made this cowl I named after her :-)
Enjoy! Supplies:
Directions:
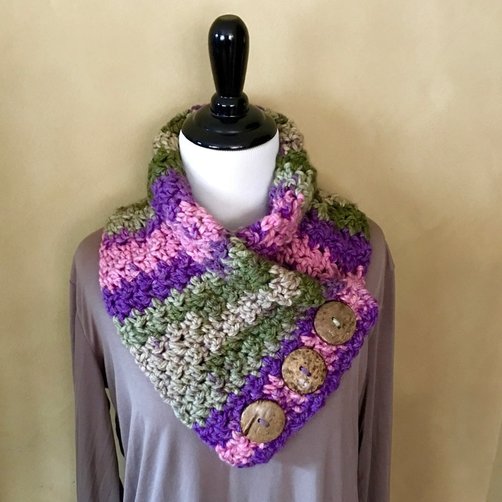
Super simple!
Check out our two other FREE cowl patterns: (click the picture to go to pattern)
Thanks for visiting!
Check out our other FREE crochet patterns here! We have some great Crochet Boards on Pinterest too! Sincerely,
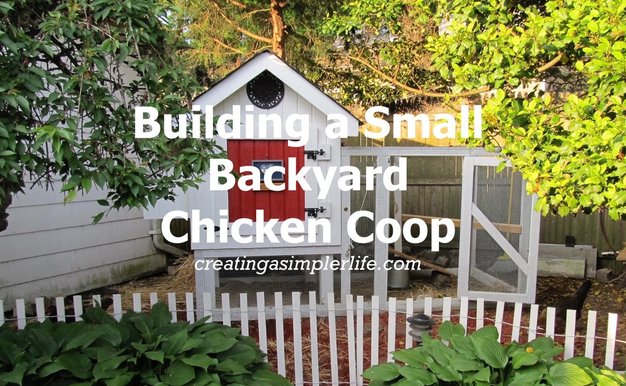
Building a backyard chicken coop requires a little research and planning before getting started. Below you will find a some of the things to think about with respect to the requirements and basic design principles before you start building, or even if you are considering buying a ready-made coop. Either way, if you are getting chickens you absolutely need to make sure you have a coop in place first!
Coop Requirements
Design Principles
Coop Cost
Check out our slide show of building the coop!
We built it in the spring of 2010 and it is still great 7 years later!
For information on building a coop check out: http://howtobuildachickencoopmanual.com
Thanks for visiting!
Check out more about our chickens on our page "Backyard Chickens" and follow our "Chickens & Eggs" board on Pinterest! Sincerely,
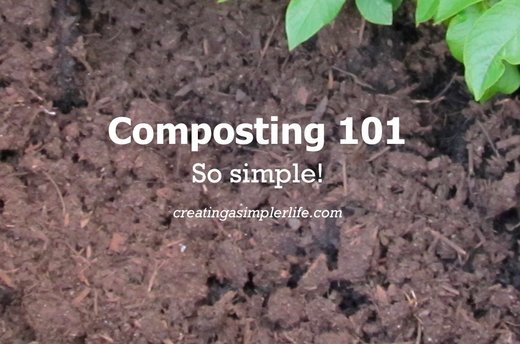
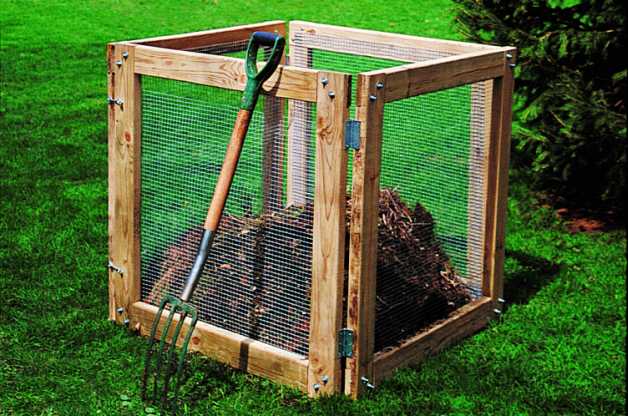
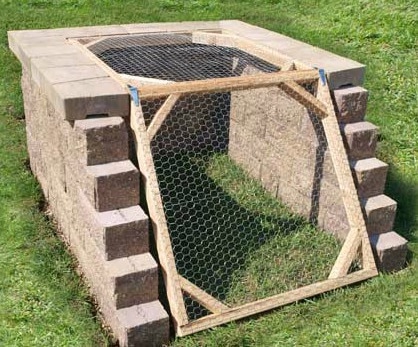
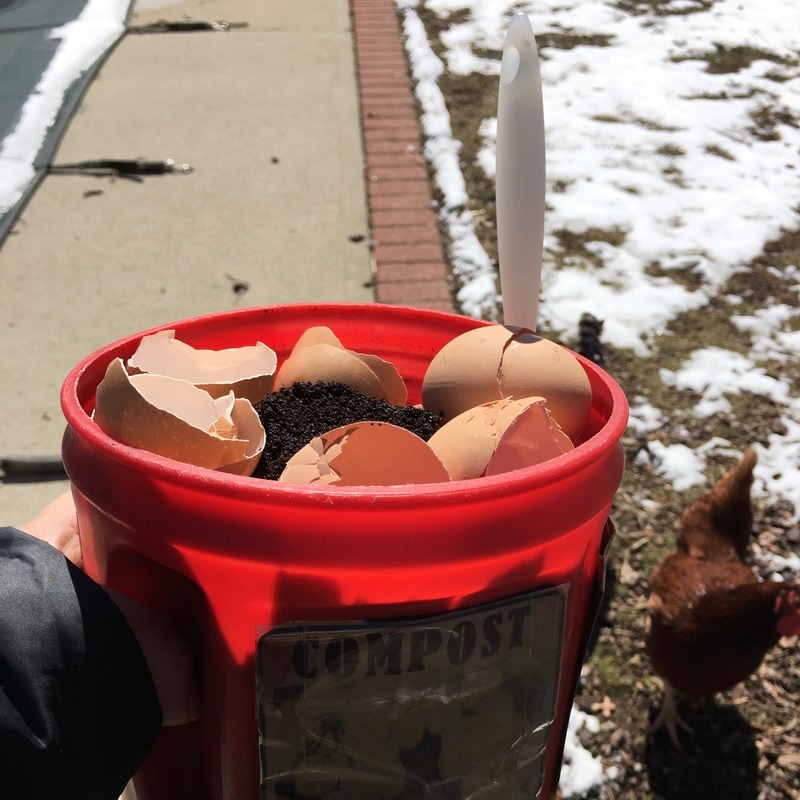
We compost here every single day. Well, the scraps go on the counter every day, not necessarily out to the bin. But the point is that we compost and we reap the rewards every spring when we use that wonderfully rich, dark, material in our gardens! We currently have an inexpensive four sided recycled plastic compost bin. It came with a removable lid on top and a front sliding door that could be opened to pull out the material. We modified it over the years by removing the top and the front door so it is always open to the elements (and because the were annoying and unnecessary). Now it is much easier to maintain but when we move to our New Future Homestead we will simply build a three sided bin from cement blocks or wood (see pictures below) that will be much easier to access and turn regularly. No matter how big or small a bin you choose or use, the reward of beautifully rich compost is well worth the effort!
Choose a question below to learn more:
What is compost?
Compost is a homemade organic material that can be added to your garden soil to help plants grow. It is a combination of three basic ingredients
Why should you compost?
How can you get started?
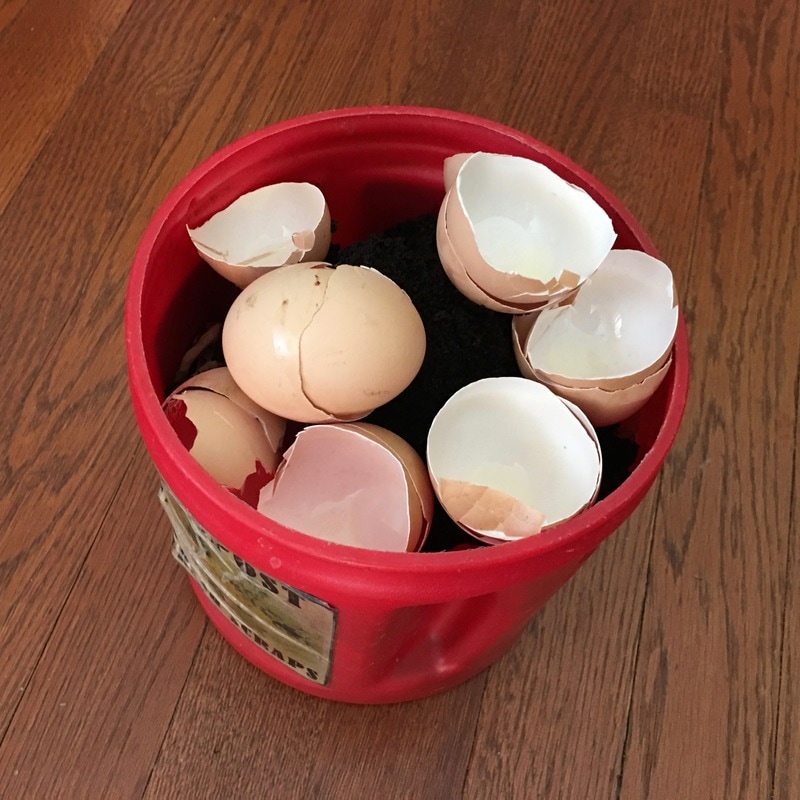
What can be composted?
You won't believe this list of things you can compost!
What should not be composted?
Anything that could be harmful if it gets into your food. For example, if your yard waste or grass was treated with herbicides and or pesticides then you do not want them in your compost pile. If you added processed charcoal to your fire, then do not put the ash into the compost, again, due to the harmful chemicals.
It is also said to avoid adding bones and uncooked meat from animals and fish because they attract animals (including flying buggies) and can smell over time. This is definitely good advice for small yards. However, if you have a large property then you can choose to add it anyway, or you can take it out far from your house and leave it out for the animals. I know what you might be thinking (gross), but if you are a hunter then you know this is not a big deal. If it doesn't get eaten (which it will), it will still decompose! Lastly, you should never add any prepared or cooked foods, again, for the same reasons as above. However, some of these leftovers can be saved in the freezer to add to soups and or stews or fed to your own chickens, goats, and or pigs! So basically, be smart! And when in doubt, well, just keep it out! Of the compost pile, that is :-)
You can easily purchase a bin (see some at the bottom of this page),
but DIY is even better if you can! Here are two of my favorites! Note: pictures are links to plans (actual links at the bottom of this page)
A few simple tips to help make composting simpler:
If all goes well, your compost can be usable anywhere from two (2) months to two (2) years. Ours is used once a year when we plant our garden in the spring and it is awesome!
Thanks for visiting!
Please follow us social medial and check out our other ways to Minimize Household Waste and Zero Waste Home! Sincerely,
Sources:
www.epa.gov/recycle/composting-home www.birdsandblooms.com/backyard-projects/diy-garden-projects/diy-compost-bin/ www.allanblock.com/courtyard/compost-bin.aspx
Ways to Conserve Water at NO COST to you:
Ways to Conserve Water at a Minimal Cost (but are worth it!):

Links:
http://www.epa.gov/WaterSense/pubs/fixleak.html http://www.epa.gov/watersense/ http://www.epa.gov/WaterSense/docs/ws_waterenergy508.pdf
Thanks for visiting!
Sincerely,
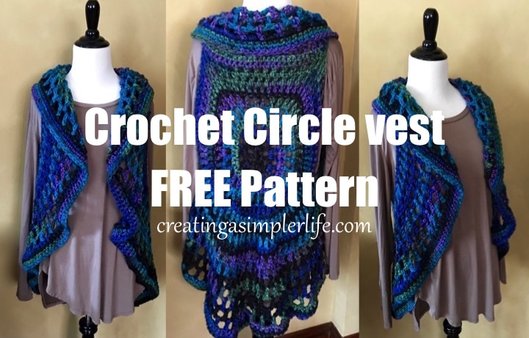
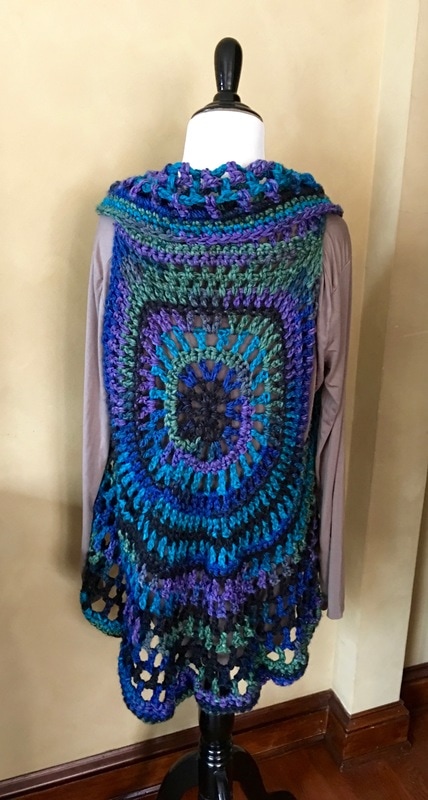
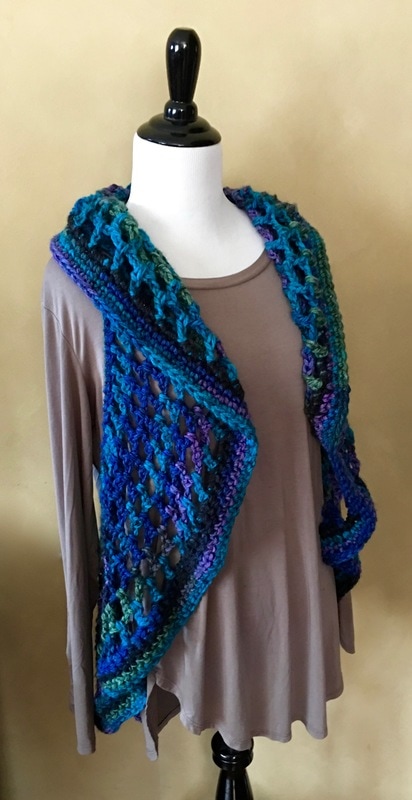
Oh so simple! Love this circle vest. I will attempt to write out directions, but know that it really depends upon the stitch, the yarn used, and how much you increase each time around. The more you increase, the more of a 'bustle' you will end up with in the back.
Supplies:
The Basic Pattern:
I love this vest because it is so simple that I can work on it while watching television with my husband!
Thanks for visiting!
Check out our other FREE crochet patterns here! We have some great Crochet Boards on Pinterest too! Sincerely,
|

Hi there! I'm Kathie, the author behind Creating A Simpler Life blog. I'm excited to share our longterm projects (and planning) toward building our future retirement homestead in the Adirondack Mountains of New York. In the meantime I will be sharing all the other little things we do that are part of creating our simpler life!
Categories
All
Archives
July 2020
|


 RSS Feed