Blog
A little bit of anything and everything that's part of
creating, enjoying, and living a simpler life!
creating, enjoying, and living a simpler life!

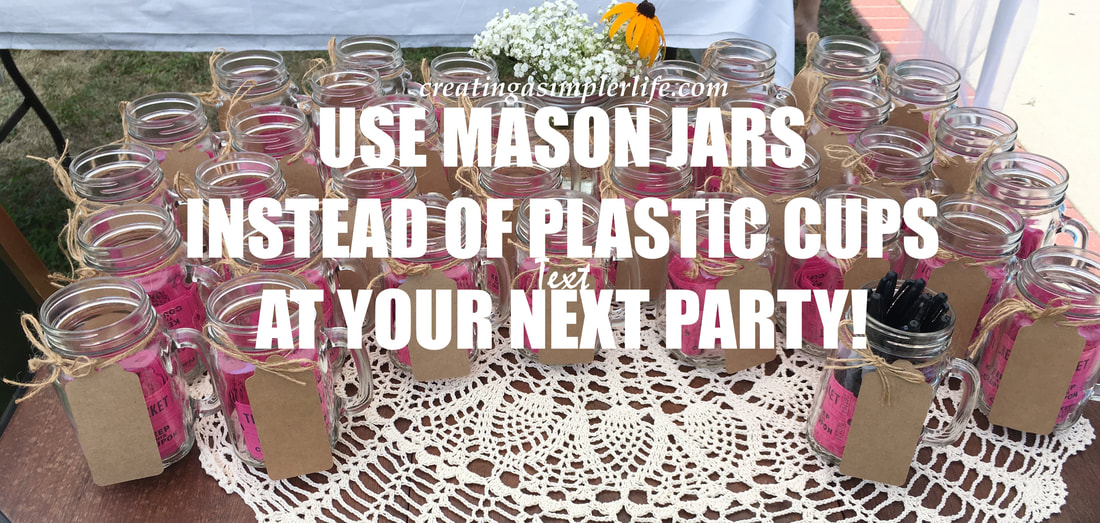
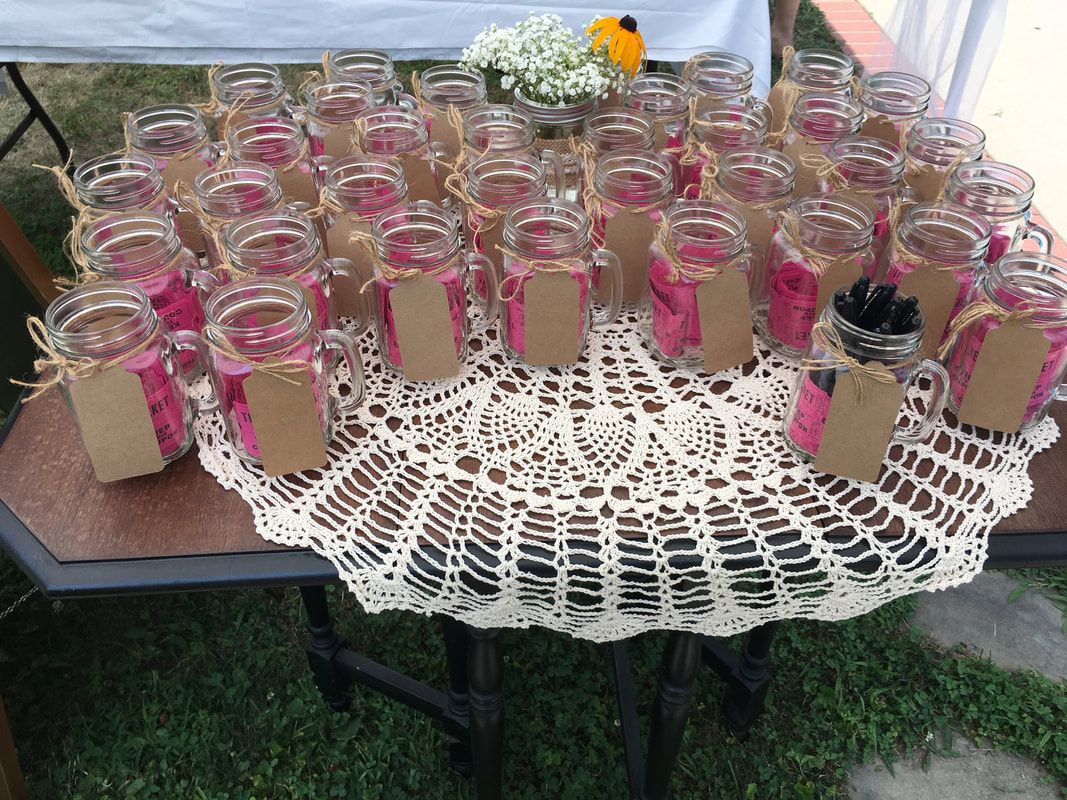
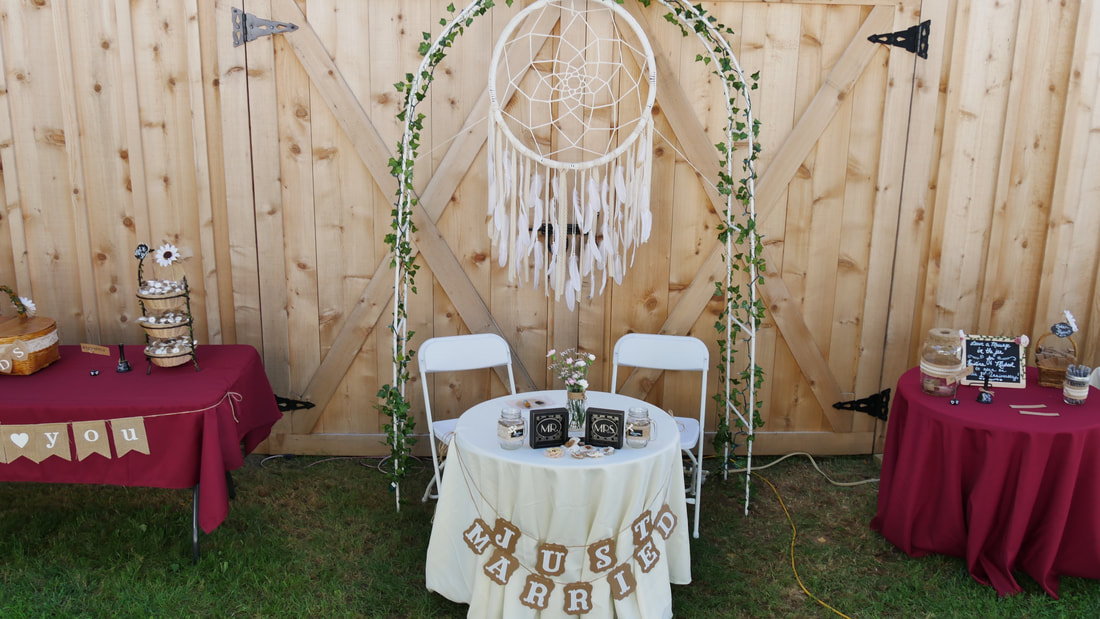
The past few months have been a little hectic for our family. My daughter, the oldest child, was married in September. She had a wonderful backyard wedding with about 250 people! Yes, 250! This was really only possible because it was in the backyard but it was well worth it. So basically over the next few months I will be posting about how we planned this tremendous party. In fact, I have already posted some information about her shower and making two different dream catchers(see them below) that were used as part of the ceremony and as decorations for the party. Today, however, is about using mugs instead of plastic cups.
I know, plastic is so much easier. You just use it and throw it away. But seriously, with 250 people, how many would we need to buy? I couldn't imaging the nightmare that this would create with garbage after the party. And after all, all the plates, silverware, etc. were going to be recyclable bamboo! So why would we ruin the environmental theme by using plastic cups? We wouldn't. And in fact, we used mugs for the bridal shower as well!

Bamboo utensil and plate. Note the mason jar in the background.
A lot of people questioned the cost. Believe it or not, in my opinion (and my daughters as well), the cost was worth it for several reasons. First, we weren't using plastic which we all know is not good for the environment because it literally never decomposes. Second, we allowed guests to bring them home as a souvenir. This was especially good for couples because they would have two to bring home and use. This was also good for use because we wouldn't be left with hundreds of left over mugs! However, any left over mugs could still be used for future parties, for gifts, or many other ways! And what made these extra cool is that regular mason jar lids screw right on to them so they could even be used for storage! Anyway, back to the cost. We did end up buying a few cases from Amazon and they were definitely more expensive.
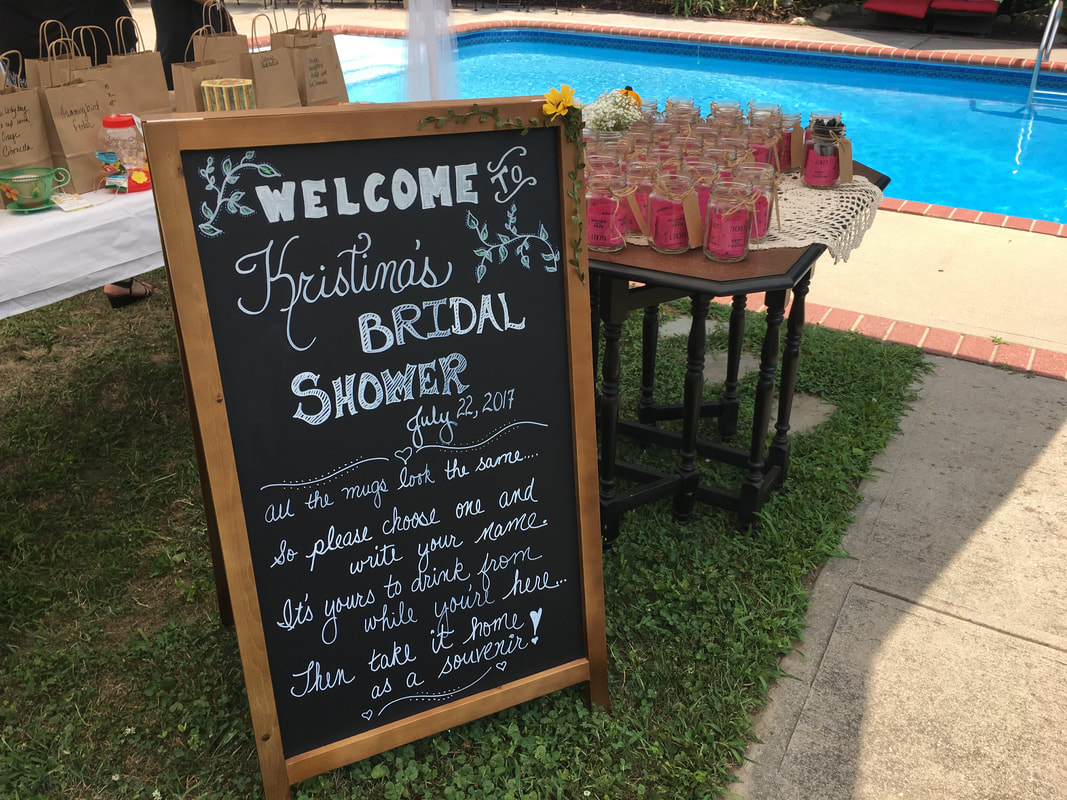
For the bridal shower we purchased the Libby Drinking Jar With Handle (Amazon affiliate link). A case cost 28.95 so we paid approximately $2.41 per mug. We had to do this because we needed them fast. Since there would only be about 40 or so people at the shower I simply tied a paper tag around each mug and let everyone write their own names on it for the party (note the mug filled with markers). The mugs are also filled with tickets for the 'Chinese' auction game! Directions were provided on the welcome sign shown below. Items purchased for the bridal shower mug display (affiliate links):
Video "How-to" (see pictorial below):
Pictorial:
For the wedding we had a lot more time to wait for delivery so we actually ordered about 12 cases of mugs from Dollar Tree. At dollar tree they were $1 per mug plus tax. Much more cost effective! But again, you need to have a lot of patience and time for delivery because I think they literally came from China. You also need to be prepared to go and pick them up at your local Dollar Tree Store. The unfortunate part of this was the fact that every mug came with a sticker on the bottom that took my husband and I three nights to peel off of the mugs in all twelve cases. Oh, and guess what! They were literally identical to the mugs we got from Amazon! Just no Libby name on the box! The Libby mugs didn't even have the name brand on the mugs either so they were really, truly, the same.
Items purchased for the wedding mug display (some are affiliate links):

Heres How They Were Done:

I created a list of everyone that responded "yes" to coming to the wedding in EXCEL by last name, first name. When the response date came and went I sorted the names alphabetically.
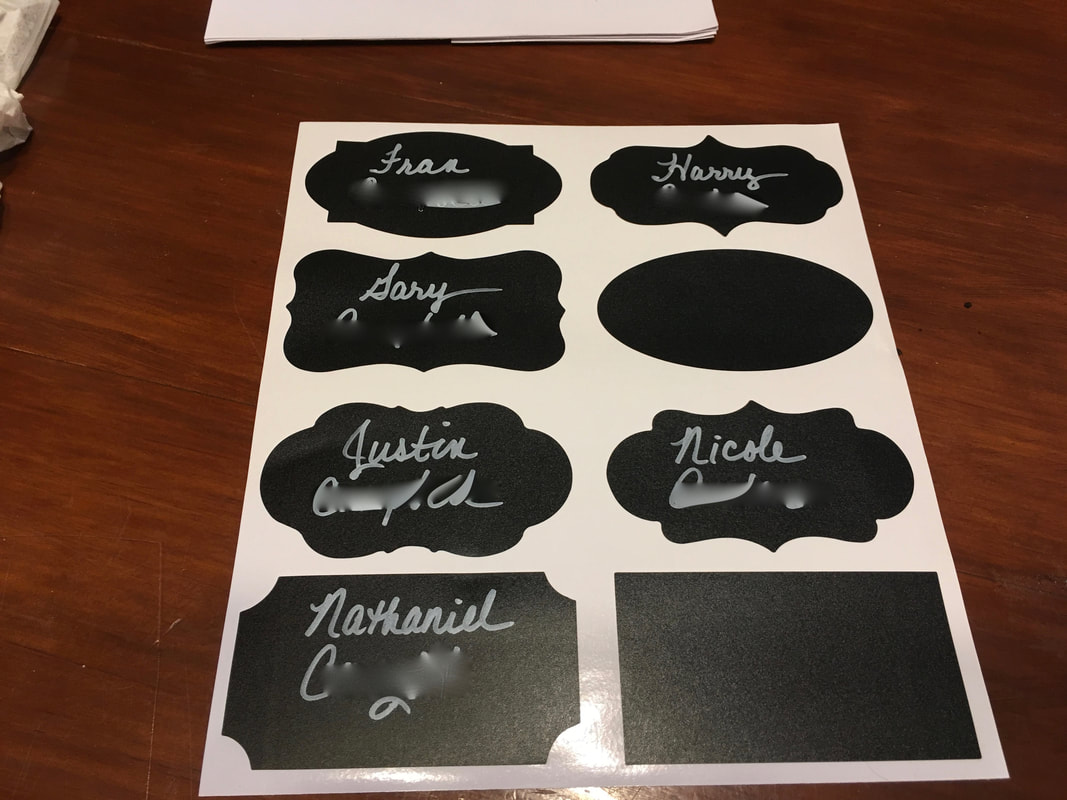
Then I used the permanent paint pen to write the names on the labels. I skipped the shapes I didn't really want to use.
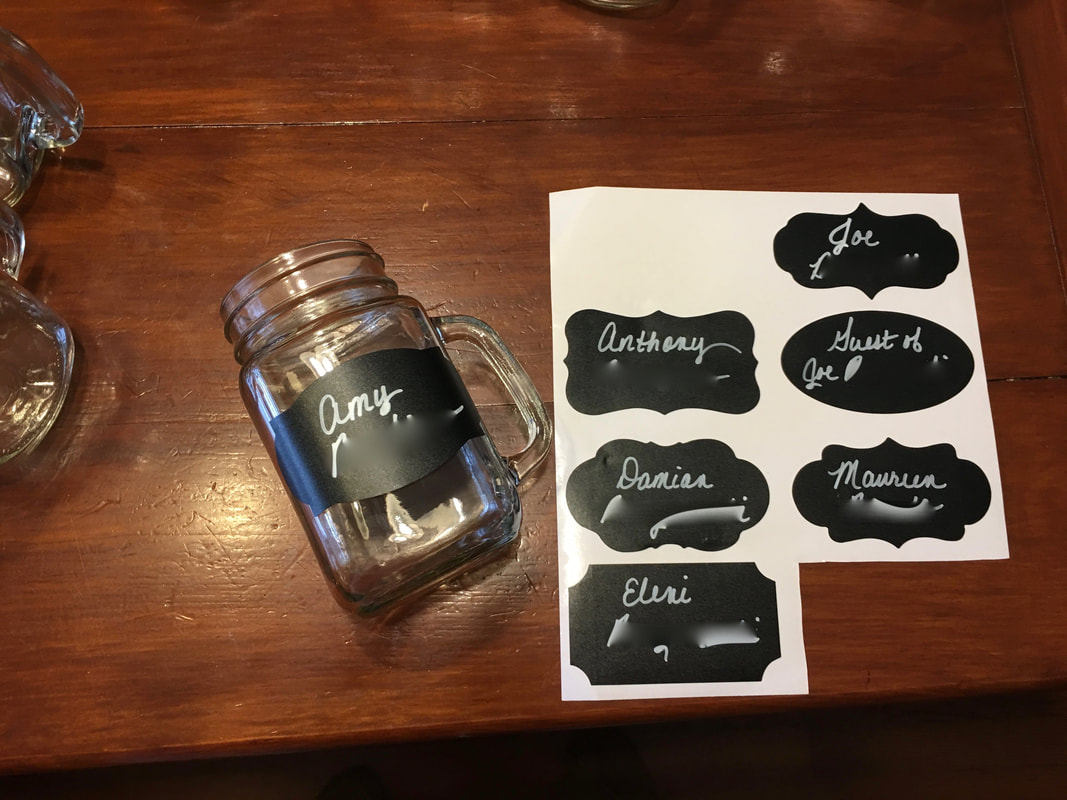
After all the names were written in alphabetical order, I carefully placed them onto the mugs.

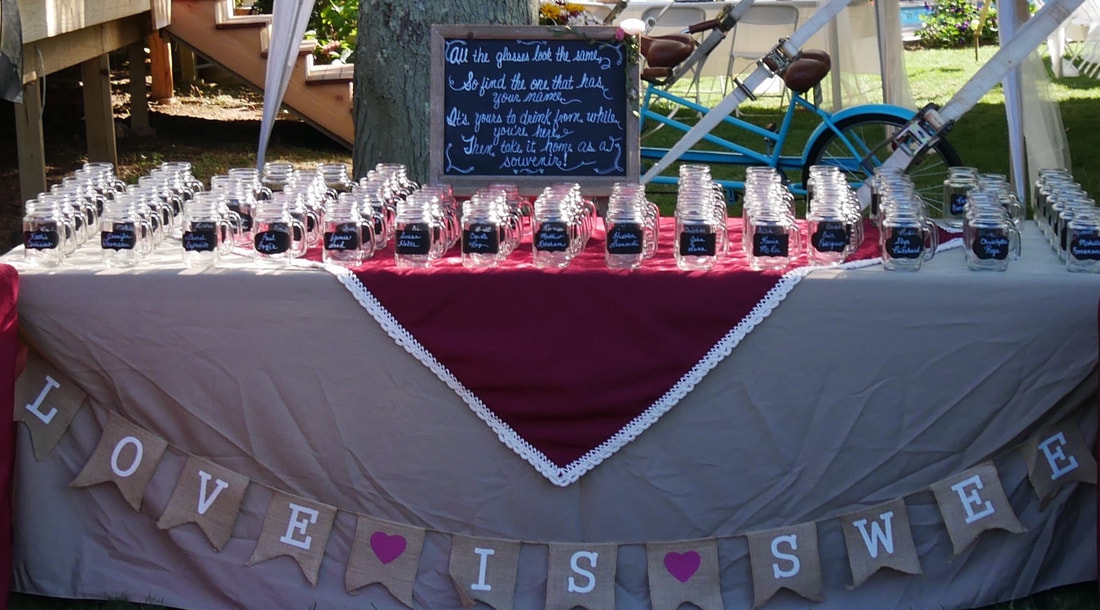
The mugs were packed back into the cases in alphabetical order so they could easily be arranged on the table at the reception. This made it easy for guests to find their mug!
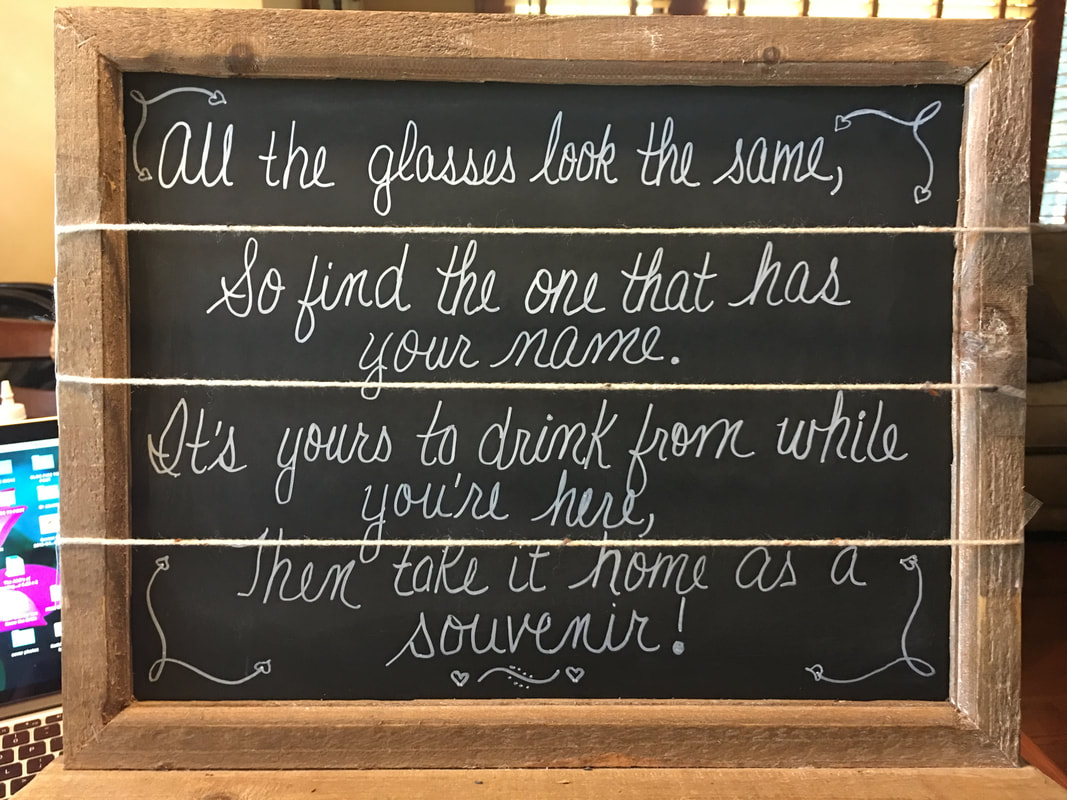
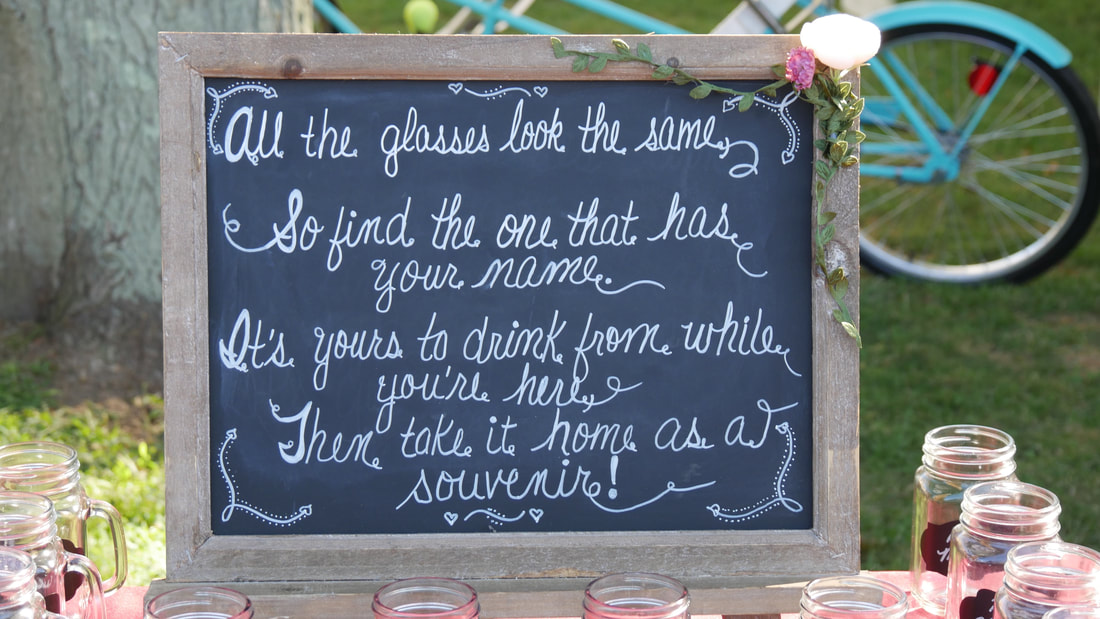
I used twine to divide the chalk easel into even sections so I could write the saying on it using the washable chalk paint pens. I used some hot glue to add flowers to the corner as a decoration (see picture below).

I even used the mugs to make these special Bride and Groom mugs! That post is coming soon too :-)
We have no regrets about using the mason jar mugs instead of plastic! One comment we recieved from guests at the shower was that it was a little difficult for them to drink from the mug being that it had the funny edge to screw on lids.
Because of that comment we provided optional drinking straws at the wedding. Some people chose to use them, and some didn't. I know, you think maybe it defeated the purpose because they too are plastic, however, the amount of plastic used by 100 or so straws was nothing compared to how many cups we would have gone through! We would love to hear from you so please share your thoughts and experiences with us! Check out our other DIY Shower and Wedding Ideas here. Sincerely,
0 Comments
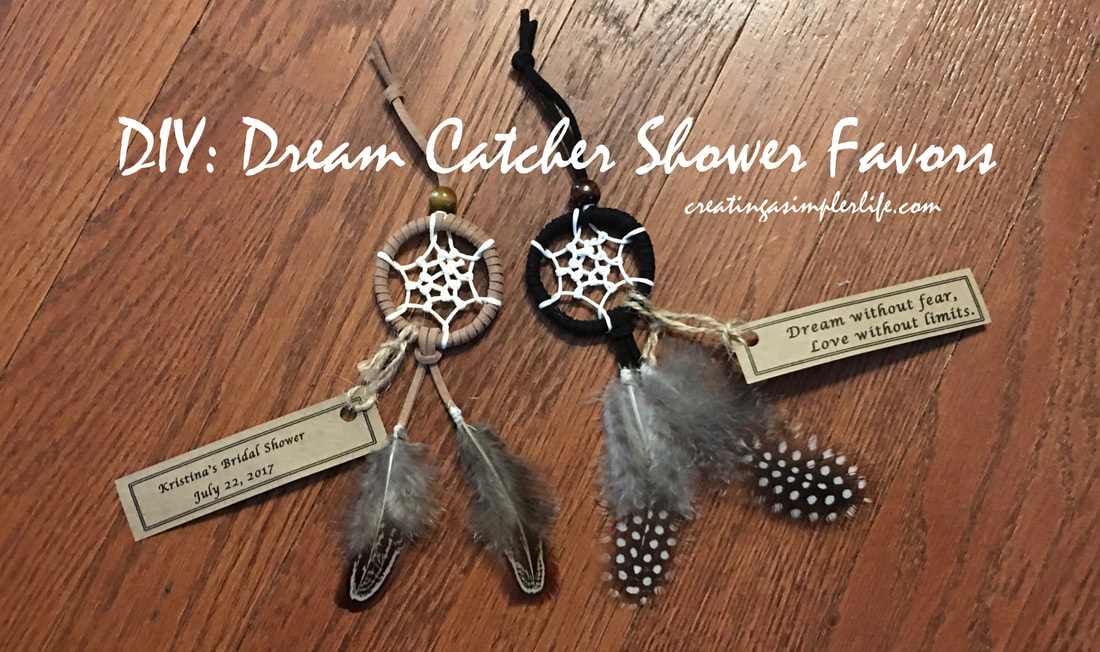
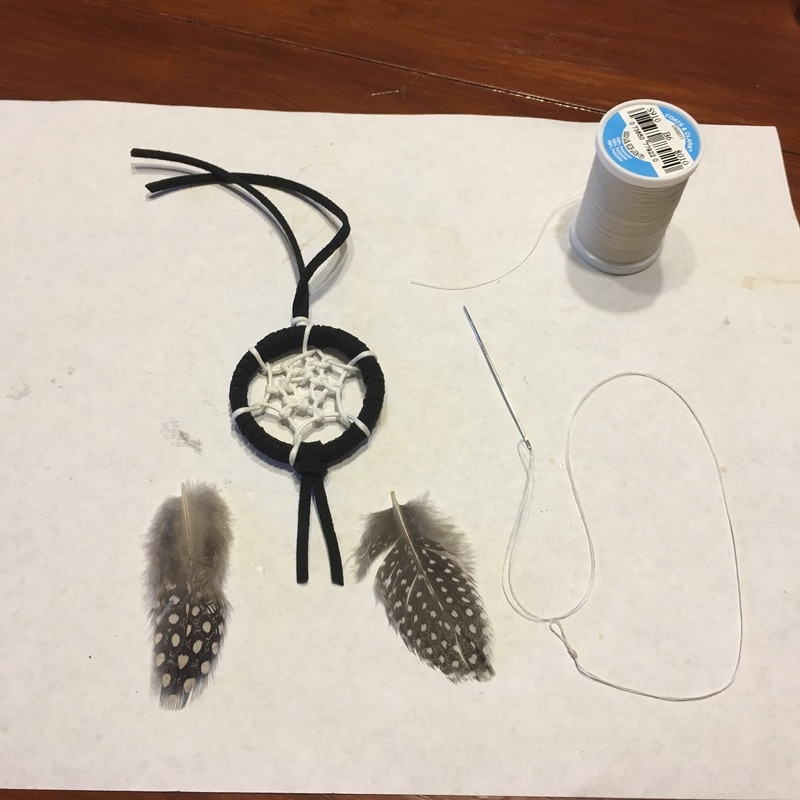
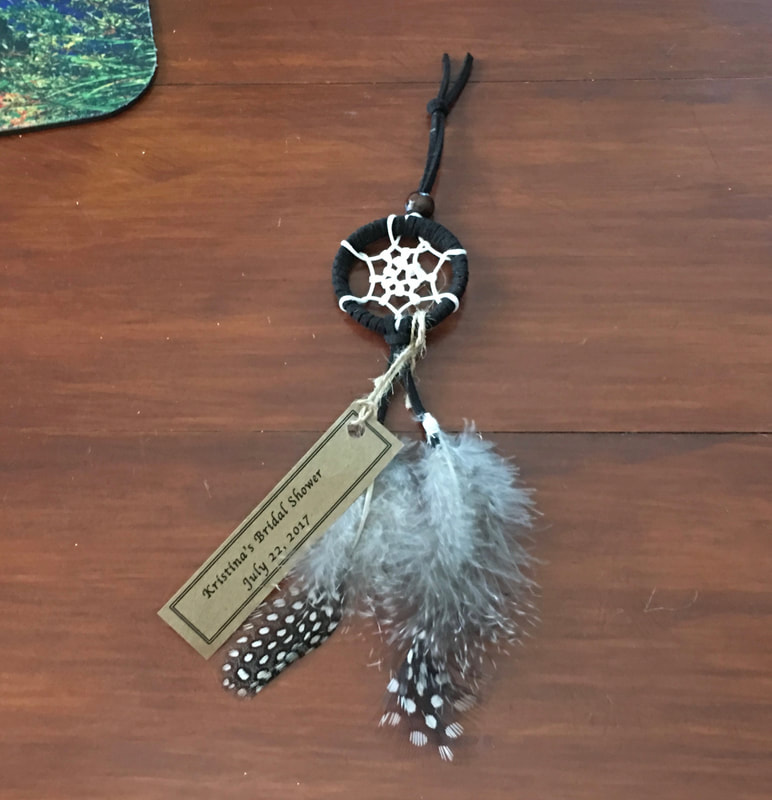
My new thing lately is making dream catchers. My daughter decided that she wanted a giant dream catcher for her wedding day and that was the beginning of my 'dream catcher' research! That led to the absolute first, and largest dream catcher I have made to date (post coming soon)! Since then I have made many more out of many different types of materials but my absolute favorite are all the dream catchers made out of what would normally be thrown out as garbage (or recycled depending upon where you live). I came up with this idea out of a need to make a lot of similar dream catchers as favors for my daughters bridal shower, and I think I need to pat myself on my back because, well, I absolutely love the way they came out! But you be the judge :-)
Completed Dimensions of Dream Catchers: Approximately 2" wide x 7" long (including loop to hang it) FREE PRINTABLE (and editable) LABELS BELOW! P.S. I know this is a lot of pictures so I am sorry ahead of time!
Supplies Needed:
(see pictures, links, and prices at very bottom of post for affiliate link supplies)
Video "How-TO" (pictorial directions below):
FREE PRINTABLE TAG LABELS:
The two sides are separate so you can choose to just do one side, for example, just the "Dream saying" side. They are also MS Word documents so that you can edit as needed as far as the date and the name for the bridal shower side. Definitely do a trial on white paper if you are printing both sides so that you can tweak the positioning as needed. These were my final prints so they should be good but you never know.
Pictorial Directions :
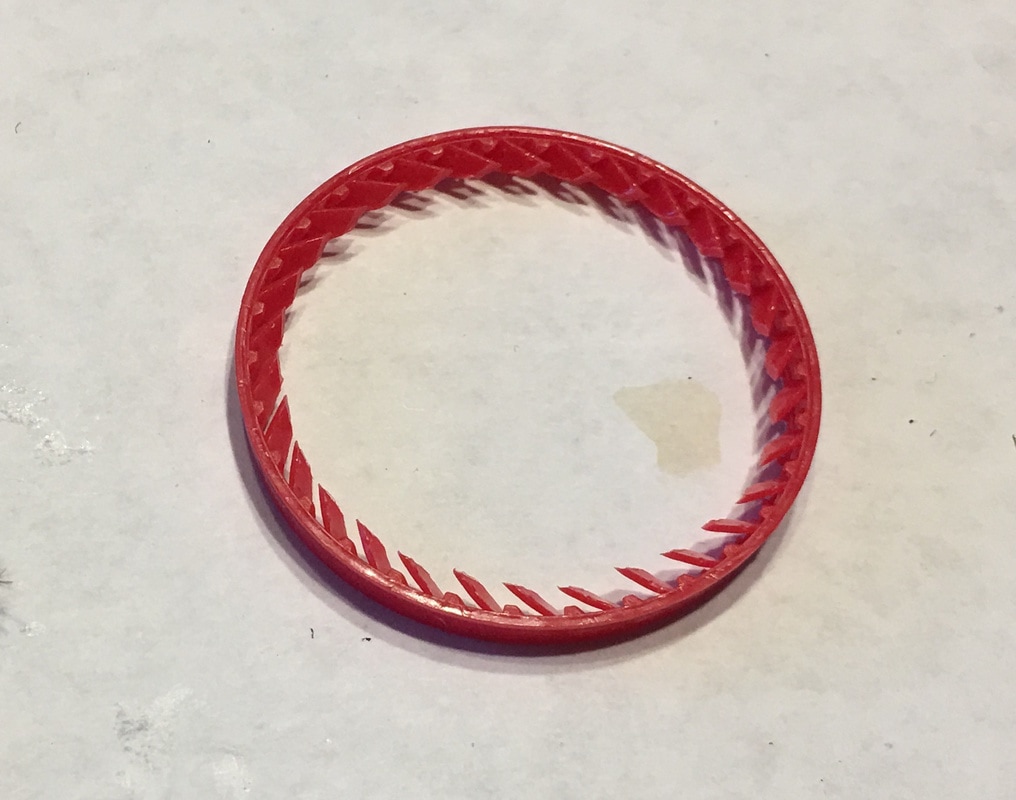
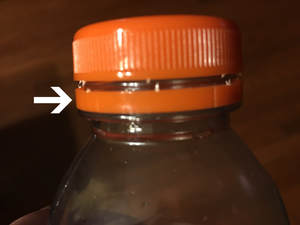
The plastic ring from a gatorade bottle! They also are on milk containers and many other plastic bottles!
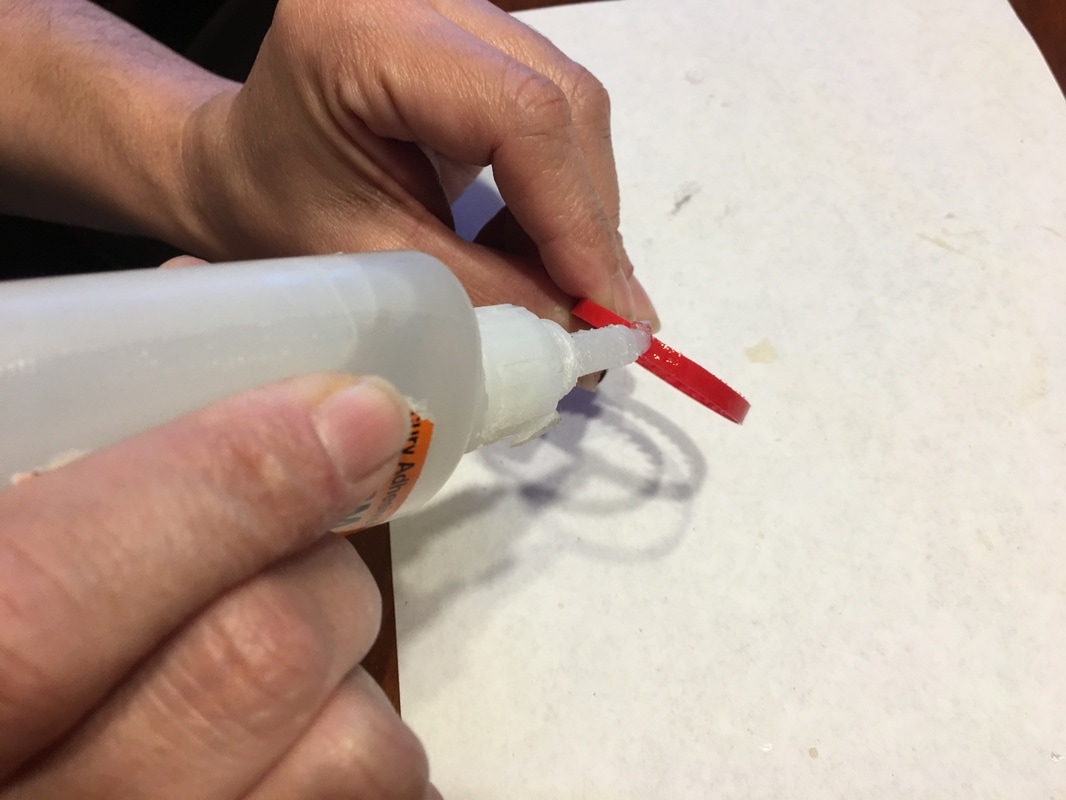
Add a bot of gorilla glue...
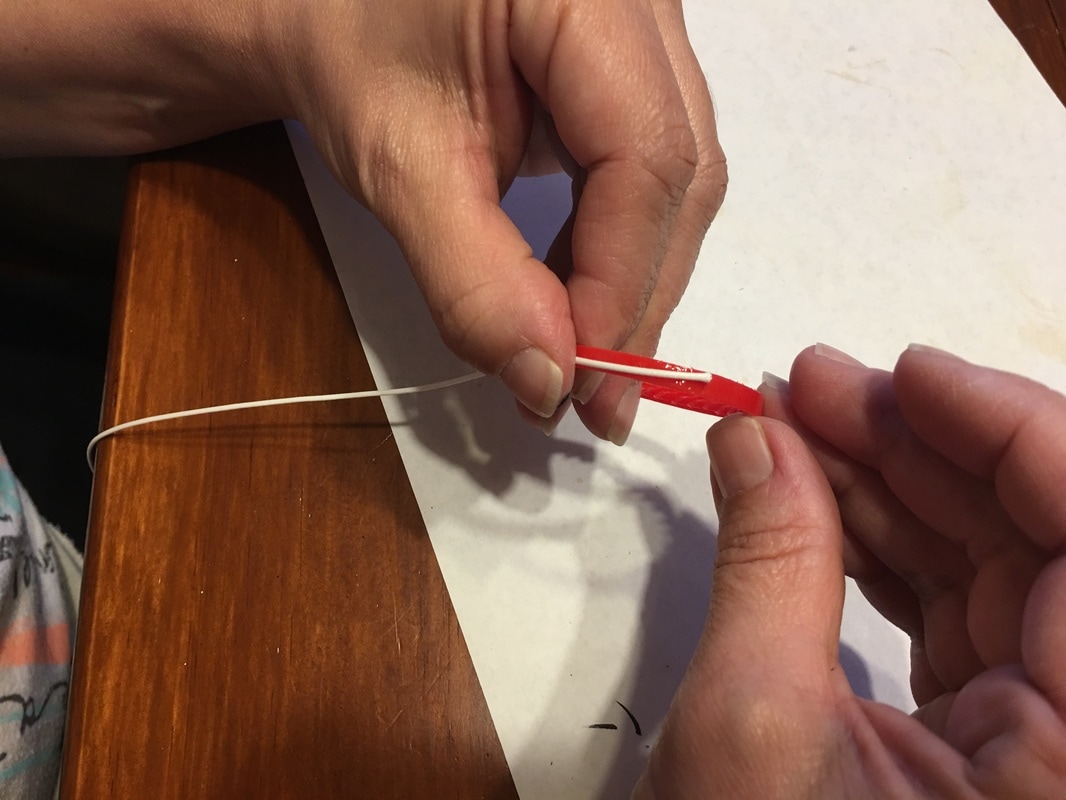
And attach the end of the cut piece of cotton string for the center of the dream catcher (about 1.5 feet long max).

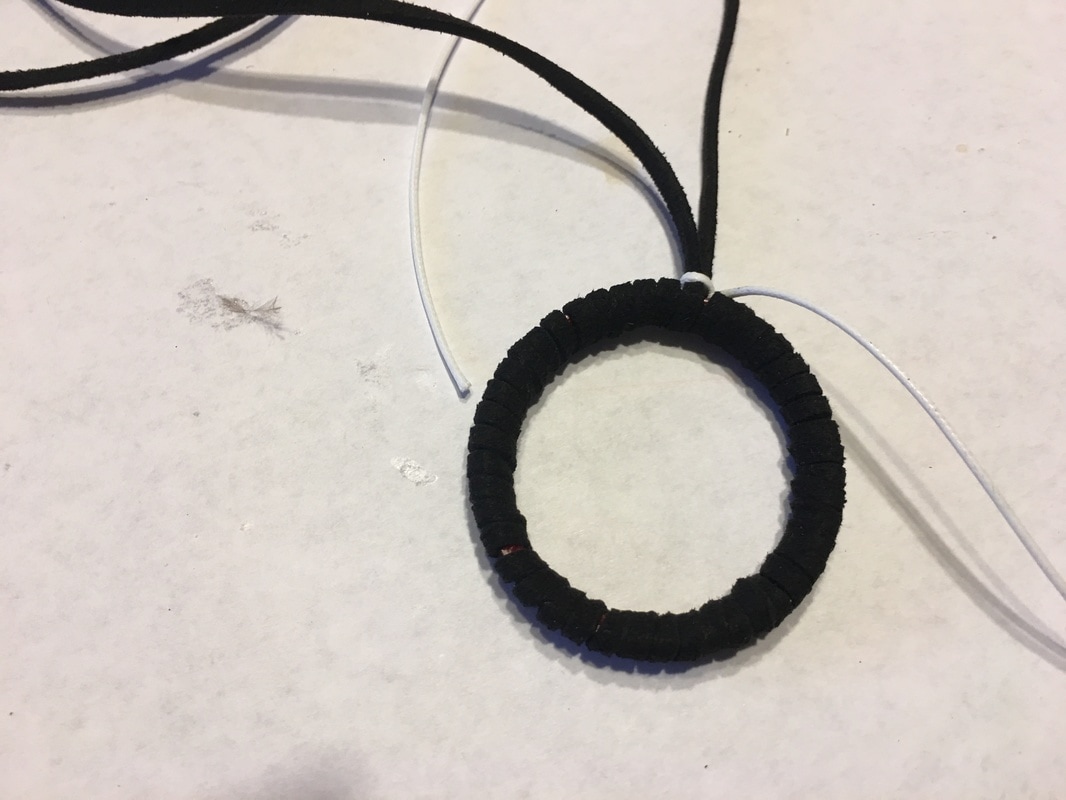
Then begin to wrap the ring with the faux leather piece - also about 1 - 2 feet long. Be sure to leave a long piece at the beginning to use to hang it.
Wrapping in progress...
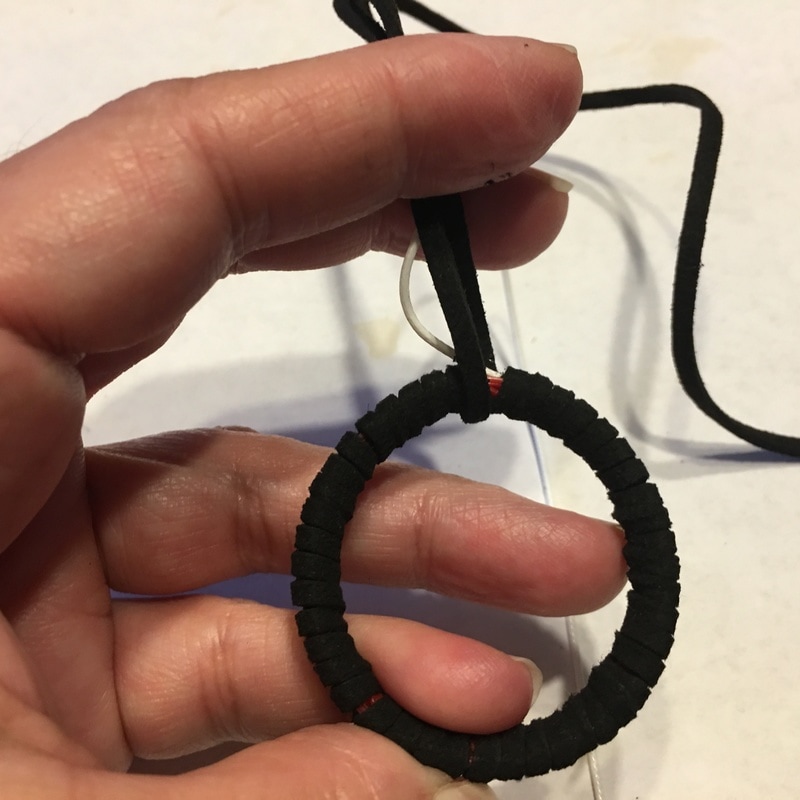
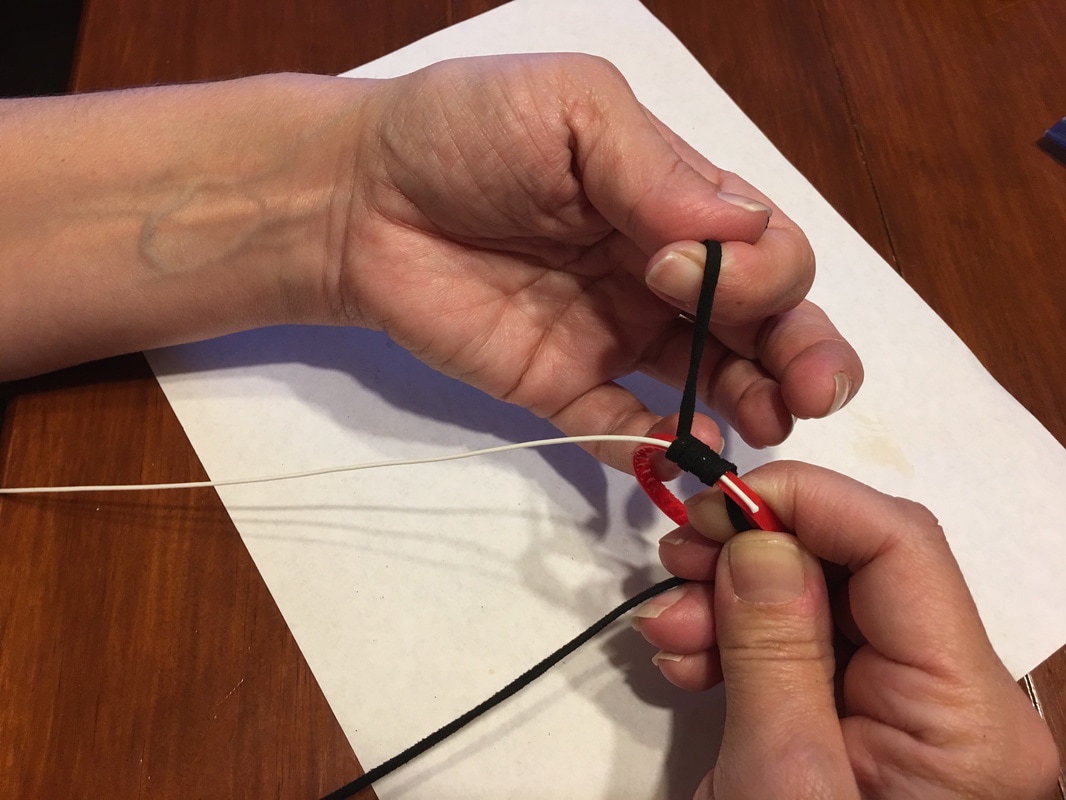
Wrapping done! Now you wrap the center string around the top pieces, pull it through to knot it and add a dab of glue to hold it.
Done! the center piece will now be threaded on the yarn needle.
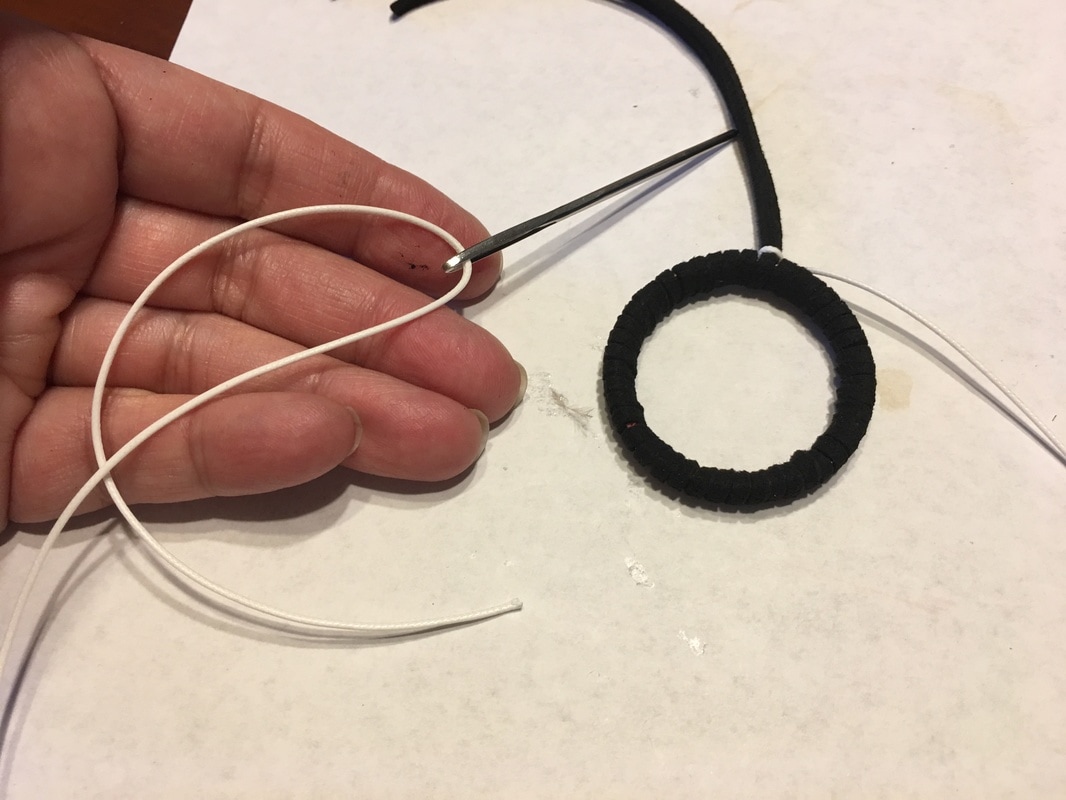
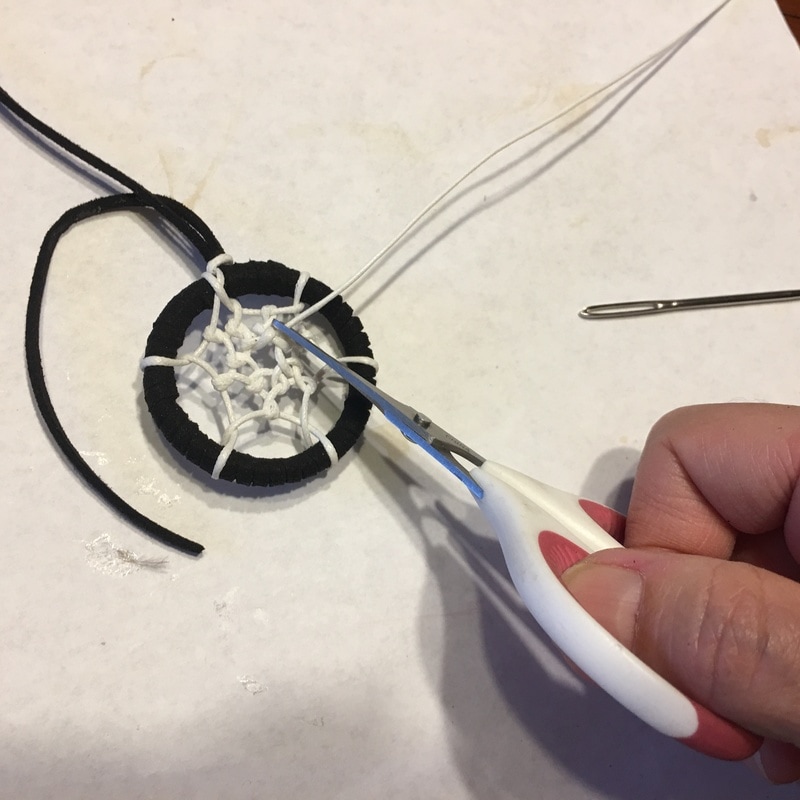
Check out this simple picture for how to weave the center part http://www.craftsforkids.com/projects/dream_catchers.htm
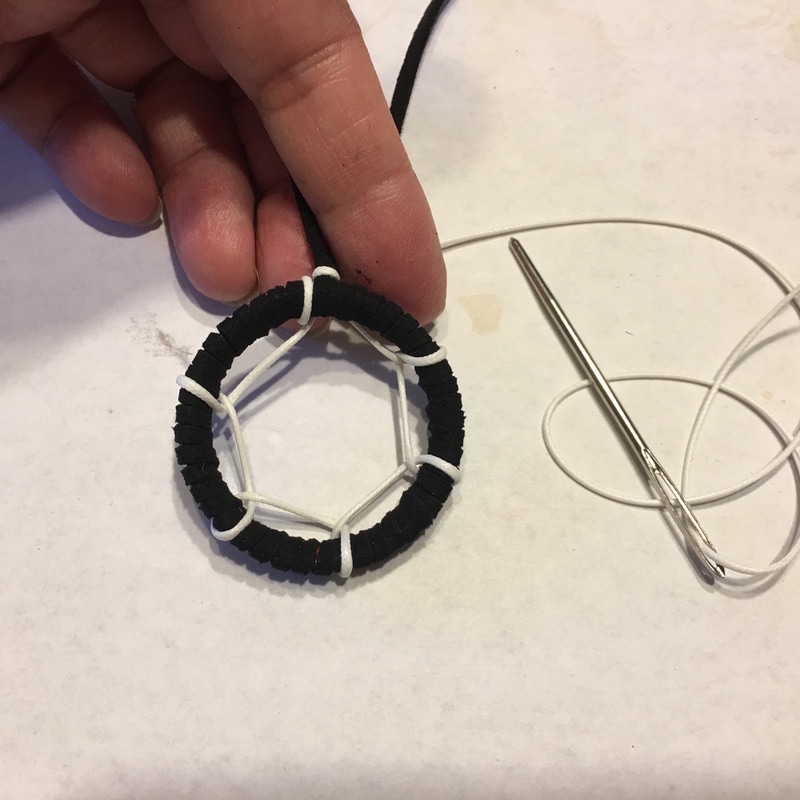 Start weaving the dream catcher center. Start weaving the dream catcher center.
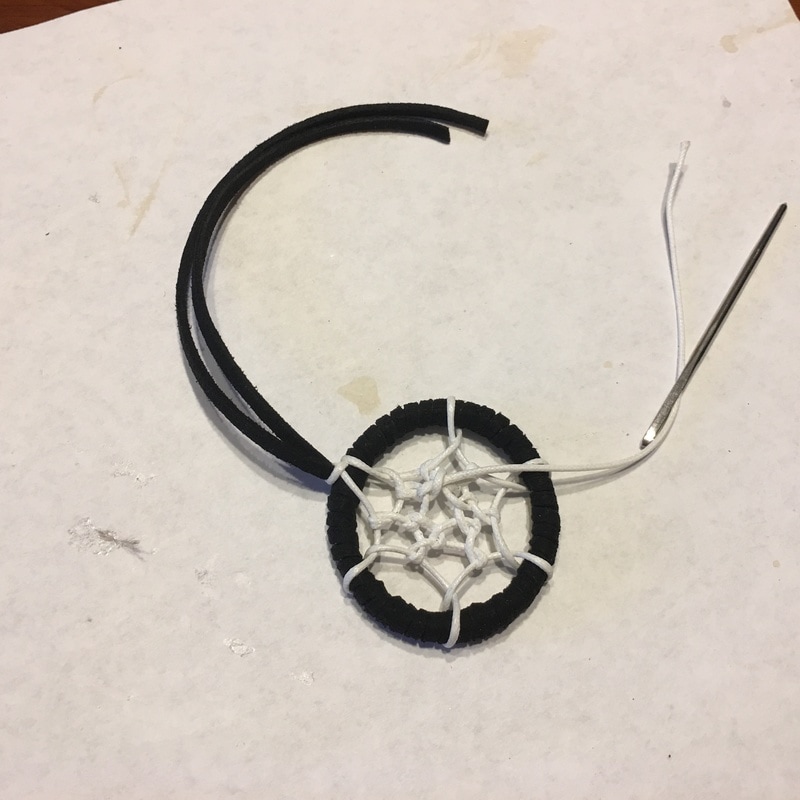
When done with the center make a small knot on the back.
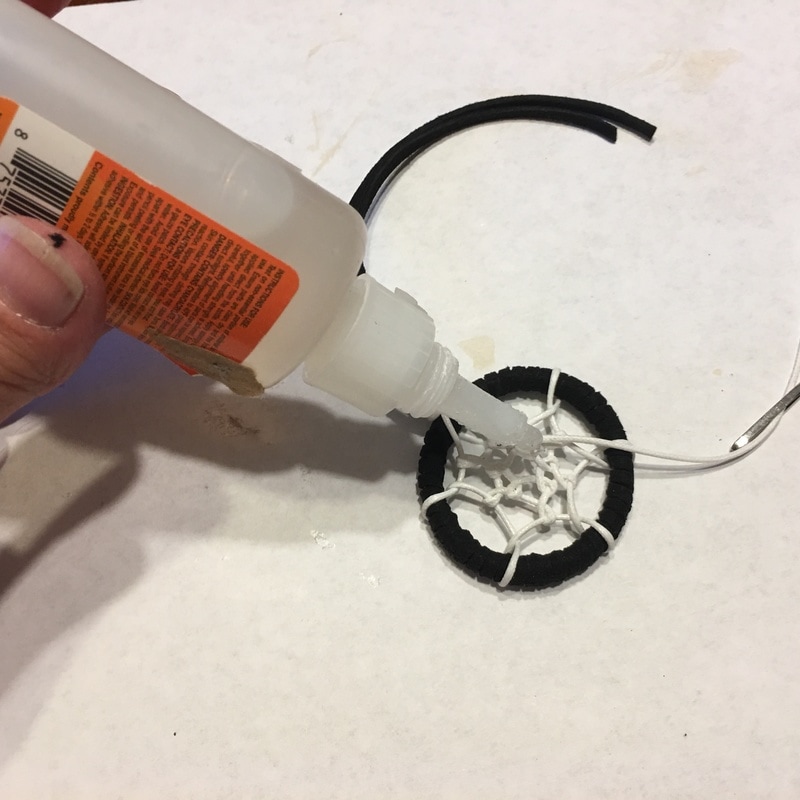
Add a dab of glue and let it dry.
After the glue is fully dry (I wait overnight), then clip off the end.
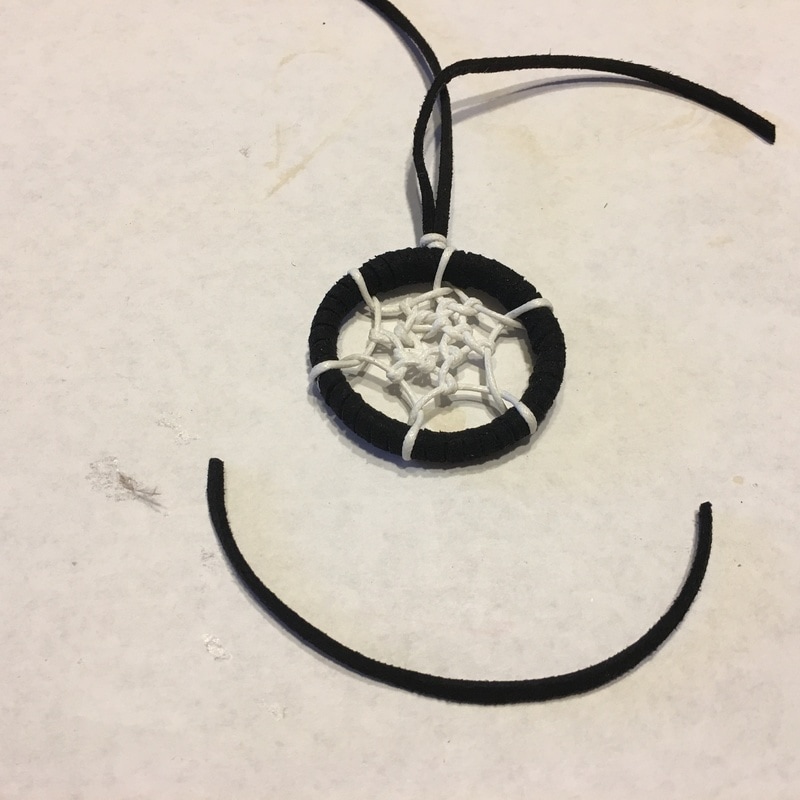
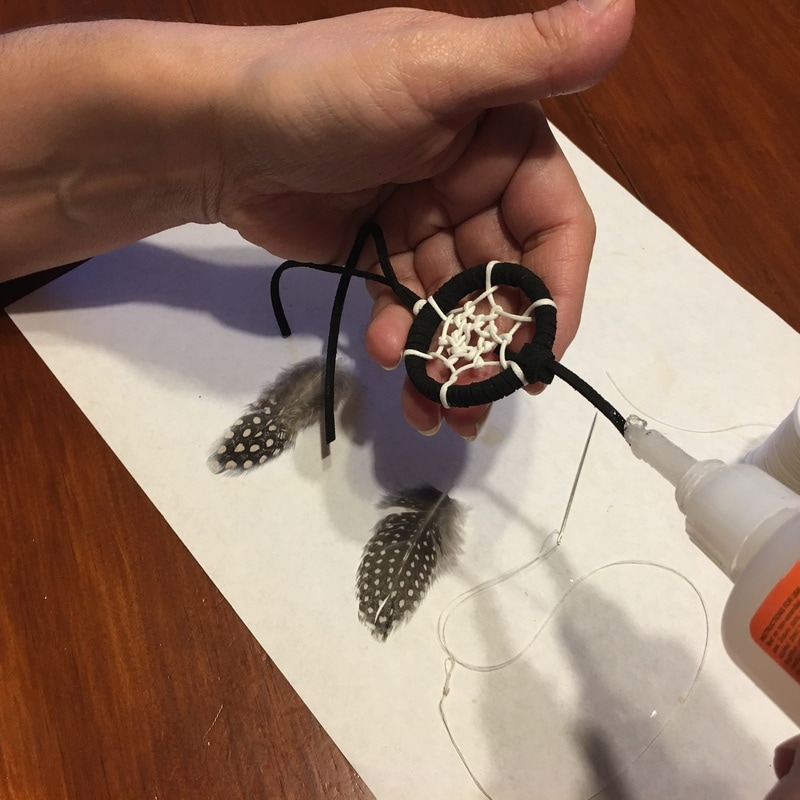
Cut a pice for the feathers to hang from.
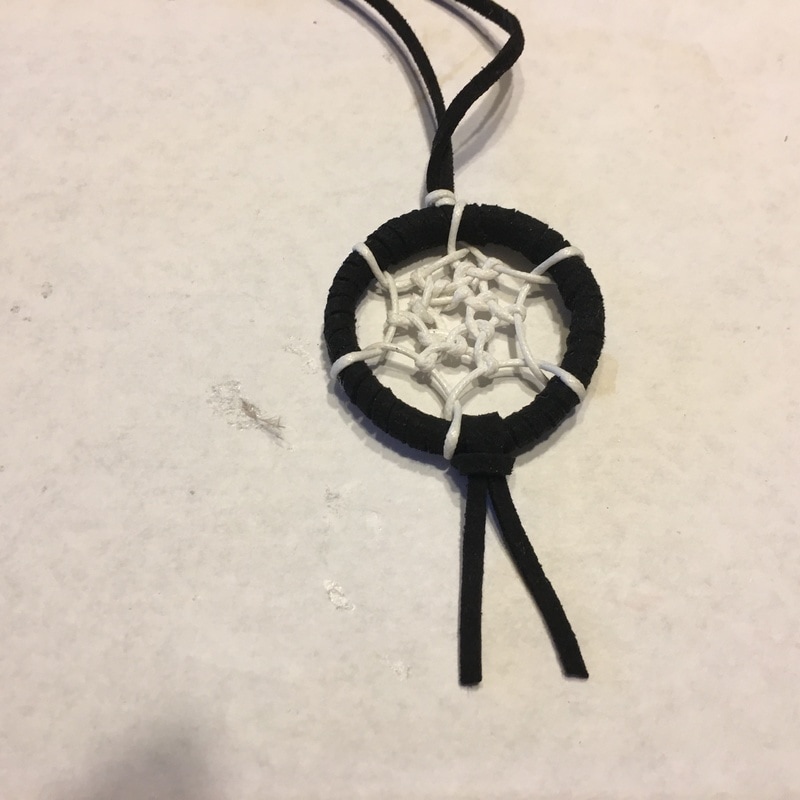
Tie it in place - more like looping it in place really.
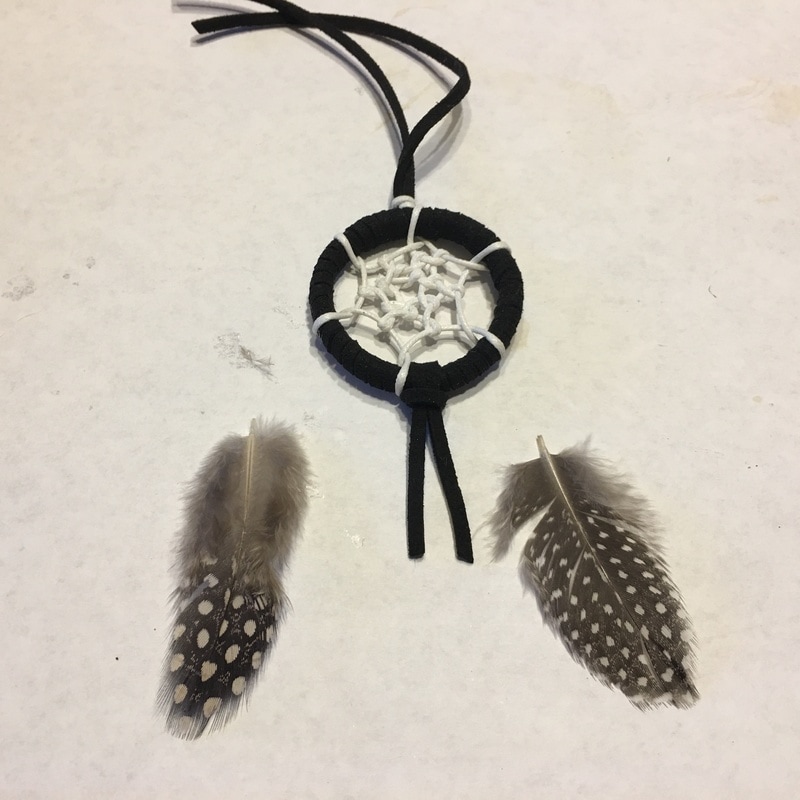
Choose feathers that will look good together.
Get a needle and thread ready.
Add a dab of glue to help hold the feather in place.
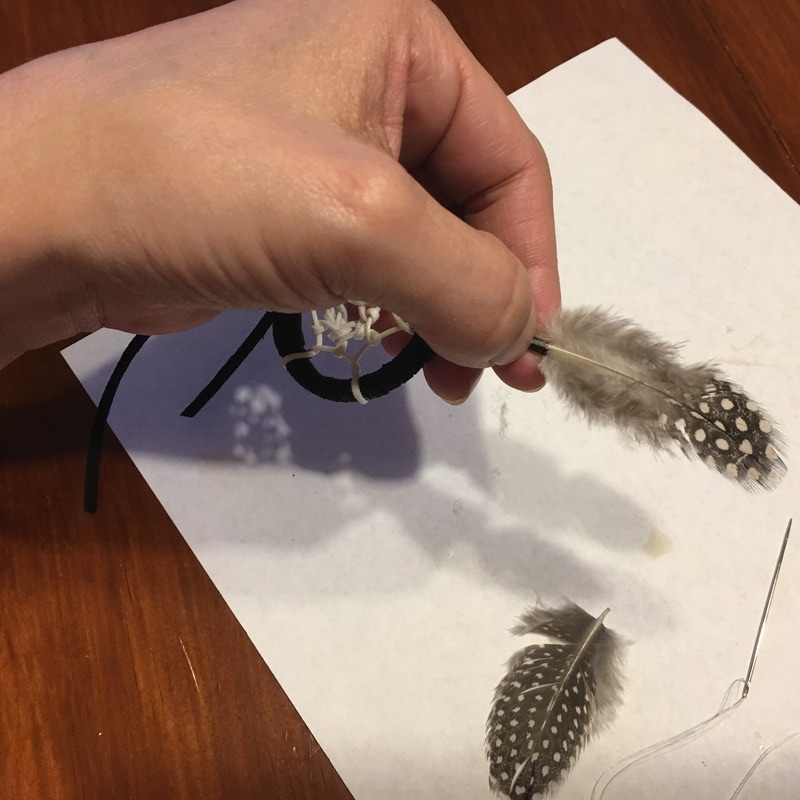
Place the feather on the front of the faux leather.
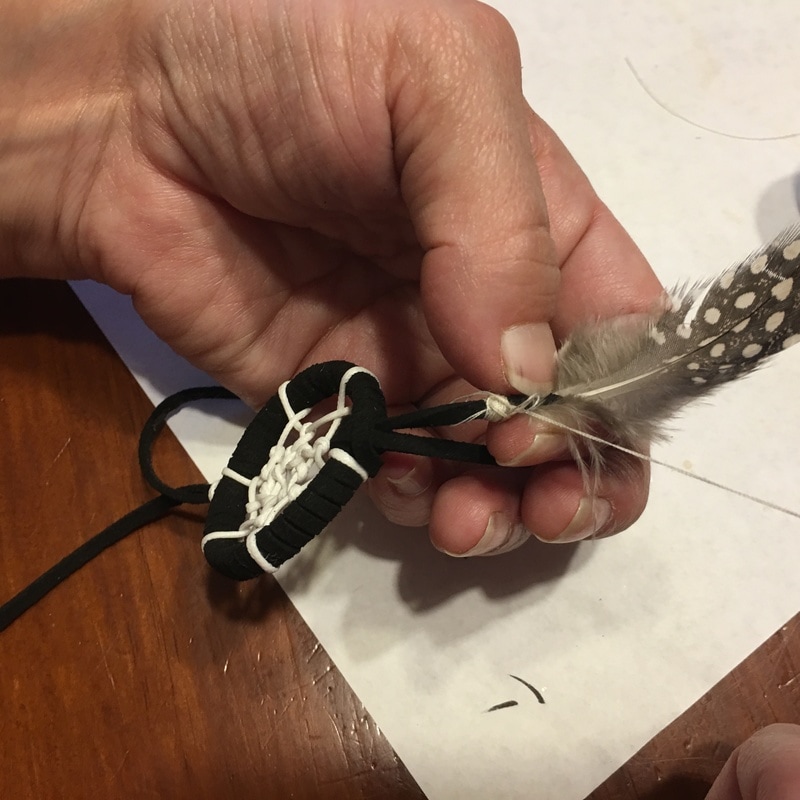
And begin wrapping it in place with the needle and thread. Nothing is sewn - I simply wrap the thread around and around and then run the needle through the wrapped portion before clipping it at the end. Then I add a drop of glue to make it permanent.
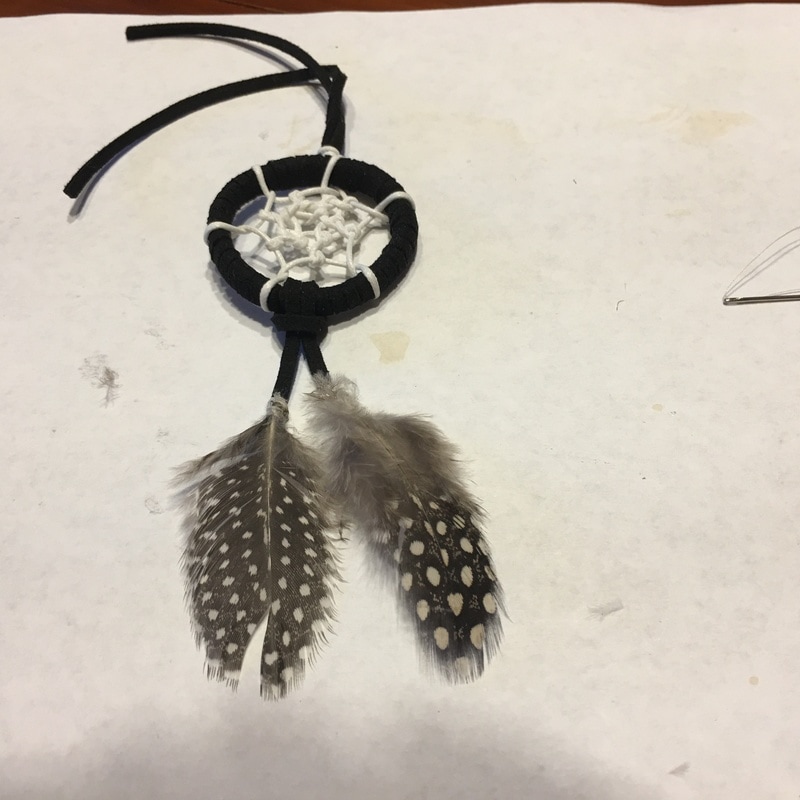
Do the same thing for the second feather. Be sure to add a dab of glue after the thread is done too!
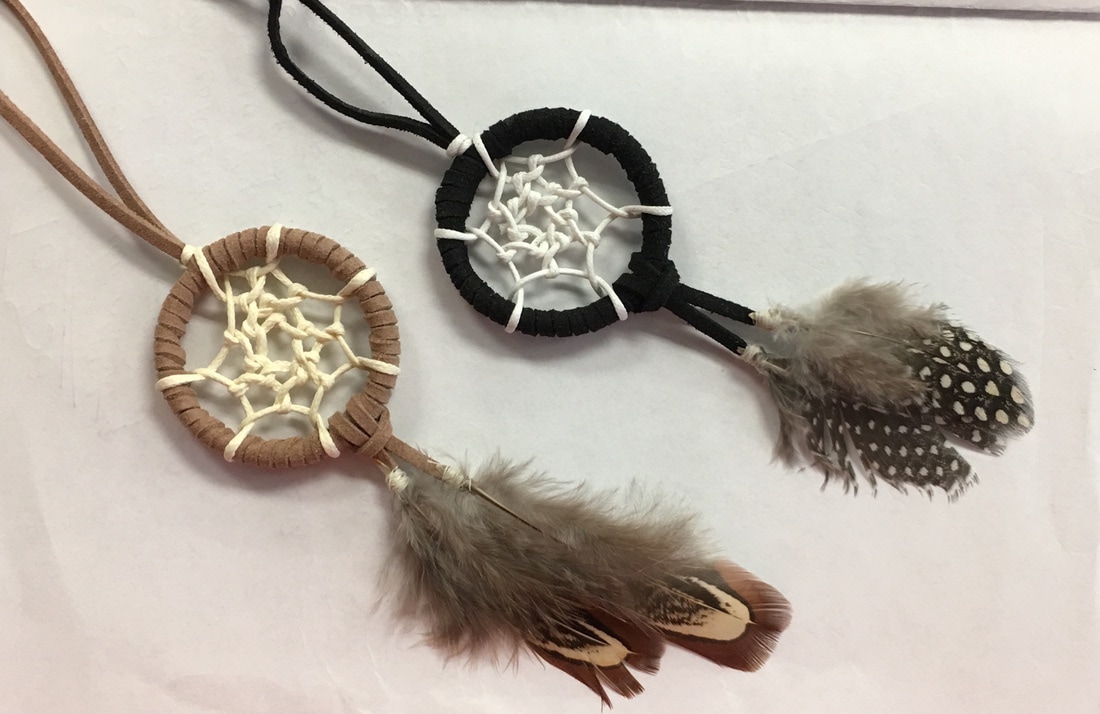
I made two different colors and still can't decide which one I like best! But they aren't done yet...
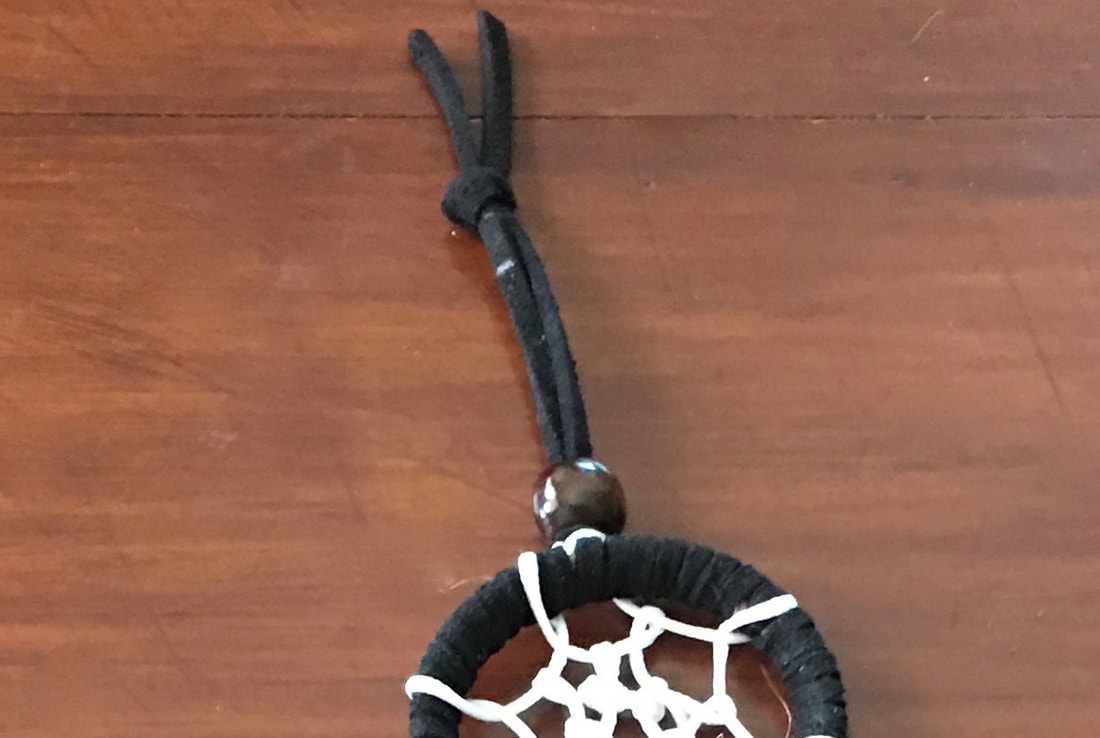
Add a drop of glue, slip on the bead (we had to drill holes larger first), and tie a nice little knot at the top! After snipping the ends even there is now a nice little loop for hanging just about anywhere!

Print out the tag on the brown craft paper and cut them out. Notice that I printed on both sides! This is not necessary though. I also use a paper cutter for nice neat cuts but scissors will work too.
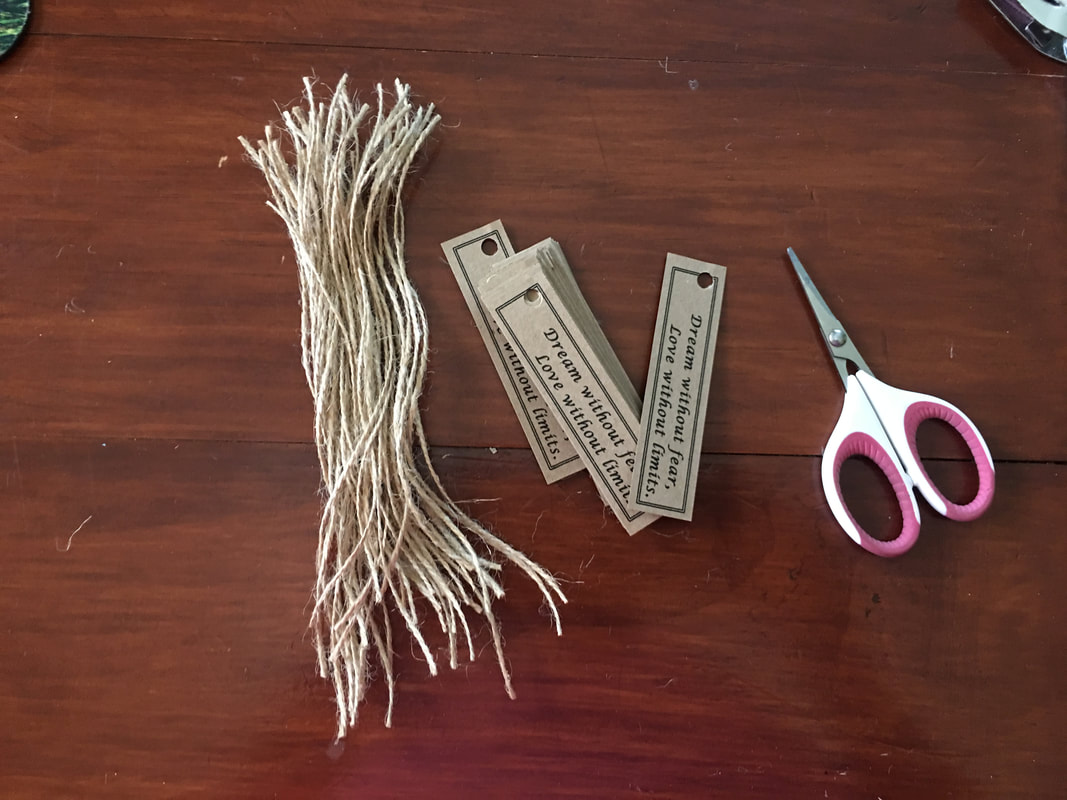
Puch a hole in each tag and cut lengths of twine (approximately 6" each).
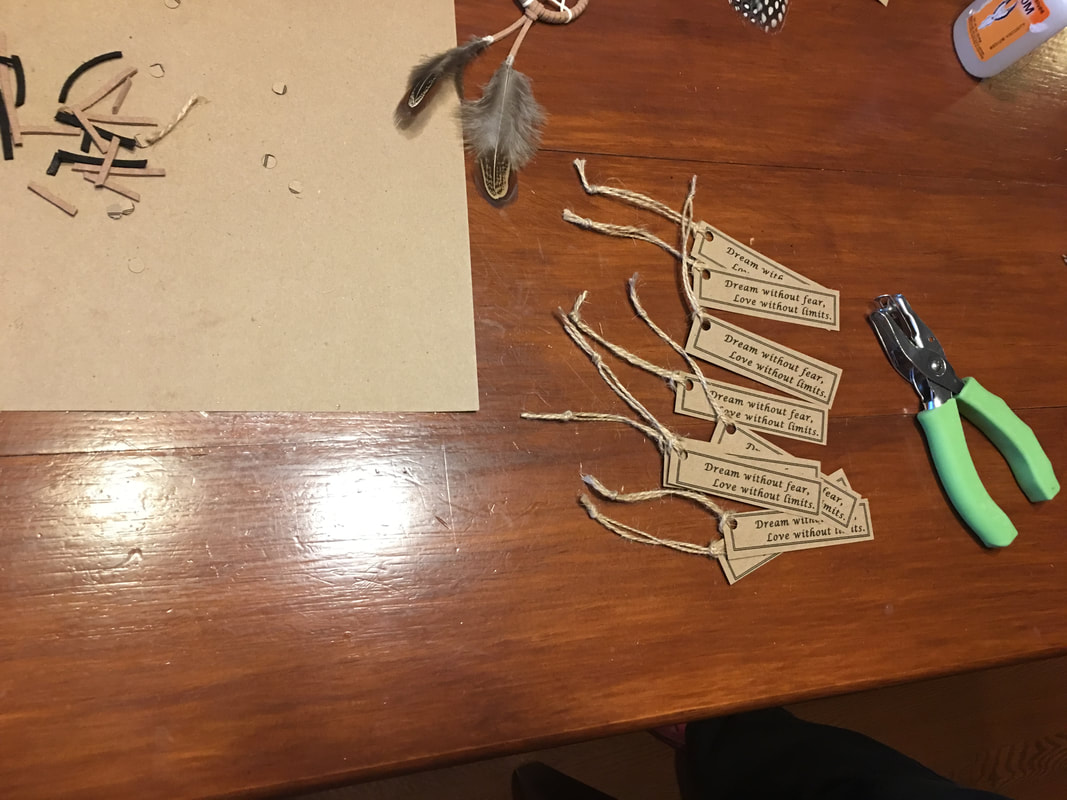
Loop the twine through the punched holes.
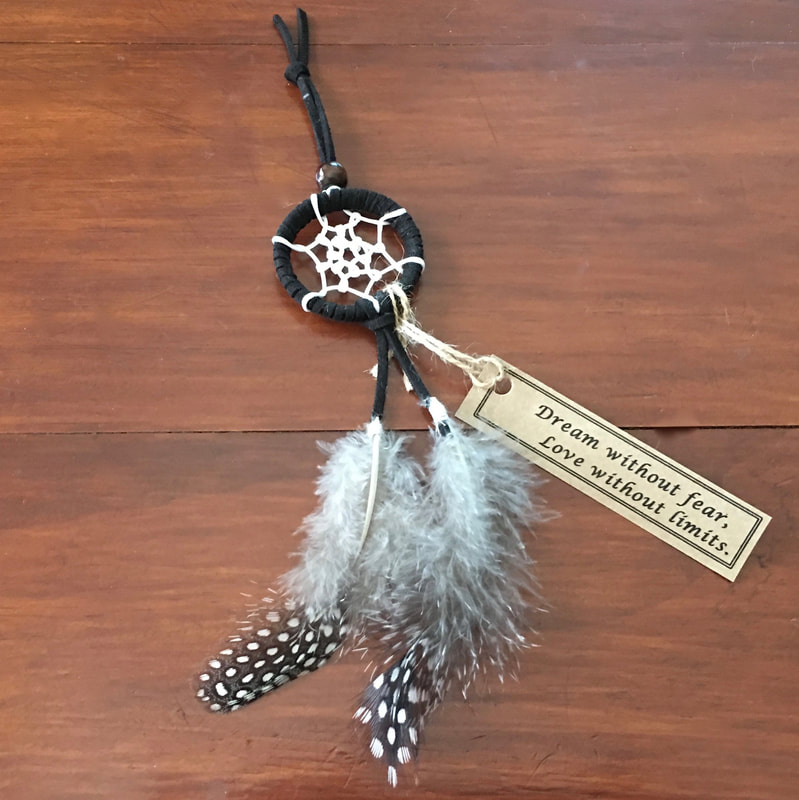
Dream without fear, love without limits.
Then loop the tag onto the dreamcatcher!
I have to say that everyone loved these and my daughter was so excited over them! So not only are they repurposing plastic, but they are something nice that are small enough to be hung anywhere!
Thank you for visiting! Please check out all my other DIY Shower & Wedding projects and follow me on social media for more crafty things!
Sincerely,
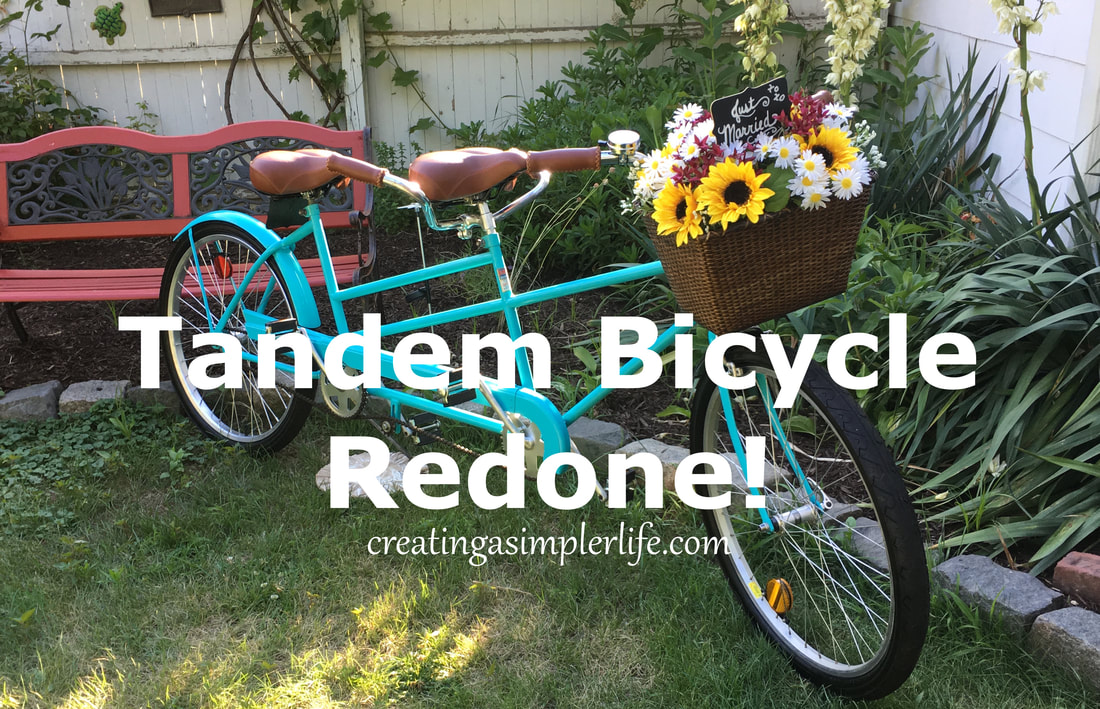
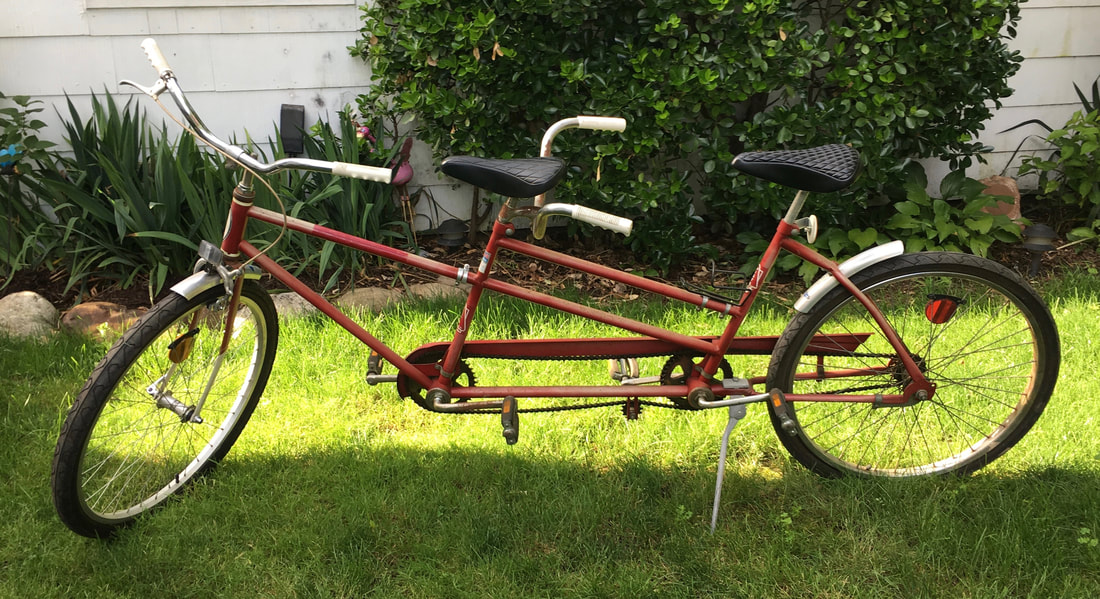
My brother and sister-in-law have had this old 1970's Vista duo tandem bike in their garage for several years now. I always thought it was the coolest thing to ride a tandem bike, especially as a kid because brings up good memories of when my cousin Lynn and I used to ride her families tandem around town. So when my in-laws recently said their's was going in the garbage if we didn't want it I jumped on the offer....but not for me.
My daughter is getting married in September and she and her fiancé live on Fire Island. If you know anything about living on Fire Island it's that there are NO cars driven around (other than for emergencies). You get around by walking or biking so what could be more perfect than having a "just married" tandem bike for them to ride around together on? My brother and sister-in-law agreed that this would make an awesome gift to for the 'married couple to be' and so we set to work! And of course it is far better than simply throwing it out ;-) With little bit of time, some MONEY, and a lot of love we finished it up just in time for my daughter's bridal shower. Let us know what you think!
BEFORE....
Check out our video of how we did it!
We did have to purchase a few items to make it work, mostly from Amazon, but a few from Target, Michaels, Lowes, and The Vicious Cycle (the local bike shop that used to be Sally's) as well. Kudos to The Vicious Cycle by the way, who must have parts saved from the beginning of time! They actually had handlebars for the second seat that worked perfectly (we couldn't get rid of the rust on the originals)!
Other parts we purchased:
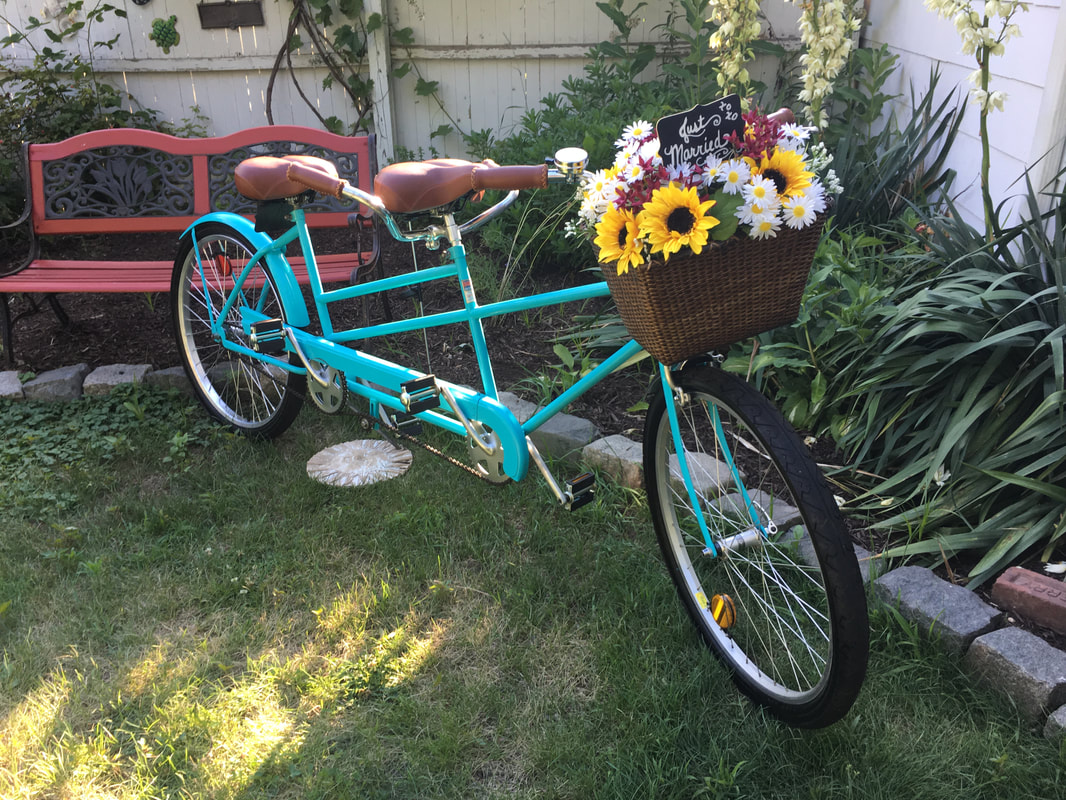
I also added a tin can wedding thingy to the back so when they ride it back to the house after the wedding ceremony by the beach it will be absolutely perfect!
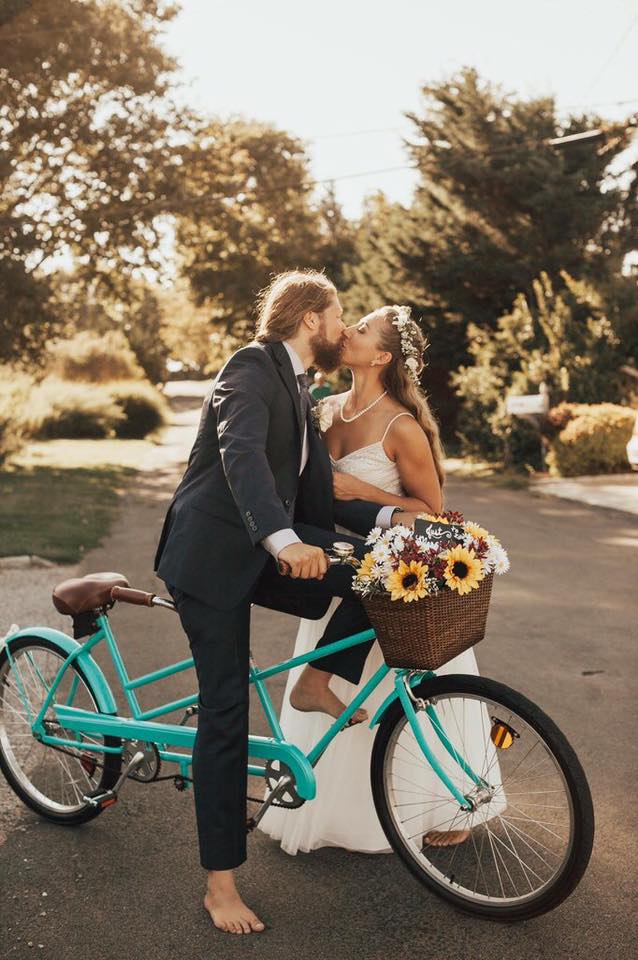
And here are the newlyweds on the bike! They rode it from the beach ceremony to the back yard reception a few blocks away. It was perfect :-) Thank you to Samantha Brancato for the beautiful photo.
Thanks for visiting.
I really hope you enjoyed this post. I have to say that this was one of my absolute all time favorite projects! Not only did I get to spend time with my husband, but we worked with his brother as well. Best of all the gift was for my beautiful bride-to-be daughter and her fiancé. What could be better? Doing wonderful things for our loved ones is what life is all about! Don't you agree? See more DIY Shower & Wedding projects here! Sincerely,
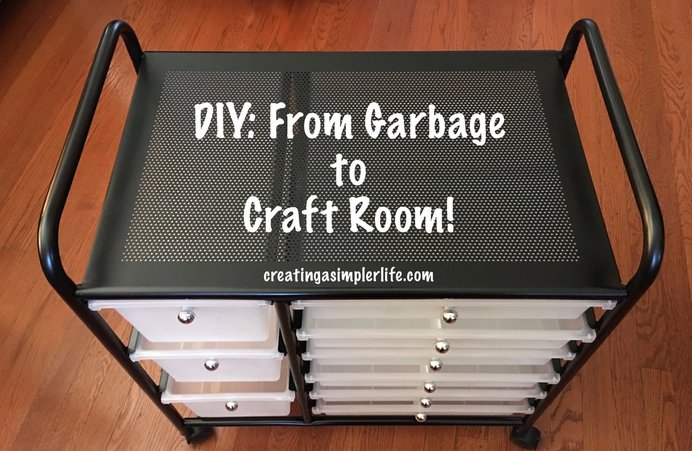
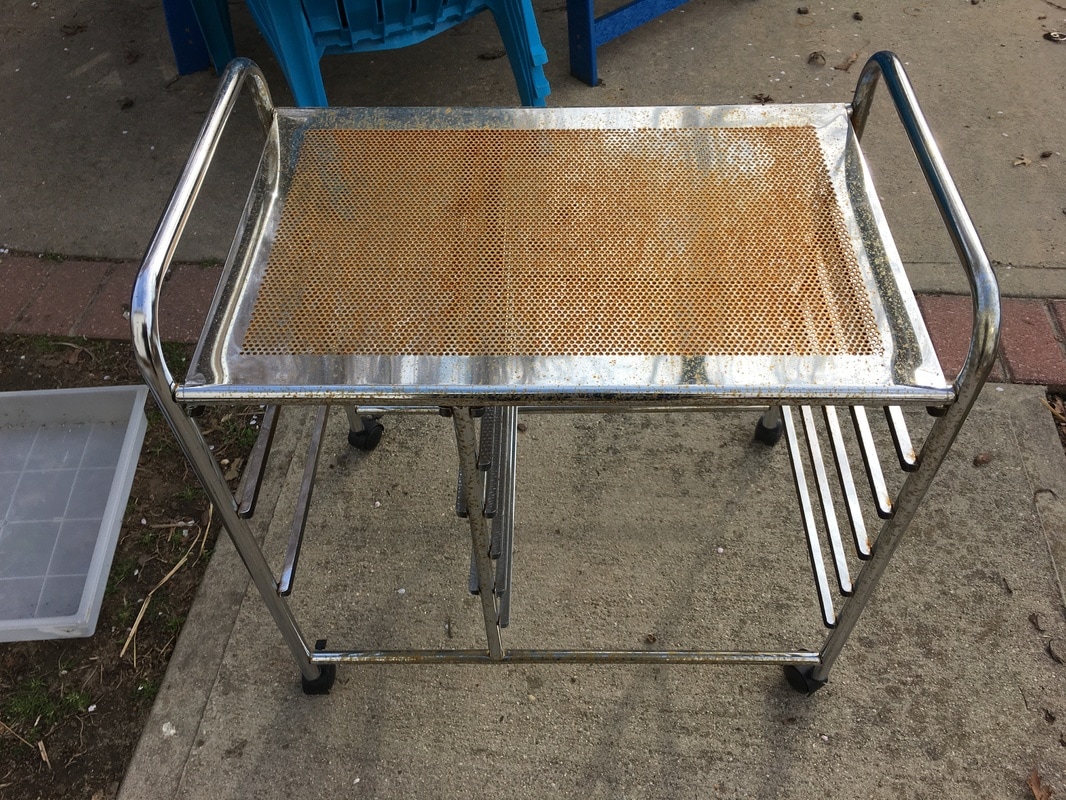
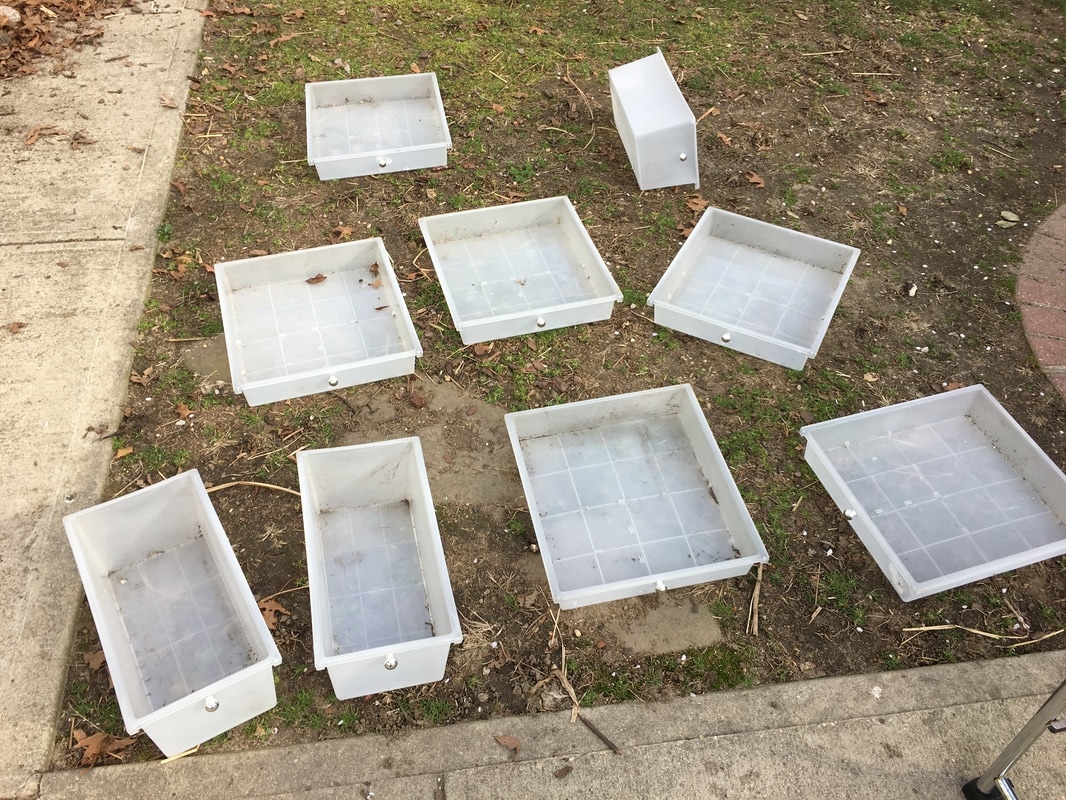
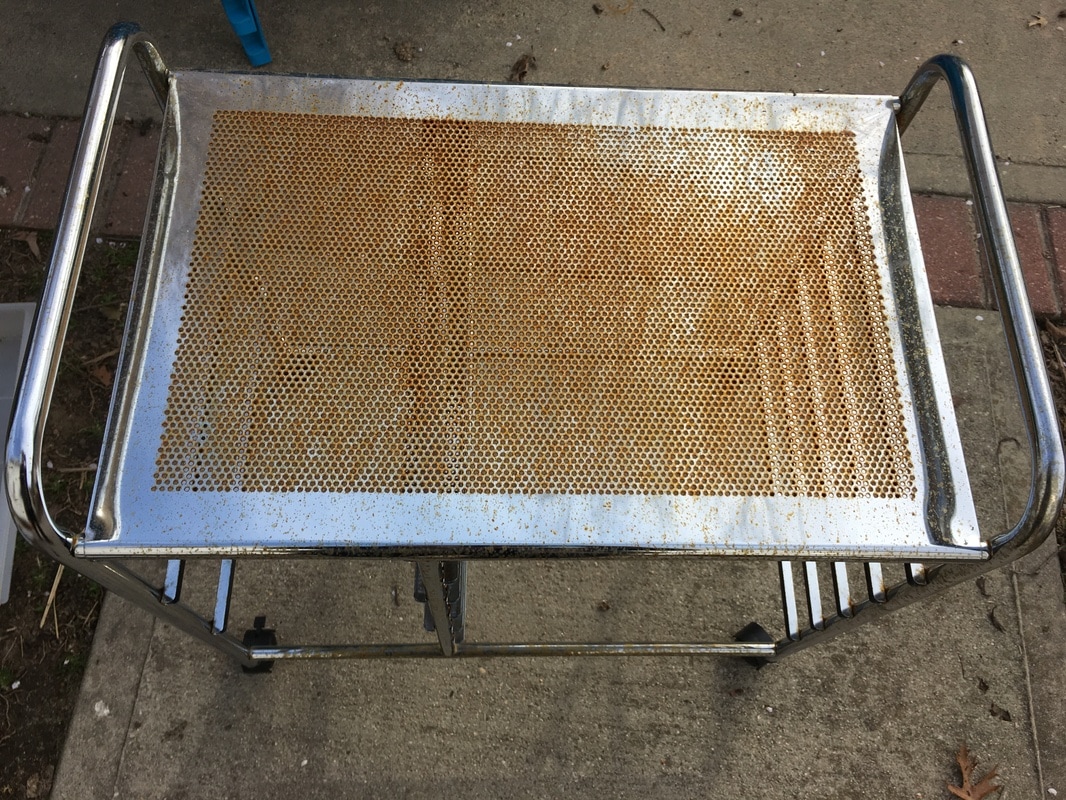
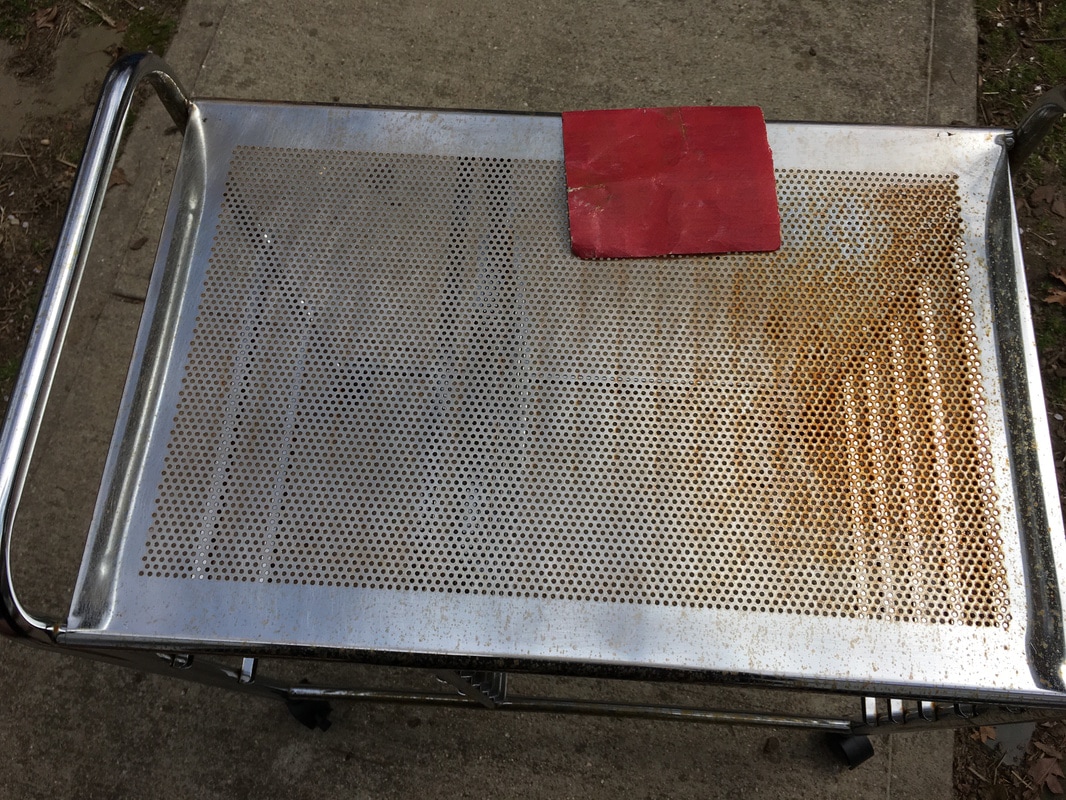
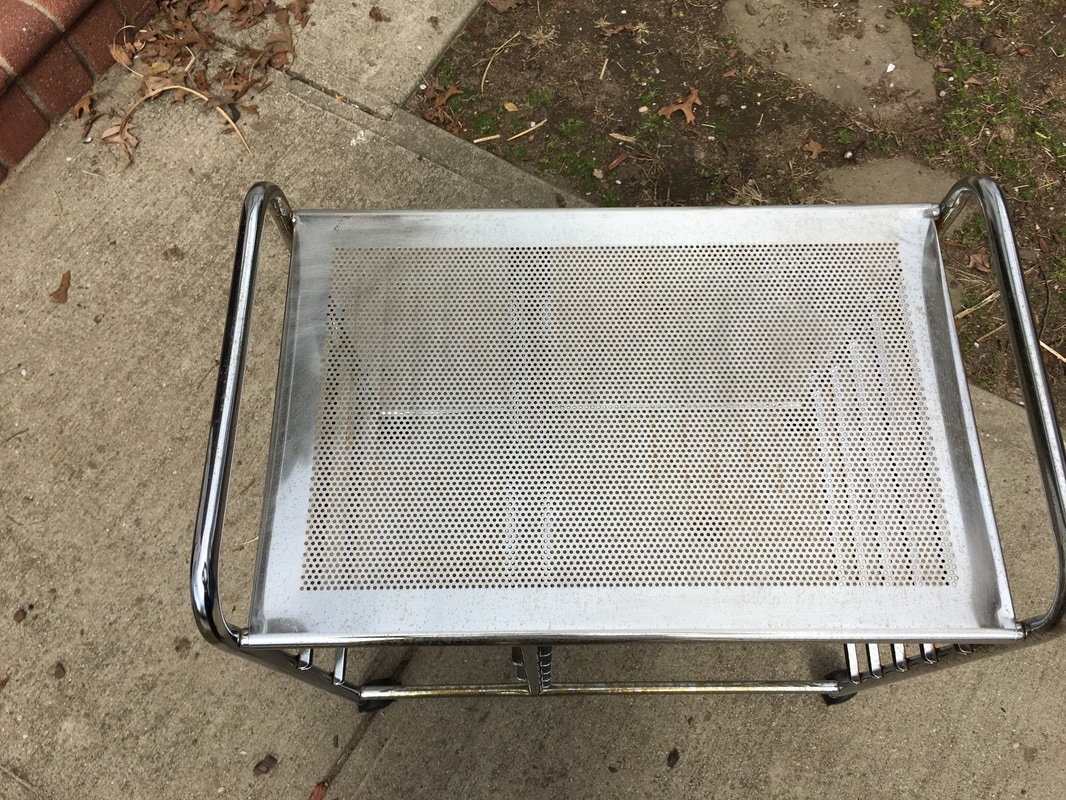
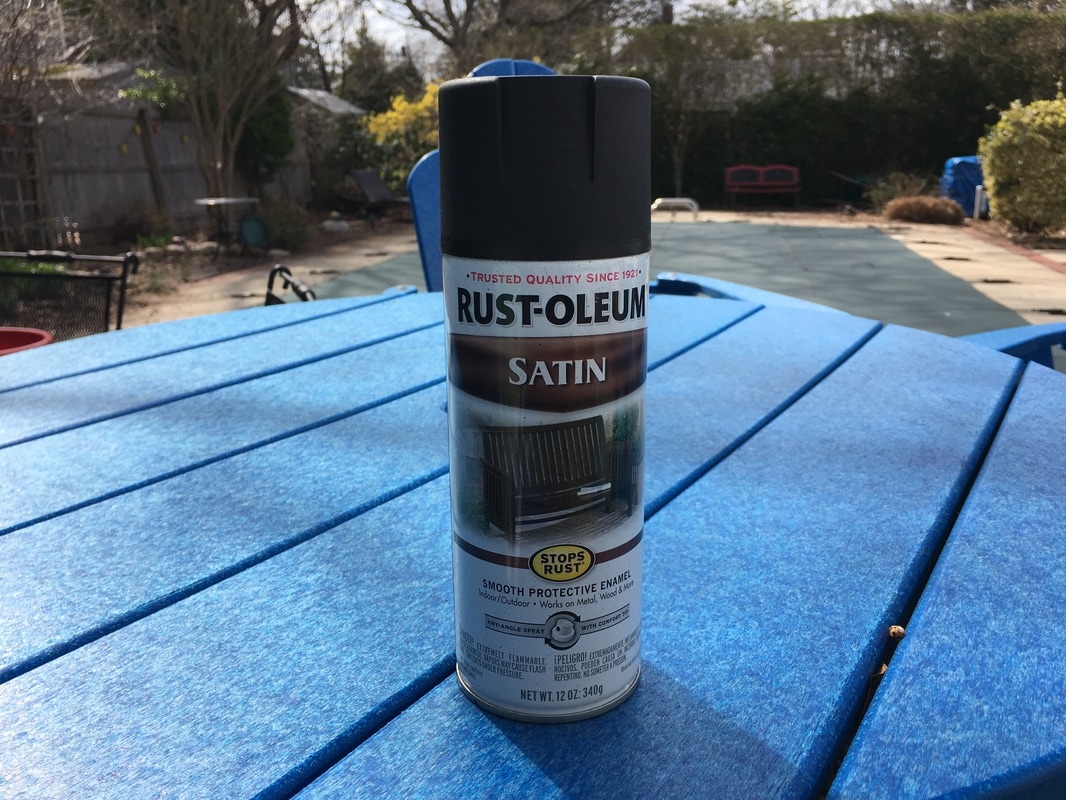
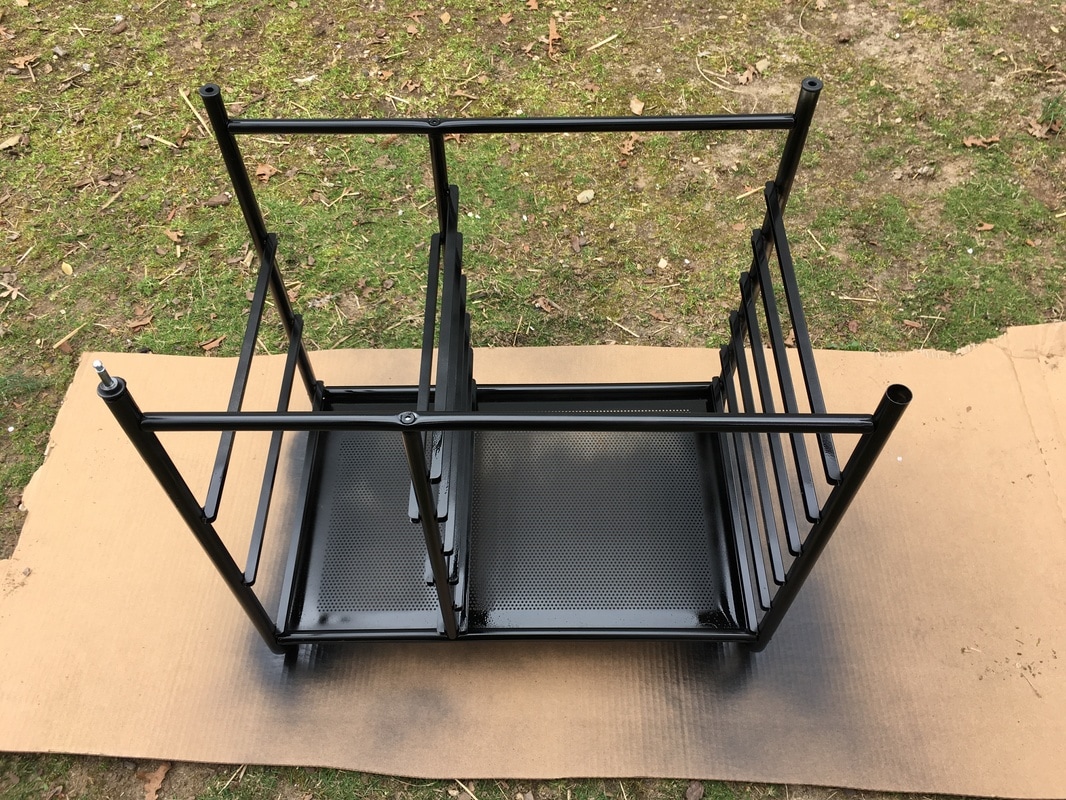
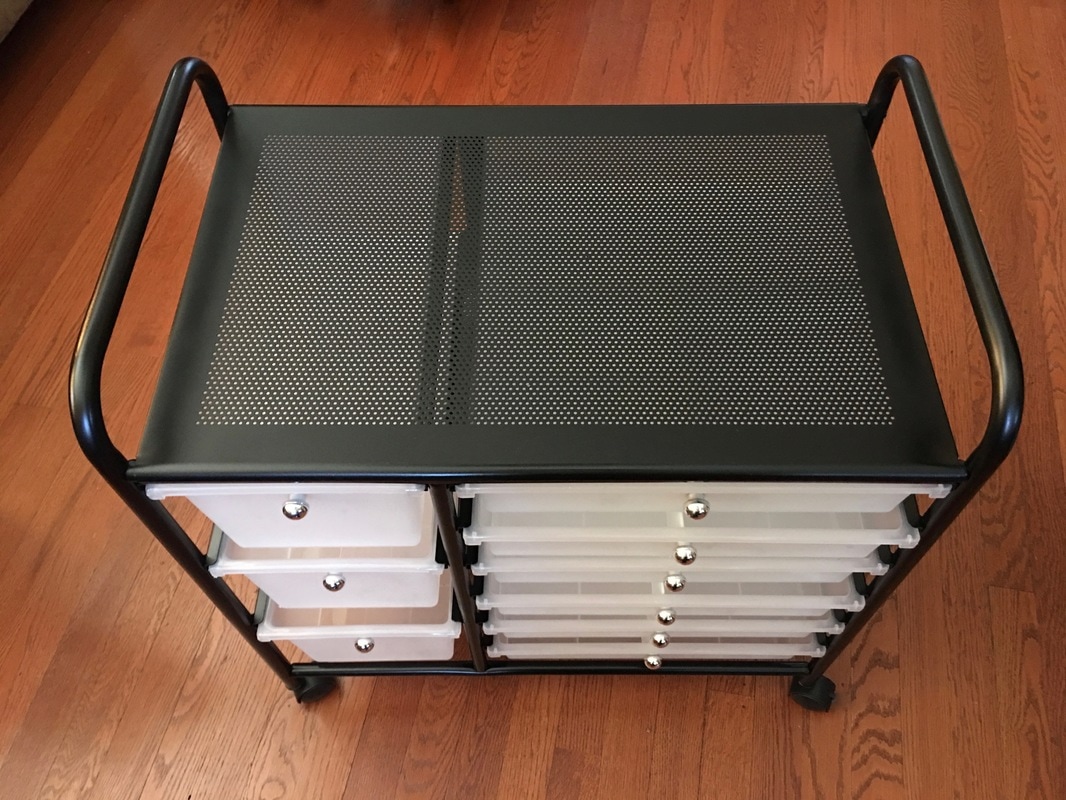
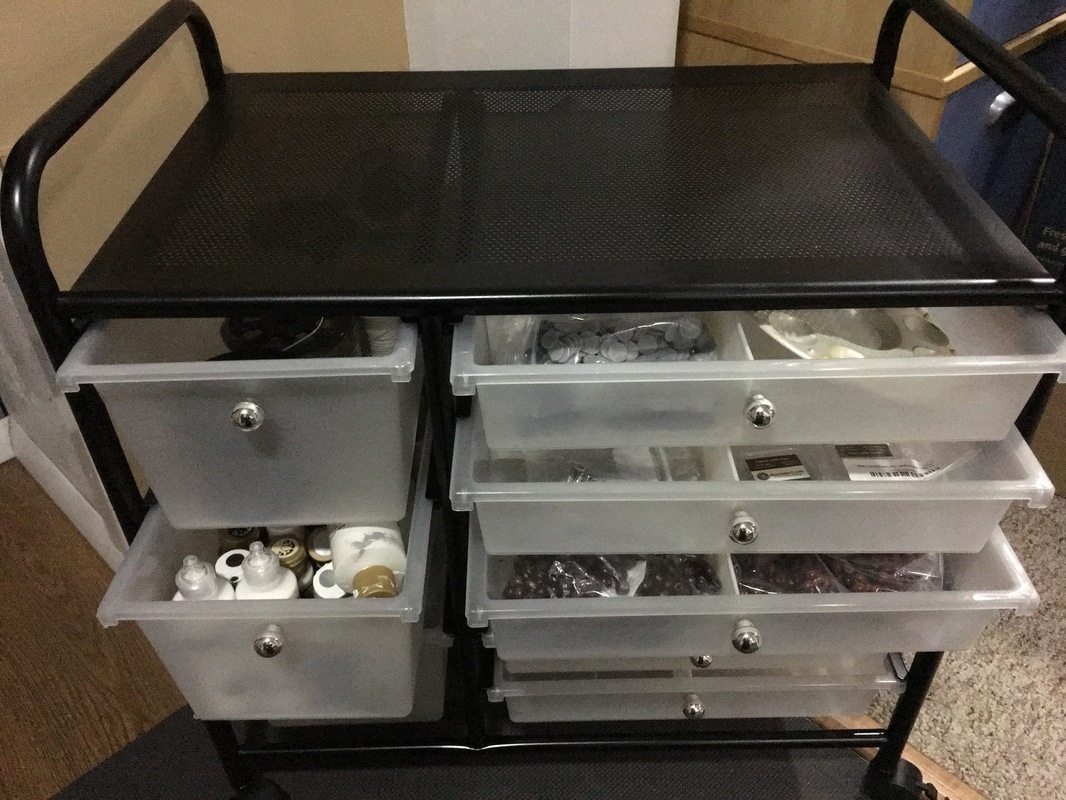
My husband pulled this 8 drawer chrome cart out of our neighbors garbage. It was a little rusty, but otherwise would be perfect for all my craft supplies. I think it is a great find because similar carts sell for upwards of $70 on Amazon! What to do, what to do.....so I simply sanded, wiped it down, and spray painted it! Now it is not only is perfect for all my supplies, but it looks brand new too!
Thanks for visiting!
Find more of our great DIY ideas here! And stay tuned for our book coming soon: "The ABC's of Creating A Simpler Life" which is full of tips for simplifying life in, well, super simple ways :-) Follow us and sign up for e-mail! Sincerely,
It doesn't matter who you are or where you live, it should be everyones goal to have as little household waste as possible! With a little work and a lot of creativity it is possible!
Practice these basics in order from top down and read about how to maximize each one to the fullest at Zero Waste Household.
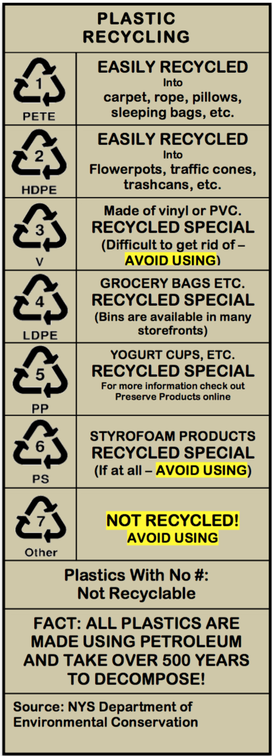
Enjoy this FREE Recycling Chart (below) to help with recycling as much waste as possible.
Click on the picture of the chart below to download and print! It is an 8.5" x 11" pdf file :-) 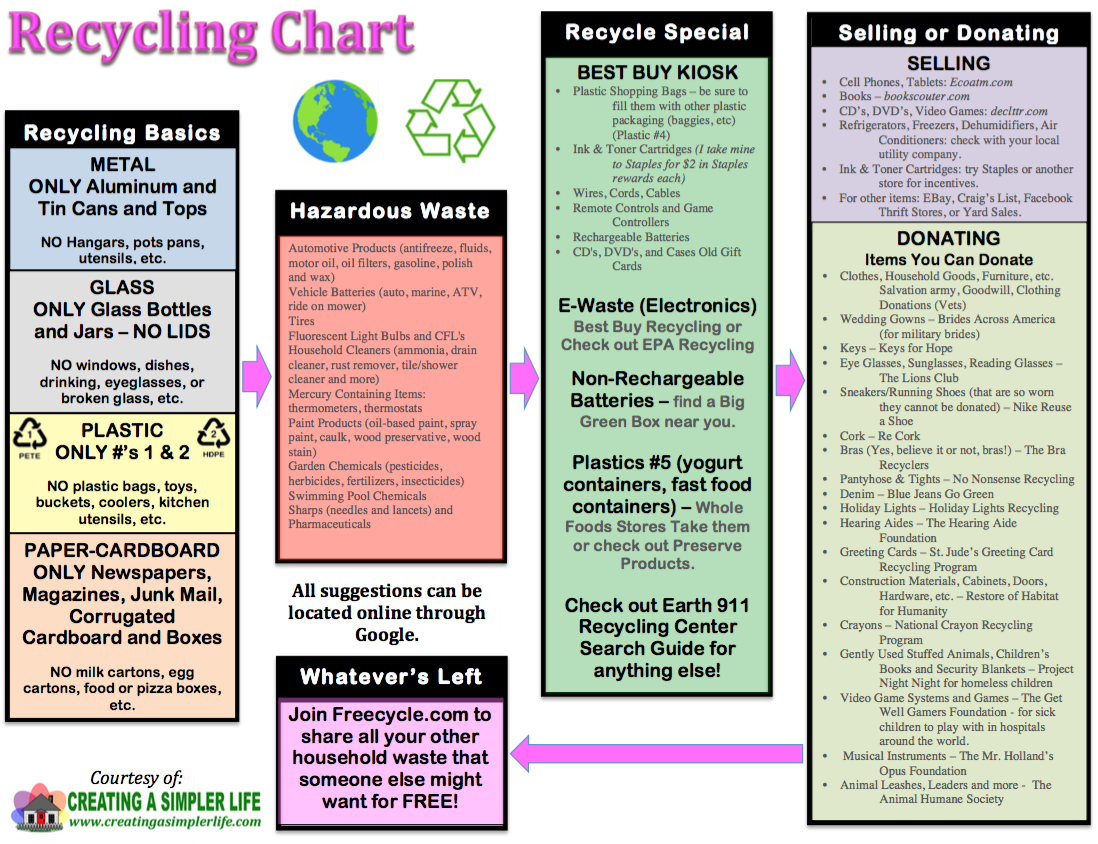
Read more about having a Zero Waste Household.
Thanks for visiting :-) Please follow us on social media! Sincerely,
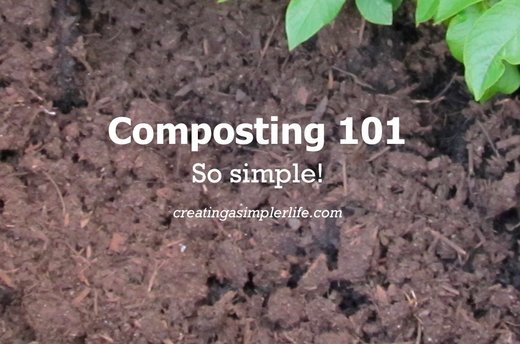
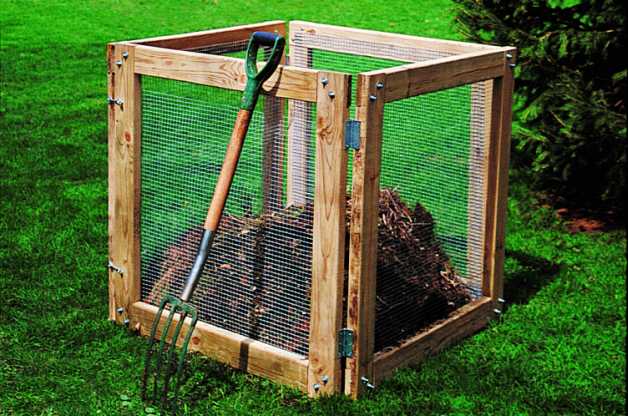
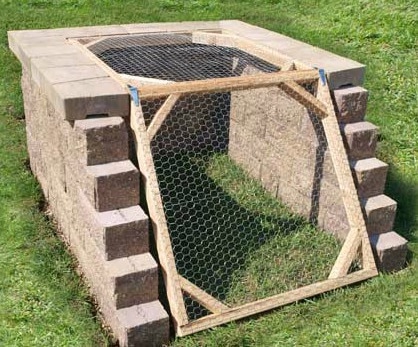
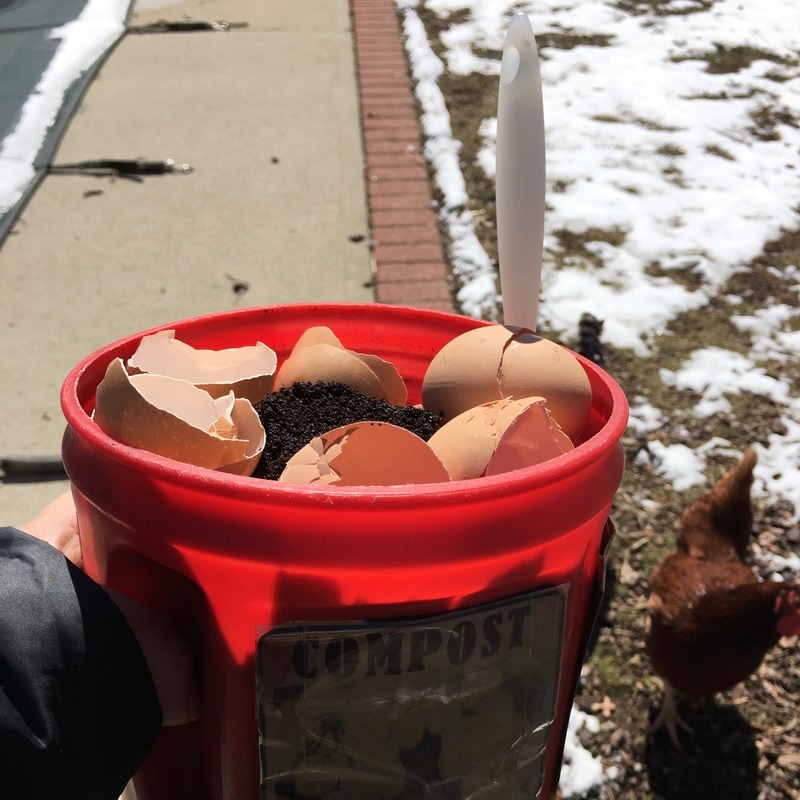
We compost here every single day. Well, the scraps go on the counter every day, not necessarily out to the bin. But the point is that we compost and we reap the rewards every spring when we use that wonderfully rich, dark, material in our gardens! We currently have an inexpensive four sided recycled plastic compost bin. It came with a removable lid on top and a front sliding door that could be opened to pull out the material. We modified it over the years by removing the top and the front door so it is always open to the elements (and because the were annoying and unnecessary). Now it is much easier to maintain but when we move to our New Future Homestead we will simply build a three sided bin from cement blocks or wood (see pictures below) that will be much easier to access and turn regularly. No matter how big or small a bin you choose or use, the reward of beautifully rich compost is well worth the effort!
Choose a question below to learn more:
What is compost?
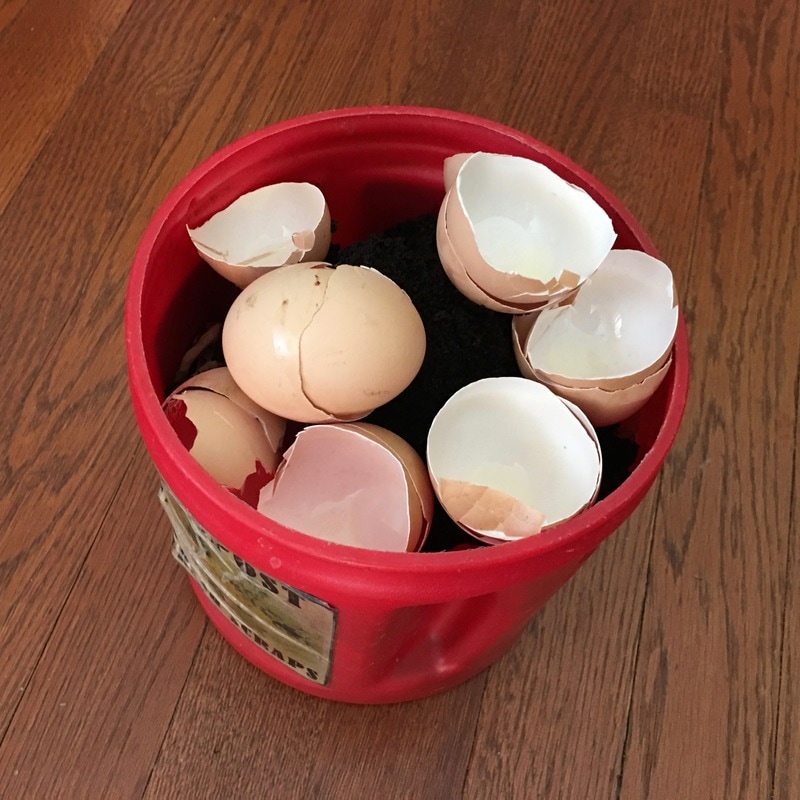
Compost is a homemade organic material that can be added to your garden soil to help plants grow. It is a combination of three basic ingredients
Why should you compost?
How can you get started?
What can be composted?
You won't believe this list of things you can compost!
What should not be composted?
Anything that could be harmful if it gets into your food. For example, if your yard waste or grass was treated with herbicides and or pesticides then you do not want them in your compost pile. If you added processed charcoal to your fire, then do not put the ash into the compost, again, due to the harmful chemicals.
It is also said to avoid adding bones and uncooked meat from animals and fish because they attract animals (including flying buggies) and can smell over time. This is definitely good advice for small yards. However, if you have a large property then you can choose to add it anyway, or you can take it out far from your house and leave it out for the animals. I know what you might be thinking (gross), but if you are a hunter then you know this is not a big deal. If it doesn't get eaten (which it will), it will still decompose! Lastly, you should never add any prepared or cooked foods, again, for the same reasons as above. However, some of these leftovers can be saved in the freezer to add to soups and or stews or fed to your own chickens, goats, and or pigs! So basically, be smart! And when in doubt, well, just keep it out! Of the compost pile, that is :-)
You can easily purchase a bin (see some at the bottom of this page),
but DIY is even better if you can! Here are two of my favorites! Note: pictures are links to plans (actual links at the bottom of this page)
A few simple tips to help make composting simpler:
If all goes well, your compost can be usable anywhere from two (2) months to two (2) years. Ours is used once a year when we plant our garden in the spring and it is awesome!
Thanks for visiting!
Please follow us social medial and check out our other ways to Minimize Household Waste and Zero Waste Home! Sincerely,
Sources:
www.epa.gov/recycle/composting-home www.birdsandblooms.com/backyard-projects/diy-garden-projects/diy-compost-bin/ www.allanblock.com/courtyard/compost-bin.aspx
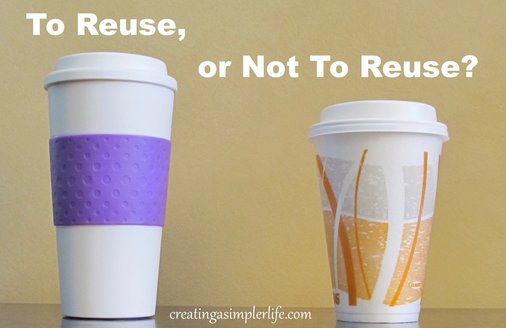
Reusing an item means it is purchased specifically to be used for the same purpose over and over again. For example, a reusable water bottle can just be refilled every day for work. There are so many reusable items out there today that it can be almost dizzying to think about and to choose from! My advice is if it is simple to use and maintain, then go for it! Some reusable items are not simple and therefore may not work for you, and that is O.K. so long as you are consciously making informed decisions.
Reusable Items
These reduce the need to buy something over and over again thereby eliminating or decreasing the amount of household waste! They save you money and help the Earth!
Take a look at this Reusable Pictorial Post!
Check out our other Recycling Posts:
And check out our Pinterest Boards:
Thank you for visiting :-)
Sincerely,
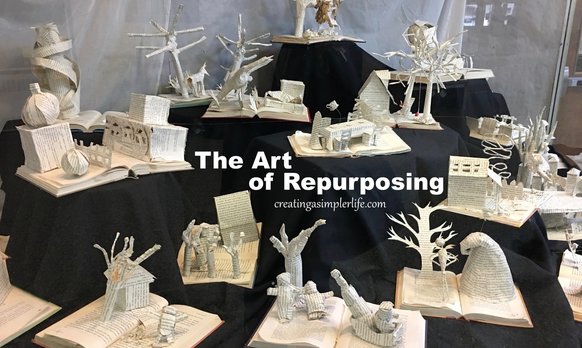
Books repurposed into fairy tale artwork by Commack high school students.
Repurposing - using an item in a way other than its original purpose. Can be called an art because sometimes it requires a lot of creativity to find a way to repurpose something!
A simple example is reusing Chinese food containers to store magic markers in. A super creative example is breaking up old cd's to create a mosaic design on furniture or other items. See what I mean? I never would have thought of that on my own! And check out those amazing fairy tale books by high school students above! Super creative :-) Be careful about what you save to repurpose though! If you don't use it within a certain amount of time, it just takes up space and makes life more complicated! Either recycle it or give it away! 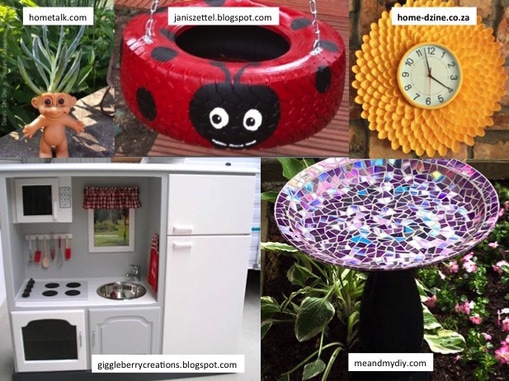
Some Creative Repurposing Ideas:
Watch this slide-show of repurposing possibilities!
Visit our page Household Waste for additional information
and check out our Pinterest Boards for more great ideas: Recycling (different ideas on what, how, and where to recycle) Selling & Donating (find ideas and places to sell and donate all kinds of items!) Repurposing (a plethora of unique and creative ideas...) Reusable Items (includes many products you may not have heard of before!)
Thank you for visiting!
Sincerely,
Today recycling is a basic requirement just about anywhere you live. It can be annoying, but it is important and in some places there are actually penalties for not complying!
Depending upon where you live the rules are different. Where I live we need to separate our recyclables and put them out on different days. In other locations they have what is called "single stream recycling" where everything gets recycled together and separated elsewhere. This is in my opinion the best way and if you are lucky enough to live in a 'single stream' town then good for you! Whether you live in a single stream town or an area that needs to be separated like me, read the series below to learn how to make the process as painless as possible. And remember, you are helping the Earth and future generations!
Check out our Pinterest boards:
Thank you for visiting!
Sincerely,
Three choices for Christmas trees:
Fresh cut - as good as dead, but can be useful in some ways Balled - a living tree with balled roots that is planted after Christmas Faux - can be purchased with or without lights on & lasts practically forever 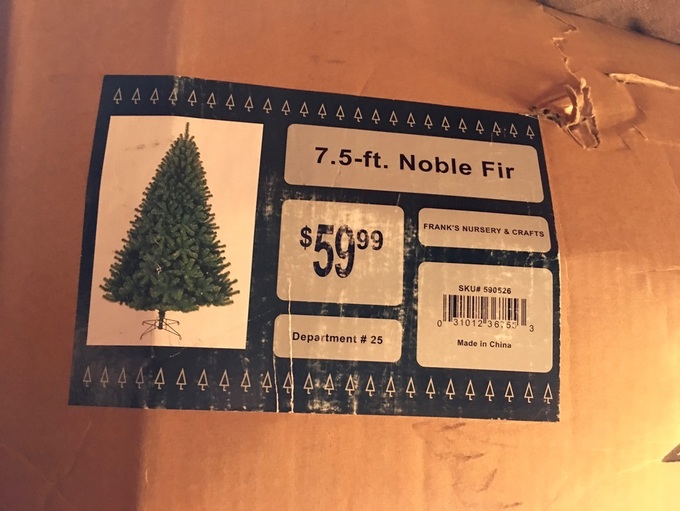
I know, theres nothing like the smell of a fresh cut Christmas tree but I don't like the idea of cutting down and killing a perfectly good tree just to throw it away after the holidays. If I had a use for it and it wasn't going to go to waste, well then I might feel differently. Or maybe not.... For many years we purchased a living tree with the root ball and all. We would plant it after Christmas and after a few years we had a nice border down the side of the yard. That was when we lived on a large piece of property and had lots of room to plant. Now we don't have the room, or need, to plant a living Christmas tree so a fake, or faux, tree it is!
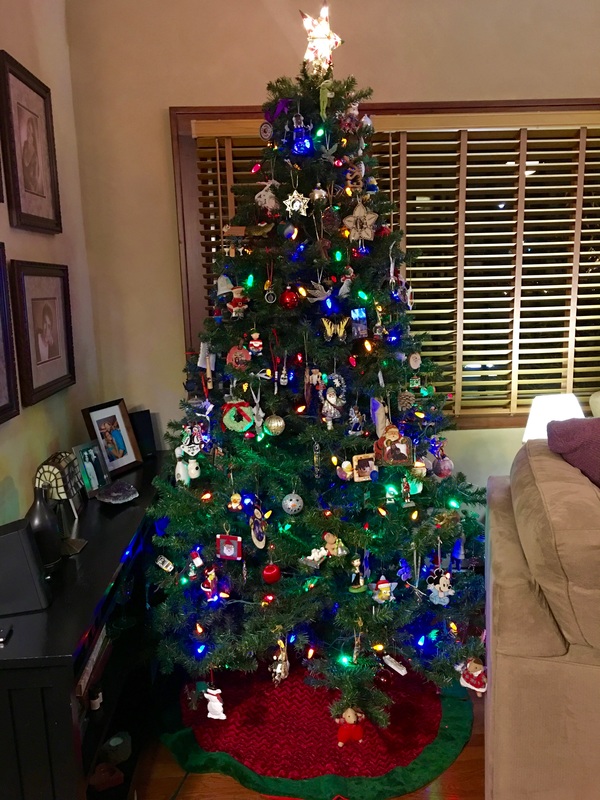
After Christmas about 14 or so years ago I was checking out the holiday clearance at Franks Nursery (when it was still here) and there it was: the beautiful 'fake' tree I would own for longer than I could ever have dreamed. That day I purchased my 7.5' Christmas tree and I can't even tell you what I paid for it, but I know it was worth it! It was the only one left and I couldn't believe my luck. I have been using it ever since and figure I have easily saved close to $1,000 over the years! I really love my artifical tree and as you can see it is still in the original box!
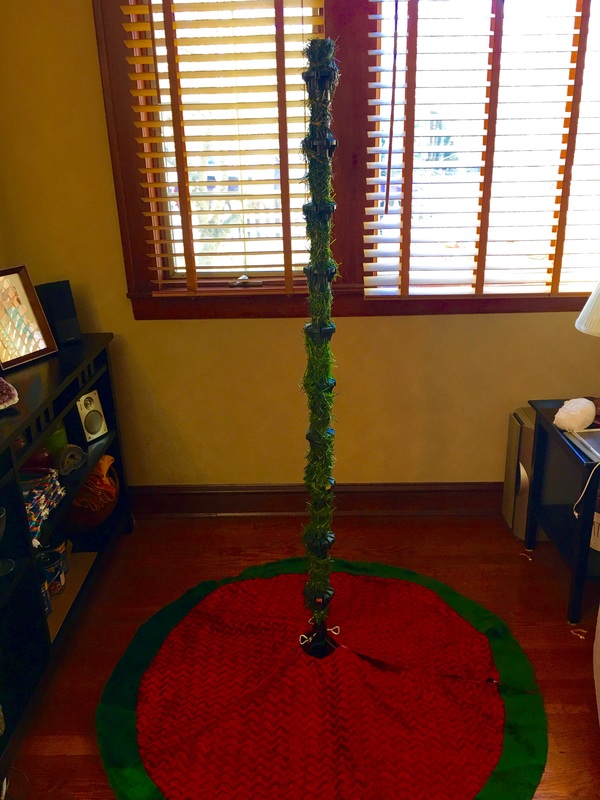
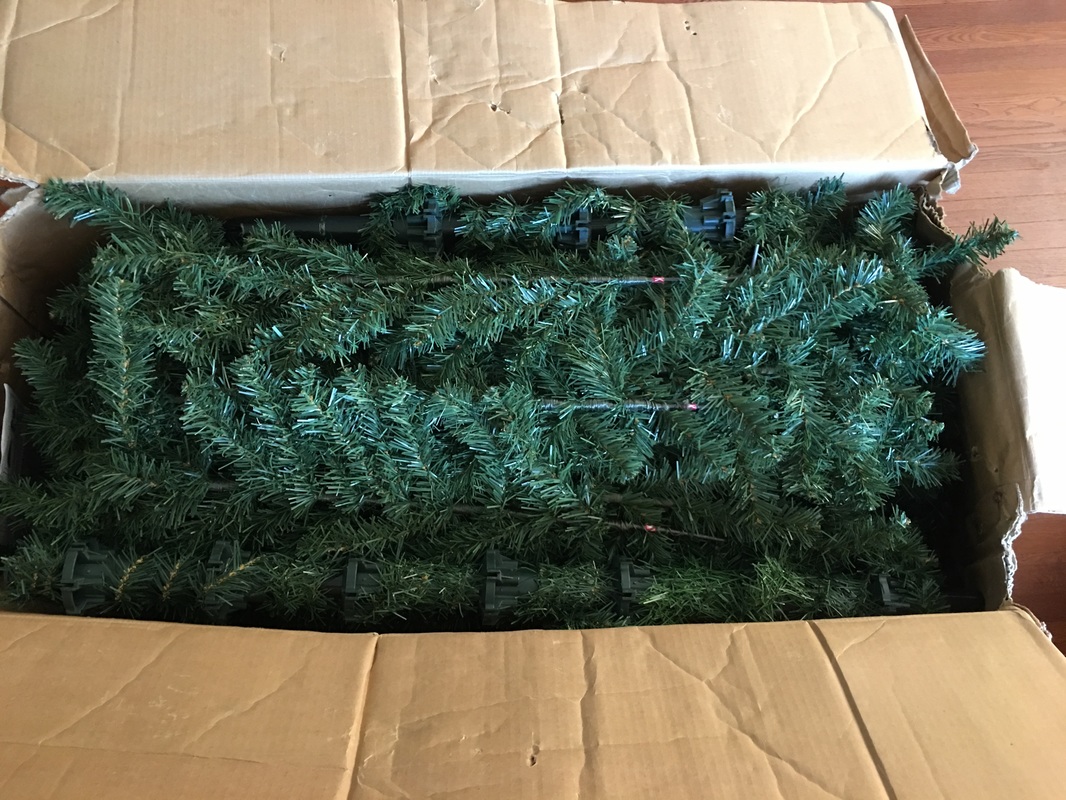
The tree is simple and has no lights on it. The center 'stem' is two parts that connect together and branches that connect around the stem working upwards. The top is a separate piece that goes on last. I fluff out the branches as I go and I think it is perfect! I have put the tree up for so many Christmas' that I don't even need the directions to assemble it anymore! It is plain, and it is simple.
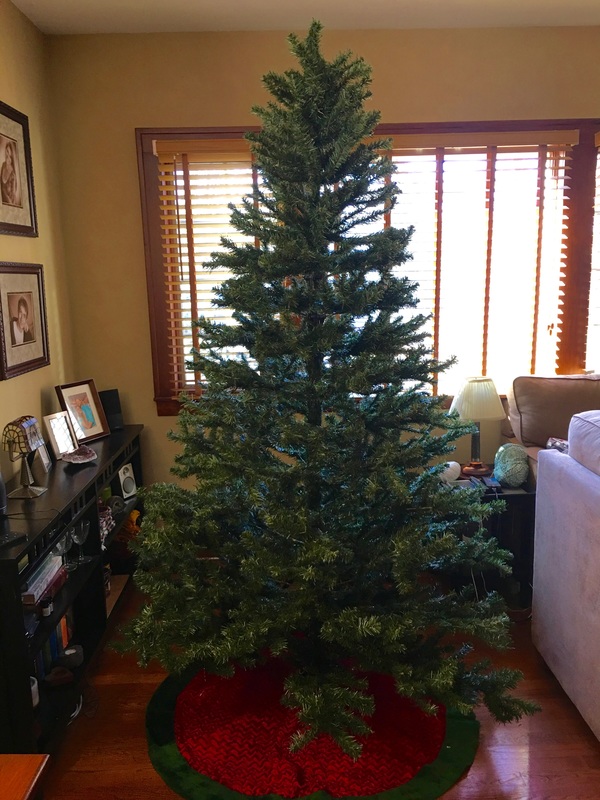
I know a lot of the fake trees available today have lights on them and that this could be a huge time saver (putting on and taking off the lighs can be a hassle), however I am glad my tree doesn't. First, have you really ever changed a bulb on Christmas lights? I have and I can tell you sometimes it's a real pain. Permanent lights on a tree takes that burned out buld replacement to a new level that I am not interested in! With my simple try I like the freedom to change things up. I am not 'stuck' with the same lights year after year, especially if they're not LED's! Traditional white lights with an angel at the top of the tree this year? No problem. A colorful star at the top with multicolored with low energy LED colored lights another year? Easy peasy. I like having the the freedom to change it up every year if I want to and a simple tree with no permanent lights allows me to do this.
Best of all, it's still lookds as good as new every year :-) 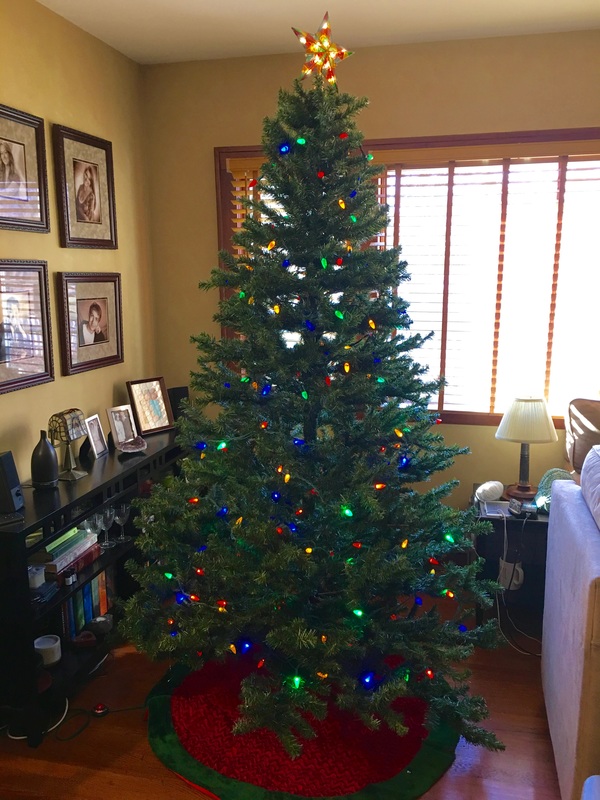
In my opinion the benefits far outweight the negatives.
Super simple, and super worth it!
Thank you for visiting :-)
Check out our social media sites through the links above! Sincerely,
|

Hi there! I'm Kathie, the author behind Creating A Simpler Life blog. I'm excited to share our longterm projects (and planning) toward building our future retirement homestead in the Adirondack Mountains of New York. In the meantime I will be sharing all the other little things we do that are part of creating our simpler life!
Categories
All
Archives
July 2020
|


 RSS Feed