Blog
A little bit of anything and everything that's part of
creating, enjoying, and living a simpler life!
creating, enjoying, and living a simpler life!

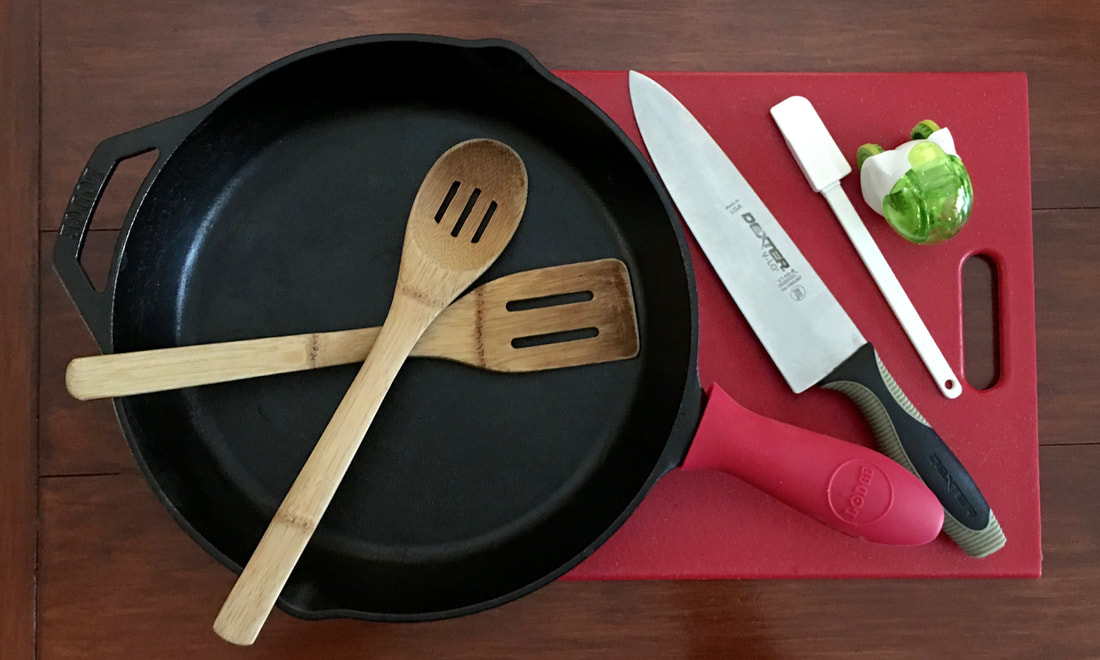
I don't know about you, but I spend an inordinate amount of time in my kitchen. Whether it is cooking, baking, or cleaning, I am always doing something in there so if there's a way to make it simpler, then I'm all for it! These are my 'go to' kitchen tools to get it all done!
You can watch this video or skip down to pictures, descriptions and affiliate links to products. P.S. We are sort of following a Plated Recipe for three adults that we doubled so that we could feed five adults instead!
Tool Descriptions & Links
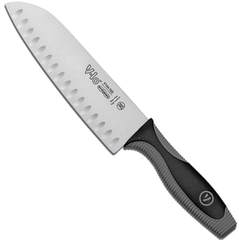
Dexter Knife - This is my favorite knife for everything from cutting fruits and vegetables to cutting meat. It is super sharp and perfect for cutting anything you can think of! Sort of a one-knife-does-it-all that I couldn't imagine not having in my kitchen. Not only that, but it is made in the USA and literally will last forever. For less than $40 I have had mine for over 10 years now so it was, and is, worth every penny! How much simpler can it be to have one knife that does everything? Dexter-Russell V-LO 7-inch Carbon Steal Duo Edge Santoku Style Chef's Knife on Amazon (affiliate link).
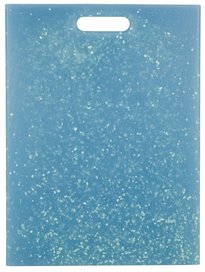
Recycled Plastic Cutting Board - I was sick of all those smelly, ugly cutting boards that just did not ever seem clean enough no matter how hard I scrubbed and sterilized it. This one cutting board solved that problem! It cleans up wonderfully, lasts a super long time (much, much longer than wood), can be put in the dishwasher for sterilization, and can be recycled with the company it was purchased from when you are done with it! Less than $20 will get you the best cutting board out there that will last nearly forever! Oh yeah, and it is made in the USA! Eco Smart Cutting Board on Amazon (affiliate link). The one I have is red and my daughter has a beige one...but it is the same company and they all work great!
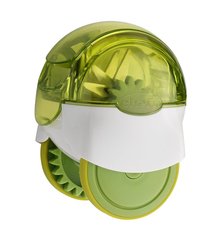
Garlic Chopper - OMG. I love garlic. I mean love it. But as much as I love it, I hate having to chop it up. Talk about annoying. I solved this problem with this handy little tool....seriously, just pop the clove in, close it up, and roll it around. A few, literally, seconds later you will have perfectly chopped garlic that can easily be added to any meal! Roll it around a little more and you can have minced garlic too! Want to do more than one clove at a time? Then buy the extra large size model. Either way, simply rinse in hot water when done and it's ready for next time! At a cost of under $10, it is worth it just in the time you will save alone. Check out the small size garlic chopper here on Amazon (affiliate link).
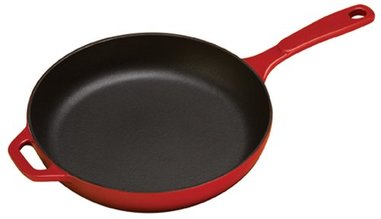
Cast Iron Skillet(s) - I use them to cook anything and everything on a daily basis. They will literally last forever, are actually good for your health, and clean better than any non-stick pan I have ever owned! I simply pour some water in immediately after cooking (only for certain foods like eggs), let it sit, and it cleans right out. For less than $50 you will have it for the rest of your life and your children will have it for the rest of theirs too! Read more about My Favorite Skillet here or check out the 11" Cast iron skillet on Amazon (affiliate link) and the 12" Cast Iron Skillet (affiliate link) and if you are going to use these skillets it's a good idea to have the silicone handles shown below so you don't get burned. I have the in both red and black and the color really doesn't matter, however I do prefer the red because at a glance it is easy to know it is there.

Aluminum Baking Pans - These pans are fabulous. I wish someone had told me years ago how great these were. I could have avoided years of using nasty cookie sheets! I use these aluminum pans for roasting any type of vegetable, for cooking chicken, pork shrimp, fish, etc. in the oven. Sometimes I put the meat and the vegetable on the same pan! They are also amazing for baking things like yummy cookies! What makes these pans so particularly awesome is two things. First, they have a lip around the edge so you can add some oil or other sauces with no worries. This is great for cooking the meats and veggies in the oven. But even more importantly, they clean up amazing. Seriously, like new! I won't be needing to replace them. Ever. I don't know what I would do without these great pans. For less than $25 for two bakers half sheets, they are definitely worth it! Check them out on Amazon! I also have the full bakers sheet and depending upon how many people I am cooking for it comes in handy as well!
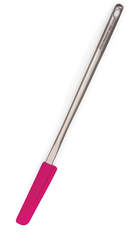
Extra long handled thin silicone spatula - These let you get to that absolute last drop of anything! Whether you are trying to reach the far corner at the bottom of a container, scrape the last drop out of a bowl, pot or pan, this tool is amazing. An invaluable tool for reaching those hard to reach corners at the bottom of all those jars. Stop going nuts trying to get that last little bit of almond butter or mayonnaise out for under $10! Extra long silicone spatula on Amazon (affiliate link).
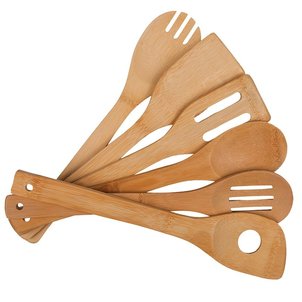
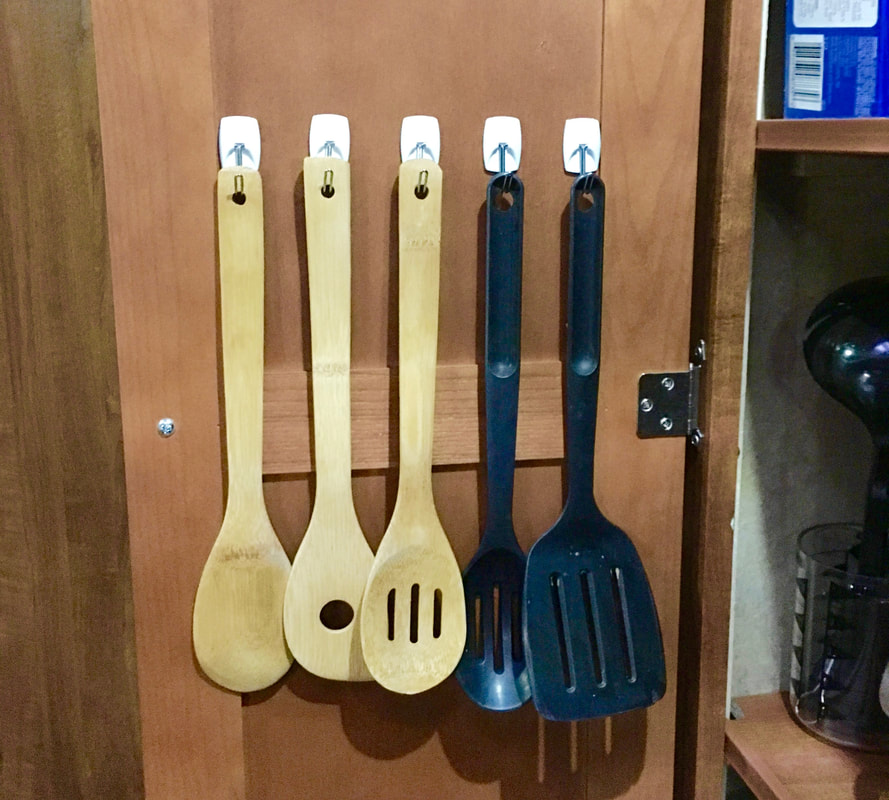
Bamboo Utensils - These are a must have for stirring up food in those cast iron pans. You can use plastic or metal, but I prefer bamboo. I don't cook without them! Here is the set of 6 Bamboo utensils that I have (affiliate link).
Thanks for visiting!
Sincerely,
0 Comments

This post contains affiliate links to Amazon.com.
Having an RV (recreational vehicle) is awesome! It gives us the freedom to be able to travel and always have a comfortable place to sleep with no worries. It is also super convenient to just pull onto the side of the road if you have to go to the bathroom! No more painful waits for the next rest area or searching for a gas station with a working bathroom. Maybe that's just me. Either way having an RV with all the comforts of home and stocked with just about everything you need for traveling makes traveling simply delightful!
However, our RV, being inexpensive and small, did not come with most of the comforts we wanted nor did it have a lot of space for all of the above, so here is what we did to make it like home for us.
1. The Bed
We chose an RV that had a bed that never needed to be 'broken down.' In other words, in many smaller RV's the bed is also the kitchen table and benches. We made sure this was not the case for us so even though our RV is small (18') it has a permanent bed. The bed also had to be a decent size. Our RV is a queen size bed and this was very important to us. 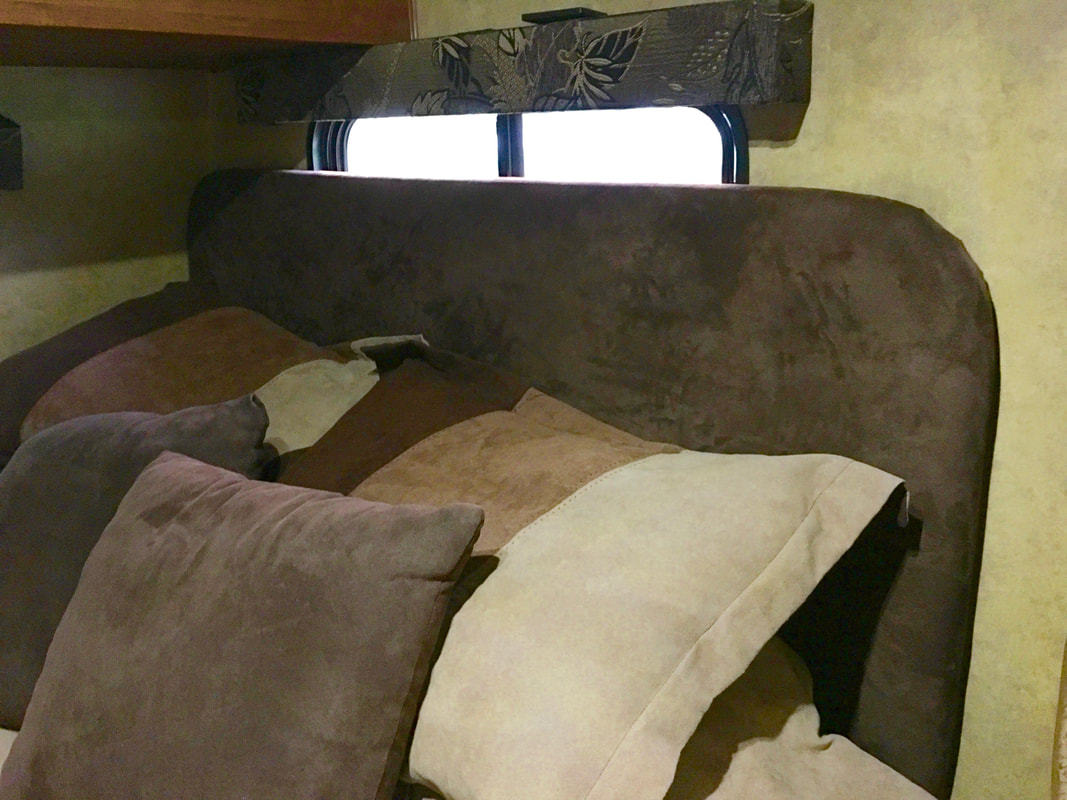
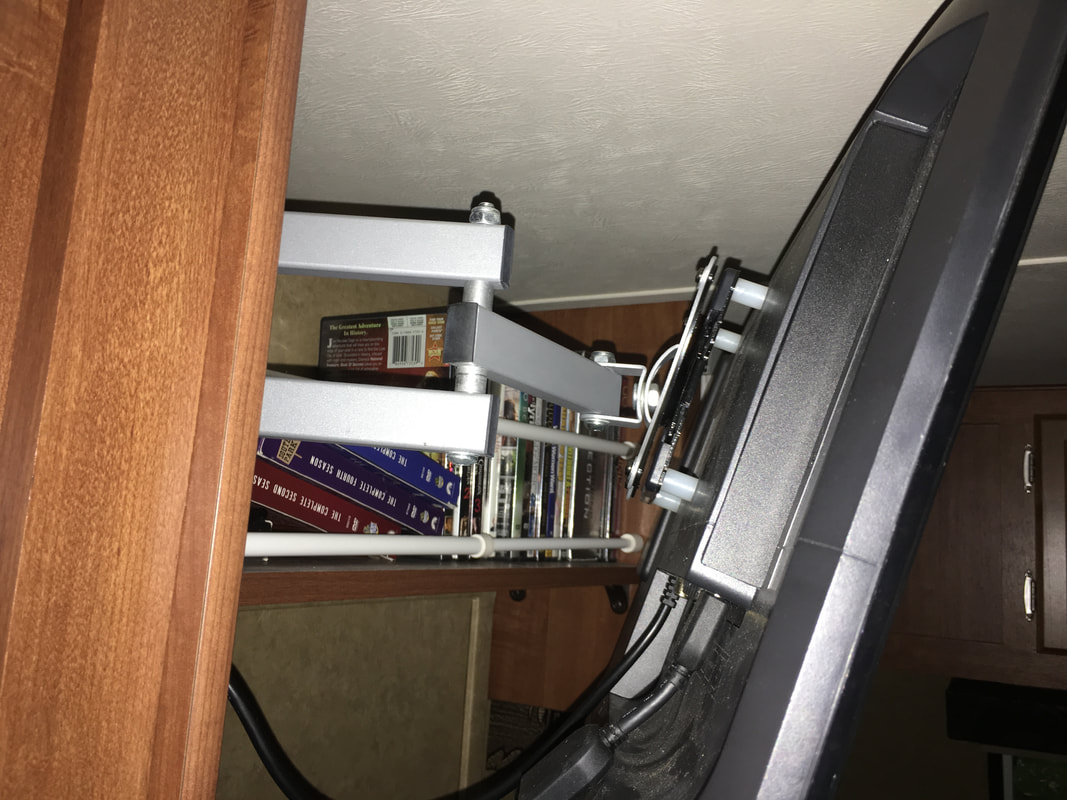
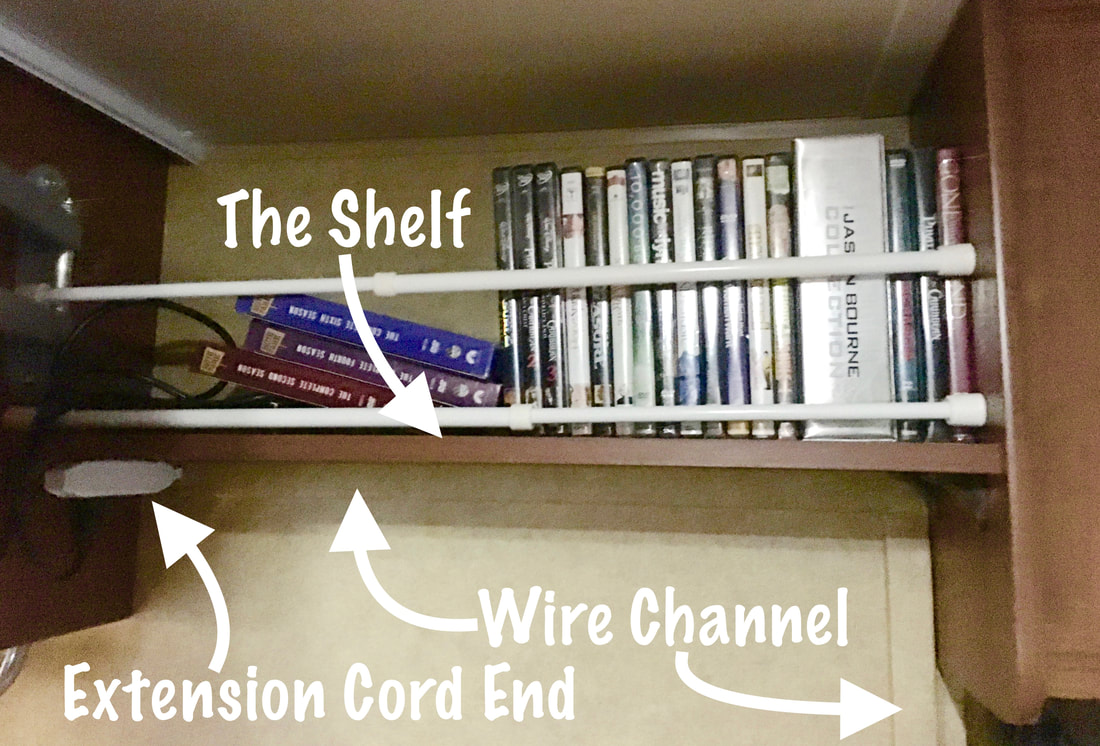
2. The Entertainment Center
OK, I know it is not camping if you have an entertainment center, but really. It's not exactly camping to stay in a nice trailer with the comforts of home anyway! At our age, we just don't care. We want to travel all around the country and at the end of the day we like to relax and watch some TV. Even if it is just a DVD, we don't care. It is relaxing. So Since our RV didn't come with an entertainment center we had to make our own! 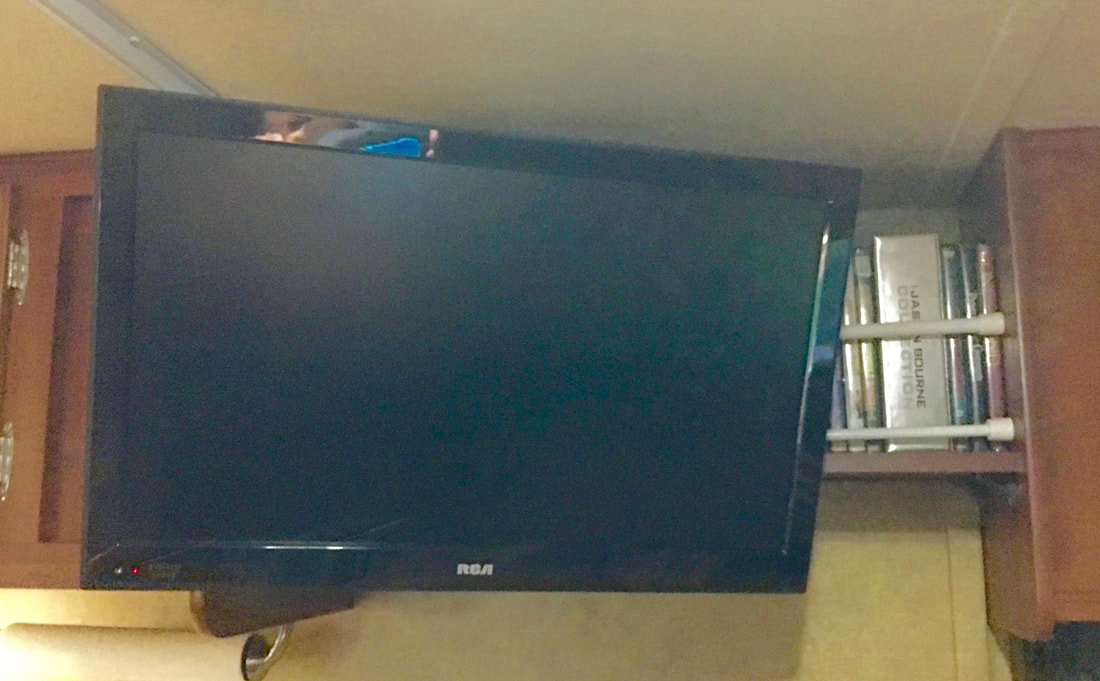
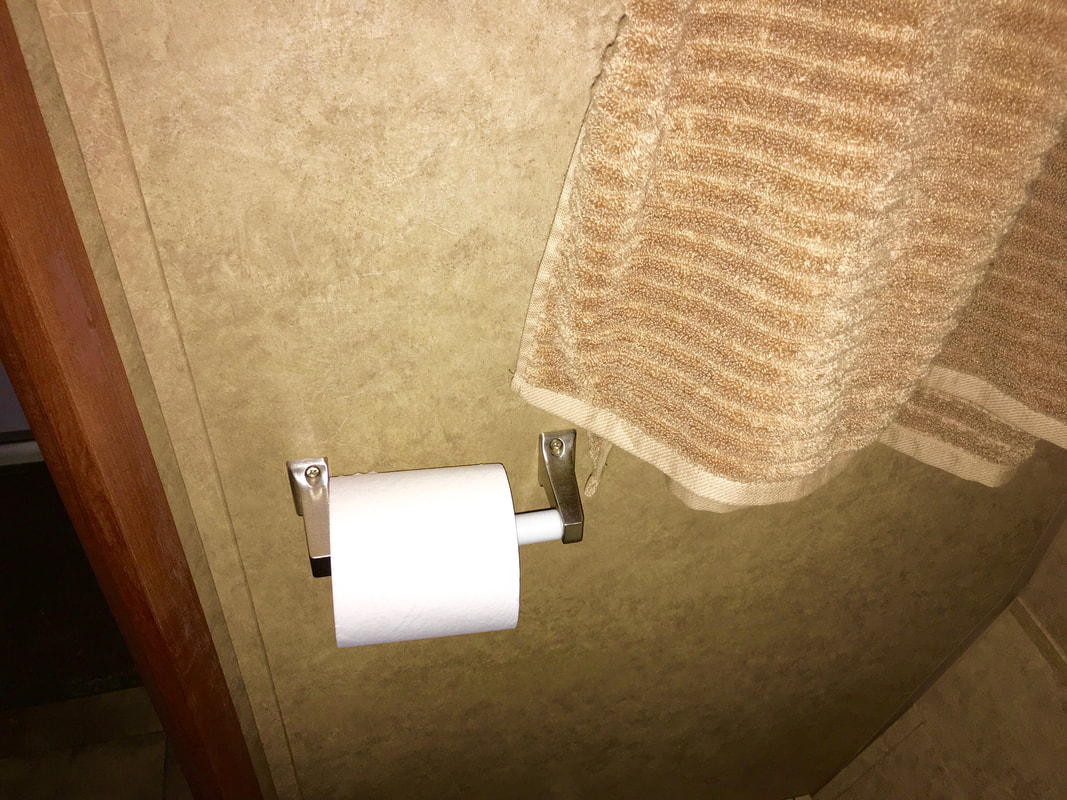
3. The Bathroom
I don't know about you, but this room is pretty important to me! In a small trailer you get a small bathroom. In our case it is really, really small. In fact, it only came with a tiny shower, a toilet, and a mirror on the wall! Nothing else but a door! 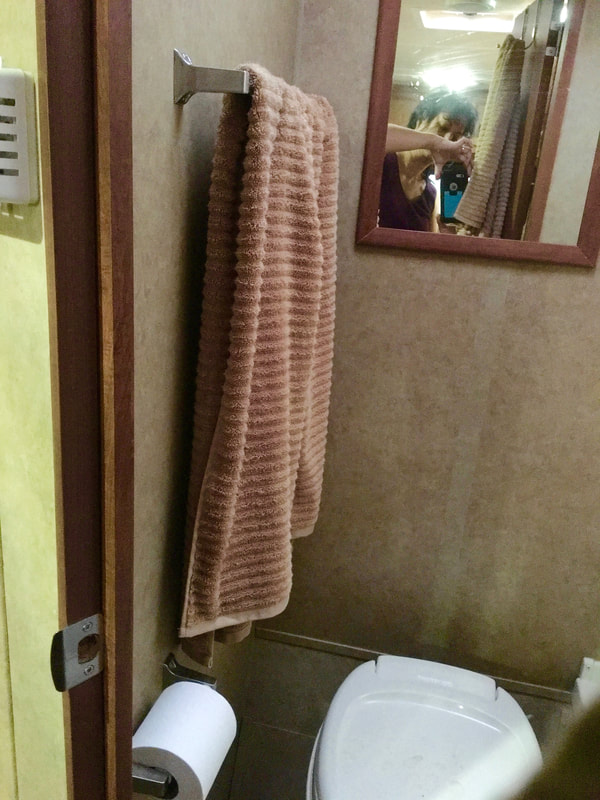
4. The Kitchen
Of course this is really part of the bedroom, the living room, and the dining room! Ha Ha. But who cares? It's still my kitchen and I knew I could improve upon it! 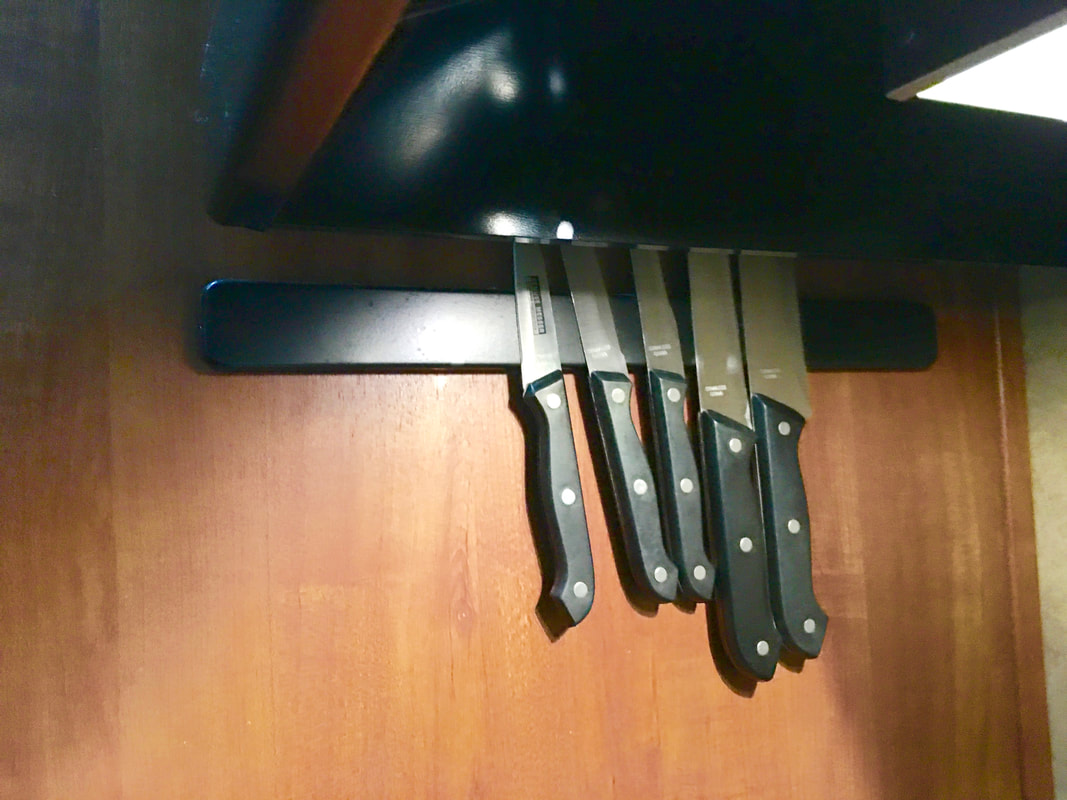
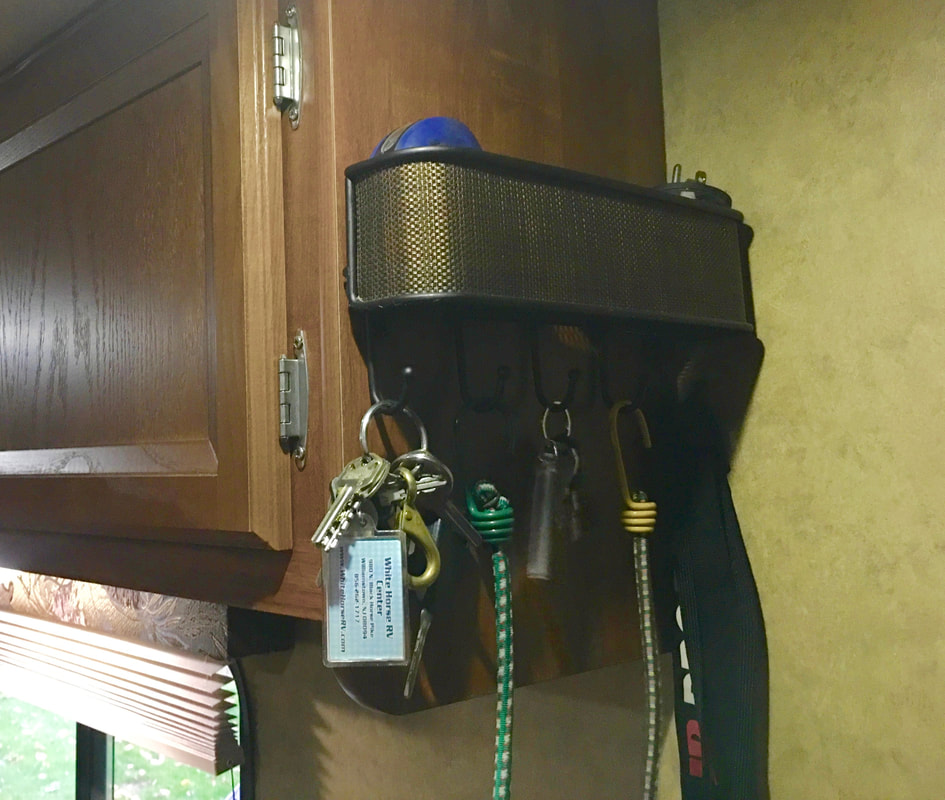
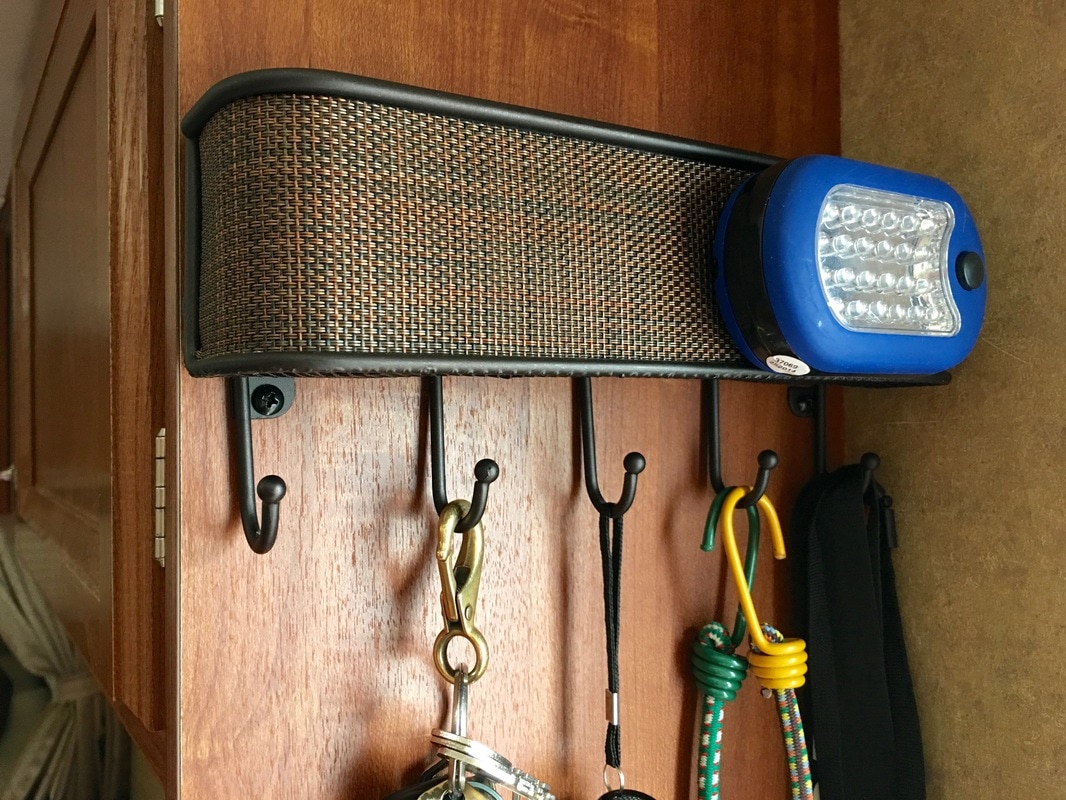
5. Key Holder
Take a little video tour with us.....
Now our trailer is always organized, ready, and feels like home no matter where we go!
Happy Travels!
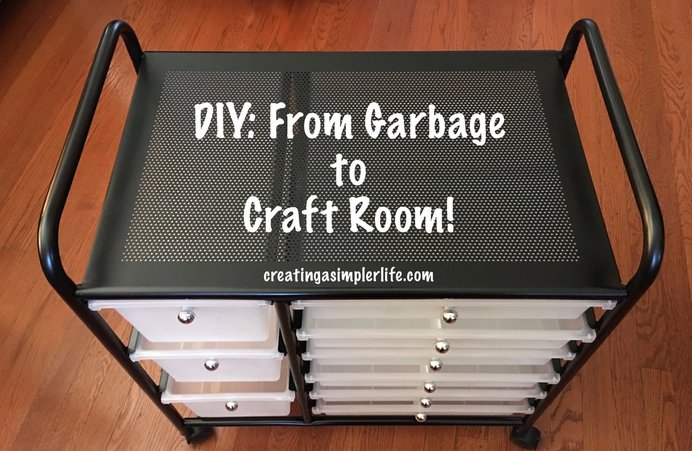
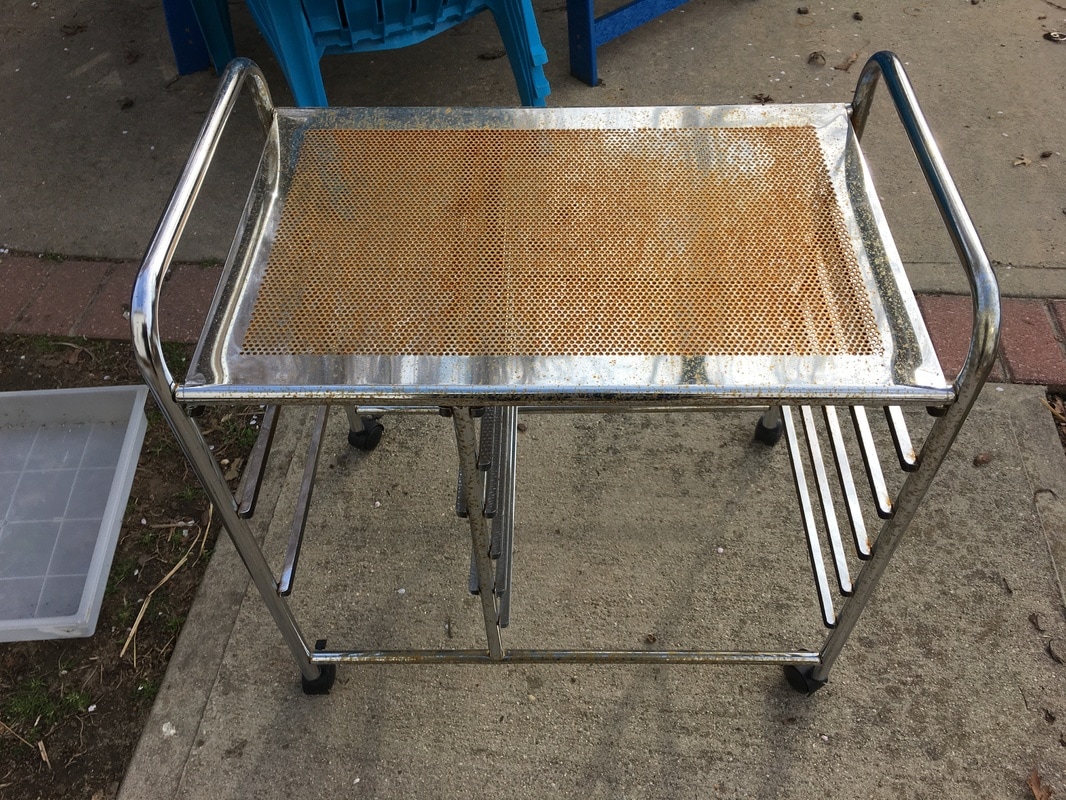
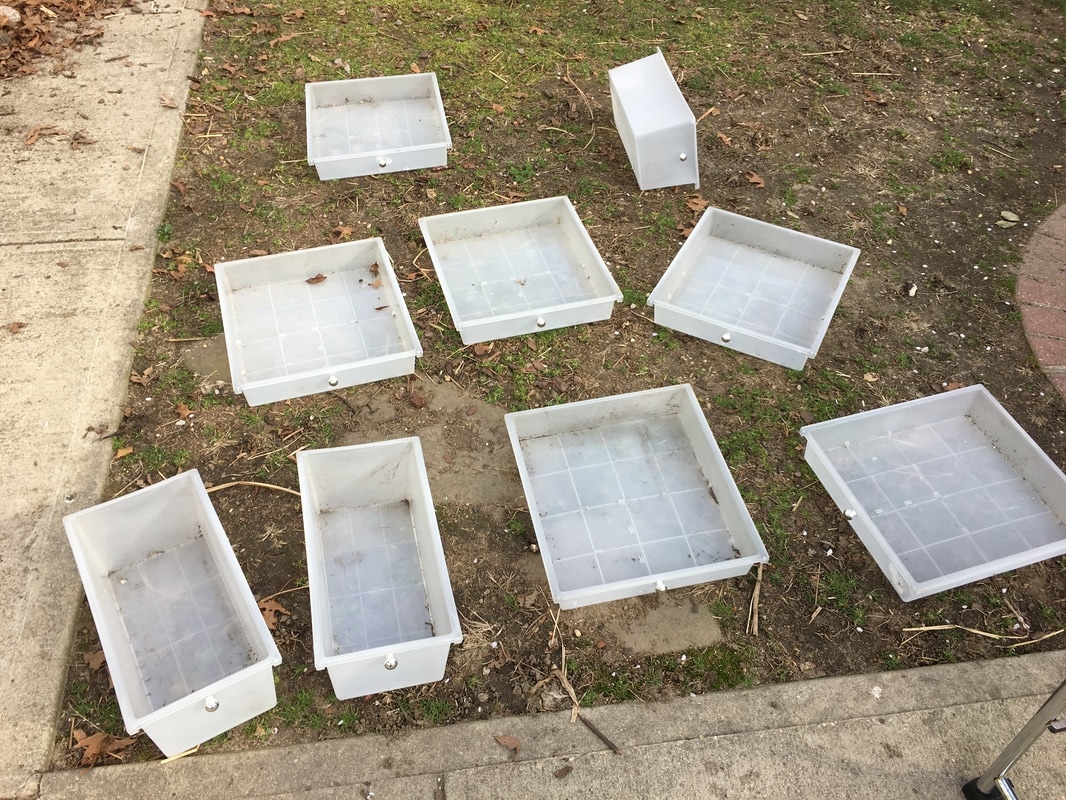
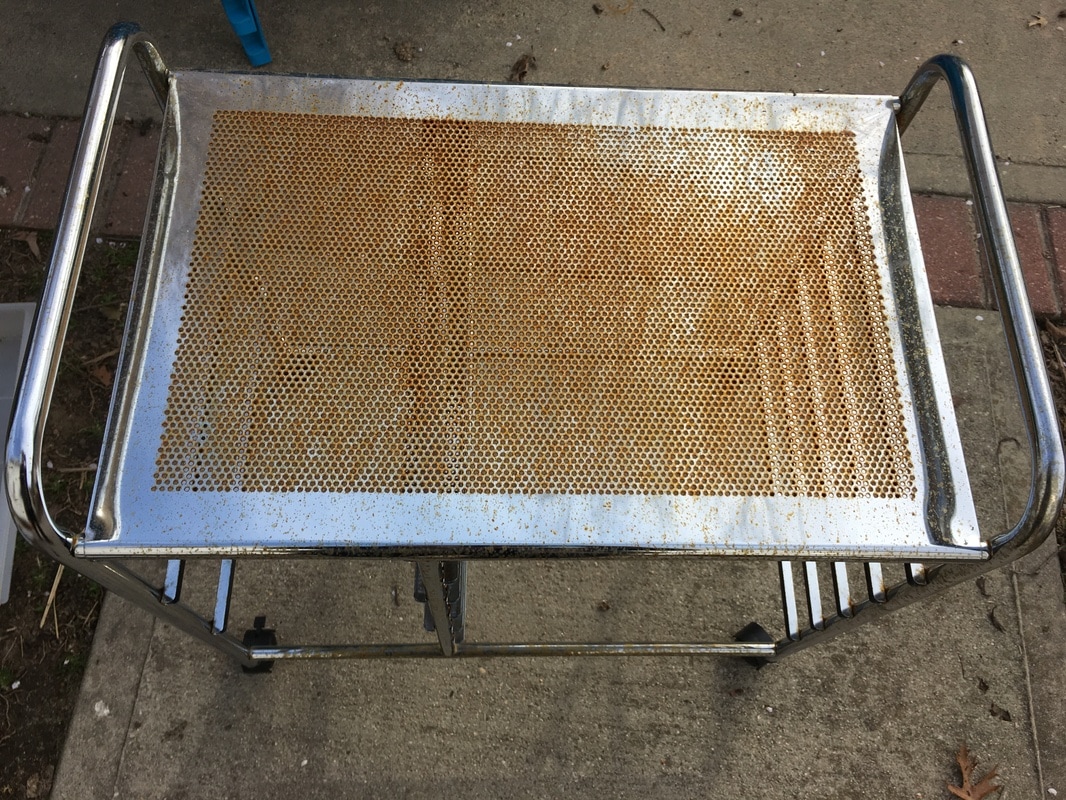
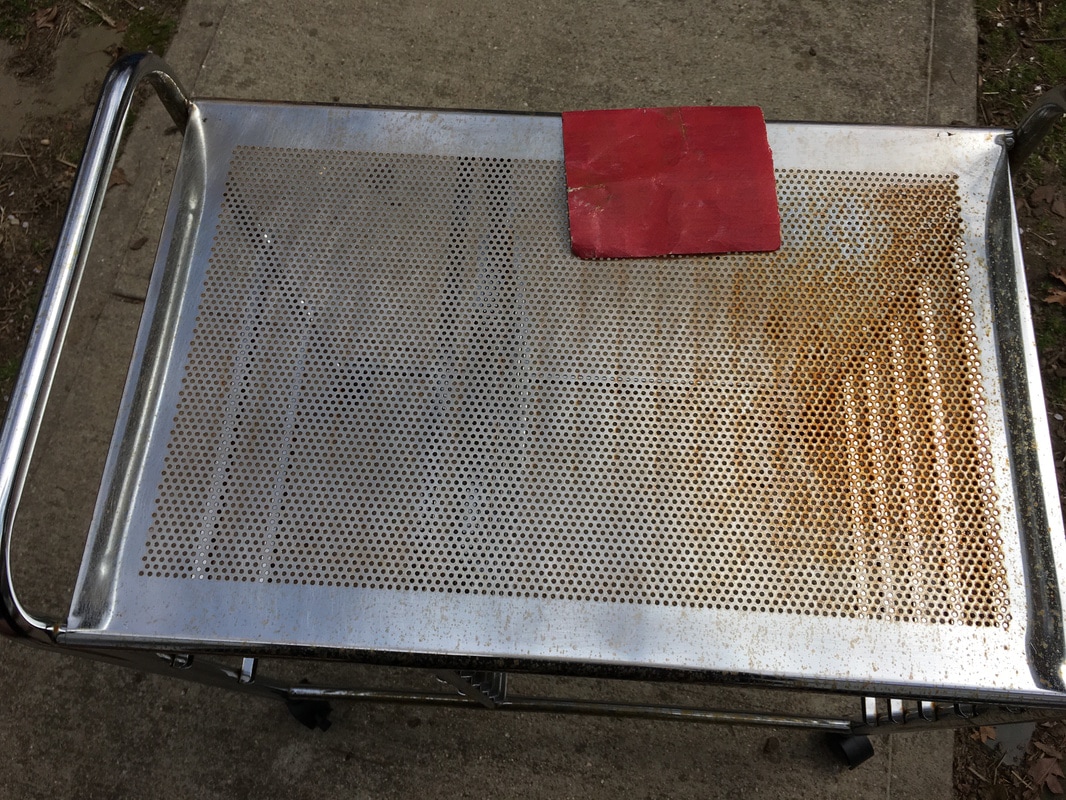
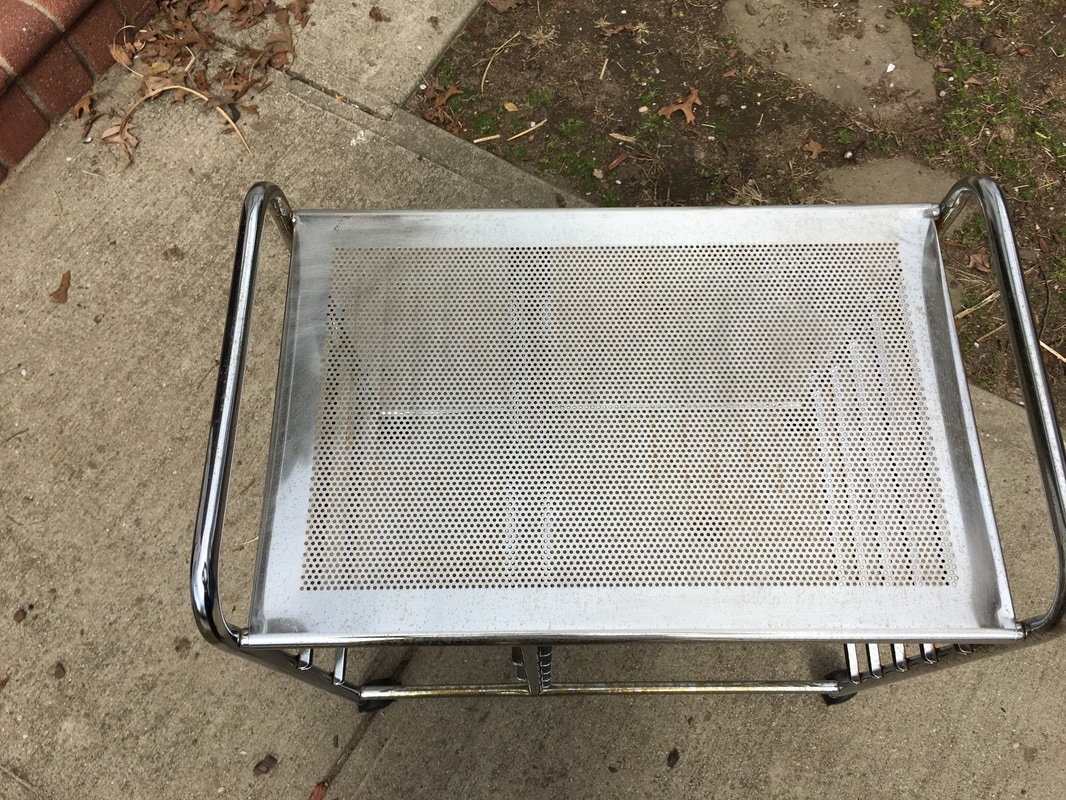
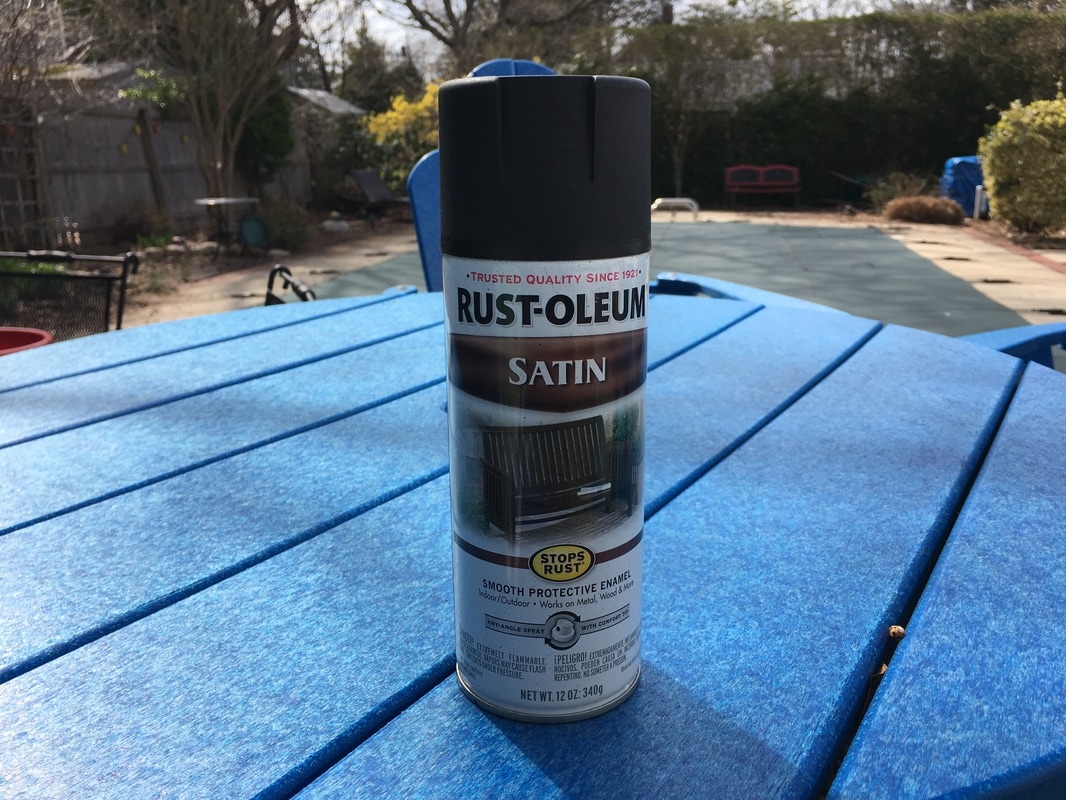
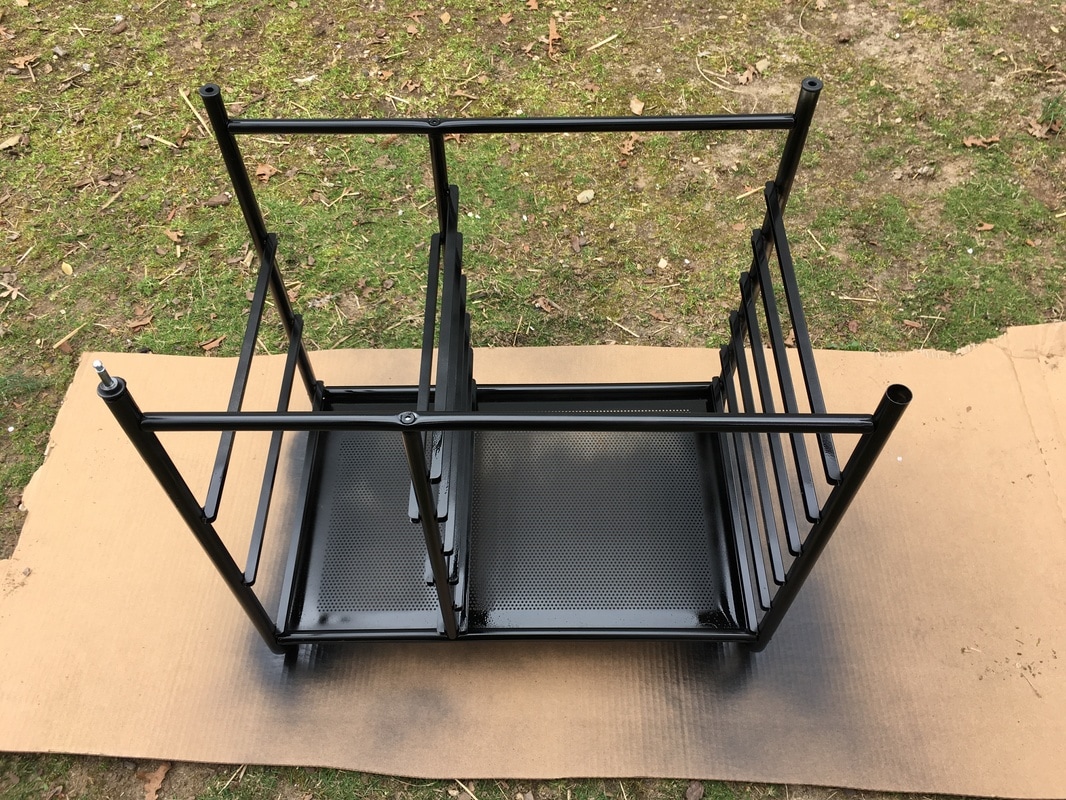
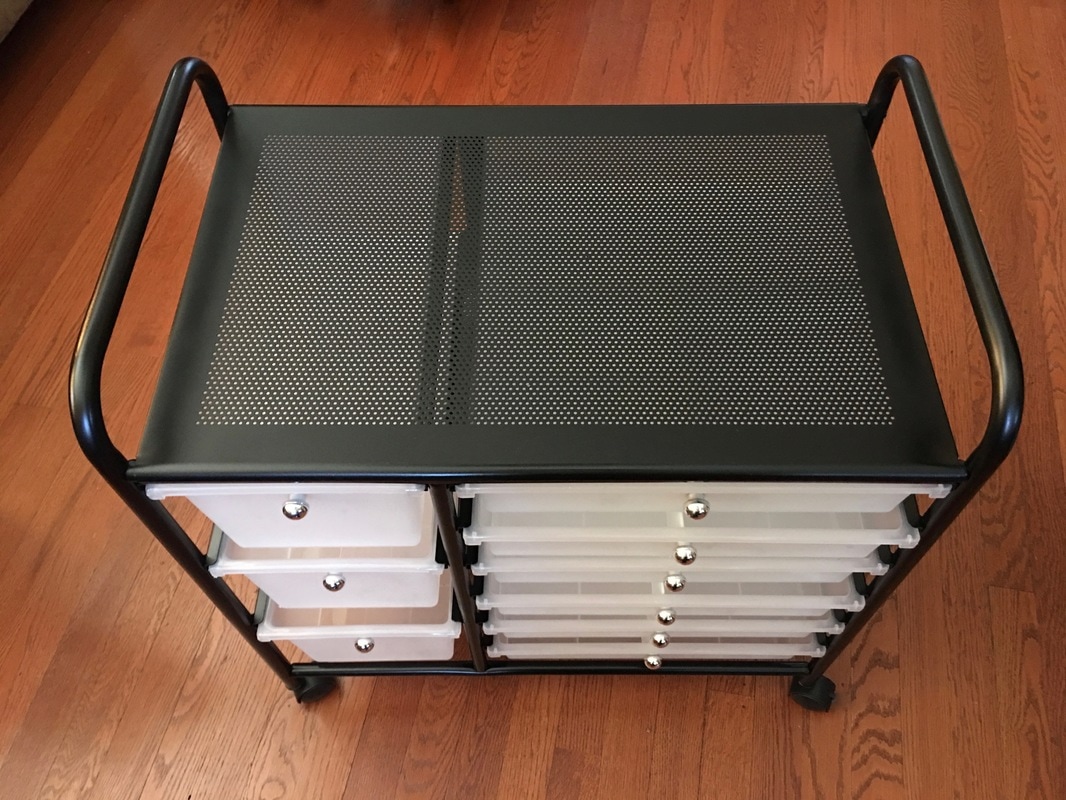
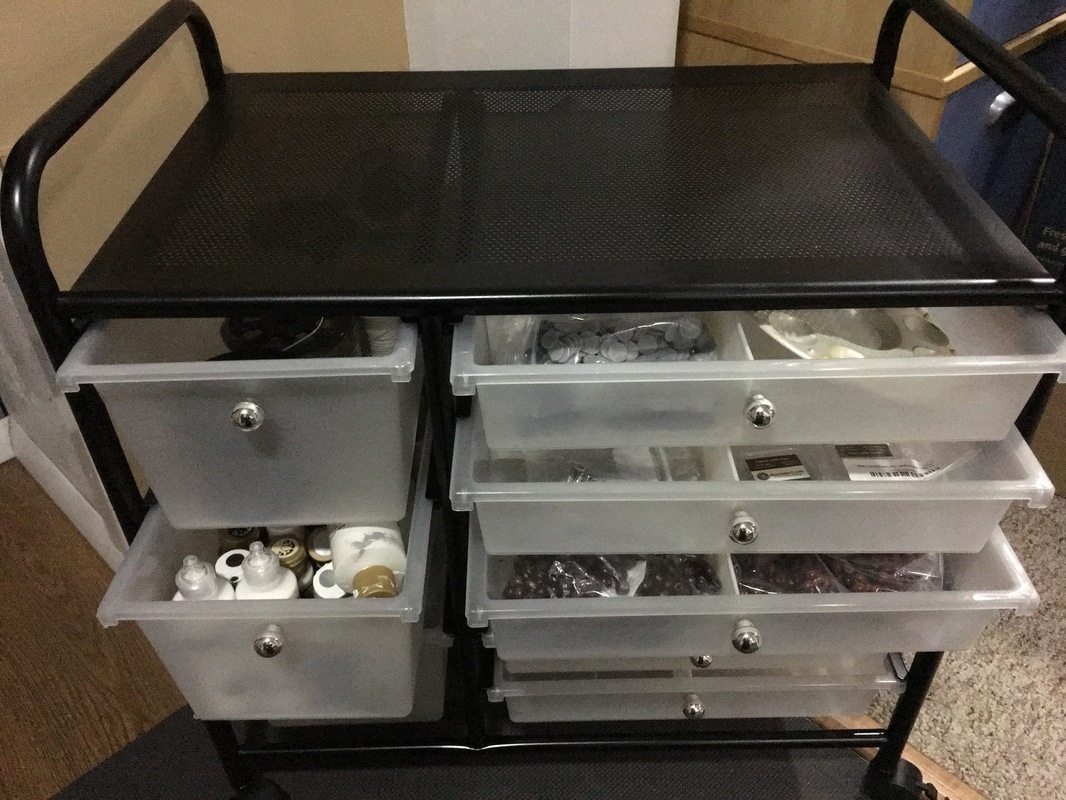
My husband pulled this 8 drawer chrome cart out of our neighbors garbage. It was a little rusty, but otherwise would be perfect for all my craft supplies. I think it is a great find because similar carts sell for upwards of $70 on Amazon! What to do, what to do.....so I simply sanded, wiped it down, and spray painted it! Now it is not only is perfect for all my supplies, but it looks brand new too!
Thanks for visiting!
Find more of our great DIY ideas here! And stay tuned for our book coming soon: "The ABC's of Creating A Simpler Life" which is full of tips for simplifying life in, well, super simple ways :-) Follow us and sign up for e-mail! Sincerely,

There are so many ways to start creating a simpler life! From finances, to house cleaning, to simply how you perceive your surroundings, simplifying your life can be, well..., simple! Here are my five favorite ways to keep my life simpler every day! You might think some of them are sort of 'cheating' but I think they are genius because to me they just make sense. In fact, they make so much sense that you may already be doing some, if not all, of them already!
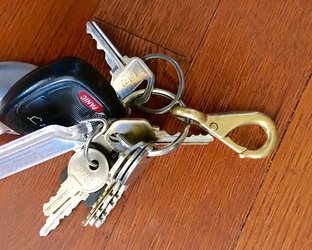
ONE: Car Keys - Nothing makes me crazier than misplacing the car keys. Whether I am home, at the store, or even at work, misplacing, or trying to locate the car keys is a annoying! Here's how I simplified this problem: a hook. What? Yup, a hook. Not just any hook, mind you. My hook is a brass round eye quick snap that is actually used for rope or chain and it can be found in just about any hardware department. I originally tried some hook clips that were specifically made for key rings, but they weren't heavy duty enough for the kind of life I lead. I just happened to spot this one in the hardware department several years ago, and well, the rest is history!
Heres why it works:
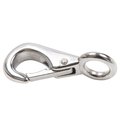
https://www.lowes.com/pd/Blue-Hawk-Stainless-Steel-Round-Eye-Quick-Snap/999971032
TWO: Crocs - Mine are faux, my husbands are real, but either works great! We each keep a pair of these right by the door on a multi-purpose tray (perfect for winter snow boots too!). This allows us to quickly slip them on to run the garbage out, put the chickens away, get the mail, pick vegetables, take the compost out, etc. No searching all over for shoes, and no wasted time having to tie them. It is so simple to slip them on and run right outside. I don't have to worry about stepping in mud or chicken poop with my good shoes because stepping in that stuff is exactly what these are for! When I come back in the door they immediately go right back on the tray, mud and all! Want to wash them? Simple, just hose them down. No stress, no worries. Notice the ones on the tray are lined for winter use? I have another pair in purple with no lining for the summer :-)
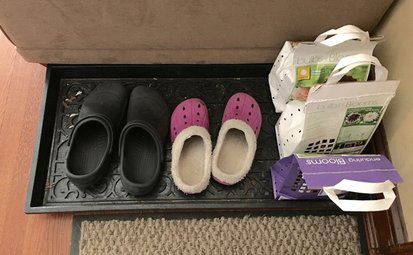
Check out the bulbs ready for planting!
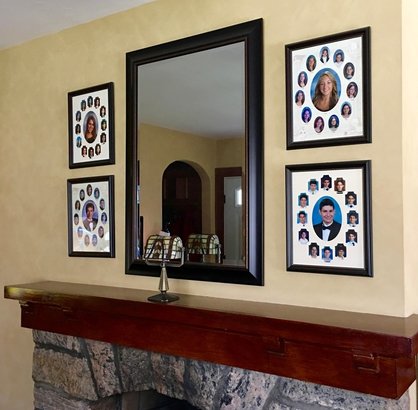
THREE: All Surfaces Clear - When the surfaces in your house are clear, your home looks, or appears, clean! When the house appears clean, you feel better and have no worries or stress about anyone suddenly visiting or stopping by. How is this accomplished? First, get rid of the knick-knacks that take up space (and collect dust) on tables, shelves, etc. Second, get rid of extra furniture and anything that takes up unnecessary floor space. The same goes for kitchen counters and the top of the refrigerator too! Less is more! The bottom line is that you should be able to easily wipe a rag across any surface in your home to dust, sweep, mop, and or vacuum any time you choose. You shouldn't have to clean, before you clean! This goes a long way towards making the house appear clean even if you haven't recently dusted or swept! Win-win:-)
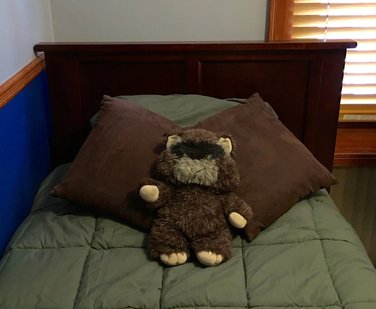
FOUR: Make the Bed - I don't really mean make the bed, which if done correctly like in a motel room can take a long time to tuck in the sheets, blankets etc. I mean make the bed appear to be made, or made good enough. First, you need to have a nice headboard. It doesn't have to be expensive, and you can even make your own, but it is 'key' for this tip to work. Then get an oversized comforter or summer quilt and a few matching decorative pillows. Keep the comforter on the bed and use it. Yup, sleep with it every night and in the morning as soon as you get up for the day, straighten it out and throw the decorative pillows at the top by the headboard. It will look great and literally only take a few seconds to accomplish! So simple!

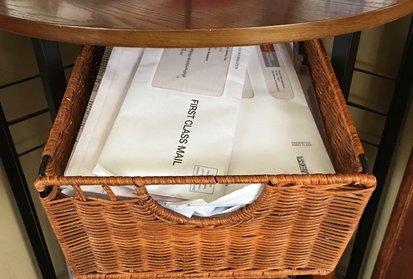
FIVE: Mail (not the 'e' kind) - The mail basically gets delivered every day but Sunday. Most of the time it is junk and bills. Not exactly a pleasant experience. How to simplify? Well, you could get a PO Box and only pick it up once a week, but this costs money. A better way is to just grab it, sort the junk and the bills, simply throw the junk right out and stick the rest in the 'bill basket.' Immediately. Don't let it sit around. Don't waste your time opening it. The 'bill basket' is simply a drawer in a wicker corner unit that I throw all the bills and other 'non-junk' mail into. Once a month when it's time to pay the bills, I go through it. That's when I file the papers that aren't bills but need to be saved (like EOB's) and sort through what bills do need to be paid. Yes, I only do bills once a month. I took the time to make all my bills due on or about the same day each month, and I sit down to pay them all about a week before they are due. It takes less than an hour of my time, on one day only, of each and every month! Thats about 12 hours a year to pay bills!
Did you like any of the tips above? Then stay tuned!
Our book "The ABC's of Creating A Simpler Life" is coming soon! It is chock full of tips from A to Z to help in creating your simpler life. There is something for everyone, no matter what stage of your life you are at or where you live. After all, who doesn't want life to be simpler?
Thanks for visiting!
Follow us on social media and/or sign up for e-mail to get notifications of our latest posts and be notified when our book is finally out! Keep it simple my friends :-) Sincerely,
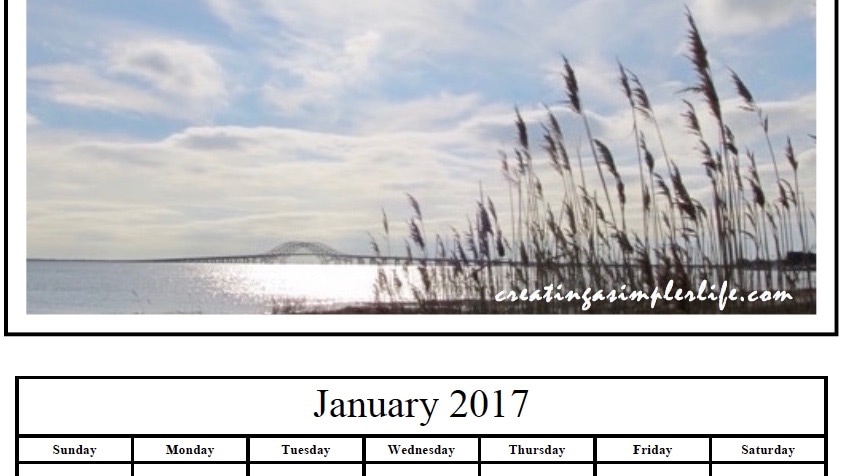 First of all, Happy New Year! I wish everyone a safe, healthy, simple, and genuinely wonderful year :-) If you are in need of a simple calendar to start the year off with, then have I got the answer for you! I know, I know. You just program all your important dates to remember into your smart phone. I'm just not there yet. I really enjoy sitting down and writing all my important dates by hand and then color coding and highlighting them all. I hang it inside my kitchen cabinet and can simply open the door and see the entire month at a glance. Oh, and it is large enough to read too! Recently when I was up in the Adirondacks helping take care of my mom after her Christmas Day injury (Read that post here.) I saw this great calendar the local Black Bear Restaurant gave out (see below). It's so simple I wasn't sure if they made it themselves or had it printed professionally, but I loved it! It was printed on 8.5" x 11" paper and stapled to a piece of thick black construction paper that was a little longer than the paper itself. Every page had the same 'picture' at the top, but was a different month. They didn't even use color printing, but the black and white on black construction paper was so simple, yet so perfect! 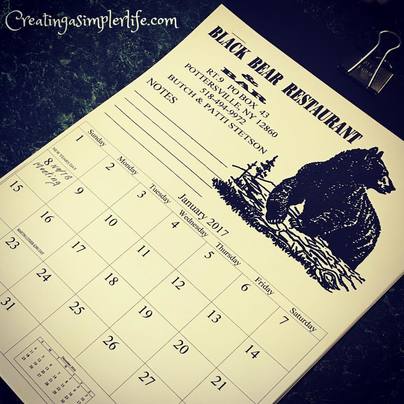 Great place to eat! Well, that got me to thinking, "How hard can it be to make your own calendar?" I began an online search right away and it wasn't long before I foundthe site: Homemade Gifts Made Easy. They had a very simple 2017 downloadable calendar template that could be personalized with one or more photos and a choice of calendar size (letter or A4). It is a microsoft word file so it was super simple to download and use! The directions are available on the site and are very easy to read and follow. Not only that, there is also a great video to watch and see it done if you prefer! I made two calendars: one for personal use with a different picture for each month and a business caledar that could be given out as an advertisement similar to the Black Bears Calendar above. Personal Photo Calendar Slide Show:If you like the calendar above and want to print a copy for your personal use, feel free! You can download a pdf of it by clicking the button above :-) The website provides very simple directions for inserting your photos. I also chose to add a separate text box with my website on top of each picture. I love the way it came out! All the pictures I chose were shared on our Instagram account over the last year (Follow us!). Simple Business Calendar (one photo):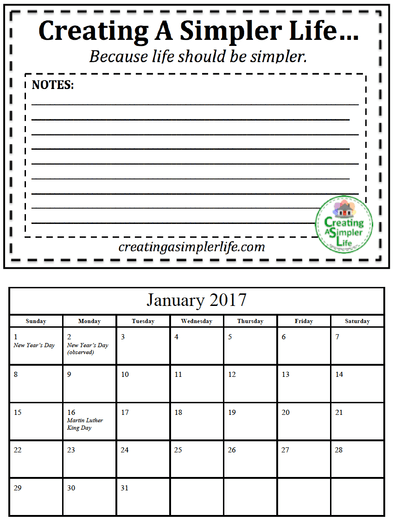 For the business calendar above, I used the same "picture" for every month. I printed them with two months to a page so that the entire calendar would be smaller (4.25" x 5.5"), and I also printed regular 8.5" x 11" calendars as well. All of them were, of course, stapled to construction paper and looked great when finished! In my opinion anyway.... If you want to create your own "business photo" like mine above, you can download the microsoft word template I created, with instructions to make it your own, by clicking on the button below. And lastly, here is the link to the awesome 2017 Calendar download I used to make both calendars that was created by Hommade Gifts Made Easy. And yes, I think you could make it into a great gift for someone too! Oooh, my parents anniversary is coming.....what a great idea! LINK TO DOWNLOAD AND MAKE YOUR OWN 2017 CALENDAR! Thanks for visiting. Please let me know if you make a calendar! I would love to know how it works out. Sincerely,
Don't forget to follow us on social media!
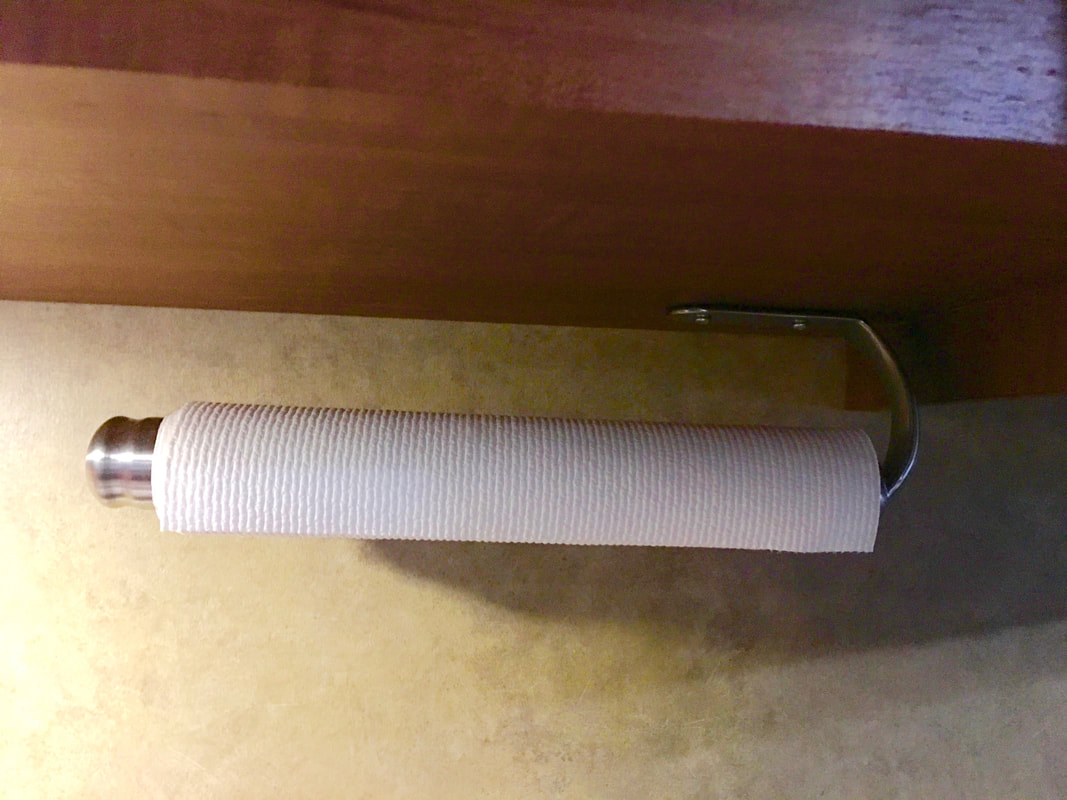
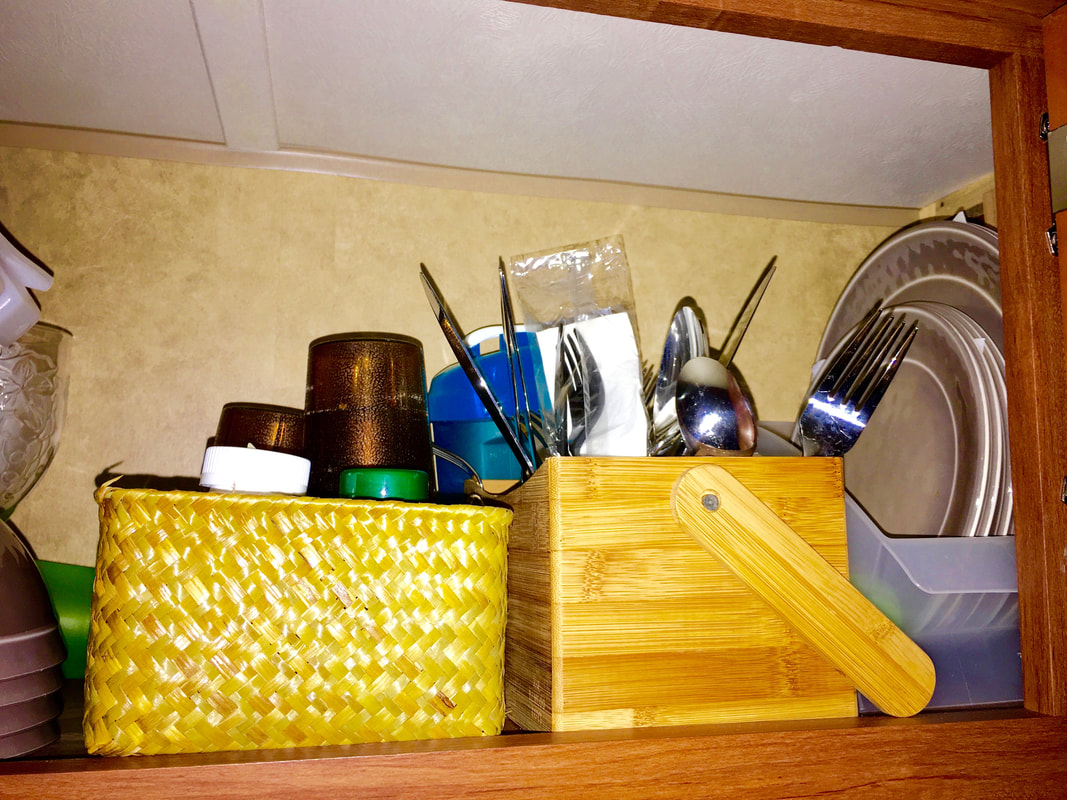
Have a small kitchen? Are you limited on space for storage? Our kitchen is 9 x 7 and yes, that is pretty small for us (it is actually smaller because its really 5 x 3 attached to a 7 x 6 for a total square footage of 57 square feet)! It's because it is so small that we had to come up with some simple ways to make the limited space work the best for us! Every one of the pictures below was taken in our little kitchen. Under the pictures is a list of all the ways we use to make the most of our minimal kitchen space! Maybe some will work for you :-)
Kitchen space saving ideas:
Like what you see? Then please consider following us for more interesting ideas that help in creating and living a simpler life for you and your loved ones!
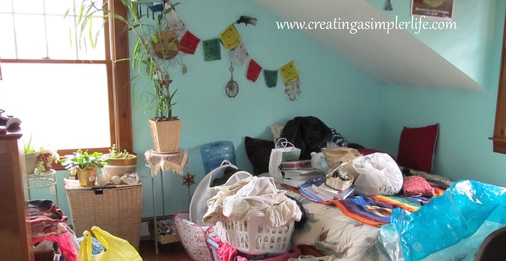 Do you have a messy bedroom or guest room in your home? Most people do for one reason or another. I happen to have several since my kids are slowly leaving the 'nest' their bedrooms have become a medley of their belongings and things that have been 'temporarily' stored in there over time. It is easy for this to get more carried away than anyone ever expected. One day when you're adding to the pile you actually stop and really look at it and you're like "Oh My Gosh! How on Earth did this happen?" If you're like me or my daughter whom this post is actually dedicated to, the thought of cleaning is overwhelming so you kind of just keep the door shut. Out of sight, out of mind, right? Well that only lasts for so long. Eventually, for whatever reason, you need something in there, or, like me, you actually have a need to use the room for something other than a bedroom so it's time to clean it! We have our new online store starting up (coming soon) so with all the stuff piling up we really needed a room to keep everything together and organized. My daughter hasn't officially lived (or slept) in her bedroom for a few years so I mentioned to her that I really could use the space. She completely understood but is overwhelmed by the amount of stuff she has accumulated over the years. She asked me for help and I told her I could have it done in a day if she really wanted me too. I think she was afraid for me to do it without her, so she's been working on her room a little at a time (the picture above is a work in progress). But, naturally the fact that I said I could do it in one day is based on experience as I have accomplished this very task several times in the past and this, of course, is what inspired me to write this post! If you are disciplined and on task, you too can clean a messy room in one day and if you follow the step-by-step process it should be as simple and painless as possible! So here we go.... STEP 1
STEP 2:
STEP 3:
STEP 4:
STEP 5:
The bottom line: get rid of as much stuff as you can. Less really is more! Less stuff to clean, manage, and take care of means less stress and more happiness :-) Enjoy your clean room! Thanks for visiting! Check our our Minimizing and Organizing pages and our Organization board on Pinterest for other ways to help simplify your life! Sincerely,
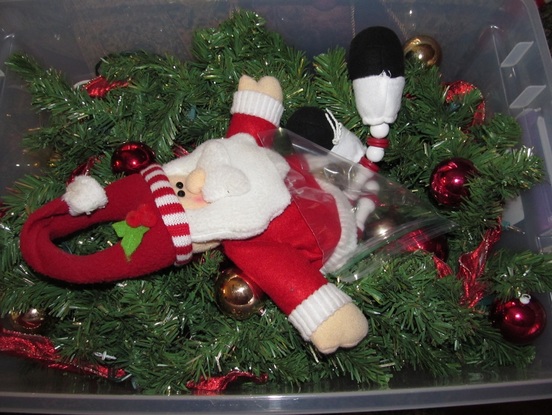
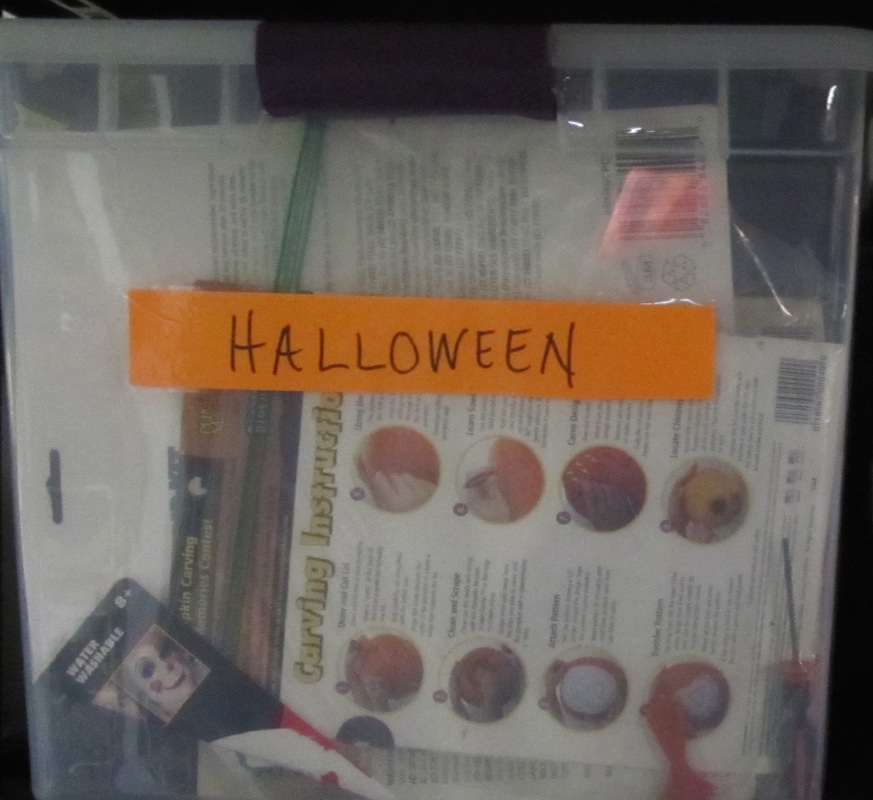
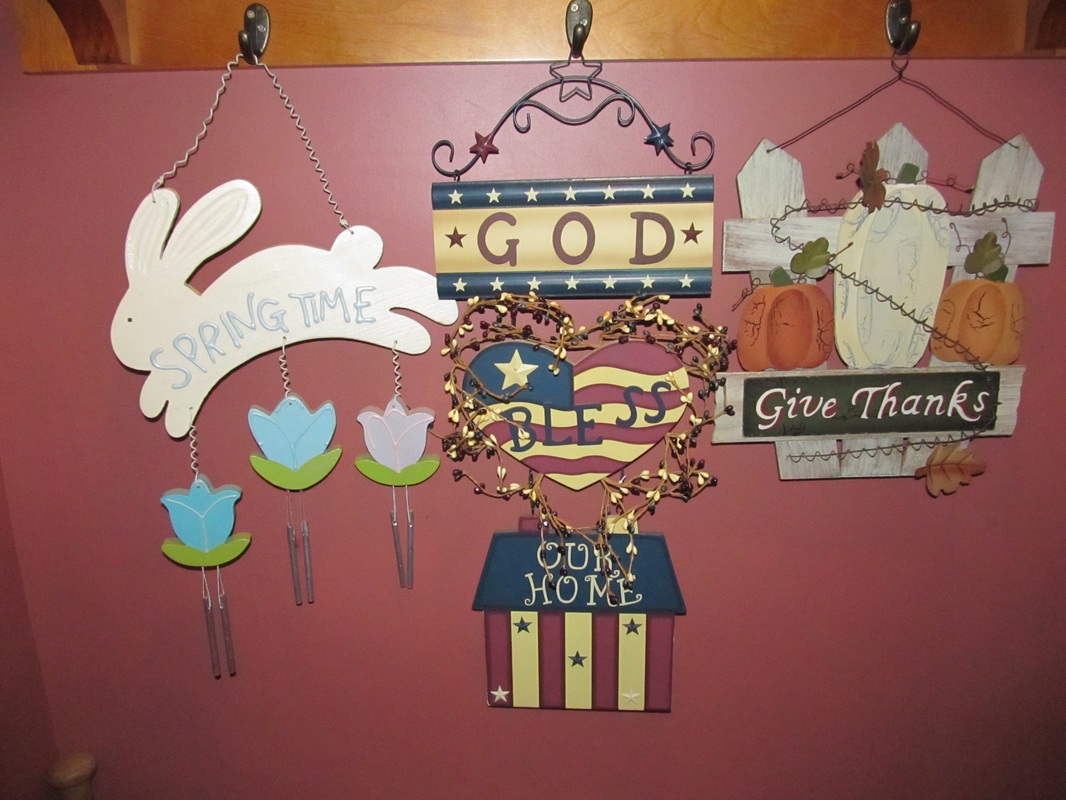
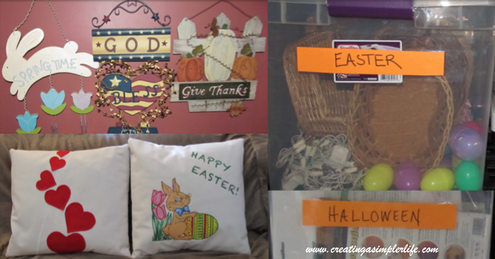 Love decorating for different holidays but discouraged by having too much stuff to decorate with? Does the thought of decorating make you tired before you begin? Are you running out of room to store all that stuff? Want to find a simpler way? Then it is time to minimize and organize! Less stuff = less stress so here's a simple way to minimize and organize all your seasonal and holiday decorations now. Where to start?
What about the "Binless" Holidays? These are the holidays you don't go all out for, but still want to acknowledge and celebrate.
Thank you for visiting! Please like and follow us :-) Sincerely,
 It's the start of a new year so what better time than now to start a Christmas memory tree? A Christmas memory tree is a tree where each ornament has a specific memory associated with it. A few of our special family memory ornaments are shown in the picture above. As you can see they range from simple items like key-chains to exquisite glass ornaments. But each one has special memory associated with it that we share and remember together every year when we decorate the family tree for Christmas. CHECK OUT OUR YOUTUBE VIDEO ABOUT OUR MEMORY TREE: OUR BLENDED FAMILY TRADITION! Why We Started This Family Tradition This is a second marriage for both my husband and myself. We each brought our own children into the marriage and we were trying to find ways to create special memories that would help to blend our two families together. I had already started some new memories and traditions with my children as a single mom, so it was easy to continue doing it as a blended family. Today, ten years later, it is still a yearly tradition for all of us to get together and even though the kids are 25, 23, and 20, we still laugh and talk about the memories as we decorate the tree. Sometimes we even get a little teary eyed over the ones that make us a little sad such as the memories of our family dog that passed away this past July. But one thing is for sure, he will never be forgotton! This is also a great idea because it minimizes the junk around the house. Everyone is always buying nick-nacks on vacations and has favors from various weddings and parties. Get rid of all that stuff and choose the special ones to make into ornaments! The memories are small, they do not sit on a shelf collecting dust, and they will be used (and actually remembered) once a year!
How To Start A Memory Tree 1. Collect Items as Ornaments During the year -
Check out this little slide of a few of our special family ornaments:
2. Make it into an Ornament -
3. Write on the Ornaments -
4. Decorate the Tree with Memories -
 Each year there will be more and more ornaments to add to the tree and the memories of all the things that you did will always be remembered :-) Above is a picture of our family the night that we decorated our tree for 2015. It's also another tradition to take a family picture in front of the tree after we decorate it and this years picture includes my daughters finance who we will now include in all our future memories! It is never too late to start! Start today and by Christmas you will have memories of the entire year to share!
Thank you for visiting :-) Sincerely, 
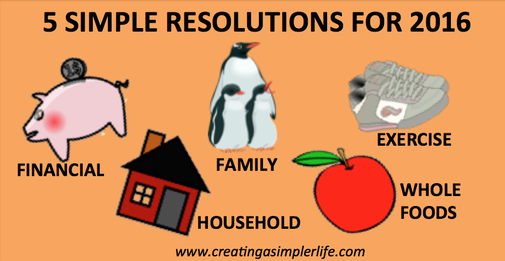 It's that time again....a new year with new resolutions. How many of us actually accomplished all of our resolutions from last year? I know I didn't. But this year I have a plan! FIVE SIMPLE, yet life changing, resolutions! Each of the 5 resolutions is simple and straightforward so they should be easier to follow through with, right? Well, hopefully! But the real plan is that they become lifetime habits that I eventually don't even have to think about!  Health 1. Eat Whole Foods - this is not a diet but if done properly should lead to losing weight and feeling more energetic. Eating whole foods means exactly that: eating fresh vegetables, fruits, and meats instead of anything that is processed. If the foods are all organic, then even better! If the food required some sort of processing in a plant and has ingredients added for whatever reason, then it is OUT! Need some help with this? Then check out the following site:
2. Exercise - Five minutes a day is all that's needed to get started and it can be simple like walking to the store instead of driving!
 Family 3. More Quality Family Time - are you usually too busy for your spouse, children, or even your parents or siblings? Then make time for them before it is too late! It doesn't have to cost anything either! You can simply make a plan to do something for 1-3 hours each week. It can be as simple as playing a game like monopoly, or going for a nature walk at the local park. The idea is to make it a priority and schedule it in if you have to!
 Household 4. Organize - get the house in order! This will make everything so much simpler this year. It makes it easier to clean, takes less time to find what you need (Don't you hate searching for something?), and of course frees up quality time to spend with your family!
 Financial 5. Grow Your Savings - even if you have debt, it is important to have some money in a savings account. Having money saved makes me feel protected in case of emergency like when our stove blew up last year. I usually set a certain goal to reach each year. I don't always meet it, but it helps!
I wish you and your family a Healthy and Happy New Year! Thank you for visiting :-) 
|

Hi there! I'm Kathie, the author behind Creating A Simpler Life blog. I'm excited to share our longterm projects (and planning) toward building our future retirement homestead in the Adirondack Mountains of New York. In the meantime I will be sharing all the other little things we do that are part of creating our simpler life!
Categories
All
Archives
July 2020
|


 RSS Feed