CREATING A SIMPLER LIFE OFF-GRID
  • Home/About
    • What does OFF-GRID mean?
    • MINIMIZING >
      • Home Size
      • Room by Room
      • Get Organized
      • Household Waste
    • MINIMIZE DEBT, MAXIMIZE SAVINGS >
      • Bills & Other Debt
      • Saving Money
      • Shopping Tips
      • Affordable Fun
    • BACKYARD CHICKENS >
      • The Coop
      • The Chickens
      • Feeding the Chickens
      • Fresh Eggs
    • HOME GARDENING >
      • Building the Garden
      • What We Grow
      • Seeds, Weeds, & More
      • Preservation & Storage
    • DO-IT-YOURSELF >
      • Health & Wellness
      • Simple Cleaning & Tips
      • Crafts & More!
      • Printables
    • CROCHET >
      • IDEAS & MORE
      • VIDEO TUTORIALS
  • HOMESTEAD
    • The 5 Year Plan PLUS! >
      • 2017
      • 2018
      • 2019
      • 2020
      • 2021
      • 2022
    • WHY AN EARTH SHELTERED HOUSE?
    • OFF GRID TINY TRAILER
    • BUILDING our HOMESTEAD from Scratch >
      • BUYING LAND & GETTING STARTED
      • BUILDING THE CONCRETE DOME
      • FROM DOME to HOME
      • SURVIVING OUR FIRST WINTER
    • HOMESTEAD MACHINERY >
      • GENERATORS
      • KUBOTA TRACTOR
      • ATV'S & UTV'S
      • WOOD CHIPPER
      • CHAINSAWS
      • LOG SPLITTER
      • POWER TOOLS
      • SNOWMOBILES
      • AUTOMOBILES
    • BUDGETING THE BUILD
    • SUSTAINABILITY >
      • WATER
      • FOOD
      • SHELTER
      • ENERGY >
        • SOLAR POWER
    • The Adirondacks >
      • Wildlife & Nature
      • Insects & Bugs
      • Things to Do
      • Water Fun
    • ADIRONDACK CRAFTS
  • VLOG
    • 2023
    • 2022
    • 2021

Blog

A little bit of anything and everything that's part of
​creating, enjoying, and living a simpler life!
Picture

Save All Those Cherry Tomatoes!

8/24/2016

0 Comments

 
Picture
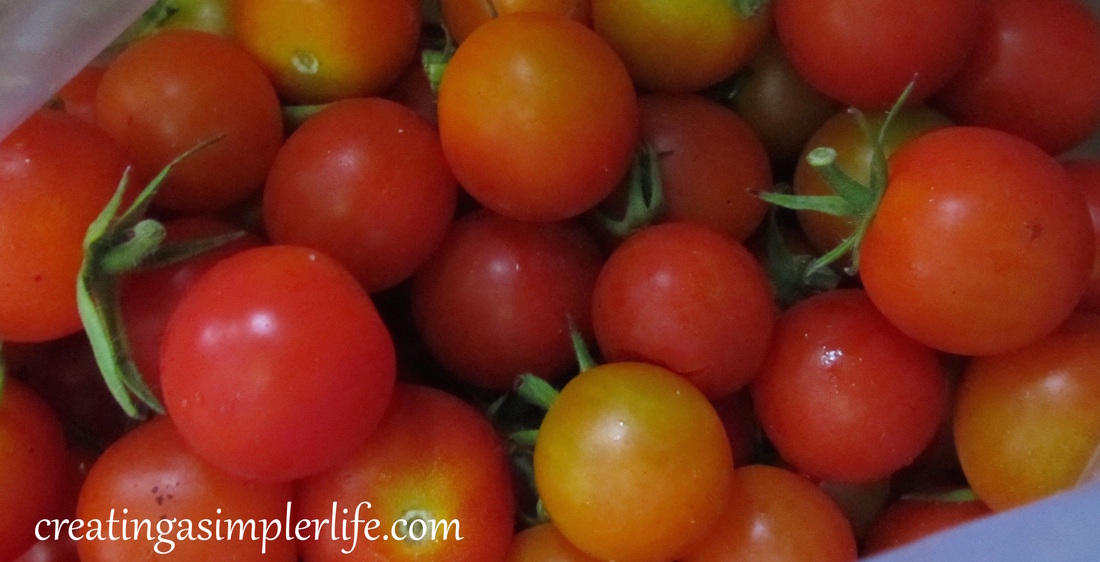
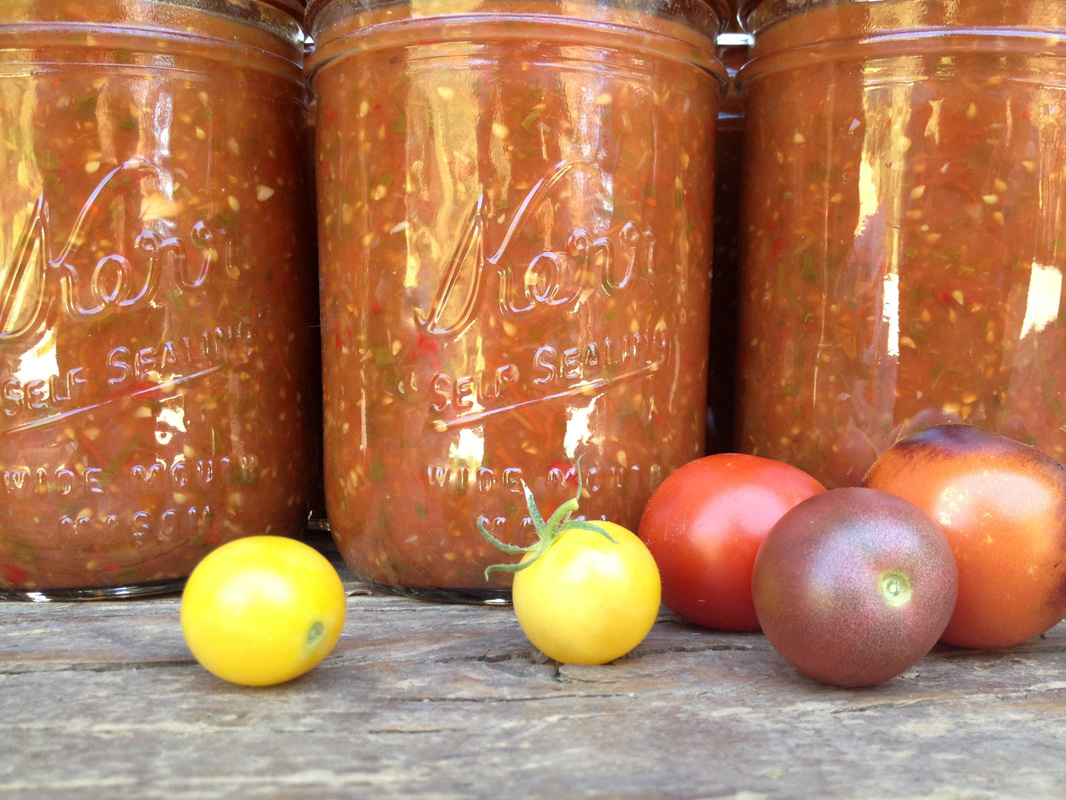
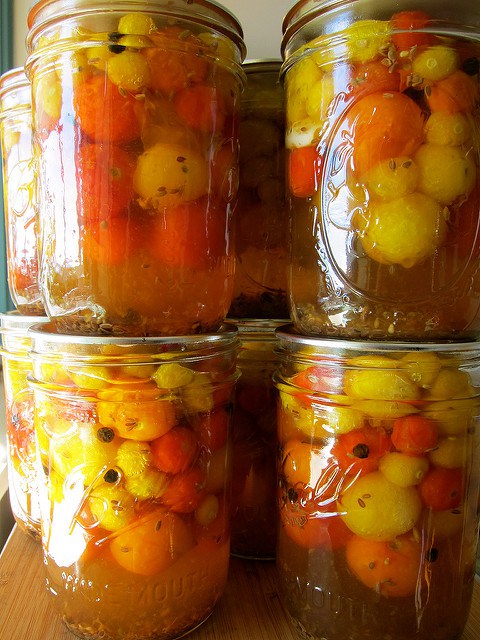
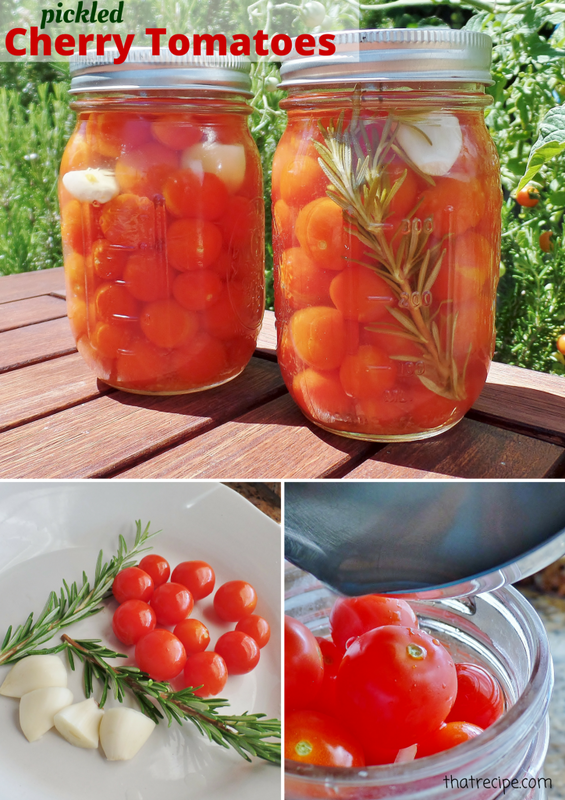
I absolutely love cherry tomatoes. In fact, they are the ONLY tomato we grow!  We do not eat a lot of pasta here so tomato sauce is not rarely used, but we do eat ALOT of summer salads and cherry tomatoes go perfect in them! But seriously, we are just two people and we can't eat enough of the cherry tomatoes to keep up!  Even with sharing with neighbors and feeding them to the chickens, there are just so many more!  So I got to thinking - What else can I do with them?  I know I can freeze them, but that's just too boring to me since they can't be eaten in a salad after being frozen so I would rather just sun-dry them and then freeze them like I've already been doing.  No, I really want to try something completely different with my excess cherry tomatoes, so of course I RESEARCHED all the possibilities on Google - after all it is one of the things I am really good at - and here are a few of my favorite ideas:
Picture
Homemade Tomato Ketchup by Common Sense Homesteading. Now ketchup is something I will use and she gives the option of using cherry tomatoes or other tomatoes to make it.  Can't wait to try it! Note that she also shares a fermented recipe but it was the canning one I plan on trying! This recipe is smooth and creamy just like the ketchup you buy in the store that most children love!
http://commonsensehome.com/2-homemade-ketchup-recipes/
Picture
Tomato Jam (really an adult ketchup) - by Never Enough Thyme.  She actually says this is a grown-up ketchup because it has a little more kick to it.  I like it because it looks really rich and healthy and because she actually made it with cherry tomatoes!  I included this because it is different enough from the first ketchup recipe and seems like it would make a great gift as well.
​http://www.lanascooking.com/tomato-jam/
Picture
Cherry Tomato Jam - by Matkonation.  Now this is really more of a jam - it literally calls for a pound of sugar and sounds absolutely scrumptious!  The recipe looks really simple too.
http://matkonation.com/en/cherry-tomato-jam-a-baby-shower-gift/
Picture
Lazy Cherry Tomato Salsa - by grow it cook it can it (that's exactly how it is on the website). This is very similar to the two recipes above, but we love salsa so it was different enough to make a mention of here!  And, in my opinion, worth trying!
https://growitcookitcanit.com/2012/09/23/lazy-cherry-tomato-salsa/
Picture
Sweet Cherry Tomato Pickles - by Diary of a Tomato. These look absolutely delicious. I might swap out a few ingredients but the overall idea is great.  I found the suggestion to puncture the tomatoes with a toothpick to prevent floating very interesting.
https://diaryofatomato.com/2013/10/10/putting-up-sweet-cherry-tomato-pickles/
Picture
Pickled Cherry Tomatoes - by That Recipe.  Wow! These look and sound amazing and the best part is that they only take 20 minutes if you are refrigerating them!  If you choose to can them they take longer, but talk about simple!
http://www.thatrecipe.com/blog/2015/07/14/pickled-cherry-tomatoes-and-tasty-tuesdays-link-up/
Picture
Real Sun Dried Cherry Tomatoes - These are mine so of course I had to share it.  If you go to the link I use grape tomatoes, but the picture above is of sun dried cherry tomatoes I made recently to show you that sun-drying works great for them too. Enjoy!
Cherry Tomato Sauce - from scratch! So simple and delicious I just had to make it to go with my eggplant parmesan.
Thanks for visiting!

Please consider following us on social media for more interesting ideas that help in creating and living a simpler life for you and your loved ones!


Sincerely,
Picture
0 Comments

DIY THANK YOU MAGNETS

8/22/2016

0 Comments

 
Picture
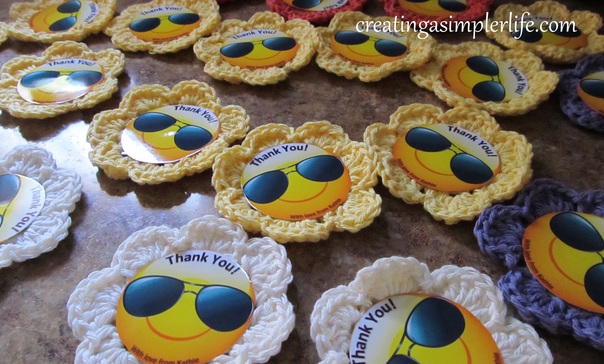
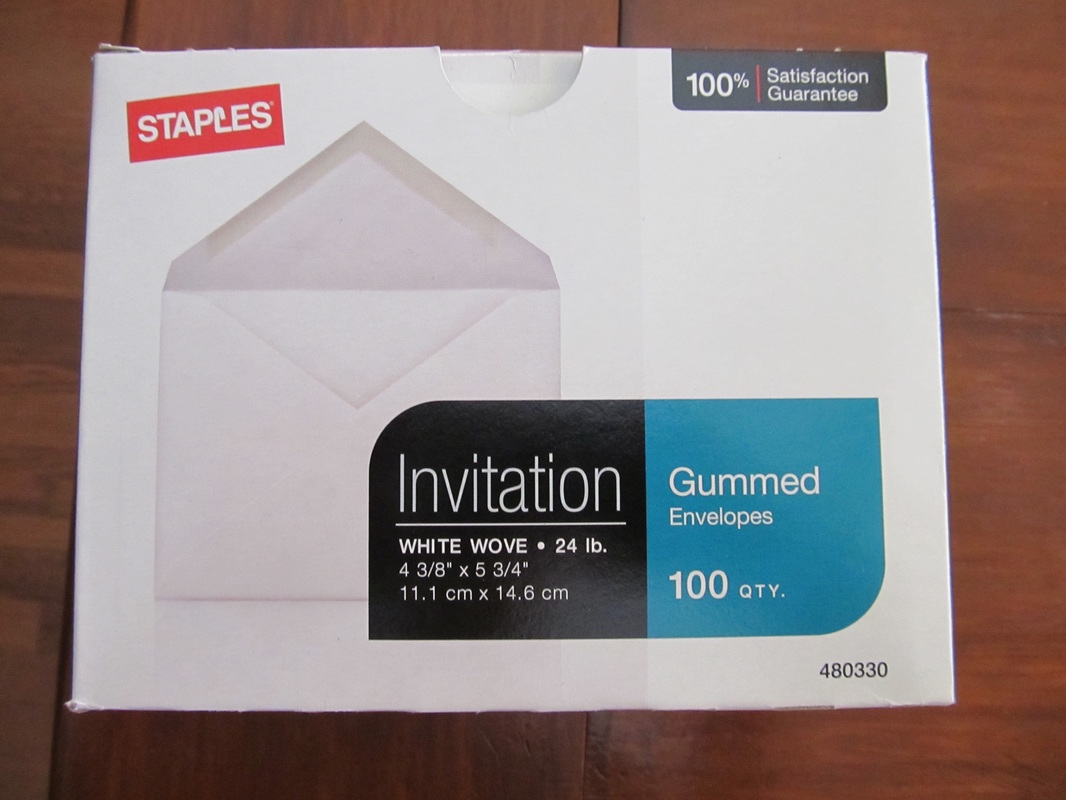
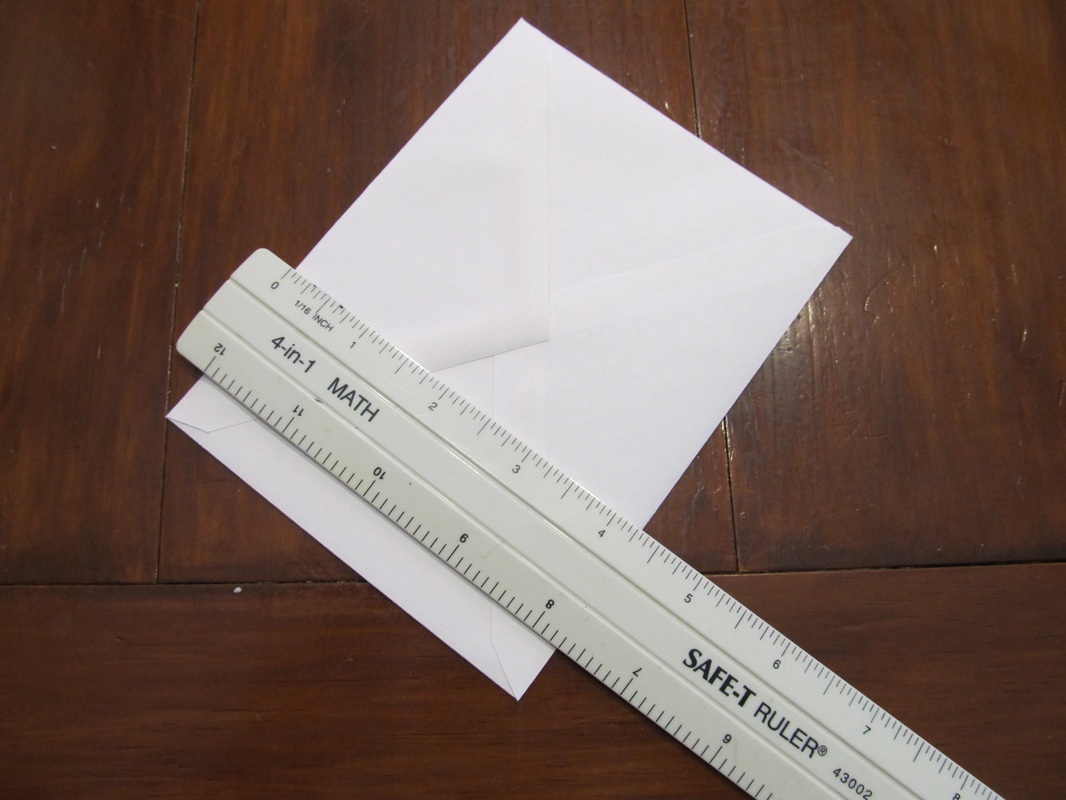
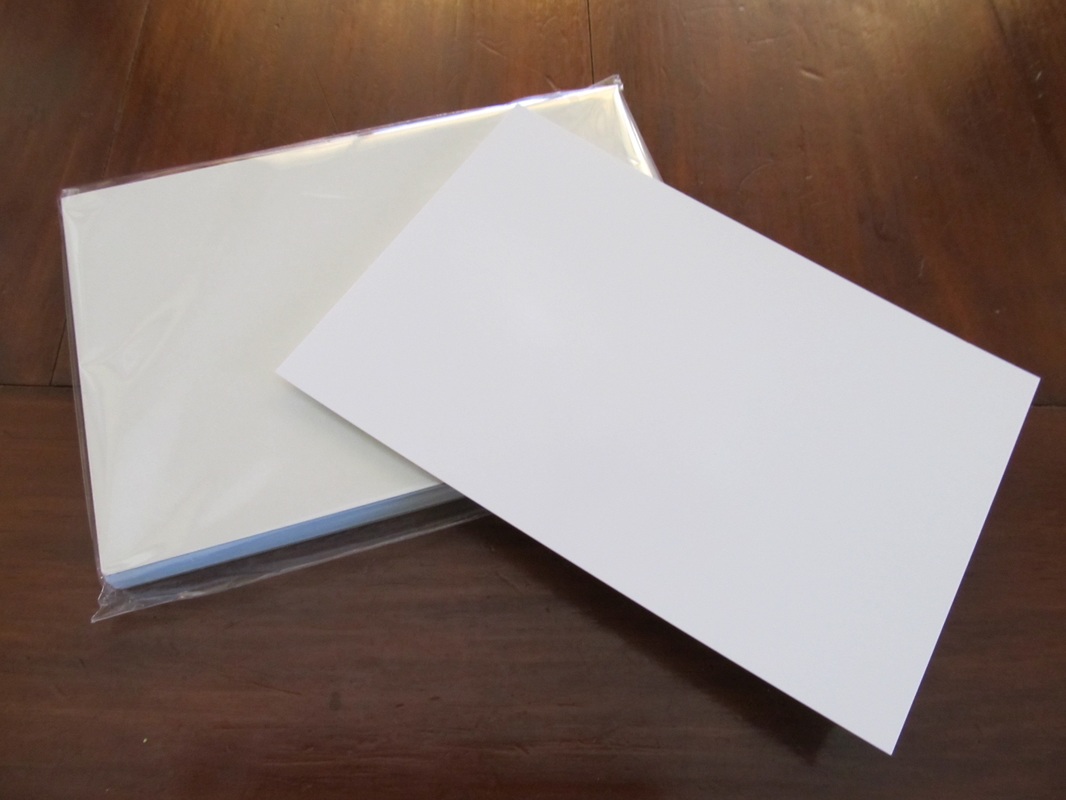
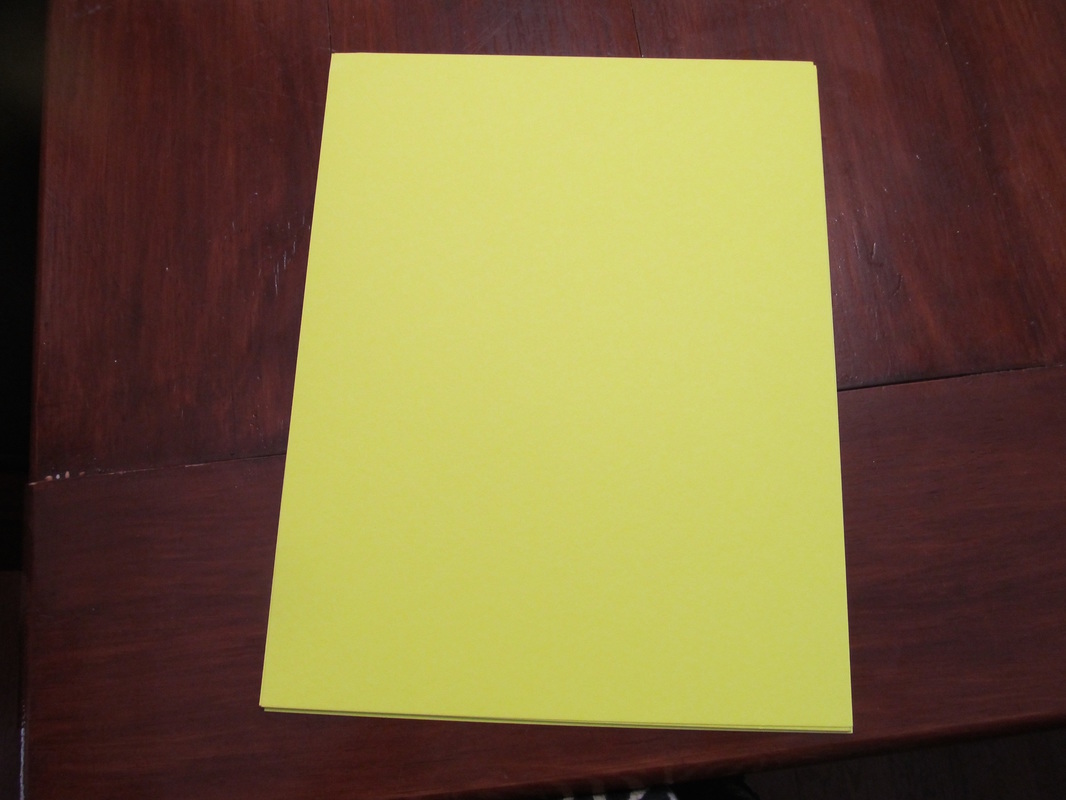
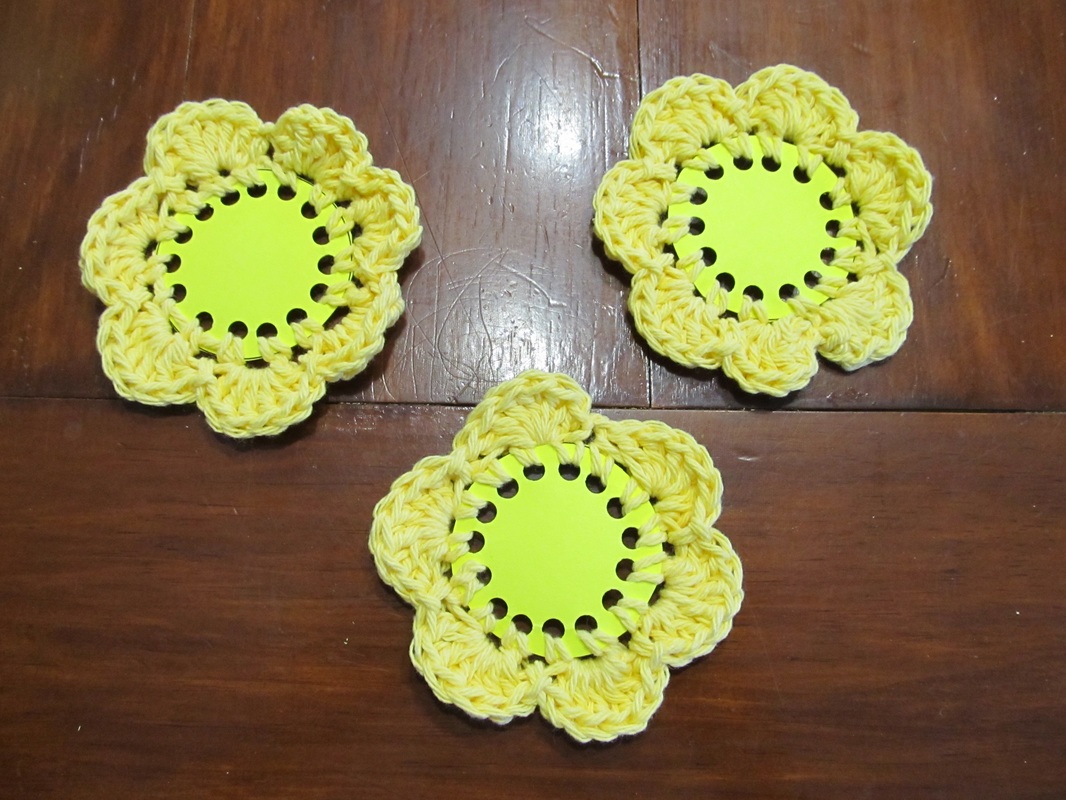
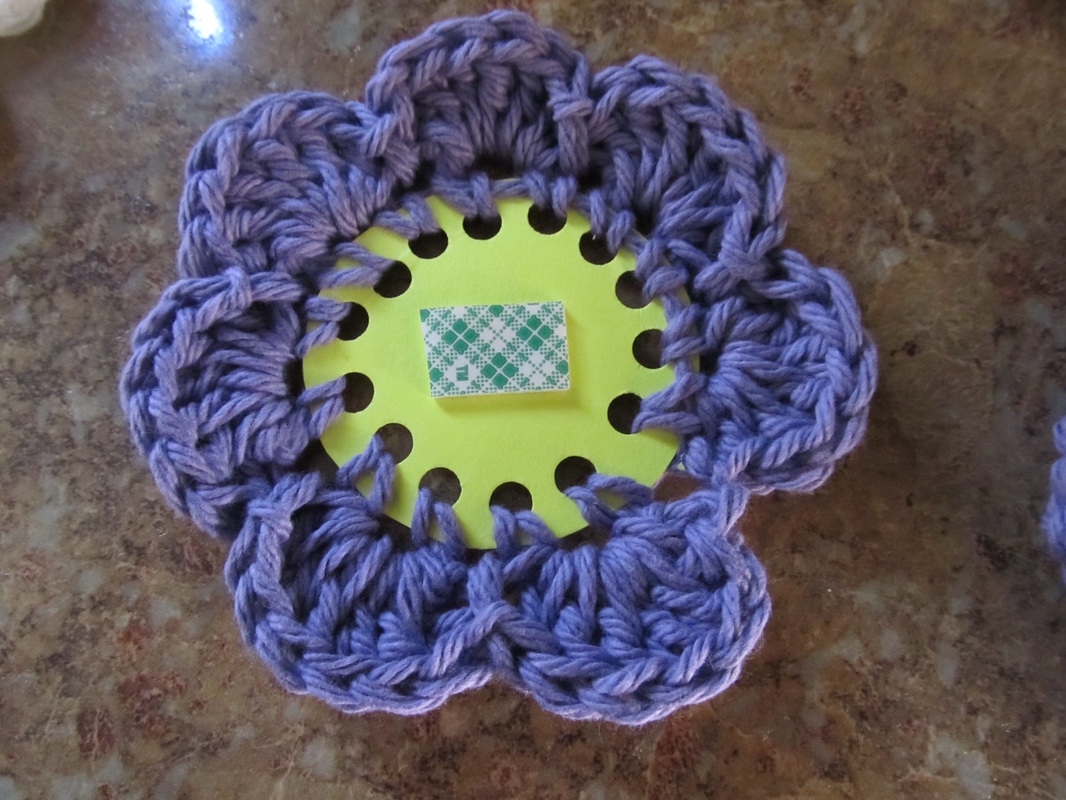
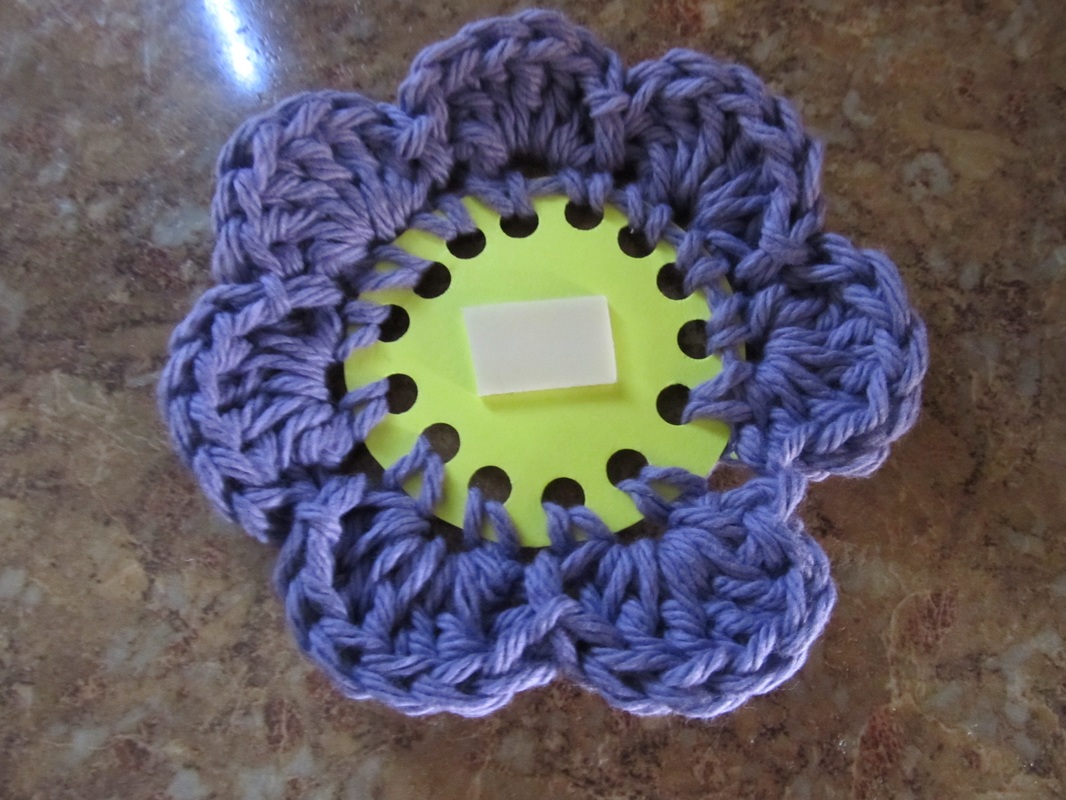
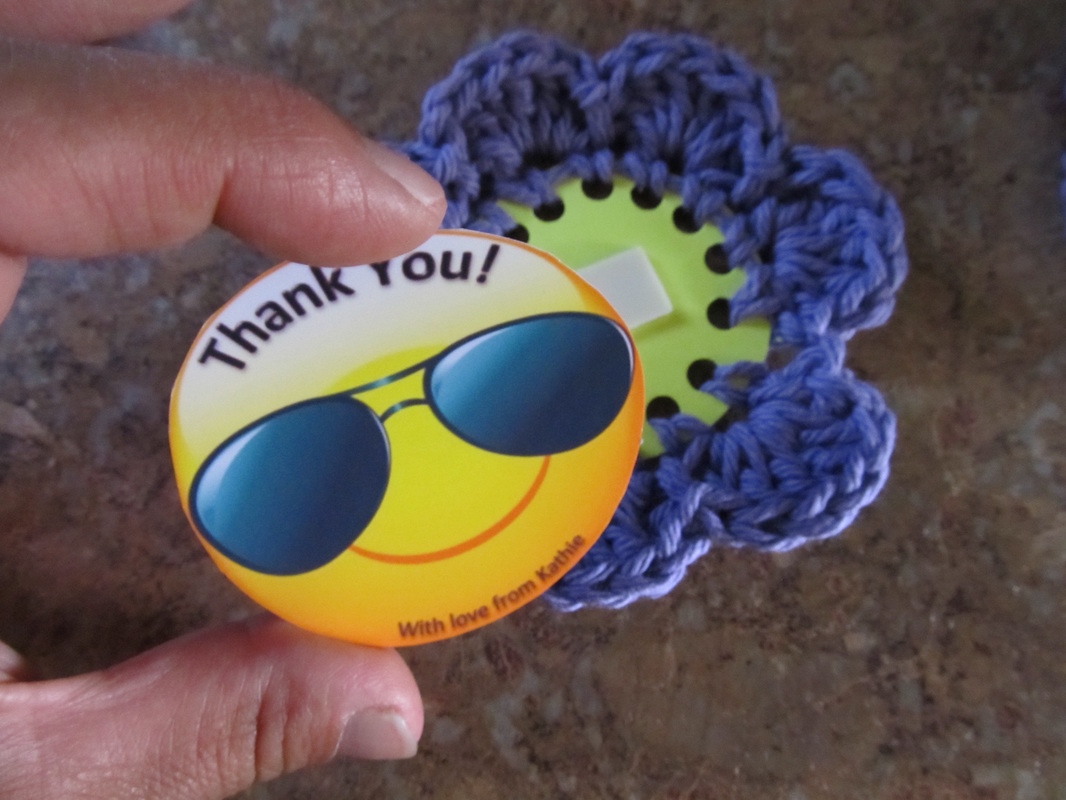
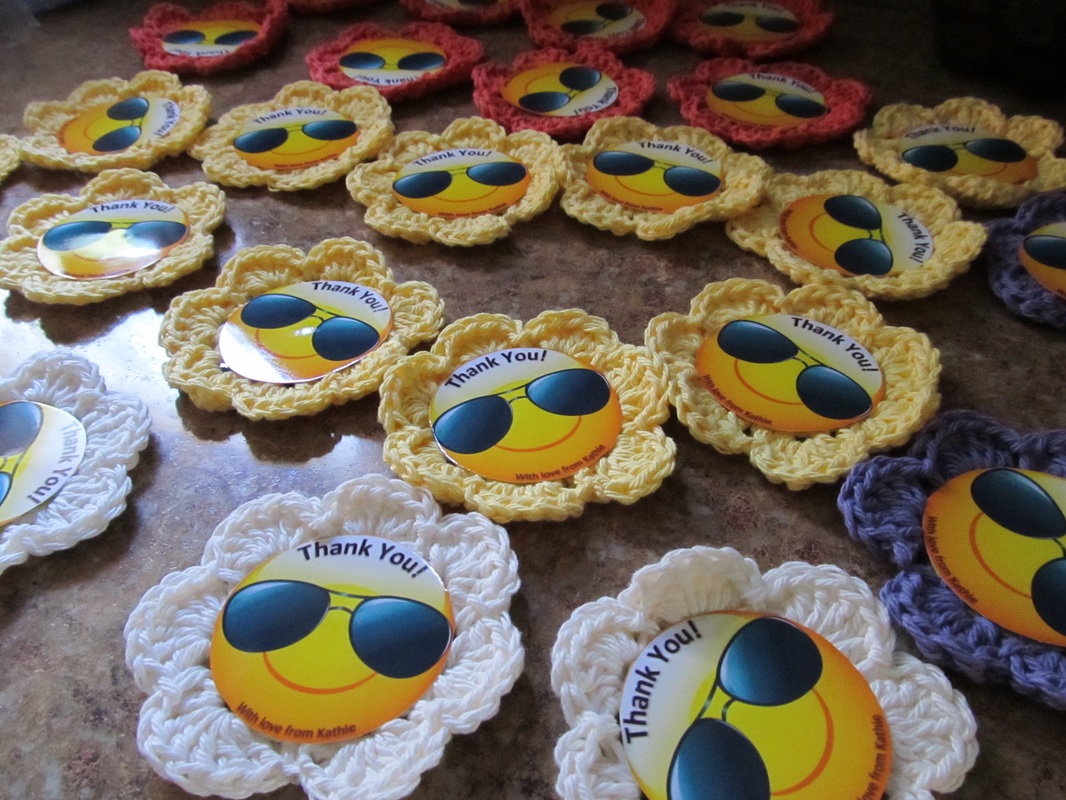
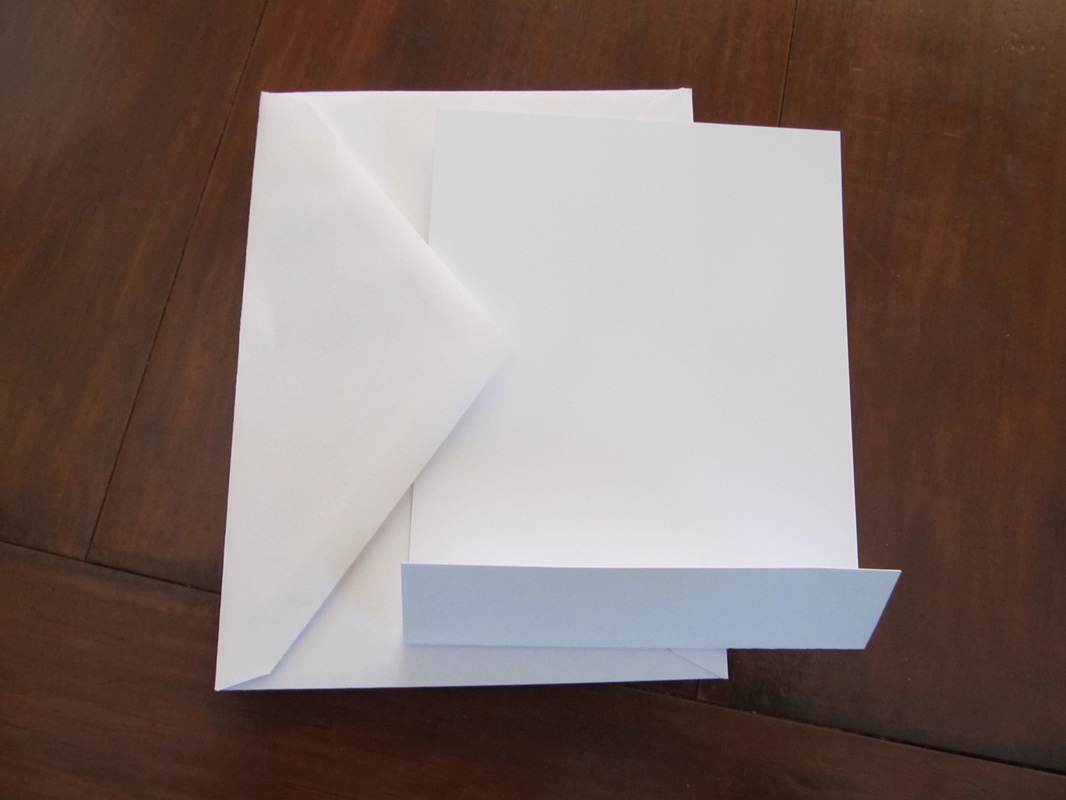
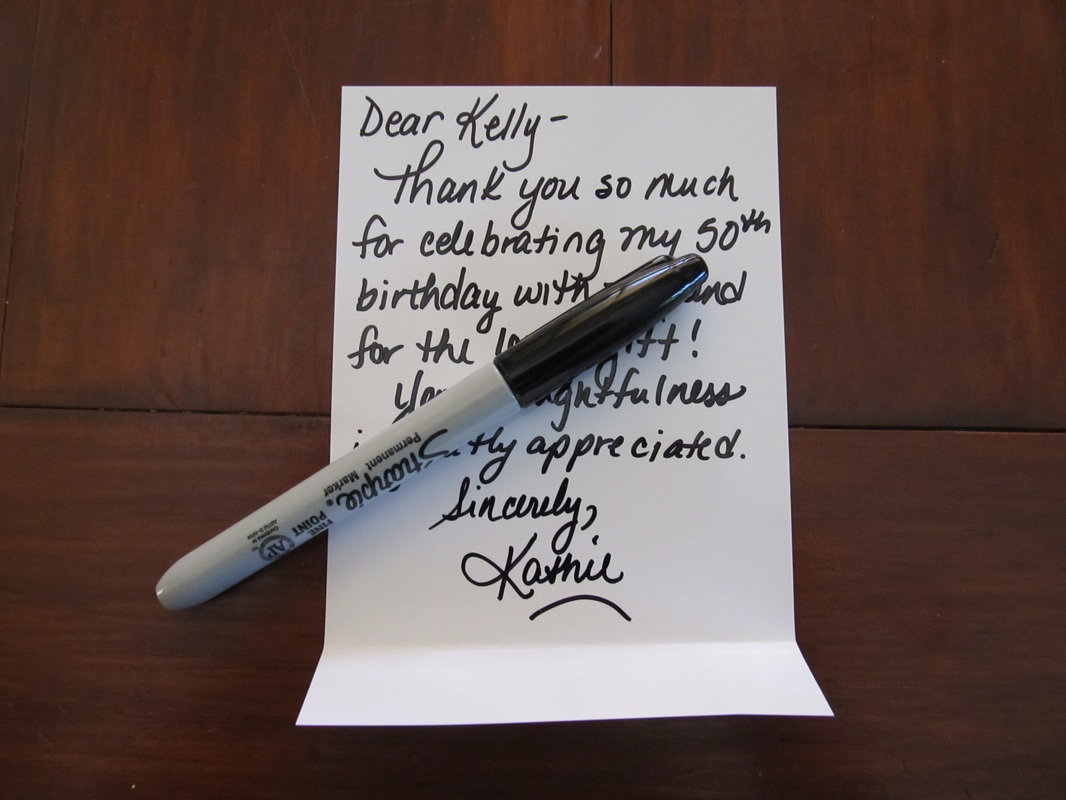
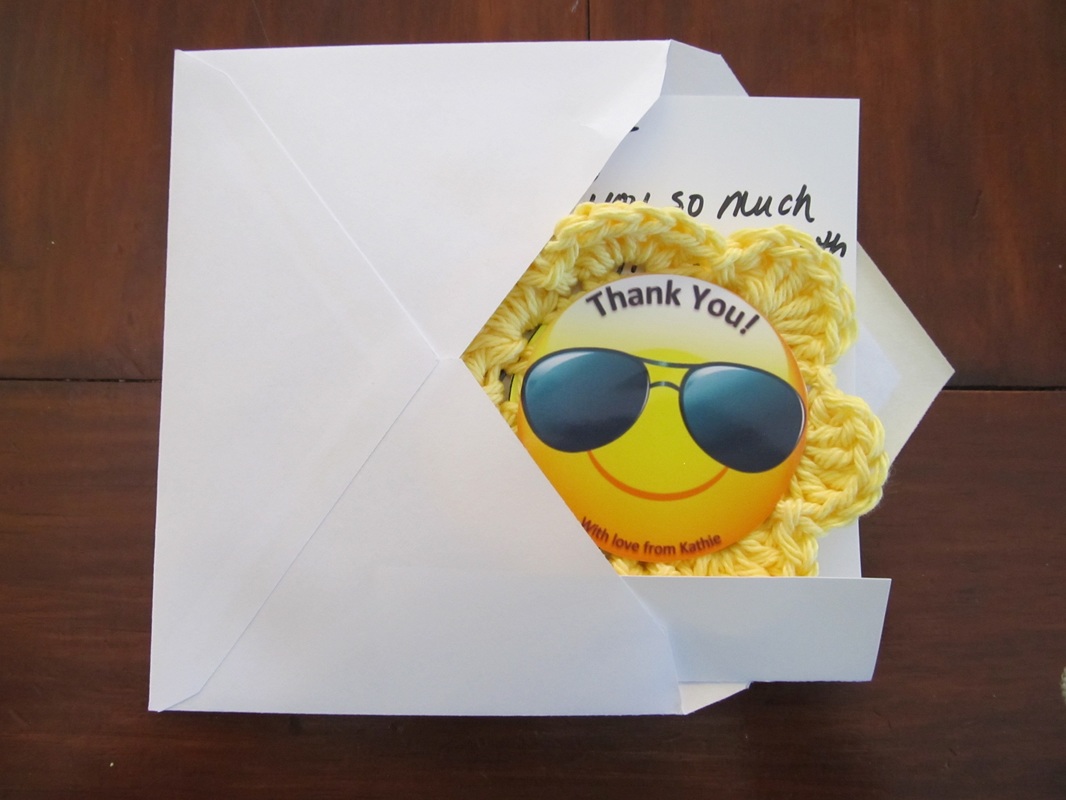
As most of you know I recently turned 50 and my husband threw me a wonderful backyard pool party at  our house.  I already posted about the DIY Bubble Favors we gave out, so check that out if you get a chance.  Anyway, call me old fashioned, but I still believe in sending out thank you cards and of course, if you know anything about me by now, I can't just send out any card.  It has to be extra special!  And that is what todays blog post is about - the magnetic thank you's I recently made and sent out to everyone that celebrated my 50th birthday with me! 

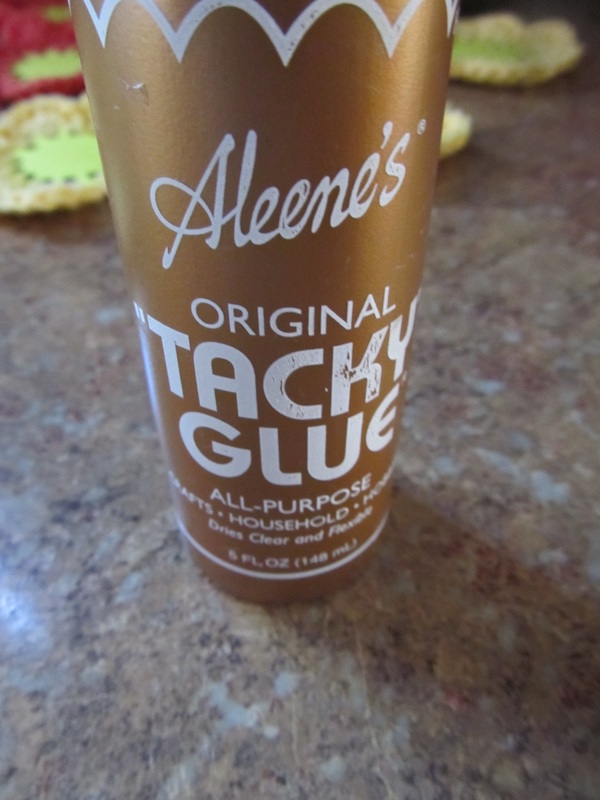
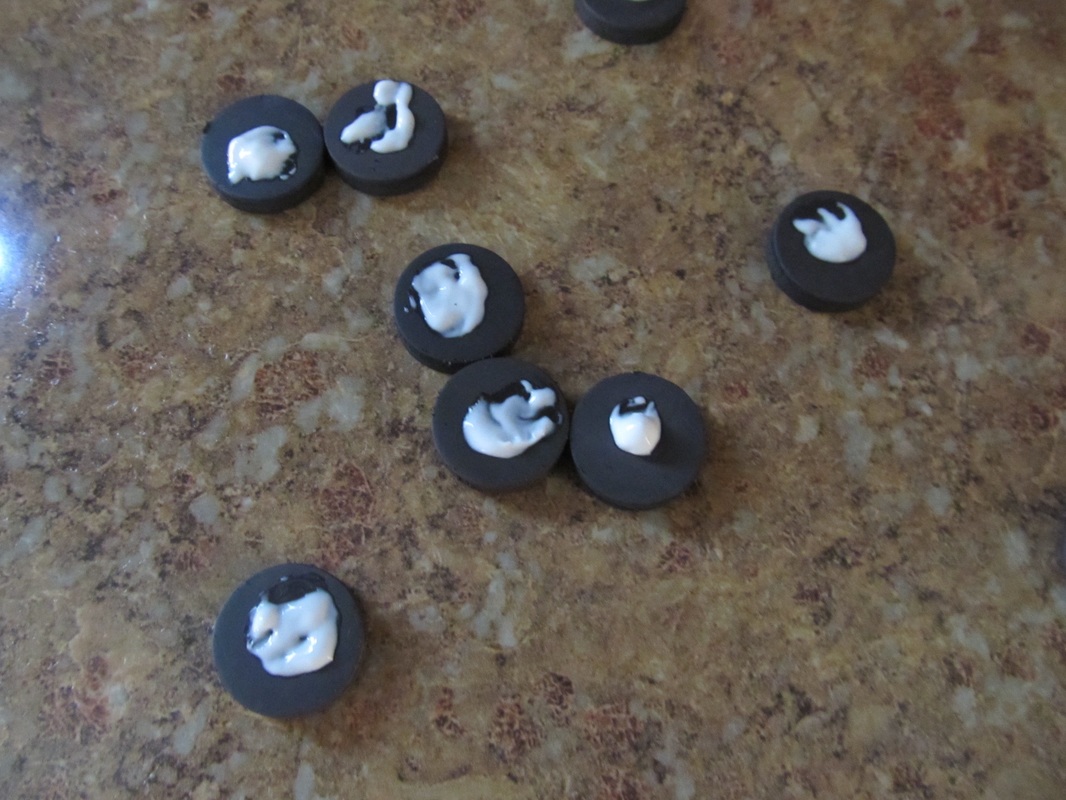
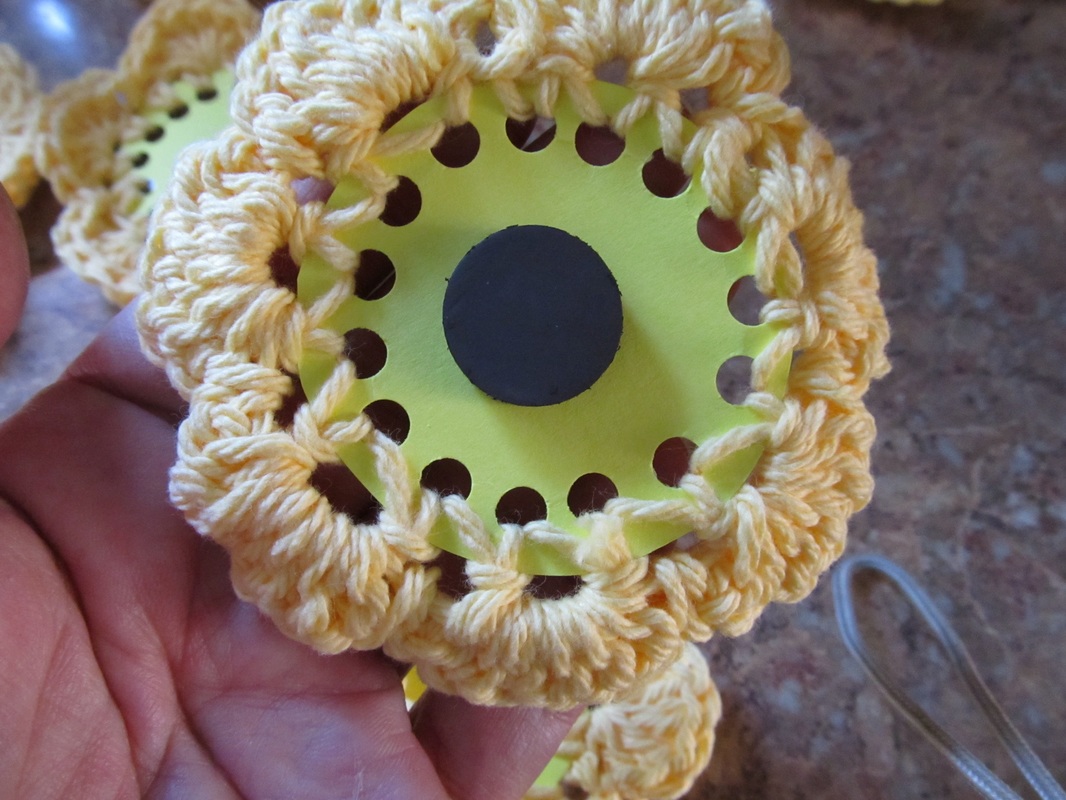
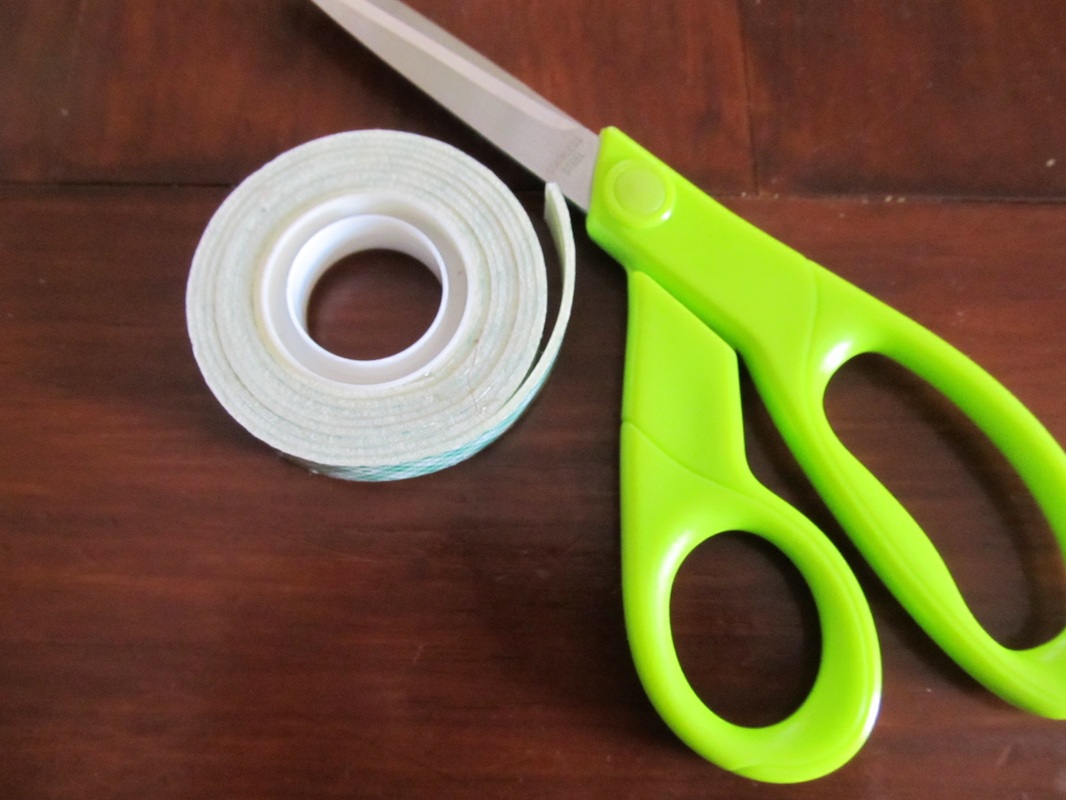
Since nothing goes to waste in our house, I already had all the materials.  In fact, I had been waiting for a good reason to use some of them! The only thing I had to buy was stamps :-)

Supplies:
  • Small round magnets (left over from an old 7th grade science lesson)
  • 4" x 6" photo paper (You know - all that free stuff you get with printer ink!)
  • 8.5" x 11" card stock paper (any color)
  • 4 ply cotton yarn (any colors)
  • Computer with Microsoft Word
  • Color Printer
  • Scissors
  • Single hand held hole punch
  • Size 7 crochet hook
  • Yarn needle
  • Craft Glue
  • Double sided foam mounting tape
  • Black sharpie marker
  • Invitation envelopes

How:
Picture
Picture
I needed to make sure that the magnet I designed would fit in the envelope!
Picture
4 x 6 photo paper (We have so much of it!)
Picture
8.5" x 11" Card Stock Paper (any color)
Picture
Print 2.5" circles on card stock paper.
Picture
Cut the circles out.
Picture
Punch holes around the edges of the circles.
Picture
Get crochet materials together.
Picture
Crochet around the circle. Row 1 - single crochet loosely around. Row 2 - triple crochet six times in 1st st, sc next st, and repeat. There is no need to skip stitches because the chains should be long and loose going around the circle.
Picture
Picture
Put a dab of glue on the back of the magnets.
Picture
Put the magnet on the back of the circle.
Picture
Design and print a 2.5" circle design on the photo paper. I chose a smiley face and I printed it so I could get two on each 4 x 6 photo paper.
Picture
Cut out the photo designs. You could use anything! Even real photos of family and friends :-)
Picture
Cut small rectangles of the double sided foam tape.
Picture
Apply to front of crocheted circle.
Picture
Peel off the backing.
Picture
Carefully center and apply a your cut-out photo design!
Picture
So simple!
Picture
Make sure the magnet is strong enough to hold it on the refrigerator!
Picture
Make as many as you need and have fun :-)
Picture
Use another piece of 4 x 6 photo paper and fold up the bottom about 3/4".
Picture
Write out your personalized thank you...
Picture
Add the magnet and put it in the envelope to mail!
Thank you for visiting!

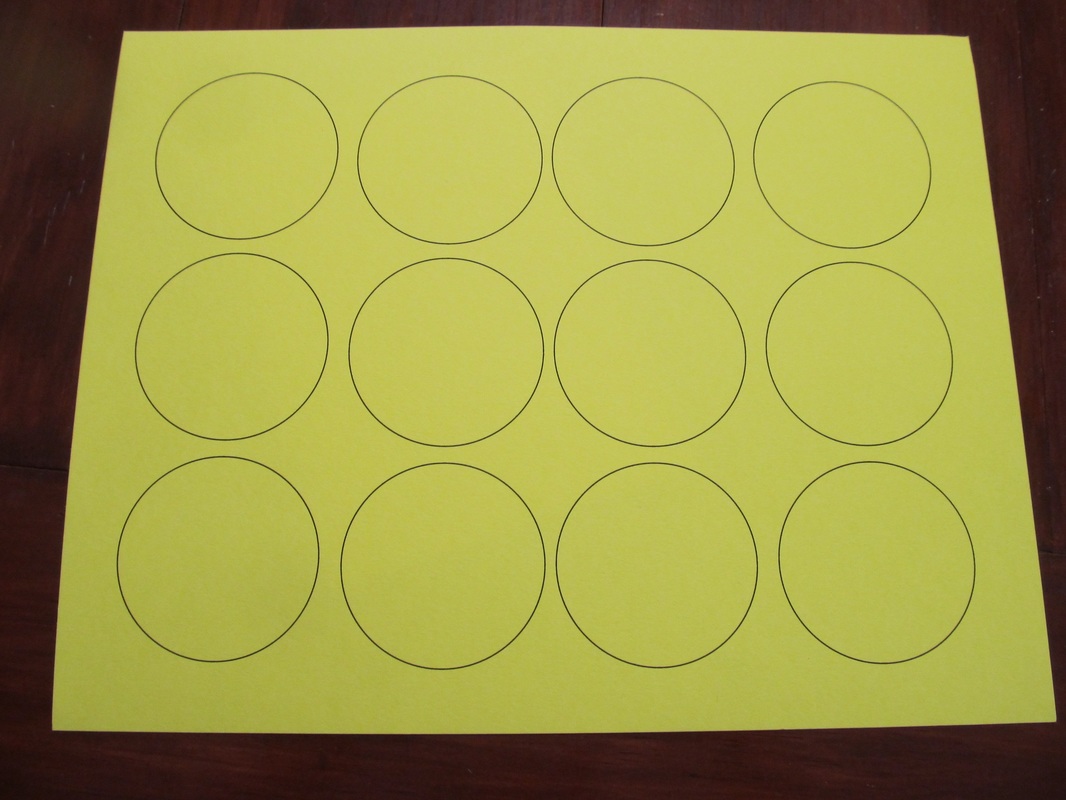
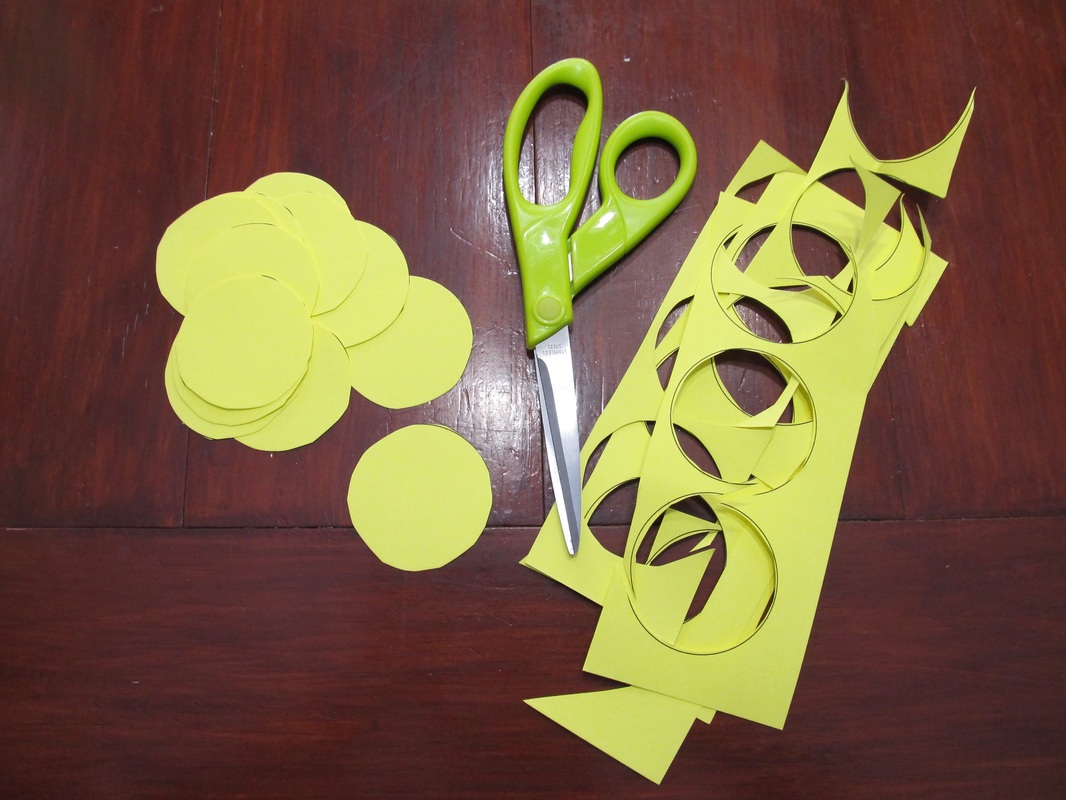
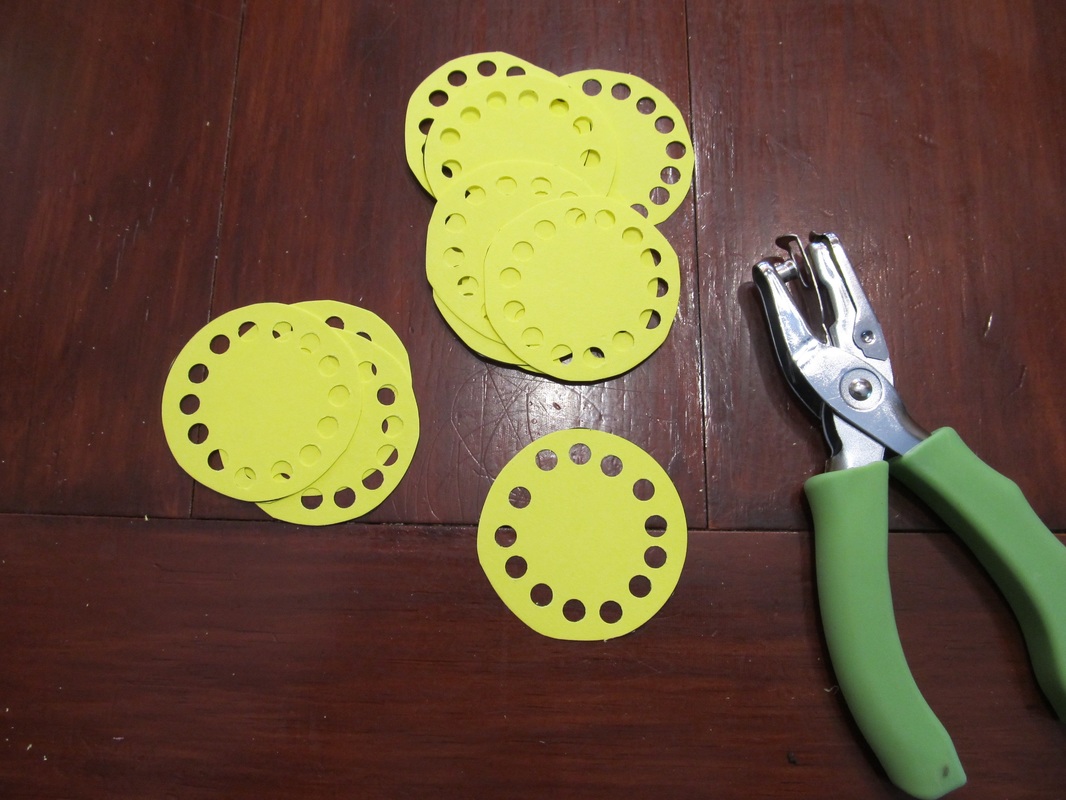
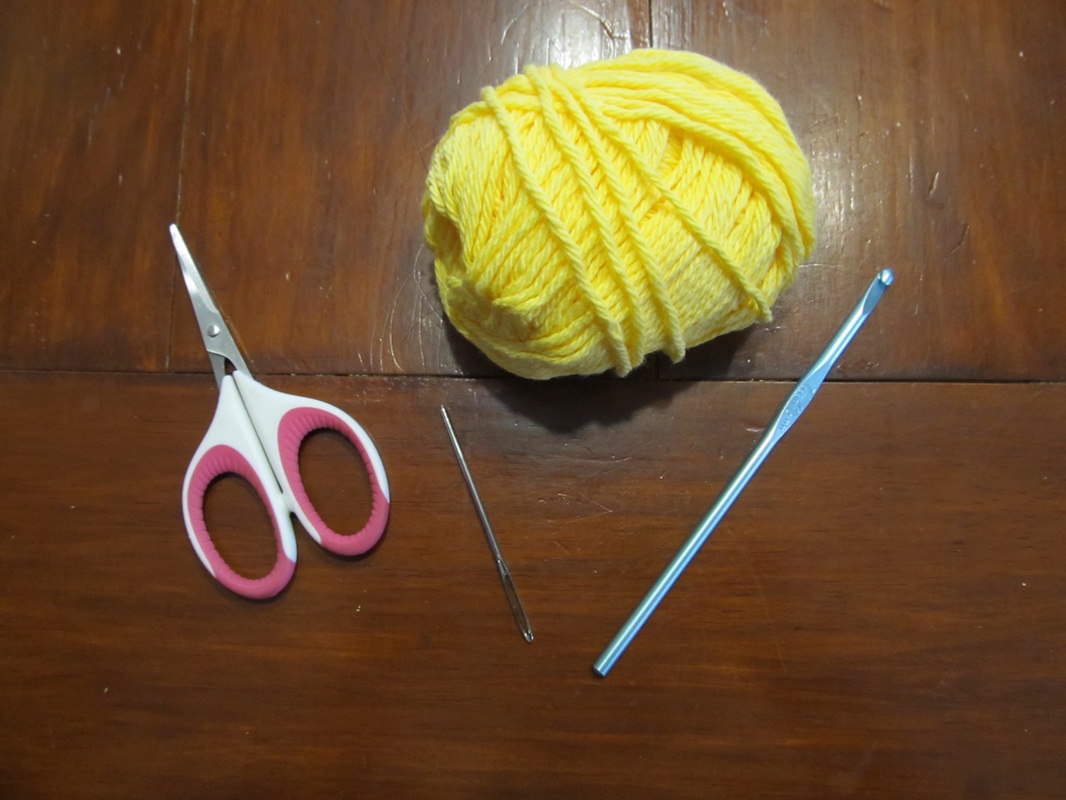
If you like to crochet then check out the our FREE crochet patterns here!

Also check out the many crochet project patterns on our Pinterest Boards Crochet ONLY and Crochet for the Kids!


Please feel free to comment, e-mail, or contact me through my Facebook or Google+ pages and follow us too :-)
​

Sincerely,
Picture
0 Comments

FREEZING FRESH LOCAL CORN

8/15/2016

1 Comment

 
Picture
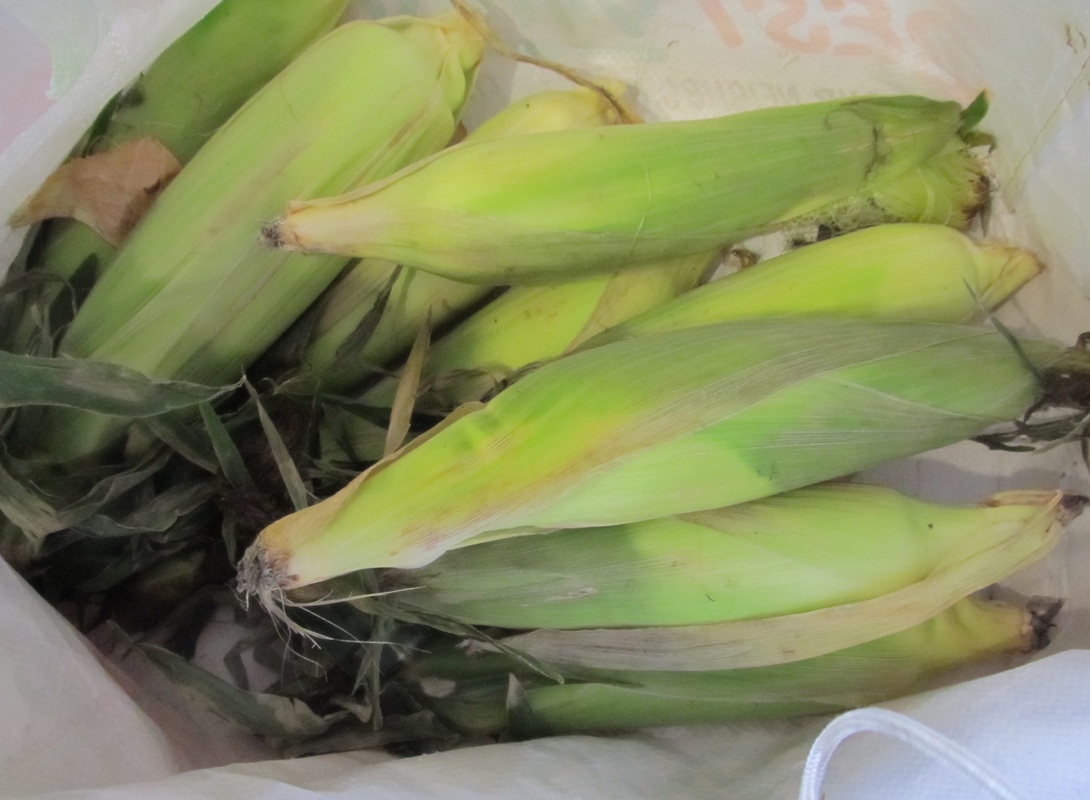
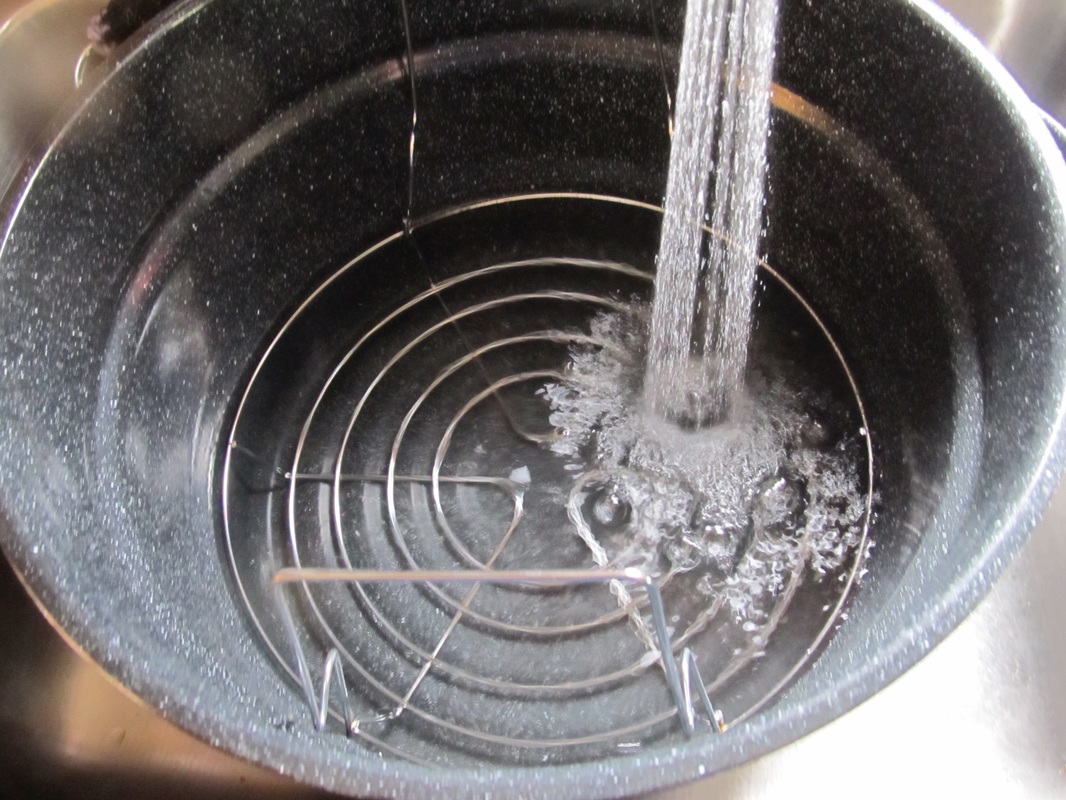
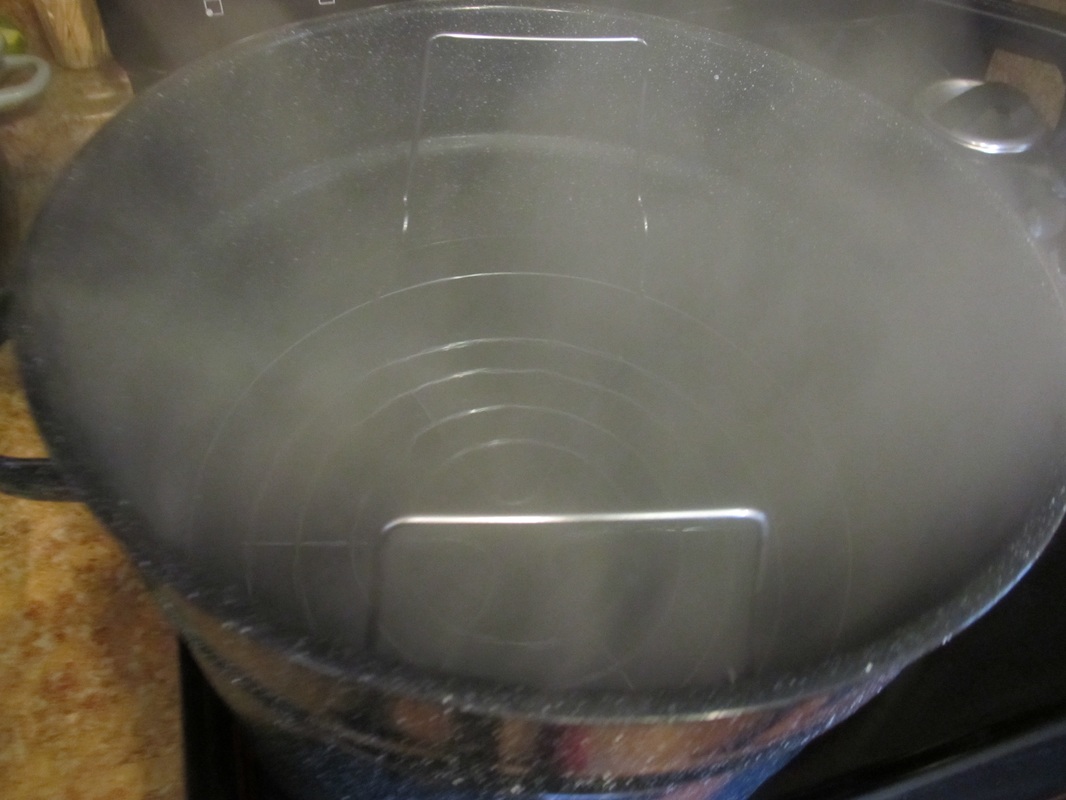
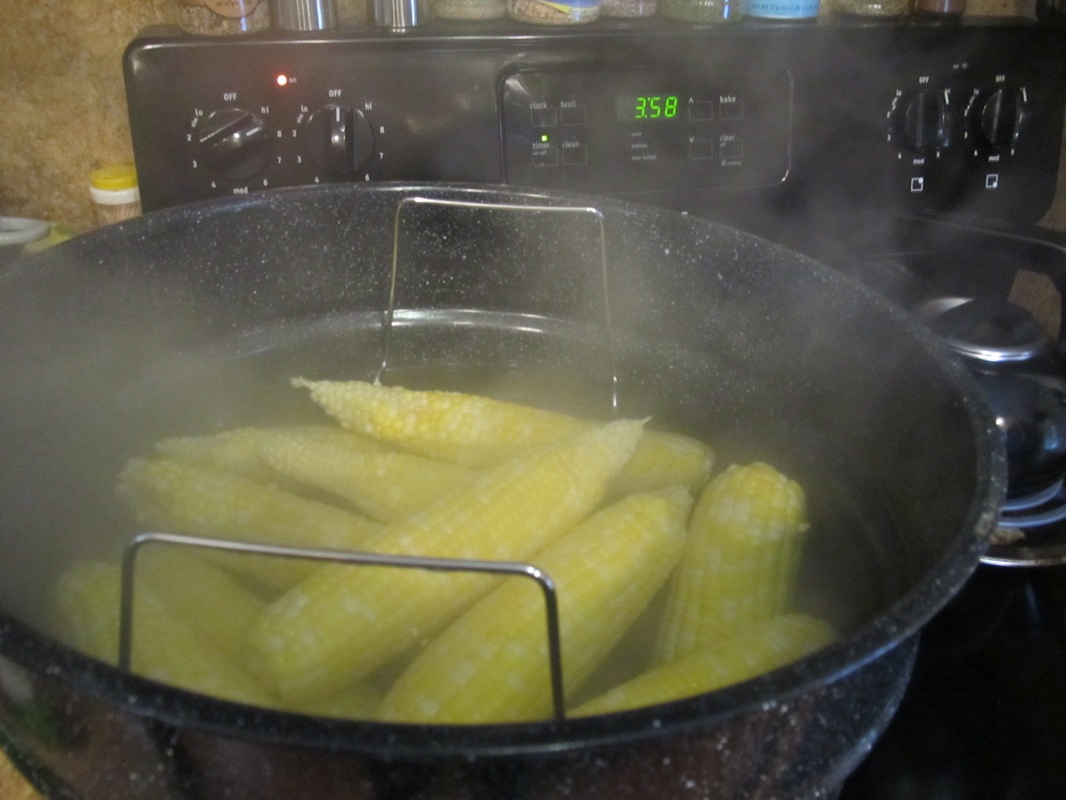
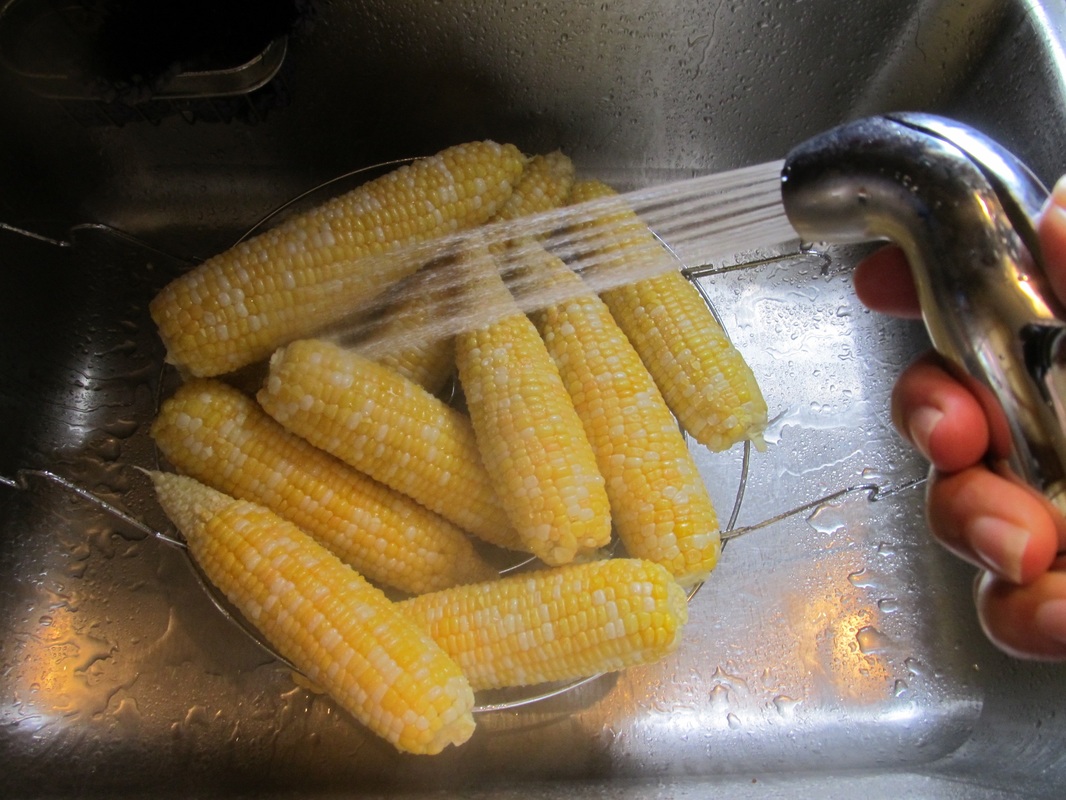
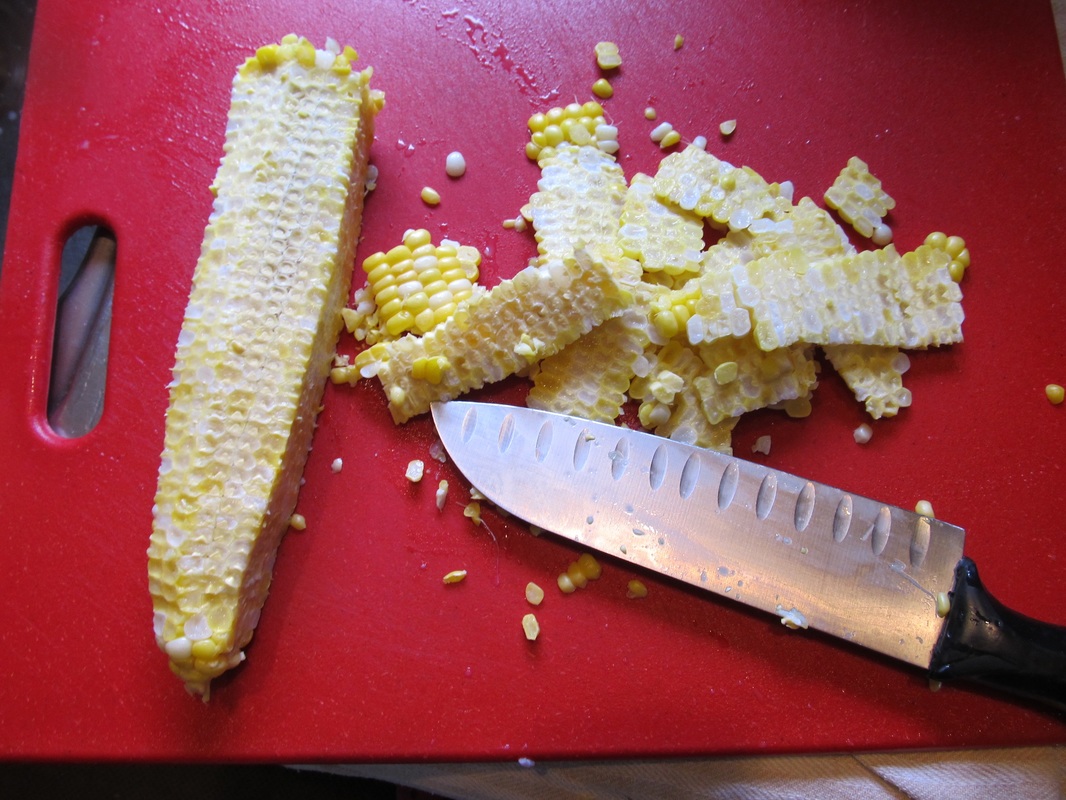
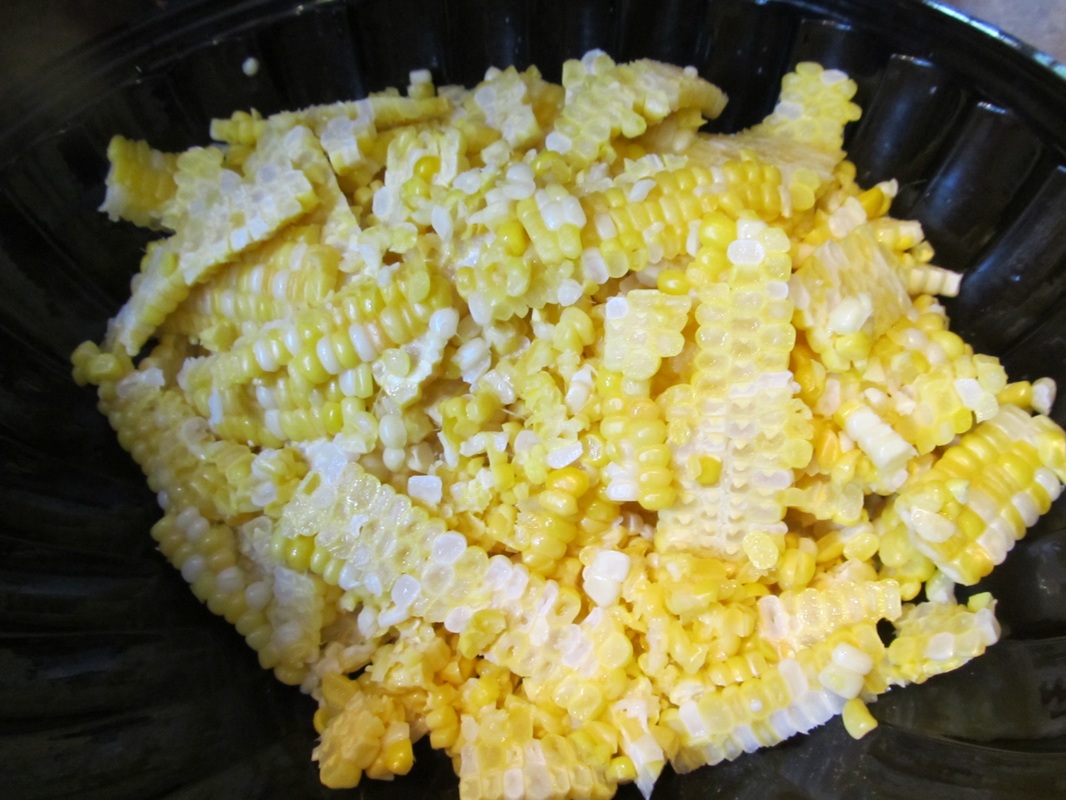
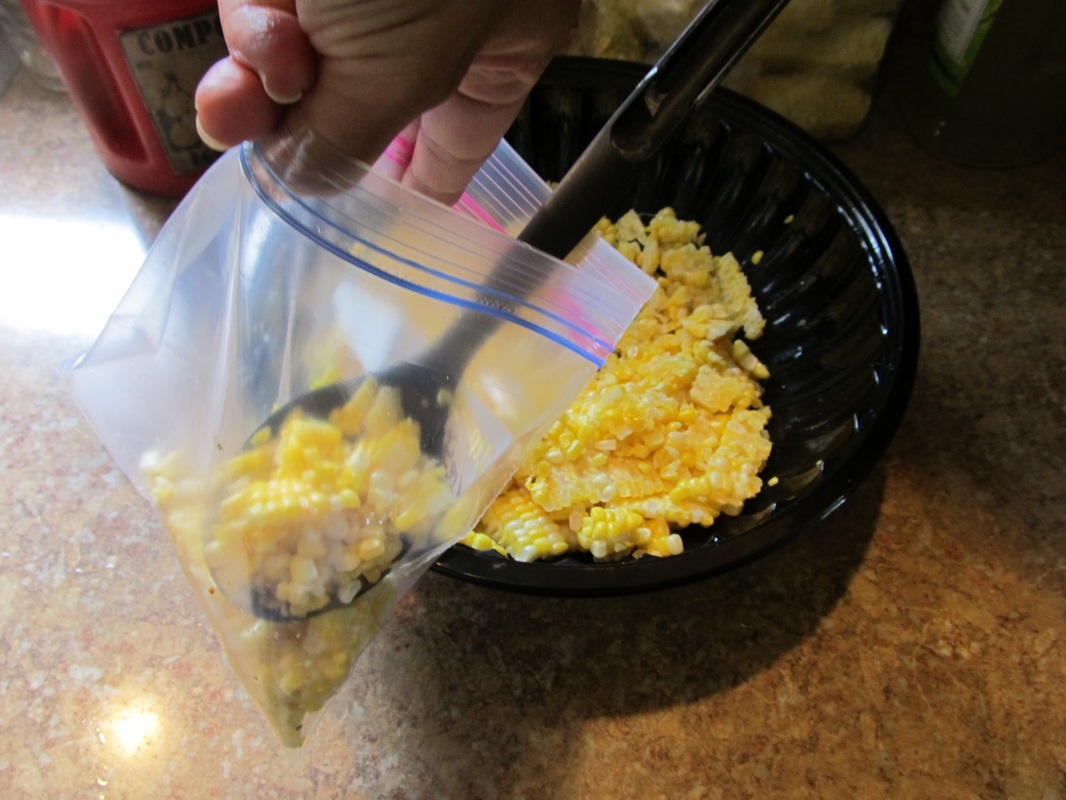
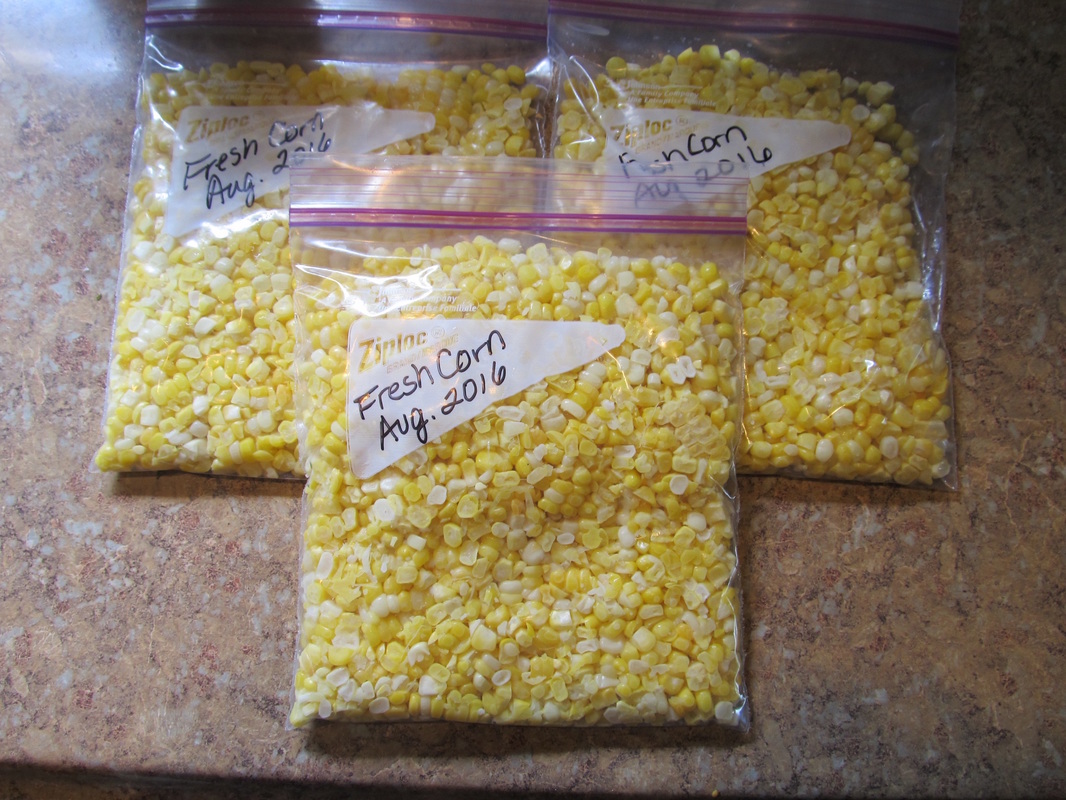
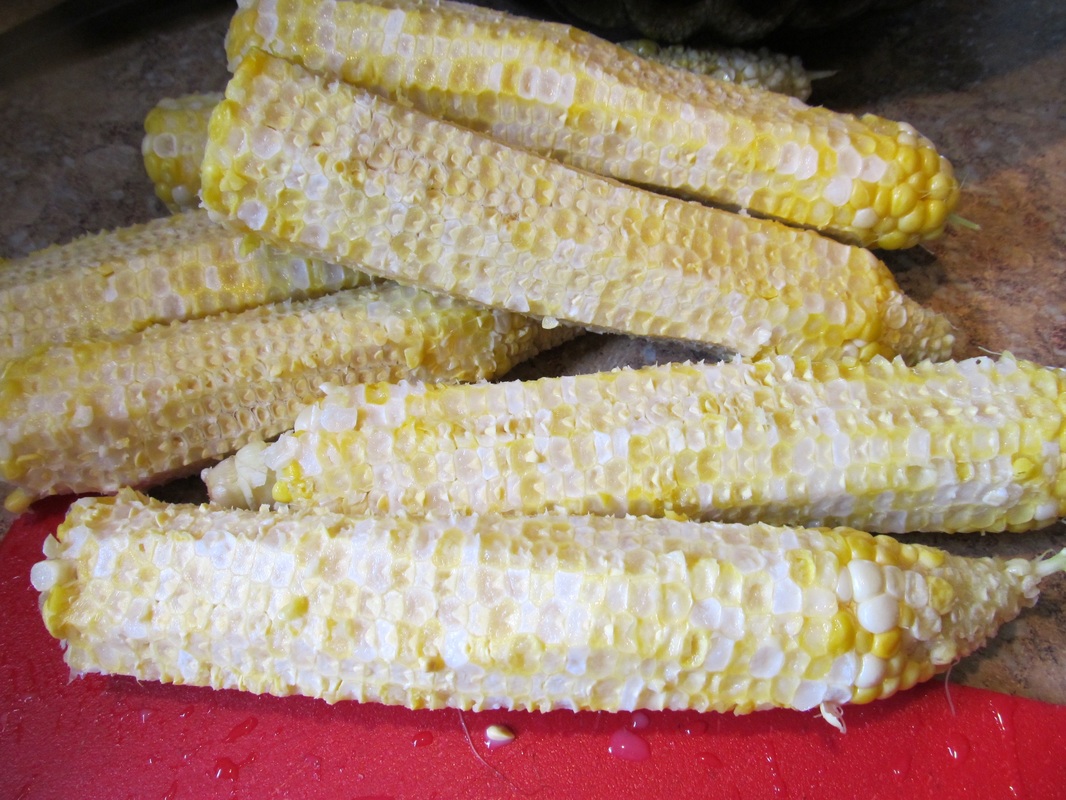
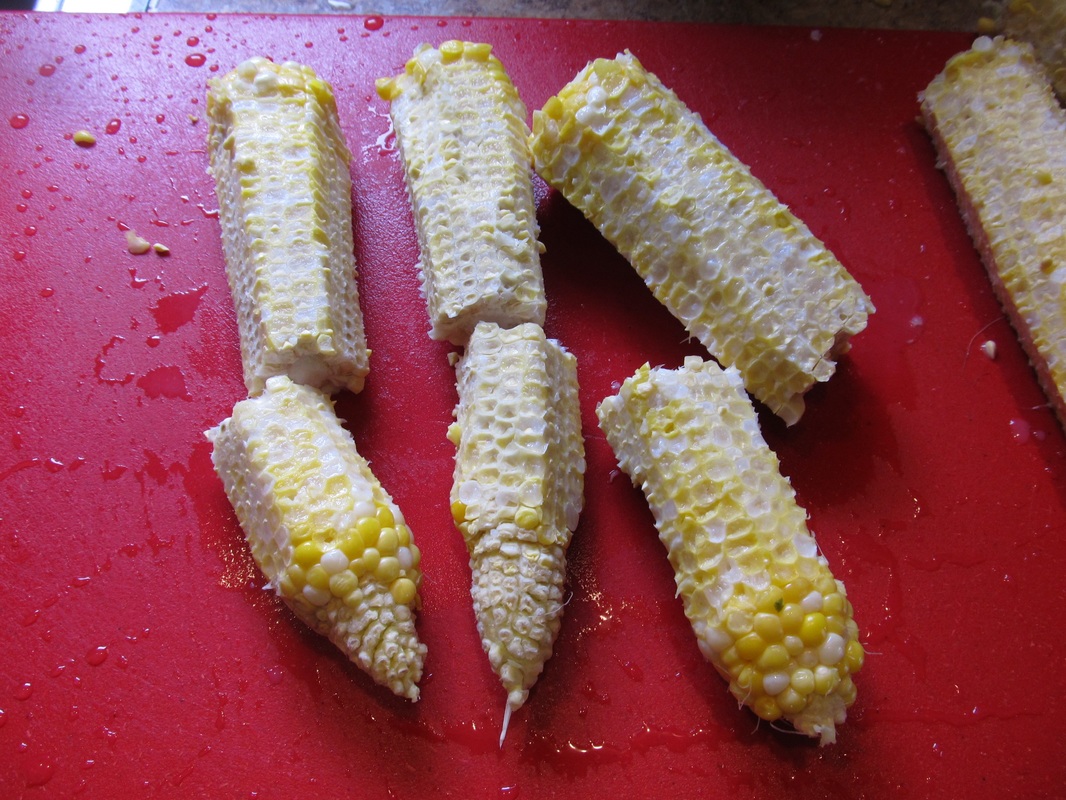
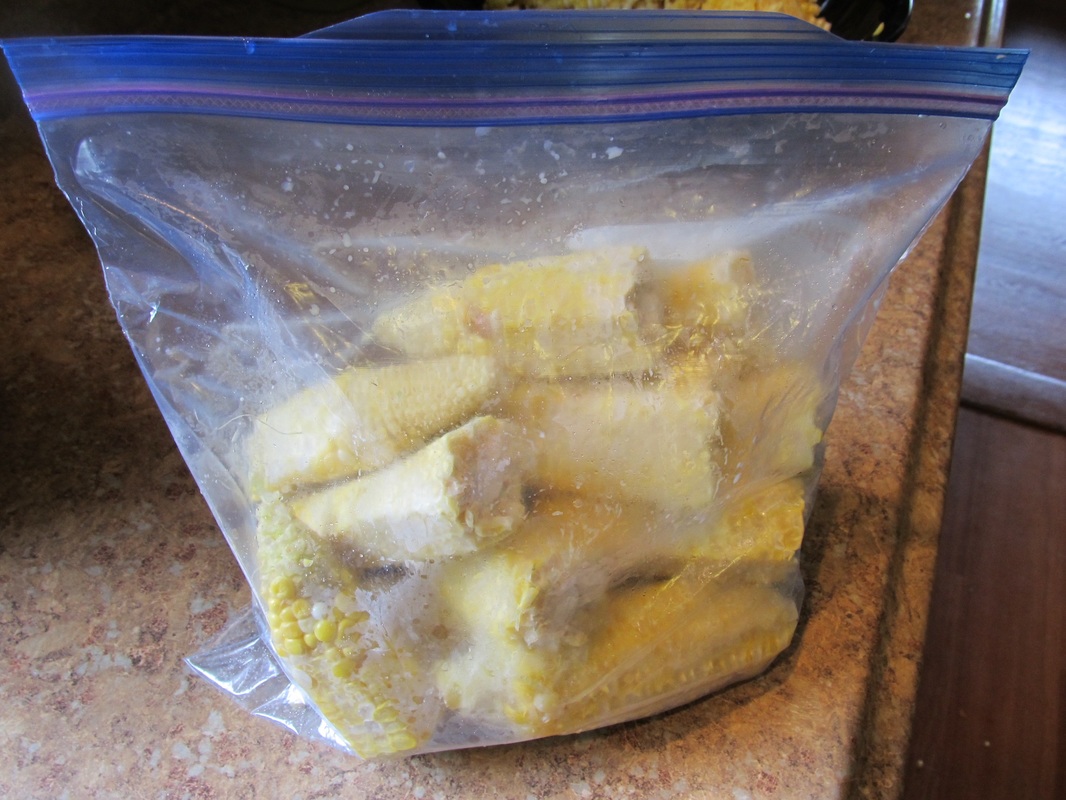
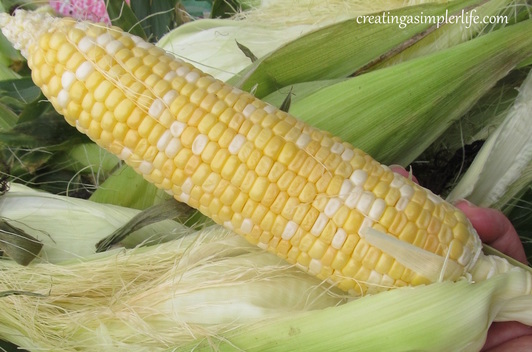
It's that time of summer when the Long Island corn is fresh and ready at the local farm stands! There is nothing better than fresh, locally grown sweet, delicious corn!  Yum! Do you wish you could eat it all year long? You can if you freeze it.  It may not be as good as it is when it was just picked, but it will still be way better than canned or imported corn!  And guess what the best part is: it's so simple!  So stock up right now while the corn is fresh! Eat all you can and freeze the rest so you can have the best, locally grown healthy sweet delicious corn any time you want all year long.  It's that simple!

Here's how:
Picture
Stock up on local fresh corn when it is in season!
Picture
Husk the corn, break off the stem, and compost the scraps!
Picture
Fill a large pot with water. I use my canning pot to make it easy, but any large pot will do.
Picture
Bring the water to a rolling boil.
Picture
Add corn and blanch for 4 minutes.
Picture
Remove corn and immediately cool with cold water.
Picture
When corn is cooled, use a knife to cut the corn off the cob. Be careful not to cut into the cob.
Picture
Corn ready for packing and freezing!
Picture
Divide corn up into freezer bags.
Picture
Make sure all air is removed and bags are labeled appropriately. Store in freezer until needed!
Picture
What about the leftover cobs?
Picture
Nothing goes to waste in our house :-) My chickens love them! See the video below...
Picture
Some of the cobs are saved for treats on other days. We can even freeze them so they have fresh treats in the winter too!
See how easy it is to freeze corn?
​
And nothing gets wasted!  
​
So simple :-)

Thanks for visiting!

Sincerely,
Picture
1 Comment

DIY REAL Sun Dried Tomatoes

8/12/2016

0 Comments

 
Picture
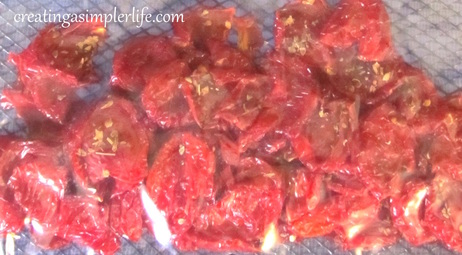
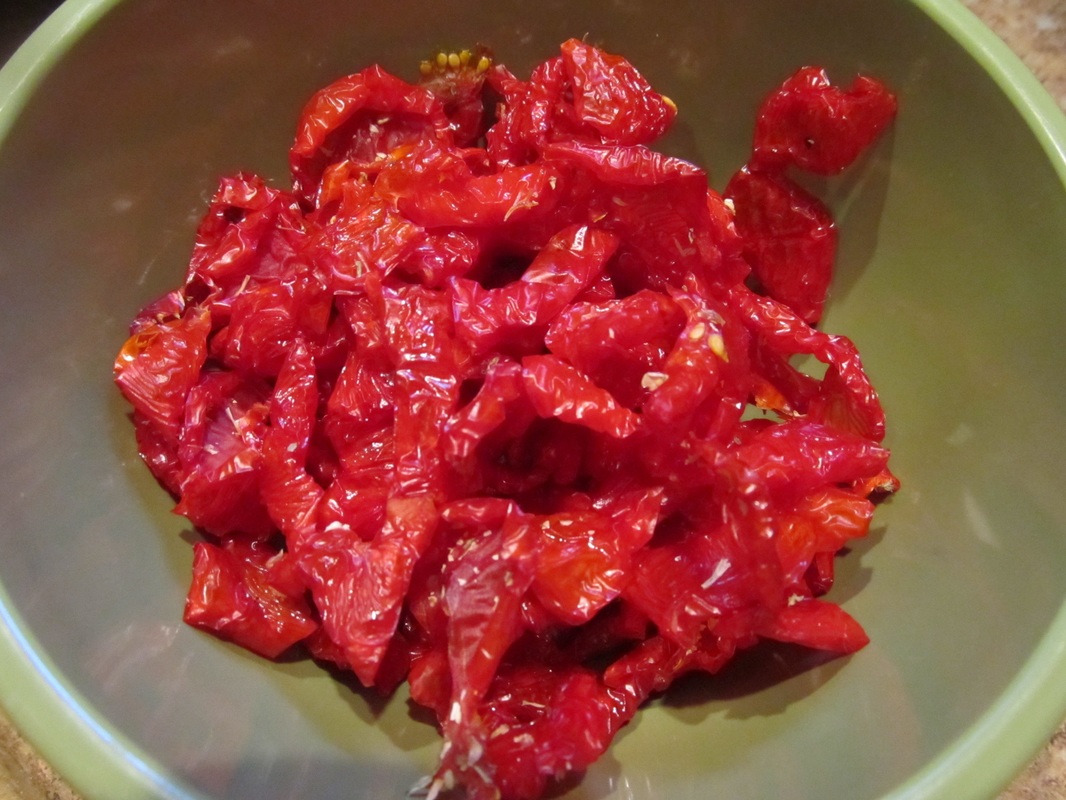
Do you grow your own tomatoes?  If you do, and if you are like me, then you have a lot of extras.   After sharing my extras with friends and family and even giving some to the chickens every day I still had so many more to go...and more growing every day.  I was trying to think of something different to do with them so I thought why not homemade sun-dried tomatoes?  

I started doing a little research and discovered that most 'sun-dried' tomatoes aren't really sun dried anymore, they are dehydrated or cooked in an oven.  Since my goal is always to do things in simple ways using as few resources as possible I was determined to really, truly, make real sun dried tomatoes. And I did!  It was so simple and so successful that I have made many more batches since then!

After drying them, which generally takes a minimum of 2 full-sun days (depending upon the humidity of course), I freeze them instead of just storing them dry because they last longer in the freezer and I don't need to check them regularly for any mold growth.  Mold growth can occur if any of the tomatoes are not 100% dry.  Any little bit of moisture left over can start growing mold, so since we live in a humid environment and I have a freezer I decided it was just easier and safer to keep them there.

When we are ready to use them for cooking all we do is boil some water, cover them with the hot boiled water and let them sit for 15 - 20 minutes. This rehydrates them so they can simply be added to any dish we choose!

The best part is they cost me practically nothing, they are organic (because they were grown in my own garden), they retain all the wonderful nutrients of fresh tomatoes, and they can be enjoyed all winter long when I have no fresh garden to pick from!

Check out my You Tube video below to see how I made them:
Thanks for visiting!

Sincerely,
Picture
0 Comments

Getting Ready For Our First Craft Fair!

8/10/2016

1 Comment

 
Picture
I have never sold at a craft fair before.  I have attended many craft fairs over the years, but I have never personally been involved in selling at one.  That is about to change.

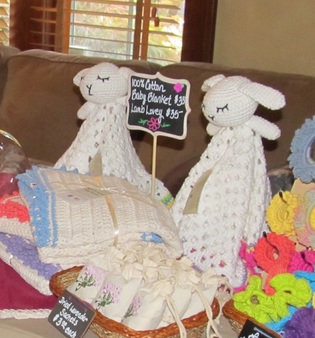
For years my daughter has been urging me to sell at the craft fair where she lives. Every summer they have a community fair to raise money and every year she reminds me that I should rent a table and sell all my handmade 'stuff.'  I usually say no.  I am not sure why, but I guess I just really never knew what to make that people would want to buy.  And what if they don't buy it?  It is very intimidating to try something new like this, but I finally just said YES!  After all, the worst that can happen is my stuff doesn't sell but I get quality time with my daughter and I get to spend a weekend on Fire Island in the summer! 

And then after saying yes, I thought, uh oh....what have I gotten myself into?  I am not the type of person to just wing something like having a craft sales table.  I have to have a plan for exactly how and what I am going to do and that is what this post is all about. 

There were some criteria about selling at the fair: I rented one (1) 8' x 30" banquet table and two chairs.  Anything and everything I sell would have to be on top of that one table. No other stands are allowed.  I also needed to get everything onto a ferry - it is not a craft fair where you can pull your car up and unload.  Everything has to be lightweight, portable, and literally carried by hand.

Here are the steps I took to get ready for our first craft fair ever:
1. I Researched...
  • I 'Googled' and looked and literally hundreds of pictures of the way sellers set up their tables and booths at craft fairs
  • I 'Googled' and read nearly as many blog posts about anything and everything having to do with advice for selling at craft fairs
2. Made A List Of What I Wanted For My Table...
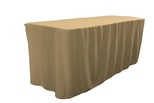
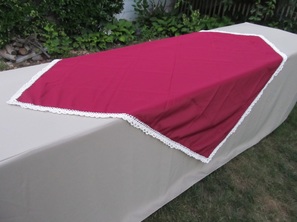
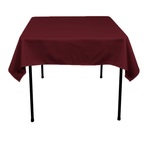
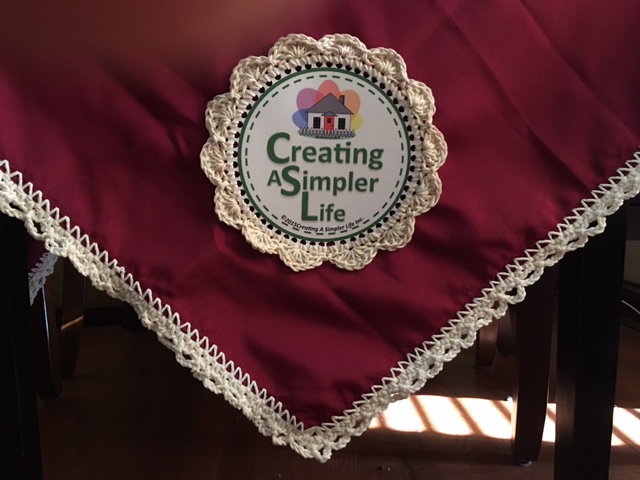
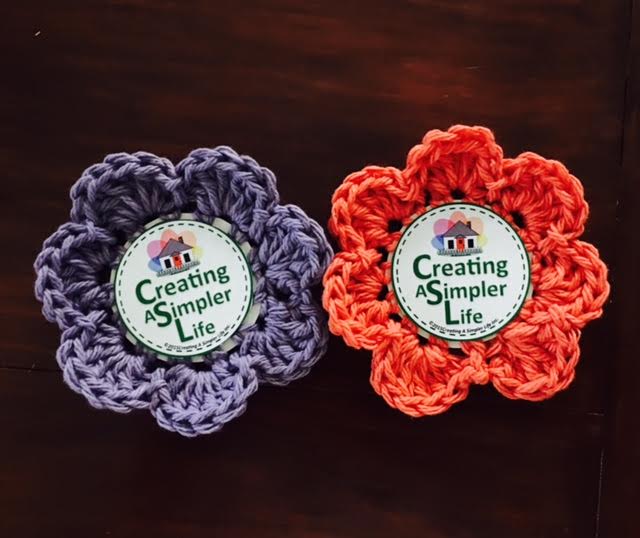
  • Bottom fitted banquet tablecloth (most tables at fairs are banquet size)
  • Second decorative tablecloth for on top of the fitted one - in a complimentary color
  • A spinning table-top display for my pendants 
  • Signs with prices and descriptions
  • Signs with our company name etc.
  • Business card holders (with business cards of course)
  • Sign showing that we take credit cards (I read that being able to take credit cards is a must!)
  • A container to do a FREE giveaway raffle to collect e-mail addresses
  • A mirror so potential customers could try on the pendants
  • Baskets to put display products in
Picture
Picture
Completed tablecloth set together for fair!
Picture
3. The Tablecloths
I didn't just want tablecloths...I wanted them to be special and stand out!
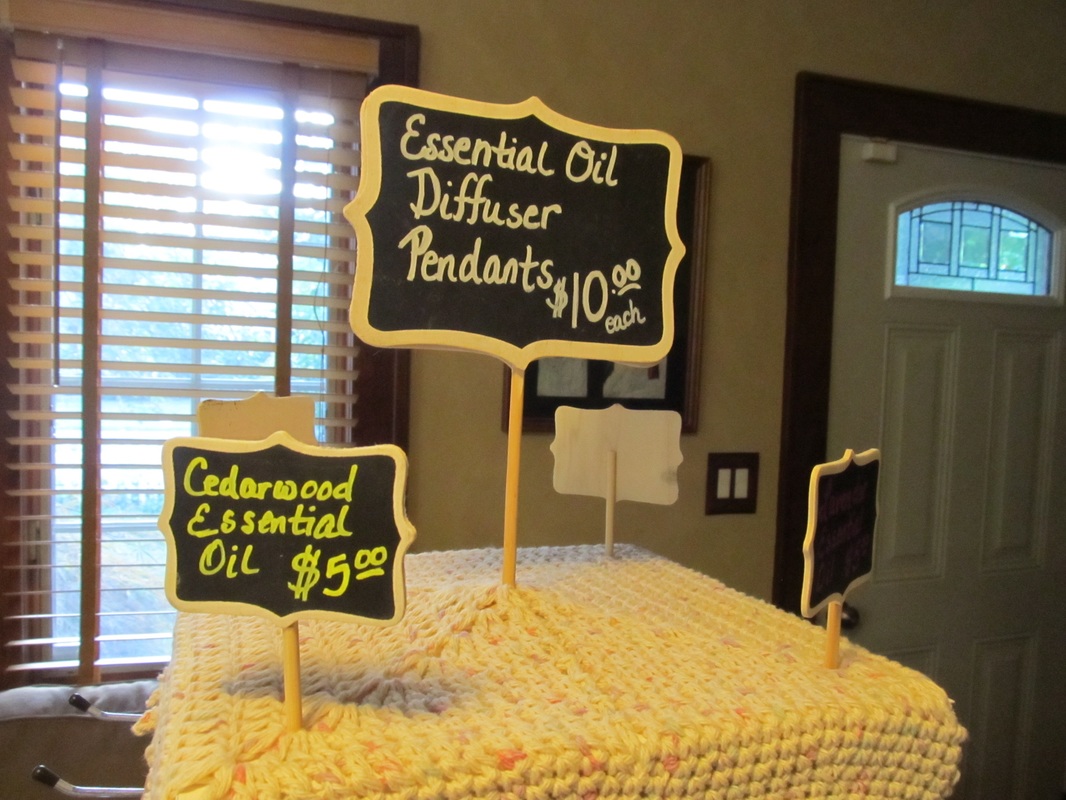
  • ​Purchased a fitted tablecloth from Amazon (affiliate link).
  • Purchased a square tablecloth from Amazon (affiliate link).
  • Personalized the tablecloth with a crochet border - Read about it here!
Picture
Picture
Picture
4. Signs
​I didn't want to simply order signs from someone else...I wanted mine to be handmade like all the products I sell!
  • Chalk board signs with chalk paint for individual signs (affiliate links).
  • Sign for credit cards - simply displayed in a photo frame
  • Crochet Sign for table - made and sewn onto tablecloth front (video below on how these were made!)
Picture
Picture
Picture
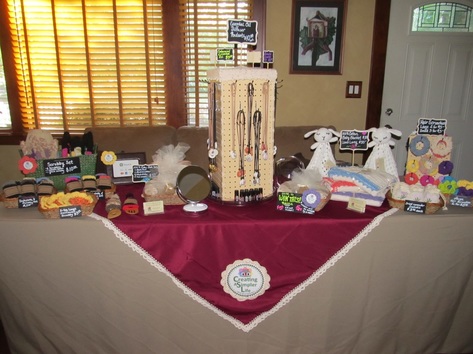
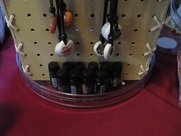
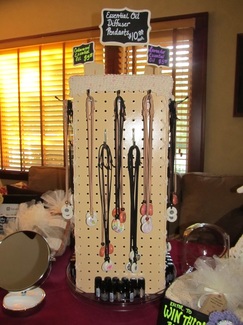
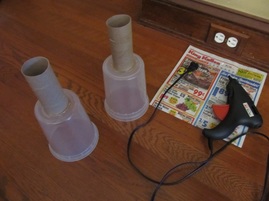
5. Spinning Table-top Display for Pendants
​It was at least $90 to buy one and I didn't like any of them anyway, so of course my husband and I decided we could make our own and put our own handmade crafty 'spin' on it - pun intended :-)
  • This is my favorite! It is a combination of *peg board with *hooks, cotton scrap yarn to hold it together, a lazy Susan (affiliate link) bottom, a foam board top with a simple cotton crocheted 'hat', and chalk-board signs written with chalkboard paint (affiliate links) on the top! Check out the video below to see how we made it :-)
  • *peg board 2' x 4' common at $10.47 and hooks at $10
Picture
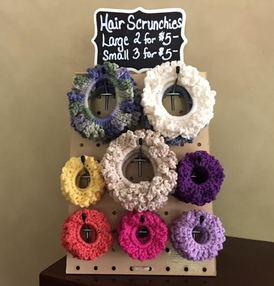
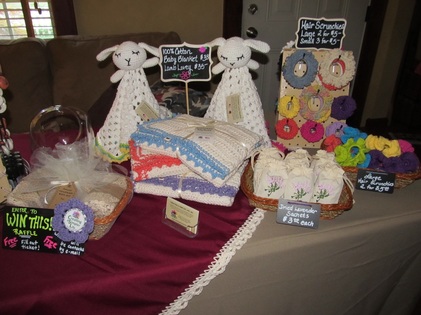
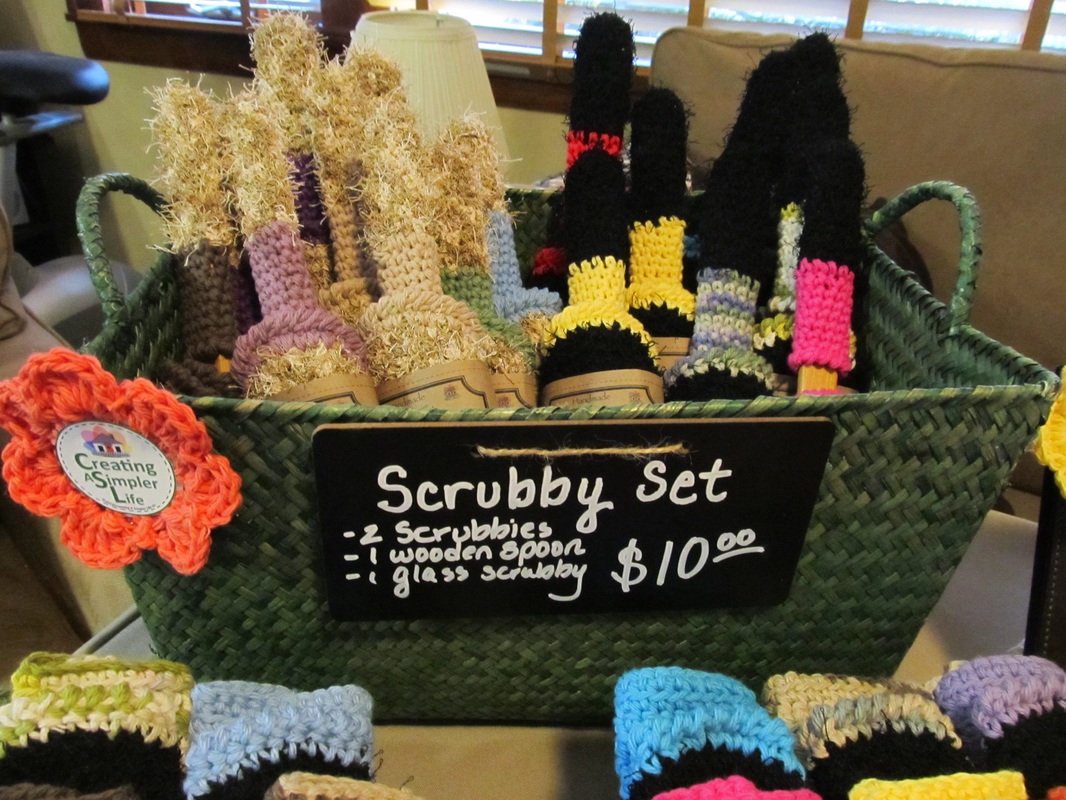
6. Bonus Hair Scrunchy Display
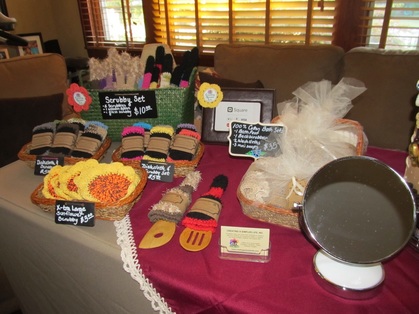
  • There was left-over pegboard from the spinning display so we used it to make a quick and simple display for my crochet hair scrunchies! We simply cut the left-over piece in half, painted it up to match everything else and used the crochet yarn to hold it together at the top and bottom.  Add a few hooks and a chalk-board sign to the top and it's the perfect little A-frame display!  
Picture
Picture
Picture
7. Miscellaneous
  • Business card holders $2 (affiliate link)
  • Mirror 6.5" for $15 (affiliate link)
  • Baskets (already had them!) - note: my wonderful husband cut up and drilled holes in some of the chalkboard signs so I could attach them with colored yarn to the front of the baskets!
  • We made a special display for the Little Lamb Lovey Blankets using a plastic soup container, a half of a paper towel cardboard center, and hot glue!
Picture
Simple stands for the Little Lamb Lovey Blankets!
Picture
Little Lamb Loveys on their special stands! It works :-)
8.  And of course, before we packed it all up, we had to do a    practice table set-up in our living room!
Picture
Picture
Picture
Thanks for visiting!

If you are anywhere near Ocean Beach Fire Island, NY the weekend of August 13th - 14th 2016, stop by our table and say hi!

Please follow us on social media!

​Sincerely,
Picture
1 Comment

DIY BUBBLE PARTY FAVORS

8/8/2016

1 Comment

 
Picture
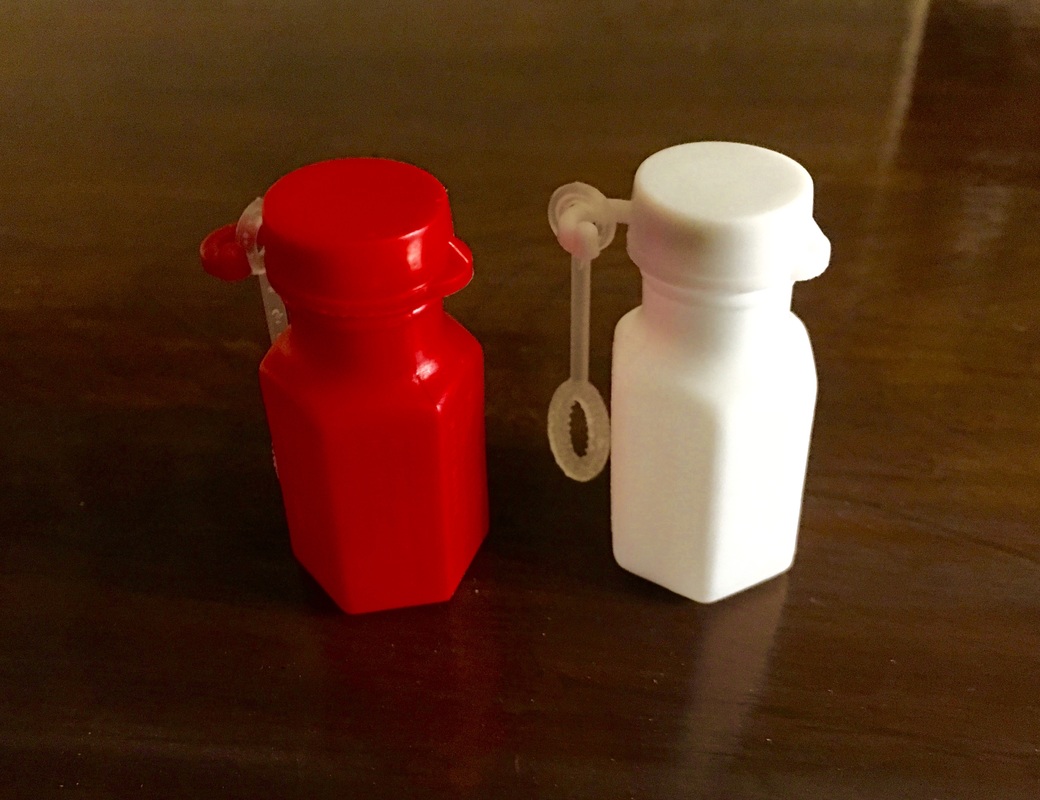
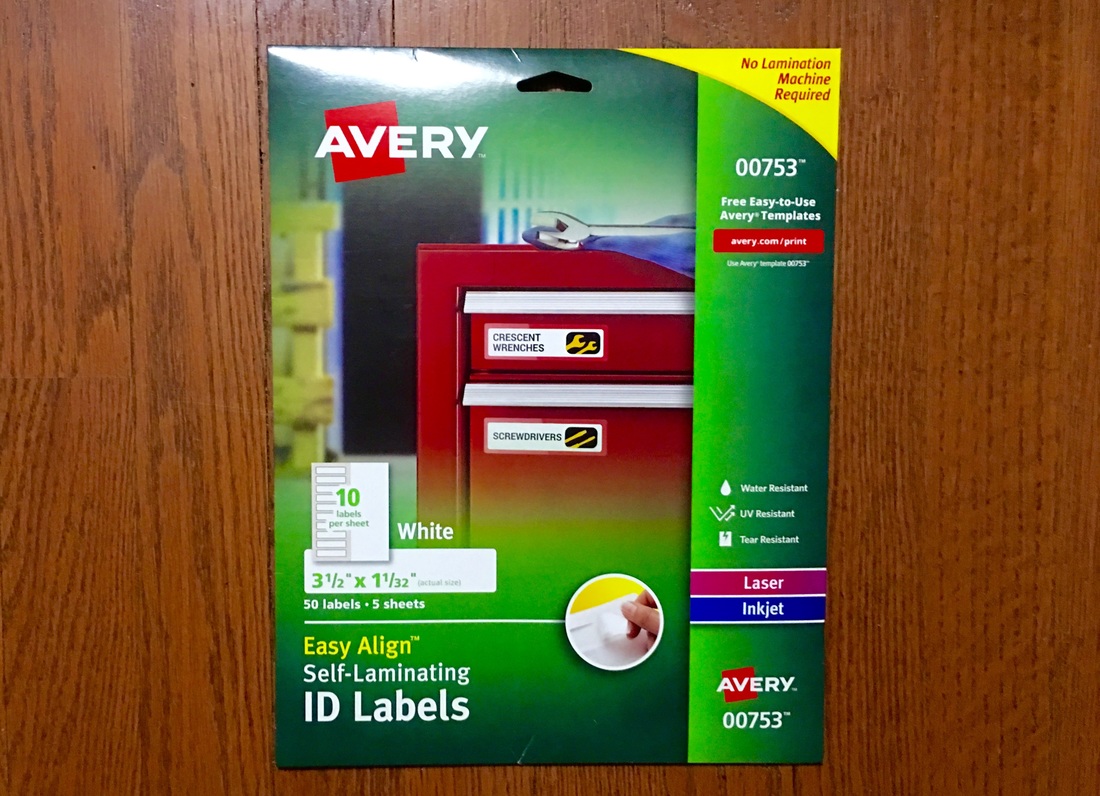
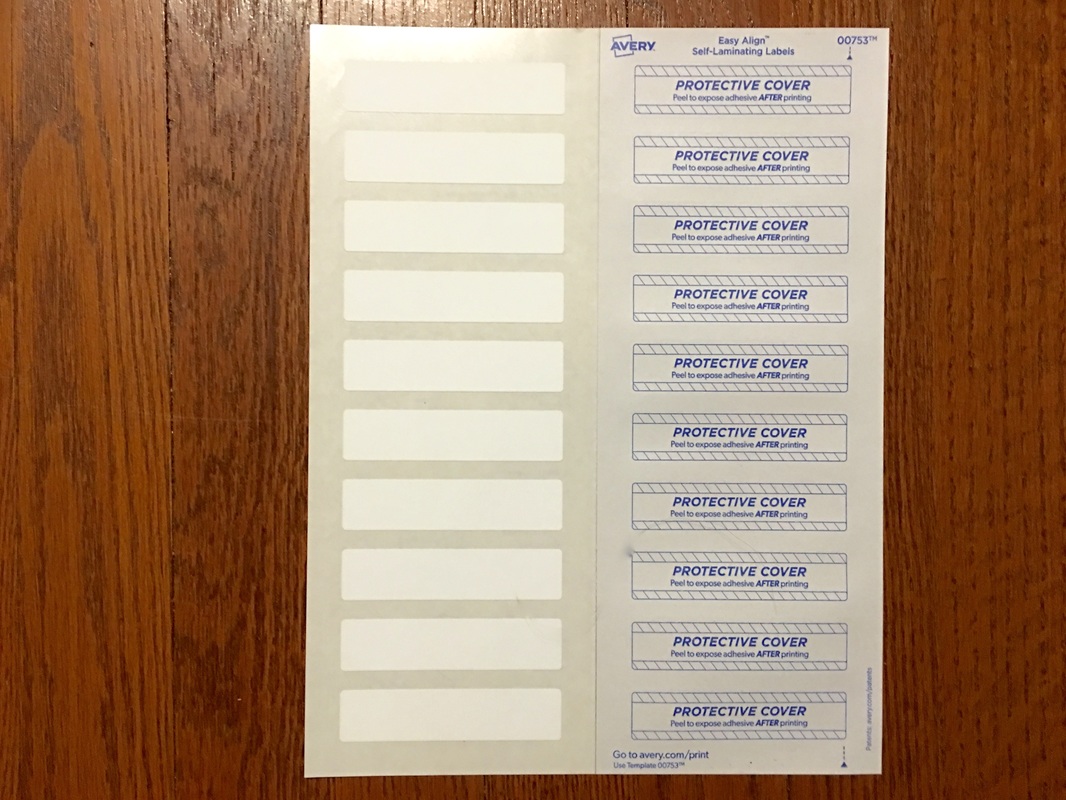
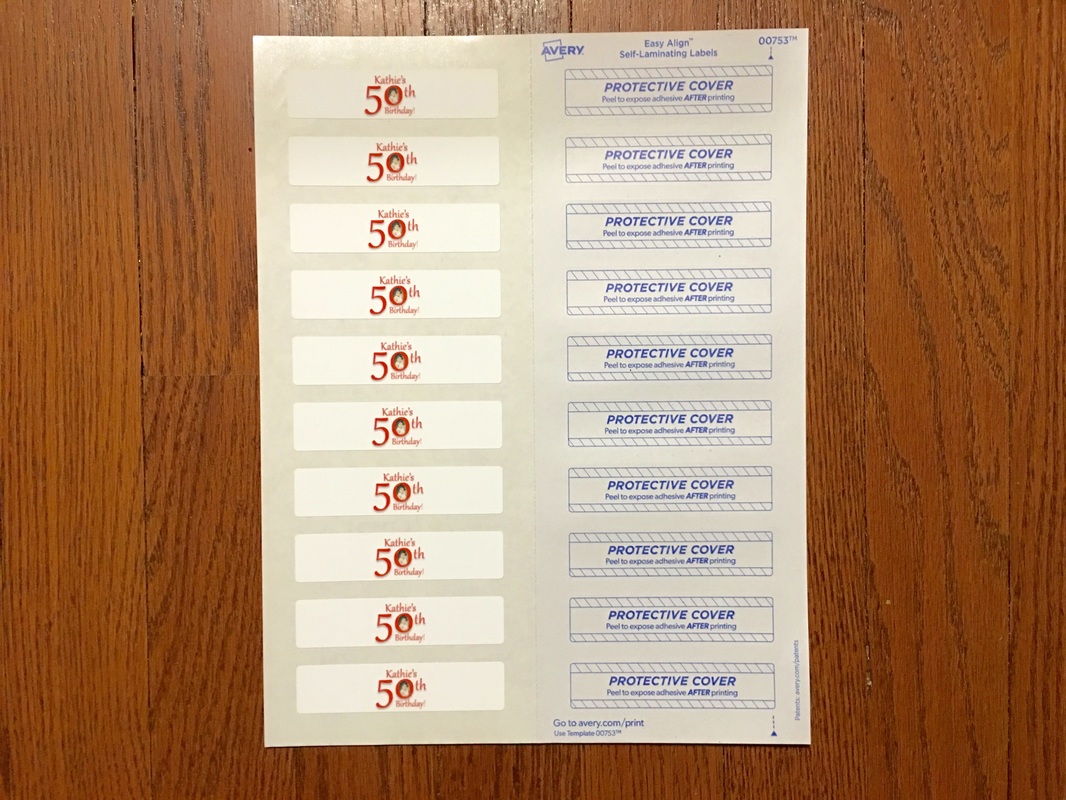
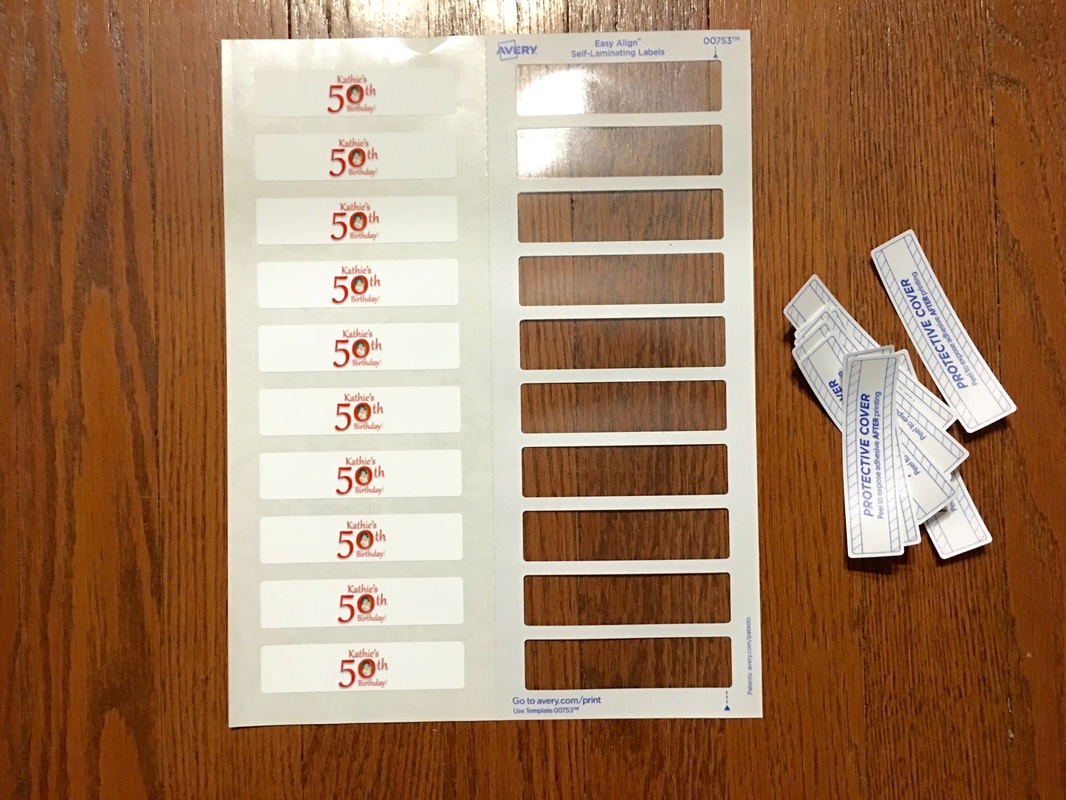
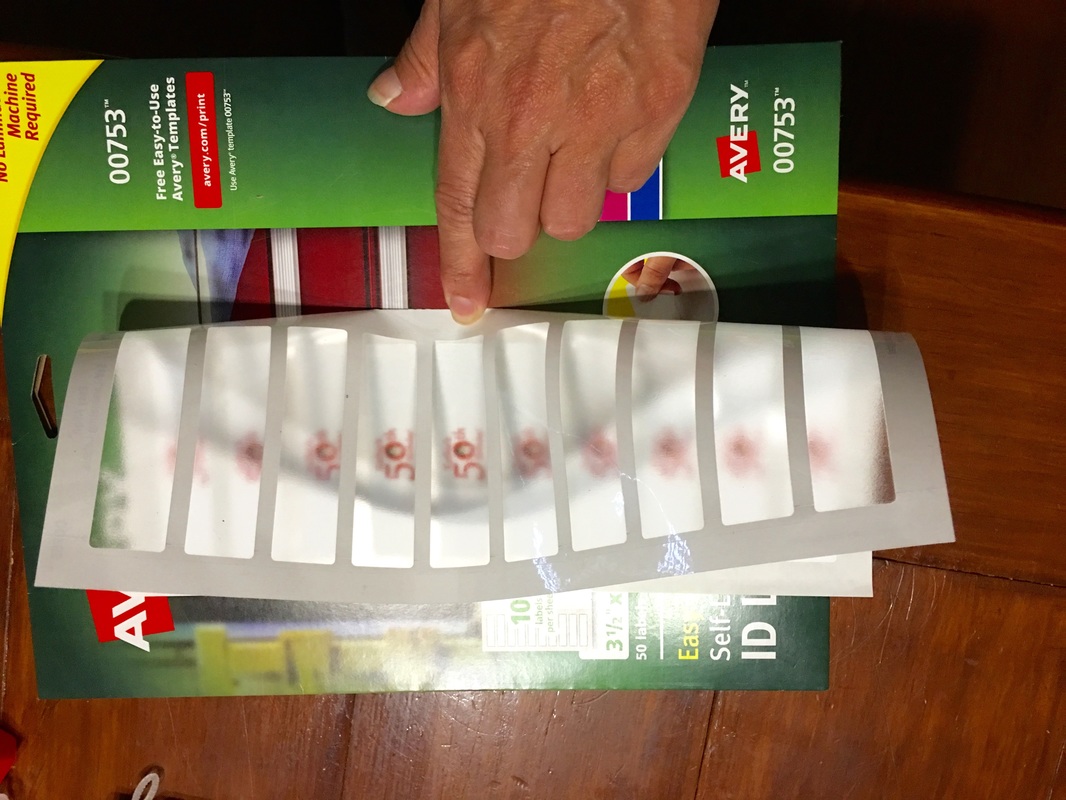
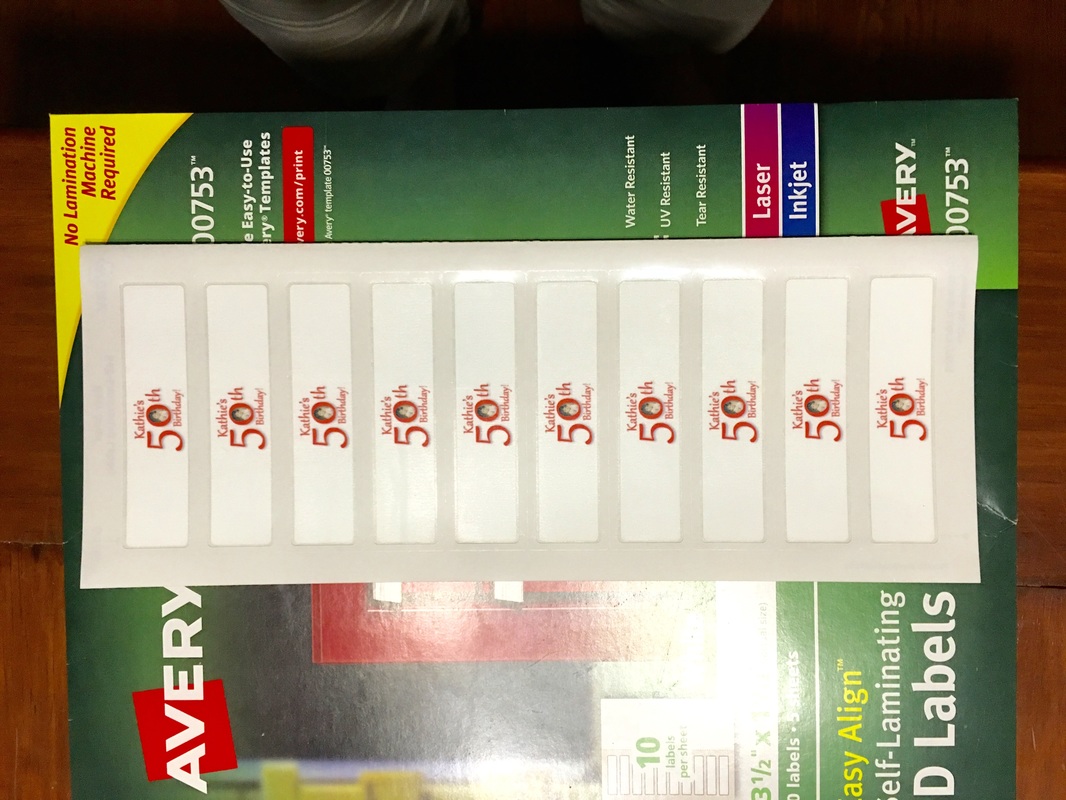
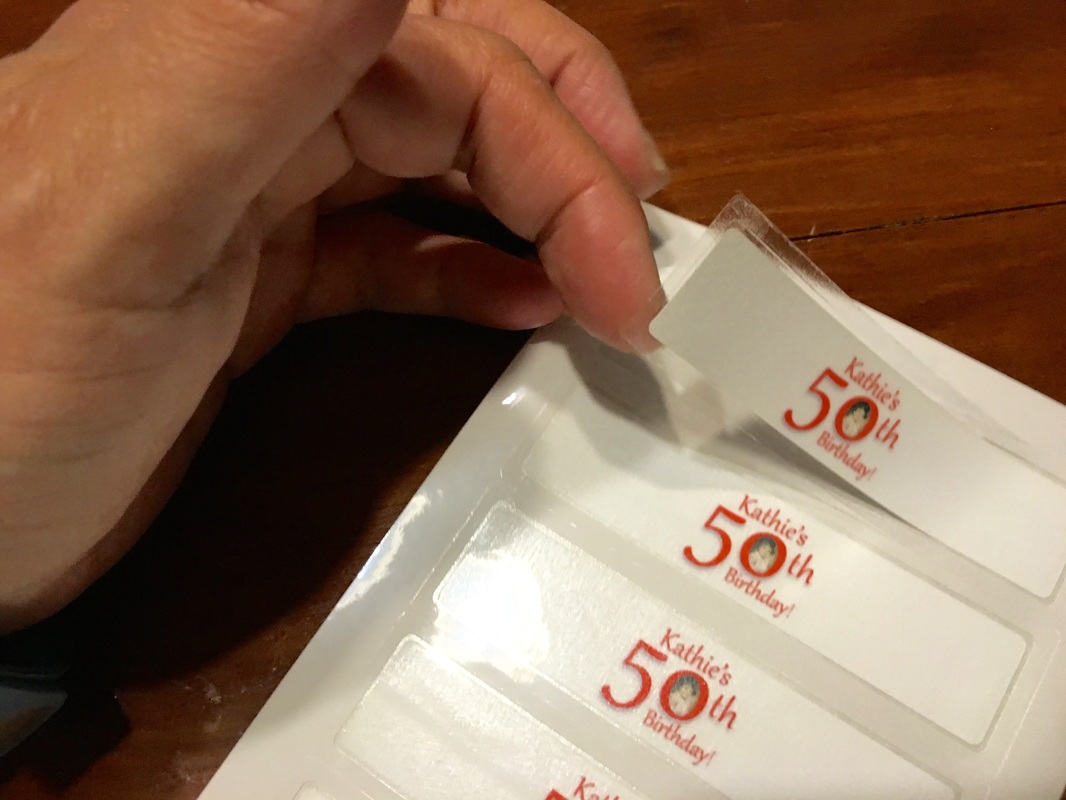
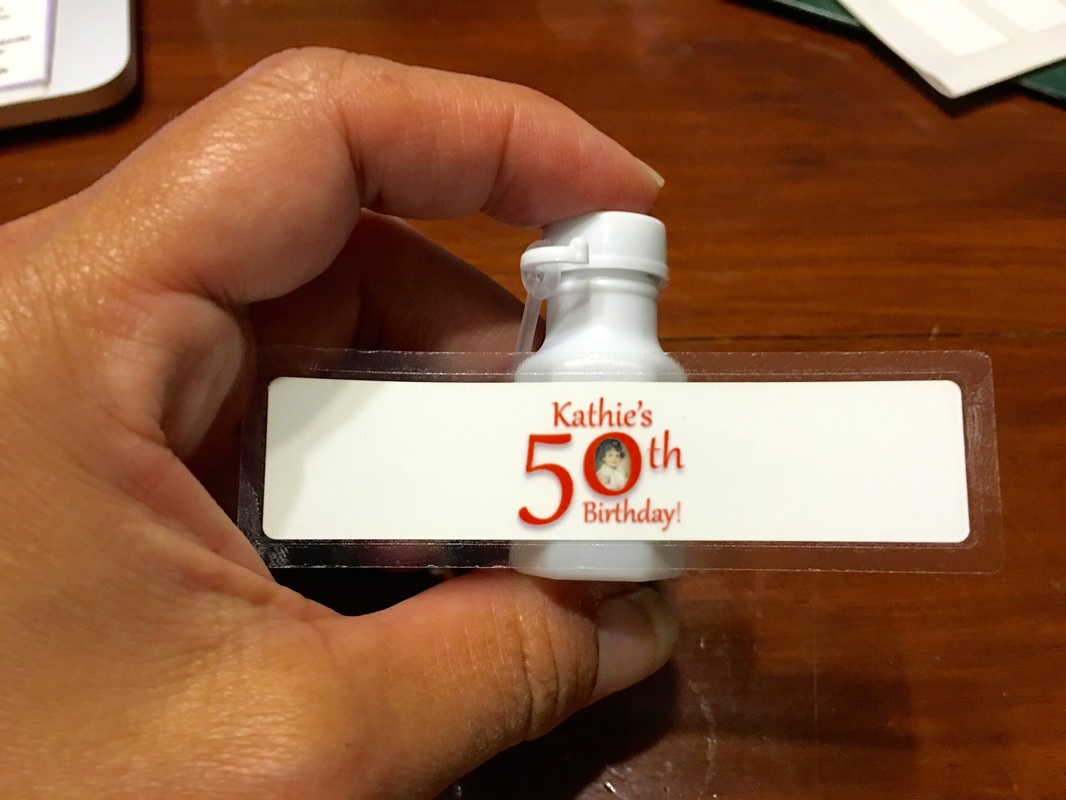
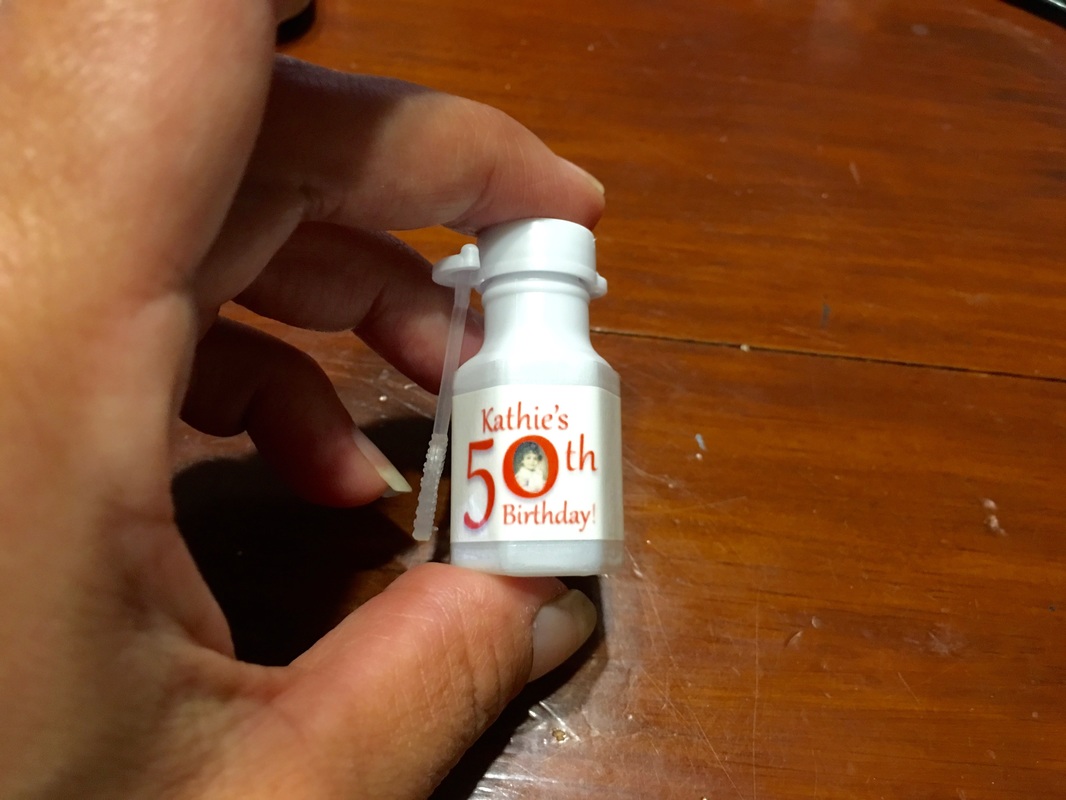
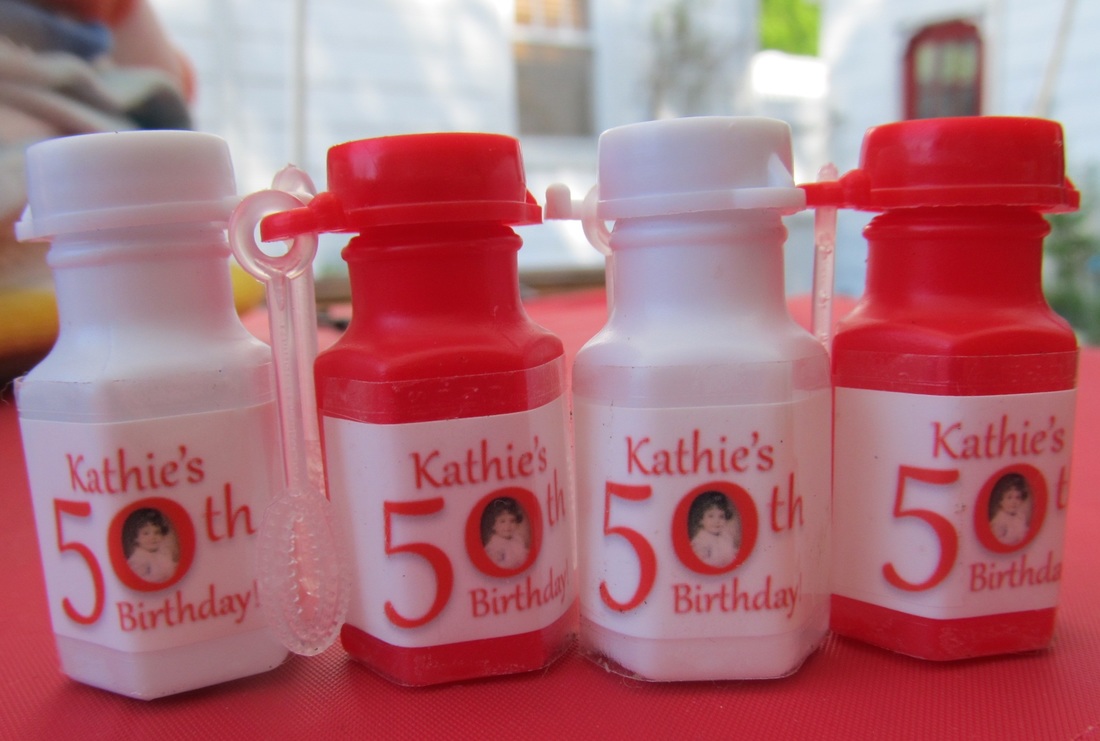
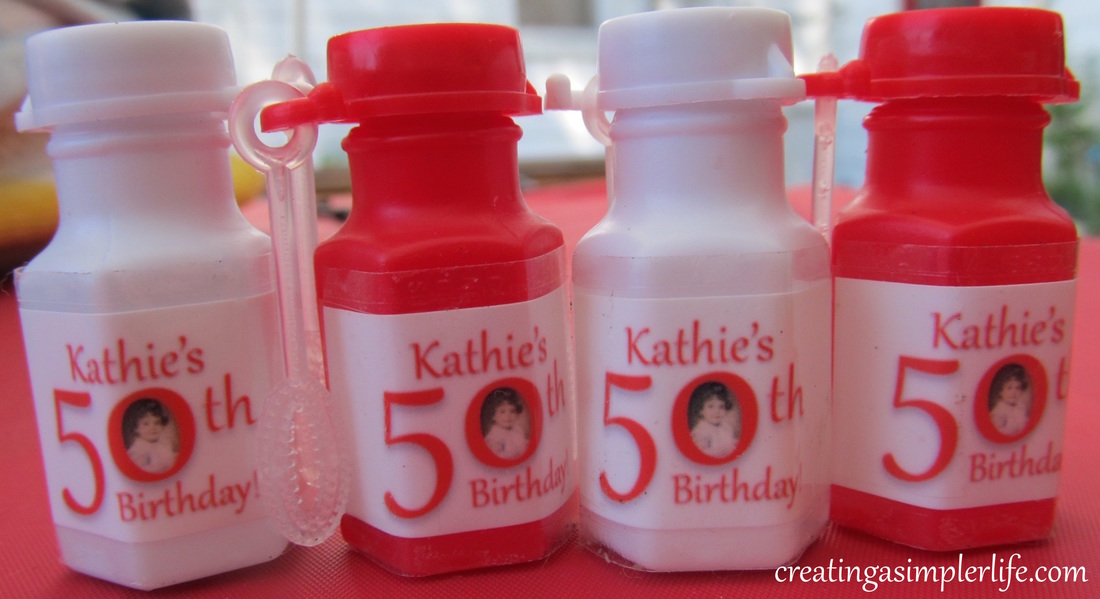
I just had my 50th birthday and yes, I ended up helping my husband with the party.  Since my birthday is in August and we have a pool, we of course planned on a backyard pool party.  Naturally we had to have something fun for a 'party favor' so why not bubbles? Who doesn't like blowing bubbles?  

It was easy enough to buy the bubbles through Amazon and/or Oriental Trading in exactly the color bottles needed to match our party 'colors.'  We could have purchased labels pre-printed with my picture, name, etc. on them, but after reading the comments about them on Oriental Trading I figured it was easier to just make my own, and of course I was right!  They were a little more expensive but I am really happy with the way they came out and that is all that matters since it was my birthday :-)
Supplies Needed:
  • Bubble Bottles in White and Red (affiliate links)
  • Avery Self-Laminating Labels - water resistant & tear resistant (affiliate link)
  • Computer
  • Printer
  • Scissors
Directions:​​Create an account on Avery.com and design the label! Note that you need to test print on plain paper before printing on actual labels.  I had to adjust several times before I was ready to print but Avery's program makes it very easy to adjust the printer so that they come out perfect!  I actually designed the word-picture I used on a powerpoint slide and saved it as a jpeg file which I then simply inserted into the Avery program.  
Picture
I created this as one jpeg using powerpoint and then uploaded it into the Avery program to make the labels.
Picture
Tiny bottles of bubbles, but I thought they were perfect!
Picture
Package of 50 Avery Self-Laminating Labels - they are also water resistant which was perfect for the bubbles!
Picture
This is what the labels look like before printing.
Picture
This is the labels after printing. Note, I did several practice prints on plain paper first!
Picture
Then the backing is removed from the laminate.
Picture
The laminate is carefully folded onto the printed labels and smoothed out so there are no air bubbles.
Picture
Laminated labels are ready!
Picture
Gently peel off a laminated label...
Picture
Center it on the bottle of bubbles...
Picture
And wrap it around!
Picture
So simple!
Like bubbles? Then check out our post on DIY Giant Backyard Bubbles!

Thanks for visiting and if you like us, please follow us on social media!

Sincerely,
Picture
1 Comment
    Picture
    Hi there! I'm Kathie, the author behind Creating A Simpler Life blog. I'm excited to share our longterm projects (and planning) toward building our future retirement homestead in the Adirondack Mountains of New York. In the meantime I will be sharing all the other little things we do that are part of creating our simpler life!
    Creating a Simpler Life

    RSS Feed

    Visit Creating A Simpler Life's profile on Pinterest.

    Categories

    All
    Adirondack Crafts
    Chickens
    Conservation
    Crochet
    Do It Yourself
    Energy Savings
    Essential-oils
    Essential-oils
    Food-storage-preservation
    Food-storage-preservation
    Gardening
    Health
    Health-wellness
    Health-wellness
    Homemade-remedies
    Homemade-remedies
    Homesteading
    Homesteading Dreams
    Inexpensive Fun
    Minimizing
    Organization
    Products We Sell
    Recipes
    Recycling
    Saving-money
    Saving-money
    Shopping
    Wedding & Shower DIY

    Archives

    July 2020
    June 2020
    April 2020
    March 2020
    March 2019
    January 2019
    December 2018
    October 2018
    August 2018
    July 2018
    June 2018
    April 2018
    March 2018
    February 2018
    January 2018
    November 2017
    October 2017
    September 2017
    August 2017
    July 2017
    June 2017
    May 2017
    April 2017
    March 2017
    February 2017
    January 2017
    December 2016
    November 2016
    October 2016
    September 2016
    August 2016
    July 2016
    June 2016
    May 2016
    April 2016
    March 2016
    February 2016
    January 2016
    December 2015
    November 2015
    October 2015
    September 2015
    August 2015
    July 2015
    June 2015

mrandmrscorbi@gmail.com
Contact Us - Privacy Policy - Disclaimer
Copyright 2022©Creating A Simpler Life, Inc. All rights reserved. Reproduction in whole or in part without permission is prohibited.
  • Home/About
    • What does OFF-GRID mean?
    • MINIMIZING >
      • Home Size
      • Room by Room
      • Get Organized
      • Household Waste
    • MINIMIZE DEBT, MAXIMIZE SAVINGS >
      • Bills & Other Debt
      • Saving Money
      • Shopping Tips
      • Affordable Fun
    • BACKYARD CHICKENS >
      • The Coop
      • The Chickens
      • Feeding the Chickens
      • Fresh Eggs
    • HOME GARDENING >
      • Building the Garden
      • What We Grow
      • Seeds, Weeds, & More
      • Preservation & Storage
    • DO-IT-YOURSELF >
      • Health & Wellness
      • Simple Cleaning & Tips
      • Crafts & More!
      • Printables
    • CROCHET >
      • IDEAS & MORE
      • VIDEO TUTORIALS
  • HOMESTEAD
    • The 5 Year Plan PLUS! >
      • 2017
      • 2018
      • 2019
      • 2020
      • 2021
      • 2022
    • WHY AN EARTH SHELTERED HOUSE?
    • OFF GRID TINY TRAILER
    • BUILDING our HOMESTEAD from Scratch >
      • BUYING LAND & GETTING STARTED
      • BUILDING THE CONCRETE DOME
      • FROM DOME to HOME
      • SURVIVING OUR FIRST WINTER
    • HOMESTEAD MACHINERY >
      • GENERATORS
      • KUBOTA TRACTOR
      • ATV'S & UTV'S
      • WOOD CHIPPER
      • CHAINSAWS
      • LOG SPLITTER
      • POWER TOOLS
      • SNOWMOBILES
      • AUTOMOBILES
    • BUDGETING THE BUILD
    • SUSTAINABILITY >
      • WATER
      • FOOD
      • SHELTER
      • ENERGY >
        • SOLAR POWER
    • The Adirondacks >
      • Wildlife & Nature
      • Insects & Bugs
      • Things to Do
      • Water Fun
    • ADIRONDACK CRAFTS
  • VLOG
    • 2023
    • 2022
    • 2021