CREATING A SIMPLER LIFE OFF-GRID
  • Home/About
    • What does OFF-GRID mean?
    • MINIMIZING >
      • Home Size
      • Room by Room
      • Get Organized
      • Household Waste
    • MINIMIZE DEBT, MAXIMIZE SAVINGS >
      • Bills & Other Debt
      • Saving Money
      • Shopping Tips
      • Affordable Fun
    • BACKYARD CHICKENS >
      • The Coop
      • The Chickens
      • Feeding the Chickens
      • Fresh Eggs
    • HOME GARDENING >
      • Building the Garden
      • What We Grow
      • Seeds, Weeds, & More
      • Preservation & Storage
    • DO-IT-YOURSELF >
      • Health & Wellness
      • Simple Cleaning & Tips
      • Crafts & More!
      • Printables
    • CROCHET >
      • IDEAS & MORE
      • VIDEO TUTORIALS
  • HOMESTEAD
    • The 5 Year Plan PLUS! >
      • 2017
      • 2018
      • 2019
      • 2020
      • 2021
      • 2022
    • WHY AN EARTH SHELTERED HOUSE?
    • OFF GRID TINY TRAILER
    • BUILDING our HOMESTEAD from Scratch >
      • BUYING LAND & GETTING STARTED
      • BUILDING THE CONCRETE DOME
      • FROM DOME to HOME
      • SURVIVING OUR FIRST WINTER
    • HOMESTEAD MACHINERY >
      • GENERATORS
      • KUBOTA TRACTOR
      • ATV'S & UTV'S
      • WOOD CHIPPER
      • CHAINSAWS
      • LOG SPLITTER
      • POWER TOOLS
      • SNOWMOBILES
      • AUTOMOBILES
    • BUDGETING THE BUILD
    • SUSTAINABILITY >
      • WATER
      • FOOD
      • SHELTER
      • ENERGY >
        • SOLAR POWER
    • The Adirondacks >
      • Wildlife & Nature
      • Insects & Bugs
      • Things to Do
      • Water Fun
    • ADIRONDACK CRAFTS
  • VLOG
    • 2023
    • 2022
    • 2021

Blog

A little bit of anything and everything that's part of
​creating, enjoying, and living a simpler life!
Picture

How to Lower Your Electric Bill NOW!

2/28/2017

0 Comments

 
Picture
Who doesn't want to lower their electric bill? Especially if you live in a location where the electric costs a small fortune like here on Long Island.  But fret not!  In the past four years, with a lot of work and implementing everything you will read here, we were able to lower our yearly KWH usage from 13,634 KWh's in 2013 to 9,670 KWh's in 2013.  That is a savings of 3,964 KWh's per year! Wow! The goal was to get below 10,000 KWh's and we exceeded that.  What did we do and how can you do it too?

First, we used an energy meter to determine how much energy different appliances were using. For example, we used it on our refrigerator and after seeing how much electric it used and comparing that to the new energy star ones, well replacing it was a no brainer.  This saved us the most KWh's. Read about our new Energy Star Refrigerator here.

Second, we decreased how many hours our pool filter runs in the summer. This was a huge savings as well. Read about our
Pool Energy Savings here.

The third huge change was switching to all LED bulbs. This was a bit of an expense to start with, but worth every penny! And since we bought in bulk, it wasn't as costly as it could have been.  Read why you should switch to LED bulbs here.

Read more below about how we decreased our KWh's and lowered our electric bill.

Decreasing Electric Use - Investment required!
The following cost us money, but our electrical use decreased a lot so they were worth it!
  • LED lightbulbs - We switched our entire house to 40 Watt equivalents, called A19's.  They only use 6 Watts each!  We saved a lot of money on our bill with this.   Note - We have some bright white and some warm white  depending upon the room in the house.  I prefer the warm color though. I was able to find the A19 - 40 Watt equivalents that use only 6 Watts each for $3.75 per bulb with free shipping on Amazon if I bought the 12 piece value pack here: VALUE LED BULBS or a 4 piece pack here: LED BULBS.  Its a price I have not been able to beat anywhere else yet!  UPDATE:  The 12 piece value pack which I had purchased on Amazon is no longer available.  The 4 piece pack shown at right is though.  Note that comparable CFL's use about 13 Watts per bulb and of course a regular bulb uses 40 Watts.
  • Power Strips -  We plug multiple items into a strip and keep the strip accessible so it can be switched on or off as needed.  Example: all the video games in the basement are plugged into one strip.  When we play them, we switch in on, when we are done, we switch it off.  This way all the games are not constantly drawing power when they are not being used. Using power strips also protects your appliances from being ruined if there is a power surge. Harbor Freight sells 4 outlet strips for 3.99 (on sale) and 6 outlet strips for 5.99 (on sale) - bonus: they always have 20% off coupons and coupons for something free with purchase! ​
  • Electric Timers - These are great for plugging in Christmas lights or lamps.  Essentially, you set the timer for when they turn on and off.  Every day the timer does it for you.  There's no forgetting to shut something off.  It works for the chicken coop light in the winter as well.  Note that if you have an appliance with a 'soft' electronic button for on/off, the timer will not work. When it shuts it off, it will not turn back on at the set time (just like when the power goes out).  So think about what you want to use it for before you buy it.  We use the INTERMATIC timers.
  • Buying Energy Star Products - when it's worth it.  Energy star products are products that have been independently certified to use less energy, save money, and help protect the environment.  They make it easier for us to identify and potentially purchase an energy saving product that meets certain standards.  However, I think it is really only worth it financially on products that use a lot of energy like the refrigerator, stove/oven, dishwasher, air conditioner, air purifier, etc.  Example:  we just purchased an LED television for the basement.  Its energy guide label (edited for use below) showed a yearly estimated energy use of 76 kWh/yr (Note: we ignore the operating cost because electric bills are different everywhere).  This is based on a typical baseline usage of 5 hours per day. Anyway, this purchase was for our basement and typical use for us would be maybe an hour per day at most.  After doing the math, that meant our estimated use would be about 16 kwh/yr. It was more beneficial for us to save money on the purchase of the television rather than buy an energy star one!  Note: if the television was energy star it would have the picture in the bottom corner.  We have however, gone out of our way to purchase the following energy efficient appliances:
    • ​Refrigerator
    • Dishwasher (low water use too!)
    • Large living room window air conditioner
    • Master bedroom window air conditioner
Decreasing Electric Use - Little to No Money required:
These are mostly common sense, but reminders are needed every day in our house :-)
  • Turn lights off when you leave a room (serious no brainer).
  • Keep less bulbs 'burning' in a room.  For example, if you have a light fixture that holds two or more bulbs, unscrew one or more of them (don't leave them empty it is a fire hazard).  Fixtures with multiple bulbs are common in hallways, bathrooms, dining rooms, kitchens, etc.  We did this for all the lights where you can't actually see the bulbs.
  • Unplug anything that runs on electric when it's not in use.  This is not as easy to do since some outlets can be hard to get to, but for things like cellphones and computer chargers that may be plugged in on counters, this is  a good idea because they are constantly drawing what is called 'Phantom Power.'  One charger won't matter, but multiply this by all of the other items that draw as well, and it does contribute.
  • Hang your clothes to dry!  Especially sheets and towels in the summer.....This can cost nothing and save a lot!  Or you can purchase an inexpensive retractable clothes line and still save!
  • Lower the temperature on the pool heater in the summer (we like it about 85 degrees).  
  • Decrease the amount of time the pool filter runs per day.  Most people run the filter far too long - the goal is to run all of the water in the pool through the filter once a day.  See our Blog post: Reduce Your Pools Energy Use.
  • Close the pool two weeks earlier than normal.  Nobody used it anyway because it was cold.  Our heater only heats the pool if it's hot out.
We are always working to save money on our electric bill and continue to replace high energy use appliances with energy star ones.  The washer and dryer will be soon! Cant wait to see how much we will save :-)
Thank you for visiting!
Check out other ways to Save Money on your Bills & Debt!
Follow us on social media :-)
Sincerely,
Picture
0 Comments

The Art of Repurposing

2/26/2017

0 Comments

 
Picture
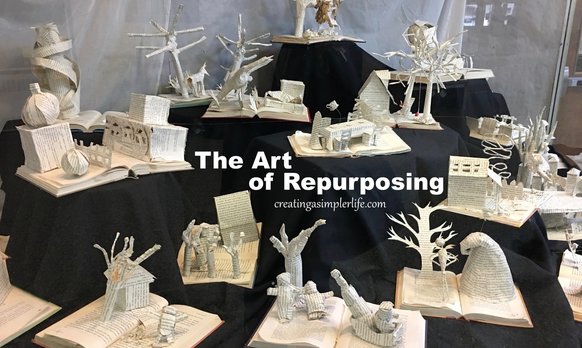
Books repurposed into fairy tale artwork by Commack high school students.
Repurposing - using an item in a way other than its original purpose.  Can be called an art because sometimes it requires a lot of creativity to find a way to repurpose something!

A simple example is reusing Chinese food containers to store magic markers in.  A super creative example is breaking up old cd's to create a mosaic design on furniture or other items. See what I mean? I never would have thought of that on my own! And check out those amazing fairy tale books by high school students above! Super creative :-)

Be careful about what you save to repurpose though! If you don't use it within a certain amount of time, it just takes up space and makes life more complicated!  Either recycle it or give it away
!
Picture
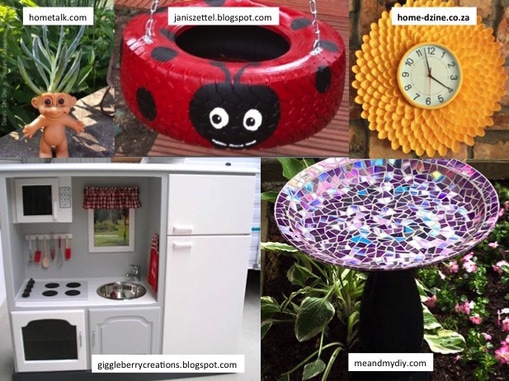
Some Creative Repurposing Ideas:
  • 5 Gallon Water Jugs - great for saving money in!
  • Chinese Food Containers - use for storing pens, pencils, etc.
  • Newspaper Bags - picking up dog waste.  Put your hand in, using it as a glove to pick up the waste, then turn inside out so the waste is inside, and tie it closed!
  • Computer Paper - if it is only used on one side, we cut it in half and staple it in bunches to make pads for lists.
  • Wood - scraps are saved and used for projects or crafts around the house (or firewood if non-toxic).
  • Material - used for crafts, curtains, etc.
  • Ribbon - we keep all ribbons wrapped up in a bin for use on crafts, presents, etc.
  • Plastic jugs (from iced tea or other beverage) - stores chicken feed, seeds, and water.  I really like the heavy duty plastic jugs that have a handle because it makes it easier for me.  We just refill it as needed from the bulk bags we buy.
  • Paper Grocery Bags  - saved and used when needed.
  • Plastic Grocery Bags - used as garbage bags in the small waste containers in the bathrooms. Check out this crochet grocery bag holder.
  • Egg Cartons - used for our backyard chicken eggs, as seed starters, etc.
  • Plastic Zip Lock Bags - cleaned and re-used for household objects (we do not re-use them for food).
  • Glass Jars with Lids - for making our pickles in.
  • Spice Bottles - we just dry our own spices and refill them.
  • Tins - a great way to 'wrap' a present.
  • Milk Crates - we use these in the garage to store pool supplies, garden tools, etc. They stack up nicely too.  Check out how I used them to sun-dry my cherry tomatoes!
  • Plastic 1 lb Coffee Container with Handle & Plastic Snap on Lid - we drill holes in the lid and use the container for saving used coffee grounds in to sprinkle in our garden and another to store winter ice melt salt so it can be sprinkled on the walkways.  We also use one for sprinkling grass seed as well!  One winter we actually had saved so many containers that we decorated them for Christmas, filled them with ice melt salt, and gave them as gifts to our relatives to keep on their front stoops for the winter. They loved the convenience of it..​
  • Ethernet cable - check out this crochet bowl pattern!
  • Dresser Drawers - use for raised garden beds!
Watch this slide-show of repurposing possibilities!
Visit our page Household Waste for additional information
​and
check out our
Pinterest Boards for more great ideas:
Recycling (different ideas on what, how, and where to recycle)
Selling & Donating (find ideas and places to sell and donate all kinds of items!)
Repurposing (a plethora of unique and creative ideas...)
Reusable Items (includes many products you may not have heard of before!)
Thank you for visiting!
Sincerely,
Picture
0 Comments

Simple Crochet  Cowl

2/24/2017

0 Comments

 
Picture
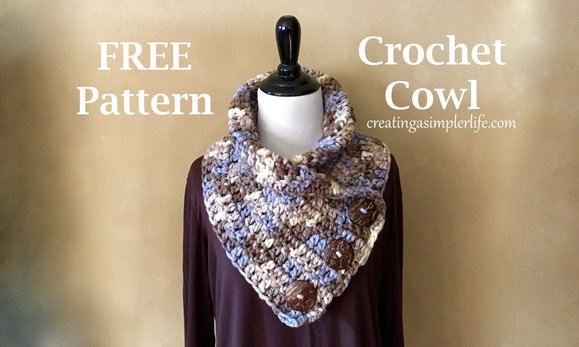
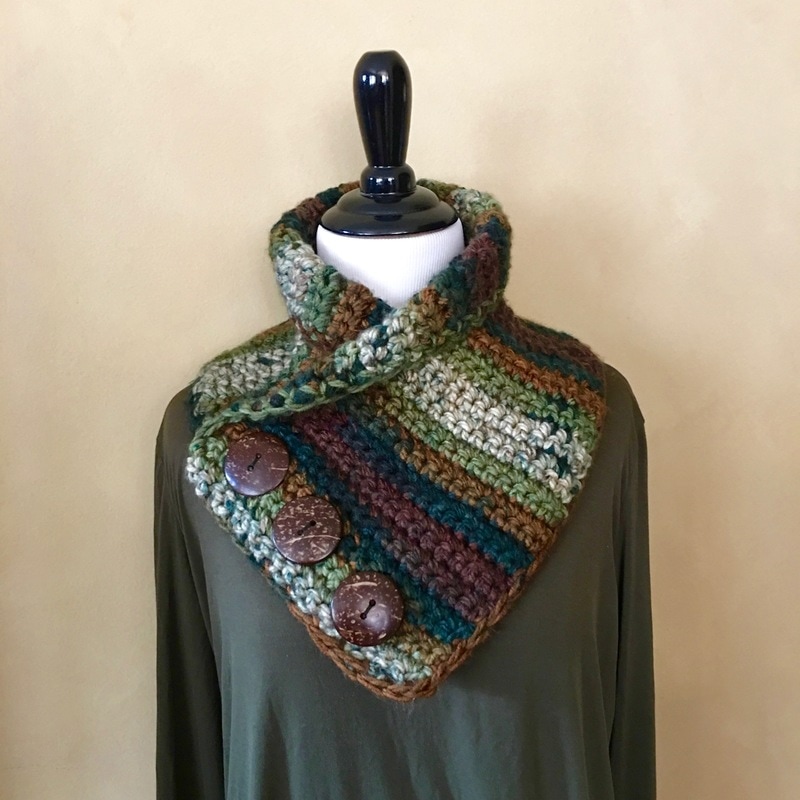
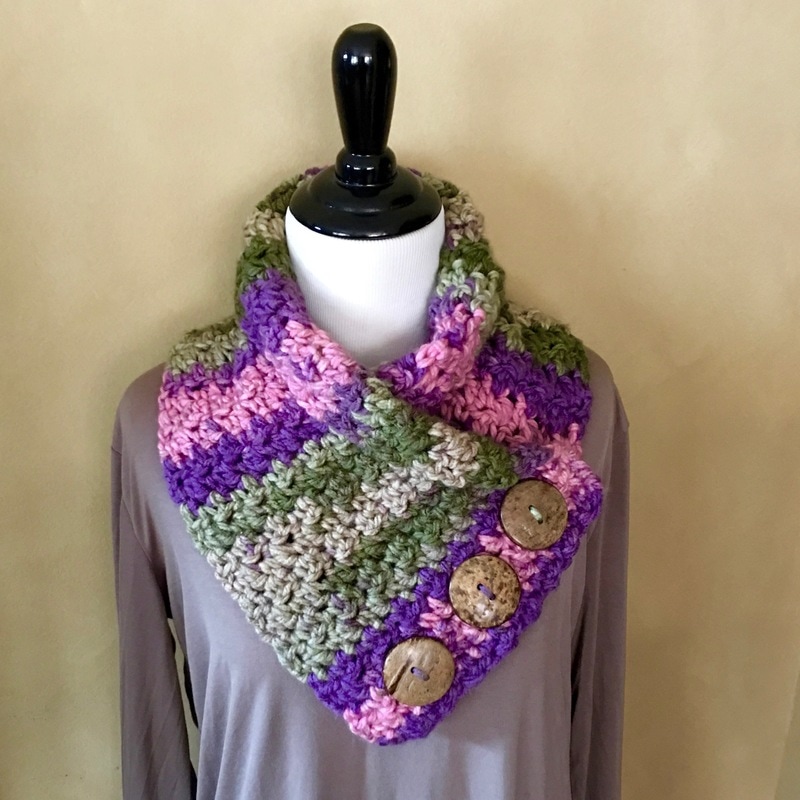
This is a simple crochet cowl that can be completed in just an hour or two while watching television at night.  So quick and simple and so many compliments when worn!

This pattern is a great one for beginners because it only requires two stitches: chains and double crochet. New to crochet and need help? Check out the Crochet Guru on You Tube. She has video tutorials on just about every stitch you could ever want to know!

Supplies Needed for Simple Cowl:
  • 9 mm crochet hook Susan Bates Bamboo handle Hook (affiliate link)
  • 2 skeins Bernat Softee Chunky Yarn (color is Natures Way) (affiliate link)
  • Lion Brand Steel Yarn Needle (affiliate link)
  • Small Scissors
  • Three (3) 1.75" Carved Coconut Buttons from Amazon (affiliate link)​
Picture
Picture
Picture
​Directions for Simple Cowl:
  • Row 1: Chain 68
  • Row 2: Double crochet in 4th chain from hook, and continue dc in each chain accross.
  • Rows 3 - 9: chain 3, turn and dc across. 
  • At end of 9th row, knot off and weave all loose ends.
  • Fold over and sew on three buttons as shown in the picture. The buttons are just for show only and are sewn through both sides. And as you can see from the other cowls below, the buttons can go on either side. Your Choice! The cowl is simply placed over the head to wear.
Picture
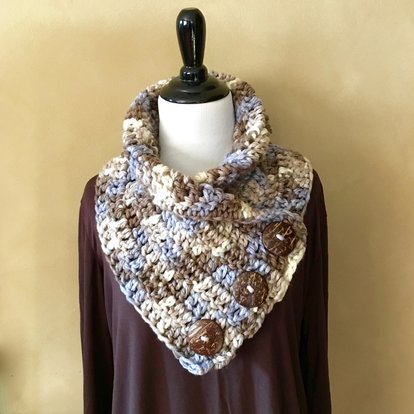
Basic Cowl Dimensions are: 9-10" wide by 32-33" long.
Super simple!
Two more FREE cowl patterns coming soon:
Picture
The "Vicki" Cowl
Picture
The "Patty" Cowl

Thanks for visiting!
Check out our other FREE crochet patterns here!
We have some great Crochet Boards on Pinterest too!

Sincerely,
Picture
0 Comments

Open-Air Chicken Coop Success!

2/22/2017

0 Comments

 
Picture
Well, we actually did it! We tried the open air coop method for the winter to date and so far it is a huge success!  We started out slow (one day at a time) because we weren't sure if it really was a good idea or how our chickens would react. But after only a few weeks we realized they were way healthier than ever before despite the fact that it had reached temperatures below freezing!

Ok, so what is an "open air" coop? Well, actually, the idea is that the coop is basically left open for fresh air all year long. Rather than just having a vent (which we do have at the front and the back), the coop is literally left open even through the winter.  

For our coop (pictured above) we simply just left the inside coop door open all winter (you can't see this door - the screen door you see would actually be closed every night to keep predators out). The little inside door faces south, but is in the shade so really doesn't get as much sunlight as we would have liked. It didn't matter though. The chicken coop was full of great fresh air and the chickens (five of them) shared a perch of 4 feet wide that is just above the inside door opening. They easily kept each other toasty warm on the perch each night!

Our girls are more healthy than ever before! Normally over the winter their combs (on top of their heads) would look pale and sickly. Their feathers would not look healthy and full. Not this year! They  are absolutely thriving, and I believe they are even happier!

The reason we think this method was so successful is the decreased moisture content and increased  fresh oxygen. Normally we would close the coop up each night and all the exhaling done by the chickens would stay inside the little 4 x 4 house with them. This would create a moist environment with high concentrations of carbonic acid (they exhale this) - neither of which is healthy for the hens.

Of course, I don't know what the results would be should the temperature go below zero degrees, however according to the book "Fresh-Air Poultry Houses" it still shouldn't be a problem! In fact, this book provided the general concept of a open air coop to start with and was my inspiration to give it a try! It's a great book and well worth the read!

​Our future hen house will definitely be designed with this fresh-air concept in mind!
Thanks for visiting!
​Please follow us on social media :-)
Sincerely,

Picture
0 Comments

Two Ingredient Muscle Ache Rub

2/20/2017

0 Comments

 
Picture
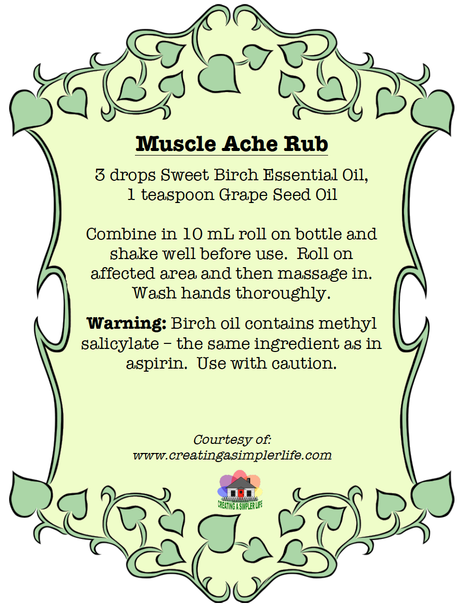
Ugh. My husband and I have been feeling pretty sore these days.  With my daughter getting married in seven months we both are trying pretty hard to get in shape and that means we have been working a few muscles that most certainly are not used to the extra work! 

But they do feel a lot better when we use this simple muscle rub afterwards!  Just two ingredients and someone to help you rub it on.... and, well, you can see why it makes us feel better almost instantly!

See below for purchasing ingredients and supplies through our affiliate: Amazon.com!


*NOTE: the Birch oil in this recipe contains the same ingredient as in Aspirin and therefore should not be used in conjunction with anything containing Aspirin or Ibuprofen!
Please note that essential oils for home health DO NOT replace a doctor or modern day medicine.   However, some can definitely be used to supplement, or, in the case of minor medical issues, be used instead of pharmaceuticals.  

Always use common sense and seek the advice of a medical professional before making any major medical decisions. 
​

Thanks for visiting!  

Check our our other Essential Oil Remedies & Recipes and our Essential Oils Etc. Pinterest Board for other great uses!

​Sincerely,
Picture
0 Comments

Recycling 101

2/18/2017

0 Comments

 
Picture
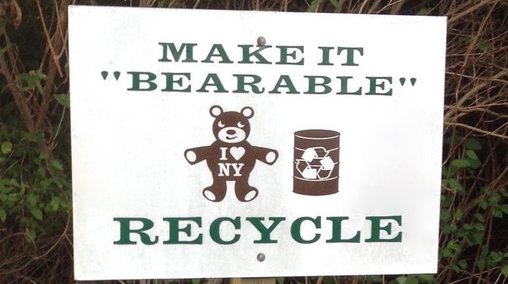
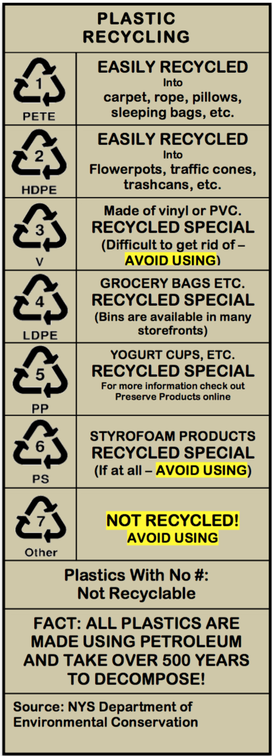
Today recycling is a basic requirement just about  anywhere you live. It can be annoying, but it is important and in some places there are actually penalties for not complying!

​Depending upon where you live the rules are different. Where I live we need to separate our recyclables and put them out on different days.  In other locations they have what is called "single stream recycling" where everything gets recycled together and separated elsewhere. This is in my opinion the best way and if you are lucky enough to live in a 'single stream' town then good for you!  

​Whether you live in a single stream town or an area that needs to be separated like me,  read the series below to learn how to make the process as painless as possible.  And remember, you are helping the Earth and future generations!
  • Read Recycling Part I - At Home Basics to learn more about recycling aluminum and tin cans, plastics #1 and #2, glass jars and bottles, and paper and corrugated cardboard.
  • Read Recycling Part II - Oddball Stuff to learn more about other products that are recyclable in other ways and where and how to get rid of it, and learn about household hazardous waste - stuff that never should end up in the garbage!
Picture
A Note About Recycling:
One thing that drives me crazy is when people reuse recyclable plastic items in ways that make them into non-recyclable items. For example, cutting up plastic bottles and being creative with them is fun, but this removes them from the recycle 'cycle' which in turns creates a need for more new plastic that will itself need to be recycled. Get it? Try to remember to recycle any and all plastic that can be recycled so that we can decrease the need to create more from scratch! Better yet, try to use less, or NO, plastic at all!
Items to Recycle at specific locations:
  • Computers - Apple Re-use/Recycling Program
  • Sneakers - NIKE REUSE-A-SHOE grinds down worn out athletic shoes and turns them into new places to play.
  • Denim Jeans - Recycle through BLUE JEANS GO GREEN
5 cent Deposits:
Don't throw away those nickels!  Recycle the 5 cent deposit bottles.  How do can you make this easy for yourself?  Wash them out immediately and keep a tote/bin in the back of your car.  Line the tote with paper towels so they will dry.  Put them in there at the same time that you take out the garbage or in the morning when you go for a walk. This way when you go grocery shopping, they are first on your agenda and you can't forget them at home!!

Check out our Pinterest boards:
  • Recycling (different ideas on what, how, and where to recycle)
  • Selling & Donating (find ideas and places to sell and donate all kinds of items!)
  • Repurposing (a plethora of unique and creative ideas...)
  • Reusable Items (includes many products you may not have heard of before!)
Thank you for visiting!
​Sincerely,
Picture
0 Comments

Homestead Dream Step 1: We Bought Land!

2/10/2017

0 Comments

 
Picture
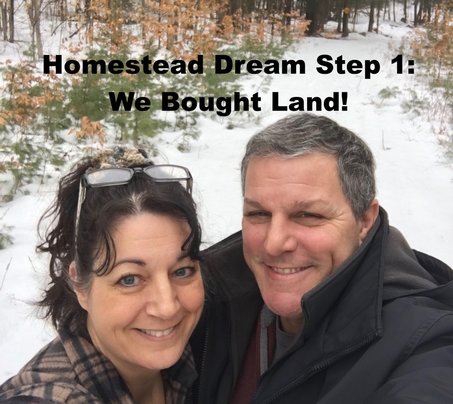
We did it! We finally found a piece of land that met all of the criteria we set for it! Seriously, all of the criteria which was a pretty difficult thing to do. However, patience and perseverance paid off because God provided for us and what we wanted for our future homestead.  After several offers back and forth and several visits to the property to explore it we finally settled on a price and signed the documents. We are now the proud owners of 30 acres of  beautiful, prime Adirondack parkland! We couldn't be happier. Step 1 toward our future homestead is now checked off!

In my last post I talked about Things to Consider Before Purchasing Land (all things we learned as we were looking) but now I want to share with you a comparison of what we wanted verses what we purchased:
  • State and Location: We knew we wanted to live in the Adirondack Park in New York. After looking around at the different counties, we chose Warren County because it is the closest county to Long Island where most of our friends and family still reside. It is also great because it is where my parents reside! We ended up purchasing our land in a small town about 20 minutes outside of Lake George in Warren County, NY. That is approximately 4.5 hours from Long Island and 40 minutes from my parents who live to the north. Perfect!
  • Willing to Spend: After doing some research we discovered that land can vary between $700 and several thousand dollars per acre. We decided we wanted to stay between $1,000 and $2,000 with a maximum total of $50,000. Our final purchase was 30 acres for $40,000 which works out to about $1,333 per acre!
  • Land Use:  We needed to have land that was in a rural location to allow for animals, farming, hunting, snowmobiles, ATV's, and the most difficult: sub-dividing so we could give some land to each of our children. In the Adirondack park there are many rules and regulations with respect to what you can and can't do and where you can and can't do it. The Citizens Guide was our most important resource. The land we purchased has 3.2 acre zoning which means that we can give a minimum of 3.2 acres to each of our children and still have plenty for us!
  • How Much Land: We were looking for anything greater than 20 acres.  And you already know we purchased 30, but we looked at properties up to 70!
  • Distance to Town: This was important to us since we plan on living out the rest of our lives on our homestead. Our land is 5 minutes from our small town that consists of a market, post office, library, restaurant, bar, fire department, and church.  We are 20 minutes from a larger town that actually has several gas stations, a medical center, many take out and sit down restaurants, a lumber yard, and more.  Even better, we are only about 30 minutes from a larger town with a  mall and major department stores and a large hospital. Perfect!
  • Surface Water: This was negotiable as long as we could drill a well, so finding land with a small creek was a huge bonus! It was running decently in the fall and I am sure the spring will see it run even better. We just need to see what happens in late summer, when we have a feeling it is minimal based on the fact that it is listed on the property as a seasonal stream. Being seasonal is good for us because it is therefore not regulated by the DEC or the Adirondack  Park. 
  • Drilling a Well: Yes this is possible. There are many wells around so there is a very high probability of finding groundwater.
  • Septic: We did not do an official perk test, however we did our own perc test and did research with respect to septic systems in the town and county. Fortunately for us the county we are purchasing in is very thorough and up do date with all research and records. All the soil has been tested and there are maps and data describing everything. The soil on our land is a bouldery sandy loam (good permeability) and as long as we choose a homesite with a gentle gradient we should be fine. If not we have the option of bringing in soil to make it possible. Of course this will cost more, but I really don't think it will be necessary.
  • Adirondack Park Rules:  We are fortunate that we found a piece of land in 3.2 acre zoning in a town that does not have it's own strict zoning laws and rules to follow. This makes it easier for us to be able to do what we mostly want as long as we meet the Adirondack Park Guidelines.
  • Soil and Slope: The land was perfect for our needs because it has some steep areas, some gentle slopes, and some relatively flat areas.  There are some great building sites for our earth sheltered home on a gentle south facing slope and also plenty of other sites for our children to build should they choose to.  The soil is mostly a bouldery sandy loam which is pretty much what you get in the Adirondack Mountain region.  The soil can be made richer depending upon what we want to do with it, but after some research I found many plants that thrive in this planting zone in those soils. This type of soil, so long as it is a gentle or flat area, is also perfect for septic percolation.
  • South Facing Slope: This was absolutely non-negotiable since we need to make use of passive solar heating and as much sunlight as possible for our earth sheltered home.  We visited many properties that had north facing slopes. The site we chose on this land is actually a little to the south west, but it will work perfectly for our plans as the house can still face due south. 
  • Flooding: Spring runoff can be a big problem in the Adirondacks. Many properties we looked at were in valleys that could potentially flood. We wanted to avoid this if at all possible and we wanted to have a view as well so buying land at a higher elevation was important to us. In the Adirondacks any land over an elevation of 2500 feet is subject to additional regulations, but that was pretty easy to avoid. The land we purchased is approximately 700 feet in the South to a little more than 1,400 feet in the Southeast corner where we want to make our "Viewing Area."
  • Local Building Codes and Rules: The town we purchased in requires a permit, but they follow the rules of the Adirondack park. To our knowledge they do not have plans to create their own codes and rules any time soon. 
  • Road Frontage: We have 1,125 feet of road frontage. This allows for many potential roads into the land. 
  • Electric at the Road: There is electric at the main road that can, and will, be brought in despite the fact that we plan on supplementing with solar (another reason for a south facing slope). 
  • Cell Phone Service: There is currently no cell service anywhere on the land. We did try to see if there was any potential for boosting as we learned from Mother Earth News, but as of the time of purchase the answer to that was a resounding no. However, we did get a slight signal to retrieve messages and get text's 5 minutes away at the restaurant in town.  On our land there are other options such as using satellite, however we believe that there might be service in the area over the next 5 years or so anyway so this was not a huge concern. A regular phone line and walkie talkies will do for now.
  • Internet and/or Cable: No, no, no. The only option as of now is satellite, however we did meet someone from the local town recently who said the town was beginning to provide their own cable service. Since we are not too far from our own town, this may be a future possibility.   
  • Mineral and Water Rights: These are owned by the property owner, but it is important to make sure that there is not a lease signed by the previous owner. This is not much of an issue in the Adirondacks due to their regulations. The only concern would be timber, and to our knowledge no lease existed on our land.
  • Property Minerals and Rocks:  The Adirondack are mostly metamorphosed Igneous and Sedimentary rocks. There is a lot of gneiss on our land.  There is also a concern regarding radon gas, especially since we will have an earth sheltered home (radon gas usually leaks into basements). This is easily and inexpensively remedied at the time of construction through ventilation pipes.  Other than that there is no fracking, little clay in the soil so minimal landslides, and no Karst topography.
  • Other considerations: We can hunt on our own 30 acres, fish and canoe locally in the Hudson River, there are snowmobile trails on our land we can't wait to make use of, and so many more wonderful things we can't wait to enjoy! However, there is no garbage  pick up (we will need to go to the dump) and no postal delivery (will require a P.O.Box at the local post office). But, the road we are on is well maintained and plowed regularly. We are 5 minutes or less from the local fire department, there is a local ambulance, a small market is 5 minutes away and a grocery store is 20 minutes. There is a medical center, dentist, and more within a 20 minute drive, and a large hospital is only about 35 minutes.  What more could we want?
​Next Big Step?
​A road!

Next small step? An ATV!
ATV Accomplished! Read more here :-)

Thanks for visiting!
Read more about our Future Homesteading Dreams here!
​Sincerely,
Picture
0 Comments

Crochet To-Go Cup Cozy

2/8/2017

0 Comments

 
Picture
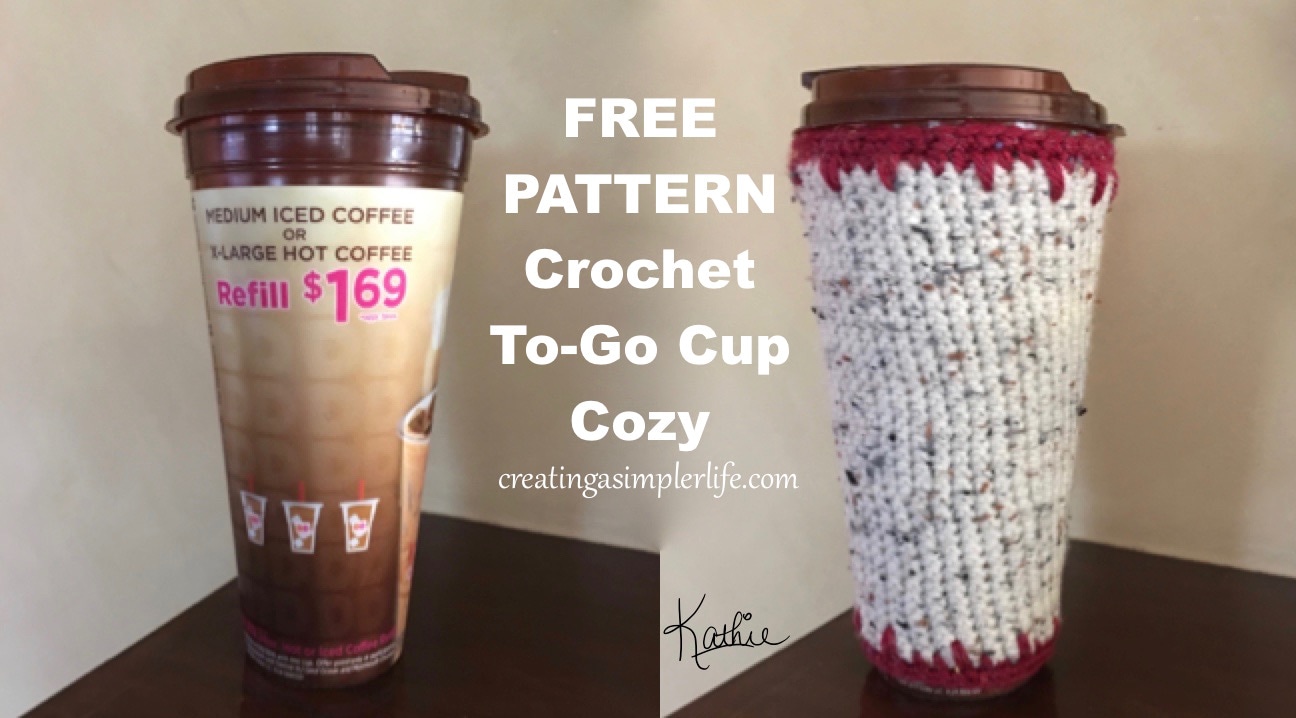
I simply had to have it. I couldn't find this size, and type, to-go cup anywhere else. All the 24 oz to-go cups I could find were more like thermoses with insulating properties, handles, and weird shapes and lids. I wanted a cup that is light weight, easy to clean, and was as close to being like the styrofoam cups with lids that I was so used to using for so many years. Yup, I am talking about the Dunkin Donuts 24 oz reusable to-go cup. To my knowledge they only offer it once a year and I knew I had to have it despite the fact that I am not fond of Dunkin' Donuts coffee. I simply wanted their cup so when they became available again, we went there with our coupon in hand and purchased it! It is  my absolute favorite to-go cup! I use it every morning on my way to work when I stop at the local gas station and fill it up for $1.25 - less than what Dunkin' Donuts would have charged me! 

The only problem with the mug was, well, it says Dunkin' Donuts on it. Of course I had to change it with a nifty little crochet cozy! It was super simple to make using some of my leftover yarn around the house.  
Picture
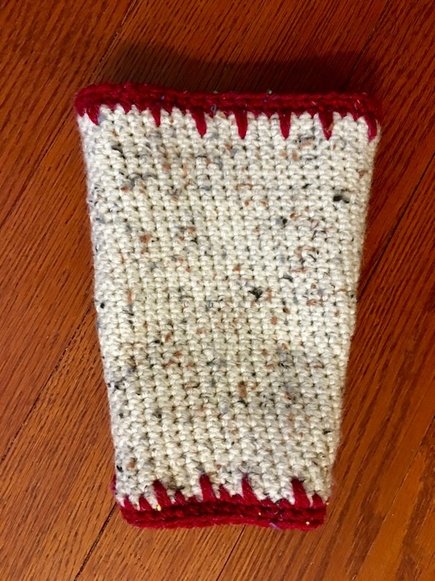
Dimensions for 24 oz. Cup: 3.75" width at bottom, 6.0" width at top, and 7.5" high.
Supplies needed:
  • 4.5 mm hook
  • Yarn needle
  • Scissors
  • About 5-6 ounces of any color yarn (I used Red Heart that I already had)
  • About 1 ounce any other color yarn for top and bottom

Here is the basic pattern made with red heart yarn:
  • Chain 30 and connect to make a loop (Bottom diameter measures approximately 3.75".)
  • Single crochet in each stitch around, mark your start, and continue around and around with the single crochet. Every 3 rows increase by one (just do 2 single crochet in one stitch)
  • Continue for approximately 37 rows (this will depend upon how tightly you crochet). You basically want it to about 7.5" inches high. You can try it on the cup as you go. You want the holder to fit very tightly because it will stretch out over time (top diameter measures approximately 6.0".).
  • When it is the right height, knot off. Turn it inside out (the back side will show). I did this because I wanted a different look. If you prefer the other side, then use that instead!
  • Using an alternate color slip knot to attach to the top and single crochet around as follows: do two regular single crochet in the next two stitches, then do one long single crochet (go down 2 rows and insert). Repeat pattern all the way around.
  • Connect, chain one and single crochet around one more time. Knot off.
  • Turn the holder around and do the exactly the same thing around the entire bottom of the holder.
  • Use the needle to weave all loose ends. 
Super simple and I love it!

Thanks for visiting!
Check out our other FREE crochet patterns here!
We have some great Crochet Boards on Pinterest too!

Sincerely,
Picture
0 Comments

Are You Thinking About Buying Land?

2/4/2017

0 Comments

 
Picture
We have been looking to buy land for a homestead for many years now and boy have we learned a lot as we have looked at many different properties over the years. Who knew there was so much to think about before making a decision?  We certainly didn't so I just want to share some of the more important things we have learned in our search. 
What we learned to consider when looking for land:
  • What state and location are you looking to buy? Consider retirement, taxes, family, etc.
  • How much are you willing to spend? Naturally the average cost per acre varies in different locations. Make sure you do your homework so you know if you are getting a good deal or not. This also helps when making a fair offer if you aren't willing to pay the asking price.
  • What are you looking to do with the land? Are you going to have animals, farm, hunt, etc? Are you thinking about subdividing it to share with your children?
  • How much land do you need? This will depend upon what you plan on doing with the land.
  • How far from a decent size town are you willing to be? Think shopping, hospital, etc.
  • Do you want water on the land? Streams, ponds, springs, etc. are good, but check local building codes and regulations with regards to fresh water.  
  • Can you drill a well for groundwater? If there is no water on the land, and none under the land, then are you willing to bring it in or have it delivered? Of course this all depends upon what your plans for using the land are.
  • Will the property perk? This means can you put in a septic system. Of course there are other options if you can't, but they get more expensive and you need to know ahead of time if  you are willing to go down that road.
  • Are there any governmental and/or environmental controls over the land? If there are any areas classified as wetlands on the land, the DEC or another agency will probably have a say as to what you do with it. 
  • Is the soil and the land usable? Cliffs, steep slopes, sandy or clayey soil, and too many rocks may not be conducive to your plans for using the land. Even if they are, are you O.K. with choosing native plants or having a driveway you need a winch to get up in the winter? 
  • If you are looking in a mountainous region, what direction do you want the slopes to face? It is usually preferable, and therefore more expensive, to purchase a south facing slope because it gets more daily sunlight (think solar heating and power). However, if you want the snow to stay longer, or prefer cooler temperatures, then the a north facing slope may be better. 
  • What about flooding? If you are in a mountainous region, do you want to be up the mountain or in the valley? If you are near a river or lake, does it flood and how will this affect your plans?
  • What about local building codes and rules? Think about how many structures you might need such as a home, garage, barn, maybe a guest house, etc. Zoning laws will affect what and where you can build.
  • Do you want road frontage? If the land does not have road frontage for easy access, you need to make sure there is an access through someone else land specifically stated on the deed (usually called an easement). Landlocked property is useless unless you can fly in.
  • Do you want to live on or off the grid? Are there utilities at the road that can be brought in? If the homesite is very far you need to consider the expense of bringing in the electric or living off grid instead.
  • Is cell phone service necessary? Many remote locations have no cell service at all. Some have it nearby and you may be able to boost it. The potential for boosting can be tested using your cell phones field test mode. Read more about Remote Cell Service at Mother Earth News.
  • What about internet and cable services? If these are not available, satellite is an option but you will probably need to be willing to sacrifice the speeds at which you are used to!
  • What about the mineral and water rights beneath the land? Will you own them? If not, who will and what are their rights vs. yours? The same thing goes for timber rights. In some cases these rights have been sold and you need to know this before you make a decision to buy.
  • And what exactly are the minerals and rocks made of on your property? Is it unconsolidated sediment that will move in an earthquake? Does it release radon, a cancer causing gas that is easily remediated if you are aware ahead of time? Is there a lot of clay that can expand in heavy rains and lead to landslides? What about fracking, is there gas that someone might want to frack for beneath it? And of course you would want to know if it is Karst topography that leads to sink holes. 
  • Other considerations: natural disasters, local wildlife and hunting laws, seasonal temperatures, state trails for hiking and snowmobiling, dumping, mail and package delivery, winter road maintenance, ambulance and fire services, etc..
Wow! Who knew there was so much to think about...and this isn't even everything!  Thankfully we learned all of this before finding the land we finally purchased to build our future homestead on!  
Read Homestead Dream Step 1: We Bought Land!

One last piece of advice:
​Get out and walk or ride (think ATV) the land! If you can't, then find someone who can do it for you. There is no better way to really know if you want to buy it than to see it and experience it first hand!
​
Thanks for visiting!
If there is anything important you think I have missed please comment or send me an e-mail.
​I am always interested in learning!
Sincerely,
Picture
0 Comments
    Picture
    Hi there! I'm Kathie, the author behind Creating A Simpler Life blog. I'm excited to share our longterm projects (and planning) toward building our future retirement homestead in the Adirondack Mountains of New York. In the meantime I will be sharing all the other little things we do that are part of creating our simpler life!
    Creating a Simpler Life

    RSS Feed

    Visit Creating A Simpler Life's profile on Pinterest.

    Categories

    All
    Adirondack Crafts
    Chickens
    Conservation
    Crochet
    Do It Yourself
    Energy Savings
    Essential-oils
    Essential-oils
    Food-storage-preservation
    Food-storage-preservation
    Gardening
    Health
    Health-wellness
    Health-wellness
    Homemade-remedies
    Homemade-remedies
    Homesteading
    Homesteading Dreams
    Inexpensive Fun
    Minimizing
    Organization
    Products We Sell
    Recipes
    Recycling
    Saving-money
    Saving-money
    Shopping
    Wedding & Shower DIY

    Archives

    July 2020
    June 2020
    April 2020
    March 2020
    March 2019
    January 2019
    December 2018
    October 2018
    August 2018
    July 2018
    June 2018
    April 2018
    March 2018
    February 2018
    January 2018
    November 2017
    October 2017
    September 2017
    August 2017
    July 2017
    June 2017
    May 2017
    April 2017
    March 2017
    February 2017
    January 2017
    December 2016
    November 2016
    October 2016
    September 2016
    August 2016
    July 2016
    June 2016
    May 2016
    April 2016
    March 2016
    February 2016
    January 2016
    December 2015
    November 2015
    October 2015
    September 2015
    August 2015
    July 2015
    June 2015

mrandmrscorbi@gmail.com
Contact Us - Privacy Policy - Disclaimer
Copyright 2022©Creating A Simpler Life, Inc. All rights reserved. Reproduction in whole or in part without permission is prohibited.
  • Home/About
    • What does OFF-GRID mean?
    • MINIMIZING >
      • Home Size
      • Room by Room
      • Get Organized
      • Household Waste
    • MINIMIZE DEBT, MAXIMIZE SAVINGS >
      • Bills & Other Debt
      • Saving Money
      • Shopping Tips
      • Affordable Fun
    • BACKYARD CHICKENS >
      • The Coop
      • The Chickens
      • Feeding the Chickens
      • Fresh Eggs
    • HOME GARDENING >
      • Building the Garden
      • What We Grow
      • Seeds, Weeds, & More
      • Preservation & Storage
    • DO-IT-YOURSELF >
      • Health & Wellness
      • Simple Cleaning & Tips
      • Crafts & More!
      • Printables
    • CROCHET >
      • IDEAS & MORE
      • VIDEO TUTORIALS
  • HOMESTEAD
    • The 5 Year Plan PLUS! >
      • 2017
      • 2018
      • 2019
      • 2020
      • 2021
      • 2022
    • WHY AN EARTH SHELTERED HOUSE?
    • OFF GRID TINY TRAILER
    • BUILDING our HOMESTEAD from Scratch >
      • BUYING LAND & GETTING STARTED
      • BUILDING THE CONCRETE DOME
      • FROM DOME to HOME
      • SURVIVING OUR FIRST WINTER
    • HOMESTEAD MACHINERY >
      • GENERATORS
      • KUBOTA TRACTOR
      • ATV'S & UTV'S
      • WOOD CHIPPER
      • CHAINSAWS
      • LOG SPLITTER
      • POWER TOOLS
      • SNOWMOBILES
      • AUTOMOBILES
    • BUDGETING THE BUILD
    • SUSTAINABILITY >
      • WATER
      • FOOD
      • SHELTER
      • ENERGY >
        • SOLAR POWER
    • The Adirondacks >
      • Wildlife & Nature
      • Insects & Bugs
      • Things to Do
      • Water Fun
    • ADIRONDACK CRAFTS
  • VLOG
    • 2023
    • 2022
    • 2021