CREATING A SIMPLER LIFE OFF-GRID
  • Home/About
    • What does OFF-GRID mean?
    • MINIMIZING >
      • Home Size
      • Room by Room
      • Get Organized
      • Household Waste
    • MINIMIZE DEBT, MAXIMIZE SAVINGS >
      • Bills & Other Debt
      • Saving Money
      • Shopping Tips
      • Affordable Fun
    • BACKYARD CHICKENS >
      • The Coop
      • The Chickens
      • Feeding the Chickens
      • Fresh Eggs
    • HOME GARDENING >
      • Building the Garden
      • What We Grow
      • Seeds, Weeds, & More
      • Preservation & Storage
    • DO-IT-YOURSELF >
      • Health & Wellness
      • Simple Cleaning & Tips
      • Crafts & More!
      • Printables
    • CROCHET >
      • IDEAS & MORE
      • VIDEO TUTORIALS
  • HOMESTEAD
    • The 5 Year Plan PLUS! >
      • 2017
      • 2018
      • 2019
      • 2020
      • 2021
      • 2022
    • WHY AN EARTH SHELTERED HOUSE?
    • OFF GRID TINY TRAILER
    • BUILDING our HOMESTEAD from Scratch >
      • BUYING LAND & GETTING STARTED
      • BUILDING THE CONCRETE DOME
      • FROM DOME to HOME
      • SURVIVING OUR FIRST WINTER
    • HOMESTEAD MACHINERY >
      • GENERATORS
      • KUBOTA TRACTOR
      • ATV'S & UTV'S
      • WOOD CHIPPER
      • CHAINSAWS
      • LOG SPLITTER
      • POWER TOOLS
      • SNOWMOBILES
      • AUTOMOBILES
    • BUDGETING THE BUILD
    • SUSTAINABILITY >
      • WATER
      • FOOD
      • SHELTER
      • ENERGY >
        • SOLAR POWER
    • The Adirondacks >
      • Wildlife & Nature
      • Insects & Bugs
      • Things to Do
      • Water Fun
    • ADIRONDACK CRAFTS
  • VLOG
    • 2023
    • 2022
    • 2021

Blog

A little bit of anything and everything that's part of
​creating, enjoying, and living a simpler life!
Picture

Our New Hobby is.....KAYAKING!

10/13/2018

0 Comments

 
We recently purchased two kayaks and having never kayaked before we really did not know what to expect. However, the truth is....we are absolutely hooked!  

We love it and can't wait to get out there every chance we get now, and especially to get a chance to go fishing :-)

The Kayaks cost a little money to start with (though these were a relatively inexpensive model), but if we take care of them they will literally last forever so they were definitely a worthy purchase that will be fun for a very long time to come.

They are light-weight and can easily be transported using a small trailer or in the back of our pick up truck so we can just pick them up and go to any local lake or river we choose at any time we choose. Of course, in the Adirondack park there are so many FREE access points for people to drop in their kayaks and go that we could choose a different one every time and never run out of options.

There were a lot of reviews online about these particular kayaks and we took the time to reach through each and every one before deciding that these were still the best kayaks for us. In the video we address the common complaints and show you how we either fixed them, or discuss why we didn't have an issue with it. 

Check out our YouTube video review and watch us paddle around for the first time ever!

You won't believe how easy it really was (And how great these kayaks are too!).

Oh, and did I mention the best part? THEY ARE MADE IN THE USA!

Click here to watch the review on YouTube!
Made in the USA clip art from ​http://www.clker.com/clipart-418724.html
Check out our second trip as beginners!
And check out how we fixed the tracking problem!
Thanks for visiting!
Sincerely,

Picture
0 Comments

Our First Campout on Our Land

11/21/2017

0 Comments

 
Picture
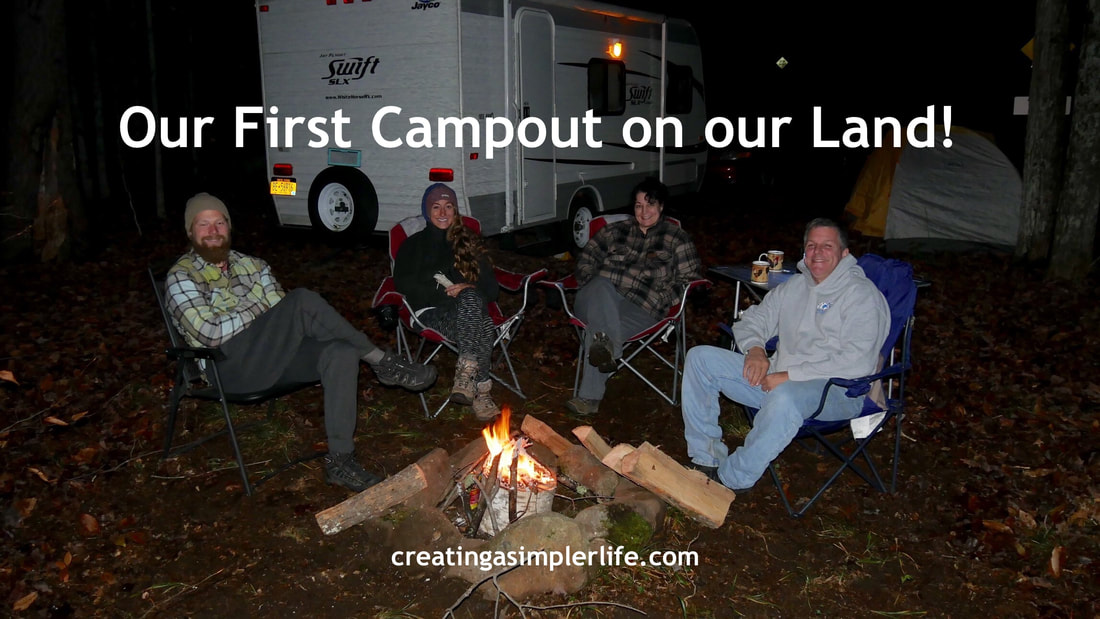
There is simply nothing that compares to sleeping under the stars (sort of) on your own land for the first time! That is exactly what we did recently and I can honestly say we really didn't want the weekend to come to an end. With no cell phone service, no electric and no running water (other than our little creek) we were in our glory staying overnight. Even with the temperatures dipping down below 27°F our newlywed children were perfectly fine sleeping in their little tent!  

None of us can wait until we can do it again! Really :-)
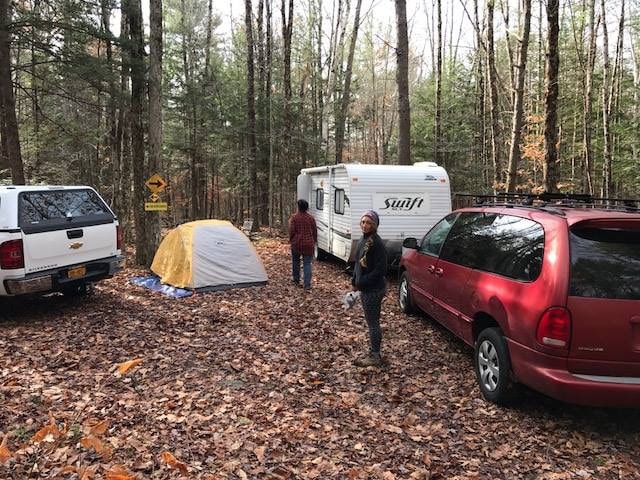
Picture
Campsite is set!
Picture
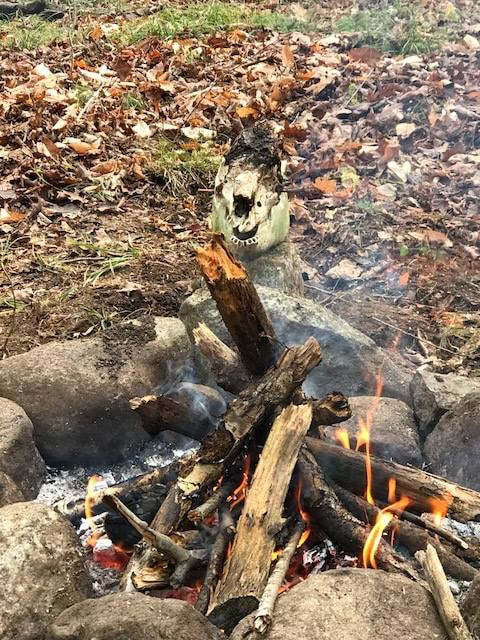
We cleared an area and used some rocks to make a campfire ring. Check out the skull we found on our land!
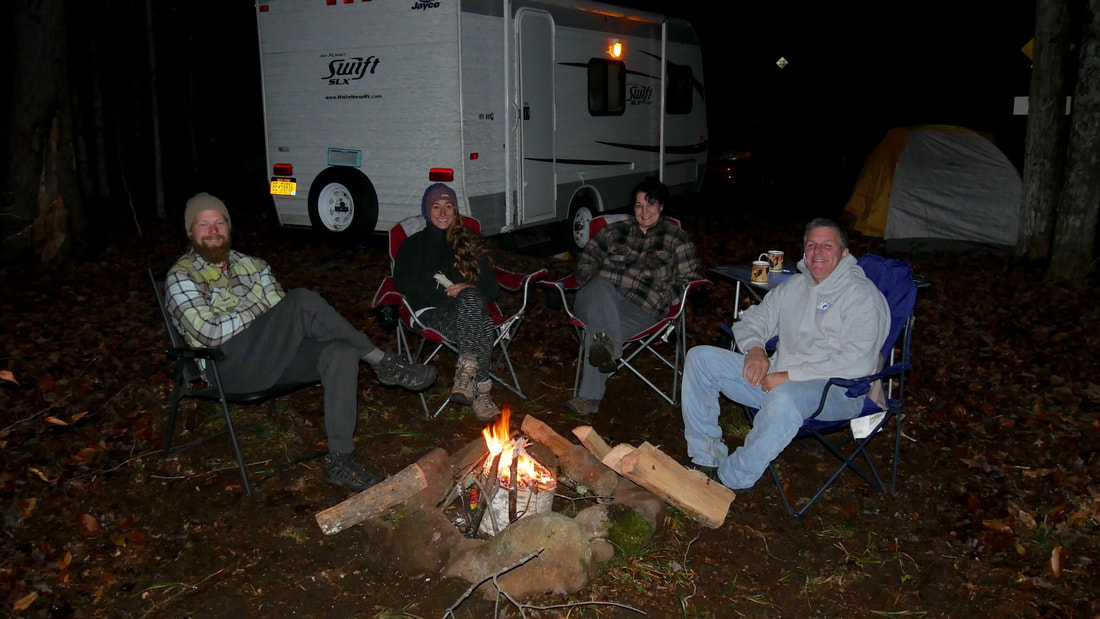
Picture
A toasty campfire!
We loved camping out so much that we can't wait to do it again!
Read more about our land
and our future Homesteading Dreams here.
Sincerely,
Picture
0 Comments

Making Our RV Feel Like Home!

10/10/2017

0 Comments

 
Picture
This post contains affiliate links to Amazon.com.
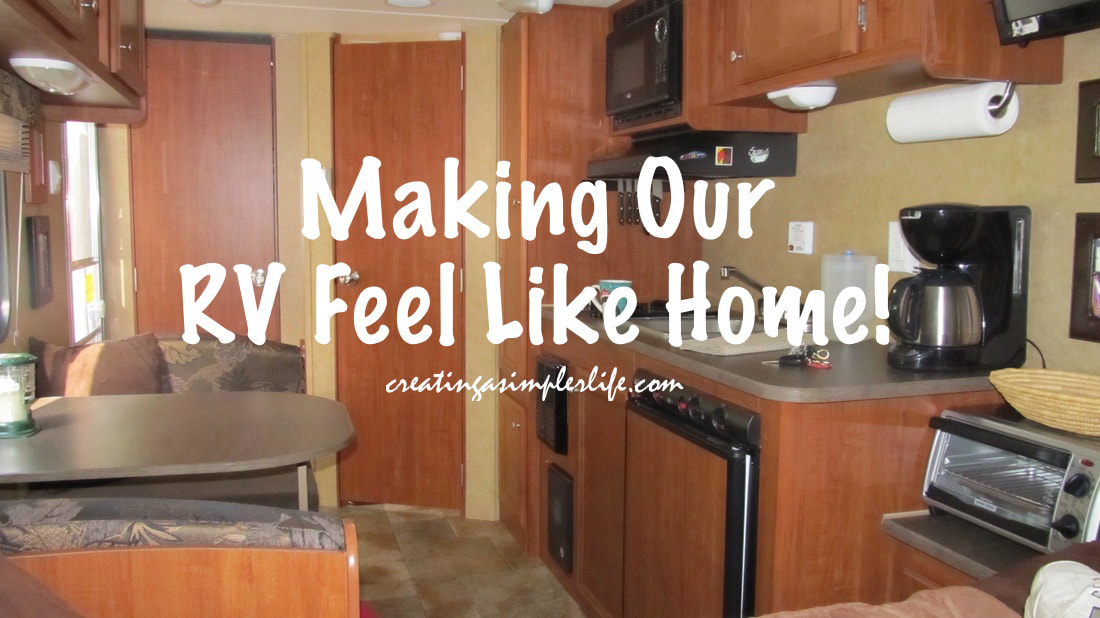
Having an RV (recreational vehicle) is awesome! It gives us the freedom to be able to travel and always have a comfortable place to sleep with no worries. It is also super convenient to just pull onto the side of the road if  you have to go to the bathroom! No more painful waits for the next rest area or searching for a gas station with a working bathroom.  Maybe that's just me. Either way having an RV with all the comforts of home and stocked with just about everything  you need for traveling makes traveling simply delightful!

​However, our RV, being inexpensive and small, did not come with most of the comforts we wanted nor did it have a lot of space for all of the above, so here is what we did to make it like home for us.

1. The Bed
We chose an RV that had a bed that never needed to be 'broken down.' In other words, in many smaller RV's the bed is also the kitchen table and benches.  We made sure this was not the case for us so even though our RV is small (18') it has a permanent bed. The bed also had to be a decent size. Our RV is a queen size bed and this was very important to us. 
Picture
  • ​To make it more homey we made our own custom headboard. Note that the bed was meant to be slept in with our heads at the other end, but we couldn't cover up the emergency escape window so we covered the window at the other end instead. To make it we simply cut a piece of Luan to size, covered it with a foam, and then stretched material over it using staples to hold it all down. Now we have a soft back to sit against while in bed. Note that because it shows through the window we also covered the back to look nice! Here is a great DIY of how to make a foam headboard, but note that we used 1" velcro to hold it to the wall instead and had to make a few customizations so that it would fit our trailer bed instead (we left the bottom part off).
  • Next we improved upon the mattress.  The mattress it came with is thin and uncomfortable so we purchased a 3" foam mattress topper with gel cooling. It makes the bed so amazingly comfortable we don't even want to get out!
  • Last but not least, we purchased a nice matching comforter set and some extra decorative pillows. I don't know, it just looks nice and is easy to 'make' on the fly (check out my post on Ways to Simplify Your Life Now).
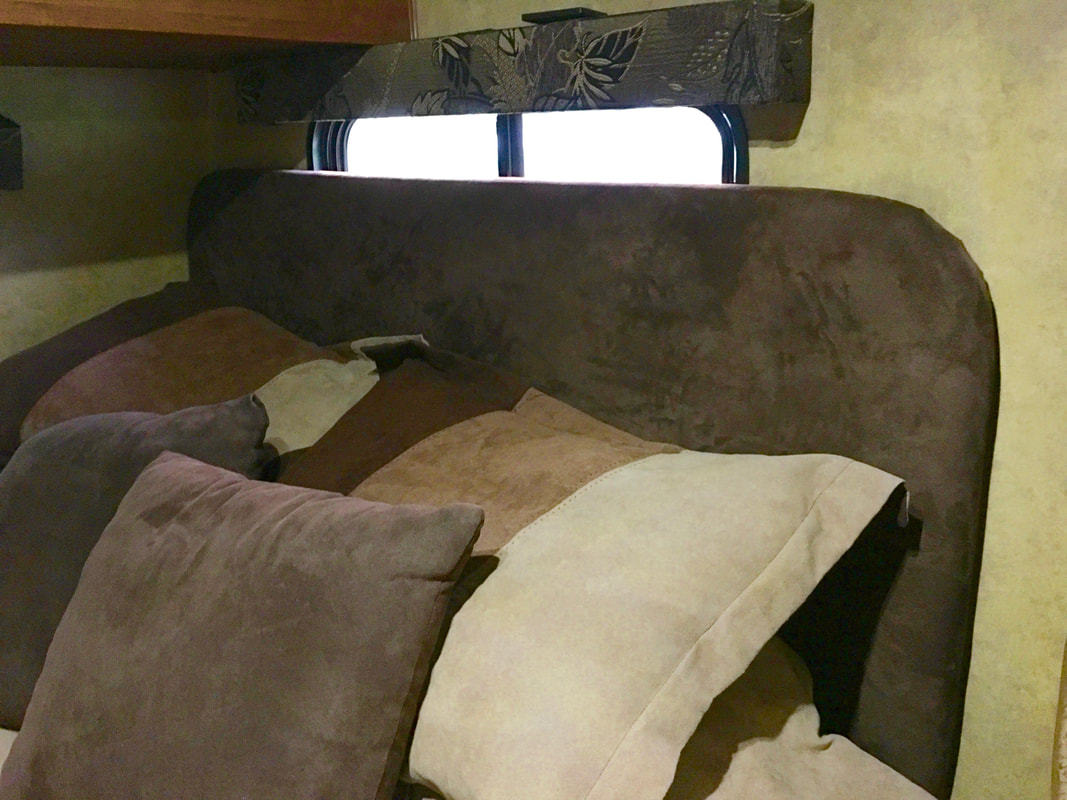
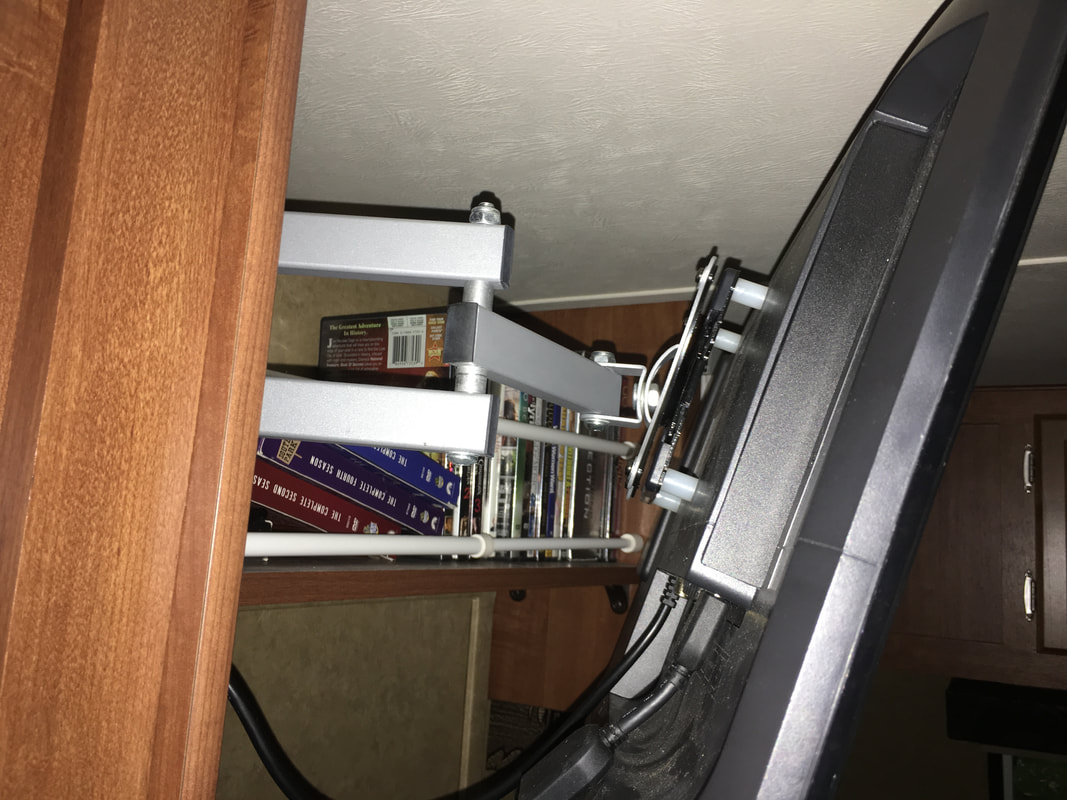
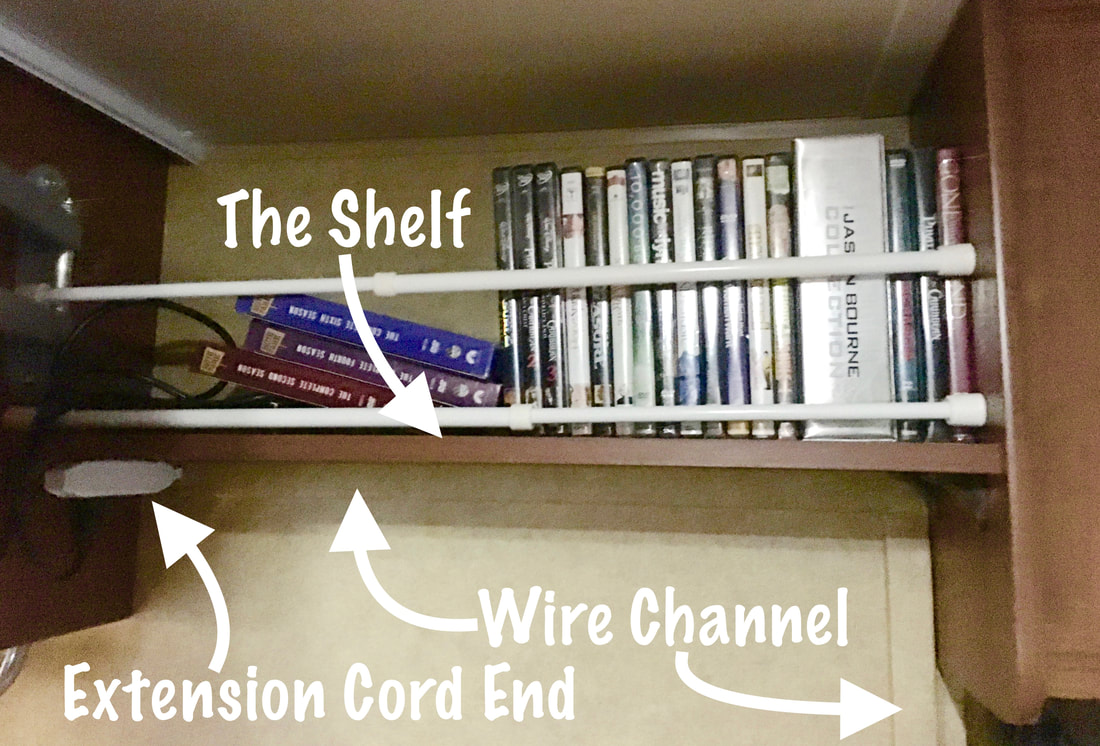
2. The Entertainment Center
OK, I know it is not camping if you have an entertainment center, but really. It's not exactly camping to stay in a nice trailer with the comforts of home anyway!  At our age, we just don't care. We want to travel all around the country and at the end of the day we like to relax and watch some TV. Even if it is just a DVD, we don't care. It is relaxing. So Since our RV didn't come with an entertainment center we had to make our own!
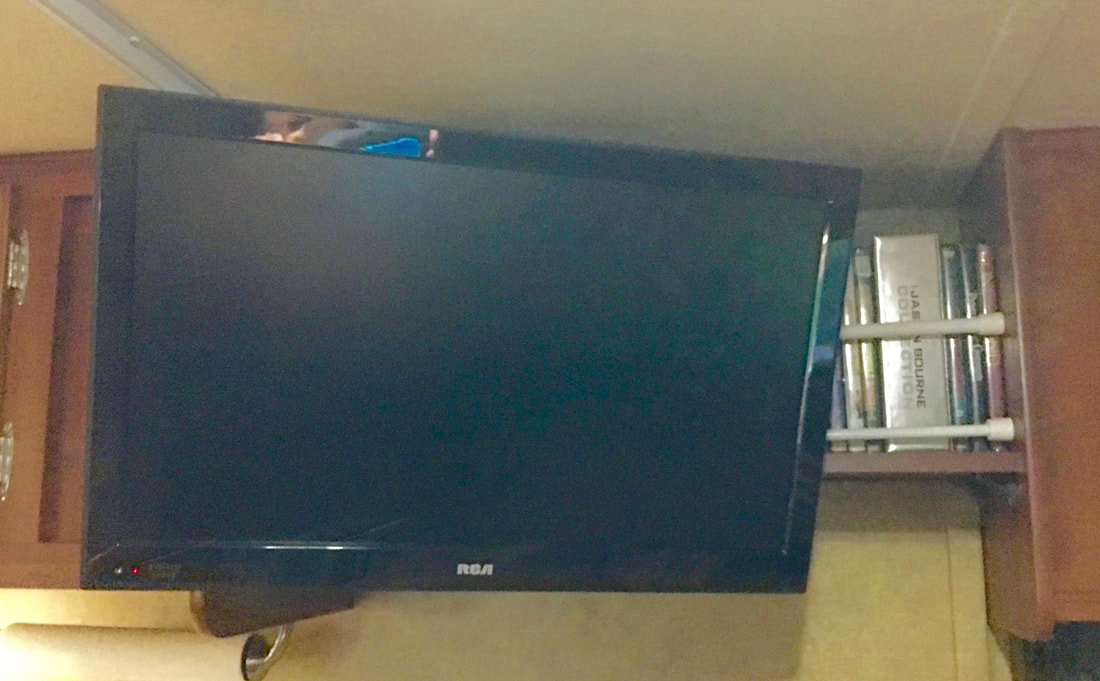
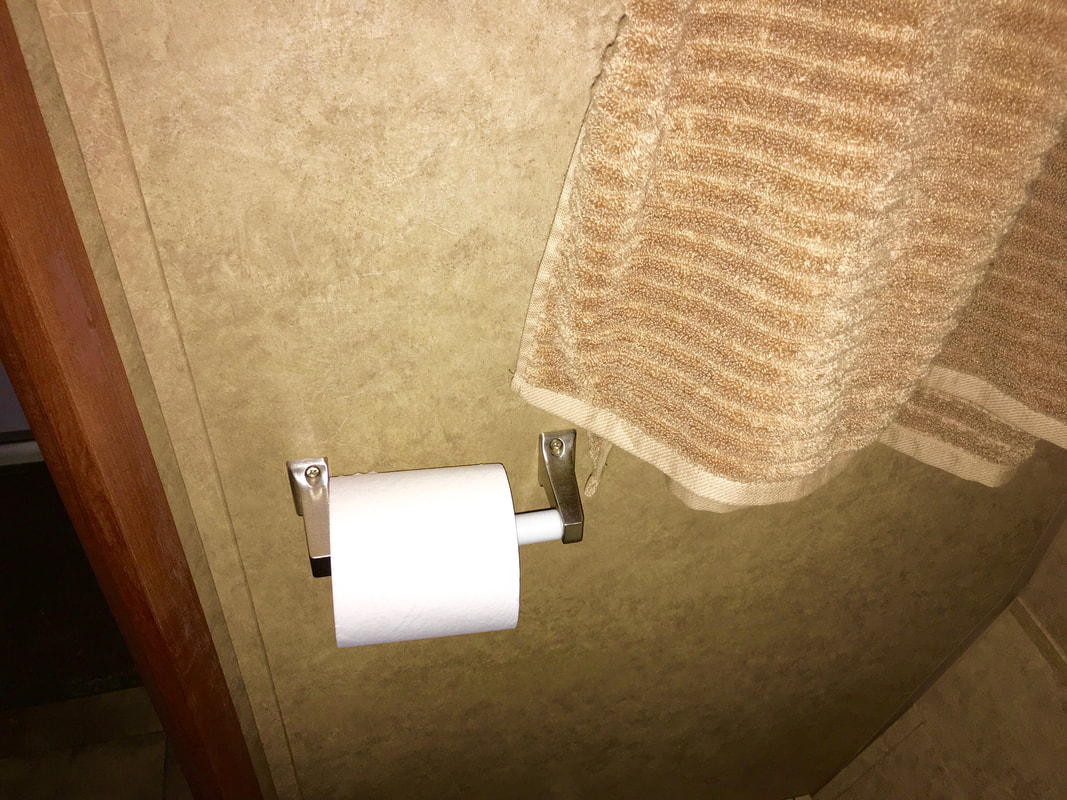
Picture
Picture
Picture
  • First we purchased a TV/DVD combination unit because it would take up less space. It is a great little unit but the sound could be better. 
  • Next we purchased a TV wall mount. We mounted it to the side of the kitchen cabinet which is very secure and the TV can be moved so that we can comfortably watch it from the bed or the kitchen area.
  • Lastly we purchased a pre-stained wall shelf that matched the stained wood in the trailer. We had to custom cut it to fit between the kitchen cabinet and the cabinet holding the air conditioner. We used metal L brackets to mount it to the cabinets on each side. We avoided putting anything into any of the outside walls.
  • For 'looks' was purchased an extension cord and a special wire channel to hide the cord under down the wall to the outlet. This was so that we could plug the TV cord into the end of the extension cord under the shelf and out of the way and not visibly see any wires.
  • Lastly, we contacted the RV dealer and purchased matching wall paper to cover the channel with. It matches the walls perfectly!
3. The Bathroom
I don't know about you, but this room is pretty important to me! In a small trailer you get a small bathroom. In our case it is really, really small. In fact, it only came with a tiny shower, a toilet, and a mirror on the wall! Nothing else but a door!   
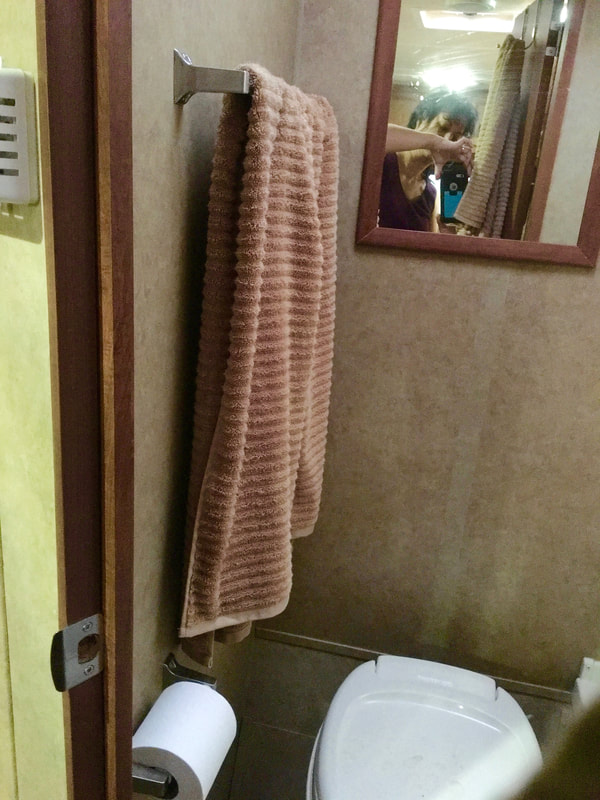
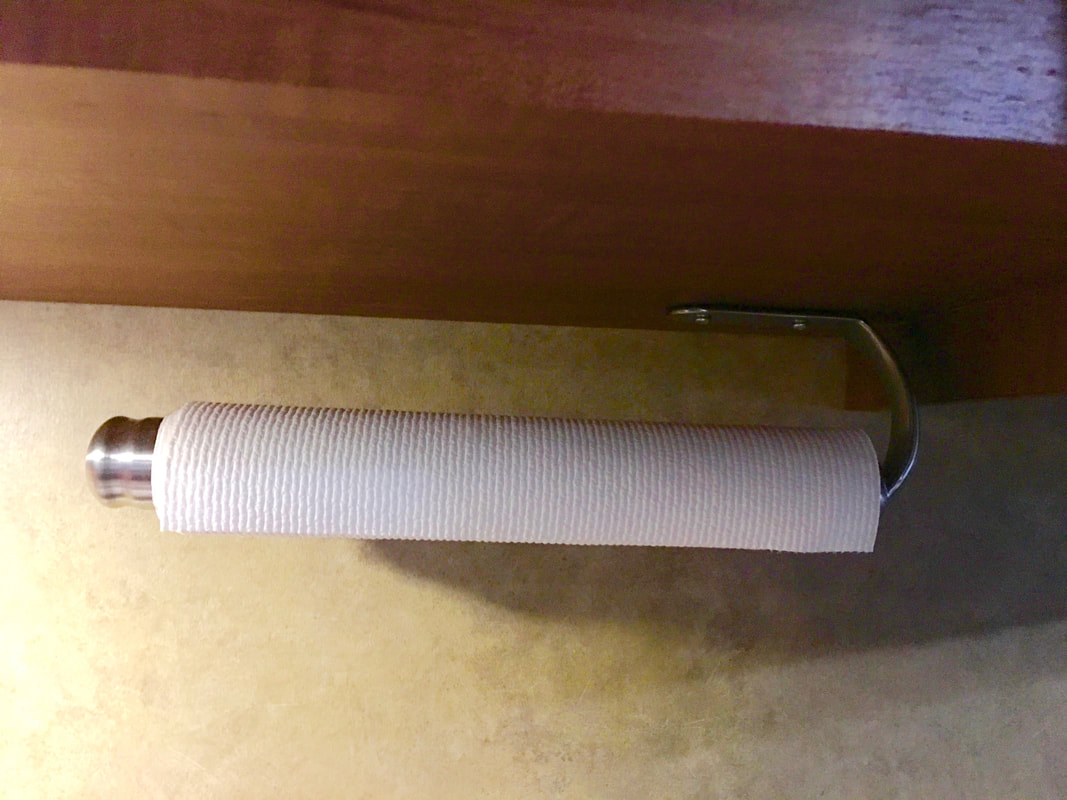
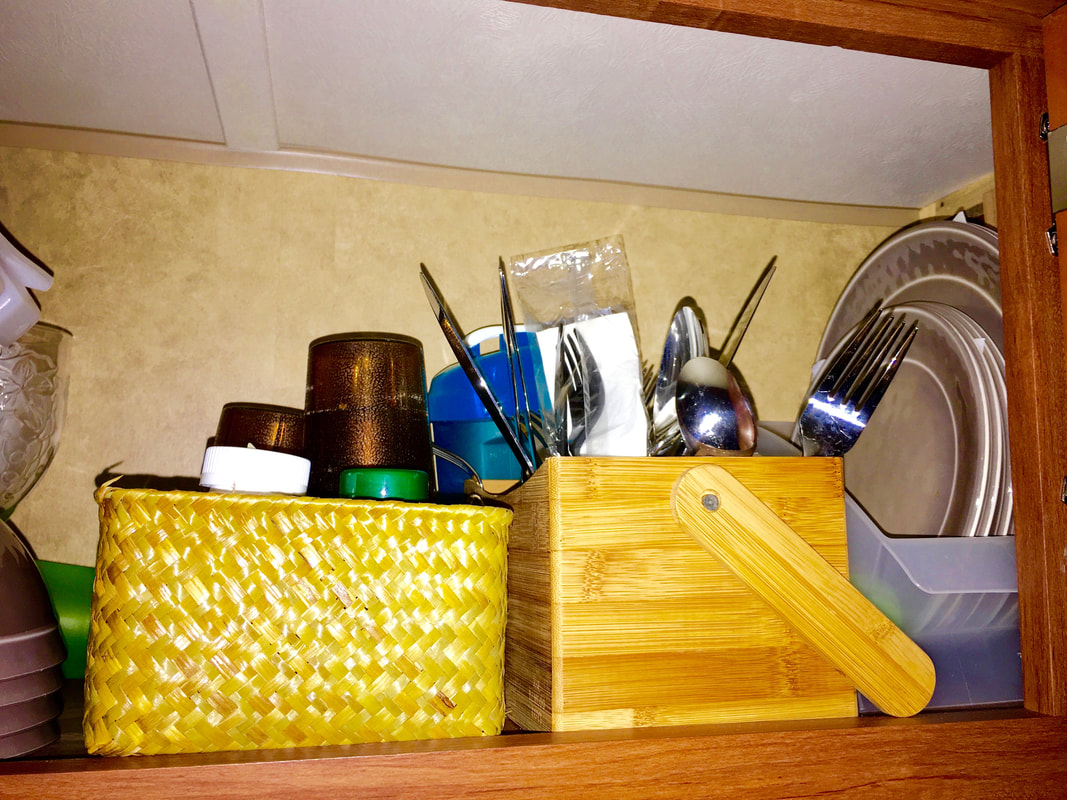
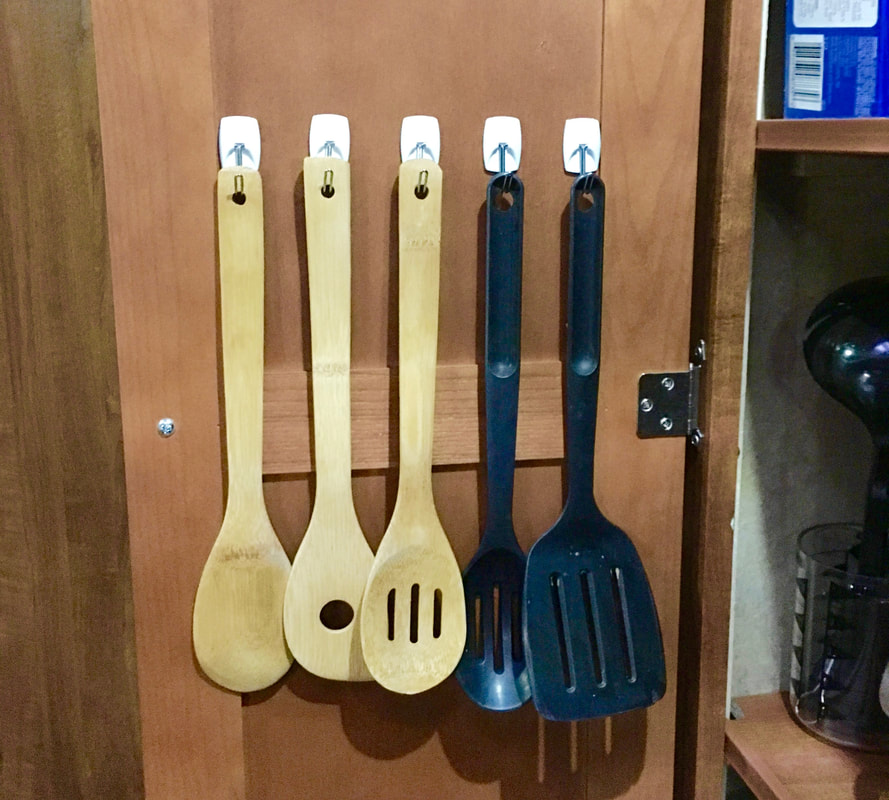
Picture
Picture
  • I have no idea why it didn't come with a towel bar or toilet paper holder, but these are the first two things we added. They were easy to install on the wall between the bathroom and the closet, that just happens to be on the right side of the toilet. It makes sense to have them there so I am not sure why the trailer didn't come with them in the first place!
  • A small caddy with a handle to hold soaps and shampoos is all that was needed in the shower. It can be hung on one of the hooks on the back of the door when not being used.
  • A nice soft brown toilet shaped rug fits nicely on the floor (after we custom cut one corner) and is great for keeping your feet warm and absorbing water when getting out of the shower.
  • Lastly, we just added metal over the door hooks. This is simply to hang our wet towels on after getting out of the shower.  
4. The Kitchen
Of course this is really part of the bedroom, the living room, and the dining room! Ha Ha. But who cares? It's still my kitchen and I knew I could improve upon it!
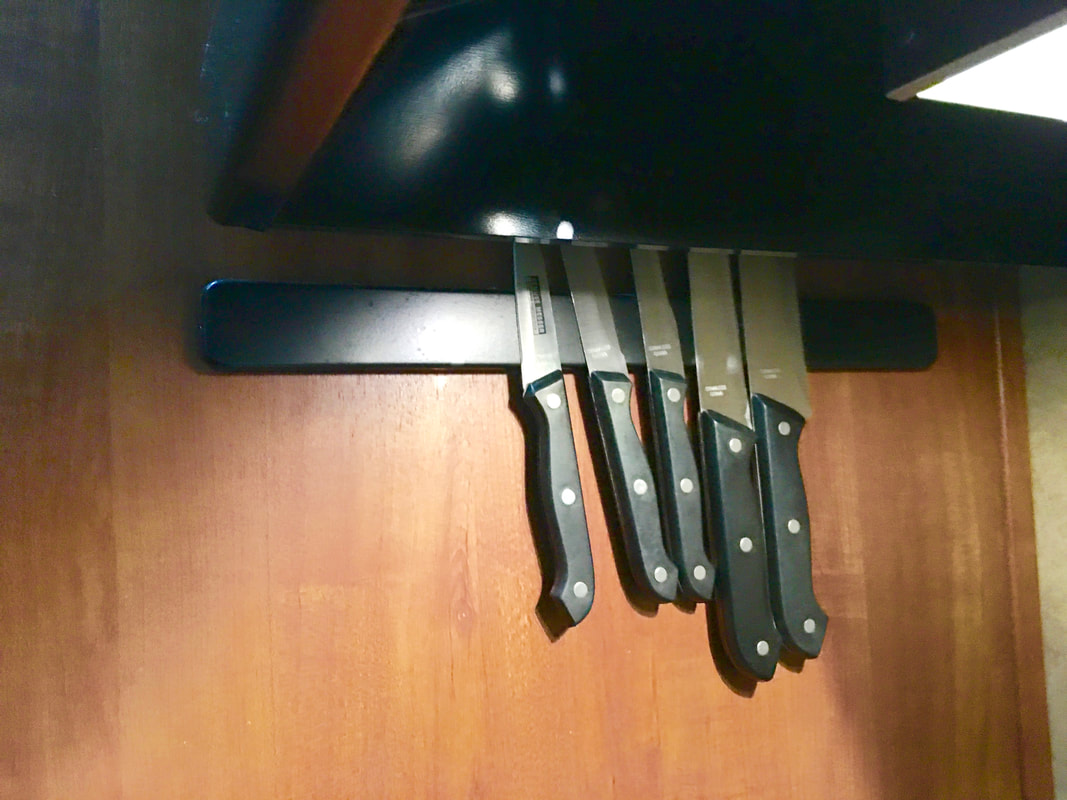
Picture
Picture
Picture
Picture
  • Added a magnetic bar to the stove to hang our knives on. Despite how many bumps we have hit a knife has never, ever fallen off!
  • Hung a paper towel bar the upper cabinets over the counter.
  • Bought a small electric coffee maker with a metal pot that can't break, but also keeps the coffee warm!
  • We have a bamboo utensil and napkin caddy for all our silverware! It's easy to use in the trailer, or to take outside if we are barbecuing.
  • Bought simple matching dishes and cups to always keep in the trailer. The dishes are kept on a plate cradle in the cabinet to save on storage.
  • Theres no oven so we purchased a small simple toaster oven. 
  • We hung acabinet kitchen towel bar on the pantry door.
  • We added sticky tape hooks to the inside of the pantry door to hang all the cooking utensils.
  • We stocked the kitchen will all the basic needs: pots, pans, knives, silverware, potholders, utensils, towels, matches (to light the stove with), dish soap, sponges, napkins, and more!​
5. Key Holder
Picture
  •  We added a key holder basket to the side of the cabinet so as soon as we walk in the door we can hang our keys or find a small flashlight quickly!

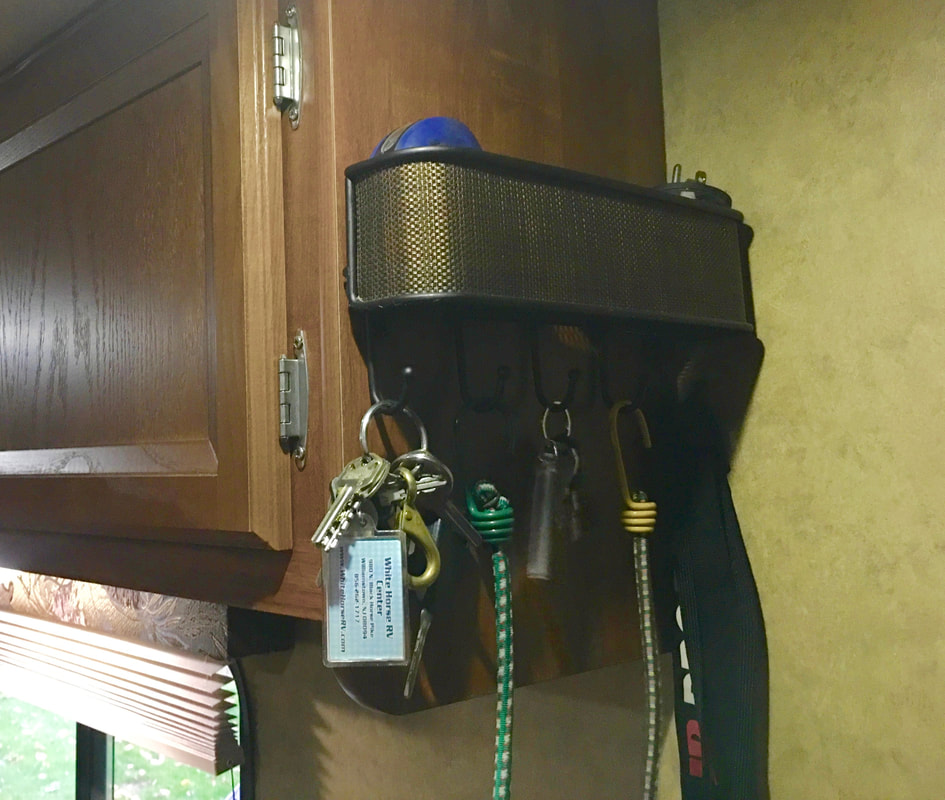
Take a little video tour with us.....

Now our trailer is always organized, ready, and feels like home no matter where we go!
Happy Travels!
Picture
0 Comments

Sharpies to Decorate Easter Eggs!

3/26/2016

 
Picture
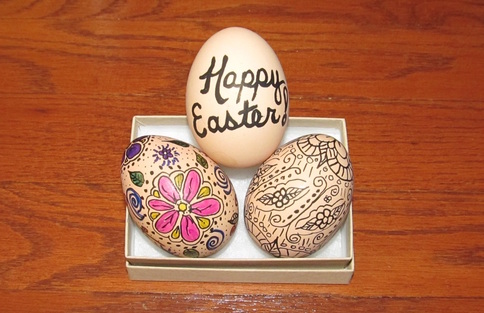
I used sharpies to decorate my Easter Eggs this year.  I wanted to try something different, and I have to say I was happy with the outcome! 

Seriously, all you need are some hard boiled eggs, sharpie markers and minimal drawing abilities.   If you can draw a simple flower,a leaf, a line with curls at the end, and make a few dots, you are good to go!

Just start at the ends and work your way down to the other end, or do both ends and then fill in the  middle.  Either way, who cares?  Just keep it simple and fun, because in the end it's just an egg you are going to crack open and eat!

And if you feel extra ambitious, you can color it in!  They look awesome both ways.

The whole idea is to just have fun!  I know I did :-)
Picture

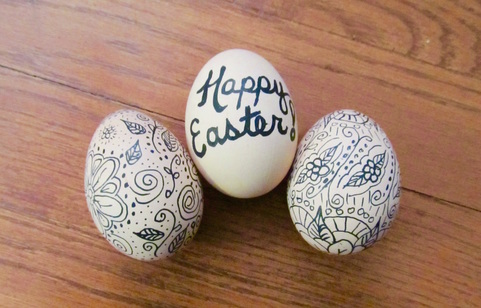
And watch this video where I use RevMark Markers to decorate eggs in 2-19!

Also check out the many other fun DIY Easter Ideas on our Pinterest Board!

Thanks for visiting!

Sincerely,
Picture

5 SIMPLE RESOLUTIONS for 2016

1/1/2016

0 Comments

 
Picture
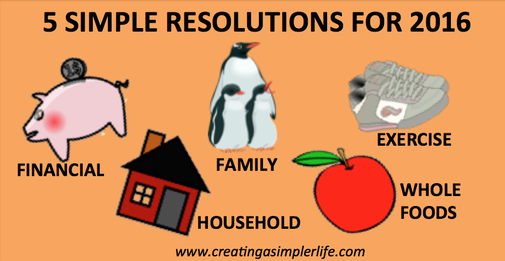
It's that time again....a new year with new resolutions.  How many of us actually accomplished all of our resolutions from last year?  I know I didn't.  But this year I have a plan!  FIVE SIMPLE, yet life changing, resolutions!  Each of the 5 resolutions is simple and straightforward  so they should be easier to follow through with, right?  Well, hopefully! But the real plan is that they become lifetime habits that I eventually don't even have to think about!
Picture

​Health

​1. Eat Whole Foods - this is not a diet but if done properly should lead to losing weight and feeling more energetic.  Eating whole foods means exactly that: eating fresh vegetables, fruits, and meats instead of anything that is processed.  If the foods are all organic, then even better!  If the food required some sort of processing in a plant and has ingredients added for whatever reason, then it is OUT!  Need some help with this?  Then check out the following site:
  • Five Foods You Should Never Eat - this is an excellent informative video by a nutritionist about why diets don't work and why eating whole foods does work.  Of course it goes into 5 foods everyone thinks are healthy, but really aren't.  The video is a little long and the goal is to get you to buy into their program at the end, but the information and inspiration makes it well worth watching!
2. Exercise - Five minutes a day is all that's needed to get started and it can be simple like walking to the store instead of driving!
  • Check out 4 Simple Steps to Start the Exercise Habit.  They share a simple, and painless way, to get started now.  I started today!
Picture

​Family

3. More Quality Family Time - are you usually too busy for your spouse, children, or even your parents or siblings?  Then make time for them before it is too late!  It doesn't have to cost anything either!  You can simply make a plan to do something for 1-3 hours each week.  It can be as simple as playing a game like monopoly, or going for a nature walk at the local park.  The idea is to make it a priority and schedule it in if you have to!  
  • Read How to Make Quality Family Time a Priority.  The article shares many great points about why and how to do this!
  • Check out my Pinterest Page Inexpensive Fun for great ideas for spending quality time with anyone in your family this year!
Picture

​Household

4. Organize - get the house in order!  This will make everything so much simpler this year.  It makes it easier to clean, takes less time to find what you need (Don't you hate searching for something?), and of course frees up quality time to spend with your family!
  • Check out The Household Organization Diet - this gives a list of 15 minute per day tasks toward cleaning, organizing, and decluttering your home in just 31 total days.  It was created for 2015, however I am pretty sure it will also work for 2016!
  • Check out How to Become a Minimalist - yes, this is the new "buzz word" however, I think it is a great one and I truly live by it as much as I can. Why?  Because I believe in it.  I believe that too much stuff leads to stress (must protect and take care of that stuff), less time for other things (stuff must be organized, cleaned, and have other stuff to supplement it)....etc.  I think you get the picture!  You don't have to go to extremes, however less stuff = simpler life with more time for your family!  Not to mention you can save a lot of money....
  • Check out our Pinterest Home Organization Page for more ideas!
Picture

​Financial

5. Grow Your Savings - even if you have debt, it is important to have some money in a savings account.  Having money saved makes me feel protected in case of emergency like when our stove blew up last year.  I usually set a certain goal to reach each year. I don't always meet it, but it helps!
  • Check out How to Grow Your Savings for basic steps to getting started.  
  • Check out The Budget Diet - How to Cut Your Spending by $400 a Month - not all of these will work for everyone (For example where I live there is only one electric company.) however there are some great ideas that will definitely  help you to get money in the bank!
  • For more ideas on how to save check out our Pinterest Board Household Debt/Budget.
I wish you and your family a Healthy and Happy New Year!

Thank you for visiting :-)
Picture
0 Comments

MY BACKYARD BIRDS OF SUMMER

10/2/2015

1 Comment

 
Picture
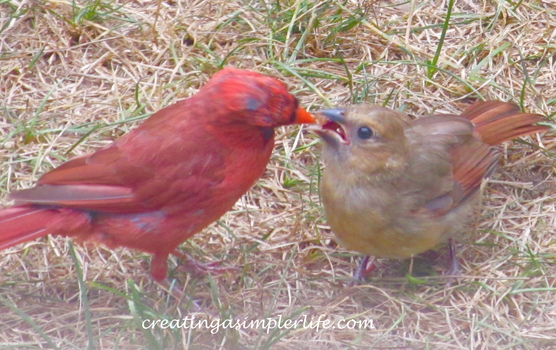
I love gardening and believe it or not, unlike many other gardeners, I love having birds of all different kinds visit all summer long!  I don't mind sharing some of my fruits with them as long as they don't take too much and I get to take their picture! 

Every morning during the summer I would go out into my backyard before the rest of the neighborhood really came alive.  This was the quiet time when the birds liked to come and visit.  I loved hearing them sing to each other.  I actually learned to recognize several different species by their song alone!

I took pictures and some video of most of the different birds that come to visit and in honor of the end of summer, and possibly migration for some (maybe all?) of them, here they are!

Hope you enjoy :-)

Watch this video of our backyard birds of summer (and a few from the winter too!) and then you can scroll down to our slide show where I try to name them, but am not sure if they are all correct!
I try to name them in the slideshow below but am not sure of a few...
Thank you for visiting!
Please like and follow us!
1 Comment

DIY TRICK-OR-TREAT GLOW STICKS

9/22/2015

0 Comments

 
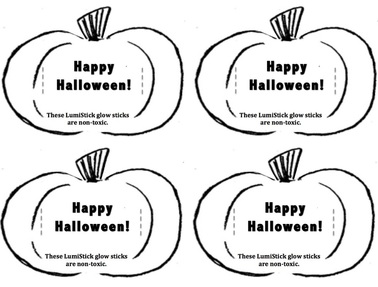
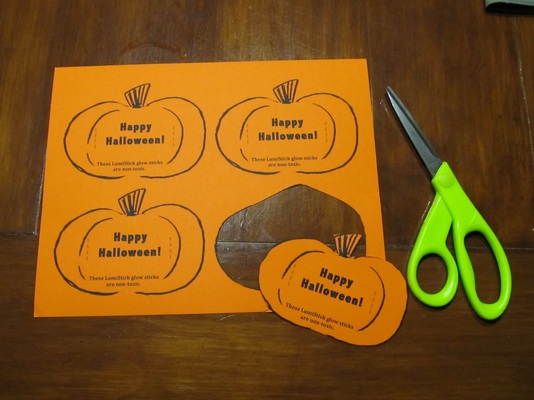
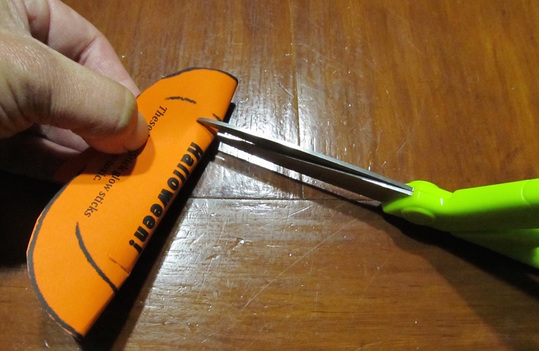
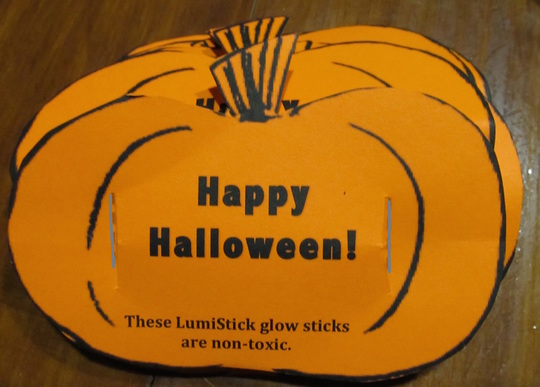
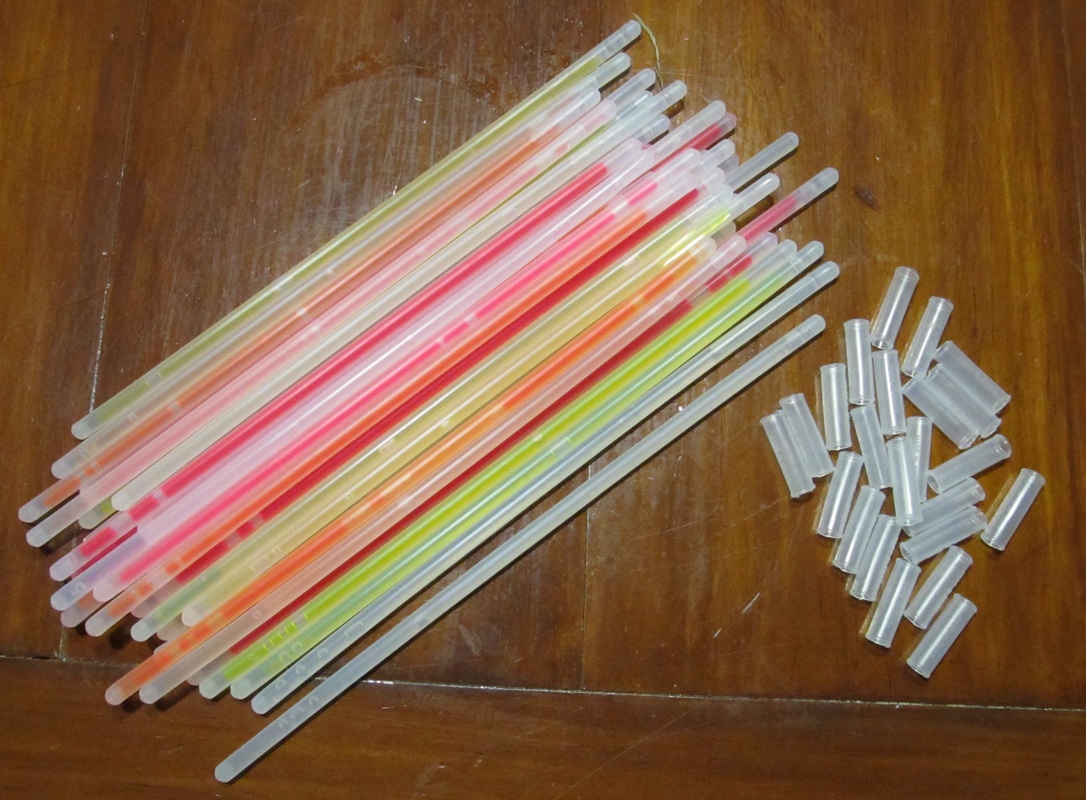
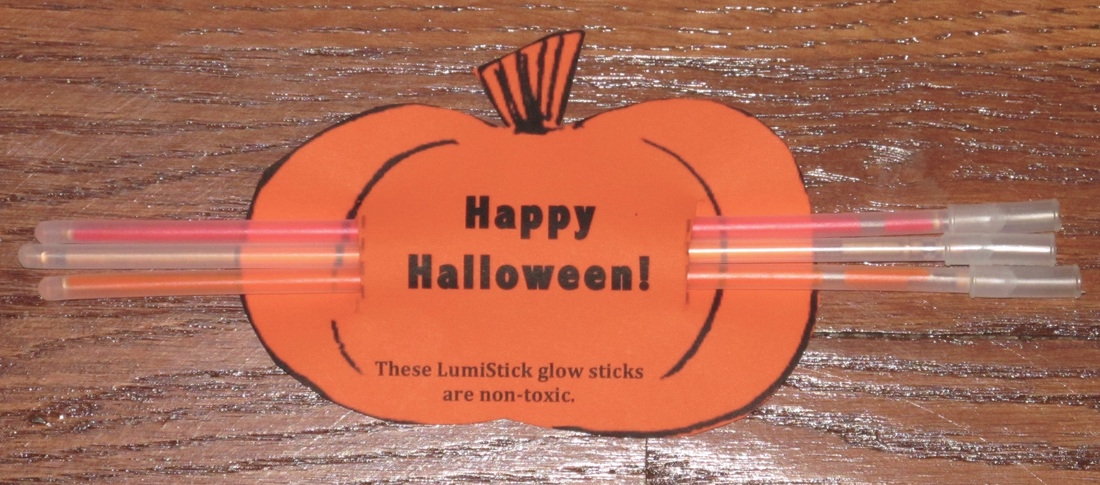
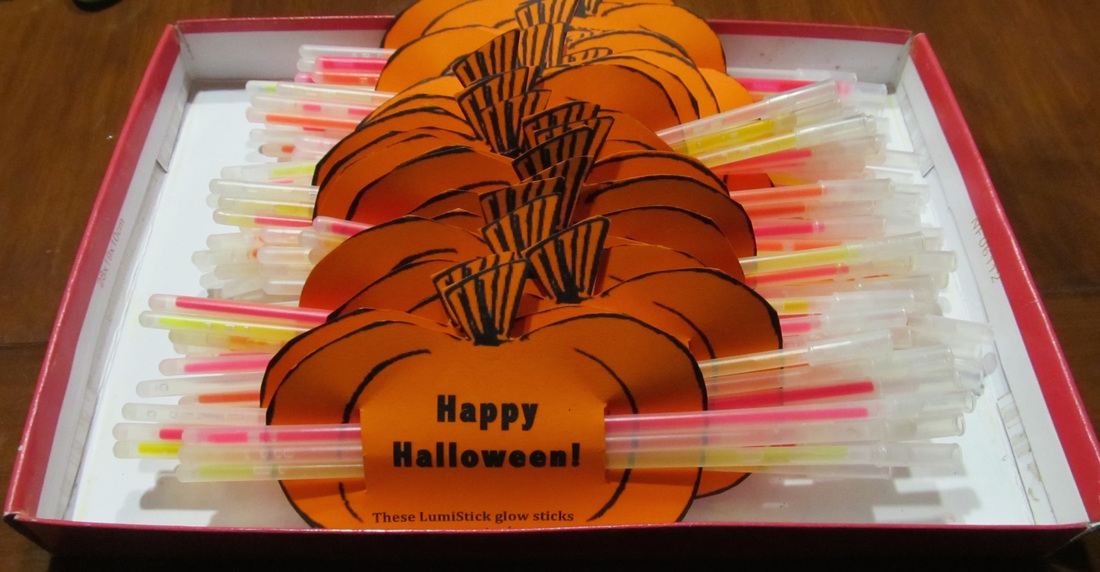
These DIY trick-or-treats would also be great as party favors!  
FREE printable pumpkin cut-out included!
Picture
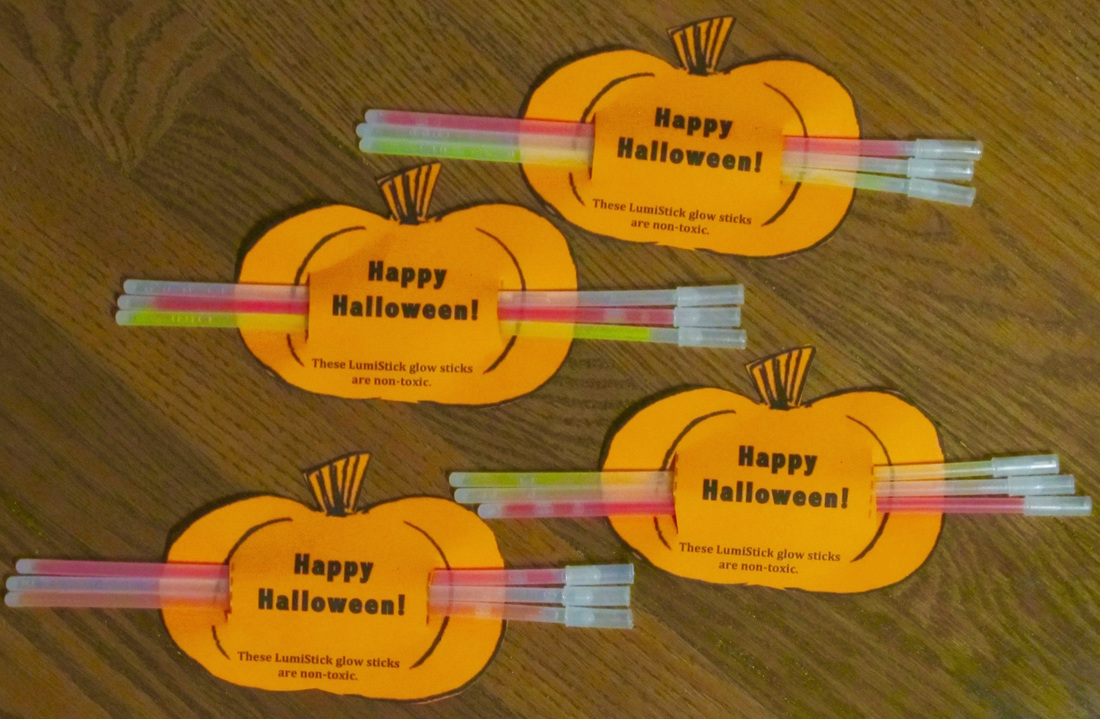
Every year for Halloween I give out candy.  Every year for Halloween I eat the candy before Halloween  and end up having to buy more.  Then I eat that candy and have to buy more again, and so on.  I never have leftover candy and it's not because we get a ton of kids knocking on our door.  I just have absolutely no willpower.  I have even purposely bought candy I don't like so I wouldn't eat it. Guess what?  I ate it.  Come on, admit it, because I KNOW I'm not alone!  Well, this year I was determined to change that pattern and do something different.  I wanted it to be fun, so when I saw glow sticks on sale I thought, "Why not? Who doesn't like glow sticks?"  Then I realized this year Halloween is on a Saturday and that means kids out after dark.  Why not help them be safer by giving them something bright to wear at night?  By this time, giving glow sticks as my trick-or-treat give-away was a no brainer.  Here's what I did.

Supplies Needed:
  • Glow Sticks (3 per favor) with connectors
  • Orange Cardstock or Construction Paper
  • Printer
  • Scissors
  • FREE Printable Pumpkin Cut-outs - This is a pdf file with four (4) pumpkin cut-outs to a page.  You can click on the link or the picture below to download.
Picture
Picture
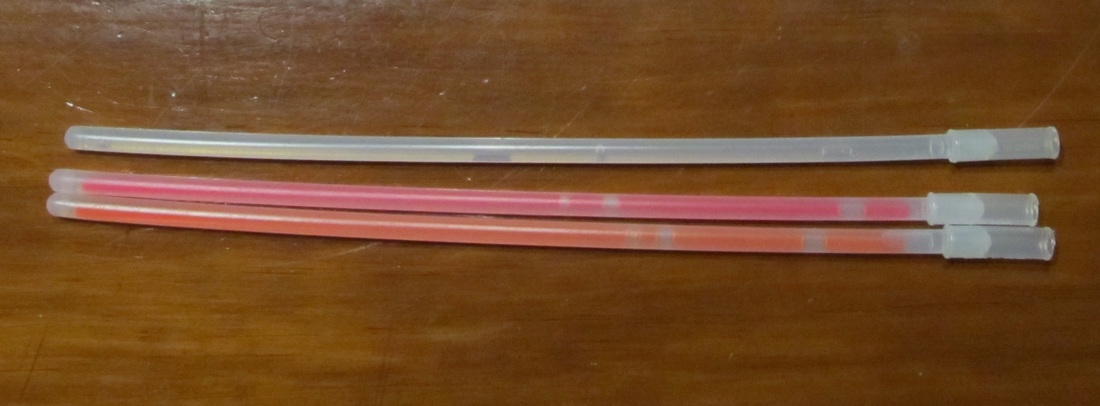
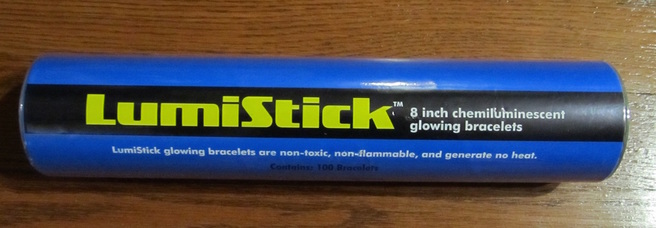
These are the glow sticks I purchased. They come with connectors. Note also that they are non-toxic, non-flammable, and generate no heat.
Picture
Print on orange paper and cut out individual pumpkins.
Picture
Gently bend cut-out in two and cut the two slits on the inside of the dotted lines.
Picture
All slits have been cut.
Picture
Slide a connector on the end of each glow stick.
Picture
Use three glow sticks per treat/favor. This allows either three bracelets or one necklace to be made.
Picture
Be VERY careful sliding the glow sticks through the slits on the pumpkin. DO NOT BEND THEM IN ANY WAY OR YOU WILL ACTIVATE THE GLOW. It is very easy to accidentally bend the sticks so be sure to bend the pumpkin instead!
Picture
Three sticks make a 24 inch glowing necklace!
Picture
All ready for my trick-or-treaters!
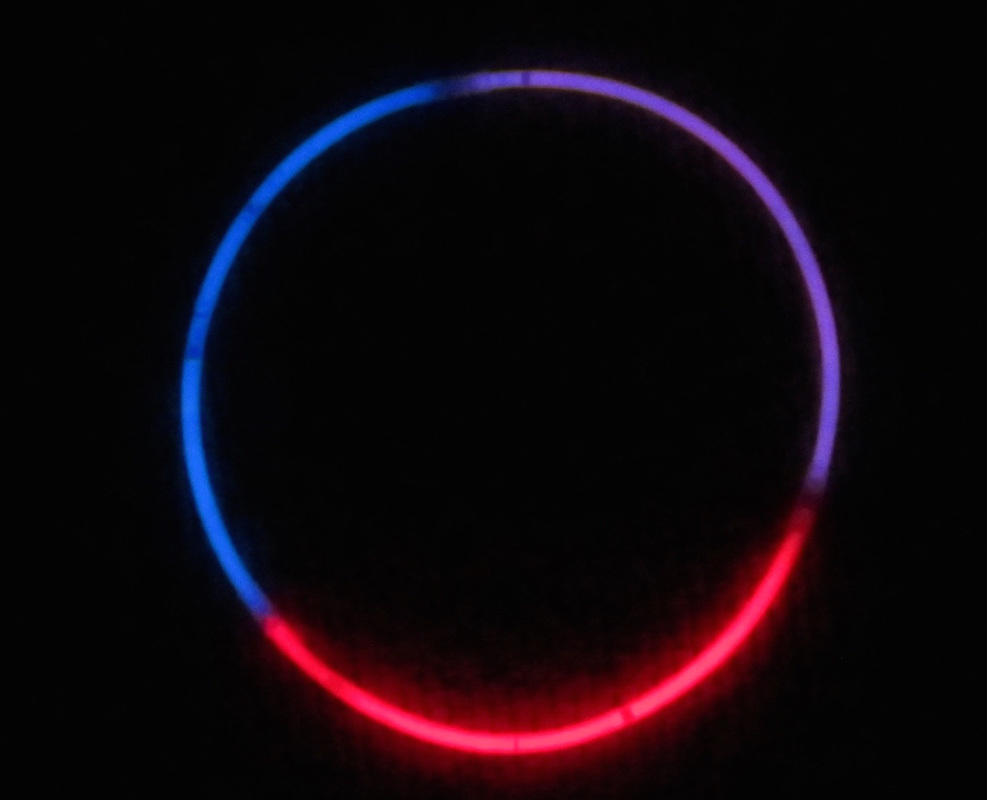
Where I Purchased Glow Sticks:

I purchased  WHOLESALE PACK of 300 8" LumiSticks (affiliate link with Amazon) for $21.99 and free shipping on orders over $35.  They are Non-toxic and they came with connectors so they could be made into necklaces. I purchased so many because I knew I would be using them for other things (Halloween decorations blog post coming soon!).

The 8" LumiSticks can also be purchased in tubes of 100 (affiliate link with Amazon) for $8.99 and free shipping on orders over $35.  
Please 'like' and follow!
0 Comments

TIE DYE SPIRAL SHIRTS

9/3/2015

0 Comments

 
Picture
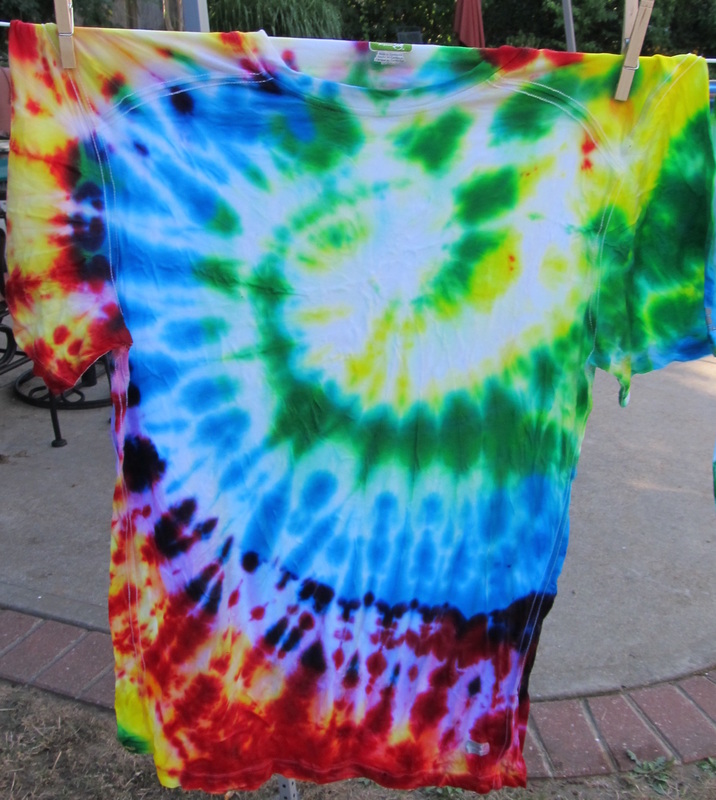
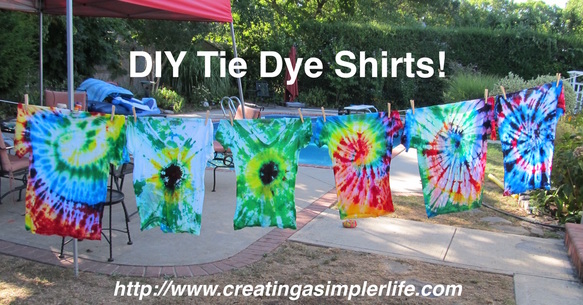
I love tie dyed clothes.  I don't know what it is about them but they just make me feel happy.  Maybe it's the combination of wild colors, or the designs, but whatever it is I really like tie dyed clothes.  That's why I decided to take a day and do some tie dying for fun!  Well, a little for fun and the rest to give as gifts for birthdays or Christmas.  Despite the fact that I hadn't tie dyed in over 20 years I am very happy with the results.
Picture
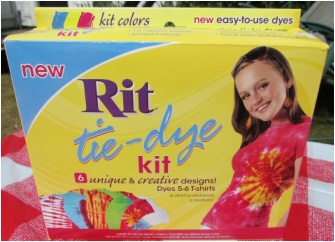
Check out the kit by clicking the picture above or here: Rit Tie-Dye Kit (affiliate link)
Supplies:
  • Rit Tie Dye Kit (This is a one step kit so there is no soaking with soda ash before hand!)
  • Latex (or other) Gloves (the ones that come with the kit are rally crappy)
  • Cheap Plastic Tablecloth
  • Grocery Store Plastic Bags
  • Rubber Bands (some do come with the kit)
  • Water (a hose or a bucket would do)
  • Large rag or towel that can be ruined
  • Crummy clothes or apron
  • About 5 - 6 Shirts or more depending upon the size and how much dye you use on each

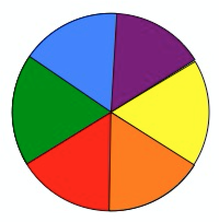
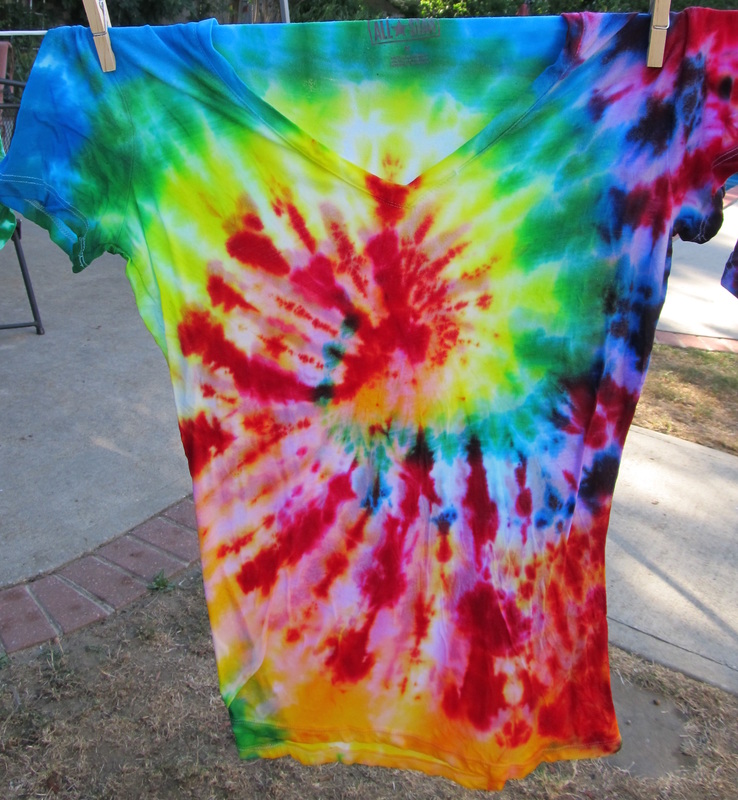
Getting Ready:
You definitely want to do this outside.
Cover a table with the cheap plastic table cloth.

Rubber-Banding the Spiral Design:
I decided to do the spiral pattern for most of the shirts.  I followed the video tutorial below.  I did not follow their instructions for dying though because they had way more colors than I did - I only had three tubes with three colors (red, blue, and yellow). The directions for coloring the rainbow using only three colors are below.
Picture
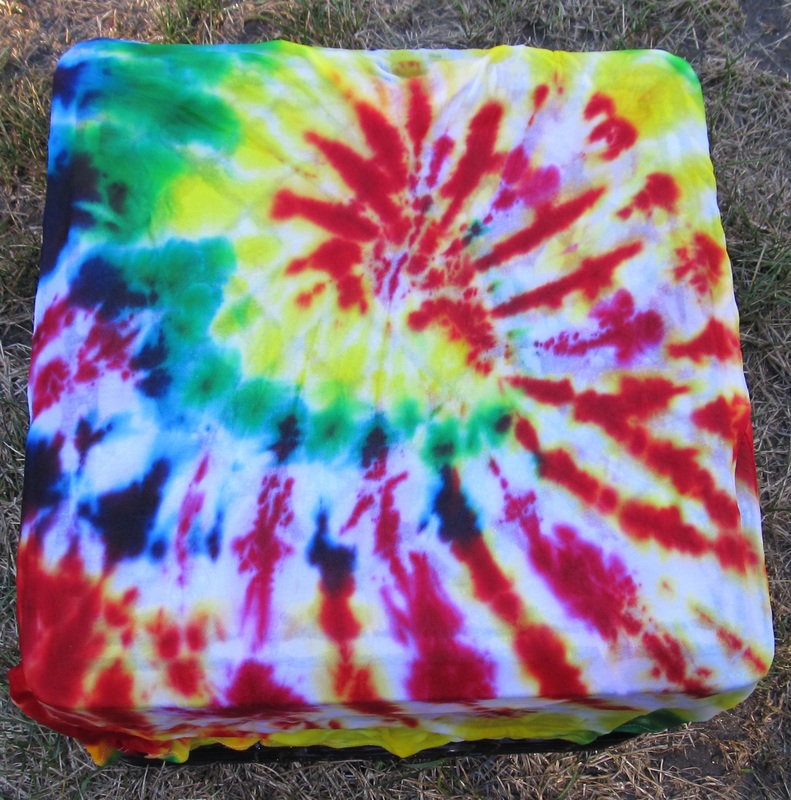
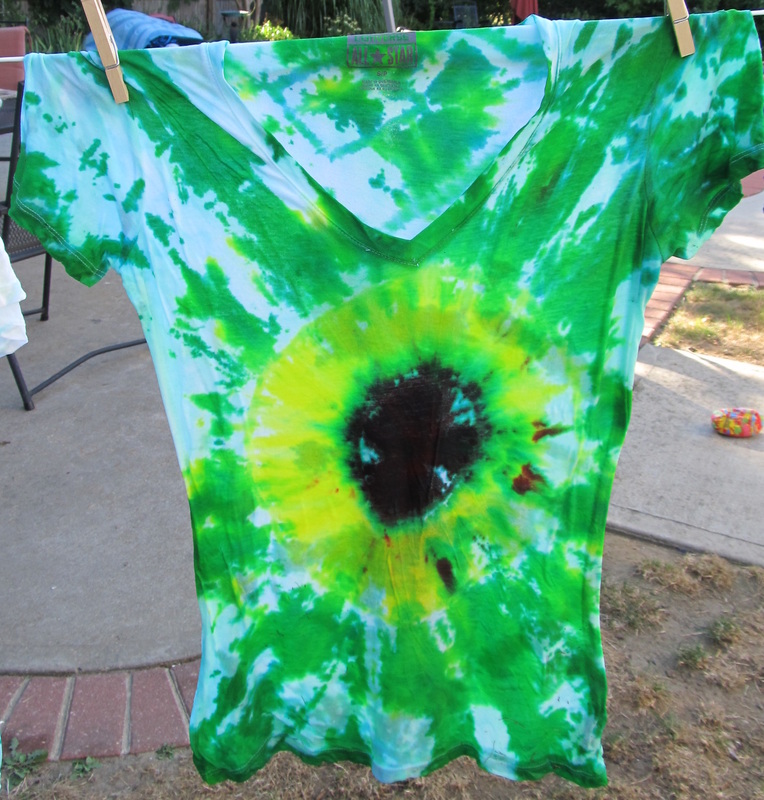
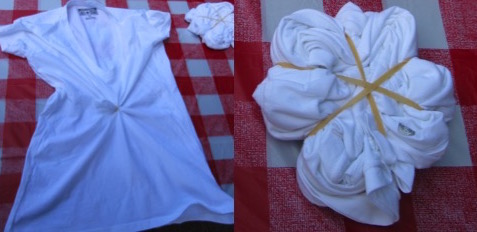
Rubber-Banding the Sunflower Design:
I couldn't find any instructions online, so I kind of made up my own based on what I thought might work. I basically just did the front of the shirt with the design by banding a small portion for the brown center. Then I pleated and banded the next section for the yellow flower petals.  That was it for the flower.  For the rest of the shirt I just banded it however it worked out naturally.  I guess you could say I 'winged' it.  It really didn't matter to me since it was an experiment.
Picture
Picture
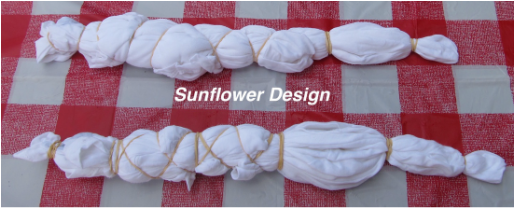
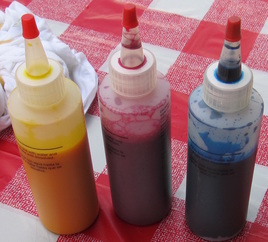
Yellow, Red, & Blue Dye
Dyeing the Spiral Shirts:
  1. Wet the shirt (dip in a bucket or wet it gently with the hose).  It has to be wet for the dye to set in.  Squeeze out the excess water so it is wet, but not soaking. Lay the shirts out on the table.
  2. Put on gloves and fill each bottle of dye to the water line marked on the outside.  Be careful to not get the dye on anything or it will be colored! 
  3. Replace the caps and shake the bottles until all color is dissolved.
  4. The Spiral Design was colored as shown in the pictures below.  The video above shows how quickly the woman dyed each pie piece.  It does not take a lot of skill or dye.  However, note that she had more colors so with only three colors I had to use the method below. Make sure you flip the shirt over and dye the same colors in the same three pie pieces (it will be opposite).  When you flip the shirt over, use the rag to wipe the table clean  before putting it back down.
  5. After shirt is dyed completely place it inside a plastic bag and close it up tightly.  Store in cool place overnight.
Picture
Color three pie pieces yellow.
Picture
Color three pie pieces red. As you can see in the picture, one of the yellow pieces will be colored red (as one of the three total).
Picture
Color three pie pieces blue. The three pieces will include one of the yellow and one of the red slices.
Picture
The colors will not look exactly like this, but they should mix and create other colors. You will then flip the shirt over and color the opposite side pie pieces the same colors (so in reverse). You can look at the sides to see what color goes where if you forget.
Dying the Sunflower Shirts
  1. Color the entire shirt yellow.
  2. Color the end (flower center) with red and blue also (this makes it almost black).
  3. Color the other end with blue (to make green).  Be sure to leave the petals of the flower yellow.
  4. Place colored shirt in plastic bag and close up tightly.  Store in cool place overnight.
NOTES TO CHANGE FOR SUNFLOWER SHIRTS NEXT TIME:  
Stay away from the rubber band area with the colors....it seems to have made a line that I don't really like. I would maybe make the center of the flower smaller and have more yellow for petals.
Somehow I would make the yellow petals more distinct - tighter pleats?  Not sure...

If you know a better way to make the sunflowers, please share.  I found pictures online all over the place but could not find any directions on how to make them so I just made up a method that I thought would work. I am happy with them since it was my first try.
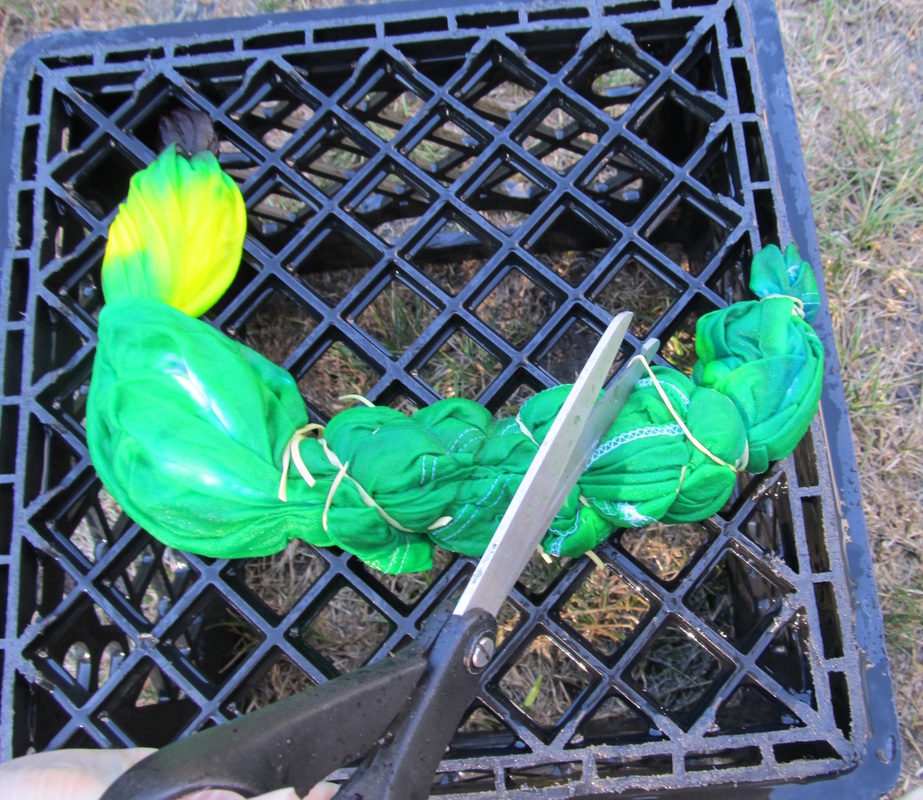
The Next Day
Using a milk crate, gloves, scissors, and a hose, I simply took out one shirt at a time and hosed it down until no more color ran from the shirt.  Then I clipped the rubber bands and removed them and hosed the shirt for a few more minutes to be sure all the color was done washing out.  After all the shirts were rinsed I washed them on hot temperature, short cycle, in the washer machine and hung them out to dry!  All done and happy with the results :-)
Please take a minute to hit like if you genuinely liked this post.
Thank you :-)
0 Comments

DO SCARECROWS WORK?

8/15/2015

0 Comments

 
Picture
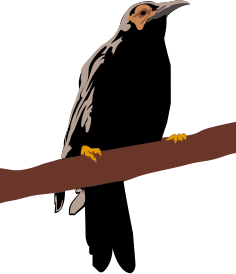
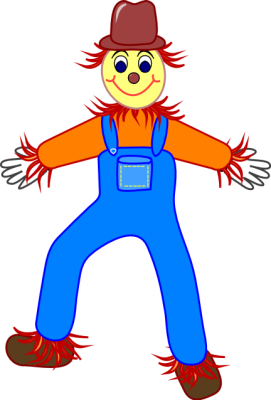
For as long as humans have been planting and growing their own crops they have been battling to keep the birds away.  Scarecrows, at one time found in just about every garden, are now more common around Halloween.  Why?  Well, frankly, they just don't work that well.  
Why don't they work well?
Birds are smart.  They figure out pretty quickly that the classic scarecrow (designed to look like a human) is not real and within a few days they are right back in the garden pecking away at whatever is available.  Some gardeners have tried moving the scarecrows around each day to make it seem like it's 'working' in different locations, but eventually the birds just figure out it's not a real person and go right back to helping themselves.
Picture
Are there alternatives?
Classic scarecrows can be built with arms that will move in the wind.  This is pretty creative and probably works better as long as there is wind to make them move.  Adding sound is also helpful as it can help to scare the birds.  This is definitely a step up from the classic 'stick' scarecrow. 

A newer technological invention is motion activated 'scarecrows.'  These do not resemble 'classic' scarecrows at all.  Two examples are the automatic sprinkler and an owl with a turning head.  I don't know about the sprinkler (birds love when I turn mine on), but the reviews on the owl are pretty good so it's an option.  Other options are 'shimmering' reflective ribbons tied to plants or fake snakes.  I don't know what is best or if any of them are worth it or not but we just choose to keep it simple.  We just anticipate sharing some of our crop with the local birds and if we  don't want to share, we just cover those particular plants with netting.
Picture
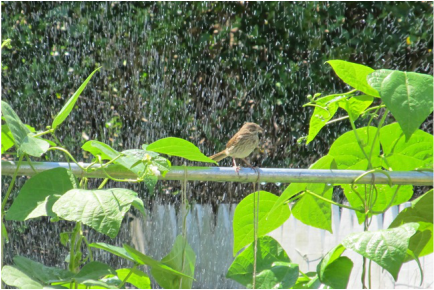
Bird enjoying our garden sprinkler!
Is it worth it to have a scarecrow?
Absolutely!  I still love having a scarecrow in my garden whether it keeps the birds away or not.  It's fun to have  and, in my opinion, my garden wouldn't feel complete without it!  
Make your own scarecrow!
Whether it is for Halloween or to keep in your garden, here are three different plans at different levels so you can build your own scarecrow.  Enjoy:-)
Picture
For Children:
Four step scarecrow construction plans designed for children!  So simple!
Build A Garden Scarecrow
Easy:
How To Make A Scarecrow Without Money or Skill
Advanced:
This awesome DIY scarecrow has moving arms and makes noise! 
How to Make Scarecrow that Moves and Chimes

0 Comments

HOST A BACKYARD CAMPFIRE!

7/27/2015

0 Comments

 
Picture
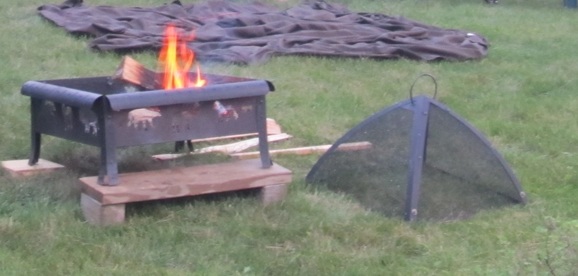
Looking for something inexpensive, simple, and fun to do this summer? Then consider having a backyard campfire complete with marshmallows, a sing-along and ghost stories. No matter what age your guests are, it's sure to be a big hit that everyone will want to do over and over again!
When I was growing up we used to go camping all the time. Whether it was upstate NY or on the beaches of Fire Island, there was always a campfire involved. Some of my fondest childhood memories are of singing around the campfire with family and friends. In fact, the picture above was taken just this summer while visiting my parents in the Adirondacks - in their backyard! No matter how old you are, campfires are fun and you don't have to travel farther than your backyard to create new memories!
WHAT DO YOU NEED?
BACKYARD 
No backyard?  No worries! Would someone you know be willing to share theirs? Is there a park or other similar place near you that permits campfires? You can call the local parks you know of and see if they allow fires or find parks in your state using America's State Parks.   Many parks already have fire pits ready and waiting to be used!
FIRE PIT
If you don't already have one then you can either buy one, or even better, make one yourself!
  • Buy: Fire pits can cost anywhere from $50.00 and up.  I personally have the Fire Sense Bonfire portable. I've had it about 10 years now and it is still going strong! 
  • DIY: Making your own fire pit is pretty easy as well. It can cost anywhere from nothing (except a little energy and time) to about $100 depending upon the kind you build.  Check out 12 DIY Fire Pits for Your Yard.
WOOD
Yes folks, you can't have a fire without something (usually wood) to burn.  
  • Buy: Lowe's is currently selling Lost Coast Forest Firewood for $6.88 (.75 cubic feet).
  • Find: Collect dead wood from around your yard and neighborhood.
  • Recycle: Burn wood scraps from projects.  I would avoid burning CCA-pressure treated lumber which contains chromium, copper, and arsenic.  
SEATING
There are a lot of options here!
  • Furniture you already have: folding chairs, beach chairs, etc.
  • Guests can bring their own folding chairs (Check out Modell's Canvas Camp Chair for $9.99 with a carry bag!).
  • Use blankets, towels, or even sit-upons!
Picture
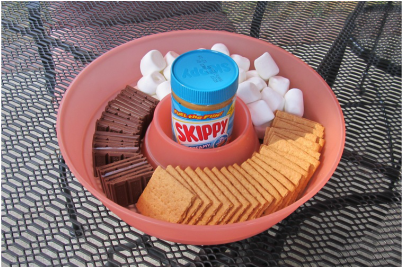
CAMPFIRE SNACKS
In my opinion a backyard campfire is nothing without being able to roast marshmallows and make s'mores! Making them is pretty easy, but you do need a few things and being prepared ahead of time makes it very simple (And we all love simple, right?).  
  • Purchase marshmallows, graham crackers, and Hershey chocolate bars. Keep an eye out for combination coupons - they have been in my Sunday paper several times this summer  so I am sure you can find them too!
  • Preparing the s'mores ingredients ahead of time makes it ready-to-go and  makes a nice presentation as well!  
MARSHMALLOW STICKS
You can either make your own, improvise, have guests bring their own, or buy them!  
  • Buy:  I actually have telescoping marshmallow sticks.  I bought a set of 8 and kept two for myself when I was making "Summer Fun" gift baskets (actually coolers filled with goodies) last year!  For a less expensive alternative you could purchase wooden sticks instead. They cost less for more, however they do not last long. 
  • Improvise: use skewers or long oven meat forks. However, be extra careful about getting too close to the fire and since they are probably made of metal they will transfer heat to your hands so be careful about getting burned.  This is definitely not an option for children!
  • Find and make your own!  If you live in an area with some trees or woods, you can probably find some good sticks to use. Make sure they are at least 24" long or more, especially for children.  
SING-ALONG SONGS
What's a campfire without an old fashioned sing-along? If you or your guests play an instrument, then even better!  We have a lot of guitar players in my family so besides the classic campfire songs we always sang a few oldies too! You can choose to sing whatever songs you want or even just listen to music, but I am not joking when I say sing-a-longs are fun!
  • FREE PRINTABLE:   CAMPFIRE SING-ALONG SONGS & GHOST STORIES BOOKLET
GHOST STORIES
Depending upon the age of the guests, these can range from funny to scary.  Either way,  ghost stories have been told around campfires for a very long time....
  • A very thorough collection of short ghost stories!
  • FREE PRINTABLE:   CAMPFIRE SING-ALONG SONGS & GHOST STORIES BOOKLET
CAMPFIRE SAFETY
A few important things about fire safety (learn more at Smokey The Bear): 
  • Have a bucket of sand and/or water nearby. 
  • Never leave the fire unattended.
  • Be sure to put out the fire properly when done.
CLICK ON THE PICTURE BELOW TO GO TO THE FREE PRINTABLE CAMPFIRE BOOKLET!
Picture

Did you like this post?  Then please take a second to hit like below!  Thank you for your support :-)🌻
Don't forget to follow us on Facebook too!

0 Comments
<<Previous
    Picture
    Hi there! I'm Kathie, the author behind Creating A Simpler Life blog. I'm excited to share our longterm projects (and planning) toward building our future retirement homestead in the Adirondack Mountains of New York. In the meantime I will be sharing all the other little things we do that are part of creating our simpler life!
    Creating a Simpler Life

    RSS Feed

    Visit Creating A Simpler Life's profile on Pinterest.

    Categories

    All
    Adirondack Crafts
    Chickens
    Conservation
    Crochet
    Do It Yourself
    Energy Savings
    Essential-oils
    Essential-oils
    Food-storage-preservation
    Food-storage-preservation
    Gardening
    Health
    Health-wellness
    Health-wellness
    Homemade-remedies
    Homemade-remedies
    Homesteading
    Homesteading Dreams
    Inexpensive Fun
    Minimizing
    Organization
    Products We Sell
    Recipes
    Recycling
    Saving-money
    Saving-money
    Shopping
    Wedding & Shower DIY

    Archives

    July 2020
    June 2020
    April 2020
    March 2020
    March 2019
    January 2019
    December 2018
    October 2018
    August 2018
    July 2018
    June 2018
    April 2018
    March 2018
    February 2018
    January 2018
    November 2017
    October 2017
    September 2017
    August 2017
    July 2017
    June 2017
    May 2017
    April 2017
    March 2017
    February 2017
    January 2017
    December 2016
    November 2016
    October 2016
    September 2016
    August 2016
    July 2016
    June 2016
    May 2016
    April 2016
    March 2016
    February 2016
    January 2016
    December 2015
    November 2015
    October 2015
    September 2015
    August 2015
    July 2015
    June 2015

mrandmrscorbi@gmail.com
Contact Us - Privacy Policy - Disclaimer
Copyright 2022©Creating A Simpler Life, Inc. All rights reserved. Reproduction in whole or in part without permission is prohibited.
  • Home/About
    • What does OFF-GRID mean?
    • MINIMIZING >
      • Home Size
      • Room by Room
      • Get Organized
      • Household Waste
    • MINIMIZE DEBT, MAXIMIZE SAVINGS >
      • Bills & Other Debt
      • Saving Money
      • Shopping Tips
      • Affordable Fun
    • BACKYARD CHICKENS >
      • The Coop
      • The Chickens
      • Feeding the Chickens
      • Fresh Eggs
    • HOME GARDENING >
      • Building the Garden
      • What We Grow
      • Seeds, Weeds, & More
      • Preservation & Storage
    • DO-IT-YOURSELF >
      • Health & Wellness
      • Simple Cleaning & Tips
      • Crafts & More!
      • Printables
    • CROCHET >
      • IDEAS & MORE
      • VIDEO TUTORIALS
  • HOMESTEAD
    • The 5 Year Plan PLUS! >
      • 2017
      • 2018
      • 2019
      • 2020
      • 2021
      • 2022
    • WHY AN EARTH SHELTERED HOUSE?
    • OFF GRID TINY TRAILER
    • BUILDING our HOMESTEAD from Scratch >
      • BUYING LAND & GETTING STARTED
      • BUILDING THE CONCRETE DOME
      • FROM DOME to HOME
      • SURVIVING OUR FIRST WINTER
    • HOMESTEAD MACHINERY >
      • GENERATORS
      • KUBOTA TRACTOR
      • ATV'S & UTV'S
      • WOOD CHIPPER
      • CHAINSAWS
      • LOG SPLITTER
      • POWER TOOLS
      • SNOWMOBILES
      • AUTOMOBILES
    • BUDGETING THE BUILD
    • SUSTAINABILITY >
      • WATER
      • FOOD
      • SHELTER
      • ENERGY >
        • SOLAR POWER
    • The Adirondacks >
      • Wildlife & Nature
      • Insects & Bugs
      • Things to Do
      • Water Fun
    • ADIRONDACK CRAFTS
  • VLOG
    • 2023
    • 2022
    • 2021