Blog
A little bit of anything and everything that's part of
creating, enjoying, and living a simpler life!
creating, enjoying, and living a simpler life!

Recently we had a last minute backyard barbecue. My sister and her family had nothing to do, and neither did we. Since we literally live on the same block, and it was really hot out and we have a pool, they came on down for some swim time, and of course, food. We are Italian and we had to have food. Not just a little either. We had enough to feed half the block because well, you never know who else might decide to visit!
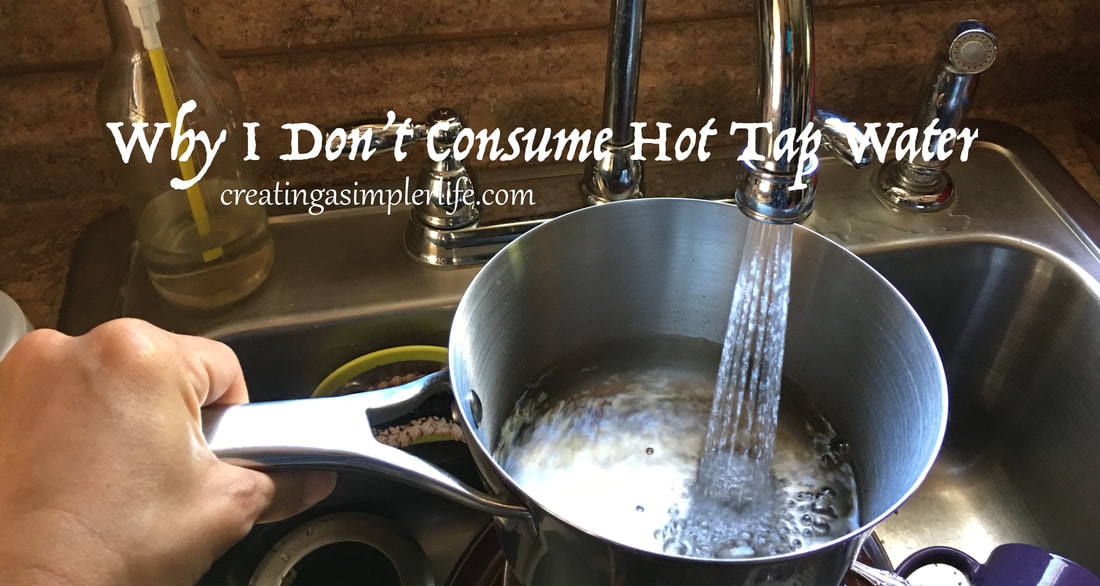
Anyway, thats not the point of this post. The point is that when my niece was filling the pot to boil the fresh corn I noticed that she was using the hot water to fill it so I said that she shouldn't be using the hot water out of the tap. And of course being a highly intelligent young lady she questioned me as to why. Naturally I was more than willing to share my reasoning with her but it started me thinking that maybe a quick post with some information for anyone who is interested in why would also be a good idea. 
So why not consume hot tap water? This is really a personal choice and I personally choose not to drink it because I would rather be safe than sorry. The science teacher in me further solidifies this decision and I have taught my children to never consume hot tap water as well for three basic reasons (and in this precise order): lead, contaminants, and disease.
Lead
How old is your house? When was it built and what are the pipes made of? Just about any home or building built before 1986 has lead in the pipes unless they have been fully replaced. Even newer metal pipes have some lead in them. Read about this at the CDC.
I live in a house built in 1931 and I KNOW there is lead in these old pipes. Drinking the cold water without running it for a few minutes (5 is recommended) first would be foolish, but drinking the hot tap water would be even more foolish! Keep reading for the reason why... Contaminants
Where does your water come from? Is it treated by a water company with chemicals or does it come from a private well? Do you have a filtration system in your home? If it is well water have you ever had the water tested for contaminants and particulate matter?
I have lived in both situations. Years ago I had well water and I paid to have it tested once a year. I also had a filtration system since we lived in an area where the water table was only 4' below the surface. Now I live in an area with a government run company that pumps up the groundwater, tests it, filters and treats it with chemicals as needed. Not ideal, but it is what it is. But either way, using hot water means that the contaminants and/or the added chemicals are more concentrated. Think about it: when you boil water only the water is steamed away. Everything else remains behind in whatever water still hasn't become steam. Simply put, the amount of contaminants stayed the same and the amount of water decreased. The heating that boiled some of the water created a greater ratio of contaminants to water. The same thing happens in the hot water tank. As the water is heated and some turns to steam, the amount of ratio of contaminants and/or added chemicals to hot water in the tank will be greater. When you use the hot tap water you will be getting water with a greater than average amount of contaminants. Then if you cook with it the ratio of contaminants to water becomes even greater! Of course there are variable such as the temperature you keep the hot water tank set at, how often you use the hot water, how much hot water you use each time, etc. Me, I still prefer to be safer than sorrier. Oh yeah: and lead is considered a contaminant so that would mean there would be a greater concentration of lead in the hot tap water verses the cold. Contaminants and Disease
How old is your hot water heater storage tank and how often do you use it? How long does the water sit in there heating up? An older tank releases potential contaminants into the tank. Some people say there is actually a sludge in the bottom. I am not sure if this is true or not, but why test the theory out? Maybe if I ever need the tank replaced I will open it up to get a look! But for now, I am not taking any chances.
The same goes for how often you use it. If your hot water sits for hours, or even days (or more if it is a vacation home) at a time in the tank this is just more opportunity for more water to boil away and the contaminants and chemicals to become even more concentrated. Sitting also allows molds and bacterias to grow in there. Some of the growth depends upon the temperature that you keep the water at, but it could be a potential problem that I don't even want to think about. Again, no thanks. Disease
Do you live in a large apartment building? Or maybe you're away on vacation staying in a big hotel and just want a quick cup of hot tea. Don't do it! These types of buildings have huge water storage tanks with the potential for Legionaires disease according to the EPA.
I don't live in an apartment building but I have friends that do and I have stayed in many a hotel in my travels over the years. For me it is just something to remember and keep in mind during my visits and travels.
Those are my personal reasons for not drinking hot tap water in my home, or anywhere else for that matter. In my opinion, it's just not worth it to use it. Do you have any other reasons to add? I would love to hear from you! But remember, everything is a choice. I am not telling you not to drink hot tap water, just the reasons that I choose not to! The choice to drink it or not is yours!
Sources:
http://www.nytimes.com/2008/01/29/health/29real.html http://mesaaz.gov/residents/water-resources/services/water-quality/lead-and-copper https://www.cdc.gov/nceh/lead/tips/water.htm http://www.labtechtests.com/page/Common_Drinking_Water_Contaminants.aspx https://www.epa.gov/ground-water-and-drinking-water/legionella
0 Comments

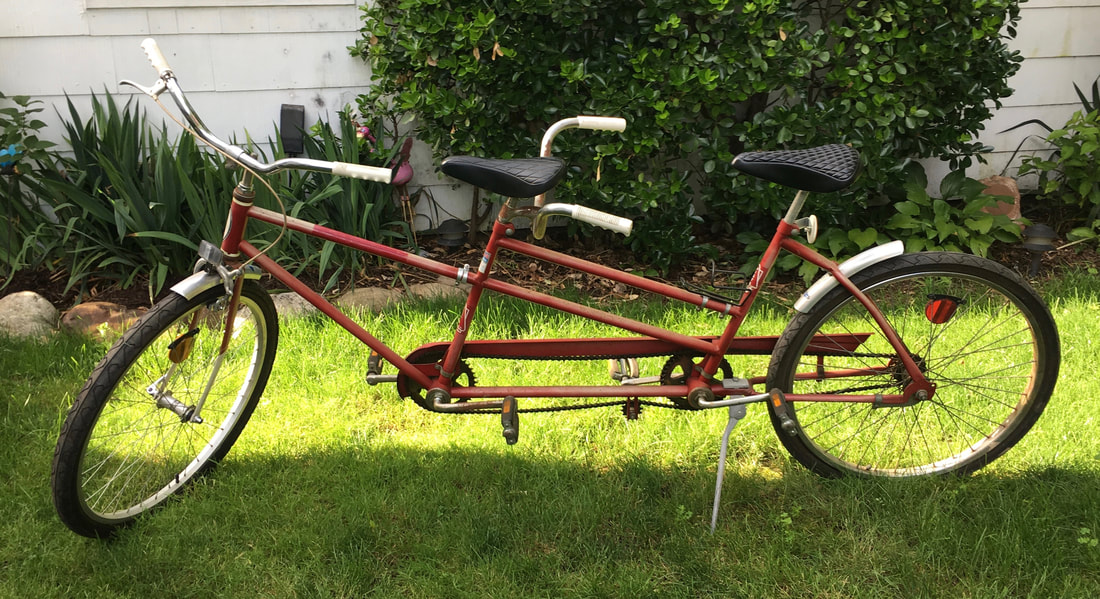
My brother and sister-in-law have had this old 1970's Vista duo tandem bike in their garage for several years now. I always thought it was the coolest thing to ride a tandem bike, especially as a kid because brings up good memories of when my cousin Lynn and I used to ride her families tandem around town. So when my in-laws recently said their's was going in the garbage if we didn't want it I jumped on the offer....but not for me.
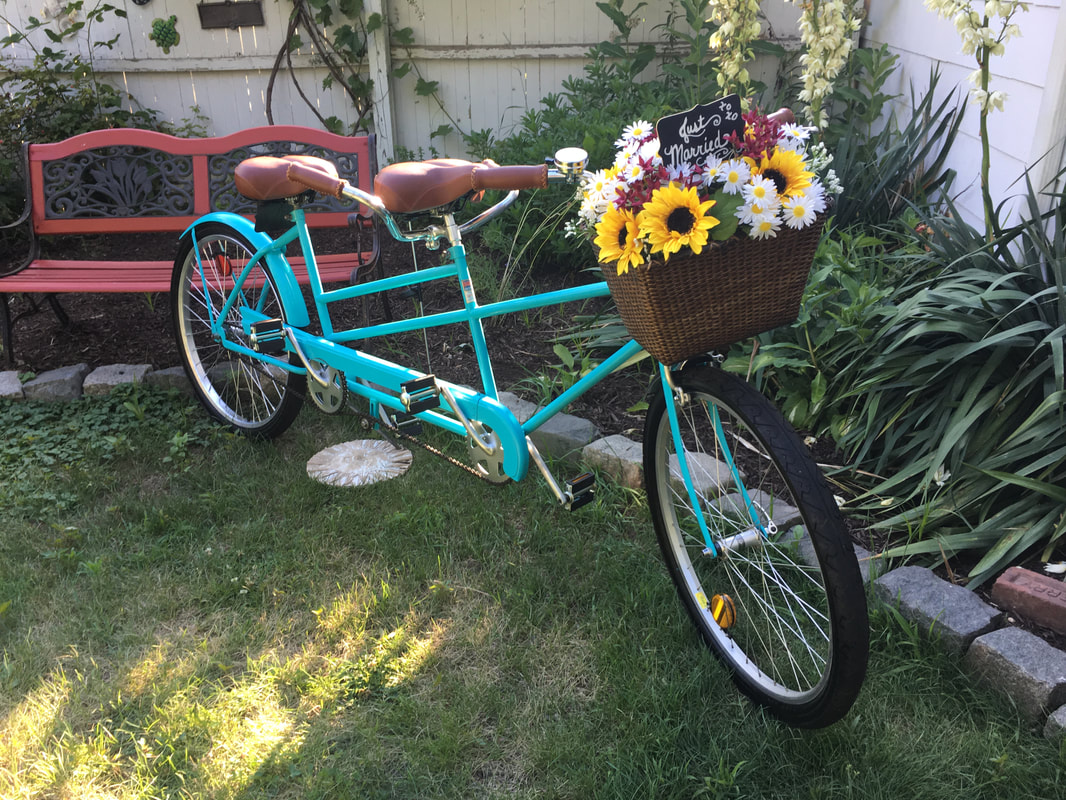
My daughter is getting married in September and she and her fiancé live on Fire Island. If you know anything about living on Fire Island it's that there are NO cars driven around (other than for emergencies). You get around by walking or biking so what could be more perfect than having a "just married" tandem bike for them to ride around together on? My brother and sister-in-law agreed that this would make an awesome gift to for the 'married couple to be' and so we set to work! And of course it is far better than simply throwing it out ;-) With little bit of time, some MONEY, and a lot of love we finished it up just in time for my daughter's bridal shower. Let us know what you think!
BEFORE....
Check out our video of how we did it!
We did have to purchase a few items to make it work, mostly from Amazon, but a few from Target, Michaels, Lowes, and The Vicious Cycle (the local bike shop that used to be Sally's) as well. Kudos to The Vicious Cycle by the way, who must have parts saved from the beginning of time! They actually had handlebars for the second seat that worked perfectly (we couldn't get rid of the rust on the originals)!
Other parts we purchased:
I also added a tin can wedding thingy to the back so when they ride it back to the house after the wedding ceremony by the beach it will be absolutely perfect!
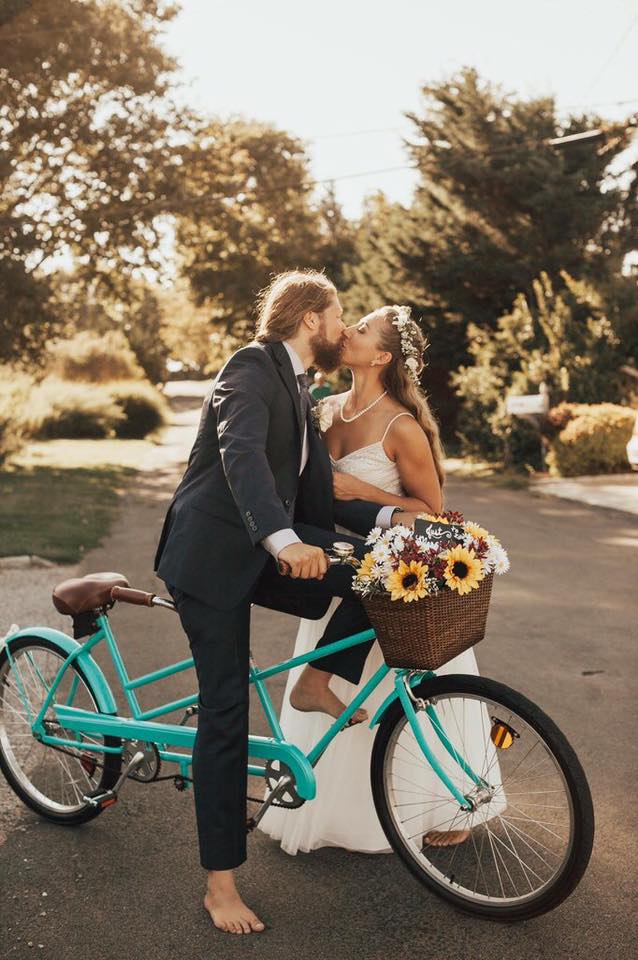
And here are the newlyweds on the bike! They rode it from the beach ceremony to the back yard reception a few blocks away. It was perfect :-) Thank you to Samantha Brancato for the beautiful photo.
Thanks for visiting.
I really hope you enjoyed this post. I have to say that this was one of my absolute all time favorite projects! Not only did I get to spend time with my husband, but we worked with his brother as well. Best of all the gift was for my beautiful bride-to-be daughter and her fiancé. What could be better? Doing wonderful things for our loved ones is what life is all about! Don't you agree? See more DIY Shower & Wedding projects here! Sincerely,

Happy people are healthier people. I know you have probably heard this a thousand times, but it is true, and it's pretty simple too!
Why are happy people healthier?
But how? How can you simply make yourself happy when you really aren't? Mind over matter, with a little practice. Trust me when I tell you, I have my good and bad days just like anyone else but here is what I do to be, and stay, happy:
Of course you can find this extra time by creating a simpler life for yourself and your family!
You knew that was coming, didn't you? Hang in there, my book "The ABC's of Creating A Simpler Life" should be out this fall, but in the meantime there are a lot of ways to help simplify your life throughout this site so there is no reason not to get started right away! But most importantly, be happy :-)
Thanks for visiting!
Sincerely,
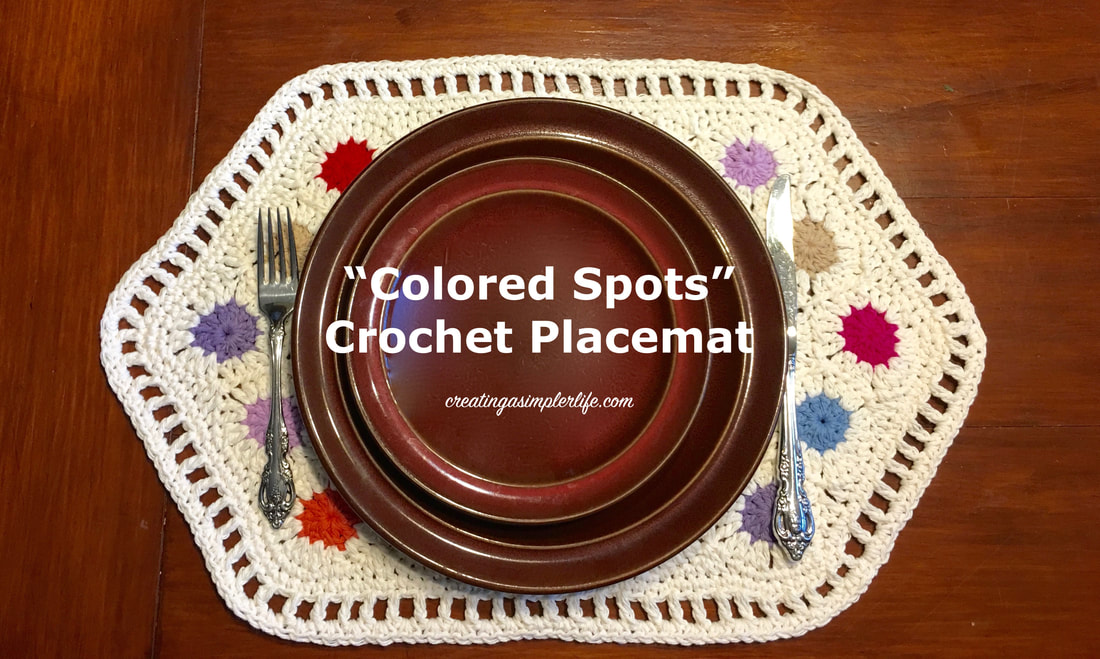
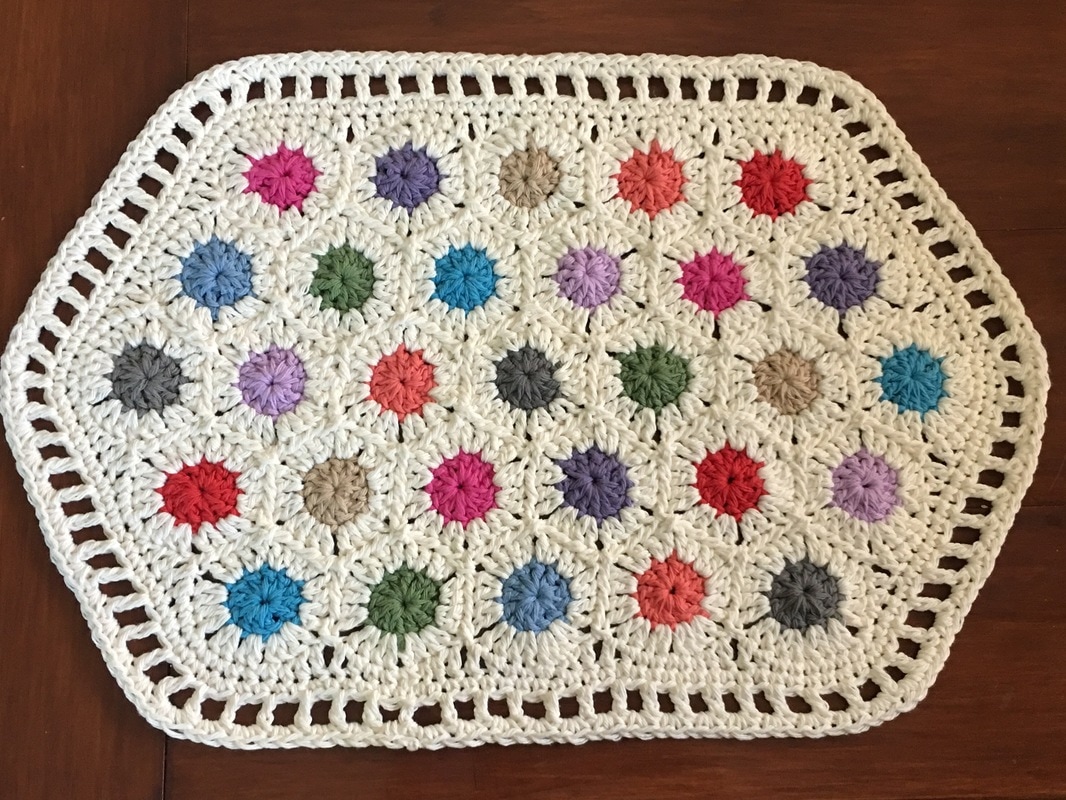
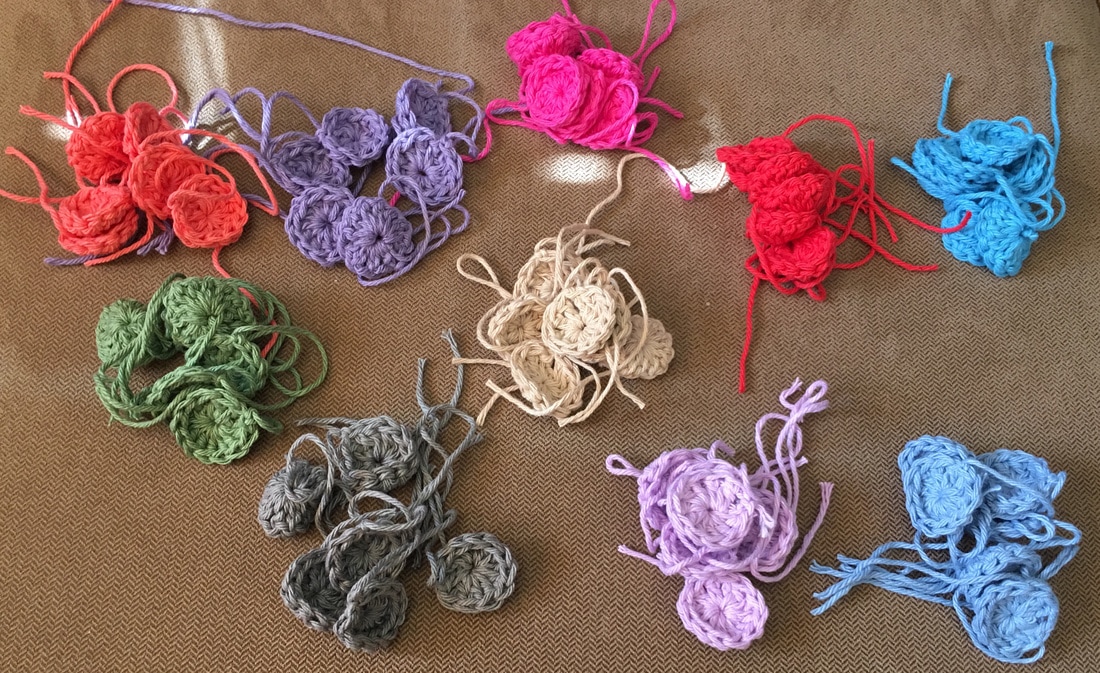
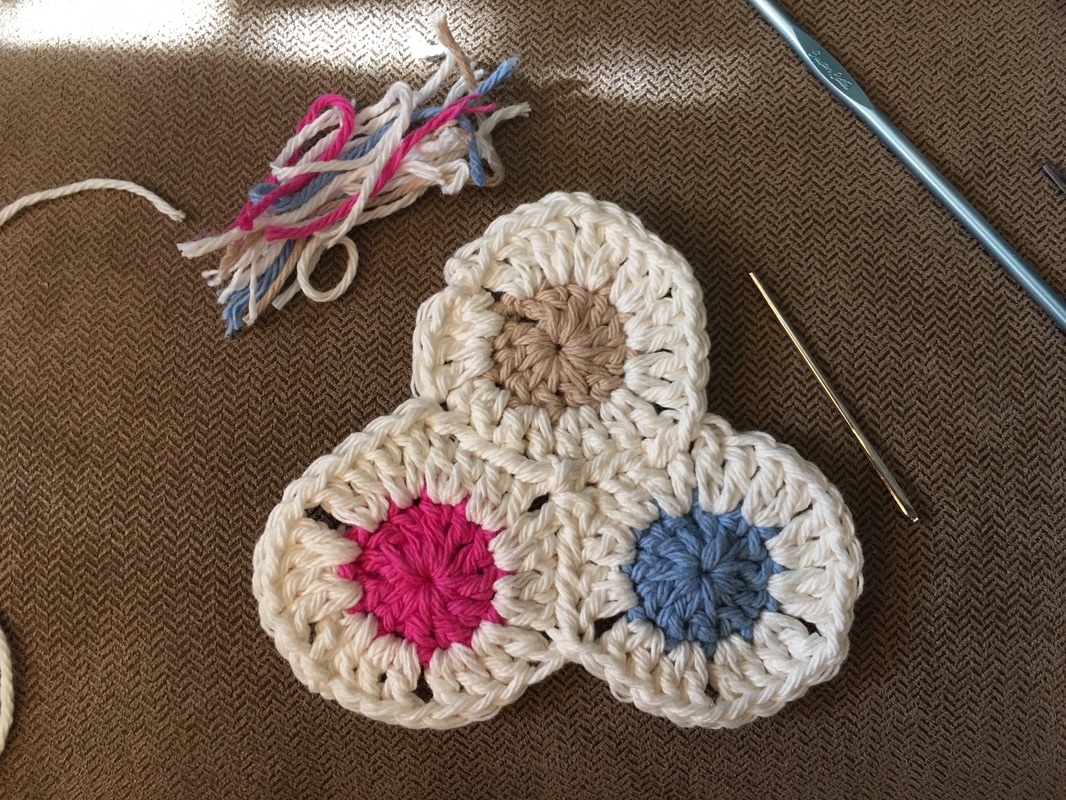
This is a great way to use up those leftover pieces of yarn that aren't big enough to do anything else with!
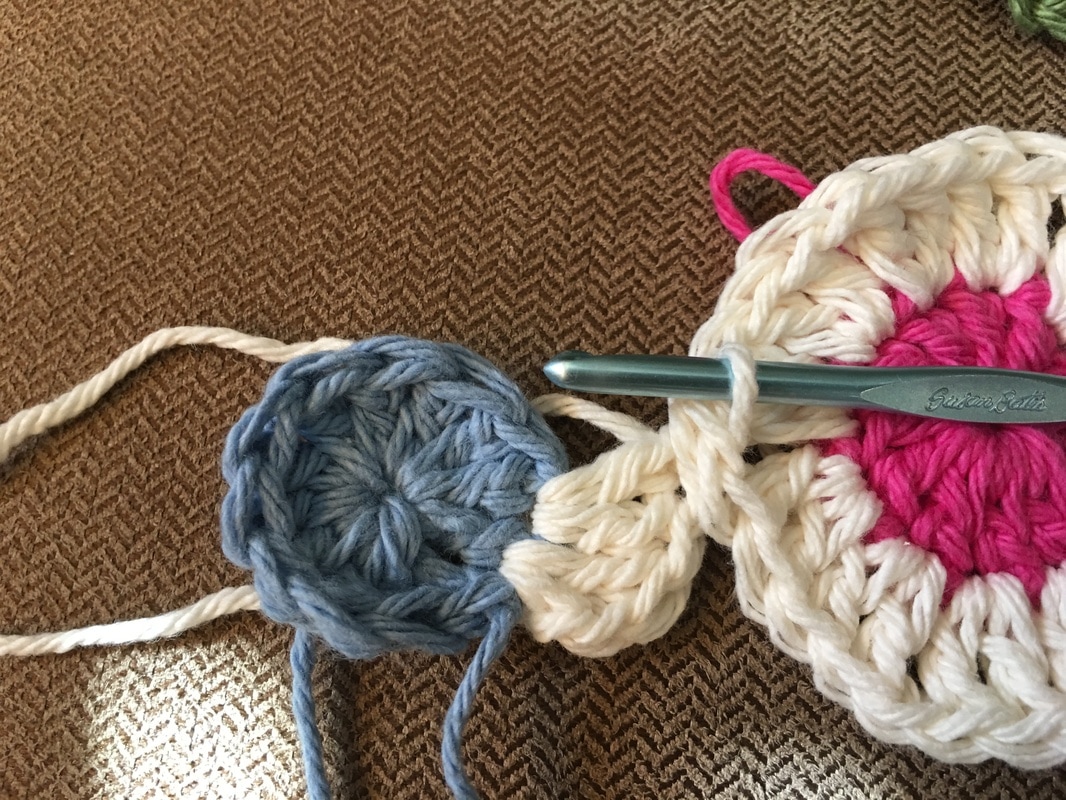
The beauty of this pattern is that the second row is basically the connecting row. There is no special connecting stitch to be done later on! I got the idea for this project from Atty's Blog Spot. She does it a little differently and she makes a blanket instead, but there are pictures that can help you get the idea if you are having any trouble. I kind of simplified the basic pattern, but it is generally the same only I make a placemat and add a border. Enjoy!
Supplies Needed:
Make the Spots:
You need a total of 29 spots for each placemat Using scrap yarn...
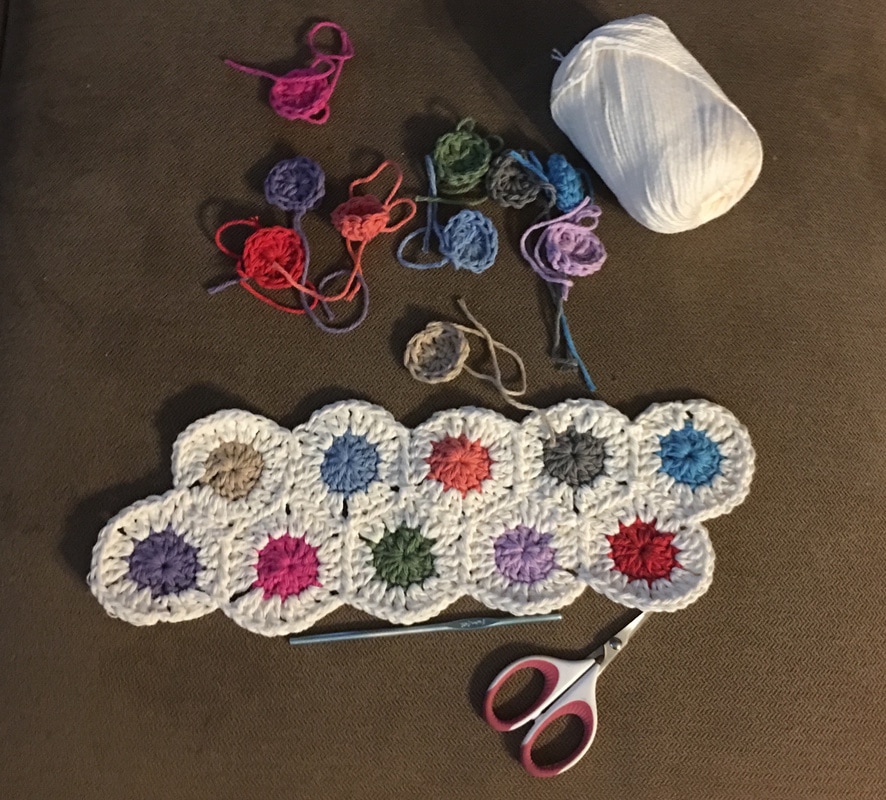
**HINT: I just make 6 of every color this is enough to make 2 placemats with a couple left over.
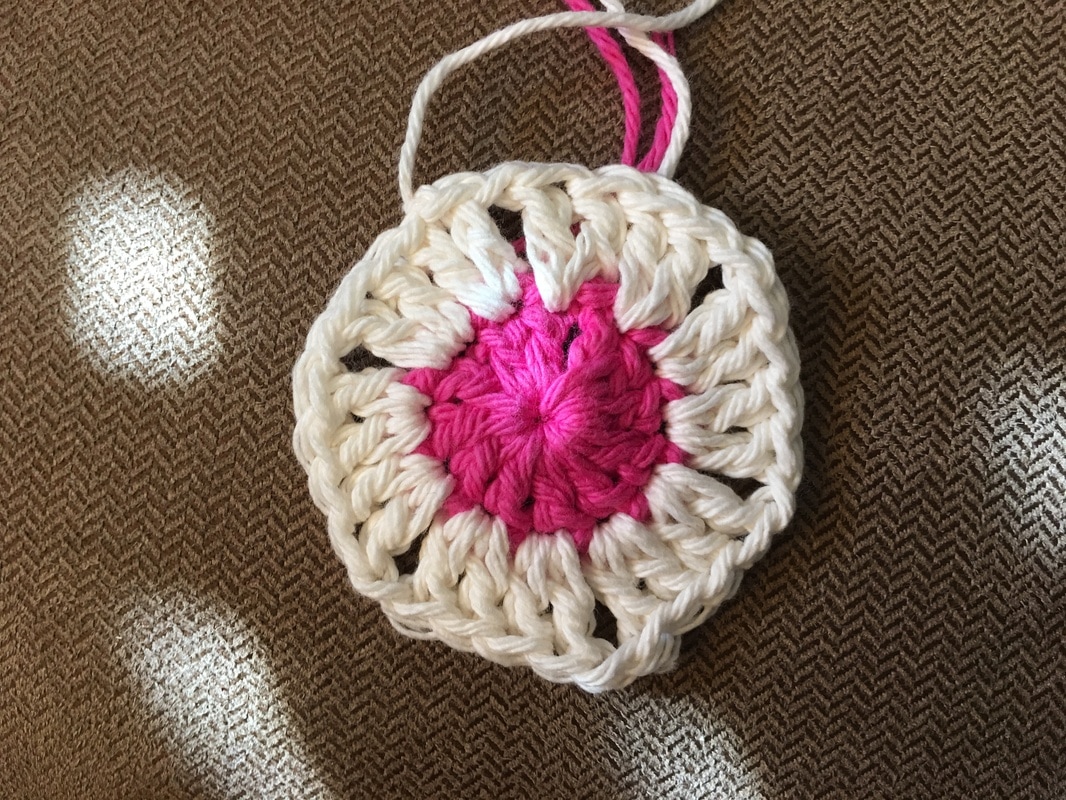
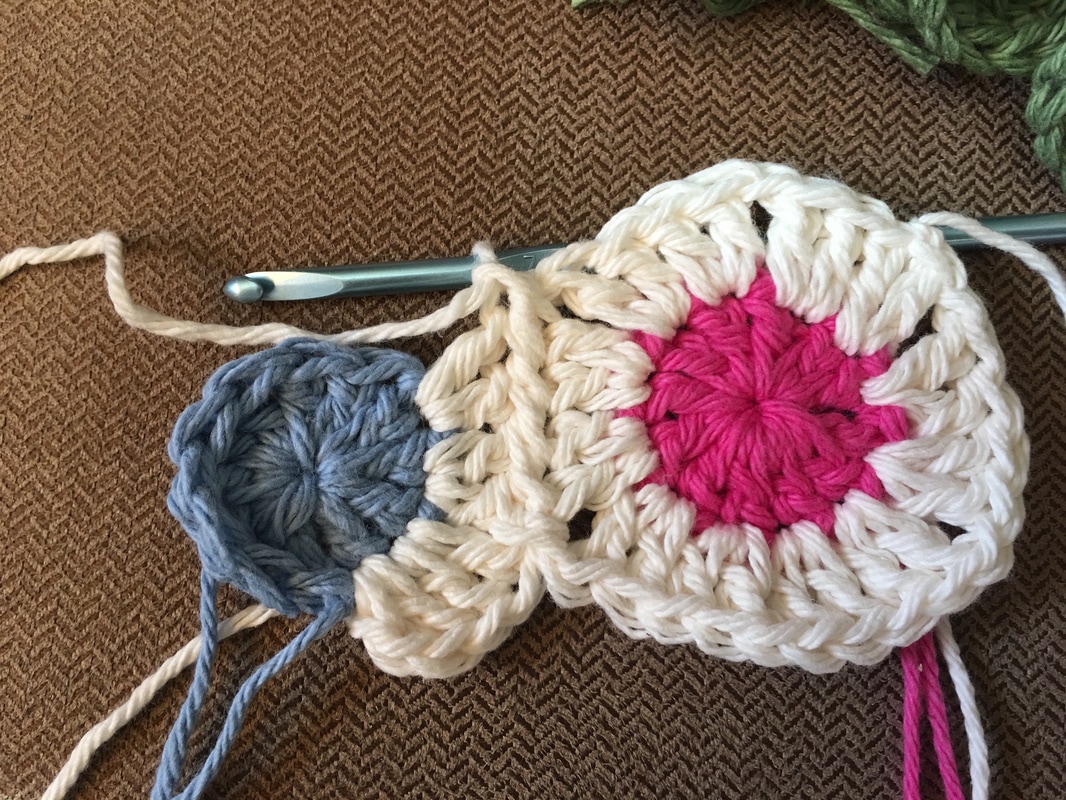
Complete First Spot:
Using your background yarn....
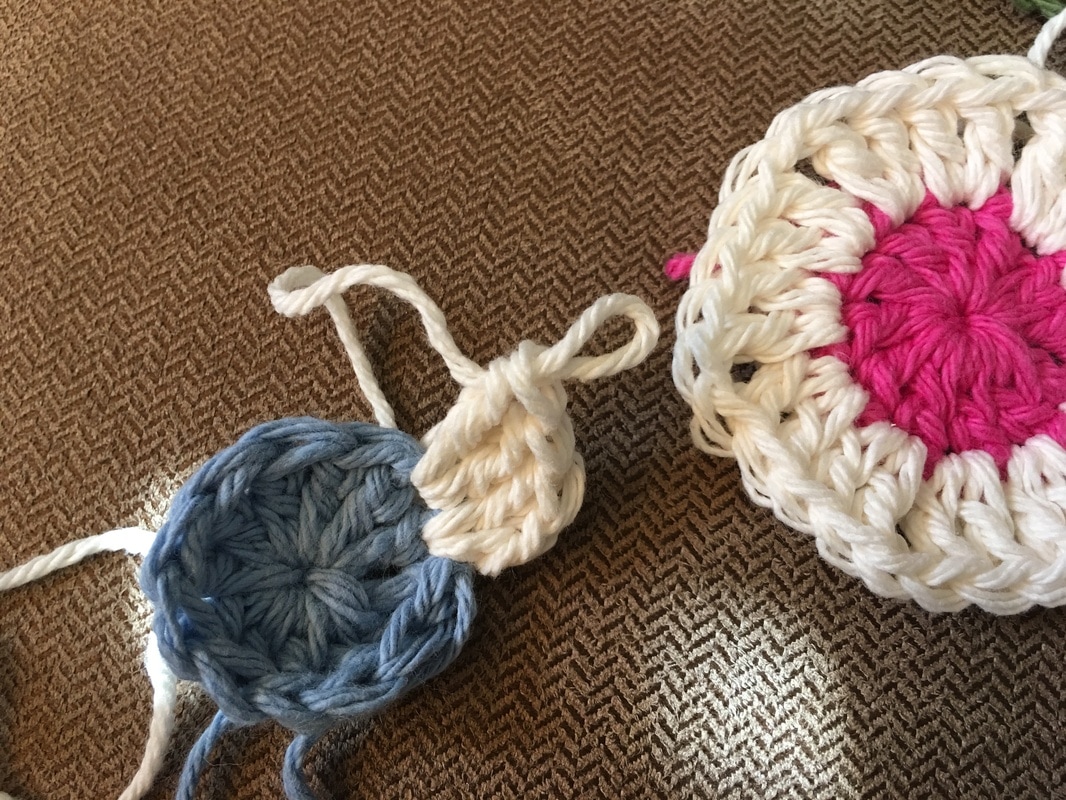
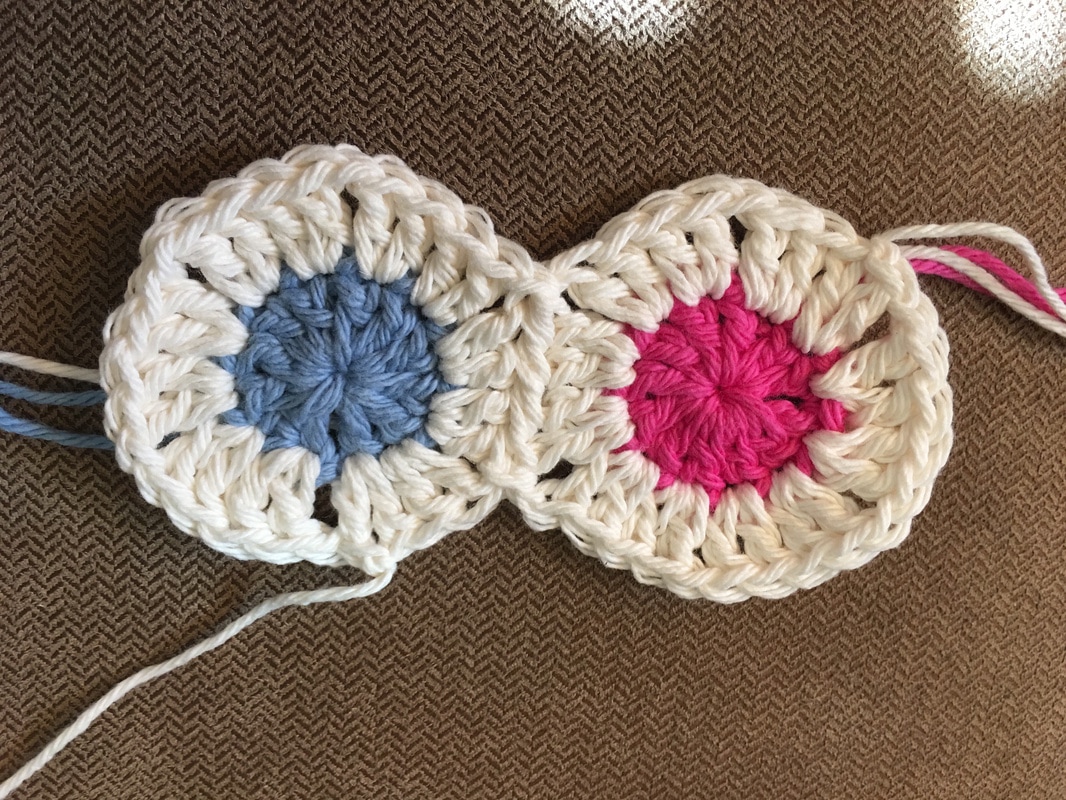
Add Second Spot:
Using background colored yarn...
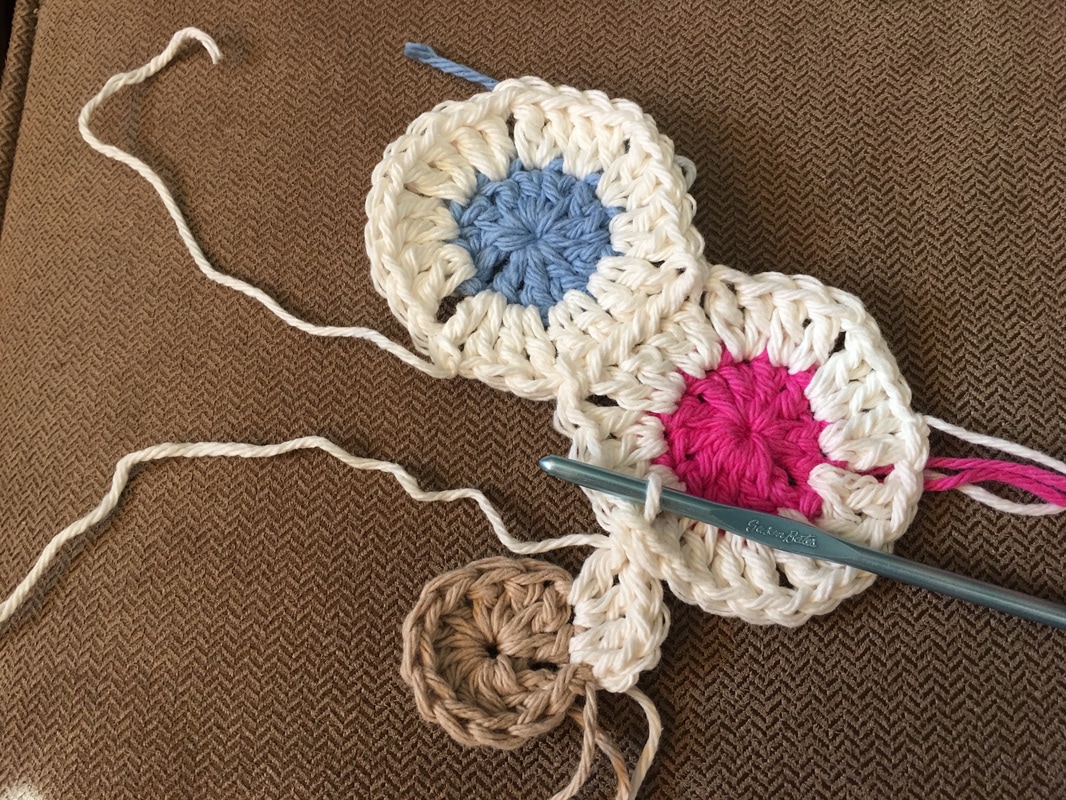
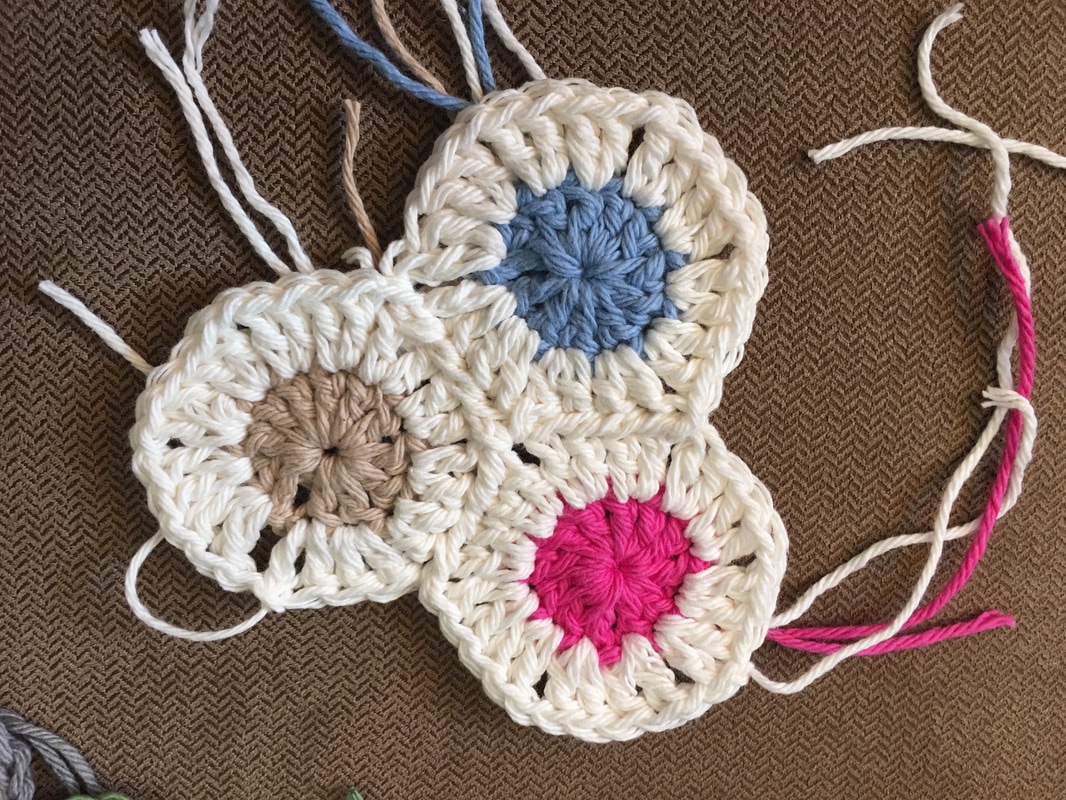
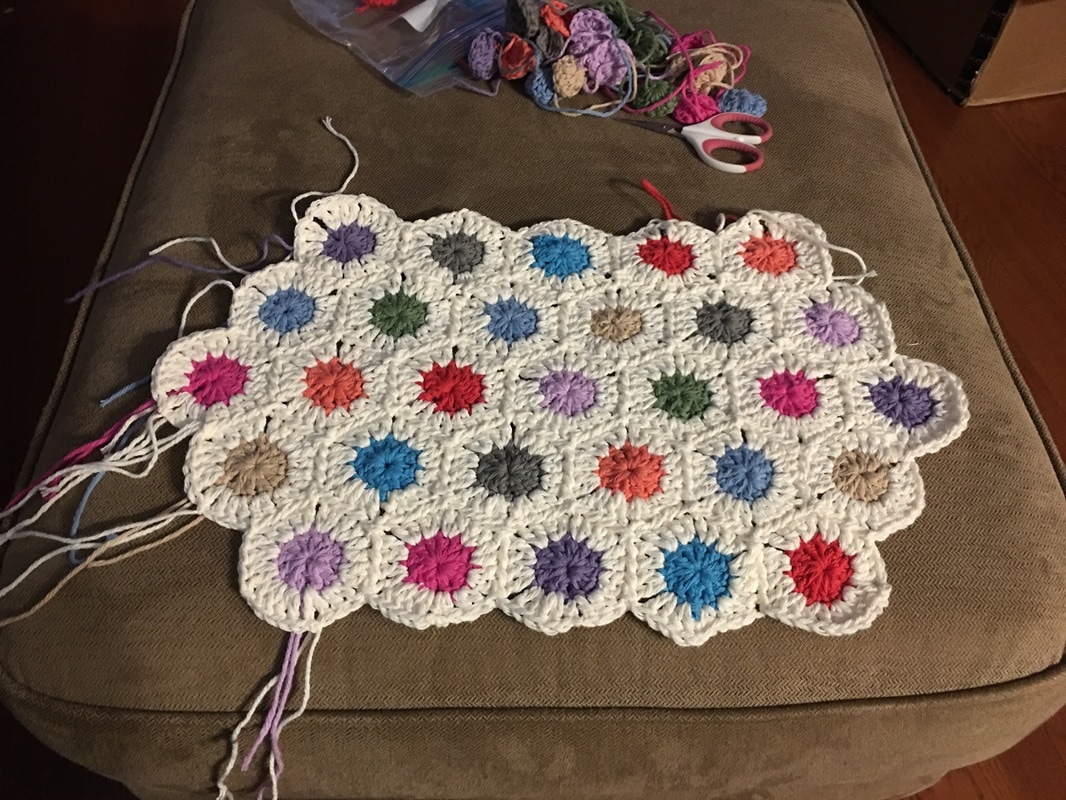
Add Third Spot:
Continue to connect more spots..
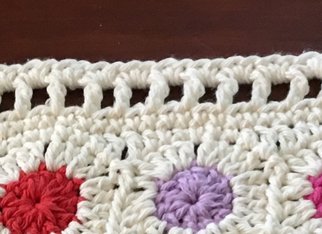
Crochet the Border:
Add the border!
It's beautiful! And it is for me...yes, I have finally made something for myself. Well, it is made with leftover scraps of yarn after all :-) How could I possibly give it away?
Thanks for visiting! Follow me on social media or sign up for e-mail to stay connected. Sincerely,
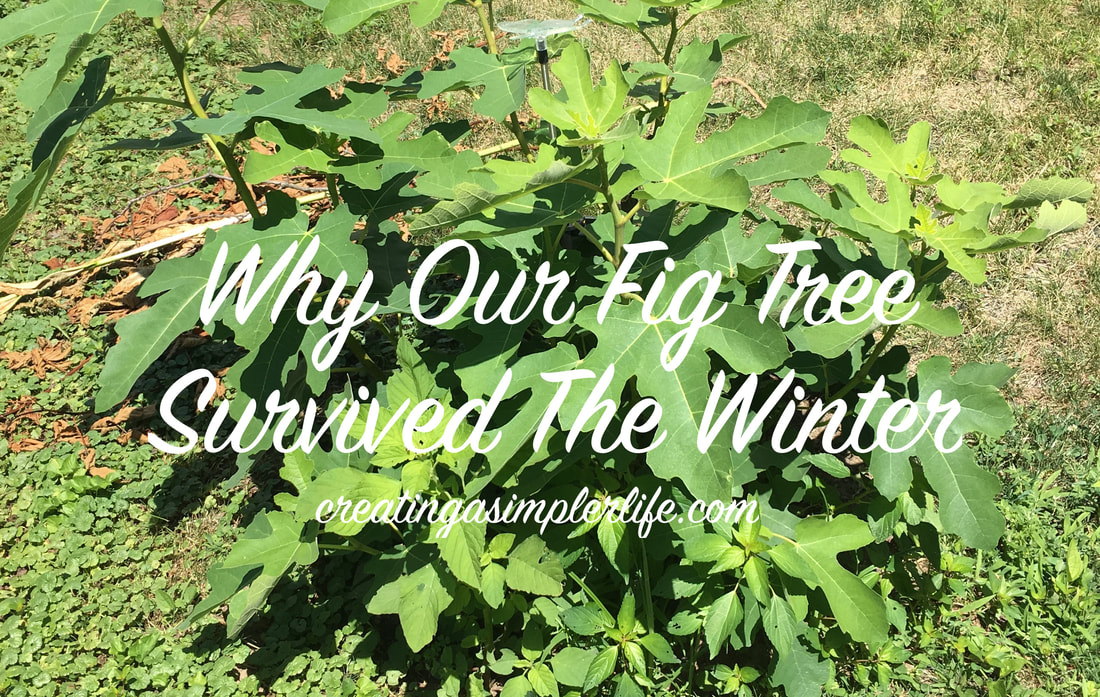
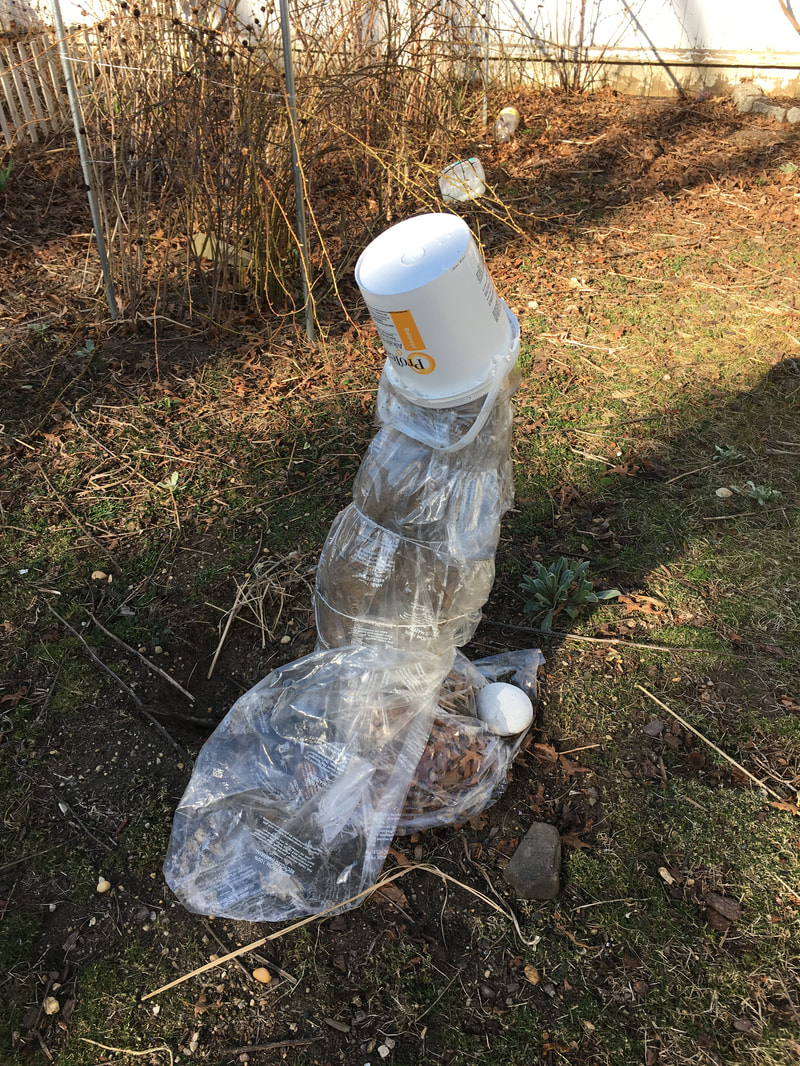
Last fall I wrapped up our newly planted fig tree for the winter not knowing if it would survive or not (but I was really trying and hoping). Read more about Winterizing our Fig Tree here. This past spring I was nervous when we opened it up, but despite losing a few branches at the top to the cold winter, lo and behold, the fig tree was alive! It had survived the winter and the proof was the little buds that were growing on the lower branches. The way we wrapped it up apparently worked out pretty well and hopefully we will get better at it each year that we own this lovely, fruit producing, edible plant! As you can see in the picture we are now into summer and it is growing really well. We are so pleased with the results we thought we would share a few pictures with you.
This is what the fig looked like after surviving the winter. We did not 'unveil' it until there was no more frost.
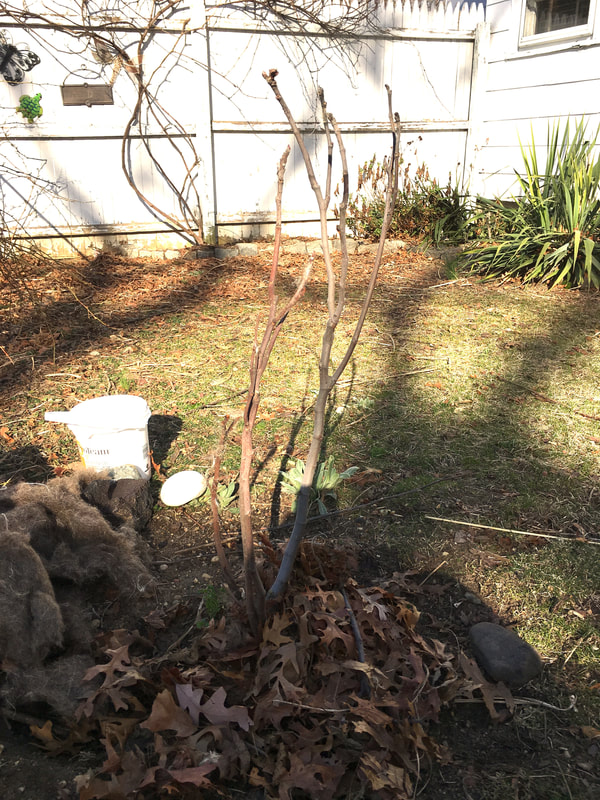
A few of the branches you see were rotted and not getting any buds so we simply cut them off.
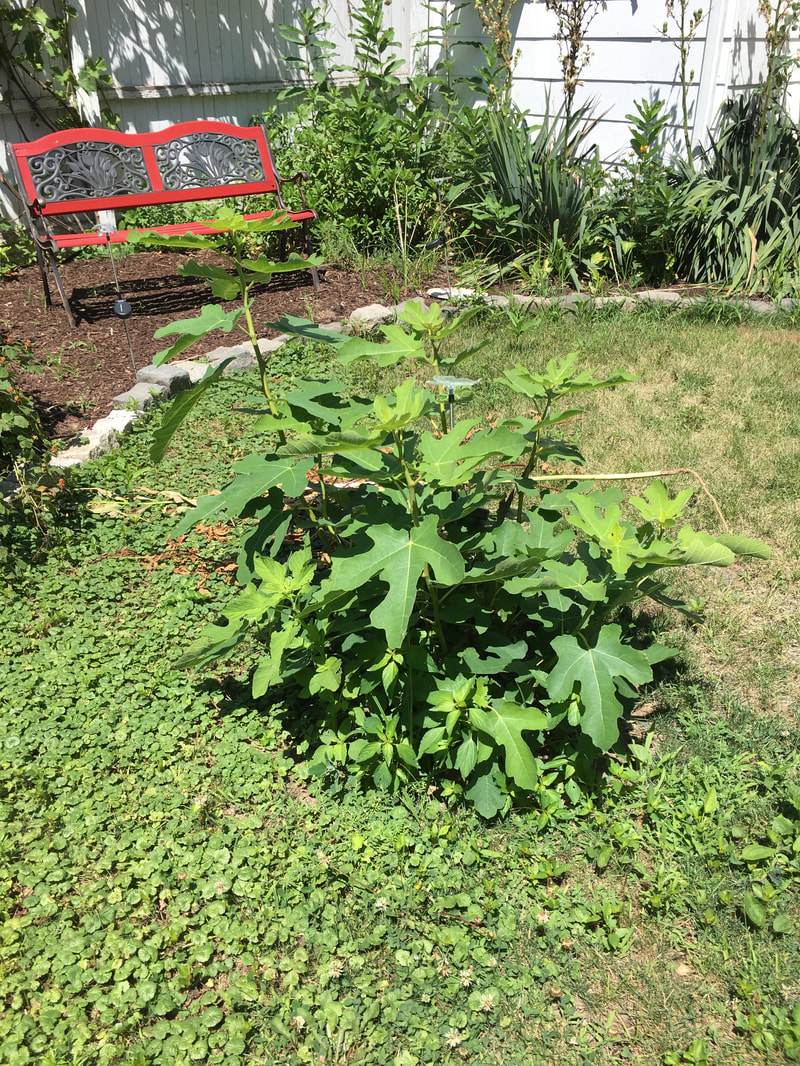
You can see that it is not as tall as it was because we had to remove some of the upper parts of the branches. But look at it! It is growing like crazy :-)
The tree had figs last year while in the pot, however we are not expecting any this year or even next year because it needs to make itself at home in it's new location. But it will provide figs down the road and we can't wait!!
Thanks for visiting!
Follow us on social media for more ideas and ways to create and live a simpler life! Sincerely,
We have a plan for our future homestead: to plant with purpose. That purpose will be edible landscaping. Basically, if the plant is edible and an easy to maintain perennial, it is in! That doesn't mean we won't be planting a few other plants for medicinal or even decorative purposes, it just means that most all of our planting on our homestead will be done with prior careful thought and purpose. That brings me to todays post.
One the years my husband and I have planted many different types of plants at our suburban house for many different reasons: pretty, suggested by friends or family, free from others, or transplanted from somewhere else. Unfortunately there was little to no research on any of these plants prior to planting, and well, we regret it now because they are impossible to get rid of and a real pain in the neck to maintain. Some of the plants actually came with the house when it was purchased, and again, we didn't think much about them at the time. Either way these plants have provided us with not only a great learning experience, but a list of plants TO NEVER PLANT on our future Homestead! Here's our list:
WISTERIA

I absolutely love how wisteria looks and smells in the spring. It is so beautiful the way it drapes down and hangs and to walk past it and smell the aroma is, well, heavenly. But...that only lasts for about a week. And. That. Is. Not. Worth. It. The rest of the year I am chasing down the runners that spread 30 feet or more all over the yard, up trees, into the neighbors yard, all over the fence, and even into my pool once while we were away! I can't even begin to describe how horrible this plant can be all for the reward of one weeks worth of beauty. It's simply not worth it. And, once it's planted you can absolutely never, ever, get rid of it! It will be a lifetime of maintenance and the plant will, literally, outlive you! if yore interested and willing to do the work you can learn more about wisteria here.
YUCCA 
The yucca plant is well, yucka! I absolutely hate it. Yeah, the flowers look kind of pretty but they attract so many ants that they become ugly really quickly! And cutting those long nasty stalks covered in ants really stinks. The leaves are pointy and sharp and can really hurt you too. And seriously, trying to get rid of the plant is impossible. It spreads too easily and seriously, the leaves need a 'hair cut" every spring! The work to pleasure ratio just isn't there for me! Oh, and I did my research and this is not the edible species of yucca. Some yucca have edible parts, but this is NOT the one so bye bye yucca! Read more about the difference between the yucca and yuca plants and their usable parts here.
BLACKBERRY 
Blackberries are delicious, but picking them really is the pits. We planted a blackberry bush a few years ago that we got on sale in Home Depot. HUGE mistake. It grows like crazy, has the nastiest and sharpest prickers, and we absolutely can't get rid of it no matter how many times we "excavated" it out of the ground. When we bought this blackberry bush we had no idea there were different kinds and that some are invasive. Apparently there are ways to tell the species apart - the invasive ones have a hexagonally shaped stem with flattish sides. Who knew? Well, now we do, but either way the thorns are terrible so unless there is a thornless variety that is not invasive, blackberries will never be planted on our homestead! Read about invasive and non-invasive blackberries here.
CLIMBING HYDRANGEA 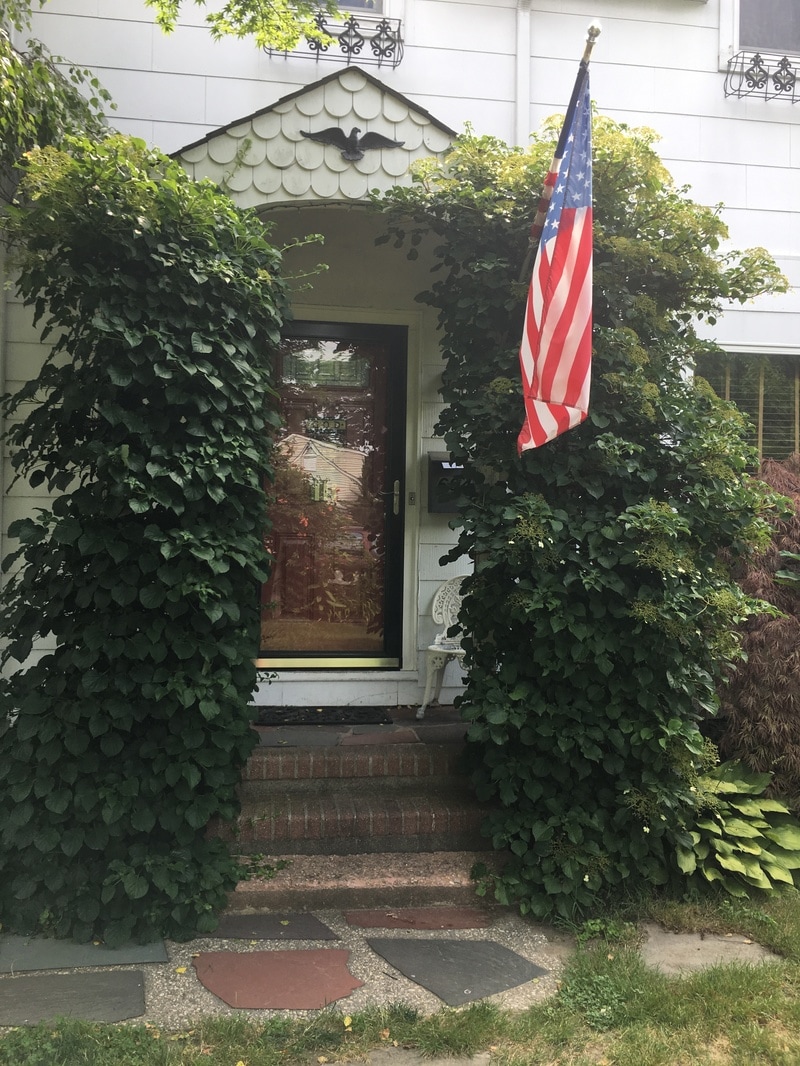
Where to start? Yeah, it looks pretty nice around our little front porch but it does need to be cut at least twice a year, the flowers aren't that pretty (and only grow in the sunlight so only the right side gets any flowers), and they don't even smell that good! The stems become like mini trees and literally rip the porch apart as they wrap around it and through it. They are also ripping the rain gutters off the roof! Finally they have these little tiny roots on all the shoots that literally grab onto anything so they can climb. Pretty interesting, but this means you literally have to rip it off sometimes. Again, too much maintenance for relatively minor return. Not worth it in my opinion. Here's more info on climbing hydrangeas if you are interested.
TRUMPET VINE 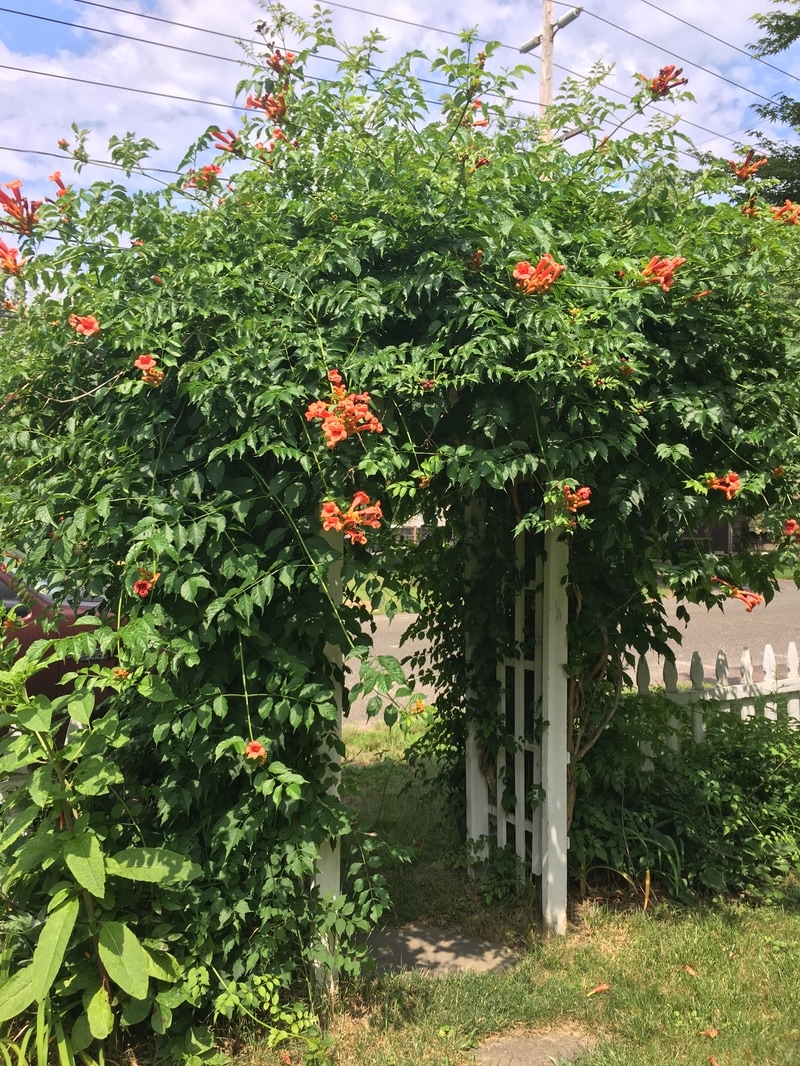
What. A. Nightmare. As pretty as this looks, it is a real pain to maintain. It can send runners out up to 10 feet (or ore) away that literally pop out in the middle of the lawn! This would literally take over my entire front yard if I let it. The flowers are pretty but they attract a lot of ants and other critters and it constantly needs to be 'trimmed.' Way too much work to simply keep it under control. Read more about trumpet vines here.
PRIVET HEDGES 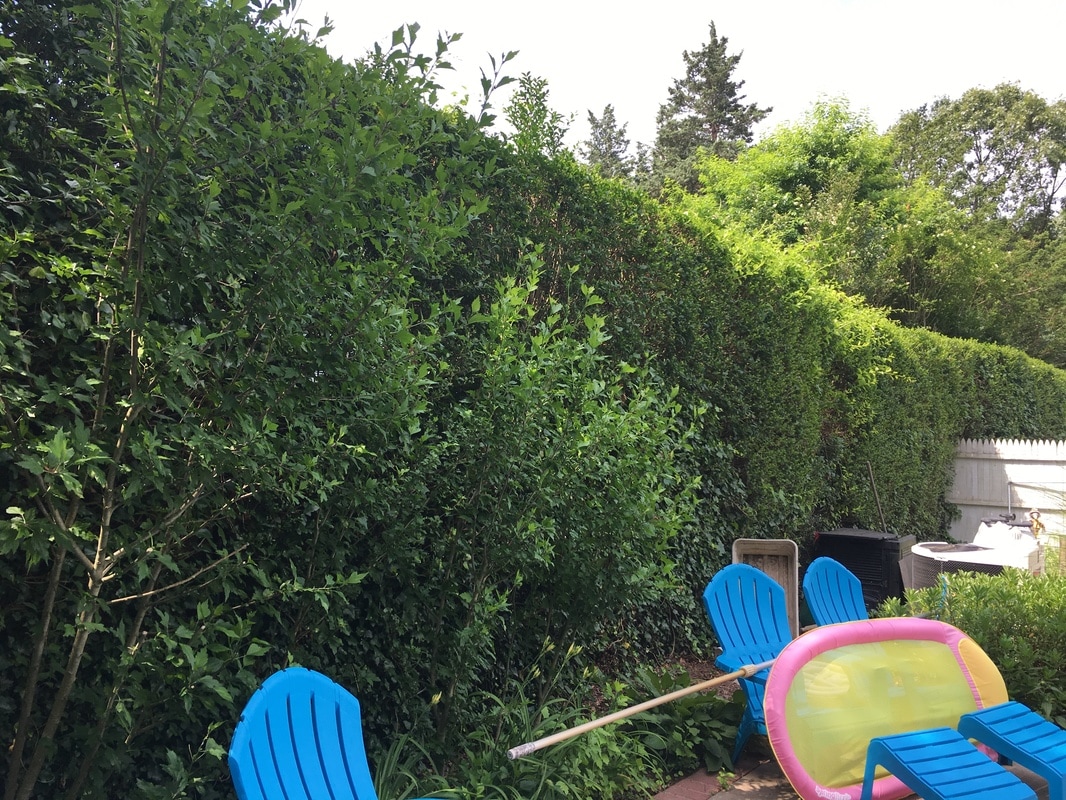
I have a love-hate relationship with my privet hedges. Here in the suburbs I love the privacy they provide me in my backyard (hence their name), however with 50' feet of them on one side and about 20' on the other, it is a lot of work to keep them maintained. Believe it or not I used to have about 70' of them across the front of my house too, but we ripped those out. We used to keep them trimmed ourselves but they are currently about 10 feet high and we just can't keep up with it anymore. This means we pay to keep them looking ok each season. And that is just ok because they really should be trimmed twice a year. Thankfully on our new homestead there will be no need for any privacy barriers since we will be building literally in the middle of our 30 acres! We won't have any close neighbors at all! Read more about privet hedges here.
ENGLISH IVY 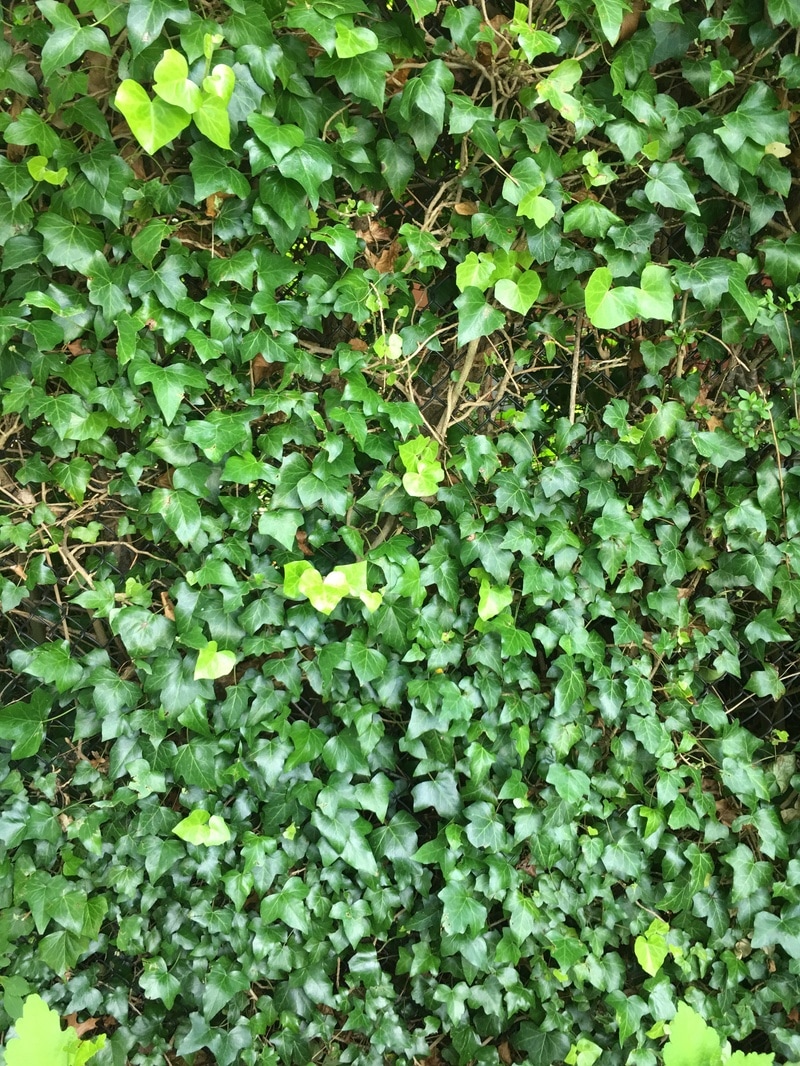
These are great for growing on fences because it looks nice by kind of hiding the fence but it spreads and grows like crazy and I find myself ripping it out every season as it reaches for all my other plants and bushes around it. There is a tree in the neighbors yard that is actually being choked to death by this ivy and we worry that it will die and fall in our pool at some point. In my opinion it just requires too much maintenance. Read more about English Ivy here.
Thanks for visiting!
Read more about our future homestead garden here and follow me on social media! Sincerely,

I take a nap every single day. I just have to. My body wants it and needs it. Even a small 15 minute nap rejuvenates me so that I can get through the rest of my day! Taking a nap is good for you at any age and this post will share why!
Taking a nap is nothing new, People in other countries take naps too! After all, isn't that what a siesta is? According to the National Sleep Foundation, the siesta, or midday nap, goes back thousands of years and is still common in warmer countries where Spanish is spoken. However, they are also relatively common in other countries such as Italy (called a riposo), Greece, the Philippines, Mexico, Costa Rica, Ecuador, and Nigeria. Apparently, the tradition began so that farmers could take a rest during the hottest time of the day, usually for about 2 hours. Even though this reason may no longer be necessary (for many of us anyway), a nap, or siesta, is still a good idea for many reasons!
Some interesting facts: Source: http://sleep.org/articles/napping-around-the-world/ Note: These are taken word for word from the site above as changing them would not have made any sense!
I know that many people think that if you nap regularly you are either lazy or sick. Napping is usually only associated with babies, children, old people, or sick people after all. Right? Well, no, not right. There have been some very famous, and very significant people in history that were nappers! Here are just a few: Winston Churchill, Ronald Reagan, Albert Einstein, Napoleon, John F. Kennedy, and George W. Bush are all said to have taken afternoon naps regularly!
Moral of the story?
Take a nap every day! It should be obvious by now that it is good for you :-) Thanks for visiting! Check out more Health & Wellness here and please follow me on social media. Sincerely,
|

Hi there! I'm Kathie, the author behind Creating A Simpler Life blog. I'm excited to share our longterm projects (and planning) toward building our future retirement homestead in the Adirondack Mountains of New York. In the meantime I will be sharing all the other little things we do that are part of creating our simpler life!
Categories
All
Archives
July 2020
|


 RSS Feed