CREATING A SIMPLER LIFE OFF-GRID
  • Home/About
    • What does OFF-GRID mean?
    • MINIMIZING >
      • Home Size
      • Room by Room
      • Get Organized
      • Household Waste
    • MINIMIZE DEBT, MAXIMIZE SAVINGS >
      • Bills & Other Debt
      • Saving Money
      • Shopping Tips
      • Affordable Fun
    • BACKYARD CHICKENS >
      • The Coop
      • The Chickens
      • Feeding the Chickens
      • Fresh Eggs
    • HOME GARDENING >
      • Building the Garden
      • What We Grow
      • Seeds, Weeds, & More
      • Preservation & Storage
    • DO-IT-YOURSELF >
      • Health & Wellness
      • Simple Cleaning & Tips
      • Crafts & More!
      • Printables
    • CROCHET >
      • IDEAS & MORE
      • VIDEO TUTORIALS
  • HOMESTEAD
    • The 5 Year Plan PLUS! >
      • 2017
      • 2018
      • 2019
      • 2020
      • 2021
      • 2022
    • WHY AN EARTH SHELTERED HOUSE?
    • OFF GRID TINY TRAILER
    • BUILDING our HOMESTEAD from Scratch >
      • BUYING LAND & GETTING STARTED
      • BUILDING THE CONCRETE DOME
      • FROM DOME to HOME
      • SURVIVING OUR FIRST WINTER
    • HOMESTEAD MACHINERY >
      • GENERATORS
      • KUBOTA TRACTOR
      • ATV'S & UTV'S
      • WOOD CHIPPER
      • CHAINSAWS
      • LOG SPLITTER
      • POWER TOOLS
      • SNOWMOBILES
      • AUTOMOBILES
    • BUDGETING THE BUILD
    • SUSTAINABILITY >
      • WATER
      • FOOD
      • SHELTER
      • ENERGY >
        • SOLAR POWER
    • The Adirondacks >
      • Wildlife & Nature
      • Insects & Bugs
      • Things to Do
      • Water Fun
    • ADIRONDACK CRAFTS
  • VLOG
    • 2023
    • 2022
    • 2021

Blog

A little bit of anything and everything that's part of
​creating, enjoying, and living a simpler life!
Picture

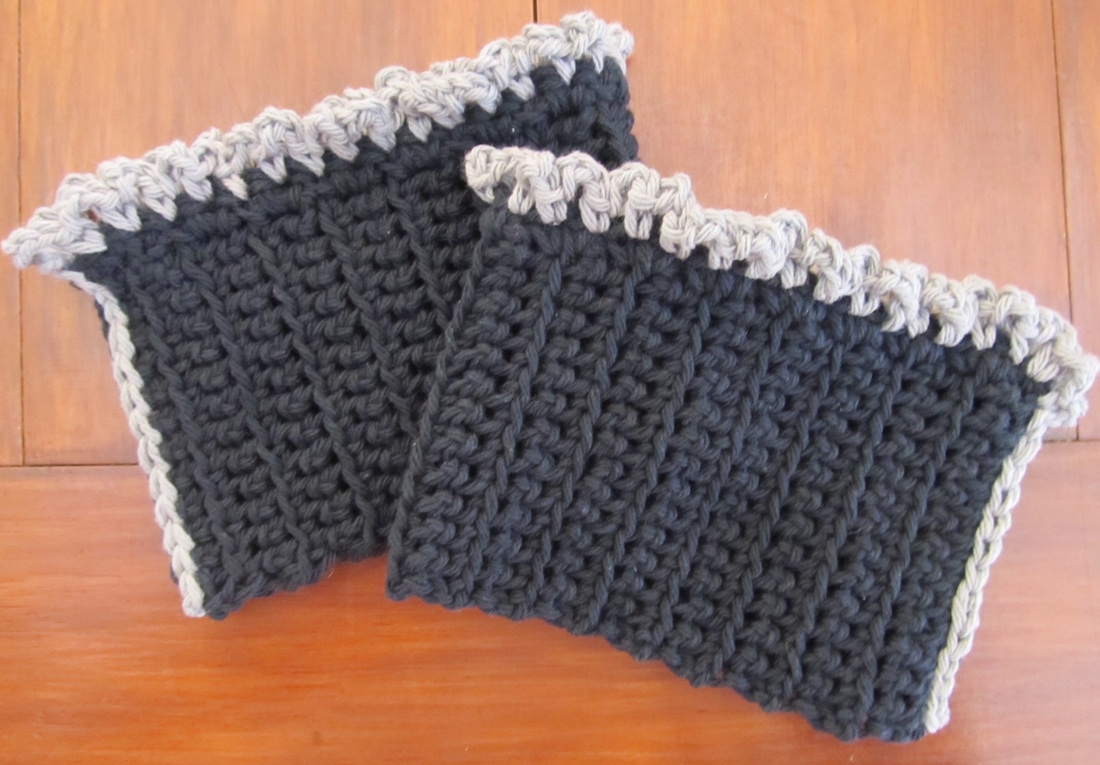
CROCHET BOOT CUFFS

1/29/2016

 
Picture
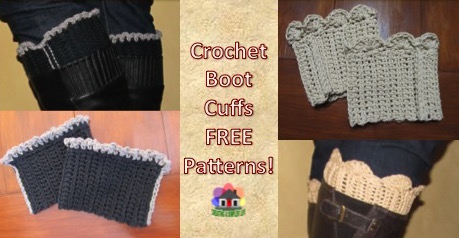
Boot cuffs are apparently the new fad.  I would never have known what they were or thought to make them if my sister hadn't specifically requested them.  After she explained what they were to me it was simple to come up with a design.  The basic design has the same base, but with a choice of two different tops.   I decided to do the base sideways because it allows more stretch in the cuff and can therefor fit different sized calfs more easily.  The pattern below makes a cuff that is 12 inches in diameter that can stretch to comfortably fit a 14 inch calf.  You may need to adjust the rows of the base depending upon the size of the calf.  Each of the FREE patterns can be found below!

Enjoy :-)  

Oh, and remember, I am not the best at writing pattern instructions so if you have any questions please feel free to contact me through e-mail or on Facebook!

Supplies Needed:
  • Lily Sugar'n Cream 100% Cotton Yarn (one 2.5 oz. skein per set) 
  • Crochet hook USA size 9 (5.5 mm)
  • Crochet hook USA size 7 (4.5 mm) (If you choose the ruffled top).
  • Scissors
  • Yarn needle
Picture
Instructions for the Base and Seam:
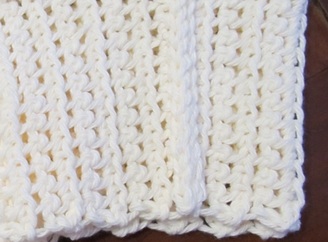
I used the single crochet front loop ridge stitch to make the base but you can easily just use a regular single crochet stitch.
The sides were connected using the slip stitch seam.
  • Using the size 9 hook, chain 15.
  • Row 1: do 1 single crochet (sc) into the 14th chain (one away from hook) and continue to sc into each chain for a total of 14.
  • Row 2: chain 1 and turn. Single crochet into the front loop only of each stitch across.
  • Row 3 - 30: repeat row 2, always crocheting only into the front loop each time. Do not finish off yet.
  • NOTE: 30 rows works well for a 14" calf (you get about a 2" stretch).  Adjust the number of rows for smaller or larger calfs so that the length is always 2" less than the actual calf diameter.  Example: for a 14" calf you want the boot cuff to measure at about 12".
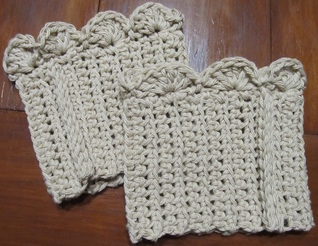
  • Connect ends:  Fold the two sides together and connect them using the slip stitch seam. Do not finish off yet.
  • Chain 1 and single crochet loosely around the top edge.  Slip stitch to connect to top of first stitch.  Do not finish off.  
  • Choose which top you want to do below.
Picture
Scalloped Edge:
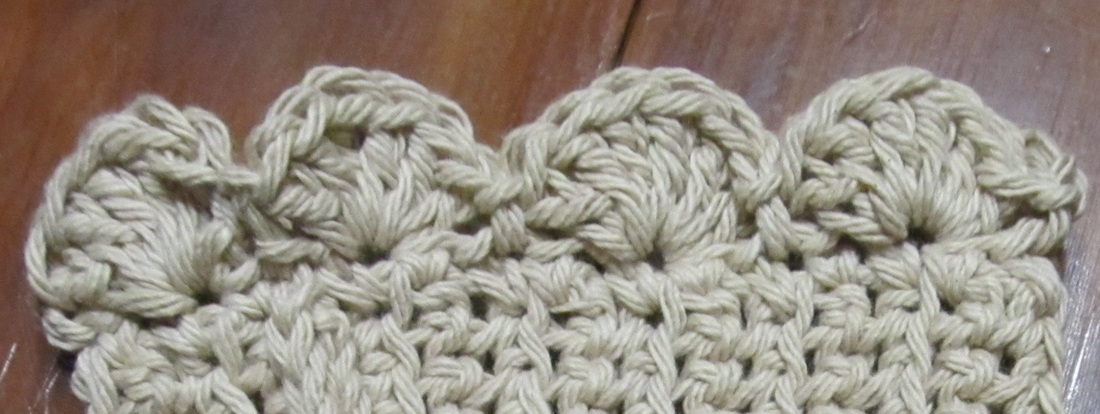
Here is a simple tutorial how to crochet a scalloped edge.  I only skip one stitch and I use 6 instead of 5 dc, but the concept is the same!
  • ​Use the same size 9 hook
  • Double crochet 6 times into the second stitch from hook (so skip 1 stitch), then skip 1 and slip stitch into he second stitch from there.
  • Repeat the same pattern around and connect with slip stitch and knot.
  • Finish by weaving all loose ends.
Picture
Ruffled Top:
I have no tutorial for this stitch.  I do not even know what it might be called, but it is really simple only requiring chains and single crochets.
  • Switch to a size 7 hook and chain 4.  
  • Single crochet into the next stitch, then chain 3 and single crochet into the next stitch.
  • Continue the same pattern all the way around without skipping any stitches.  
  • Connect to first chain stitch with a slip stitch and then knot off.
  • Finish by weaving all loose ends.​​
Picture
Picture
NOTE: If you choose to use two colors you either need to use the same color as the base to make the seam, or if you want to make the seam a different color like the picture above, you have to make it OPPOSITE so they will match properly!
Thank you for visiting!

Please check out my other FREE Crochet Patterns or our Crochet Only
and Crochet for the Kids Pinterest boards!

Sincerely,
Picture

Minimizing Your Seasonal Decorations

1/23/2016

 
Picture
Love decorating for different holidays but discouraged by having too much stuff to decorate with?  Does the thought of decorating make you tired before you begin? Are you running out of room to store all that stuff?  Want to find a simpler way?  Then it is time to minimize and organize! Less stuff = less stress so  here's a simple way to minimize and organize all your seasonal and holiday decorations now.
Where to start?
  • Think about the different seasons/holidays you decorate for and choose which ones you want to continue to fully decorate for (sort of go all out).  We chose Christmas, Easter, and Halloween.
  • Decide how many bins you want to have per holiday, and how big they need to be. We purchased 10 gallon bins with locking lids and decided to have one bin each for Easter and Halloween and two bins for Christmas (one for the tree including ornaments, skirt, topper, and lights and one for indoor/outdoor decorations and stockings).
  • Decide which holiday/season to start with and take out all the decorations for that holiday.
  • Start putting the items you want to keep into the bin one at a time.  When the bin is full you are either done, or you need to take something out in order to put something you want more in!  This is the hard part, but it really makes you look closely at each item to decide what is really important!  It is helpful to have a box ready for all the stuff you decide you do not want.
  • Label the "keeping" bin with the name of the holiday and put it on a shelf out of the way until you need it!
  • What about what  you are not keeping? Donate or sell them! Check out our Pinterest Board Selling & Donating for ideas on where and how to do this!
​
What about the "Binless" Holidays?
These are the holidays you don't go all out for, but still want to acknowledge and celebrate.
  • We have decorations for holidays such as the Fourth of July and Thanksgiving, however we don't need a bin because we don't decorate a lot for them. We just change either the pillow covers, the front door hanging, or both!  Oh, so simple!
Picture
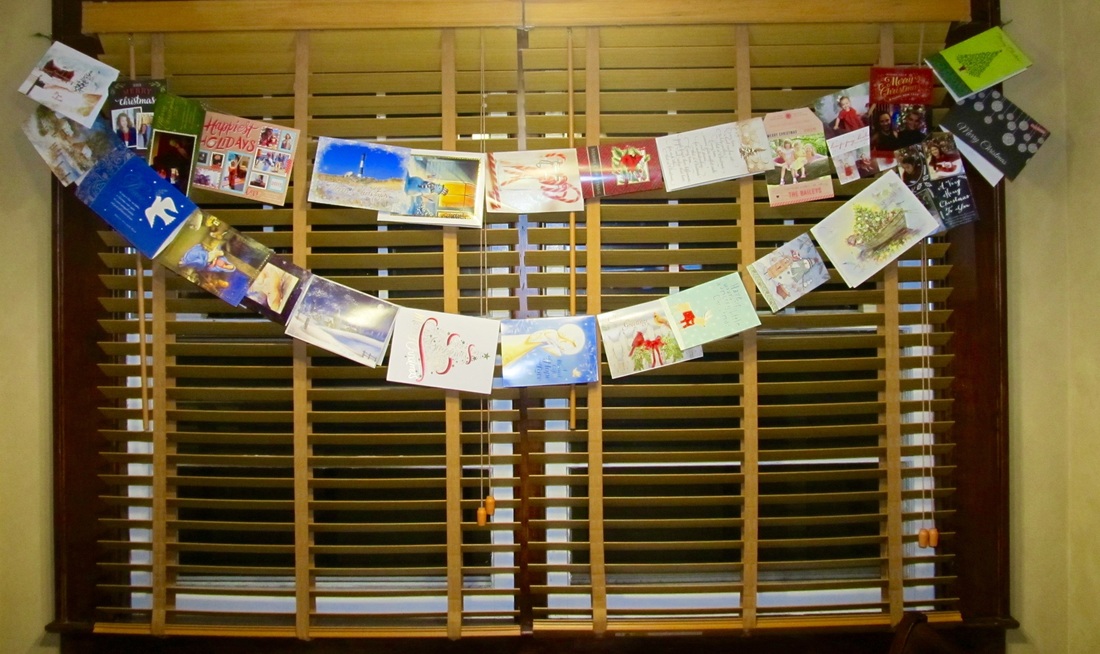
Christmas Cards: Screw one tiny eye hook into each side of a window (2 total). Hang as many loops of string as needed between them each Christmas. Cards with no fold? No problem, just use a piece of tape over the top of the string! Holiday over? Save the string and the hooks with your decorations for next year! Simple :-)
Picture
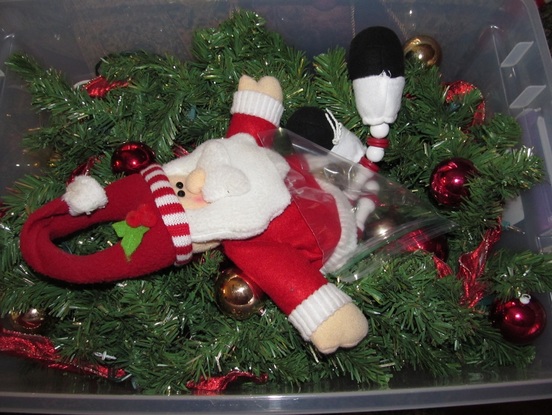
Keep the decorations for each holiday in a large bin. We use two bins for Christmas: one for tree decorations (skirt, ornaments, star, lights) and one for the house decorations.
Picture
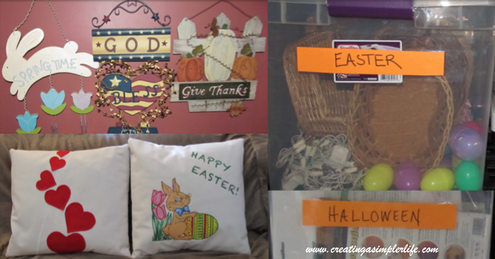
We allow one bin for Easter - if it doesn't fit in the bin, then we don't keep it! Notice the bin is labeled?
Picture
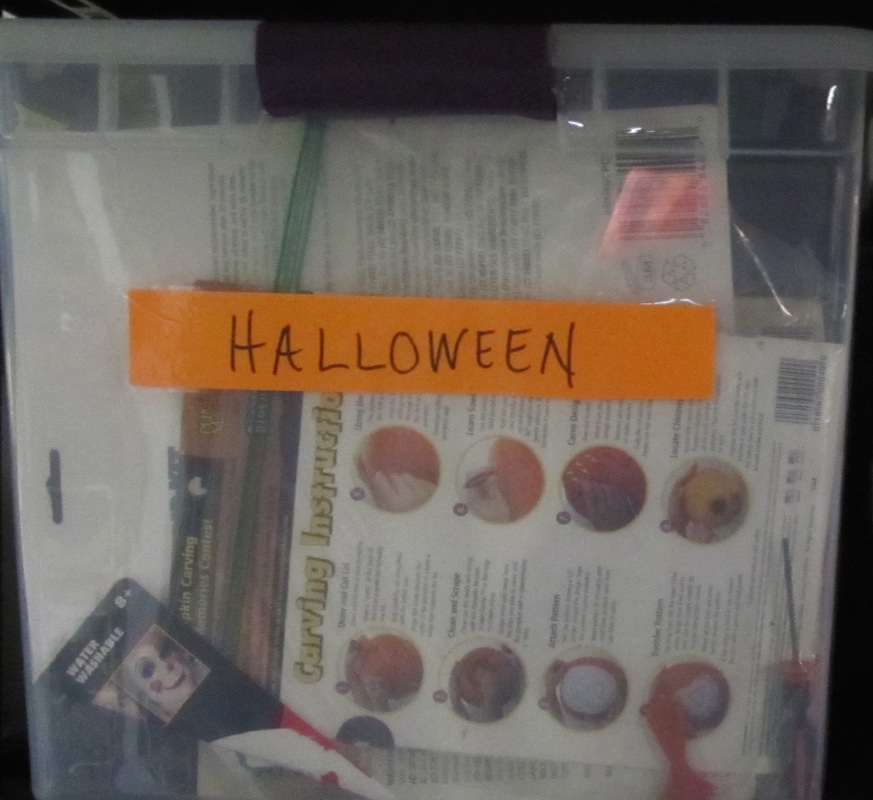
And we allow one bin for Halloween - same rule, if it doesn't fit in the bin, then it doesn't get to stay!
Picture
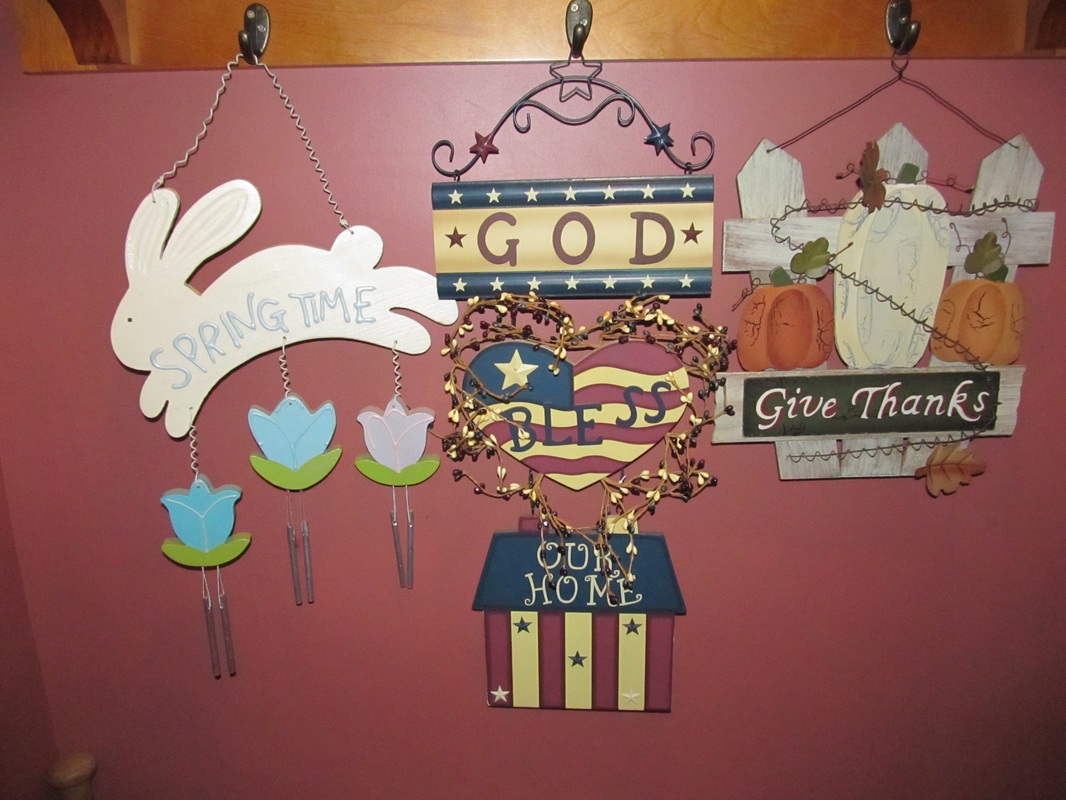
Hang your door decorations on coat hooks near your door to make switching it easy as 1, 2, 3!
Picture
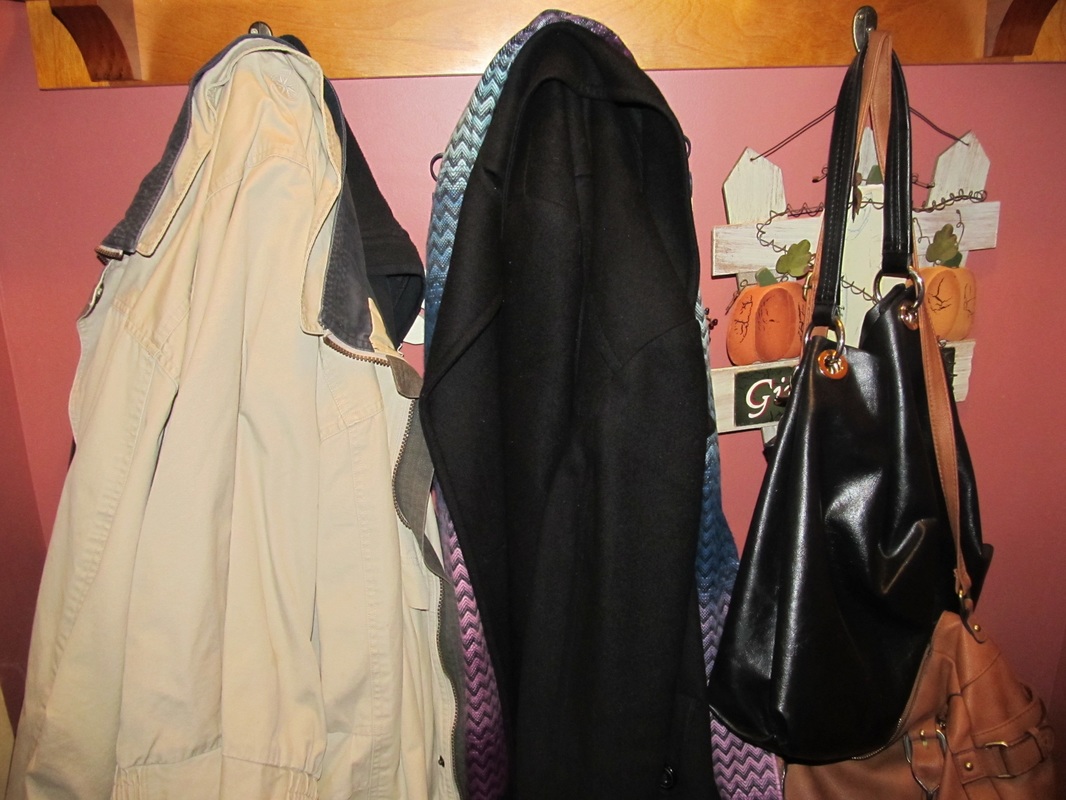
When coats are hanging on them nobody will even know they are there!
Picture
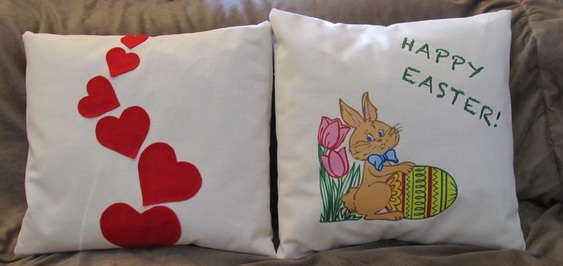
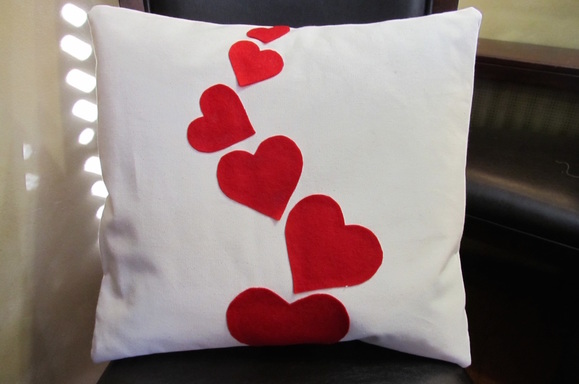
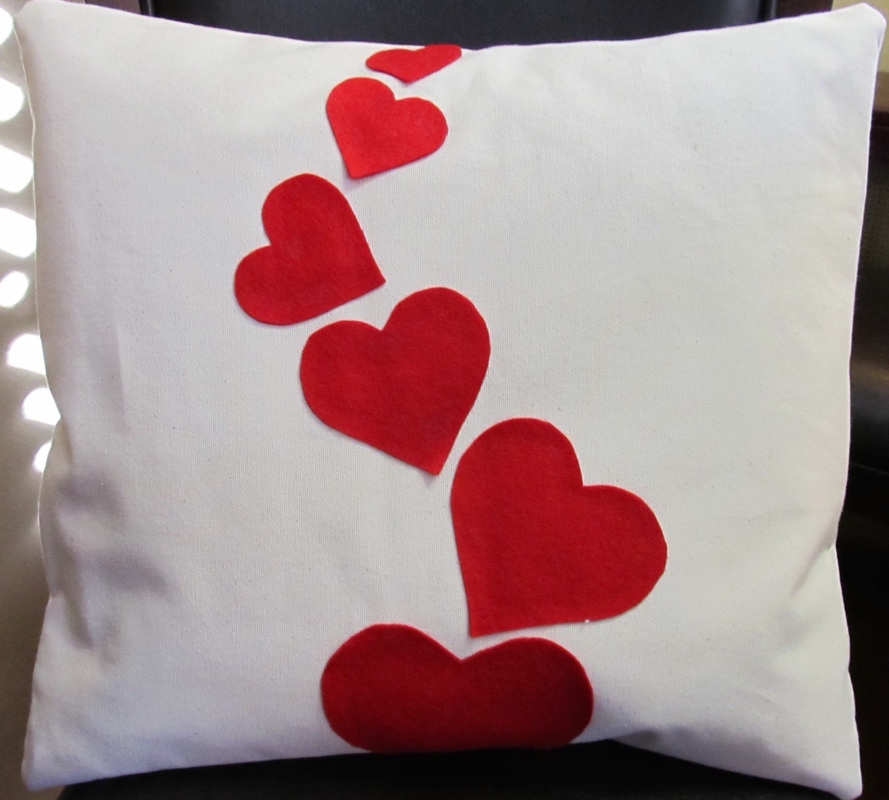
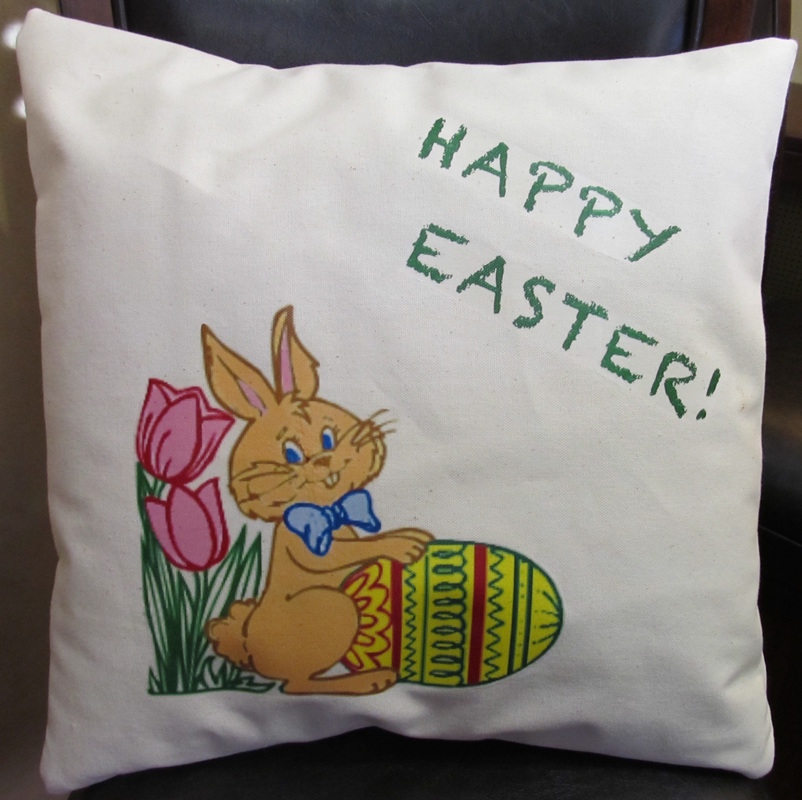
A simple way to decorate for the holidays that takes up very little space is pillow envelopes! The pillow stays the same, but the cover changes with the season or holiday! These can even be kept in a drawer if you don't have a bin for the holiday!
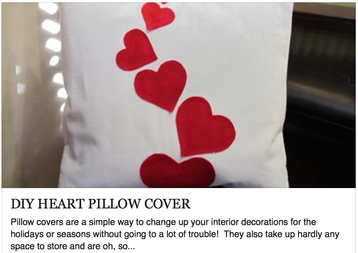
CLICK ON THE PICTURE BELOW TO GET FREE INSTRUCTIONS AND HEART TEMPLATE TO MAKE THE HEART PILLOW COVER ABOVE! INSTRUCTIONS FOR EASTER PILLOW COMING SOON.
Picture
Thank you for visiting!

​Please like and follow us :-)

​Sincerely,
Picture

CROCHET WINTER SCARF

1/21/2016

 
Picture
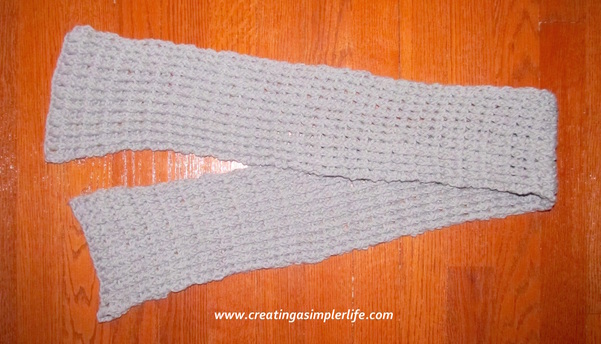
I just love this super simple double crochet stitch because it looks the same on both sides which makes it perfect for a scarf! Connect the ends and turn it into an infinity scarf or add some fringe to dress it up!

Supplies:
  • 3 Skeins 2.5 oz Lily Sugar'n Cream Cotton Yarn
  • USA size K hook (6.5 mm)
  • Yarn needle
  • Scissors
Picture
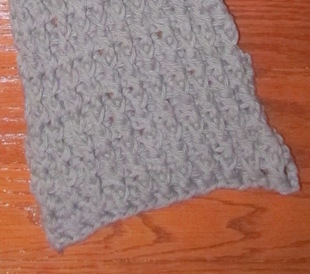
A close-up of the stitch!
Directions:
  • Chain 26
  • Row 1 - double crochet into the 4th chain stitch from hook (into the 23rd chain).  Continue dc stitches into each of rest of the chain stitches across (23 dc total).
  • Row 2 - chain 3 and turn.  This pattern will be doing alternating front post dc and back post dc for the entire row.  View a tutorial here.  Double crochet around the front of the second double crochet in the row below, then dc around the back of the next dc in the row below, etc. Repeating the around the front and around the back of all the dc's in the row below for a total of 22 dc to end of row (23 including the 3 chains as a dc stitch).
  • Row 3 - chain 3 and turn. The front and back post dc continues, but you will now do the opposite of row 2 because you will start with a back post instead of a front.  Dc around the back of the 2nd dc in the row below, then around the front of the next, etc. until the end of the row for a total of 22 stitches (23 including the 3 chains as a dc).
  • Rows 4-90 - Repeat rows 2 -3.
  • Finish with a slip stitch and weave loose ends.

You can leave it as is (simple!) or
  • Make it into an infinity scarf by connecting the ends or
  • Decorate the ends with fringe!
Thank you for visiting!

Check out the our other FREE crochet patterns here!

Also check out the many crochet project patterns on our Pinterest Boards Crochet ONLY and Crochet for the Kids!


Please feel free to e-mail me using the form on this page or contact me through my Facebook or Google+ pages if you have any questions!
​

Sincerely,
Picture

DIY HEART PILLOW COVER

1/18/2016

 
Picture
Pillow covers are a simple way to change up your interior decorations for the holidays or seasons without going to a lot of trouble!  They also take up hardly any space to store and are oh, so simple to make!
Supplies:
  • Cotton Canvas (4x 12 drop cloth at Harbor Freight is $8.99 and get 20% off!)
  • 1 Sheet Red (or any color you choose) Felt
  • 1 sheet heavy card stock paper 8.5" x 11"
  • Printer
  • scissors
  • Aleene's OK To Wash it Fabric Glue (affiliate link)
  • Sewing Machine
  • Thread
Picture
Picture
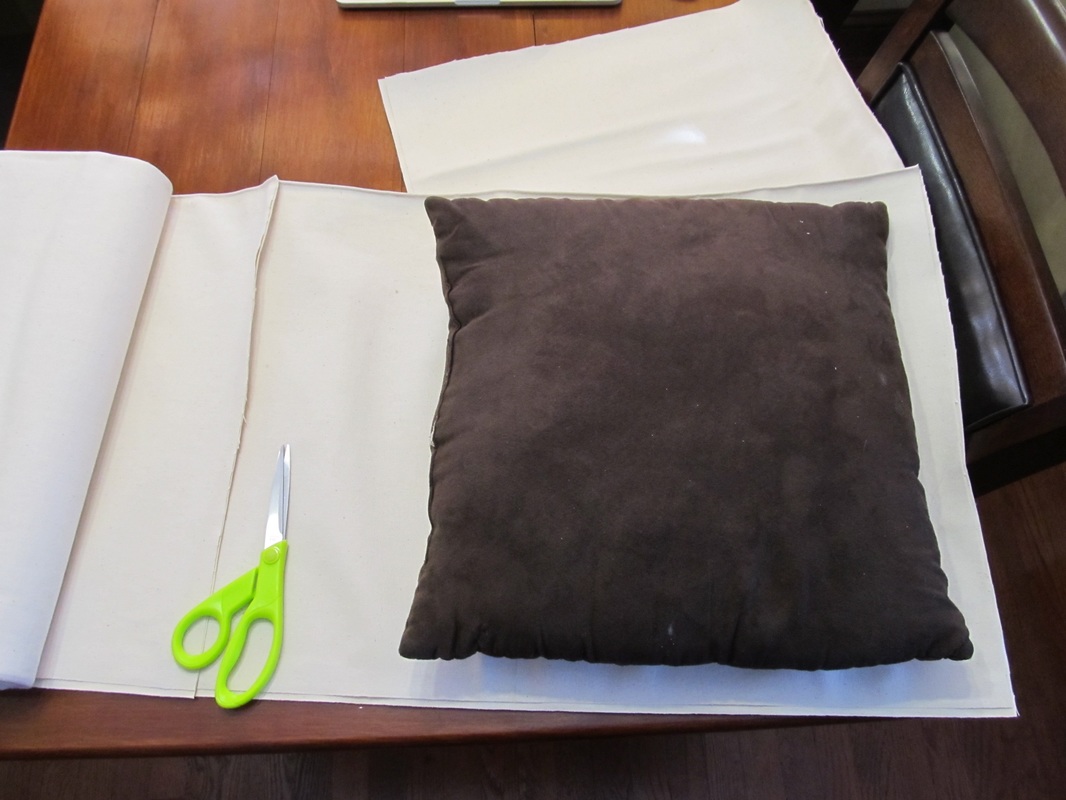
Measure the pillow and cut the three pieces of fabric. Refer to link for more explicit instructions.
Simple DIY Envelope Pillow instructions from momtastic.

Picture
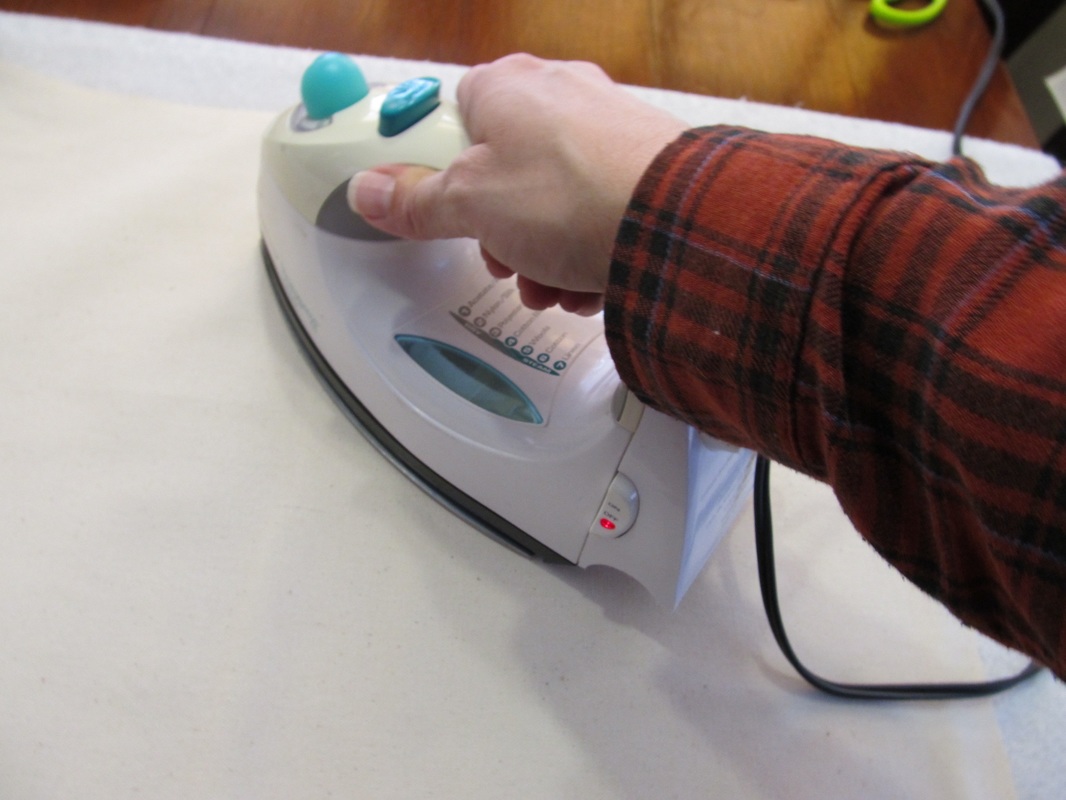
Iron the fabric.
Picture
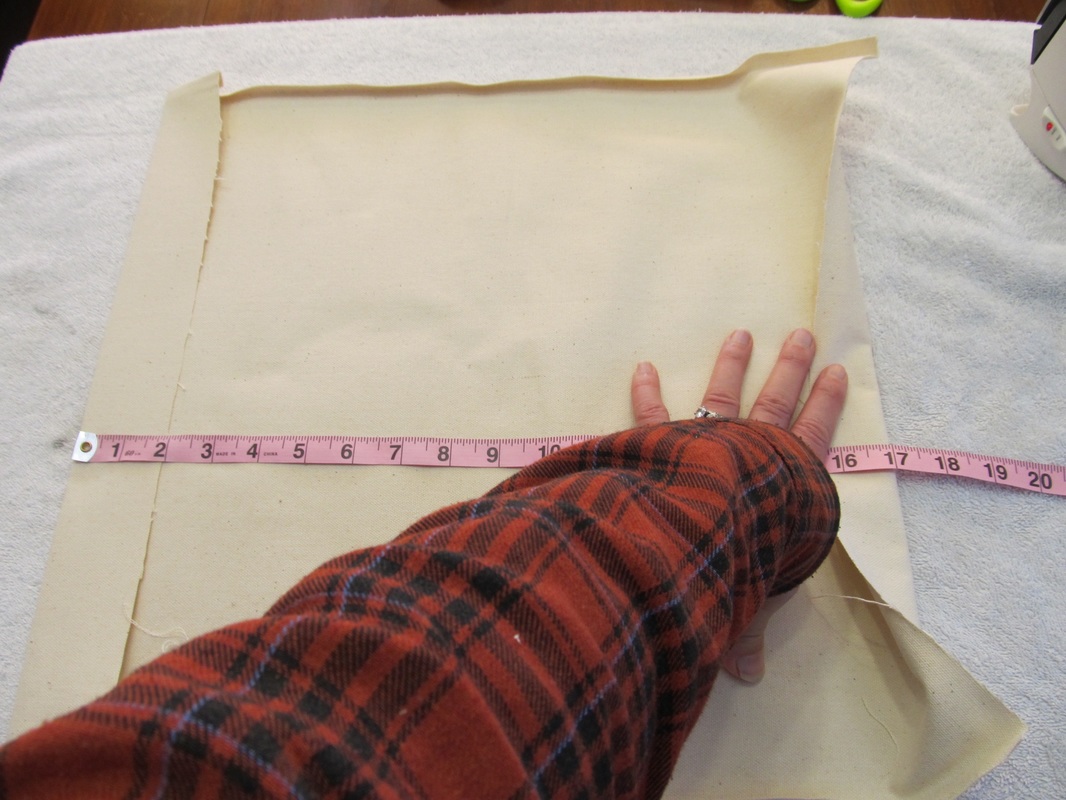
Measure the hem distance vertically and horizontally (my pillow was 17" square) and iron the hem over so you can create your workspace for the decoration.
Picture
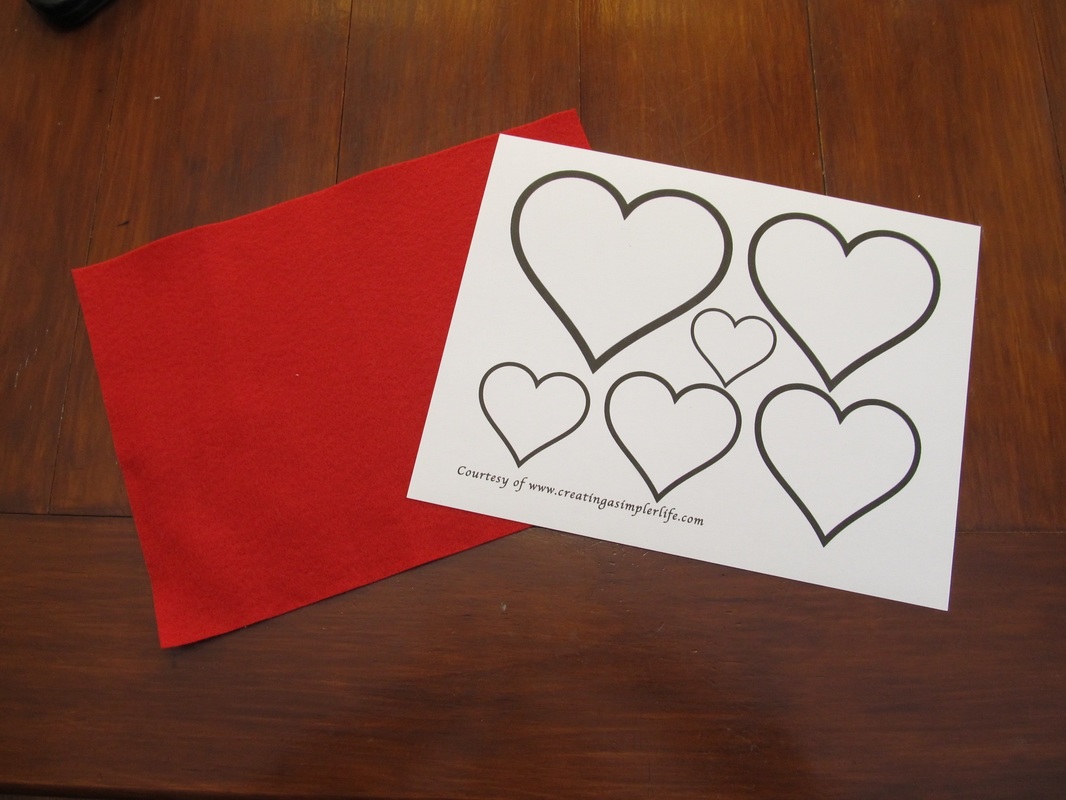
Download and print out the pdf. heart template using the button below. It is best if it is printed on card stock paper.
Download Heart Template pdf. File
Picture
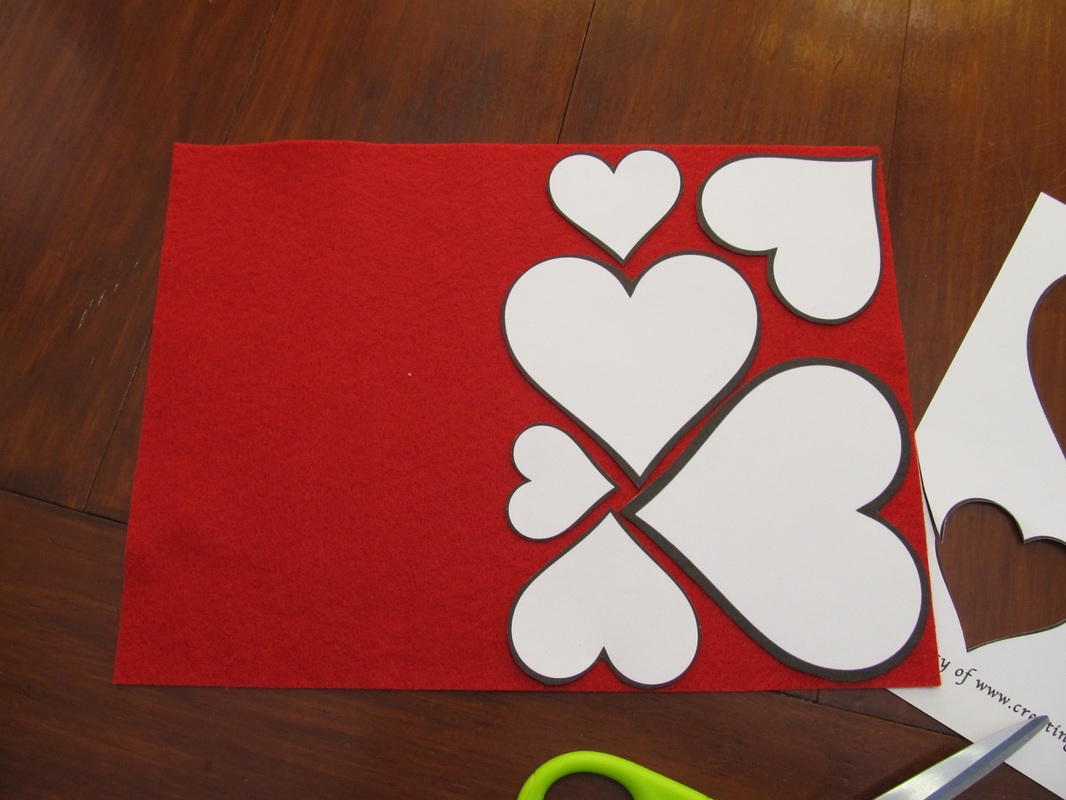
Cut out the hearts and arrange them on the felt in such a way that you only use what you need (waste not want not!).
Picture
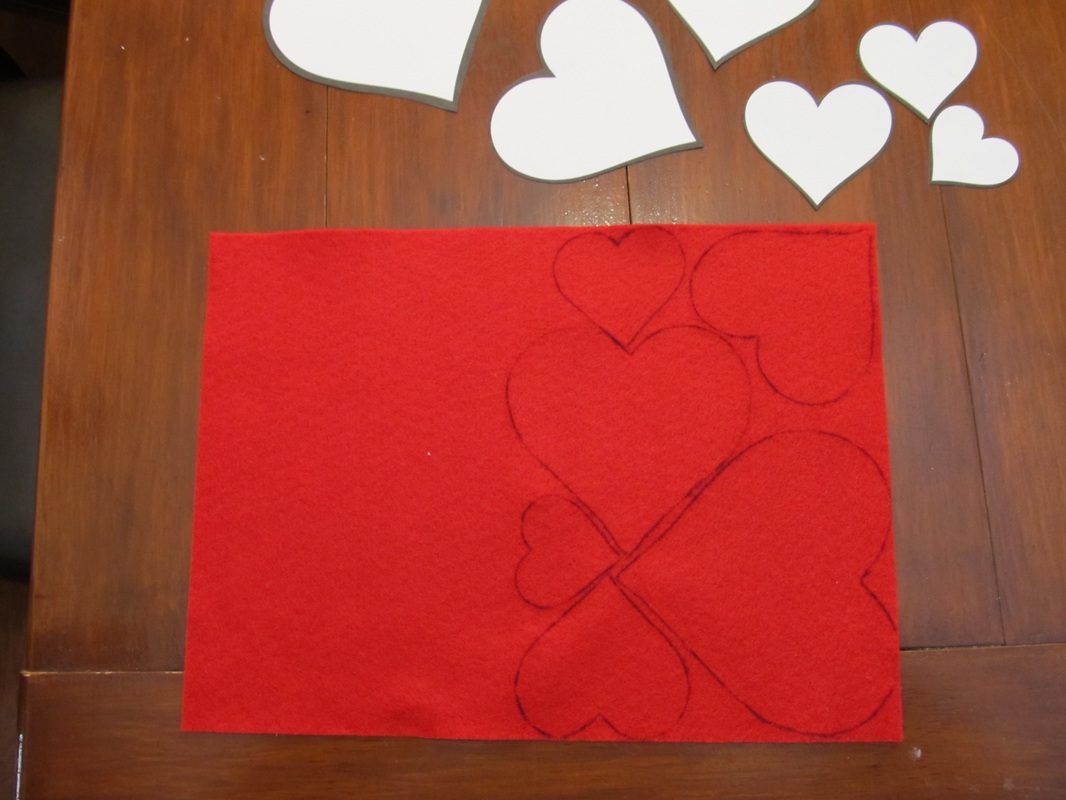
Trace the hearts using a simple ball point pen.
Picture
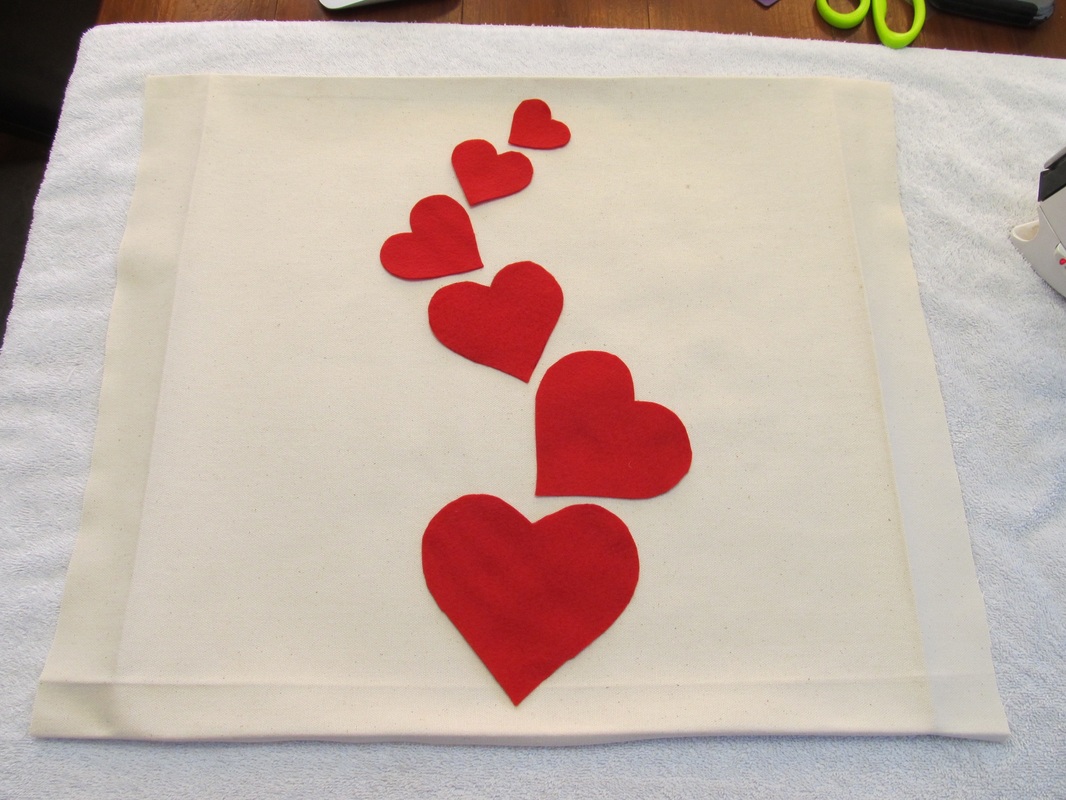
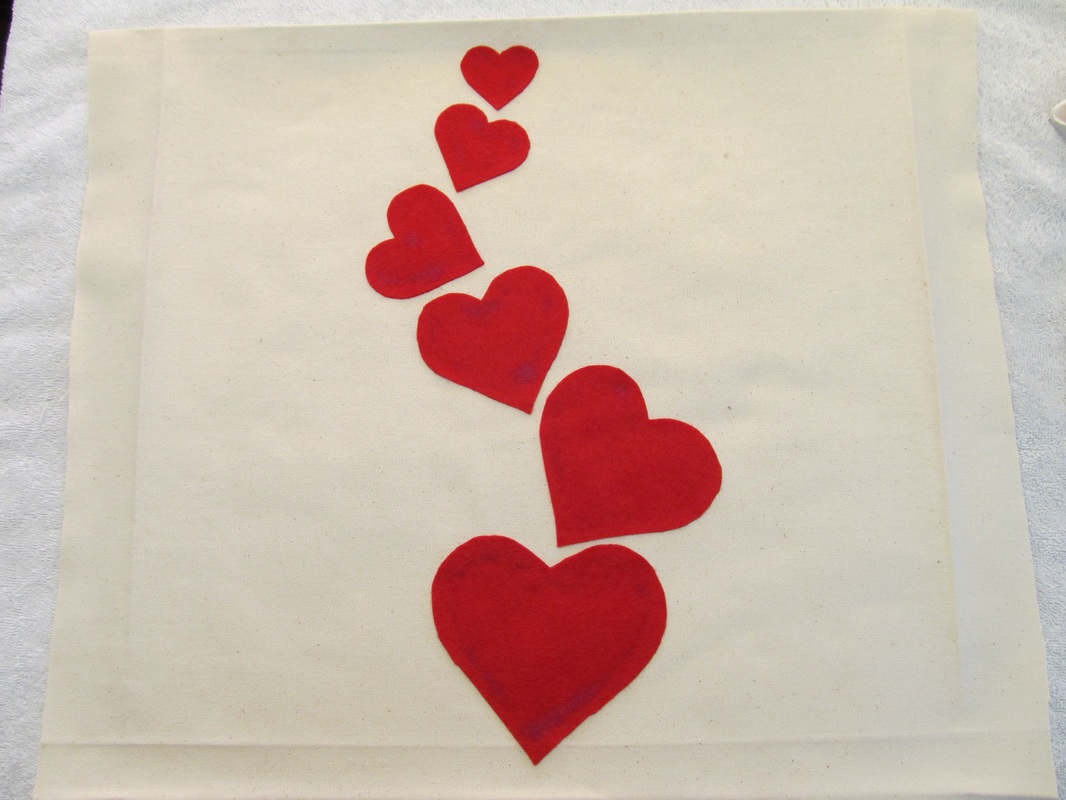
Cut out the hearts and arrange them on the front of the pillow piece the way you want them being sure to stay within the ironed hems.
Picture
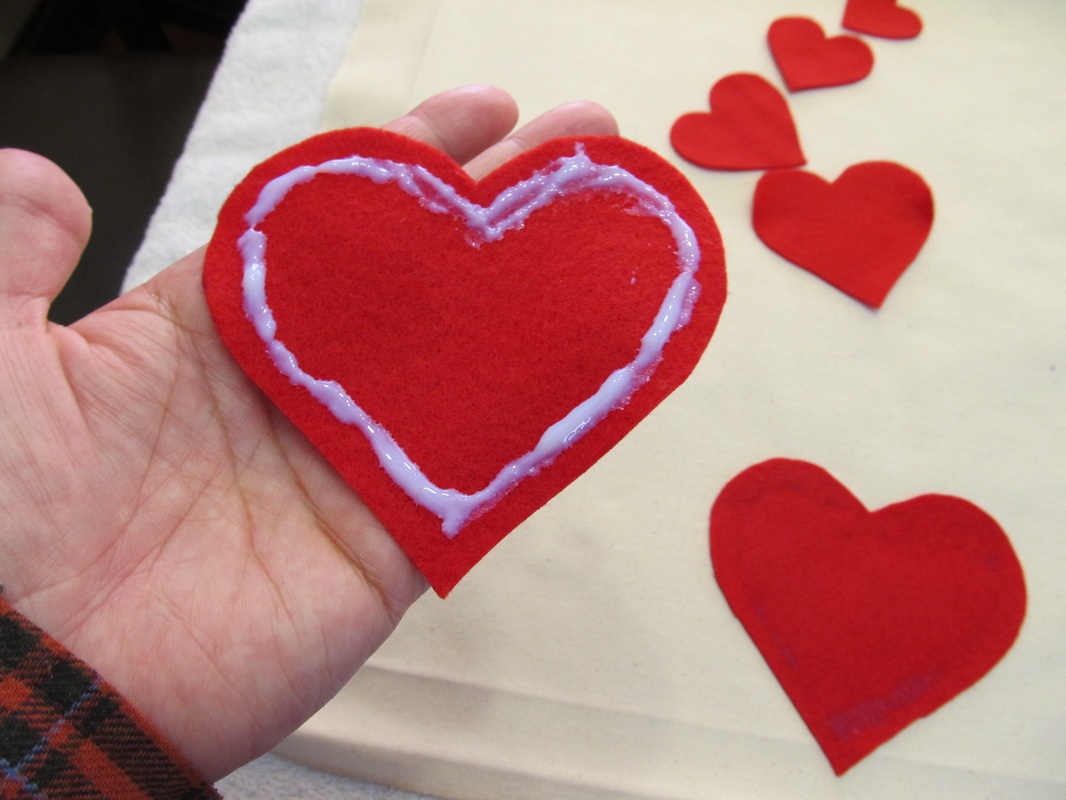
Put glue on the backs of the hearts (the opposite side that you traced on) and glue the heart in its place.
Picture
Don't worry if the glue shows through the heart. It will dry clear and not be visible.
Picture
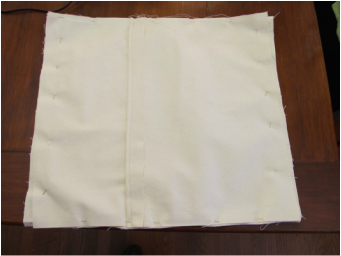
Sew a seam on the two envelope pieces (the part that creates the envelope). Arrange all the pieces together inside out, pin together, and sew around the entire outside of the pillow using the ironed hems as a guide. You will actually be sewing along the ironed line.
Picture
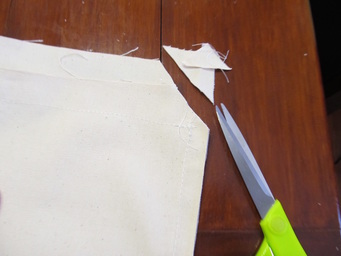
After you sew around the entire edge of the pillow cover, cut off the inside corners at an angle.
Picture
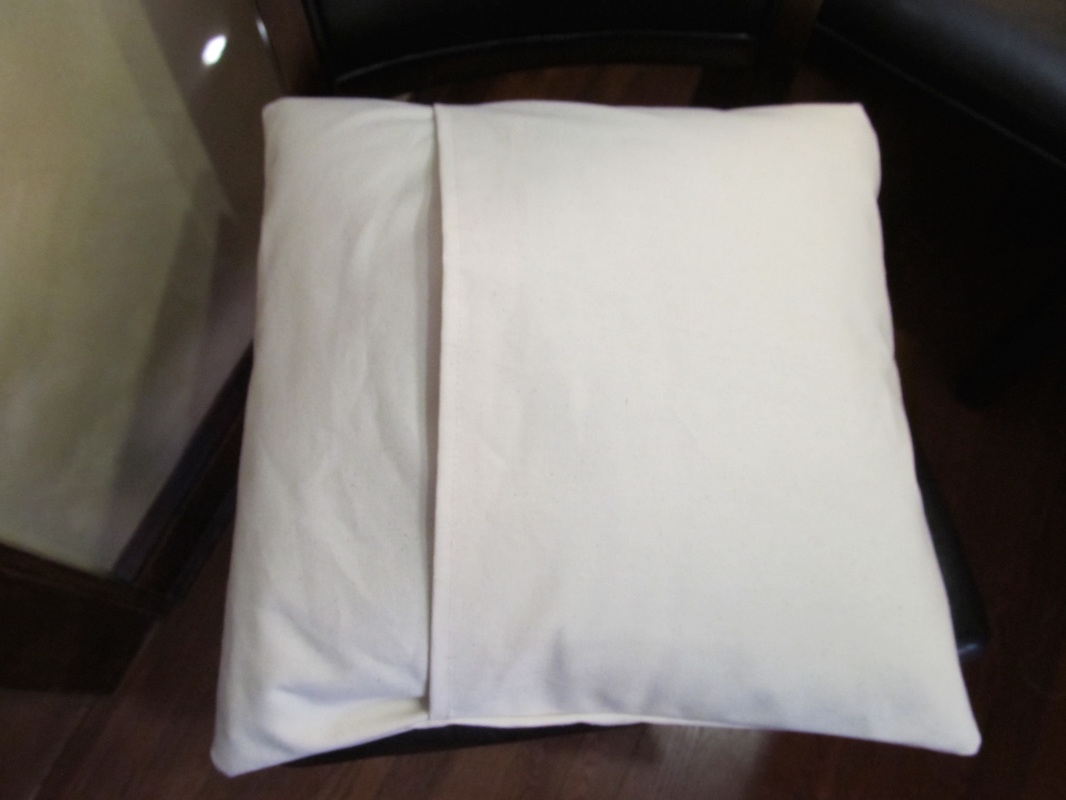
Turn the cover inside out and put a pillow in!
Picture
Simple :-)
DIRECTIONS FOR THIS DIY PILLOW COMING SOON!
Picture
Happy Valentines Day and thank you for visiting!

Check out our other DIY crafts & projects or our other Pinterest boards!
​
Sincerely,
Picture

CROCHET HEARTS

1/14/2016

 
Picture
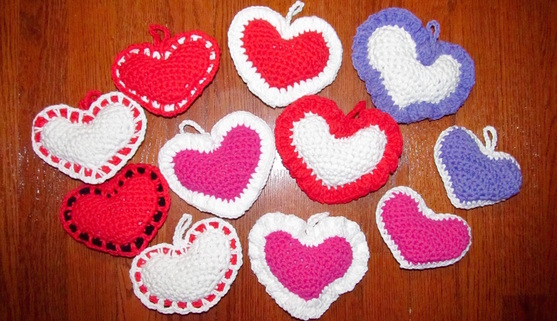
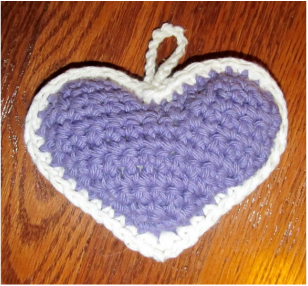
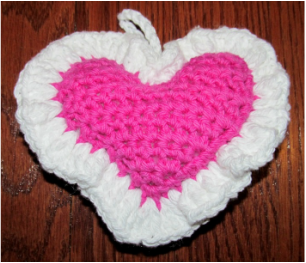
Same simple heart pattern with different borders!  Choose the one you want to make, or make them all!  Add a few drops of lavender essential oil to turn it into a sachet.  A lovely way to show someone you are thinking about them on Valentines Day!
Supplies:
  • 100% Cotton Lily Sugar'n Cream Yarn (any color(s) desired)
  • USA size 7 crochet hook
  • Yarn needle
  • Stuffing (poly-fil, cotton, etc)
  • Essential Oil (optional if you want to make it scented)
Basic Heart:
  • Row 1: chain 2 and sc in first chain 3 times.
  • Row 2: turn and chain 1, do 2 sc in first stitch, then 1 in the next, then 2 sc in the last (total 5)
  • Row 3: turn and chain 1, do 2 sc in first stitch, then 1 in each of the next 3, then 2 sc in the last (total 7)
  • Row 4: turn and chain 1 2 sc in 1st stitch, 1 sc in each of the next 5, then 2 sc in last (total 9)
  • Row 5: turn and chain 1 , 2 sc in 1st stitch, 1 sc in each of the next 7, then 2 sc in last (total 11)
  • Row 6: turn and chain 1, 2 sc in 1st stitch, 1 sc in each of the next 9, then 1 sc in last (total 13)
  • Row 7: turn and chain 1, 1 sc in each stitch accross (total 13)
  • Row 8: turn and chain 1, do 1 sc in each of the first 6 stitches (you are doing one bump of the top of the heart)
  • Row 9: turn and chain 1, do 1 sc in each of the 6 stitches accross
  • Row 10: turn and chain 1, sc 1 stitch in the first 4, then do a decrease stitch in the 5th & 6th stitches (learn how to do a decrease stitch here)
  • Row 11: turn and chain 1, do a decrease stitch in the 1st & 2nd, do 1 sc in the third, then do a decrease in the 4th & 5th.  
  • Row 12: turn and chain 1, do 1 sc in each of the 3 stitches. Do not finish off!
  • Do 4 slip stitches down the inside of the heart bump to row 7, do 1 slip stitch in the middle stitch of row 7 (it would be the 7th stitch in of the total 13 stitches).  
  • Row 8: Chain 1, then sc in each of the next 6 stitches accross (you are now making the second bump of the top of the heart).
  • Row 9: turn and chain 1, then sc in each of the 6 stitches.
  • Row 10: turn and chain 1, sc in each of the next 4 stitches, then do a decrease in the 5th and 6th stitches.
  • Row11: turn and chain 1, do a decrease in the 1st & 2nd stitches, sc in the third, then do a decrease in the 4th and 5th stitches
  • Row 12: turn and chain 1, do 1 sc in each of the three stitches. Do NOT finish off yet.
  • Continue around the outside of the heart with single crochet stitches.  It should be 12 stitches down to the point of the heart,  in the same hole as the 12th stitch, do 2 more (3 total at the point of the heart) then another 11 up the side.  Then continue around each bump of the heart using slip stitches instead of sc. Each bump gets 11 slip stitches.  You should have a total of 47 stitches around the outside of the heart.
  • You have finished side one.  Make a second one for side 2.
Connect With A Border:
Choose the border you want to use to connect the two sides of the heart.
Two Tone Border
Picture
Directions:
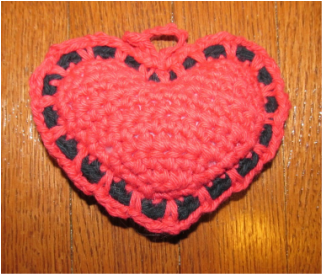
Using a different color, connect to the center stitch at the tip of the heart and do one single crochet in each stitch around for a total of 47 stitches.  Before you finish, be sure to fill the heart with stuffing. Then using the same color as the heart, connect to the original center stitch of the sc you made at the tip and do one single crochet  in that spot using the same exact original hole.  This will require a longer amount of yarn.  Then chain 2, skip one sc, and sc in the same sc stitch as the alternate color.  You are basically repeating this pattern all the way around using the same stitch holes as the first row of single crochet.  Weave all ends.  Refer to picture if you are confused.
Plain Sc Border
Picture
Directions:
Connect to the center stitch at the tip of the heart and do 2 sc.  Continue around the heart doing one sc in each stitch around.  You want to do the sc's loosely especially around the bumps of the heart.  Connect to original sc and finish with a slip stitch. Weave all loose ends!
Frilly Border
Picture
Directions:
Connect tot he center stitch at the tip of the heart and do 3 dc in that stitch.  Continue around doing 3 dc in each stitch until you approach the "V."  Two stitches before the V decrease to 2 half double crochets  (learn half double crochet here), then to a sc in the center of the V.  Then do 2 half doubles in the next stitch, then do 3 dc in each stitch the rest of the way around.  When you get to the point of the heart do one last dc in the same stitch that you originally did 3 in, connect with slip stitch and finish off.  Weave all loose ends.
Add an Optional Hanging Loop:
Connect to the top center of the "V" with a  slip stitch.  Chain 15 then connect again to the top center of the "V" and finish off.  Weave loose ends.
Happy Valentines Day and thank you for visiting!

Check out the our other FREE crochet patterns here!

Also check out the many crochet project patterns on our Pinterest Boards Crochet ONLY and Crochet for the Kids!

Please feel free to e-mail me using the form on this page or contact me through my Facebook or Google+ pages if you have any questions!

​
Sincerely,
Picture

START A CHRISTMAS MEMORY TREE NOW!

1/10/2016

 
Picture
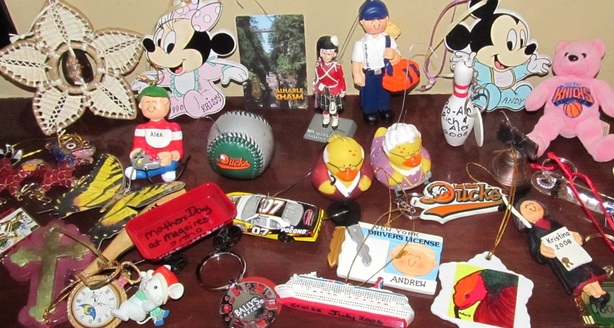
It's the start of a new year so what better time than now to start a Christmas memory tree?   A Christmas memory tree is a tree where each ornament has a specific memory associated with it. A few of our special family memory ornaments are shown in the picture above.  As you can see they range from simple items like key-chains to exquisite glass ornaments. But each one has special memory associated with it that we share and remember together every year when we decorate the family tree for Christmas.  

CHECK OUT OUR YOUTUBE VIDEO ABOUT
​OUR MEMORY TREE:
OUR BLENDED FAMILY TRADITION!

Why We Started This Family Tradition
This is a second marriage for both my husband and myself. We each brought our own children into the marriage and we were trying to find ways to create special memories that would help to blend our two families together.  I had already started some new memories and traditions with my children as a single mom, so it was easy to continue doing it as a blended family.  Today, ten years later, it is still a yearly tradition for all of us to get together and even though the kids are 25, 23, and 20, we still laugh and talk about the memories as we decorate the tree.  Sometimes we even get a little teary eyed over the ones that make us a little sad such as the memories of our family dog that passed away this past July. But one thing is for sure, he will never be forgotton!

This is also a great idea because it minimizes the junk around the house.  Everyone is always buying nick-nacks on vacations and has favors from various weddings and parties.  Get rid of all that stuff and choose the special ones to make into ornaments!  The memories are small, they do not sit on a shelf collecting dust, and they will be used (and actually remembered) once a  year!
How To Start A Memory Tree
​

1. Collect Items as Ornaments During the year - 
  • ​Handmade from Children/Grandchildren - over the years we have saved all the little gifts the children have given us and we have turned the choice ones into ornaments to hang on the tree.
  • Vacations - you can purchase an ornament or a key chain from special places you visit such as a trip to Philadelphia.  We prefer key chains because there is a lot more to choose from, they are usually much less expensive, and there is room on the back to write (more on this later).
  • Day Trips - we have taken the kids to the Ducks Baseball games, the Museum of Natural History, a trip to the city to the 2112 Cafe, etc.  During these special trips we pick out a cool ornament or key chain the same as we do for vacations.
  • Events - we have purchased specific ornaments for special events such as the birth of a child, graduations, getting a drivers license, engagement, becoming an EMT, and many more.  I love looking through the possible ornaments to buy at Personal Creations.
  • Parties - I have made it a point to give out party favors that would make a great little memory ornament for sweet 16's, 50th birthdays, etc.  
  • Sports /Activities/Hobbies - is someone a soccer player?  Then purchase an ornament to remember all the craziness involved in attending all those practices and games! How about a kid who just doesn't stop playing video games?  Yup, theres an ornament to remember that too!  Again, check out Personal Creations for the many different personalized ornaments available.
Check out this little slide of a few of our special family ornaments:
2.  Make it into an Ornament -
  • If it doesn't have a hole, then drill one!
  • Buy Ornament Hooks (affiliate link) and make them into an ornament!  
3. Write on the Ornaments -
  • We use a special Sharpie Oil Marker (affiliate link) to write on the ornaments.  We usually write the month and year only because the ornaments we choose are mostly self descriptive as you can see in the pictures.
  • Then put them in a special location to save until it is time to decorate the tree!
4. Decorate the Tree with Memories -
  • Put up your tree with the lights and topper, and schedule a date to decorate!
  • When it is time to decorate the tree, be sure to do it on a day when everyone can get together.  As each person takes a turn hanging an ornament, it is is only natural to share the memories of that time with everyone else!
Picture
Each year there will be more and more ornaments to add to the tree and the memories of all the things that you did will always be remembered :-)  Above is a picture of our family the night that we decorated our tree for 2015.  It's also another tradition to take a family picture in front of the tree after we decorate it and this years picture includes my daughters finance who we will now include in all our future memories!
It is never too late to start!
​Start today and by Christmas you will have memories of the entire year to share!
  • Are you a grandparent?  Then start a special memory tree for your grandchildren as they grow!
  • Are you single?  So what...start a memory tree of all the awesome things you have time to do with your friends!
  • A new couple?  Those memories have already begun...document them on the tree and remember them each year!
  • Young parents?  Well, then it's perfect timing to start that tree and family tradition!
Thank you for visiting :-)

Sincerely,
Picture

ROASTED SWEET POTATOES & HOMEMADE SOUP

1/5/2016

 
Picture
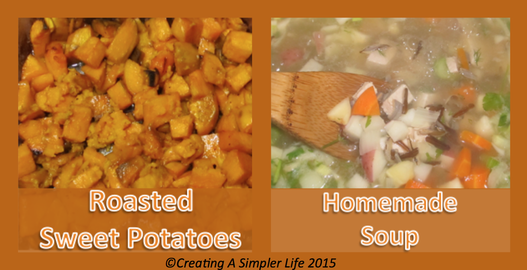
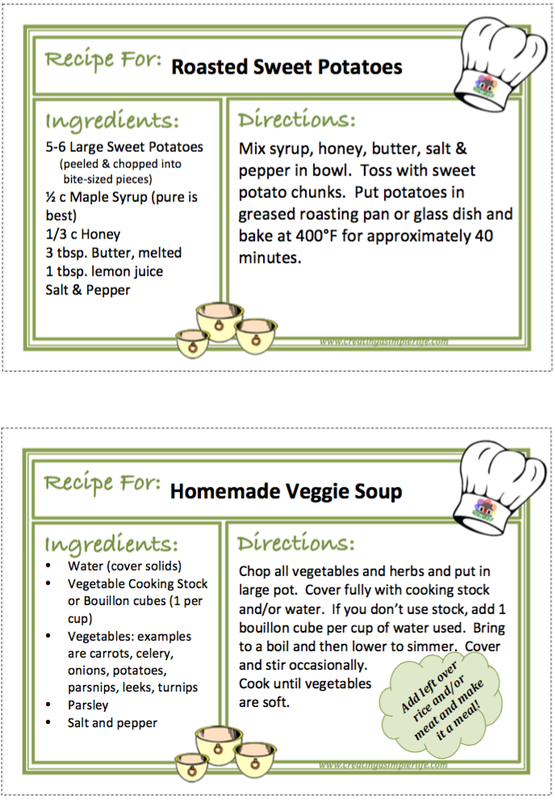
Happy New Year! There is nothing more comforting on a cold winters day than a warm cup of homemade soup or the warmth and smell of oven roasted sweet potatoes.  Why not start this new year with some simple fresh and healthy recipes?
​

Oven roasting fresh vegetables is a great winter alternative to grilling on the barbecue and using the oven helps warm up the house too!  My homemade soup includes nice fresh vegetables, but it is also a great way to use up those leftovers from past meals as well.  Any little bit of rice, vegetable, or even meat that is left over but not enough to use for another meal goes in a baggie and into the freezer.  Then when I make my soup, out the baggies come and into the soup the leftovers go!  We do NOT waste food and every soup is different! 

Both recipes are simple, of course.  I hope you did not expect anything complicated...well, because that's just not me!

As with all my recipes you can click on the recipes shown or use the button below them to download the pdf file  and print one sheet of  8 1/2 x 11 cardstock paper.  Then cut out each of the 4 x 6 inch recipe cards.  They always come two recipes per sheet in an effort to not waste paper! 

Visit my Recipes Page to view or print out previous recipes (pdf files) or to download a FREE 4 x 6 Recipe Card Template (.dox file) for your own recipes! You can also check out my past Recipe Blog Posts here!

Enjoy!
Picture
Download the pdf file Here
FYI: there are always two recipes because I do not want to waste paper!
​

Please 'like' us on Facebook or join our mailing list 

so you never miss out on a blog post!

Sincerely,
Picture

CROCHET PLACEMATS & NAPKIN RINGS

1/3/2016

 
Picture
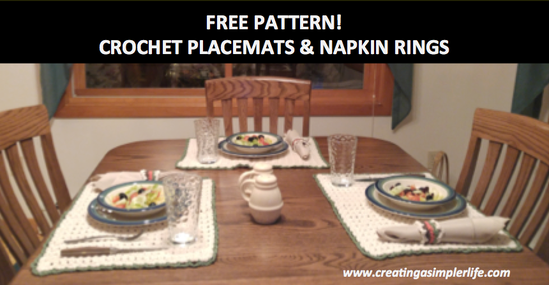
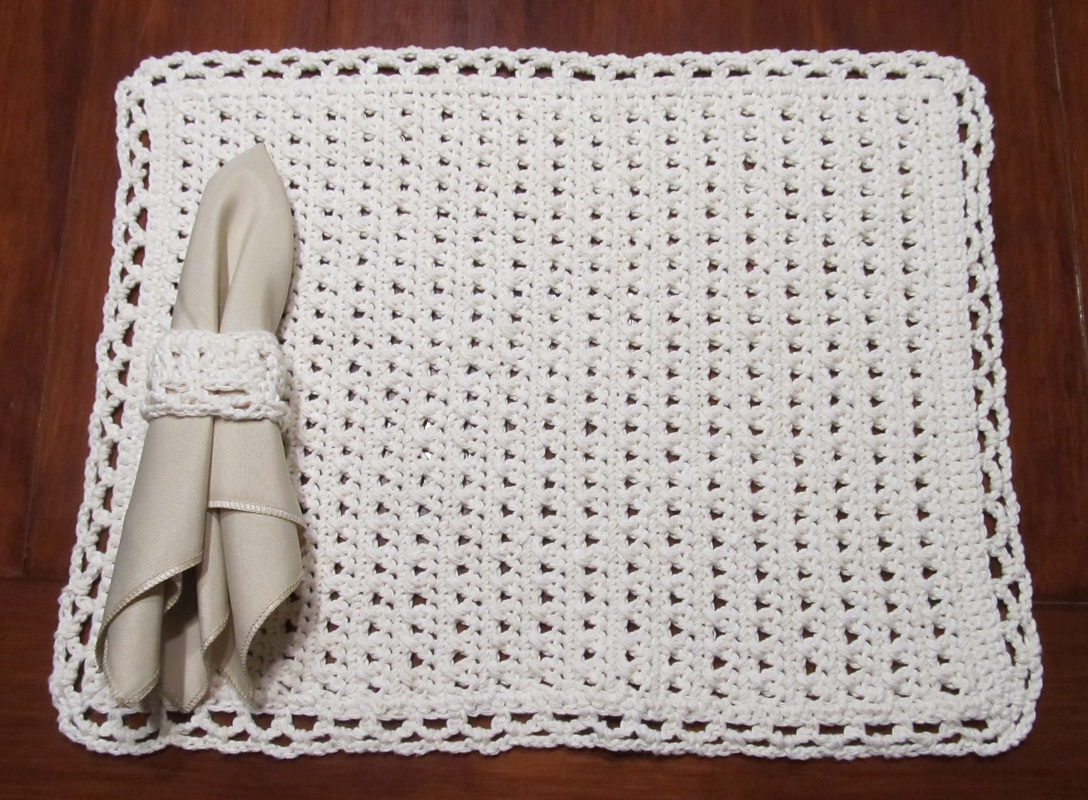
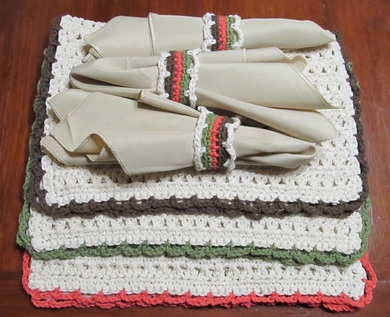
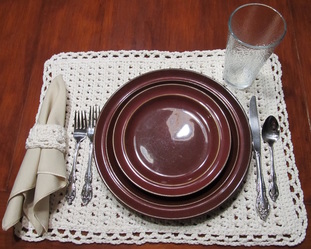
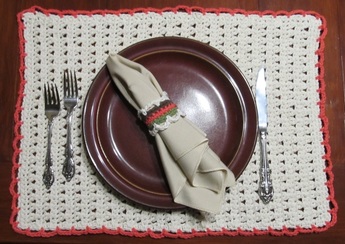
These placemats are simple to make and simple to care for!  Made of 100% cotton, they can be washed and dried on the delicate cycle.  Why not treat yourself to a matching set or make it as a gift for someone you love?
Supplies Needed for Placemats:
  • 100% Cotton Yarn in the color(s) of your choice (quantity needed depends upon # of placemats) but one 14 oz skein of Lily Sugar'n Cream makes about 3 placemats.
  • Size 7 crochet hook (4.5 mm)
  • Scissors
  • Yarn Needle
Picture
Picture
Make the Placemats:
​Chain 46
Row 1: single crochet in 2nd stitch from end and then in each chain accross (45 total).
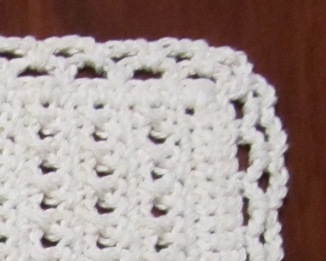
Row 2: chain 3 and turn work.  [This is the Crossed Double Crochet shown in the video below] Double crochet in second stitch from end. Double crochet backwards into the stitch you skipped. Repeat the cross crochet to end of row and double crochet in final stitch.  
Row 3: chain 1 and turn.  Single crochet in each stitch accross (45 total).
Rows 4 - 41: Repeat the row 2/3 pattern nineteen (19) more times.   Do NOT finish yet - continue on with the pattern for Border A or B (note that B is the same as A without the final row), or if you prefer, don't add any border at all!
Not sure of the Cross Double Crochet?  Then check this video tutorial on You Tube.
Choose A Border:
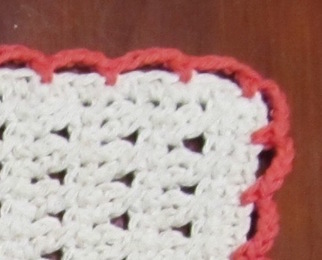
If you want to add a border, note that Border B is the same as border A without the 3rd row!
Picture
Border A
Picture
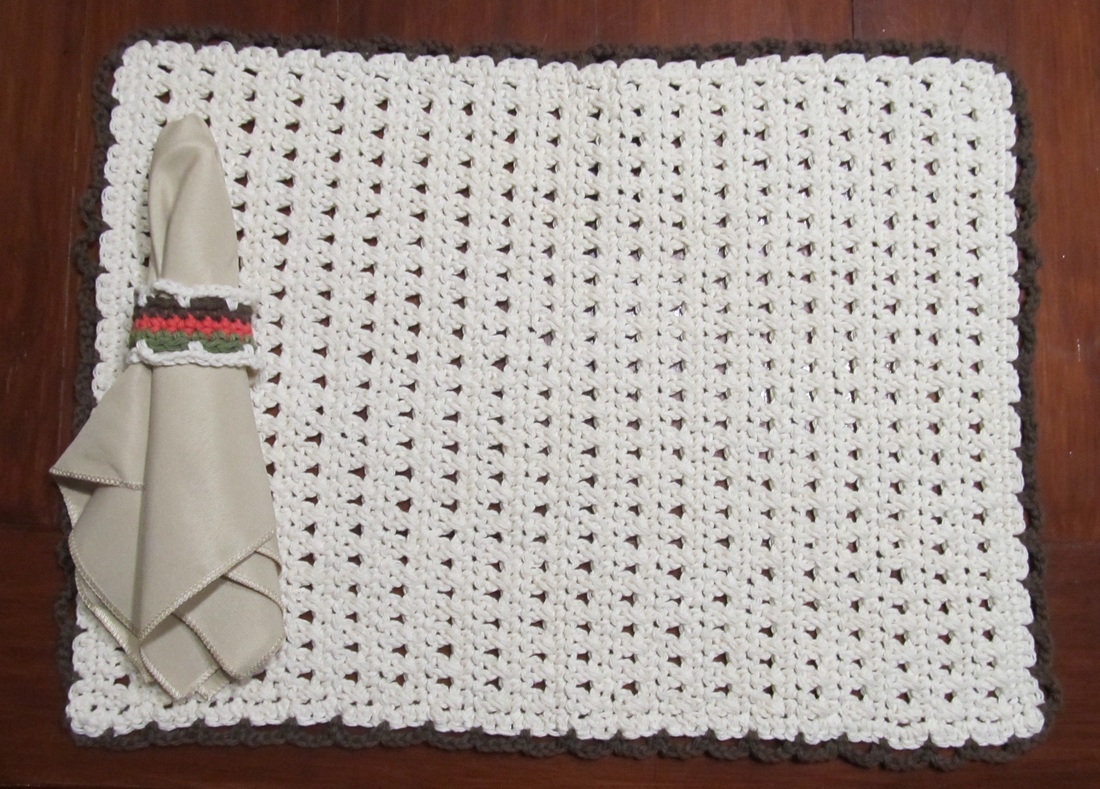
Border B
Border A:
Row 1: single crochet accross the side, do 3 single crochet in the corner, single crochet accross bottom, 3 sc in corner, sc across other side, 3 sc in corner, sc accross top, slip stitch connect and chain 1 in corner.  
Row 2: single crochet in corner, chain 4, skip two stitches and sc into third.  Continue pattern all the way around.  Be sure to single crochet into the middle stitch at each corner. Slip stitch to connect when done.
Row 3: single crochet into corner, chain 3, sc into loop of 4 stitches, chain 3 single crochet into next loop, and continue pattern to corner, sc into middle corner stitch, chain three and repeat pattern all the way around.  Slip stitch to finish.
Border B:
Do Row 1 in the same color as the placemat as per instructions for Border A.
Row 2: change color and follow same instructions as for Border A but end after row 2 (so skip row 3). Slip stitch to finish off and weave all loose ends.
Picture
Mix'n Match!
Make the Napkin Rings:

Supplies Needed:
  • 100% Cotton Yarn in the color(s) of your choice
  • Size 7 crochet hook
  • Scissors
  • Yarn Needle​
Picture
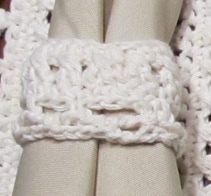
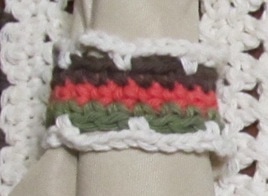
Napkin Ring A
Picture
Napkin Ring B
Directions For Napkin Ring A:
Crochet 19 chains and connect into a circle with a slip stitch.
Row 1:  one single crochet (sc) in each stitch around for a total of 19.  
Row 2: Double crochet the cross stitch as follows (same as in the placemat pattern) - chain 3, skip 1 stitch and dc in next (2 from chain), go back and dc in the skipped stitch, then skip one again and dc in next stitch etc. Continue all the way around.
Row 3: sc in each stitch around.
​Row 4: chain 4, skip two stitches and sc into third.  Continue pattern all the way around. Slip stitch to connect when done.
Row 5: chain 3, sc into loop of 4 stitches, chain 3 single crochet into next loop, and continue around.  Slip stitch to finish and weave all loose ends in.
Directions For Napkin Ring B:
Crochet 19 chains and connect into a circle with a slip stitch.
Row 1: chain one and do one single crochet in each stitch around (total 19). Connect with slip stitch.
Rows 2-3: repeat row one changing colors after each row as desired.
​Border: using the same or a different color, single crochet in any stitch to begin, then chain 4, skip 2 and single crochet into third stitch from hook. Repeat the pattern all the way around.  Slip stitch to connect to first single crochet and finish off.  Repeat the same border on the opposite side of the napkin ring (so the top and bottom with have the border). Weave all loose ends.
Picture
Picture

Please contact me through e-mail or on my Facebook page if you have any questions!

Check out our Crochet Page for other FREE patterns!


Thank you for visiting :-)
Picture

5 SIMPLE RESOLUTIONS for 2016

1/1/2016

0 Comments

 
Picture
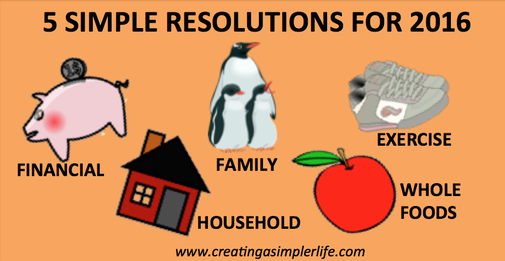
It's that time again....a new year with new resolutions.  How many of us actually accomplished all of our resolutions from last year?  I know I didn't.  But this year I have a plan!  FIVE SIMPLE, yet life changing, resolutions!  Each of the 5 resolutions is simple and straightforward  so they should be easier to follow through with, right?  Well, hopefully! But the real plan is that they become lifetime habits that I eventually don't even have to think about!
Picture

​Health

​1. Eat Whole Foods - this is not a diet but if done properly should lead to losing weight and feeling more energetic.  Eating whole foods means exactly that: eating fresh vegetables, fruits, and meats instead of anything that is processed.  If the foods are all organic, then even better!  If the food required some sort of processing in a plant and has ingredients added for whatever reason, then it is OUT!  Need some help with this?  Then check out the following site:
  • Five Foods You Should Never Eat - this is an excellent informative video by a nutritionist about why diets don't work and why eating whole foods does work.  Of course it goes into 5 foods everyone thinks are healthy, but really aren't.  The video is a little long and the goal is to get you to buy into their program at the end, but the information and inspiration makes it well worth watching!
2. Exercise - Five minutes a day is all that's needed to get started and it can be simple like walking to the store instead of driving!
  • Check out 4 Simple Steps to Start the Exercise Habit.  They share a simple, and painless way, to get started now.  I started today!
Picture

​Family

3. More Quality Family Time - are you usually too busy for your spouse, children, or even your parents or siblings?  Then make time for them before it is too late!  It doesn't have to cost anything either!  You can simply make a plan to do something for 1-3 hours each week.  It can be as simple as playing a game like monopoly, or going for a nature walk at the local park.  The idea is to make it a priority and schedule it in if you have to!  
  • Read How to Make Quality Family Time a Priority.  The article shares many great points about why and how to do this!
  • Check out my Pinterest Page Inexpensive Fun for great ideas for spending quality time with anyone in your family this year!
Picture

​Household

4. Organize - get the house in order!  This will make everything so much simpler this year.  It makes it easier to clean, takes less time to find what you need (Don't you hate searching for something?), and of course frees up quality time to spend with your family!
  • Check out The Household Organization Diet - this gives a list of 15 minute per day tasks toward cleaning, organizing, and decluttering your home in just 31 total days.  It was created for 2015, however I am pretty sure it will also work for 2016!
  • Check out How to Become a Minimalist - yes, this is the new "buzz word" however, I think it is a great one and I truly live by it as much as I can. Why?  Because I believe in it.  I believe that too much stuff leads to stress (must protect and take care of that stuff), less time for other things (stuff must be organized, cleaned, and have other stuff to supplement it)....etc.  I think you get the picture!  You don't have to go to extremes, however less stuff = simpler life with more time for your family!  Not to mention you can save a lot of money....
  • Check out our Pinterest Home Organization Page for more ideas!
Picture

​Financial

5. Grow Your Savings - even if you have debt, it is important to have some money in a savings account.  Having money saved makes me feel protected in case of emergency like when our stove blew up last year.  I usually set a certain goal to reach each year. I don't always meet it, but it helps!
  • Check out How to Grow Your Savings for basic steps to getting started.  
  • Check out The Budget Diet - How to Cut Your Spending by $400 a Month - not all of these will work for everyone (For example where I live there is only one electric company.) however there are some great ideas that will definitely  help you to get money in the bank!
  • For more ideas on how to save check out our Pinterest Board Household Debt/Budget.
I wish you and your family a Healthy and Happy New Year!

Thank you for visiting :-)
Picture
0 Comments
    Picture
    Hi there! I'm Kathie, the author behind Creating A Simpler Life blog. I'm excited to share our longterm projects (and planning) toward building our future retirement homestead in the Adirondack Mountains of New York. In the meantime I will be sharing all the other little things we do that are part of creating our simpler life!
    Creating a Simpler Life

    RSS Feed

    Visit Creating A Simpler Life's profile on Pinterest.

    Categories

    All
    Adirondack Crafts
    Chickens
    Conservation
    Crochet
    Do It Yourself
    Energy Savings
    Essential-oils
    Essential-oils
    Food-storage-preservation
    Food-storage-preservation
    Gardening
    Health
    Health-wellness
    Health-wellness
    Homemade-remedies
    Homemade-remedies
    Homesteading
    Homesteading Dreams
    Inexpensive Fun
    Minimizing
    Organization
    Products We Sell
    Recipes
    Recycling
    Saving-money
    Saving-money
    Shopping
    Wedding & Shower DIY

    Archives

    July 2020
    June 2020
    April 2020
    March 2020
    March 2019
    January 2019
    December 2018
    October 2018
    August 2018
    July 2018
    June 2018
    April 2018
    March 2018
    February 2018
    January 2018
    November 2017
    October 2017
    September 2017
    August 2017
    July 2017
    June 2017
    May 2017
    April 2017
    March 2017
    February 2017
    January 2017
    December 2016
    November 2016
    October 2016
    September 2016
    August 2016
    July 2016
    June 2016
    May 2016
    April 2016
    March 2016
    February 2016
    January 2016
    December 2015
    November 2015
    October 2015
    September 2015
    August 2015
    July 2015
    June 2015

mrandmrscorbi@gmail.com
Contact Us - Privacy Policy - Disclaimer
Copyright 2022©Creating A Simpler Life, Inc. All rights reserved. Reproduction in whole or in part without permission is prohibited.
  • Home/About
    • What does OFF-GRID mean?
    • MINIMIZING >
      • Home Size
      • Room by Room
      • Get Organized
      • Household Waste
    • MINIMIZE DEBT, MAXIMIZE SAVINGS >
      • Bills & Other Debt
      • Saving Money
      • Shopping Tips
      • Affordable Fun
    • BACKYARD CHICKENS >
      • The Coop
      • The Chickens
      • Feeding the Chickens
      • Fresh Eggs
    • HOME GARDENING >
      • Building the Garden
      • What We Grow
      • Seeds, Weeds, & More
      • Preservation & Storage
    • DO-IT-YOURSELF >
      • Health & Wellness
      • Simple Cleaning & Tips
      • Crafts & More!
      • Printables
    • CROCHET >
      • IDEAS & MORE
      • VIDEO TUTORIALS
  • HOMESTEAD
    • The 5 Year Plan PLUS! >
      • 2017
      • 2018
      • 2019
      • 2020
      • 2021
      • 2022
    • WHY AN EARTH SHELTERED HOUSE?
    • OFF GRID TINY TRAILER
    • BUILDING our HOMESTEAD from Scratch >
      • BUYING LAND & GETTING STARTED
      • BUILDING THE CONCRETE DOME
      • FROM DOME to HOME
      • SURVIVING OUR FIRST WINTER
    • HOMESTEAD MACHINERY >
      • GENERATORS
      • KUBOTA TRACTOR
      • ATV'S & UTV'S
      • WOOD CHIPPER
      • CHAINSAWS
      • LOG SPLITTER
      • POWER TOOLS
      • SNOWMOBILES
      • AUTOMOBILES
    • BUDGETING THE BUILD
    • SUSTAINABILITY >
      • WATER
      • FOOD
      • SHELTER
      • ENERGY >
        • SOLAR POWER
    • The Adirondacks >
      • Wildlife & Nature
      • Insects & Bugs
      • Things to Do
      • Water Fun
    • ADIRONDACK CRAFTS
  • VLOG
    • 2023
    • 2022
    • 2021