CREATING A SIMPLER LIFE OFF-GRID
  • Home/About
    • What does OFF-GRID mean?
    • MINIMIZING >
      • Home Size
      • Room by Room
      • Get Organized
      • Household Waste
    • MINIMIZE DEBT, MAXIMIZE SAVINGS >
      • Bills & Other Debt
      • Saving Money
      • Shopping Tips
      • Affordable Fun
    • BACKYARD CHICKENS >
      • The Coop
      • The Chickens
      • Feeding the Chickens
      • Fresh Eggs
    • HOME GARDENING >
      • Building the Garden
      • What We Grow
      • Seeds, Weeds, & More
      • Preservation & Storage
    • DO-IT-YOURSELF >
      • Health & Wellness
      • Simple Cleaning & Tips
      • Crafts & More!
      • Printables
    • CROCHET >
      • IDEAS & MORE
      • VIDEO TUTORIALS
  • HOMESTEAD
    • The 5 Year Plan PLUS! >
      • 2017
      • 2018
      • 2019
      • 2020
      • 2021
      • 2022
    • WHY AN EARTH SHELTERED HOUSE?
    • OFF GRID TINY TRAILER
    • BUILDING our HOMESTEAD from Scratch >
      • BUYING LAND & GETTING STARTED
      • BUILDING THE CONCRETE DOME
      • FROM DOME to HOME
      • SURVIVING OUR FIRST WINTER
    • HOMESTEAD MACHINERY >
      • GENERATORS
      • KUBOTA TRACTOR
      • ATV'S & UTV'S
      • WOOD CHIPPER
      • CHAINSAWS
      • LOG SPLITTER
      • POWER TOOLS
      • SNOWMOBILES
      • AUTOMOBILES
    • BUDGETING THE BUILD
    • SUSTAINABILITY >
      • WATER
      • FOOD
      • SHELTER
      • ENERGY >
        • SOLAR POWER
    • The Adirondacks >
      • Wildlife & Nature
      • Insects & Bugs
      • Things to Do
      • Water Fun
    • ADIRONDACK CRAFTS
  • VLOG
    • 2023
    • 2022
    • 2021

Blog

A little bit of anything and everything that's part of
​creating, enjoying, and living a simpler life!
Picture

DIY: From Garbage to Craft Room!

4/26/2017

0 Comments

 
Picture
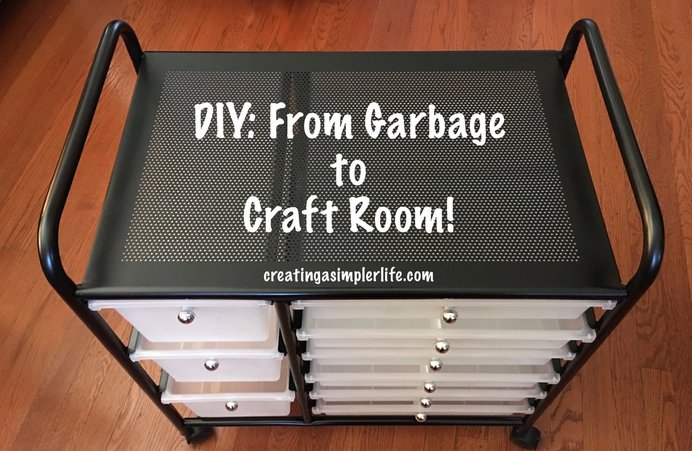
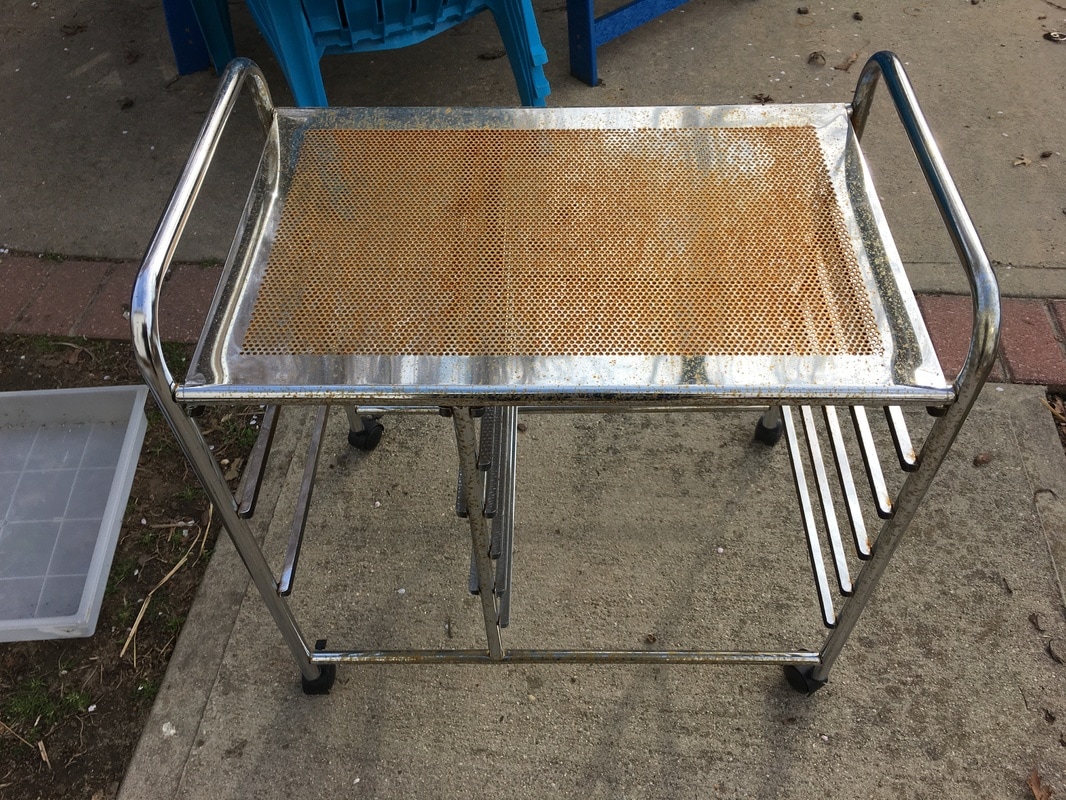
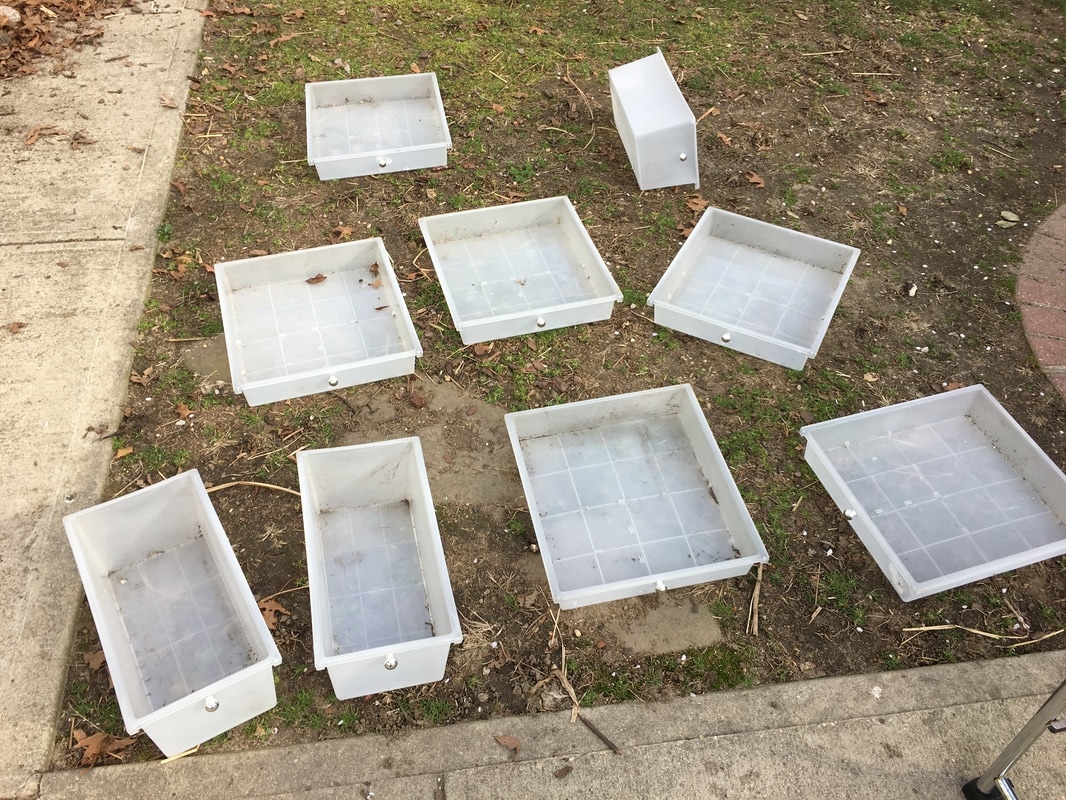
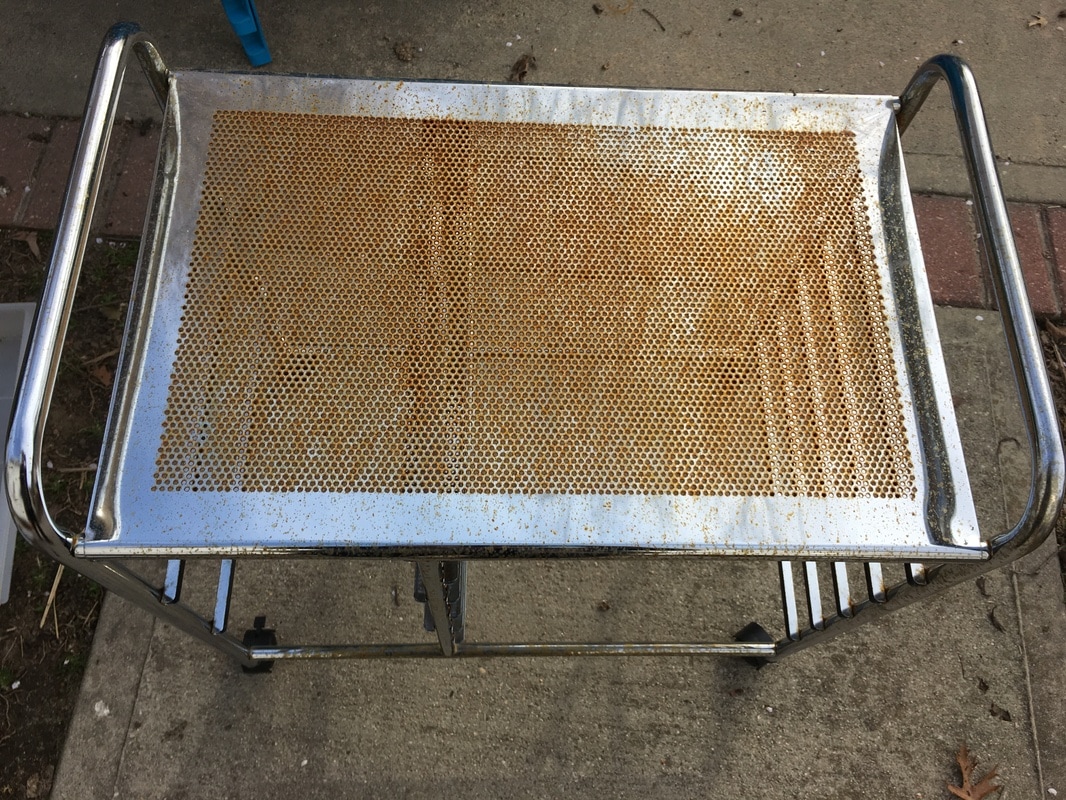
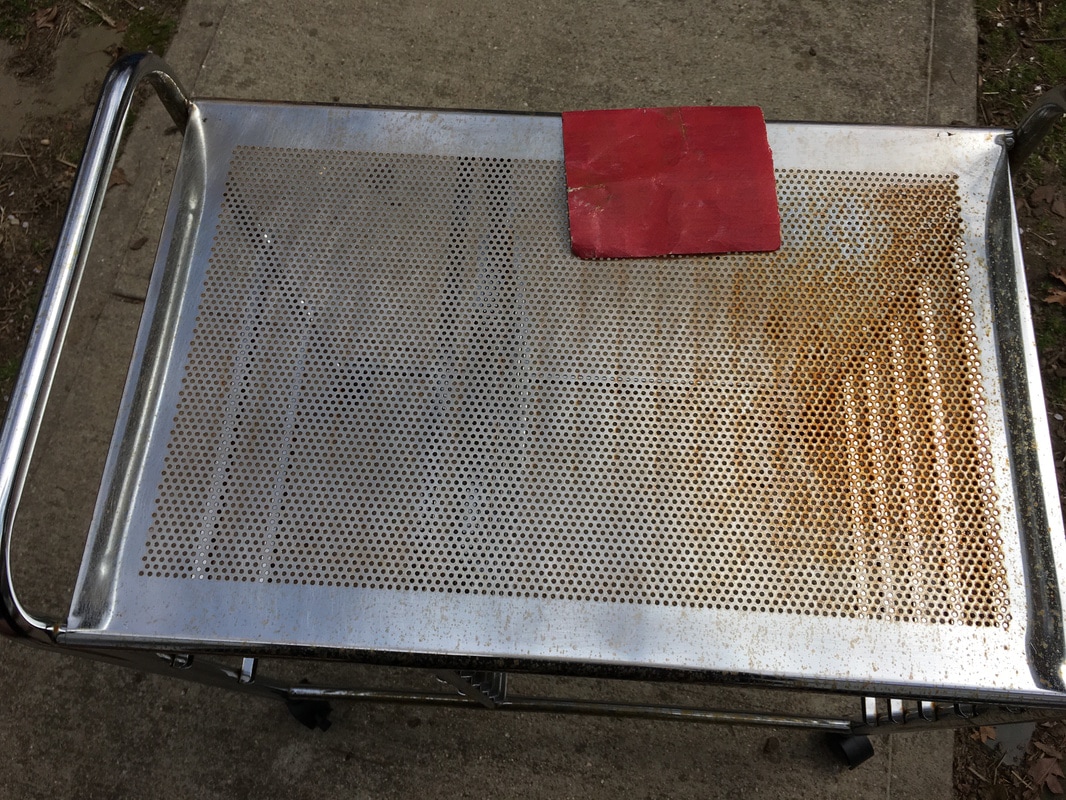
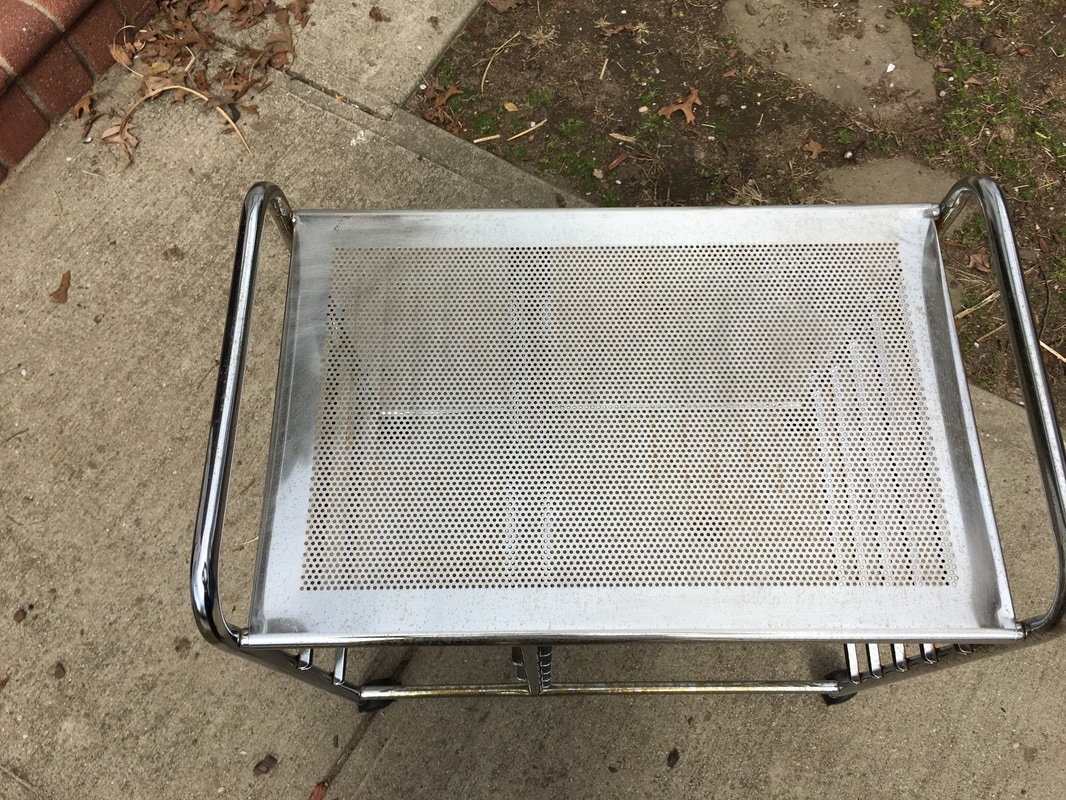
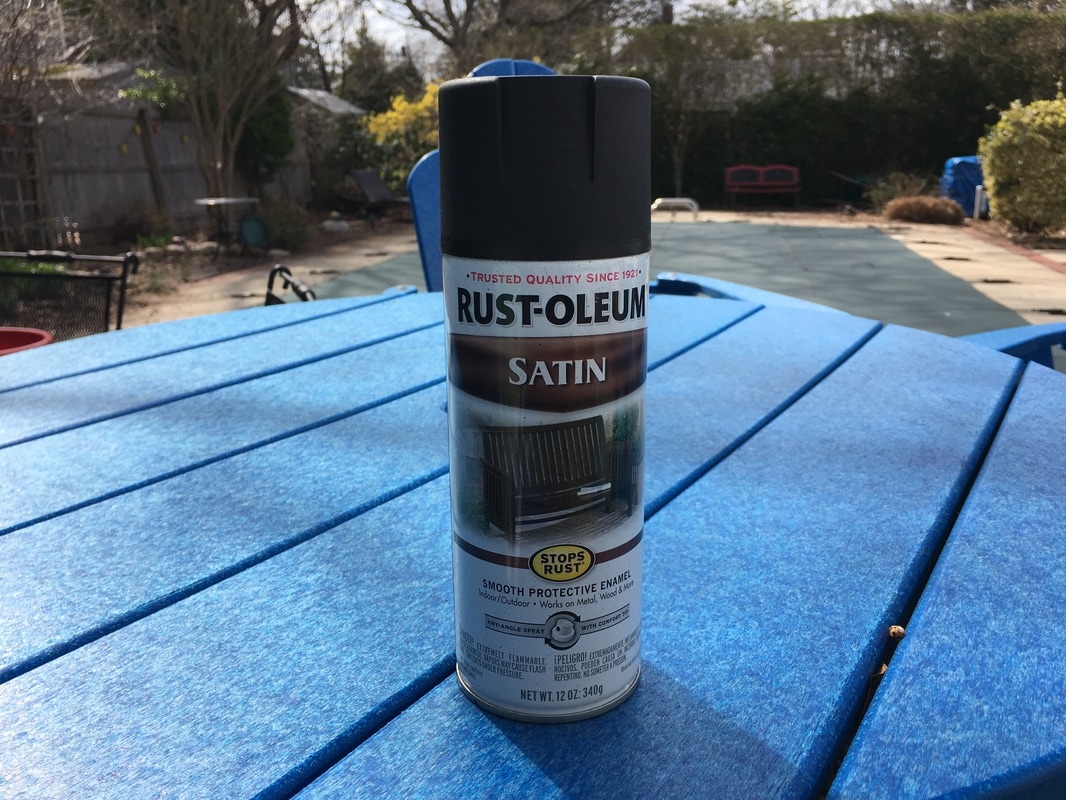
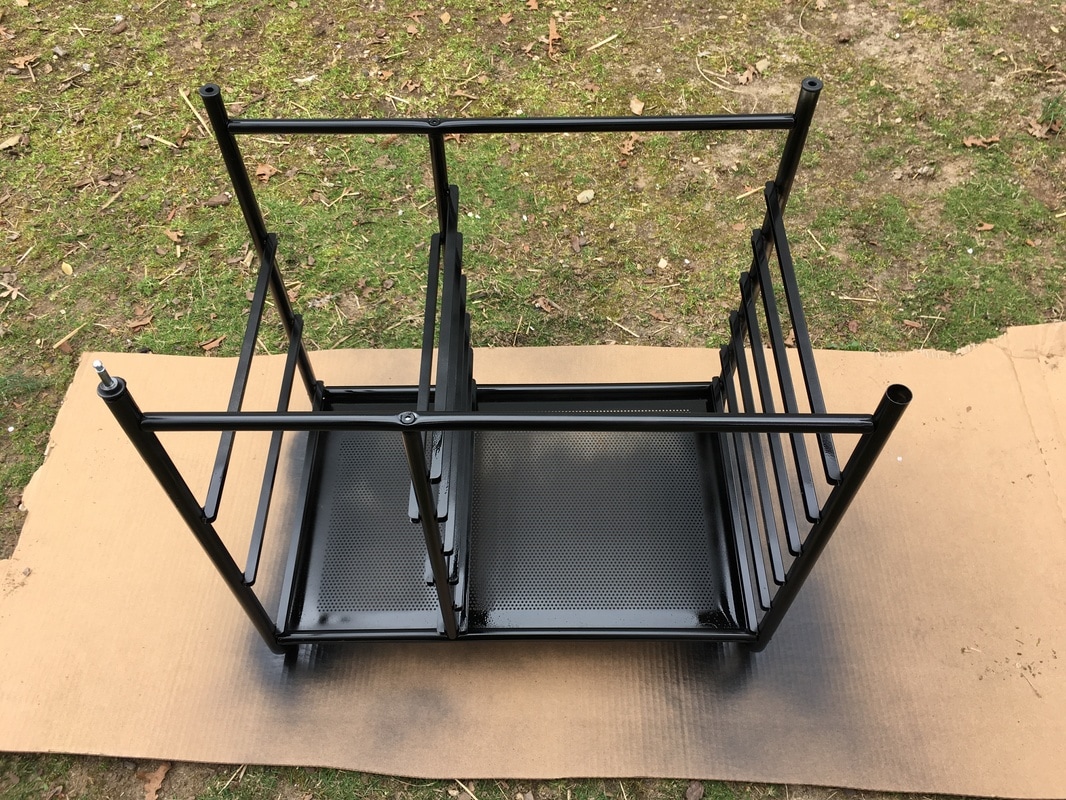
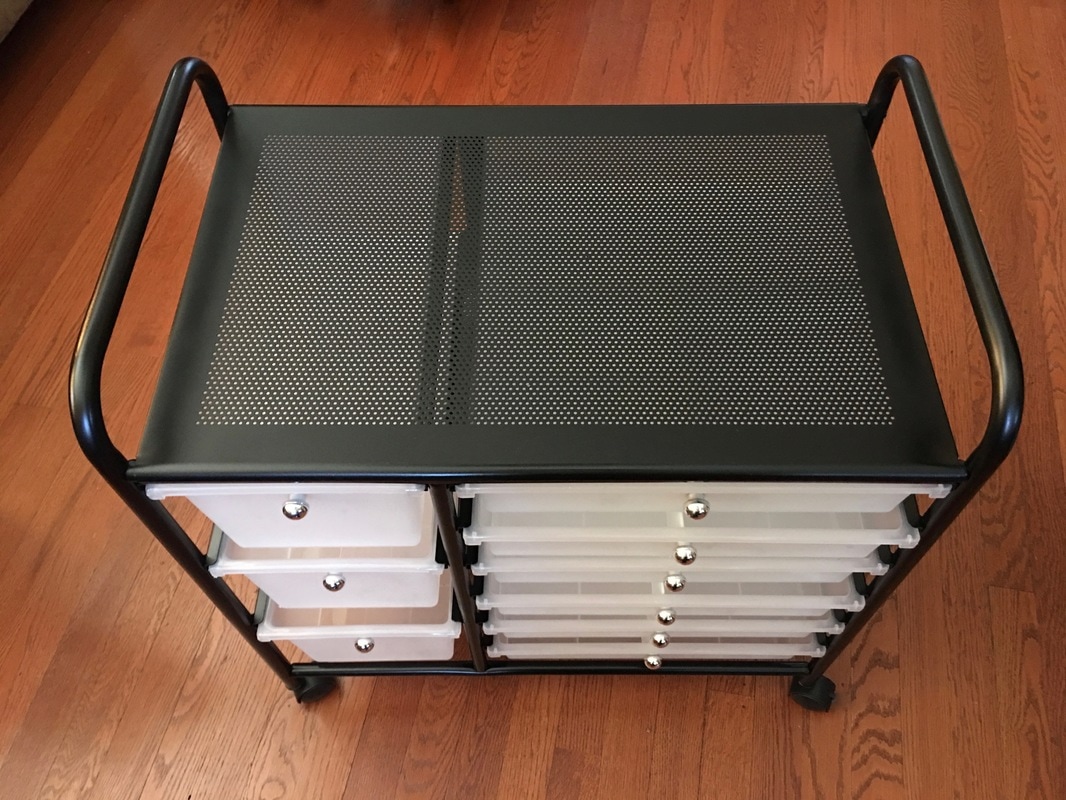
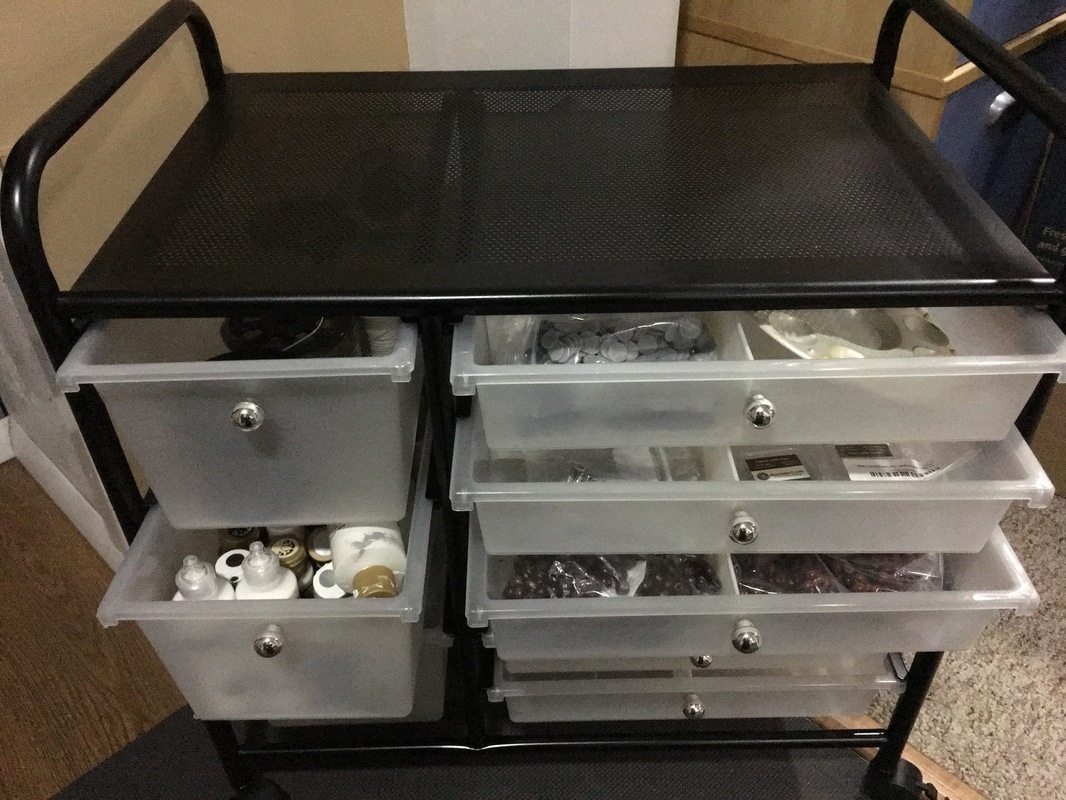
My husband pulled this 8 drawer chrome cart out of our neighbors garbage. It was a little rusty, but otherwise would be perfect for all my craft supplies. I think it is a great find because similar carts sell for upwards of $70 on Amazon! What to do, what to do.....so I simply sanded, wiped it down, and spray painted it! Now it is not only is perfect for all my supplies, but it looks brand new too!
Picture
The rust wasn't too bad.
Picture
The drawers were only a little dirty. A quick hose down and a washing with a little soap and water and they were like new!
Picture
So here is the rusty top before sanding.....
Picture
Here it is partway through sanding....
Picture
And here it is after! It looks great, however if you get really close you can still see where the rust was so I still decided to paint it.
Picture
I wiped the entire cart down with alcohol and then spray painted it with black satin Rust-oleum paint we had in the garage. It took a little more than one can.
Picture
I made the mistake of starting with the bottom first. This was a mistake because I could have probably gotten away with only one can if I had finished the top and front first.
Picture
It doesn't matter though because it came out awesome and it cost me absolutely nothing but my time!
Picture
Picture
And the absolute best part was that I found this heart-shaped rock on the ground while I was working!
Thanks for visiting!
Find more of our great DIY ideas here!
And stay tuned for our book coming soon: "The ABC's of Creating A Simpler Life" which is full of tips for simplifying life in, well, super simple ways :-)
Follow us and sign up for e-mail!
Sincerely,

Picture
0 Comments

Crochet Toaster Cover

4/21/2017

6 Comments

 
Picture
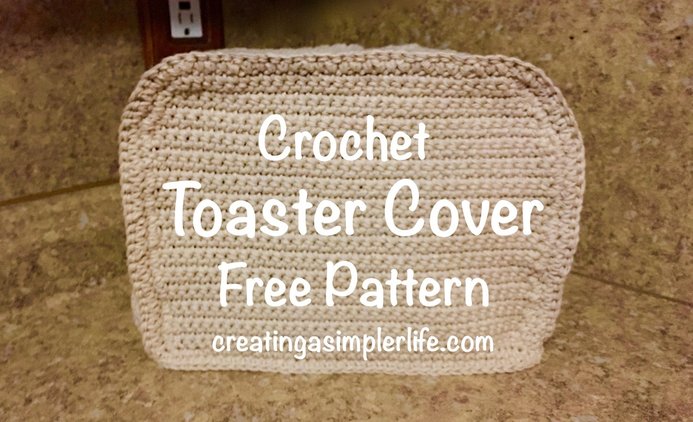
I was cleaning the kitchen last Sunday and noticed how yucky the toaster looked on the counter.  Of course I immediately decided to put a cover on it, I just didn't know what kind. After some searching Amazon for something that I liked, I decided to just use some of my leftover yarn and make my own.  I tried to find a pattern online, but I didn't find anything simple enough and you know that if it's not simple then it's not for me! I know this picture doesn't do the cover justice, but believe me it is a major improvement over simply having a toaster sitting on the counter and it absolutely looks better than the toaster alone collecting dust in the corner.

This pattern depends upon the size of your toaster, but mine is a two slice Oster (see affiliate link at bottom of post). The cover is a little larger than necessary but this is because I plant on getting a bigger toaster with 2 slide wide mouth and longer slots to fit Rye bread some day. Nothing like planning ahead!

Supplies Needed:
  • 3 skeins of Lily Sugar n'Cream 100% cotton yarn (Jute)
  • 4.5 mm crochet hook
  • Scissors
  • Yarn needle​
Directions for Center Piece
  • Chain 24
  • Row 1: single crochet into second stitch from hook, and 24 more times across. Turn and chain 1.
  • Rows 2 - 86: repeat row 1. 
  • Row 87: you will complete a sc stitch around the entire outside (see photo). Complete row 87, but in the last (corner) stitch, do 3 chains instead of one and turn. Row 87 actually counts as the first of the four sides. In each corner be sure to do 3 sc. When you get back to the 87th row, make sure there are 3 sc in the corner and slip stitch to connect. 
  • Finish off.
Picture
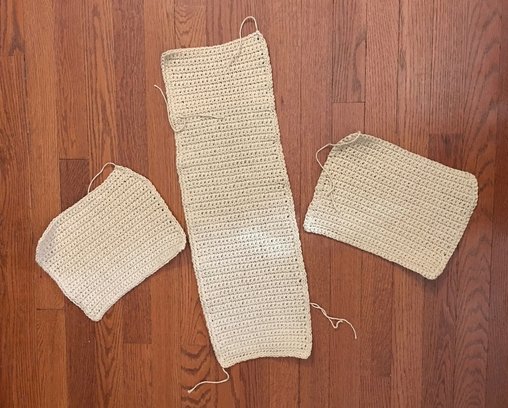
Directions for Sides - Make 2
  • Chain 34
  • Row 1: sc in the second stitch from the hook and all the way across. Chain 1 and turn.
  • Rows 2 - 19: Repeat row 1.
  • Row 20: Here you will be creating the curved corners. Skip the first stitch, sc 31 (the last stitch is skipped as well). Chain 1 and turn.
  • Rows 21 - 23: skip the first stitch, sc across and skip the last stitch as well. Repeat the pattern skipping the first and last stitch on each row. 
  • Row 24: skip the first stitch, and continue the single crochet around the corner and down the side (one stitch per each row). Single crochet 3 stitches in the corner, continue around the bottom, sc 3 in corner, and single crochet up the side and around the curve. Just at the top of the curve, connect with slip stitch and knot off.
Joining
  • Join a side to the center piece using a single crochet stitch.  Be sure to keep them matched up the entire time.
  • Join the second side to the center piece. 
  • Single crochet around the entire bottom to finish it.
  • Weave all loose ends.
Picture
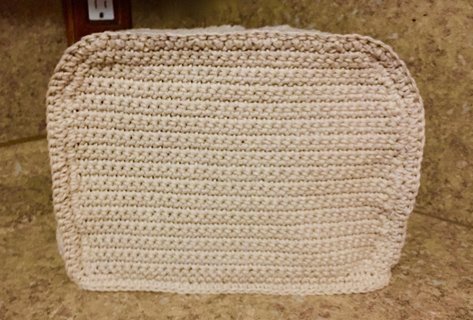
Is it perfect? No...but it's exactly what I wanted :-)
Simple to make and looks much better in person!
I promise :-)
Check out our other FREE crochet patterns!
We also have several boards on our Pinterest page.
Thanks for visiting.
Sincerely,
Picture
6 Comments

2 New Recipes: Cherry Tomato Sauce &   Roasted Shrimp and Asparagus

4/18/2017

0 Comments

 
Picture
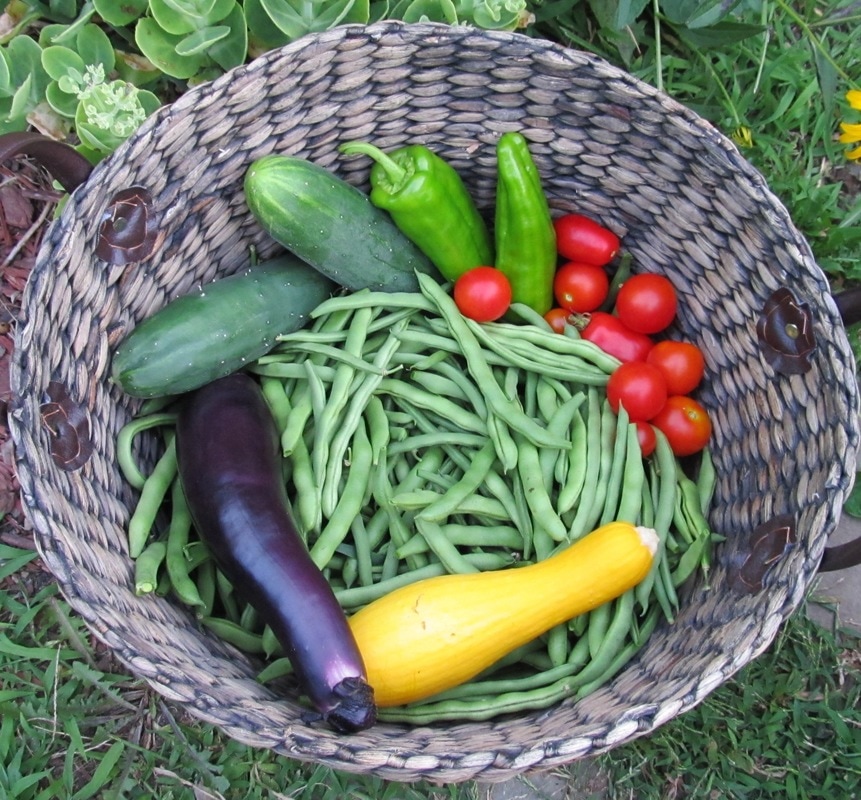
Spring is here, summer is coming soon and that, for me at least, means fresh vegetables! I just can't wait and in anticipation I am sharing two of my favorite recipes that require some of my wonderful homegrown vegetables!
  • The cherry tomato sauce I have shared before as a video on YouTube, so now I am finally sharing the printable recipe card below. You can also view the video at the bottom of this post!
  • The roasted shrimp and asparagus is one of my favorites because not only is it healthy, but asparagus is one of the first spring crops we look forward too!​
As is normal for all the recipes we share, they are both simple, simple, simple!
Click on the button below the recipes to download the pdf file. It prints out best on one sheet of 8 1/2 x 11 paper, preferable card stock.  Then you can simply cut out each of the 4 x 6 inch recipe cards on the dotted lines!  They always come two recipes per sheet in an effort to not waste paper! 

Visit my Recipes Page to
  • view or print out previous recipes (pdf files)
  • to download a FREE 4 x 6 Recipe Card Template (.dox file) for your own recipes! 
​
​Also check out my past Recipe Blog Posts here or visit my our Recipes Pinterest Board. Enjoy :-)
Picture
Download the PDF file here to print out the recipe cards!
FYI: there are always two recipes because I do not want to waste paper!
Thank you for visiting!
​Please 'like' us on Facebook, follow us on Pinterest, or join our mailing list 
so you never miss out on a new post!
Sincerely,
Picture
Super Simple Cherry Tomato Sauce:
0 Comments

Top 5 Tips to Simplify Your Daily Life Now!

4/13/2017

0 Comments

 
Picture
There are so many ways to start creating a simpler life!  From finances, to house cleaning, to simply how you perceive your surroundings, simplifying your life can be, well..., simple! Here are my five favorite ways to keep my life simpler every day! You might think some of them are sort of 'cheating' but I think they are genius because to me they just make sense. In fact, they make so much sense that you may already be doing some, if not all, of them already! 

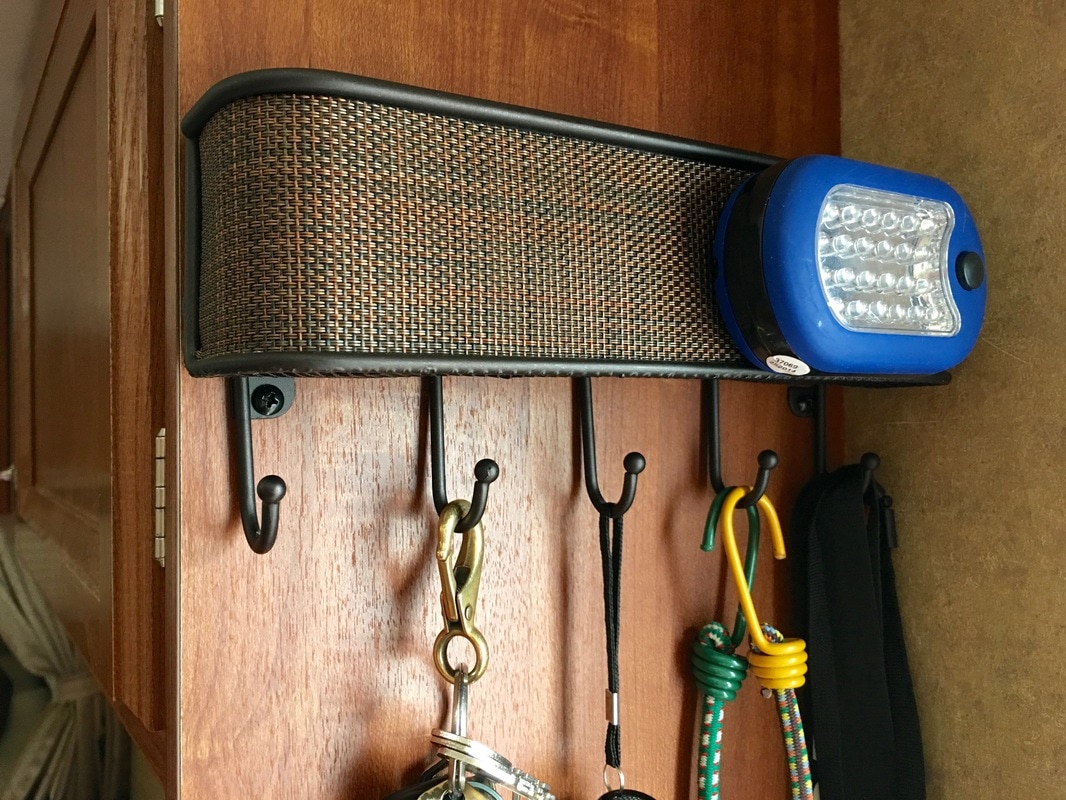
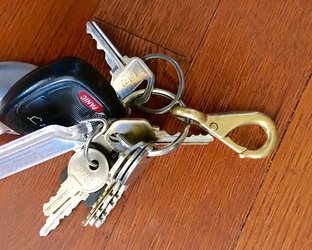
ONE: Car Keys - Nothing makes me crazier than misplacing the car keys. Whether I am home, at the store, or even at work, misplacing, or trying to locate the car keys is a annoying! Here's how I simplified this problem: a hook. What? Yup, a hook. Not just any hook, mind you. My hook is a brass round eye quick snap that is actually used for rope or chain and it can be found in just about any hardware department. I originally tried some hook clips that were specifically made for key rings, but they weren't heavy duty enough for the kind of life I lead. I just happened to spot this one in the hardware department several years ago, and well, the rest is history!  
Heres why it works:
  • I use the hook to attach my keys to my belt loop or back pack when I am on hikes or not carrying a purse for whatever reason. 
  • ​The hook also easily attaches to the handle of my pocketbook while I am at work or shopping. No digging around in the bag searching for keys!
  • Same thing goes for at home. We have a key hanging area in the kitchen so the hook easily hangs there when I am home. This also makes it easy for anyone else in the house to be able to find each others keys if they need to move cars or whatever.​
Picture
Picture
Picture
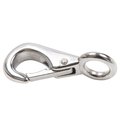
https://www.lowes.com/pd/Blue-Hawk-Stainless-Steel-Round-Eye-Quick-Snap/999971032

TWO: Crocs - Mine are faux, my husbands are real, but either works great! We each keep a pair of these right by the door on a multi-purpose tray (perfect for winter snow boots too!). This allows us to quickly slip them on to run the garbage out, put the chickens away, get the mail, pick vegetables, take the compost out, etc. No searching all over for shoes, and no wasted time having to tie them. It is so simple to slip them on and run right outside. I don't have to worry about stepping in mud or chicken poop with my good shoes because stepping in that stuff is exactly what these are for! When I come back in the door they immediately go right back on the tray, mud and all! Want to wash them? Simple, just hose them down. No stress, no worries. Notice the ones on the tray are lined for winter use? I have another pair in purple with no lining for the summer :-)
Picture
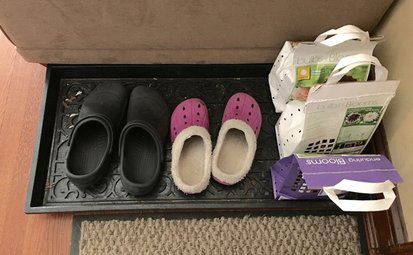
Check out the bulbs ready for planting!

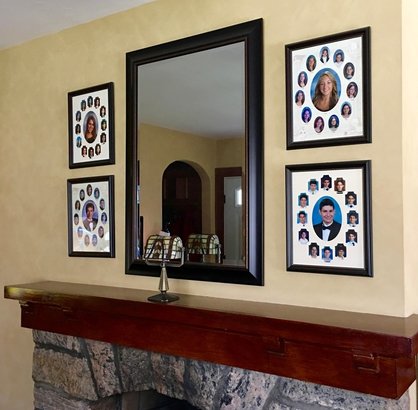
THREE: All Surfaces Clear - When the surfaces in your house are clear, your home looks, or appears, clean! When the house appears clean, you feel better and have no worries or stress about anyone suddenly visiting or stopping by. How is this accomplished? First, get rid of the knick-knacks that take up space (and collect dust) on tables, shelves, etc. Second, get rid of extra furniture and anything that takes up unnecessary floor space. The same goes for kitchen counters and the top of the refrigerator too! Less is more! The bottom line is that you should be able to easily wipe a rag across any surface in your home to dust, sweep, mop, and or vacuum any time you choose. You shouldn't have to clean, before you clean! This goes a long way towards making the house appear clean even if you haven't recently dusted or swept! Win-win:-)
Picture

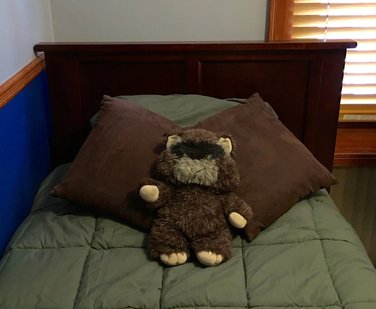
FOUR: Make the Bed - I don't really mean make the bed, which if done correctly like in a motel room can take a long time to tuck in the sheets, blankets etc. I mean make the bed appear to be made, or made good enough. First, you need to have a nice headboard. It doesn't have to be expensive, and you can even make your own, but it is 'key' for this tip to work. Then get an oversized comforter or summer quilt and a few matching decorative pillows. Keep the comforter on the bed and use it. Yup, sleep with it every night and in the morning as soon as you get up for the day, straighten it out and throw the decorative pillows at the top by the headboard. It will look great and literally only take a few seconds to accomplish! So simple!
Picture
Picture

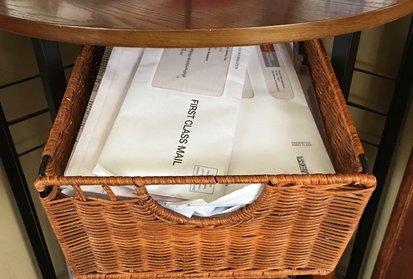
FIVE: Mail (not the 'e' kind) - The mail basically gets delivered every day but Sunday. Most of the time it is junk and bills. Not exactly a pleasant experience. How to simplify? Well, you could get a PO Box and only pick it up once a week, but this costs money. A better way is to just grab it, sort the junk and the bills, simply throw the junk right out and stick the rest in the 'bill basket.' Immediately. Don't let it sit around. Don't waste your time opening it. The 'bill basket' is simply a drawer in a wicker corner unit that I throw all the bills and other 'non-junk' mail into. Once a month when it's time to pay the bills, I go through it. That's when I file the papers that aren't bills but need to be saved (like EOB's) and sort through what bills do need to be paid. Yes, I only do bills once a month. I took the time to make all my bills due on or about the same day each month, and I sit down to pay them all about a week before they are due. It takes less than an hour of my time, on one day only, of each and every month! Thats about 12 hours a year to pay bills! 
Picture

Did you like any of the tips above? Then stay tuned!
Our book "The ABC's of Creating A Simpler Life" is coming soon! It is chock full of tips from A to Z to help in creating your simpler life. There is something for everyone, no matter what stage of your life you are at or where you live. 
​After all, who doesn't want life to be simpler?
Thanks for visiting!
Follow us on social media and/or sign up for e-mail to get notifications of our latest posts and be notified when our book is finally out!

Keep it simple my friends :-)
Sincerely,
Picture
0 Comments

Conduit for Climbing String Beans

4/10/2017

1 Comment

 
Picture
It's time to get the garden ready! I get so excited this time of year because I get to plant my favorite crop: string beans!

Years ago when we first started our garden we tried growing bush string beans. Unfortunately these felt like backbreaking work to bend over and pick them all.  They also took up a tremendous amount of space in our small garden that we really wanted to put to better use.  That led us to finally trying pole beans and that was the best decision we ever made.  

Here's why pole string beans are my absolute favorite vegetable to grow:
  • You literally put a seed in the grown and they grow like crazy with little to no care (maybe water sometimes). Yes, almost like Jack and the Beanstalk!
  • They take up relatively little space because they grow "upward" freeing up a lot of space for other vegetables.
  • ​They are easy to pick. It's great exercise to reach up a little, bend down a little, but mostly just stand there and fill your basket!  It's so relaxing :-)
  • If you pick the beans regularly they will continue to produce more and more.
  • We are able to harvest so many beans in a small 10'x 1.5' area that we even have some to share with friends and family!
  • They are delicious to eat fresh right off the vine, cooked, grilled, and even canned or frozen for the winters!
  • We save the beans from year to year to replant so we never need to buy new seeds!
We grow two, soon to be three, pole beans varieties for different reasons:
  • Kentucky Wonder (about 70 days to harvest) - grow about 7 - 9 inches long. They tend to get a little tough and very stringy if you don't pick them young, but they grow like crazy so you will have a tremendous surplus!
  • Blue Lake (about 65 days to harvest) - grow to about 6 inches long, rounder and darker green, and not as stringy as the Kentucky Wonder.

The third type of bean will be grown for the first time this year! We are so excited because it is supposed to be a perennial. Yes, that's right, a bean we should never have to plant again because it will come back on its own year after year! We can't wait to try it! Read all about the Perennial String Beans here!  Now we just need to figure out where to plant them so that they never get disturbed!
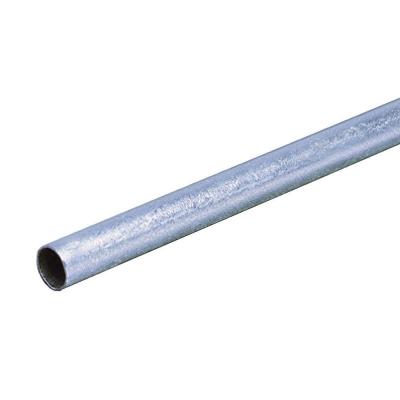
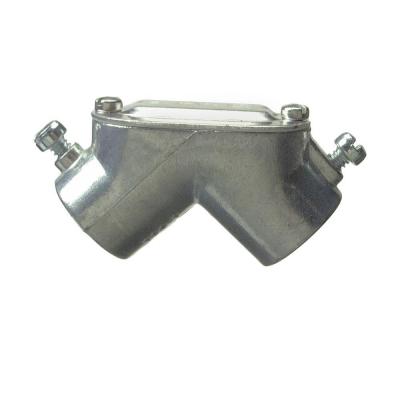
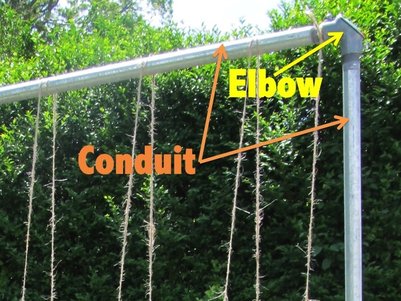
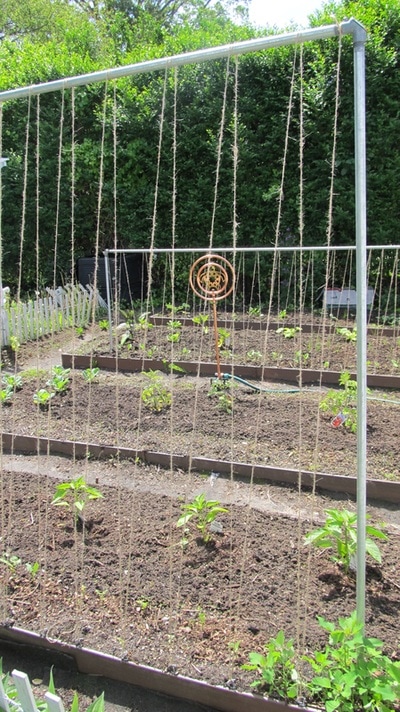
Growing pole beans is so simple that the hardest part about growing them is the poles! Yup, sounds silly, but the poles can be a pain in the neck. The beans can pull them down  they can rot, etc. After years of minimal success we finally decided to make something more permanent. After a lot of research (of course) about growing pole beans, we finally decided to try building a pole built from electrical conduit, rebar, and twine. Yes, it was a small investment but the poles are still as good as the first year we built them, even with being moved around!
Supplies For 10' long by 5' high Pole Structure:
  • Quantity 2  OF 1/2 inch x 10 foot electrical conduit 
  • Quantity 2 OF 1/2 inch 90 degree elbow
  • Quantity 2 OF 24 inch long rebar 
  • 24 hooks (if you have a raised bed garden where you can screw them in - if you don't then you don't need hooks or string and can get a netting instead)
  • String to attach to the poles (for the beans to grab ahold of as they grow)
Picture
1/2" Conduit x 2
Picture
90 degree elbow x 2
Picture
24" Rebar x 2
Instructions: 
  • Cut one of the 10 foot conduits in half (these will be the 'legs')
  • Attach the elbows to each end of the 10 foot conduit (the uncut one).  
  • Insert the two five foot cut sections (legs) of conduit to these.  
  • Measure a width of 10 feet in your bed, and hammer one rebar at each end about a foot deep into the ground (leaving a foot sticking up).  NOTE: This should be approximately 1' (one foot) away from the edge of your garden bed.
  • Slip the open end of each 5 foot piece of conduit onto the rebar to hold the pole contraption upright.  
  • Insert the hooks approximately every six inches along the edge of the raised bed garden. If you do not have a raised bed garden you could use a netting here instead.
  • String the string up and down between the hooks and the pole at the top to create a climber for the beans. If you can't do the string, netting will also work. I like the string because the beans really grab on so we simply cut it off and restring each season. 
  • Plant bean seeds about 3 - 4 inches apart along the base.  Water and wait!  You will NOT be disappointed :-)
Picture
Picture
See the smaller pole structure in the back bed? That ones for growing peas!
Picture
Picture
Thanks for visiting!
If you have time check out our other
gardening ideas!
We also have several gardening boards on our Pinterest Page!
And of course we share lots of great ideas on Facebook too!
Sincerely,
Picture
1 Comment

Crochet Bear Lovey Blanket

4/3/2017

2 Comments

 
Picture
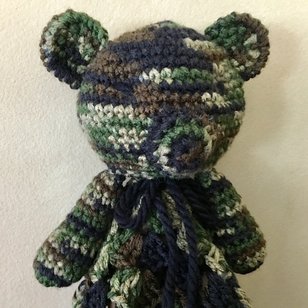
Who doesn't love a lovey blanket? They make great gifts for newborns and are sure to be their absolute favorite! 

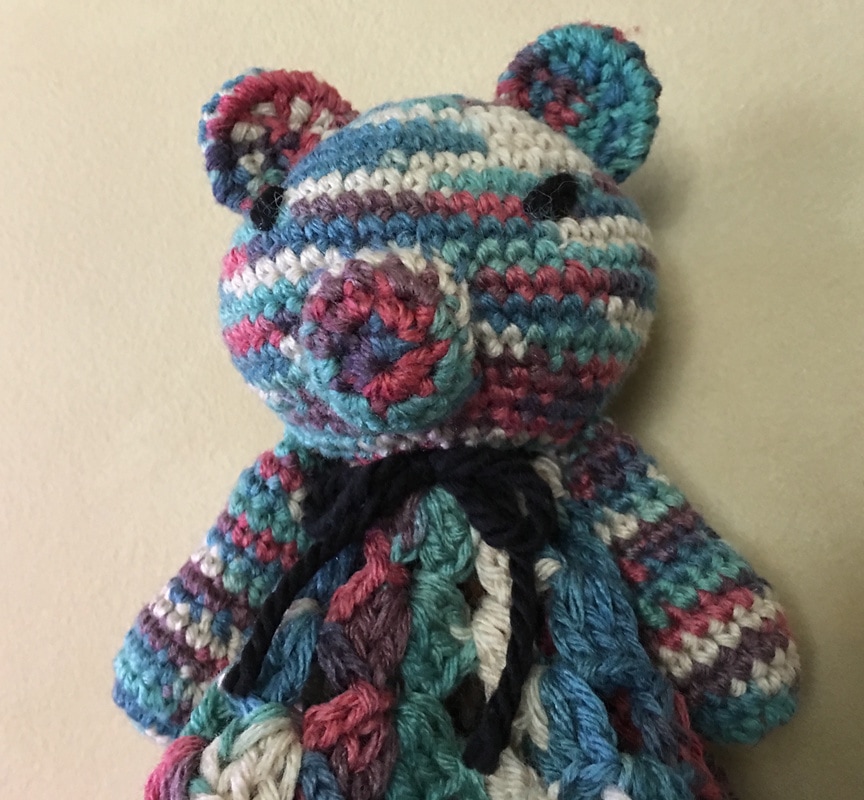
This little lovey was inspired by my niece who 'was' expecting - and just recently gave birth to - my first great nephew! After making an adorable crochet camo infant bear hat (free pattern here) for her I decided to make a matching bear lovey (I had so much leftover yarn!).  And then since I had some different leftover yarn from another project I decided to make one out of that too! 
Supplies:
  • 4.5 mm crochet hook
  • Red Heart Camouflage Yarn
  • Yarn Needle
  • Scissors
  • Thick black yarn for eyes and tie around neck

Make the Head:
(I strongly suggest reading all the directions first and then watching the video tutorial if this is your first time making a ball shape).
  • Round 1: Start with a magic circle with 6 single crochets. 
  • Round 2: Single crochet two stitches around in each of the 6 original single crochet stitches. (at this point you should basically have a circle).  Place a marker at your last stitch.
  • Round 3: Do one single crochet in the first stitch, then two in the next, then one in the next, and then 2.  Complete the pattern around.
  • Round 4: Do one single crochet in the next two stitches, then two single crochets in the third, then one sc in each of the next two, then 2 sc in the next one. Repeat pattern around until you come to the marker.
  • Round 5: 3 sc, then two sc in one, 3 sc, then two sc in one (repeat around to marker)
  • Rounds 6 - 8: Basically with each round, you will increase the the number of single crochets in each stitch by one, then do two in one stitch, then repeat the same number of sc again.  You can continue the pattern by adding rounds and increasing the sc by one each time until the bottom of the head is the size that you want. By the 8th round you should be doing 6 sc in a row, then 2 sc in one stitch and repeating that pattern all the way around  to the marker.
  • Rounds 9 - 13: single crochet in each stitch around without increasing.
  • ​Round 14 to end: Start decreasing by one for each round as follows: sc 6 stitches, then do a double decrease stitch (see video) and continue around to marker, next round do 5 sc., then a double decrease stitch and continue pattern around to marker.  You will then do a round of 4 sc 1 dd, then a round of 3 sc 1 dd, and 2 etc. Before you finish be sure to fill it with stuffing.  Lastly, using the yarn needle, thread the yarn around the remaining hole and pull tightly closed. Finish off leaving a long tail.
Make the Nose:
  • Make a magic circle and sc 6 times into it.
  • Continuing in the round, do 2 sc in each stitch (12 total).
  • Continuing in the round again, do 1 sc i the first stitch, then 2 sc in second stitch, continuing all the way around. Finish off leaving a long tail.
  • Sew onto front of face using the yarn needle and finish by pulling the long tail through to the bottom of the head. Knot it to the head tail that is hanging through.
Make the Ears:
  • Row 1: Chain 9, and sc into 8th stitch and all the way down to end, continue around the opposite side with 8 more sc, and slip stitch to connect. 
  • Row 2: 1 sc, then do a decrease sc (go into stitch and pull yarn through, then go through next stitch and pull yarn through both loops on hook). Do 2 more times for a total of three. Single crochet around the end, and do three sc decreases on the opposite side.  Knot off and leave at least 12 inches of 'tail' when cutting for finishing.
  • Use the yarn needle and sew the ears onto the head as shown in the picture. When done going all the way around the ear pull the remaining tail through the bottom of the head and knot it with another hanging tail. Do the same for the second ear.
Make the Arms:
  • Round 1: make a magic circle and sc 6 stitches into it.
  • Round 2:  do two single crochets in each stitch around (you could place a marker here if necessary)
  • Rounds 3 - 10: do one single crochet in each stitch around.
  • Finish with a slip knot and cut the hanging string so there is approximately 12 inches attached to the arm.
  • At this point stuff the arm with stuffing.
  • ​Make a second arm.
  • Then use the yarn needle to sew the arms onto the head, leaving about an inch of space between them. See the picture above. Pull the tails through the hole in the bottom of the head and knot them with other hanging tails.
Sew on Eyes:
  • ​Using black yarn and the yarn needle, go through the bottom of the head and 'embroider' the eyes in place. Do not pull too tight, then bring the yarn back down through the bottom of the head and tie the two ends into a knot.  Make sure you leave the two tails long enough to use as a tie around the neck at the end.
Make the Blanket:
This is a basic granny square blanket. If my directions are confusing, check out this granny square video tutorial. 
The final blanket is approximately 18" x 18".
  • Chain 5 and connect to create a loop.
  • Row 1: chain 3 and double crochet 2 stitches repeating this 3 more times. Connect into the loop created by the first (original) stitch around. 
  • Row 2: slip stitch through two stitches and chain 3 in the corner space. Do 2 more dc, chain 3, and 3 dc (all in the corner). Then chain one, and do the same in the other 3 corners. 
  • Row 3: slip stitch through two stitches to get to the corner. Chain 3, 2dc, chain 3, 3dc (all in corner), ch 1, then do 3 dc in middle space, then do the corner as usual and repeat around.
  • Rows 4 - 12: repeat adding 3 dc in every space around. Remember, all corners get 3 dc, 3 ch, and 3 dc.  Straight runs only get 1 ch in between the 3 dc's.
  • Row 13: chain 1 and do 1 sc in each stitch all the way around.  In the corners do three sc stitches.  Connect to first stitch and repeat once more around and finish off, or instead of second border row, add the decorative border as shown on the pink variable bear above. 
  • Optional Border: Called the picot stitch. Chain 1, 3 sc, chain 4 and slip stitch through the bottom chain, then do 3 sc, and make another picot. Basically there is a picot every three single crochets around. Here is avideo just note that I do three stitches between instead of two.
Finishing:
  • Sew head onto the center of the blanket using hanging yarn tails.
  • Finish by using yarn needle to weave in all loose ends.
  • Lovey blanket can be washed and dried on delicate cycle.
Picture
Picture

Thanks for visiting :-)
Check out the our other FREE crochet patterns here!

Also check out the many crochet project patterns on our Pinterest Boards Crochet ONLY and Crochet for the Kids!
Sincerely,
Picture
2 Comments
    Picture
    Hi there! I'm Kathie, the author behind Creating A Simpler Life blog. I'm excited to share our longterm projects (and planning) toward building our future retirement homestead in the Adirondack Mountains of New York. In the meantime I will be sharing all the other little things we do that are part of creating our simpler life!
    Creating a Simpler Life

    RSS Feed

    Visit Creating A Simpler Life's profile on Pinterest.

    Categories

    All
    Adirondack Crafts
    Chickens
    Conservation
    Crochet
    Do It Yourself
    Energy Savings
    Essential-oils
    Essential-oils
    Food-storage-preservation
    Food-storage-preservation
    Gardening
    Health
    Health-wellness
    Health-wellness
    Homemade-remedies
    Homemade-remedies
    Homesteading
    Homesteading Dreams
    Inexpensive Fun
    Minimizing
    Organization
    Products We Sell
    Recipes
    Recycling
    Saving-money
    Saving-money
    Shopping
    Wedding & Shower DIY

    Archives

    July 2020
    June 2020
    April 2020
    March 2020
    March 2019
    January 2019
    December 2018
    October 2018
    August 2018
    July 2018
    June 2018
    April 2018
    March 2018
    February 2018
    January 2018
    November 2017
    October 2017
    September 2017
    August 2017
    July 2017
    June 2017
    May 2017
    April 2017
    March 2017
    February 2017
    January 2017
    December 2016
    November 2016
    October 2016
    September 2016
    August 2016
    July 2016
    June 2016
    May 2016
    April 2016
    March 2016
    February 2016
    January 2016
    December 2015
    November 2015
    October 2015
    September 2015
    August 2015
    July 2015
    June 2015

mrandmrscorbi@gmail.com
Contact Us - Privacy Policy - Disclaimer
Copyright 2022©Creating A Simpler Life, Inc. All rights reserved. Reproduction in whole or in part without permission is prohibited.
  • Home/About
    • What does OFF-GRID mean?
    • MINIMIZING >
      • Home Size
      • Room by Room
      • Get Organized
      • Household Waste
    • MINIMIZE DEBT, MAXIMIZE SAVINGS >
      • Bills & Other Debt
      • Saving Money
      • Shopping Tips
      • Affordable Fun
    • BACKYARD CHICKENS >
      • The Coop
      • The Chickens
      • Feeding the Chickens
      • Fresh Eggs
    • HOME GARDENING >
      • Building the Garden
      • What We Grow
      • Seeds, Weeds, & More
      • Preservation & Storage
    • DO-IT-YOURSELF >
      • Health & Wellness
      • Simple Cleaning & Tips
      • Crafts & More!
      • Printables
    • CROCHET >
      • IDEAS & MORE
      • VIDEO TUTORIALS
  • HOMESTEAD
    • The 5 Year Plan PLUS! >
      • 2017
      • 2018
      • 2019
      • 2020
      • 2021
      • 2022
    • WHY AN EARTH SHELTERED HOUSE?
    • OFF GRID TINY TRAILER
    • BUILDING our HOMESTEAD from Scratch >
      • BUYING LAND & GETTING STARTED
      • BUILDING THE CONCRETE DOME
      • FROM DOME to HOME
      • SURVIVING OUR FIRST WINTER
    • HOMESTEAD MACHINERY >
      • GENERATORS
      • KUBOTA TRACTOR
      • ATV'S & UTV'S
      • WOOD CHIPPER
      • CHAINSAWS
      • LOG SPLITTER
      • POWER TOOLS
      • SNOWMOBILES
      • AUTOMOBILES
    • BUDGETING THE BUILD
    • SUSTAINABILITY >
      • WATER
      • FOOD
      • SHELTER
      • ENERGY >
        • SOLAR POWER
    • The Adirondacks >
      • Wildlife & Nature
      • Insects & Bugs
      • Things to Do
      • Water Fun
    • ADIRONDACK CRAFTS
  • VLOG
    • 2023
    • 2022
    • 2021