Blog
A little bit of anything and everything that's part of
creating, enjoying, and living a simpler life!
creating, enjoying, and living a simpler life!

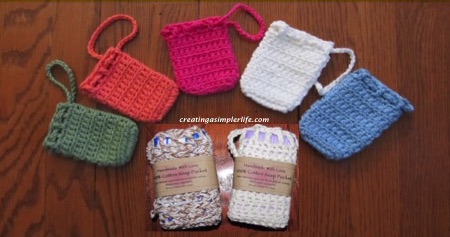 You know all those annoying little pieces of soap? Well they will no longer annoy you with this handy little soap pocket! From a full bar of soap to small leftover pieces, you can soap up with this 100% cotton, environmentally friendly soap pocket. Use it to wash yourself clean in the shower or bath and wash and dry as needed by hand or on the delicate cycle! Fill it with a bar of soap, add a label and it makes a really nice gift! Free printable label below :-) Supplies Needed
Directions (P.S. I am not very good at writing directions for crocheting so please feel free to contact me with any questions!)
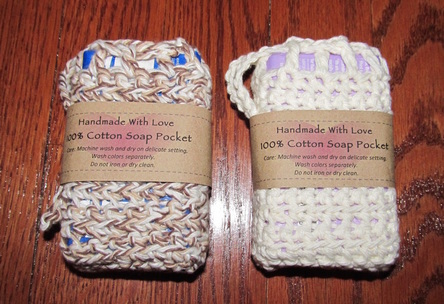 Make it into a gift! Use the FREE printable label below. Download the pdf file, print out on 8.5' x 11' paper, cut out on the outside of the dotted line, wrap it around a soap filled pocket and tape to hold! It's that simple! Just click on the example below or the button to download the FREE pdf file! It prints seven labels per page. 
Thank you for visiting! Check our our CROCHET ONLY Pinterest page for more great ideas! Don't forget to follow and like us :-)
0 Comments
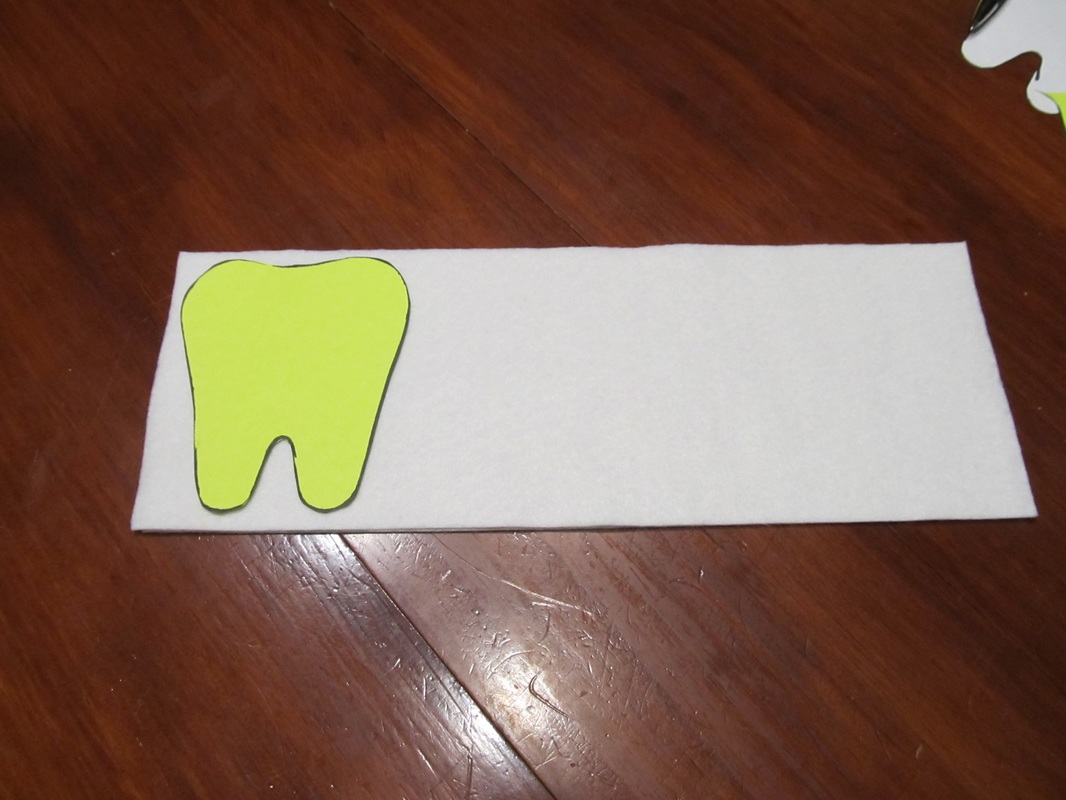
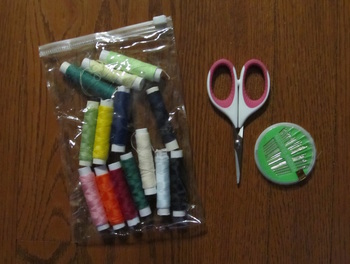
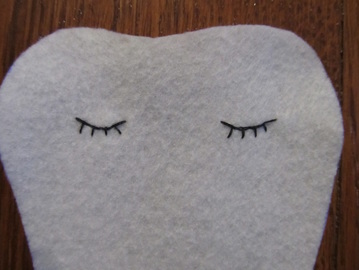
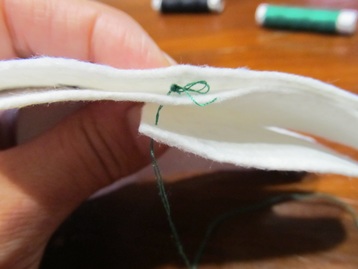
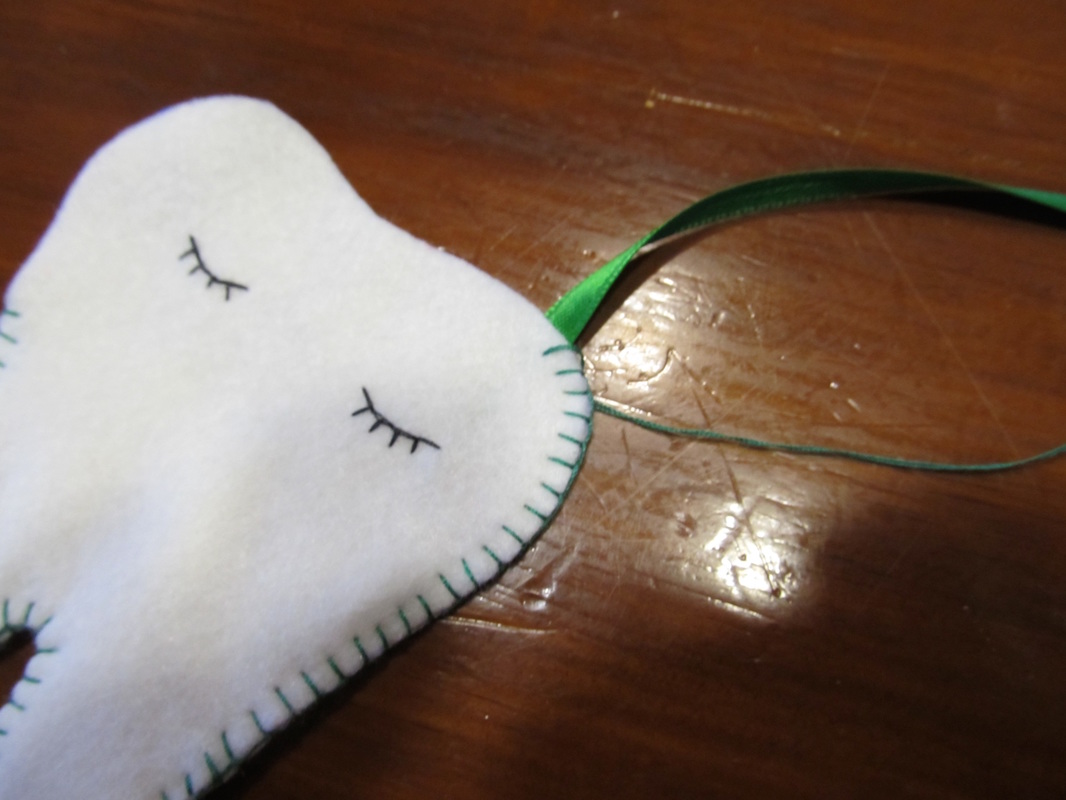
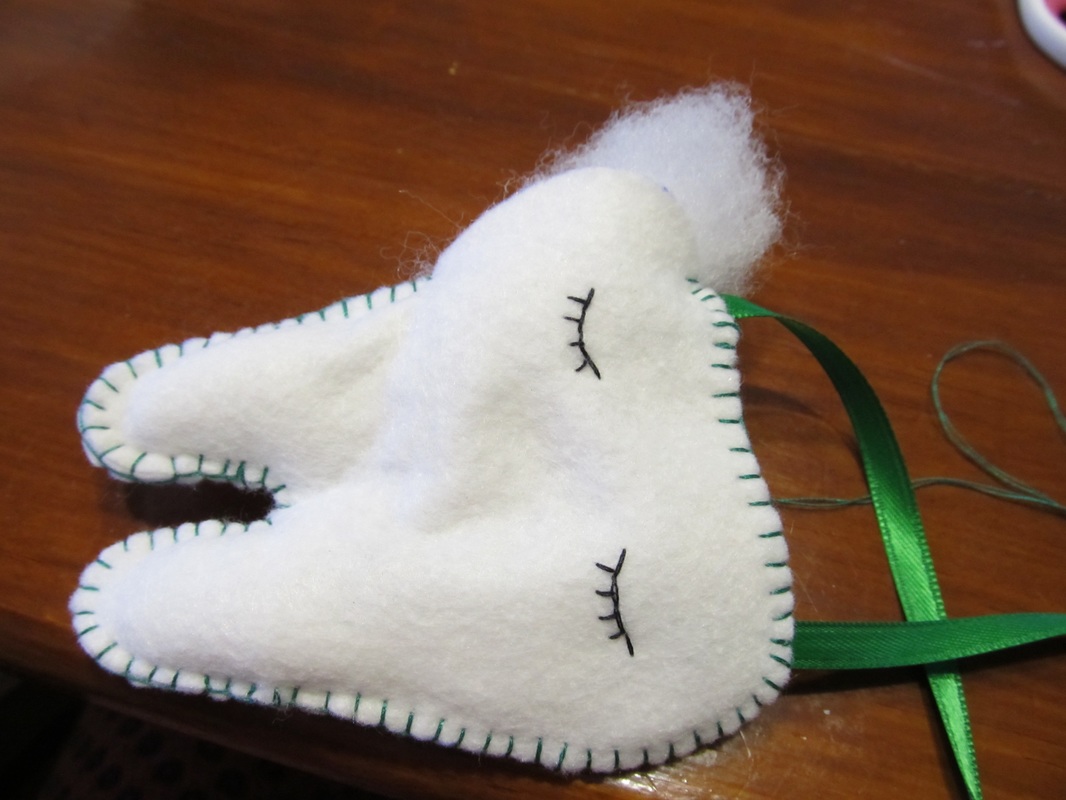
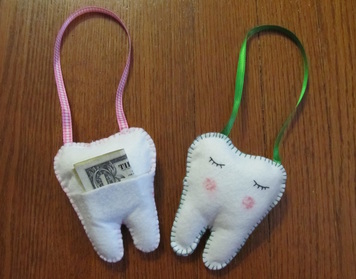
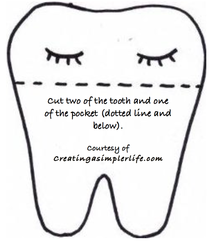
A simple and sweet gift for an expecting mom or a young child beginning to lose their teeth! There's a little pocket on the back to put the tooth in and so the tooth fairy can leave some money! This will look adorable hanging on the wall until it's needed :-) 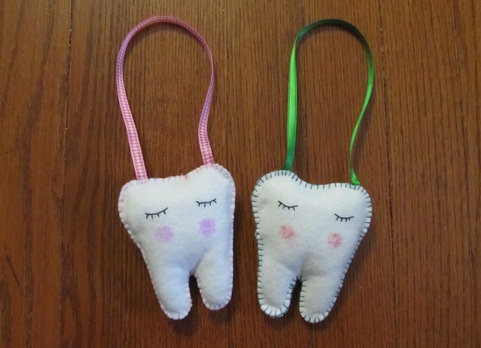 This was so simple to make. The hardest part for me was threading the needle until my husband brought me his Helping Hands Hands-Free Magnifying Glass (affiliate link)! Each one took about an hour to make and they are absolutely adorable! Please note that this creation is a combination of two different pockets I saw on Pinterest. One was from http://manouscrap.over-blog.fr and the other was from Rikapanda Crafts. FREE PDF TOOTH TEMPLATE DOWNLOAD BELOW! Finished tooth is approximately 3.75" x 3.25 inches at the longest and widest points! Supplies Needed:
Procedure:
It's that simple! Thank you for visiting :-) Please like and follow us! Check out our Pinterest DIY for the Kids & Grandkids Page for more awesome ideas!
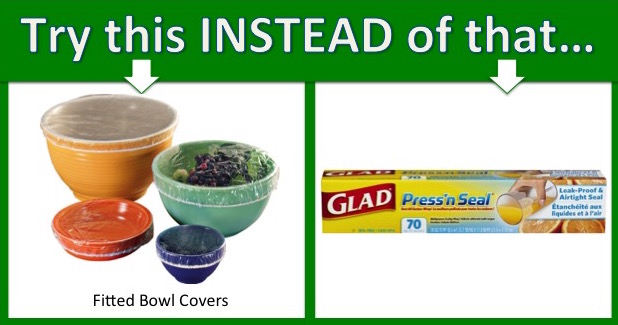
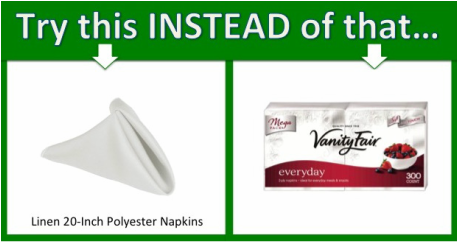
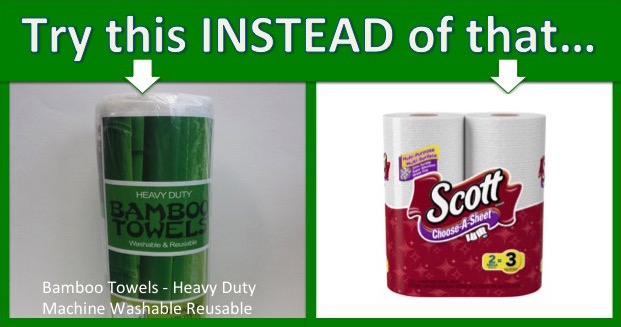
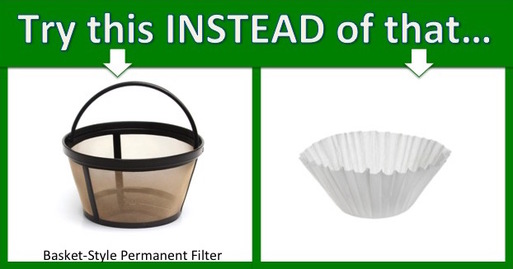
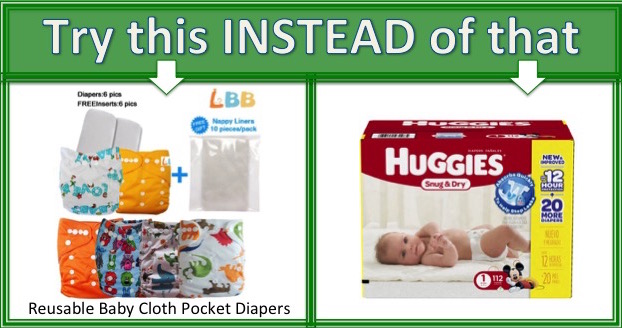
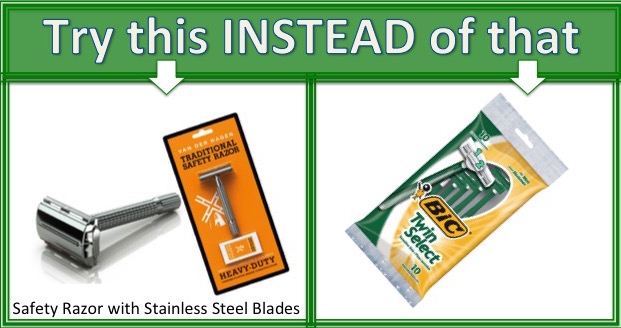
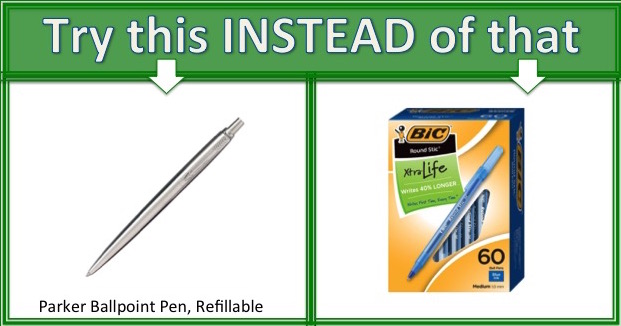
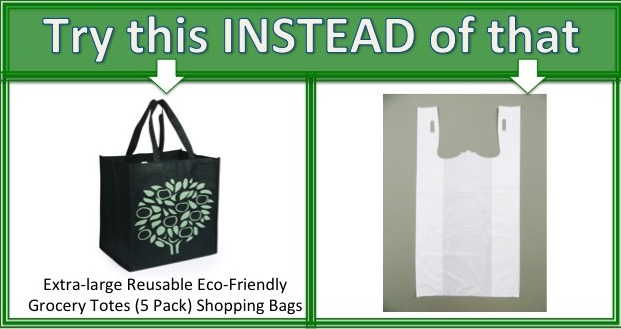
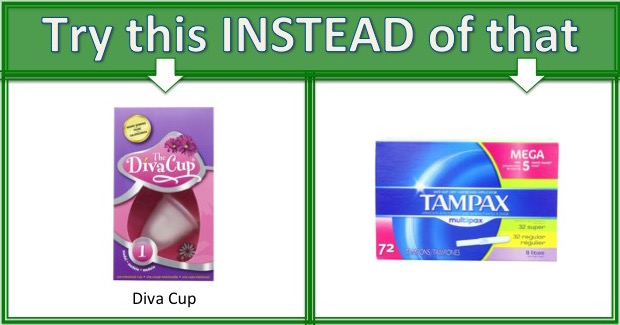
Want to be friendly to the Earth and contribute LESS to landfills? Then start buying products that can be used over and over again! And guess what....they can save money too! 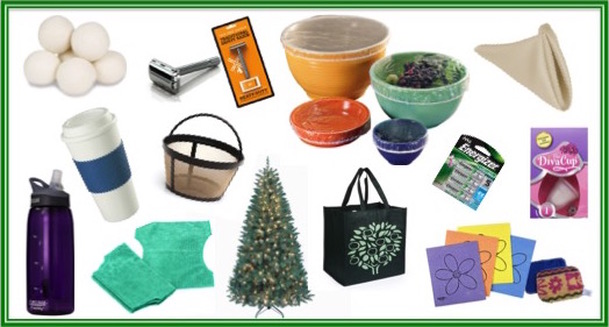 Buying reusable products is a real bonus in our home. It minimizes what I need to buy each week at the grocery store while saving money at the same time. It minimizes the garbage that we are left with each week since we are not throwing disposable items out. That of course also minimizes how much recycling and repurposing we need to do each week as well. And of course the best part is knowing that we are doing our part for the Earth by not needlessly contributing to landfills that can take hundreds to millions of years to decompose. Even longer in sanitary landfills! And remember, even paper doesn't decompose in a sanitary landfill... REUSING IN THE KITCHEN
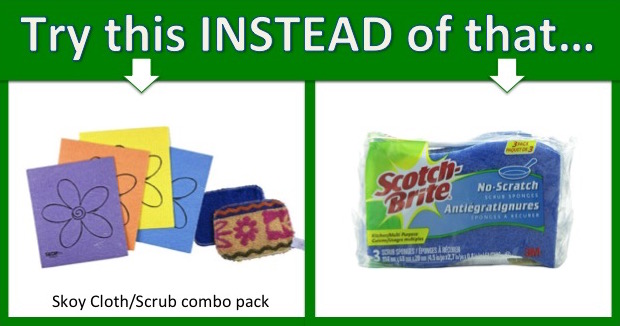
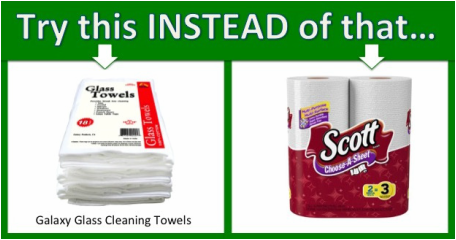
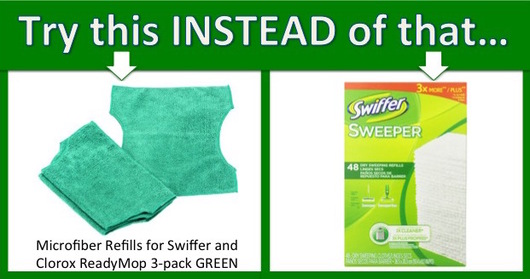
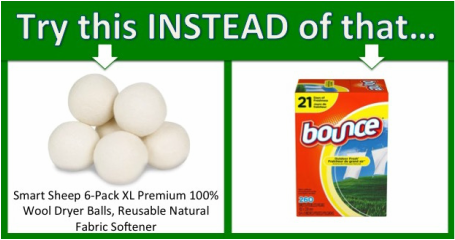
REUSABLE CLEANING
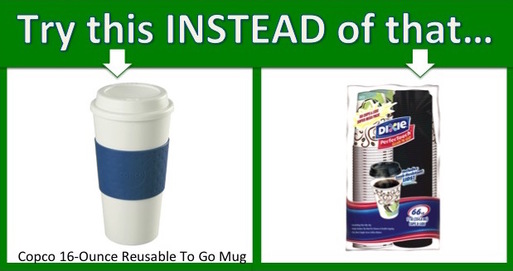
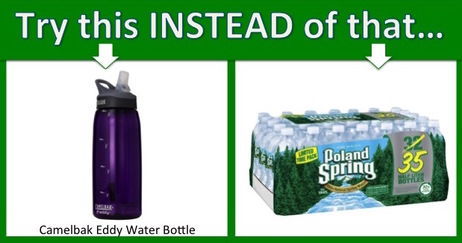
REUSABLE ON THE GO
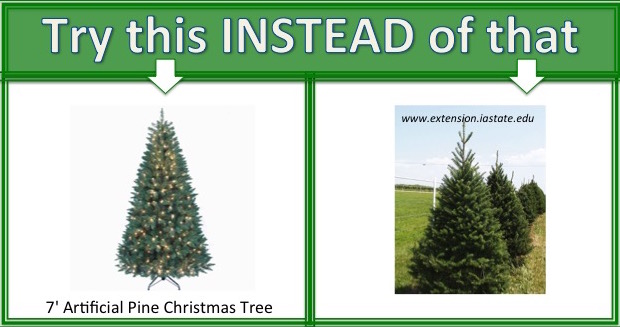
REUSABLE MISCELLANEOUS
Other items that can be reused (affiliate links): Check out our past Recycling Posts: RECYCLING PART I - AT HOME BASICS - How to recycling glass, cans, paper etc. at home. RECYCLING PART II - ODDBALL ITEMS - Recycling strange things like wires, cd's, and more. RECYCLING PART III - SELLING & DONATING - Where to sell or donate instead of throwing out. RECYCLING PART IV - REPURPOSING - What else can it be used for? Only one RECYCLING POST LEFT! Stay tuned for: RECYCLING IV - ZERO WASTE HOME. Be sure to check out our Pinterest Board "REUSABLE IDEAS" for more! Thank you for visiting. Please like and follow us!
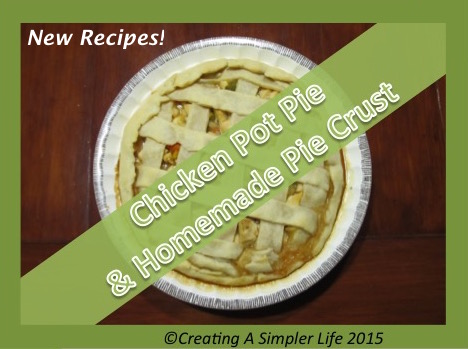 Thanksgiving is coming soon and that means leftovers! There are so many different ways to cook the yummy turkey, gravy, and vegetable leftovers, but this Chicken Pot Pie recipe leads the list in my family! How sad would it be to only make this once a year though? And what about the fact that the recipe is called Chicken Pot Pie instead of Turkey Pot Pie? Well that's because in our house this recipe is made about once or twice a month all fall and winter long! Sometimes we make it with all brand new food by just cooking up some fresh chicken, using a can or package of gravy, and buying a bag of frozen mixed vegetables. But my favorite way takes a few weeks to prepare for because it uses leftovers of course! Every time we have some vegetables or chicken left over from dinner that is not quite enough to use for anything else, instead of throwing it away I put the small amount into a snack baggie which then goes into a larger freezer bag to be saved until I have enough ingredients to make this awesome pot pie! Believe it or not I even freeze leftover gravy! Nothing gets wasted in this household! This is such a simple recipe it can be prepared in literally under 20 minutes! Hope you enjoy it :-) Copying the Recipes: You can click on the recipe cards below or use the button under them to download the pdf file. It will print on one sheet of 8 1/2 x 11 paper, preferably cardstock paper. Cut out each of the 4 x 6 inch recipe cards and put them in your recipe book! They always come two recipes per sheet in an effort to not waste paper! Visit my Recipes Page to print out previous recipes (pdf files) or to download a FREE 4 x 6 Recipe Card Template (.dox file) to type your own recipes into! Check out my RECIPE BLOG POSTS Page to read about all the previous recipes I have posted! Don't want to print them? No worries, just copy them down and enjoy! 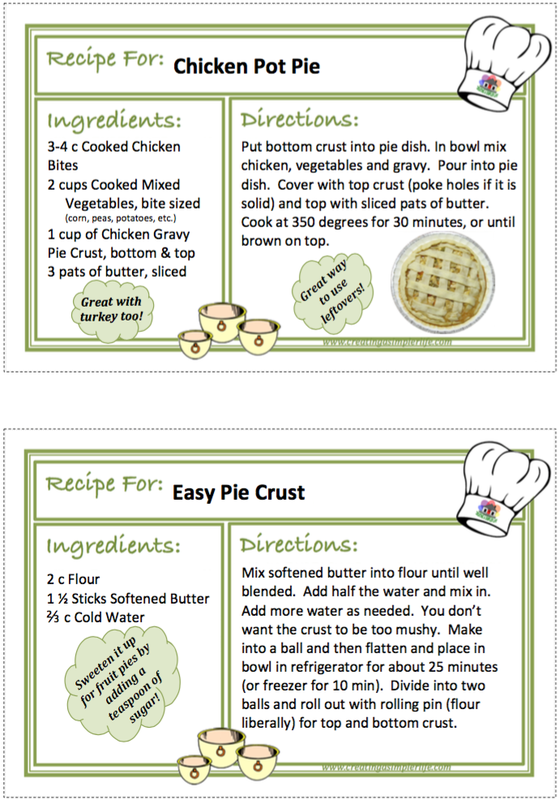
Thank you so much for visiting!
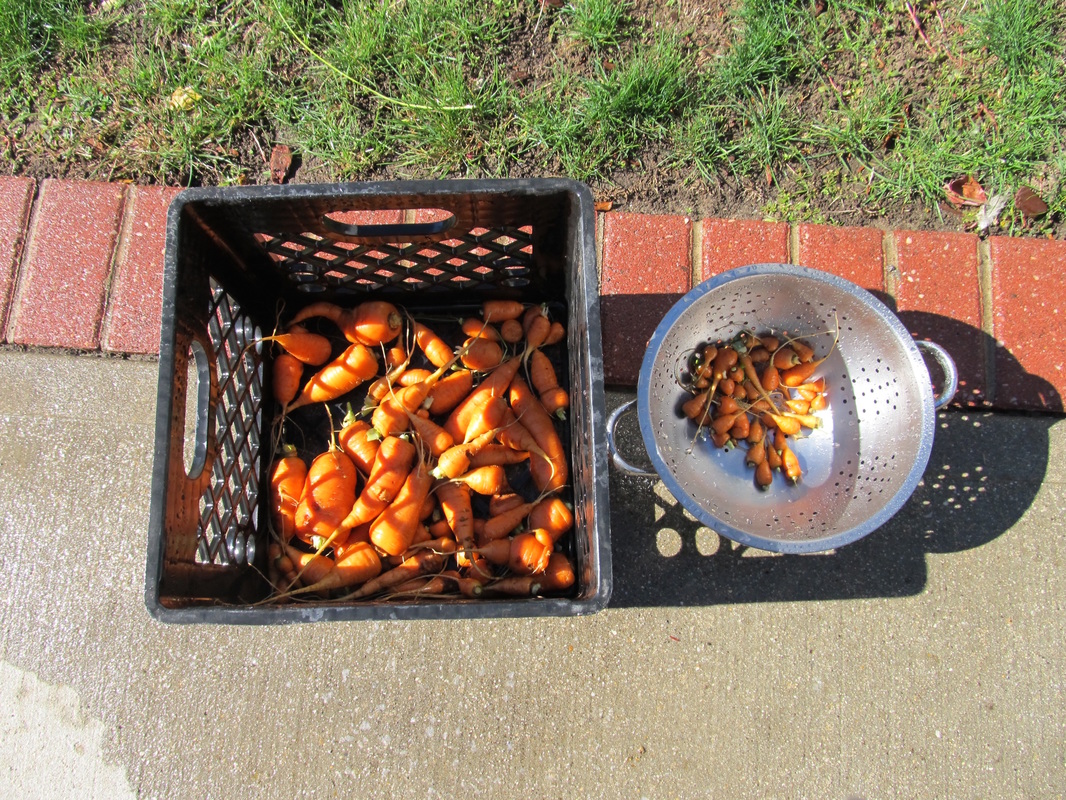
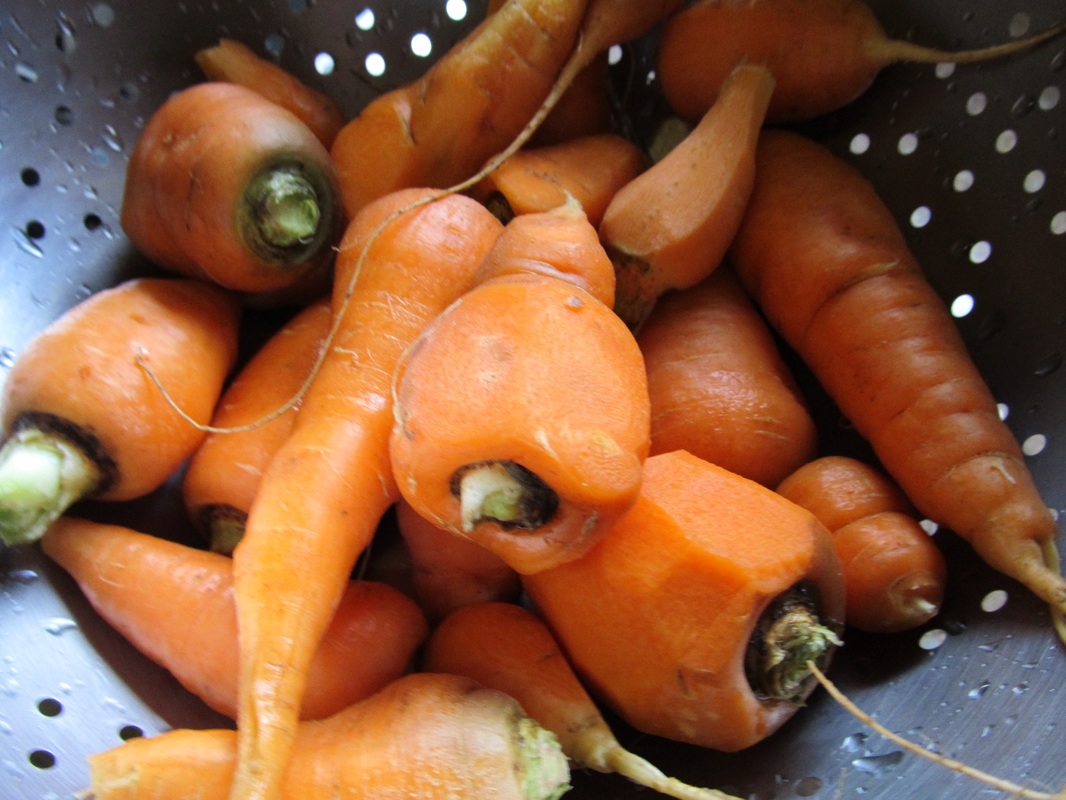
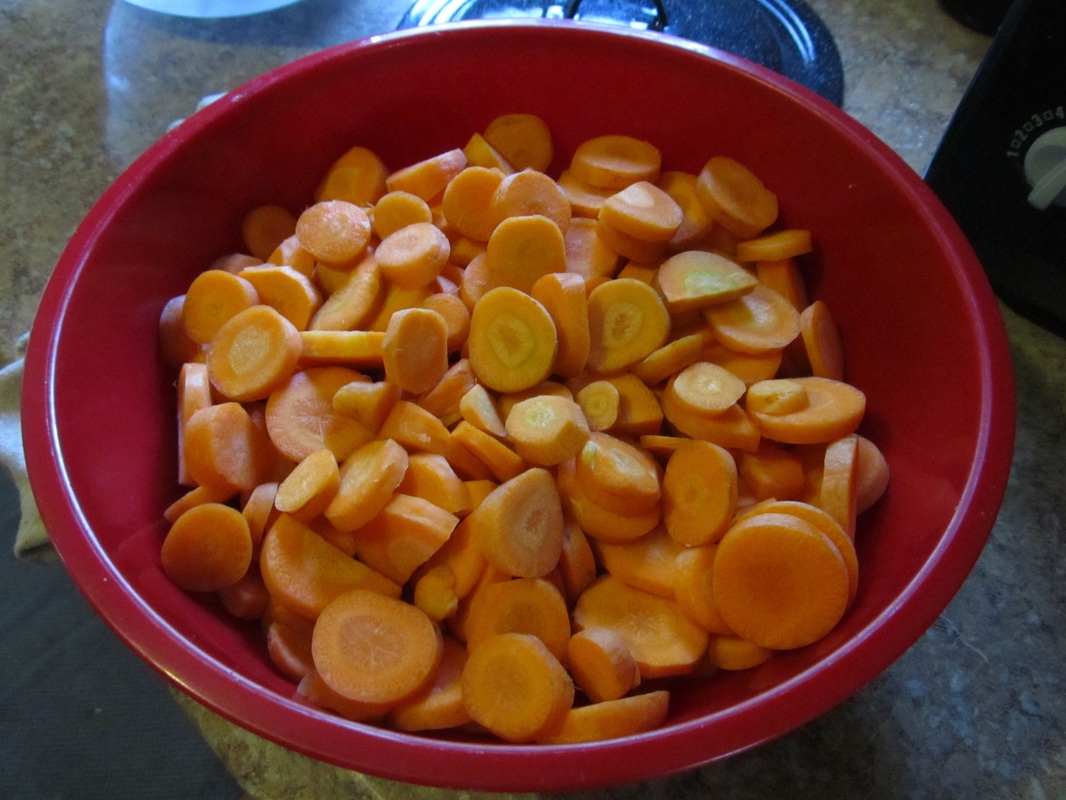
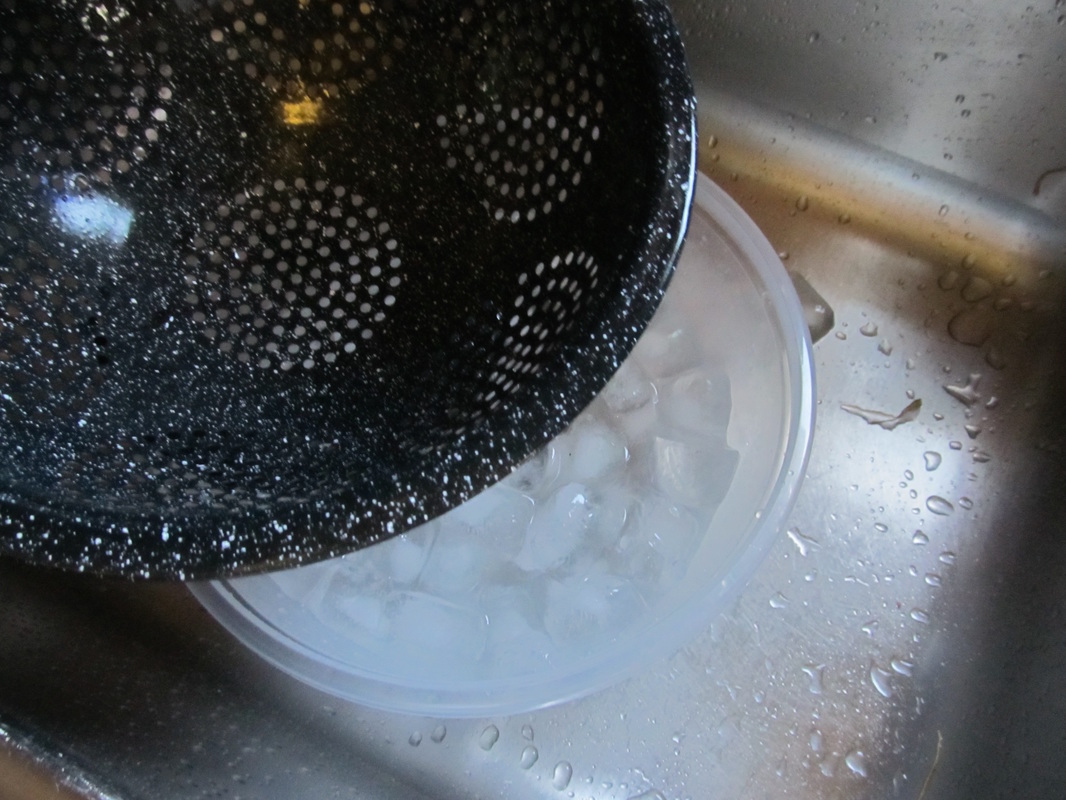
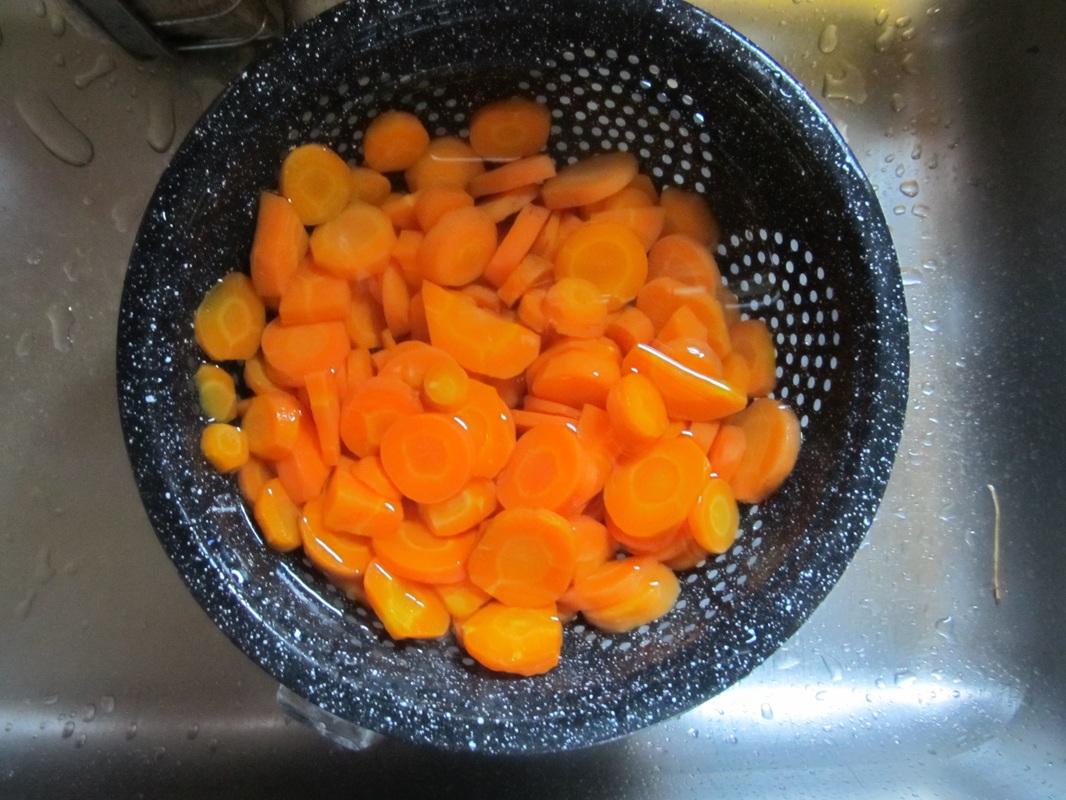
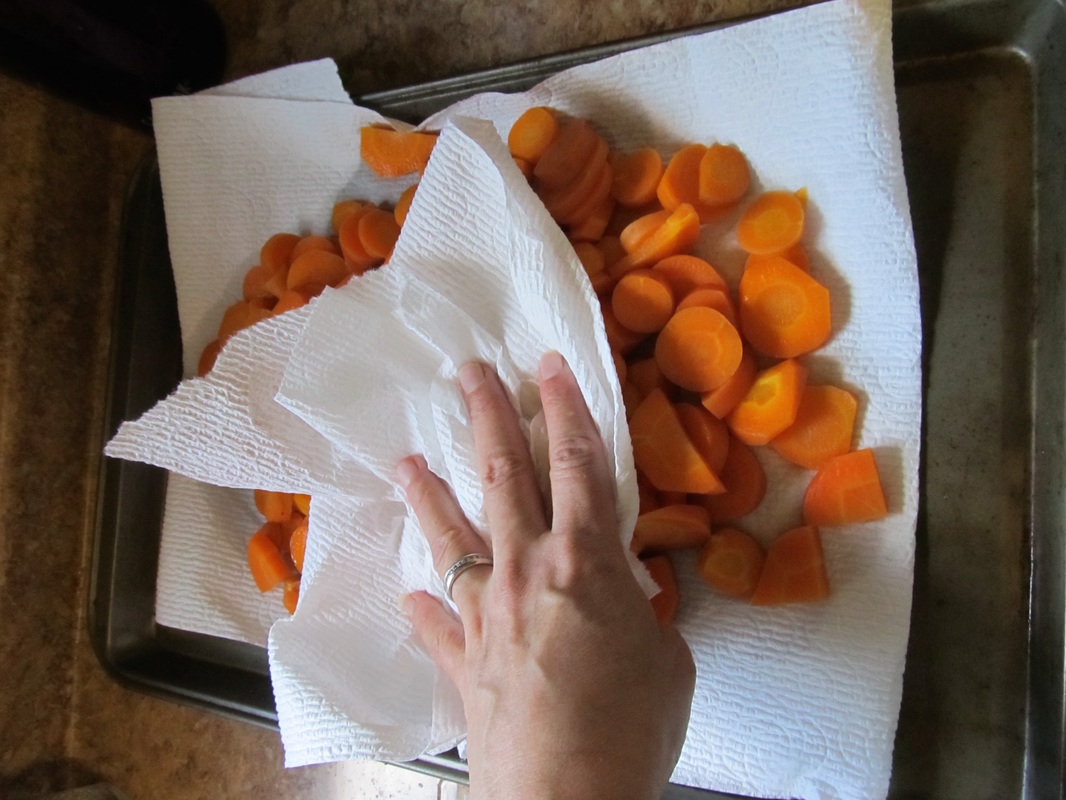
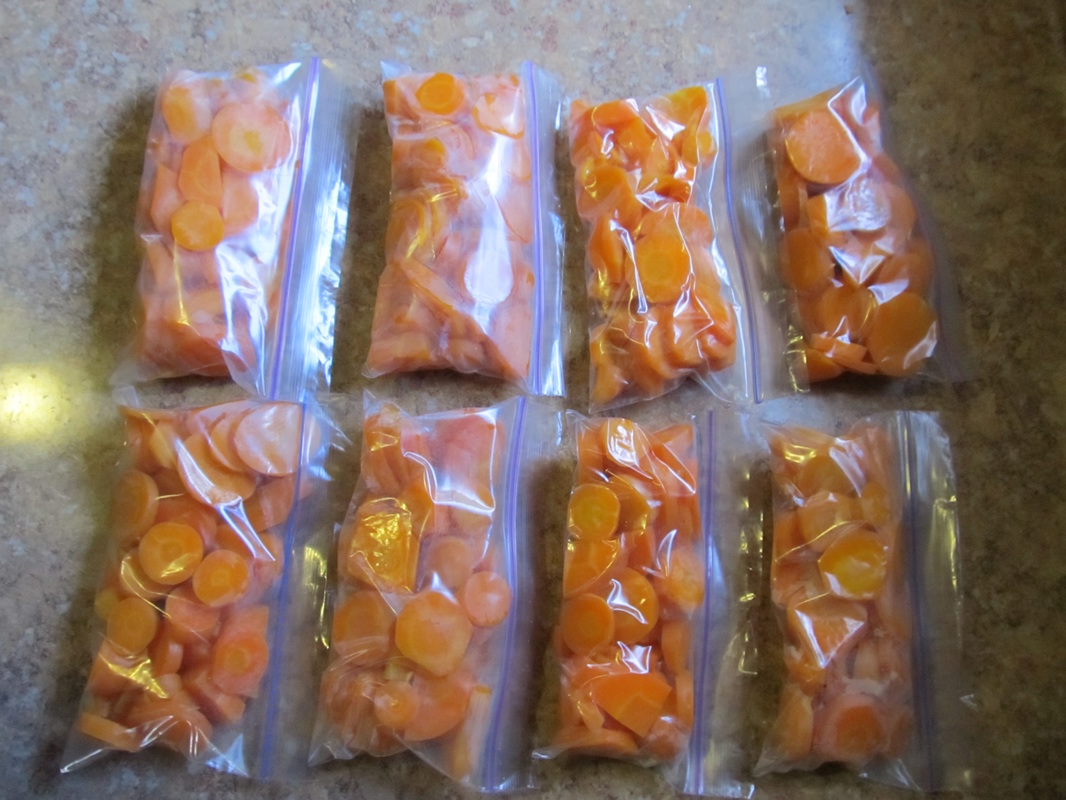
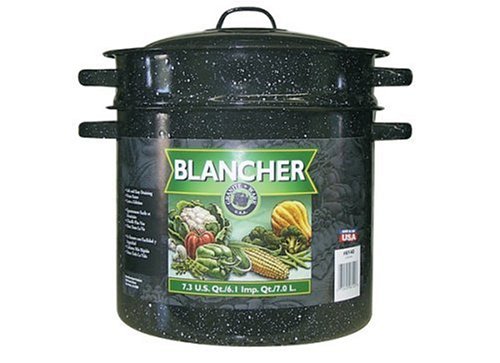
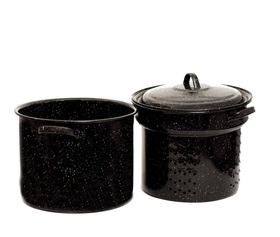
Please follow us out on Facebook, Pinterest, and Instagram! 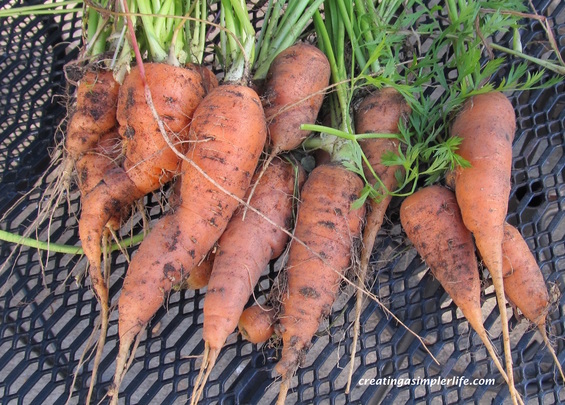 We started pulling our carrots this past weekend and I have to say that it is a really great feeling to know that you can grow your own food. Carrots are probably my second favorite vegetable to grow because they are so easy. Other than preparing the soil by making sure it is loose to about a foot or more down, we literally just plant seeds and forget about them until the fall. How simple is that? This past weekend we pulled about 3.5 pounds of carrots out. After washing and chopping them up we were left with about 3 pounds to blanch and store in the freezer. Next weekend we will pull more, and probably the weekend after that as well. Boy do I love having my own garden, even if it is small :-) Here's our very simple method to freezing them for the winter:
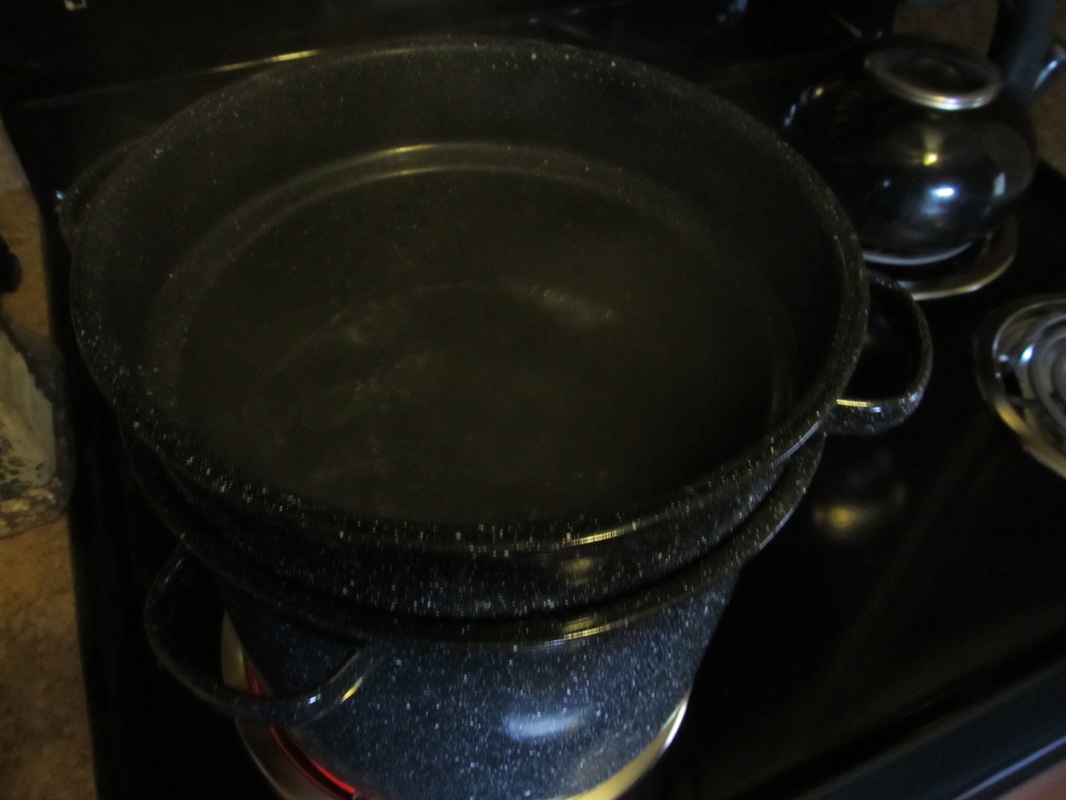
Freezing carrots is that simple! FYI - To make blanching simpler, we use the Granite Ware Blancher (affiliate link) below. It comes with the pot, the lid, and the basket which makes it so simple to quickly remove vegetables! Of course this is not necessary, however it does make it so much easier!
Thank you for stopping by. Please like and follow us on Facebook! Check out more posts about Fresh Food Preservation!
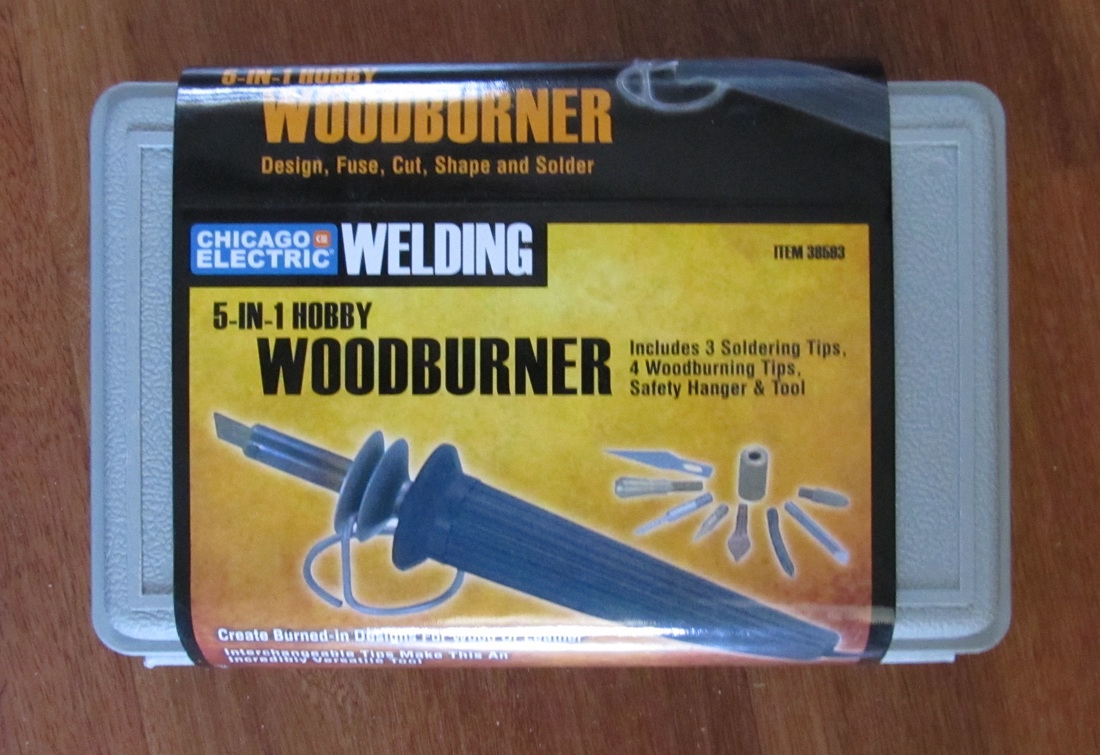
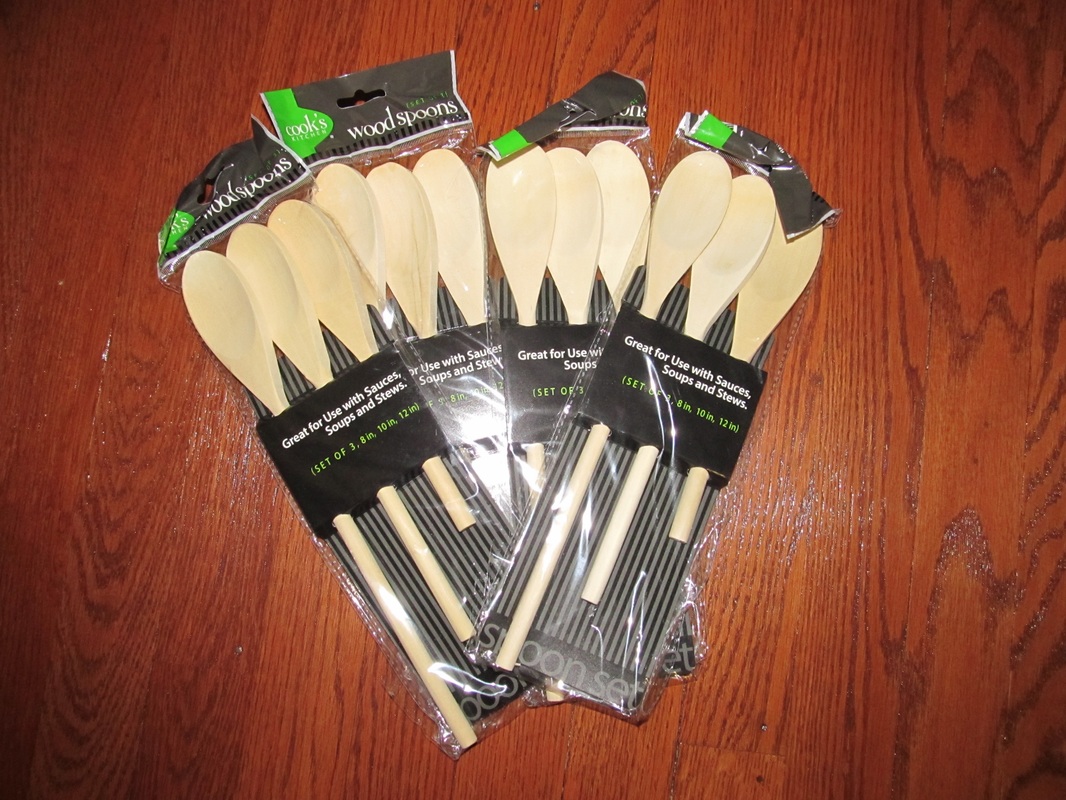
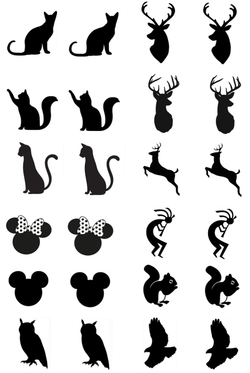
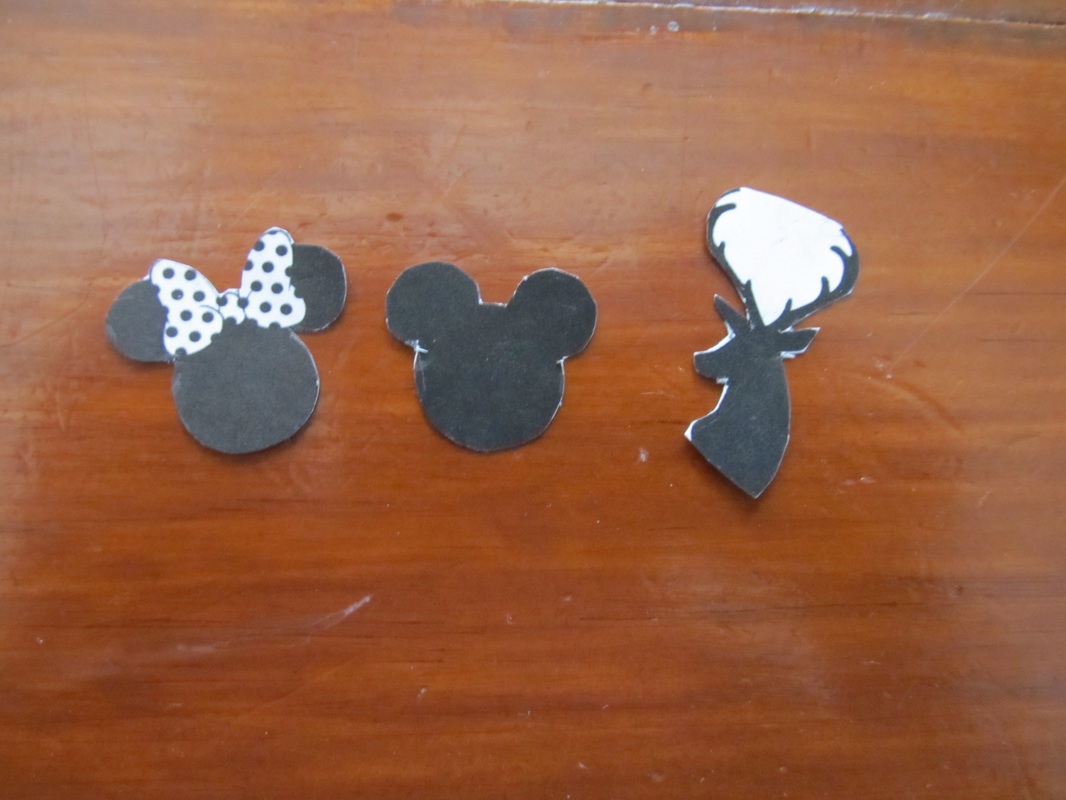
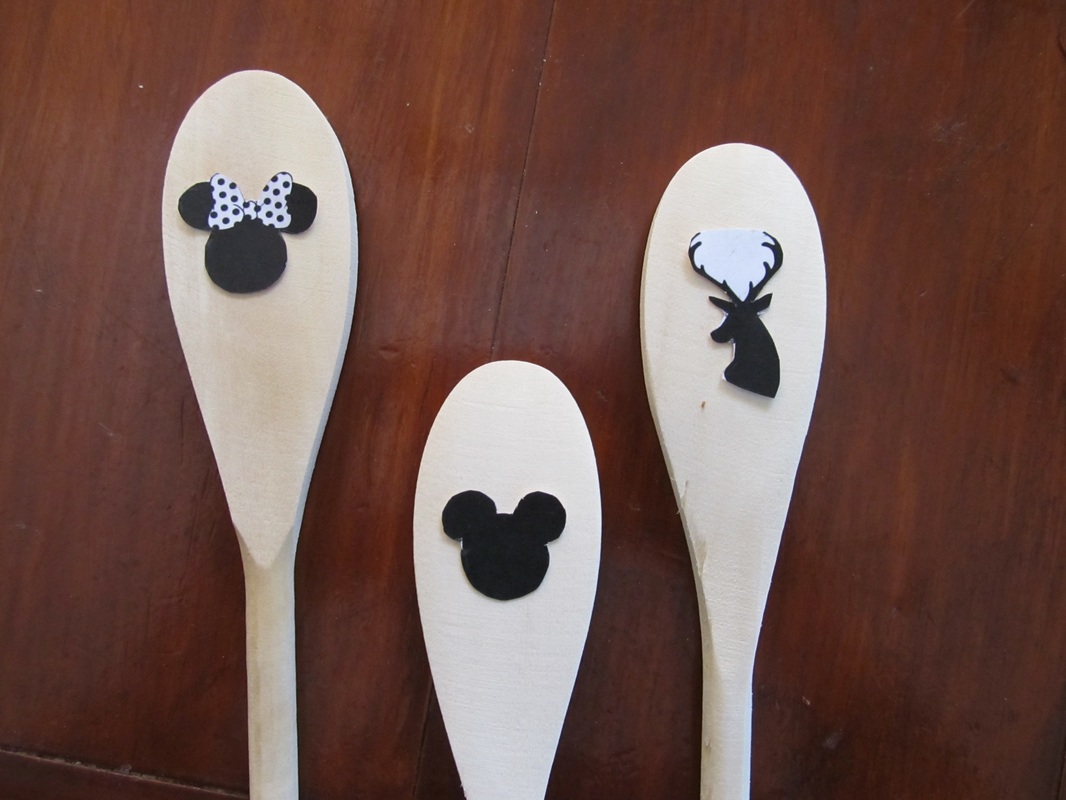
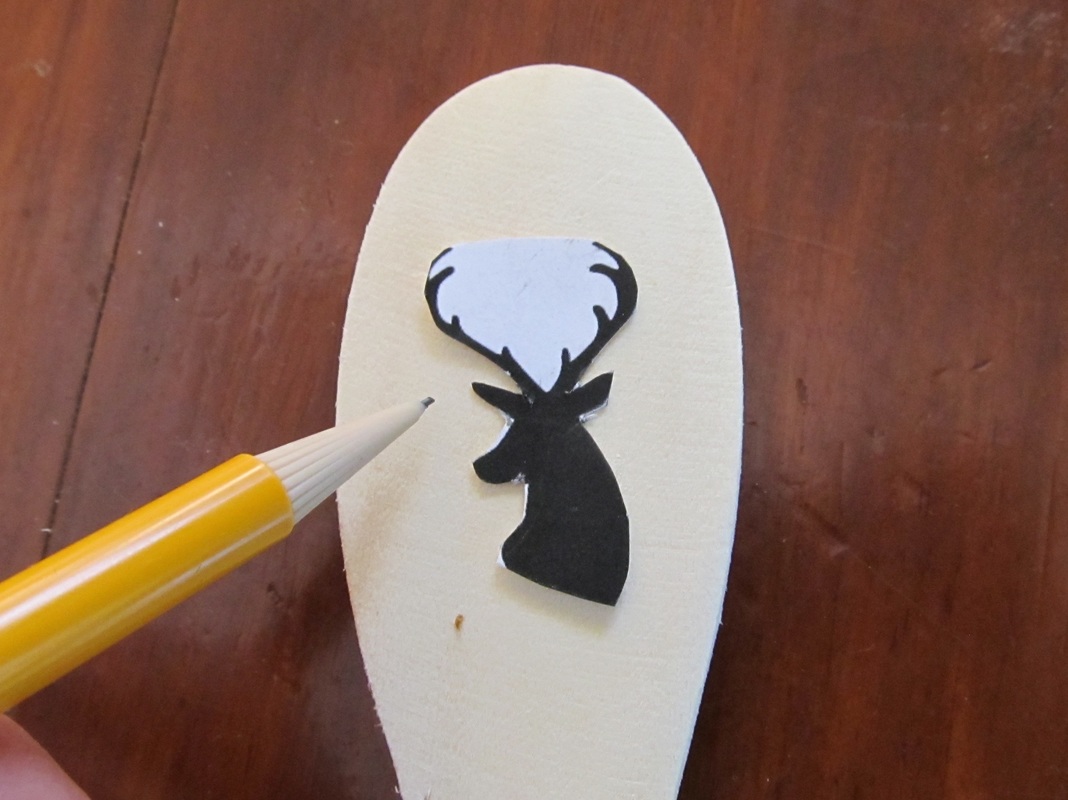
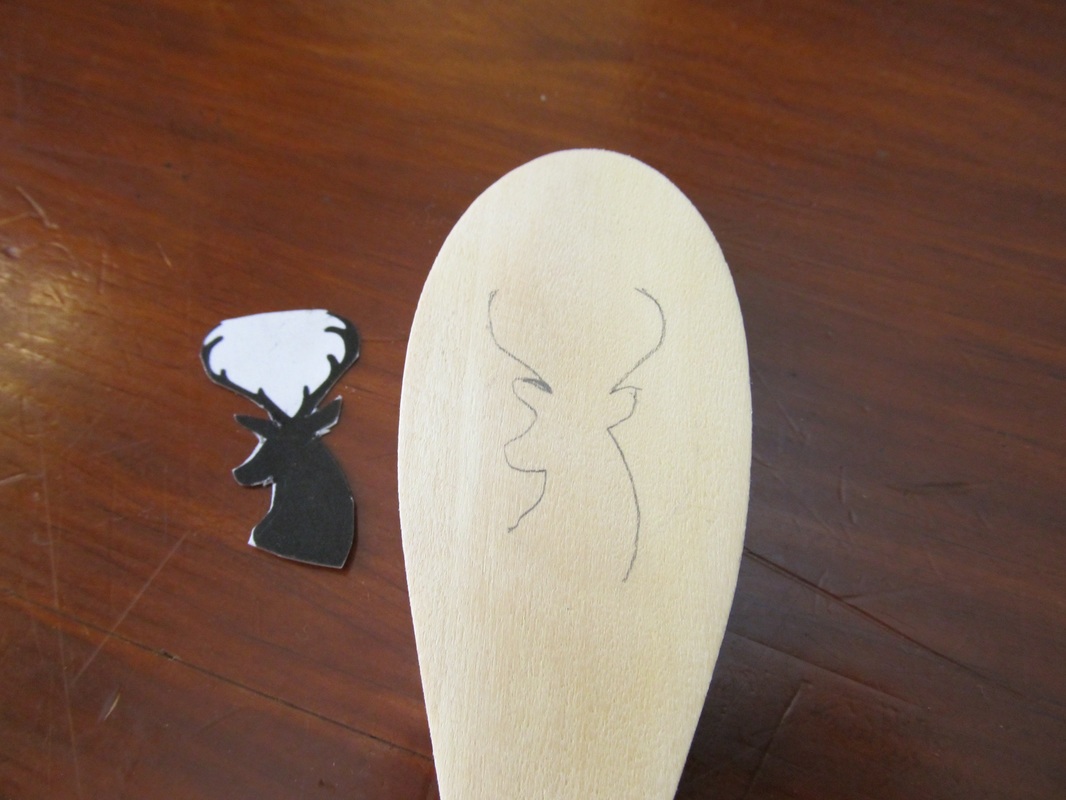
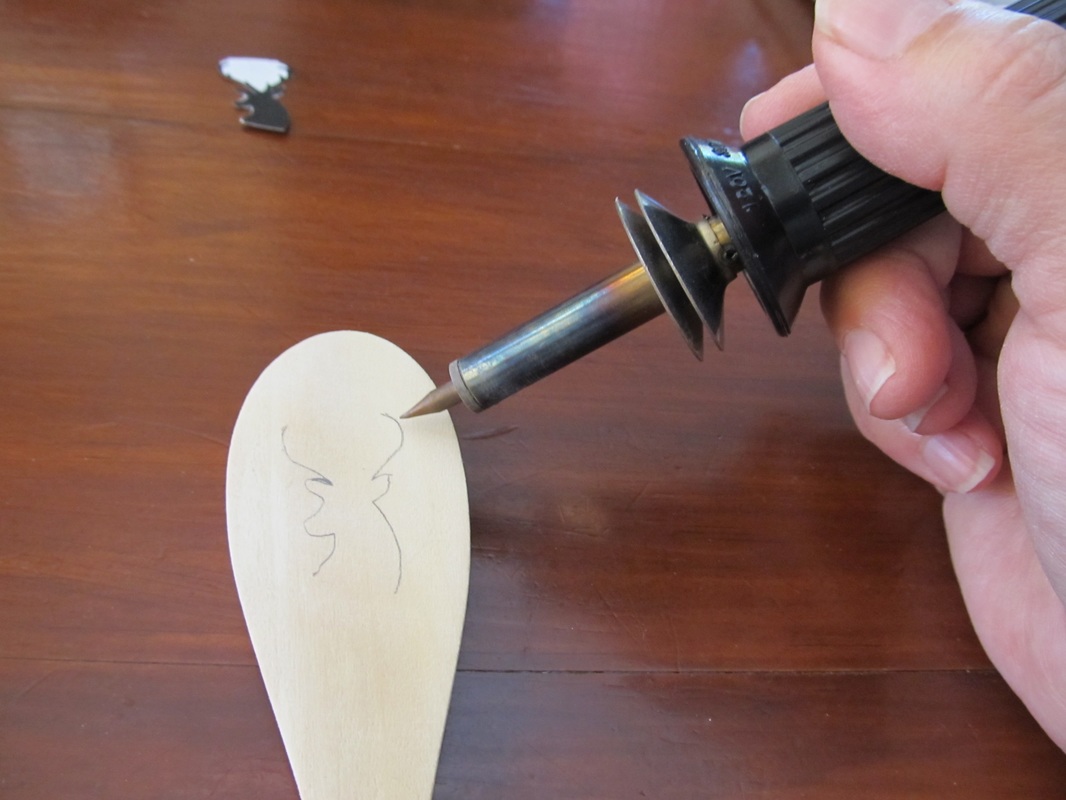
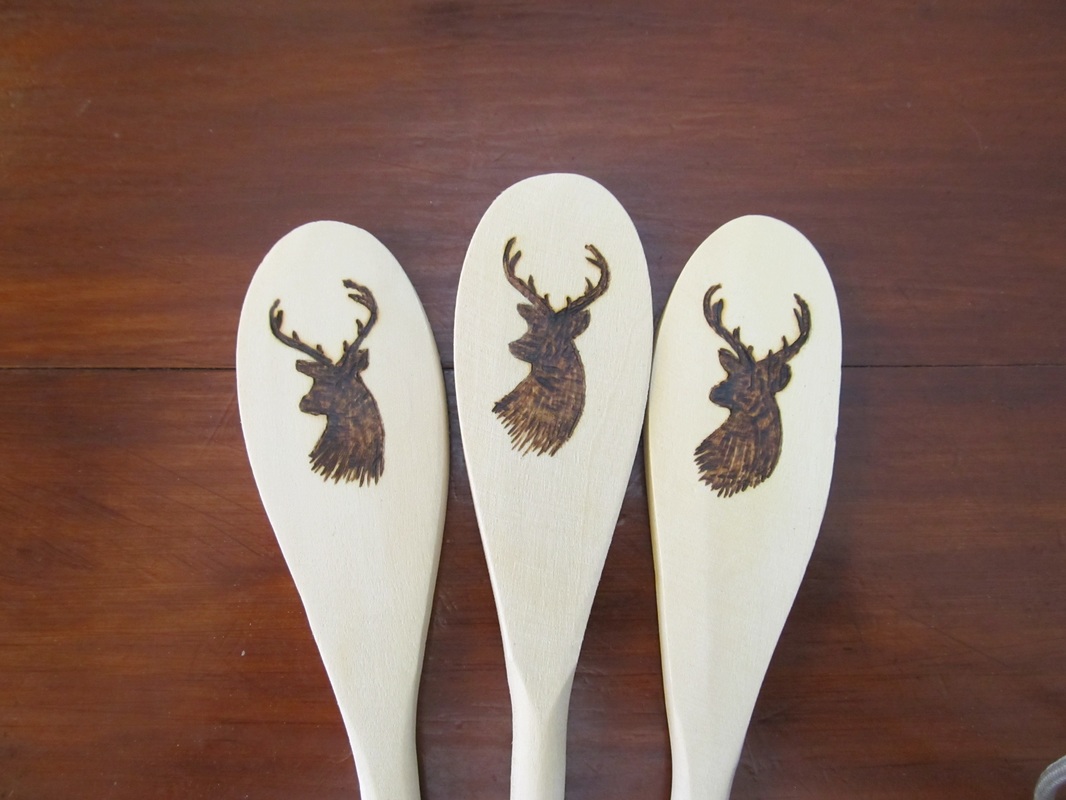
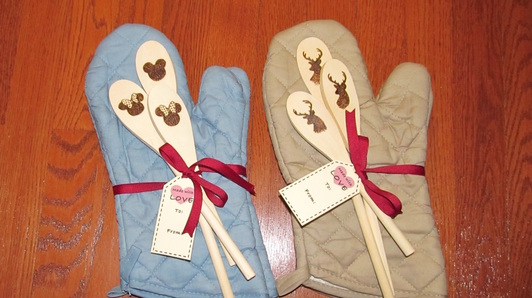 Look at what can be made with a Five in One Wood Burning Tool from Harbor Freight, three wooden spoons, two oven mitts, some ribbon and a FREE printable label below! There are also FREE printable silhouettes to trace! It's called pyrography and it's not as hard as you might think:-) Thanks to 365 Days of Crafts for the original gift idea! Heres what I did:
Find more great wood burning ideas on our Pinterest Board "DIY WOOD BURNING IDEAS" Thank you for visiting! Please remember to like and follow us :-)
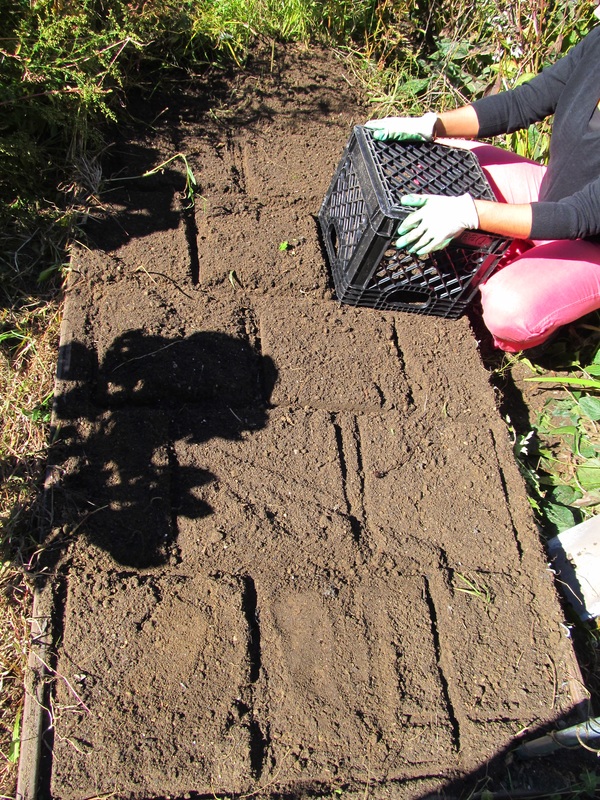
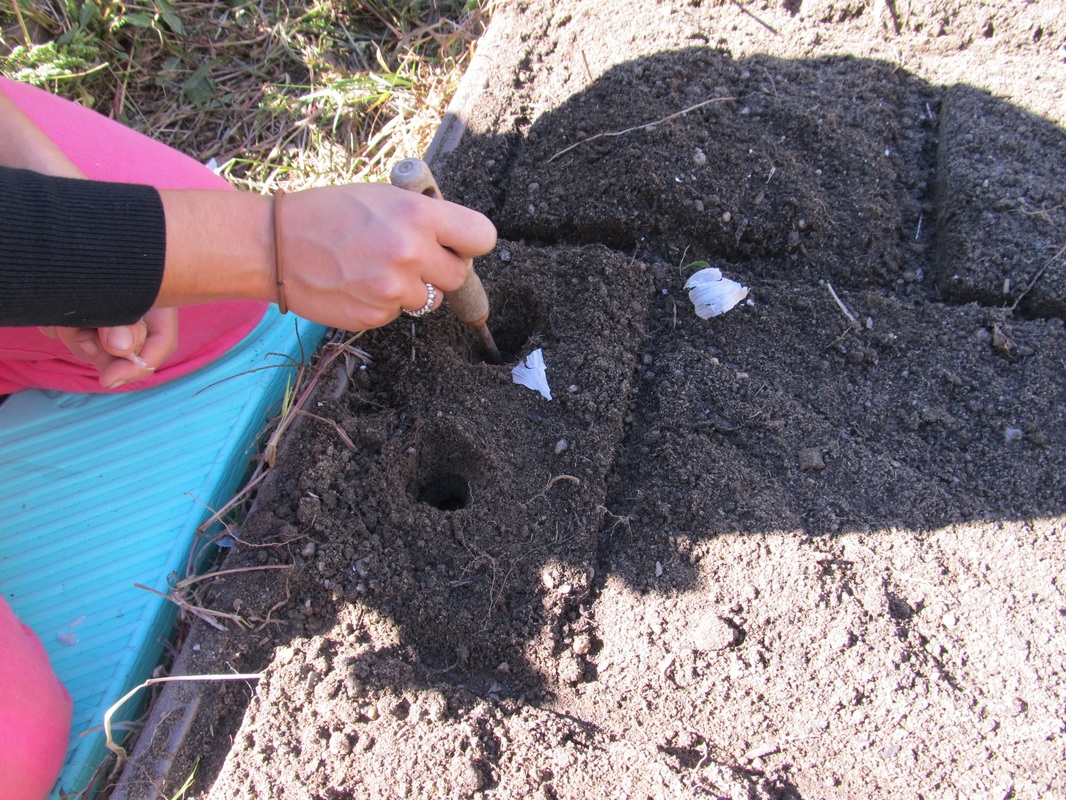
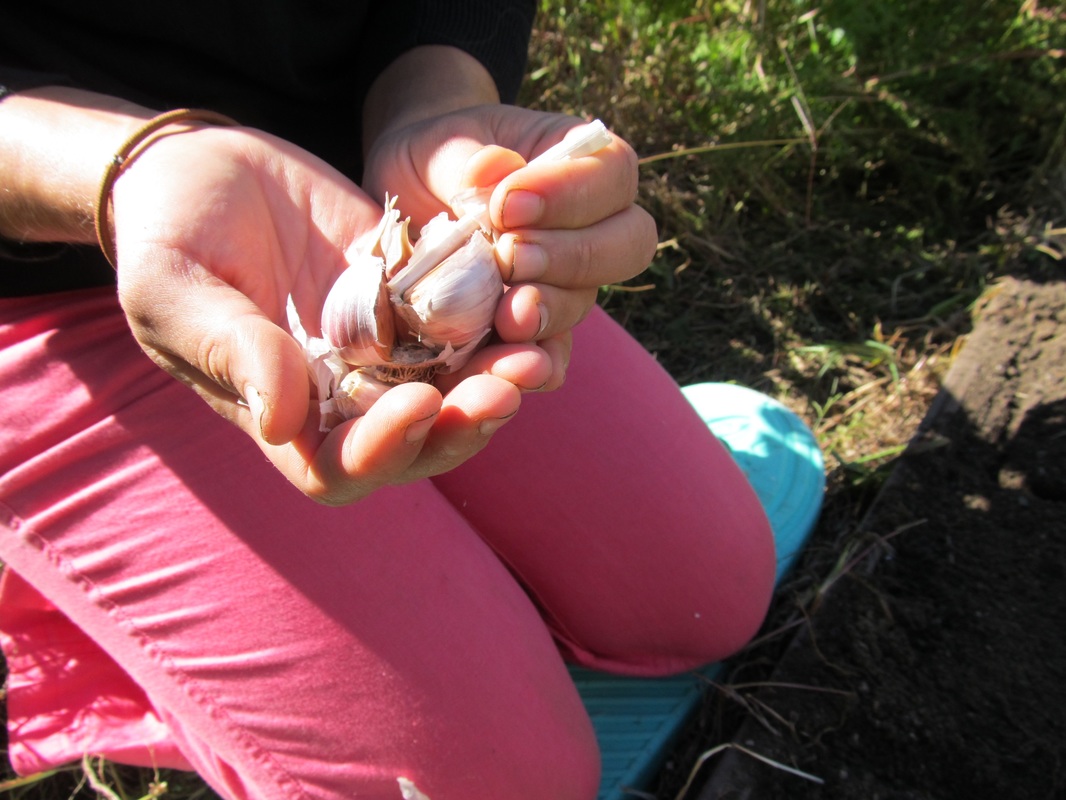
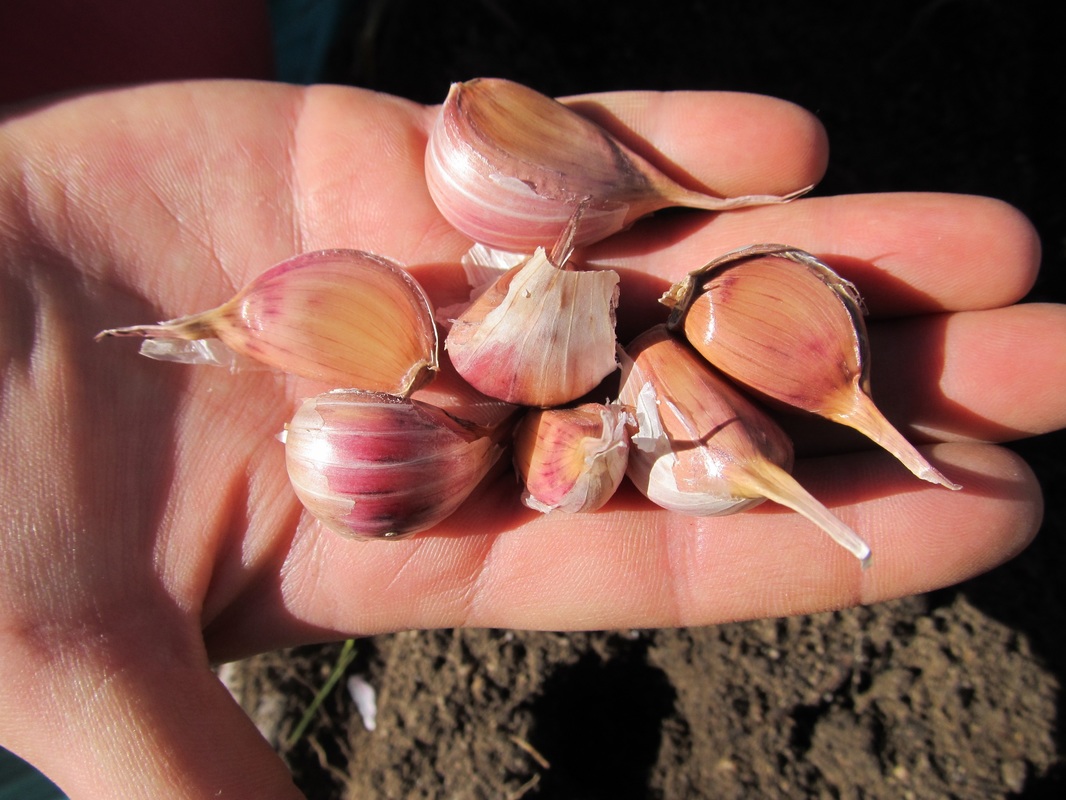
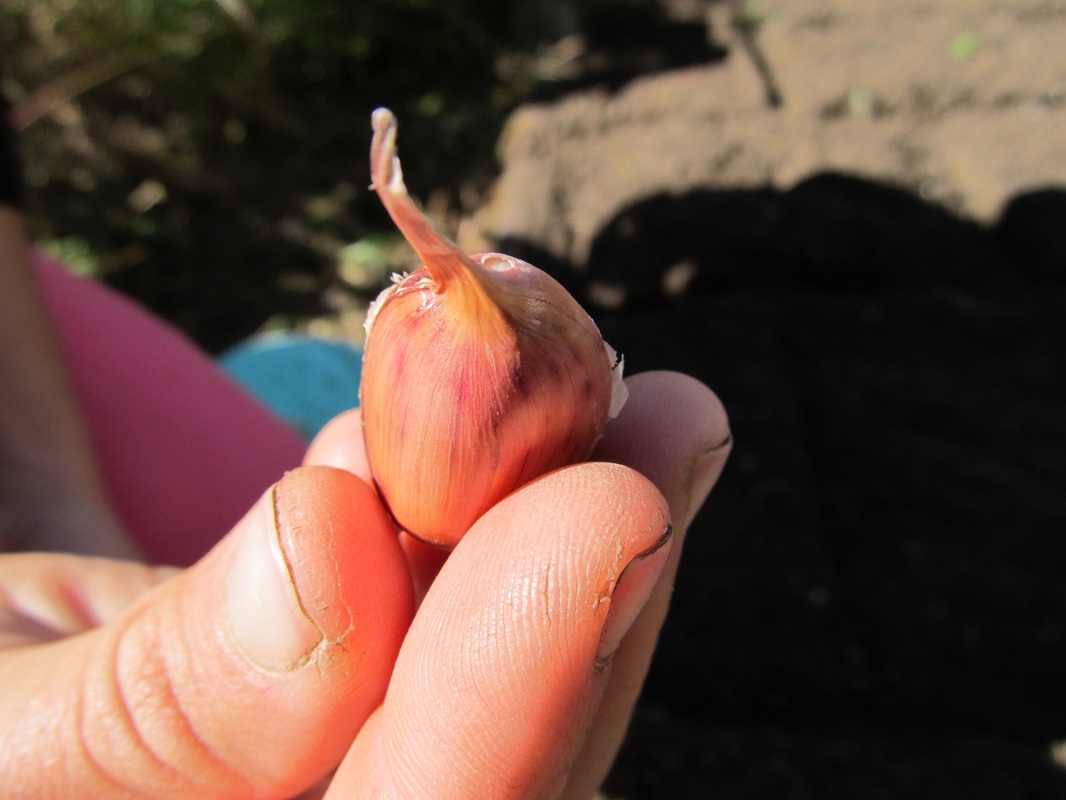
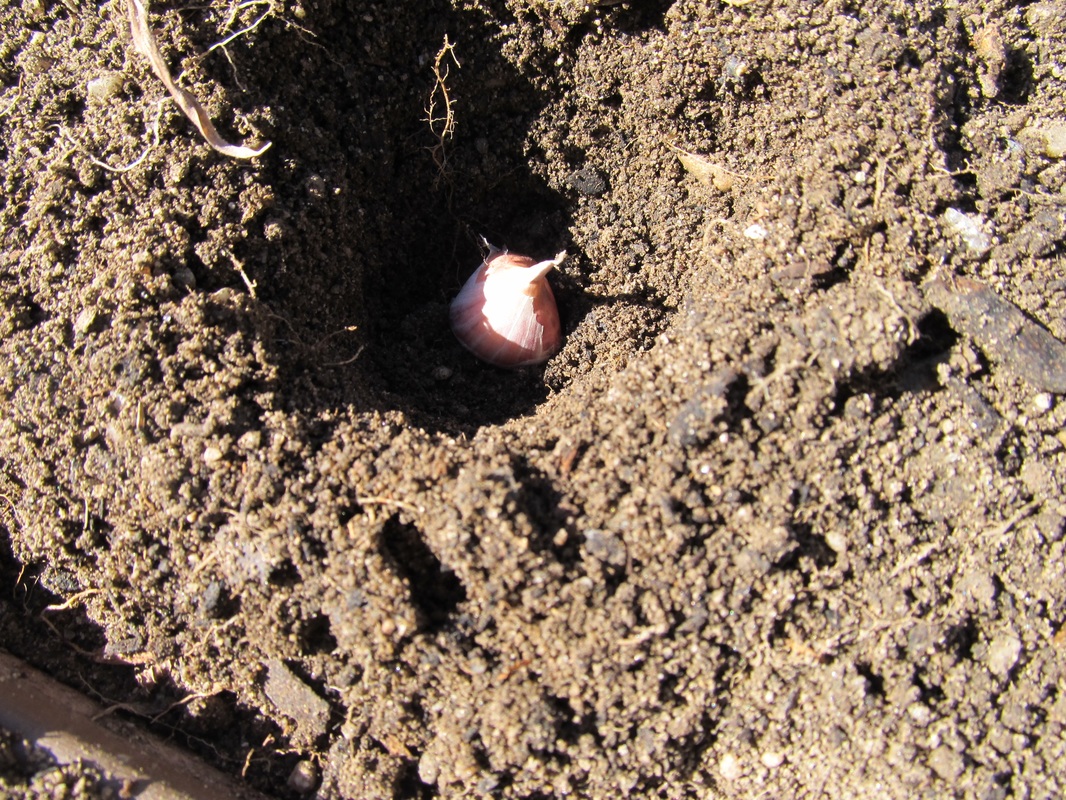
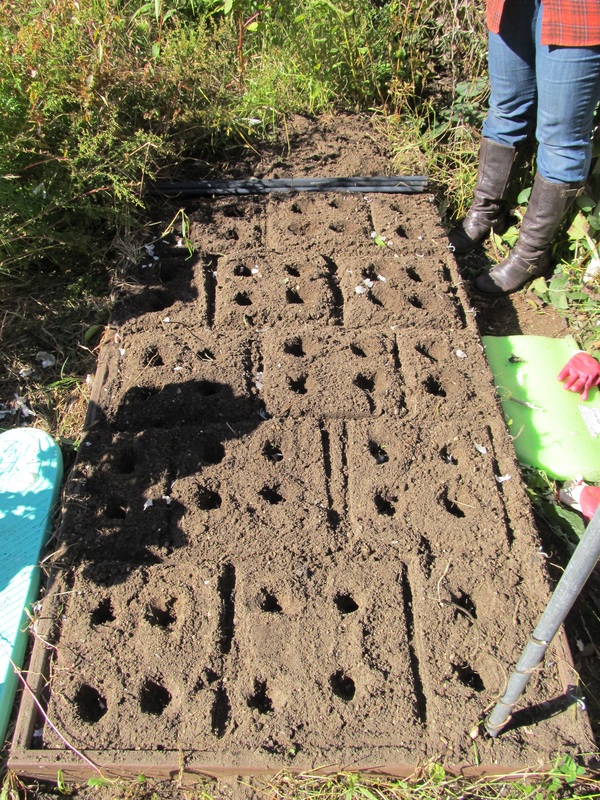
 Fall is the time to plant your garlic. We just ran to the local organic store and purchased hardneck Rocambole and Purple Striped garlic grown upstate NY for $11.99 lb. Living in New York with fairly harsh winters, the hardneck is the easiest and hardiest to grow. However, keep in mind that the hardnecks have a stiff stem that cannot be braided. Yes, it is expensive garlic, but it is worth it because each single clove will yield a full bulb! Here's how my daughter and I planted our garlic:
Be sure to keep the area weeded. In the spring you should see shoots coming up. There is controversy over whether or not to cut off the flowers and curly greens (called scapes), however I like to keep it simple and leave them alone the way nature intended. You can however cut them off if you plan on using them for cooking or eating. Harvest the garlic in the late spring or early summer (time frame can vary depending upon the climate) when the lower leaves have all turned brown. The top leaves should still be a little yellow-green. Be very careful when removing the bulbs so as not to bruise them in any way. Dry loose soil is best for removal. Just dig around them a little bit and scoop them out from underneath. After harvesting do not wash them. Just gently brush off the big chunks of dirt and put in a dry warm location until the outer skin becomes papery. When they are done drying out, which takes about two weeks, cut off the tops and store them anywhere that is dry and at a comfortable temperature (between 55°F and 65°F). Since this garlic cannot be braided, it is usually stored in a basket or paper bag. However, I actually read a very interesting post about storing onions using old pantyhose (with a knot in between each one). I think it may work for garlic as well so I want to try that this year. I plan to just hang it in my cellar! Check out how to store onions in pantyhose from "Mavis Butterfield at 100 Dollars a Month." For more information on growing and harvesting garlic check out Cornell Gardening at http://www.gardening.cornell.edu/homegardening/scene568b.html Thank you for visiting! Stay tuned in the spring for Harvesting and Storing Garlic! Please like and follow us!
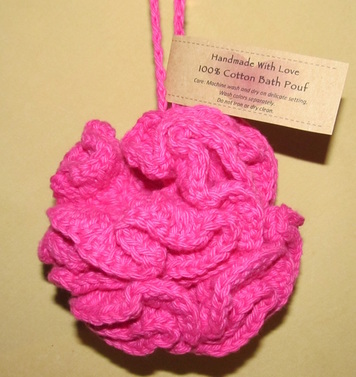
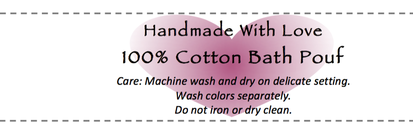
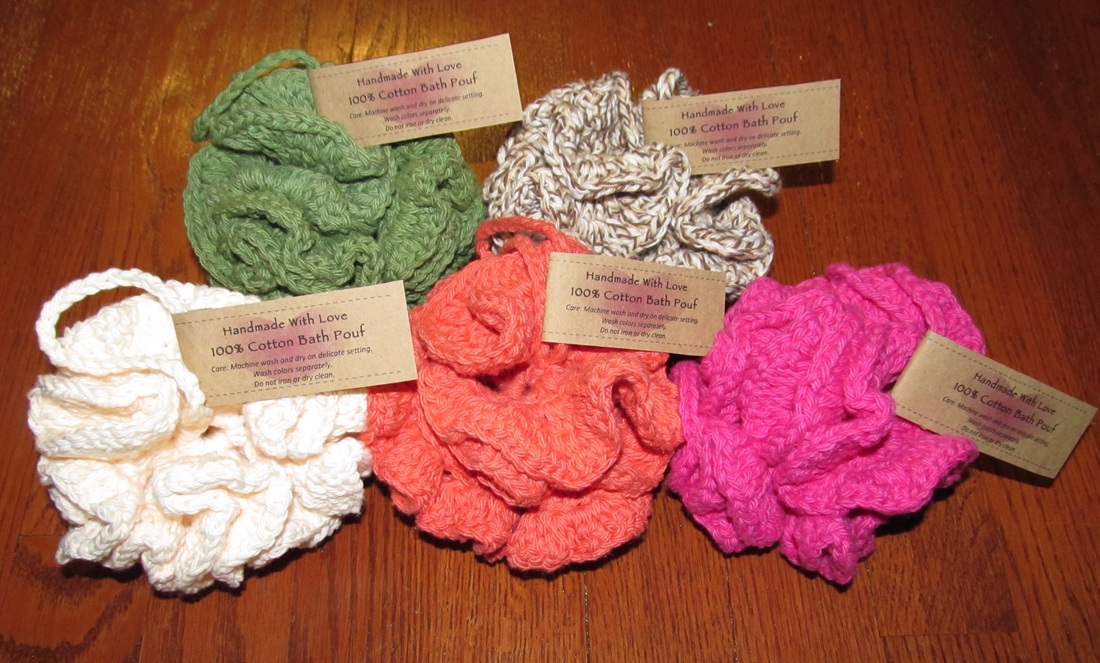 No more nasty plastic bath poufs! Spoil your body with this 100% cotton pouf to use in the shower or bath and wash it as needed! Simple to make and worth every penny because not only is it good for you, but it's environmentally friendly too! This pattern was changed out of the desire to use only one skein of 2.5 oz. Lily Sugar'n Cream yarn per pouf. The original pattern is from Daisy Cottage Designs. The pouf can be washed and dried on the delicate cycle. Supplies:
Directions:
Finishing: Use the yarn needle to weave all loose ends.
Presentation: Make it look professional by adding a handmade label! The label below is a pdf file that you can download for FREE - no strings attached! Just click on the example picture below or the button to download. Designed for 8.5" x 11" paper. I used KRAFT Brown Bag Paper from Amazon (affiliate link). Print the labels out (16 to a page) and cut between the dotted lines. Cut them in half and then fold the longer end around the handle and tape in place.
Thank you so much for visiting! Please remember to like and follow us! Check out our Pinterest board "CROCHET ONLY!" for more great ideas!
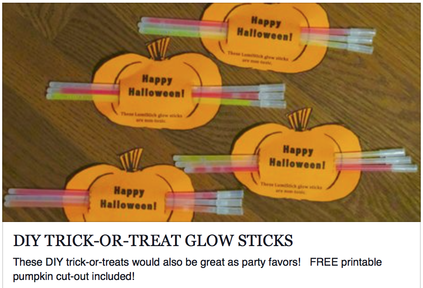
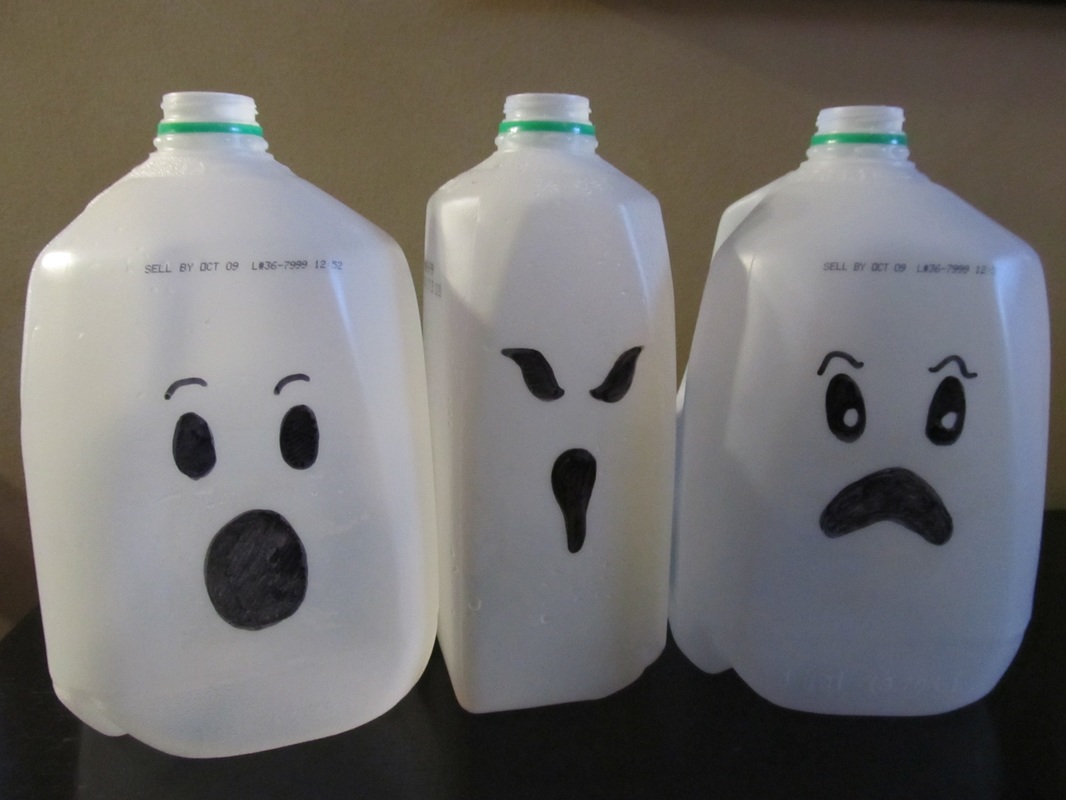
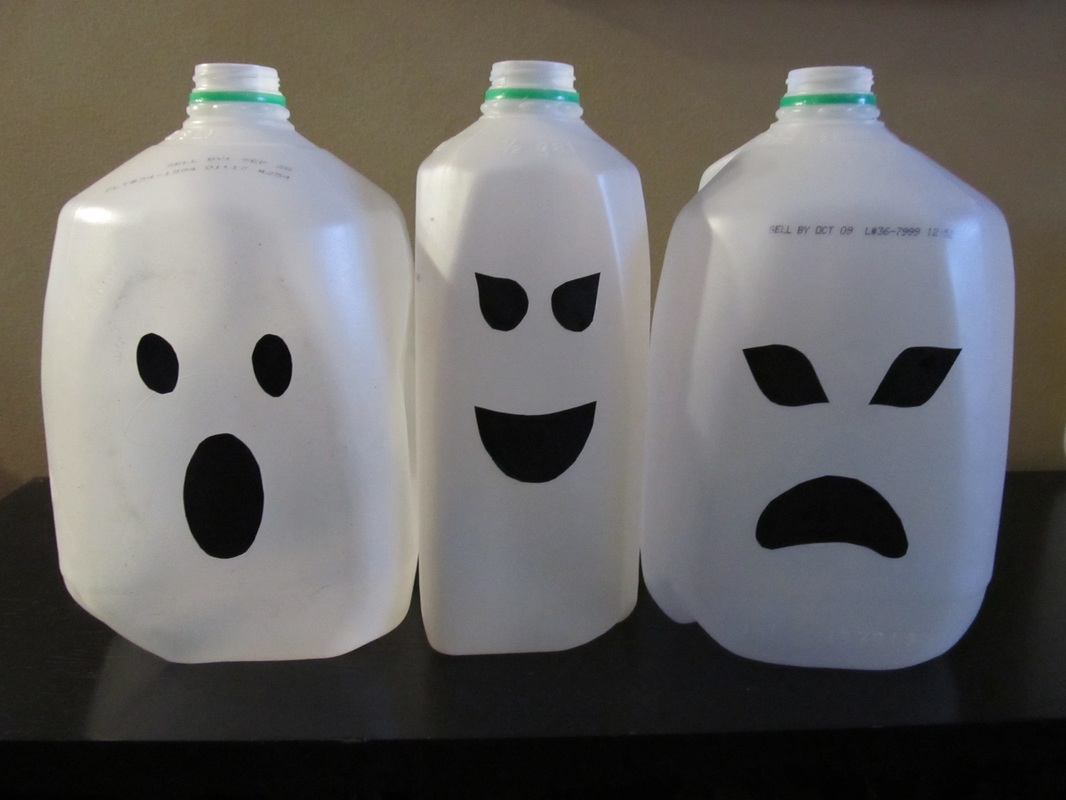
Want an interesting decorating idea for Halloween night this year? Then save your large plastic milk jugs, remove the labels and make Boo! faces to line the walk to your door! 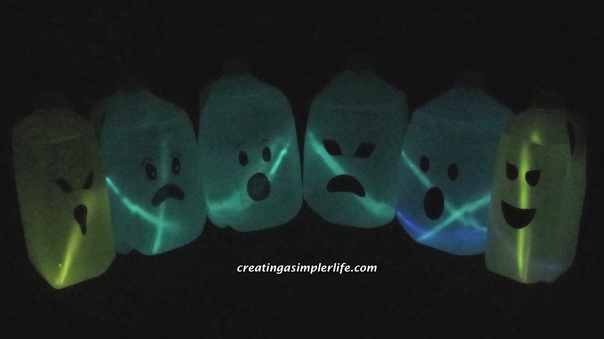 I saw this great idea on Pinterest called Ghost Faces, so it's not my original idea. They used Christmas lights inside the jugs to light them up, and you can do that. However, if you saw my post about giving something other than candy this Halloween, you would know that I purchased hundreds of glow sticks to make the DIY Trick-or Treat Glow Sticks you see below.
What could I do with the extra glow sticks? I decided to see if they would work inside the jugs! And guess what? YES! They look awesome and I am like a little kid waiting until Halloween this year... 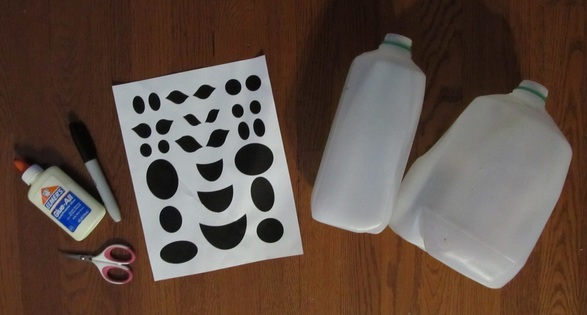 Supplies:
Instructions:
Whether you draw the faces by hand, or print, cut and paste them on, they look awesome! Issues: I don't like being able to see the glow sticks so next time I will try stringing some metal nuts on them and using the connectors to make them into bracelets! Hopefully these can be squeezed in through the top and will lay on the bottom of the jug. After Halloween is Over: Either recycle them as usual or save them for next year. Imagine how many you could have by then! The Water: Don't waste all that water! Use it for your plants :-) The Glow Sticks: I purchased 300 8" Lumistick Brand Glow Light Stick Bracelets WHOLESALE PACK on Amazon (affiliate link) to make both the Trick-or-Treats and the Boo! jugs. Check out DIY Halloween Ideas on Pinterest for more great ideas! Thank you for visiting. Please like and follow us!
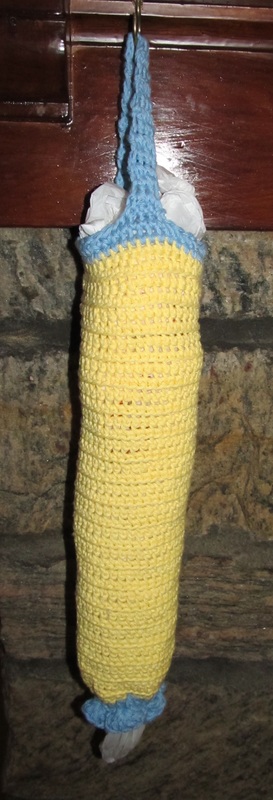
 Save and reuse your plastic grocery bags in an organized and neat way with this quick and easy crochet project! FREE directions and printable label included! Supplies needed to make the two color Plastic Bag Holder:
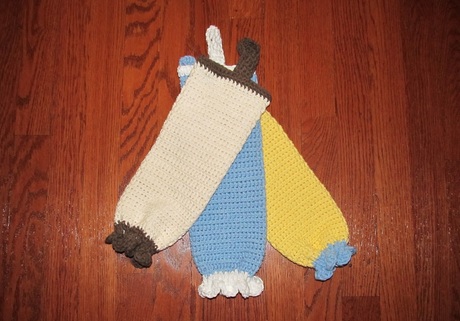
Crochet the bottom: In second color, connect to bottom using slip stitch. Row 1: chain 2 and double crochet in the bottom of each chain around. Slip stitch to top of first double crochet. Row 2: Scallop Trim: double crochet 5 times into second stitch from hook. Skip one stitch and connect with slip stitch in second stitch from where you did six double crochets. Skip a stitch and double crochet 6 times into the second stitch from hook again. Continue pattern (slip, skip, 5 doubles, skip, repeat from slip) all the way around and finish with a slip stitch where you started.  Picture of bottom of bag holder before elastic. Finishing: Weave all hanging yarn ends using the yarn needle. Cut a piece of elastic the same width as the bag holder (about 4"). Put a safety pin in each end of the elastic. Weave the elastic in and out through the double crochet stitches around the bottom. Bring both elastic ends to the inside of the holder and sew together using the needle and thread. 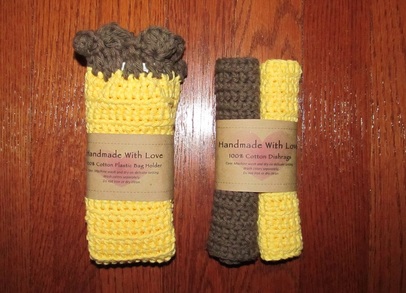 Presentation: If you want to give these as gifts you can print out the free printable label below. A handmade gift is really from the heart :-) The picture above shows the plastic bag holder folded up nicely and paired with a set of reusable/washable crochet dishcloths. Find the pattern and free dishcloth printable for the Dishcloths Here! Print the label by clicking on either the picture or the button below. It's a pdf file designed for 8.5" x 11" paper. I printed mine on KRAFT Brown Bag Paper from Amazon (affiliate link). Print the labels out (5 to a sheet) and cut between the dotted lines! FREE PRINTABLE LABEL!  Example of one label (download prints five to a page).
Thank you for visiting! Please like us and follow us on Facebook :-)
|

Hi there! I'm Kathie, the author behind Creating A Simpler Life blog. I'm excited to share our longterm projects (and planning) toward building our future retirement homestead in the Adirondack Mountains of New York. In the meantime I will be sharing all the other little things we do that are part of creating our simpler life!
Categories
All
Archives
July 2020
|


 RSS Feed