Blog
A little bit of anything and everything that's part of
creating, enjoying, and living a simpler life!
creating, enjoying, and living a simpler life!

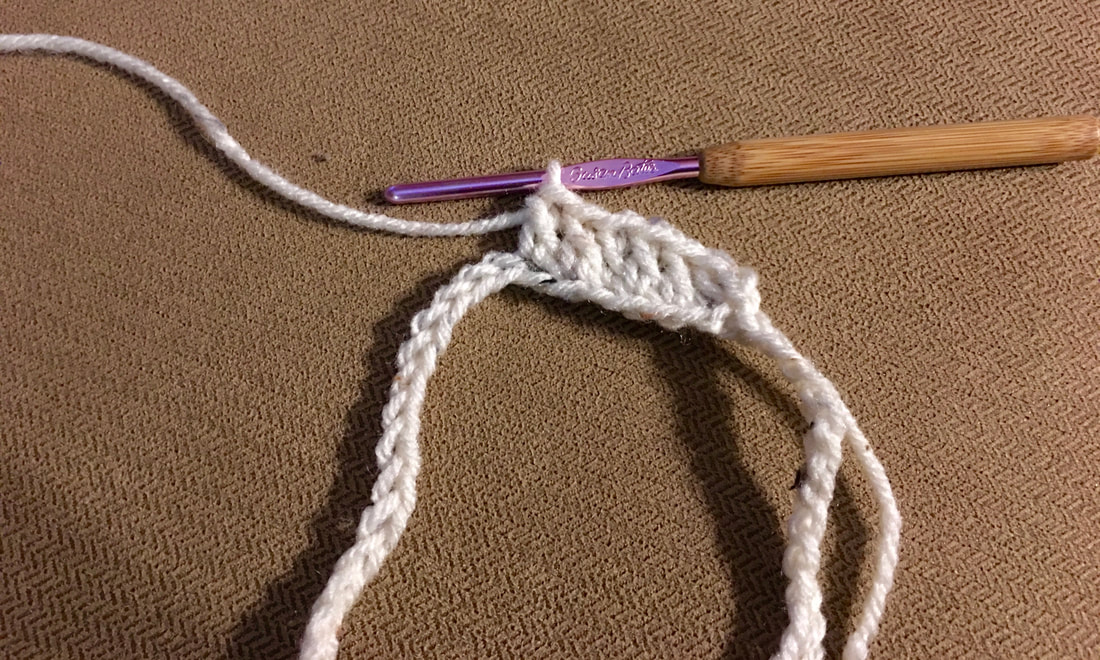
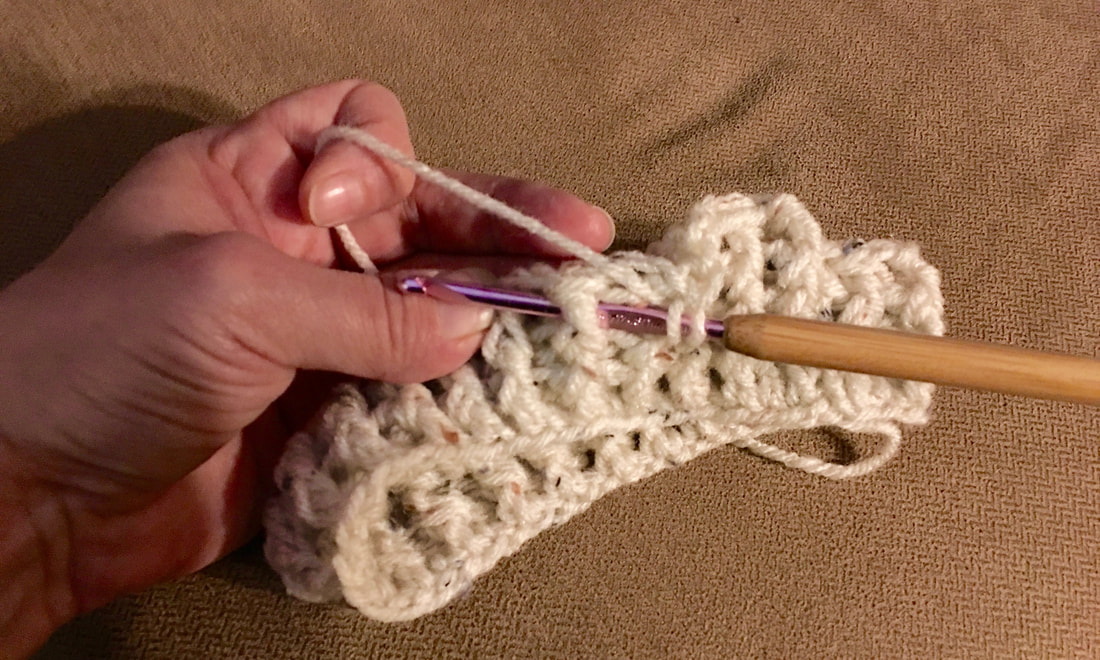
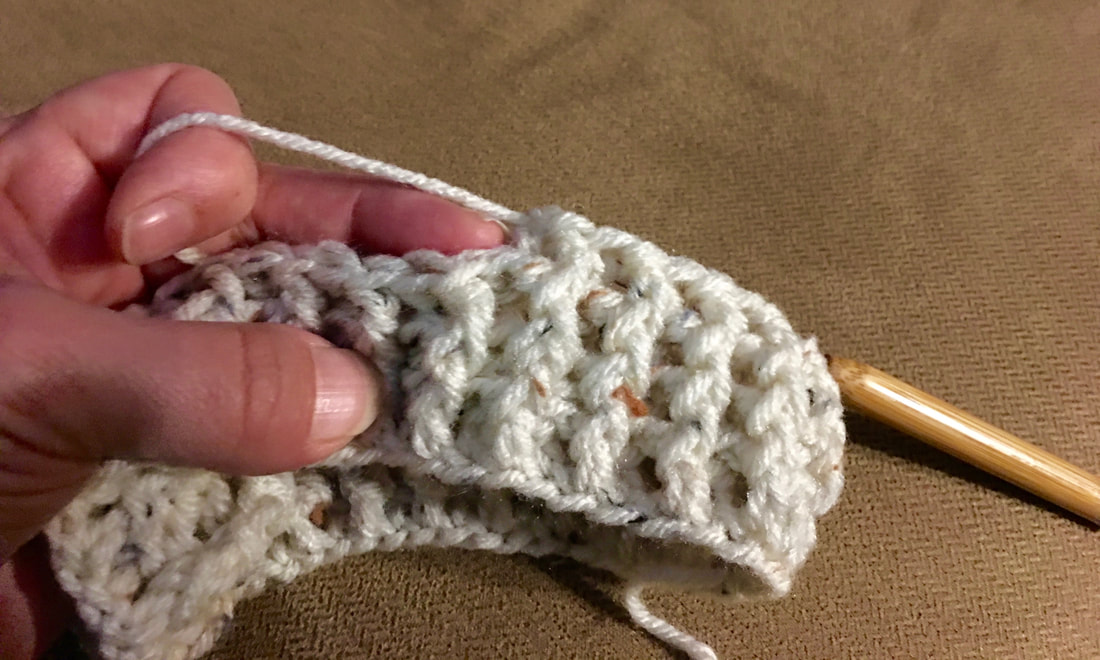
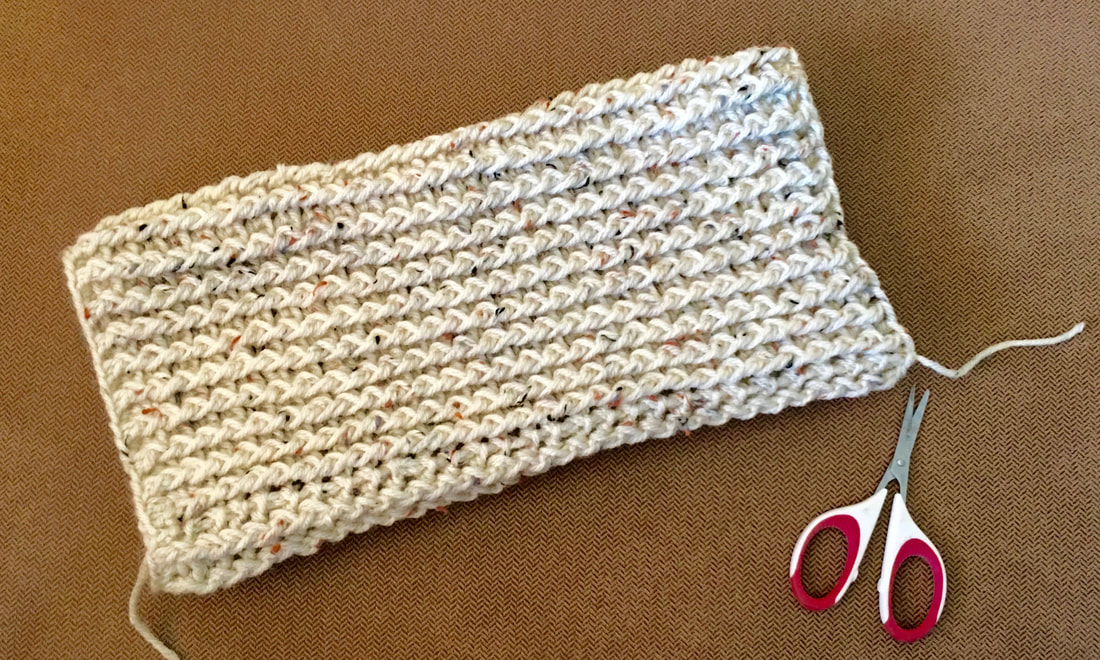
This super simple crochet afghan throw only uses two stitches: chains and single crochet, AND can be completed in under 8 hours!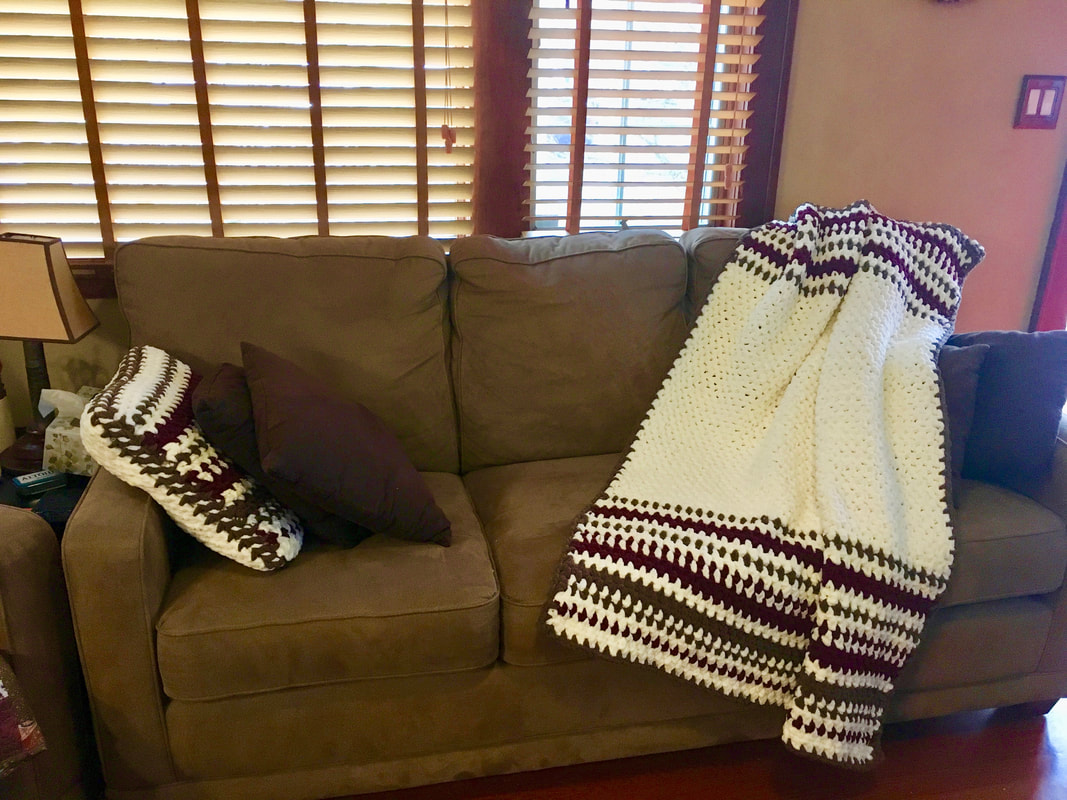
This crochet afghan is super simple to make and super soft and cozy!
The finished size is 40" x 60"
Supplies Needed:
Directions - SEE THE VIDEO BELOW!
Color Pattern used for this afghan (each number refers to the number of rows in that color):
Thanks so much for visiting! Hope you liked this simple pattern :-)
Sincerely,
0 Comments
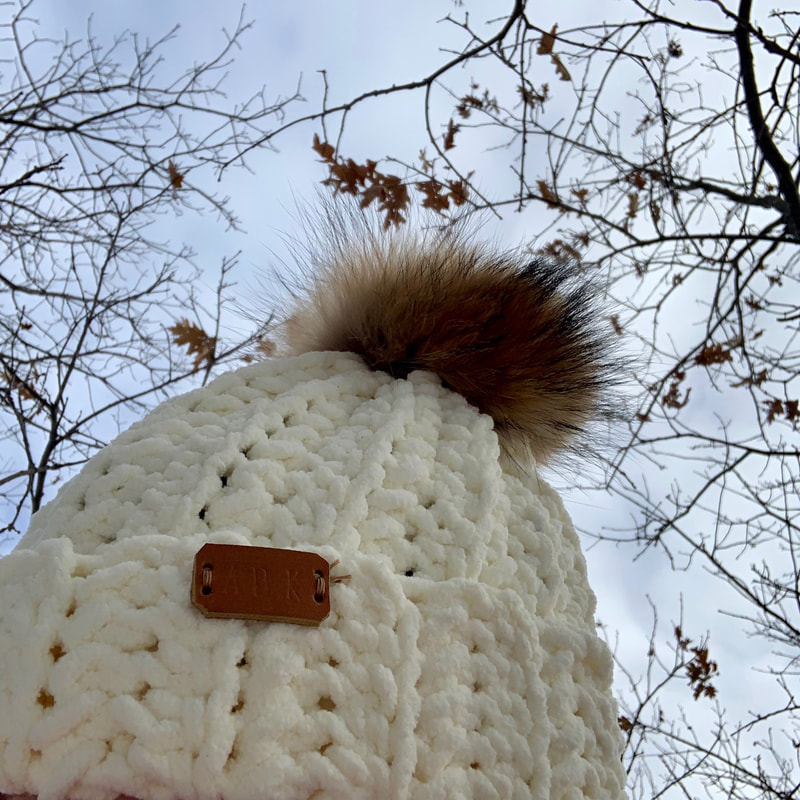
FREE PATTERN!
This hat is super soft and warm....especially on those cold Adirondack winter days!
Beginner Level Pattern! Finish in under an hour! Easily modified for larger or smaller ADULT sizes OR more or less slouch! Machine wash and dry with a removable pom pom! VIDEO TUTORIAL & WRITTEN DIRECTIONS! NOTE: directions for leather tags will be coming soon! 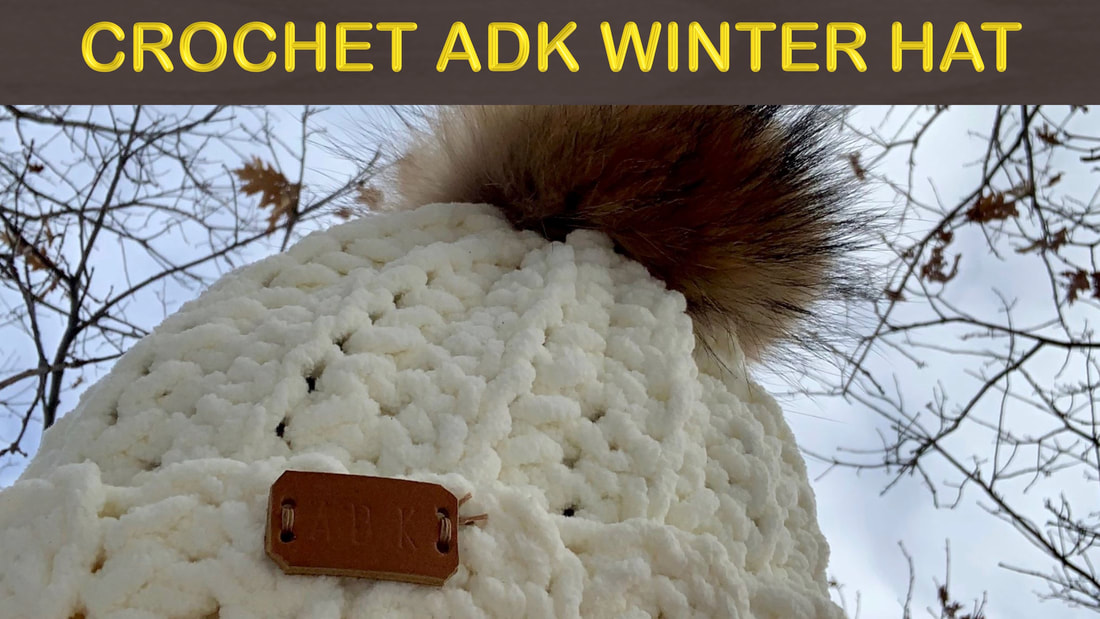
Supplies Needed for hat without Leather Tag (affiliate Links)
Stitches Used:
Video Tutorial (written directions below):
It is strongly suggested that you watch the full video and/or read the full directions before beginning!
(video for children's size hat below!) Please reach out if you have any questions. I am here to help! Thank you so much for your support :-) 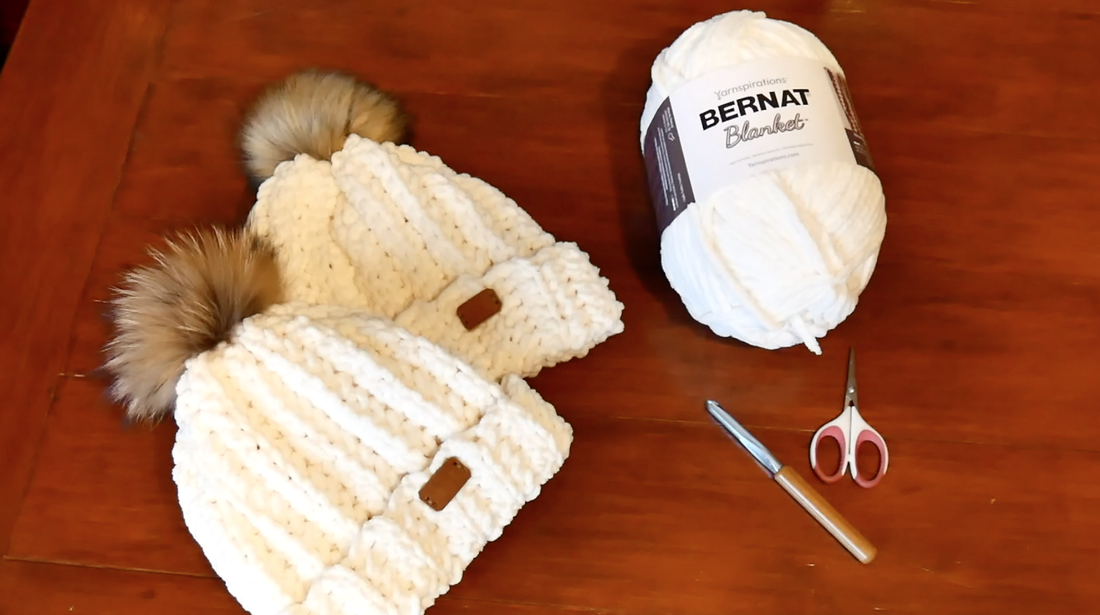
Directions:
Here is how I made the leather label:
Thanks so much for visiting!
Please check us out on our other social media platforms :-) Sincerely,
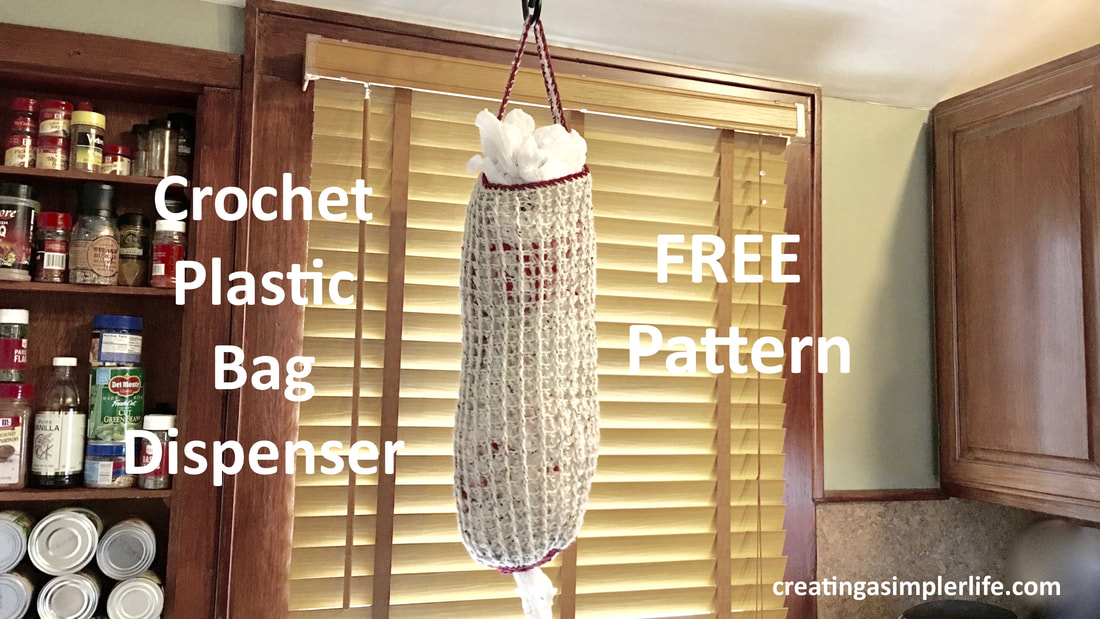
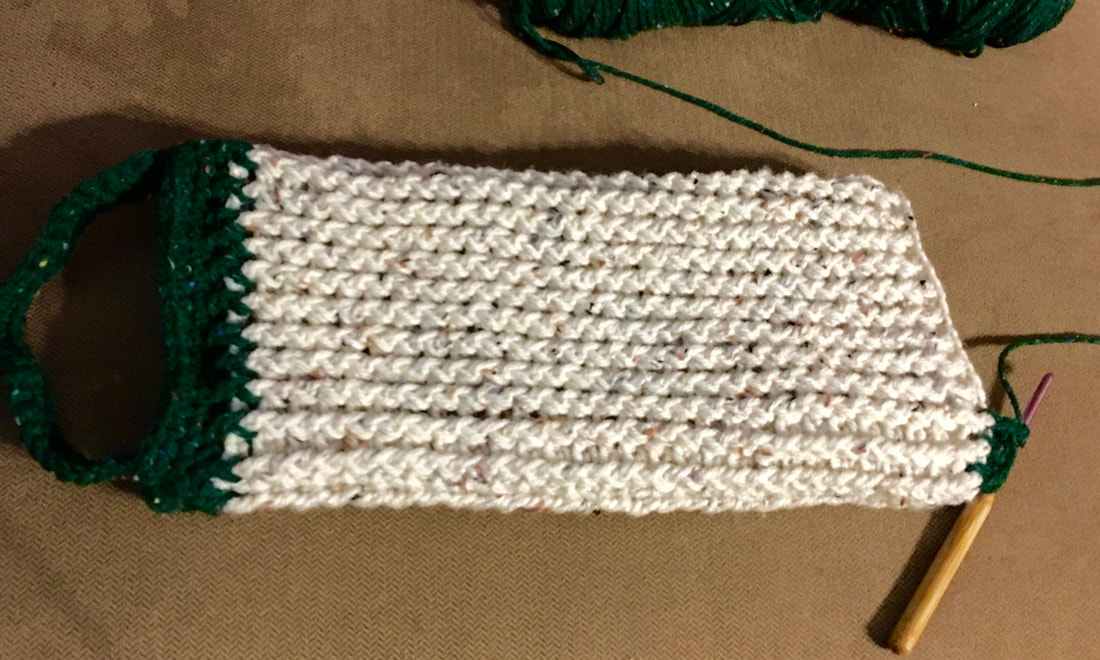
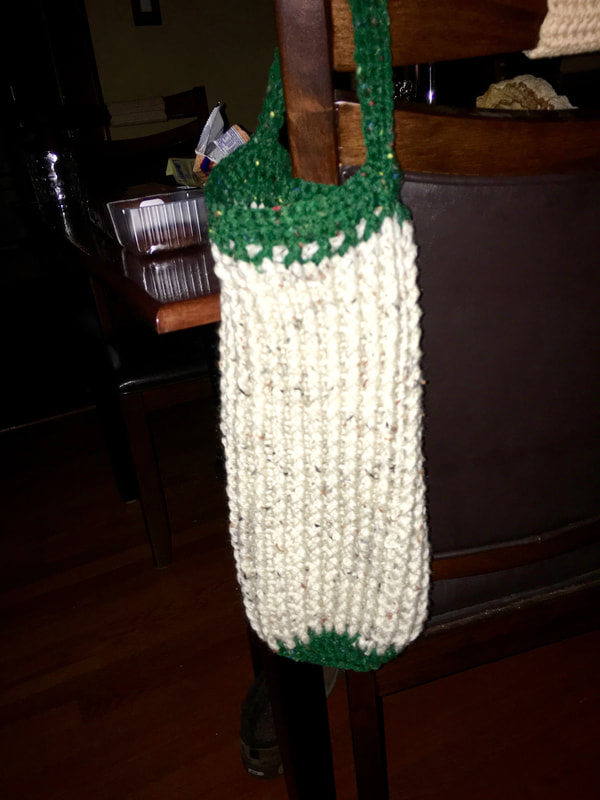
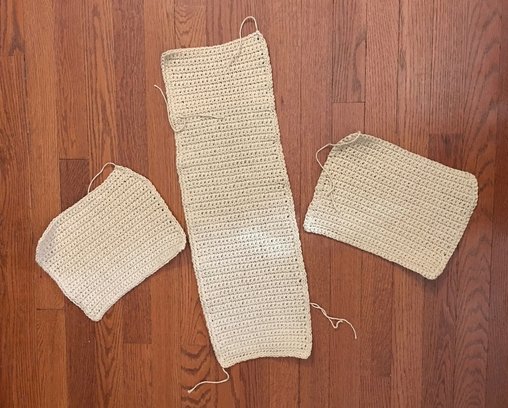
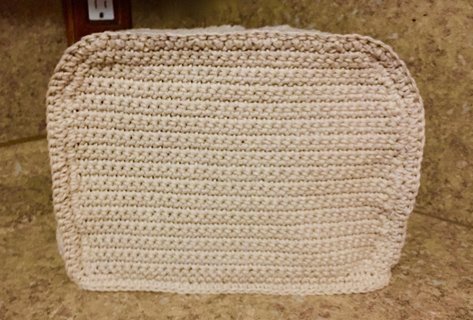
This crochet plastic bag dispenser doesn't appear jumbo to start with, but the stitch it is made with will stretch to accommodate hundreds of plastic bags! Well, maybe not hundreds, but definitely tons more than any other plastic bag holder I've ever seen. Look no further for an awesome FREE pattern!
I would consider this pattern to be of medium difficulty due to the fact that you will need to have some basic skills and knowledge to work your way through following the directions for the handle. However, to make it simpler, you could just add the handle completely separately!
Supplies (affiliate links):
Written Directions for Main body:
(pictorial directions and video below)
Finishing the top & Making the Handle:
Pictorial Directions:
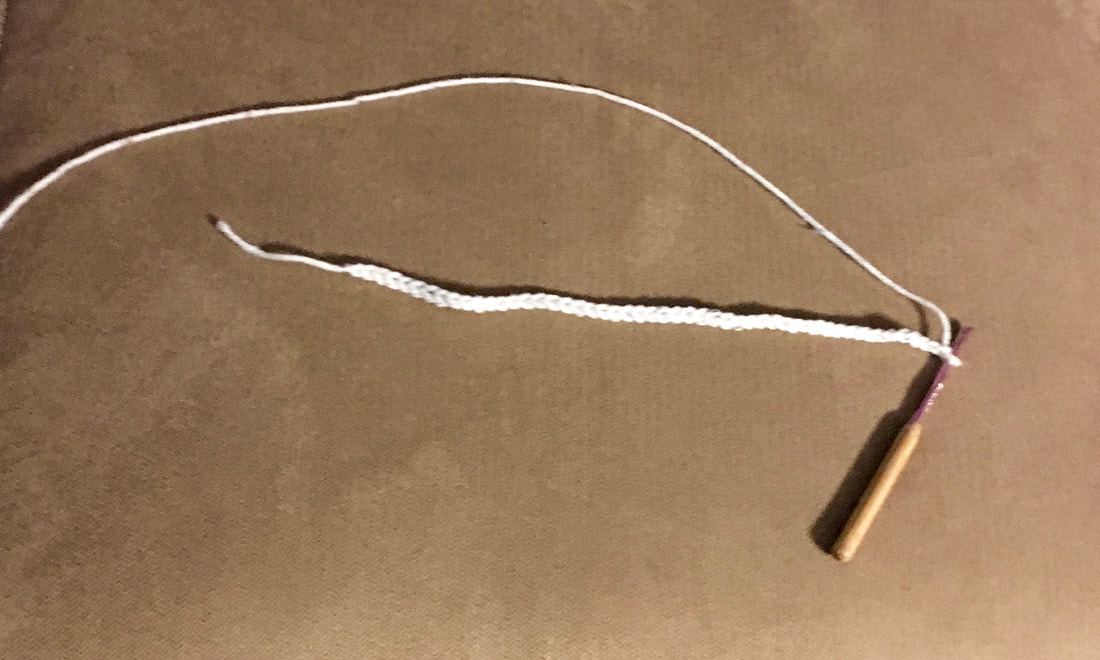
Chain 50

Connect with slip stitch to create a loop.
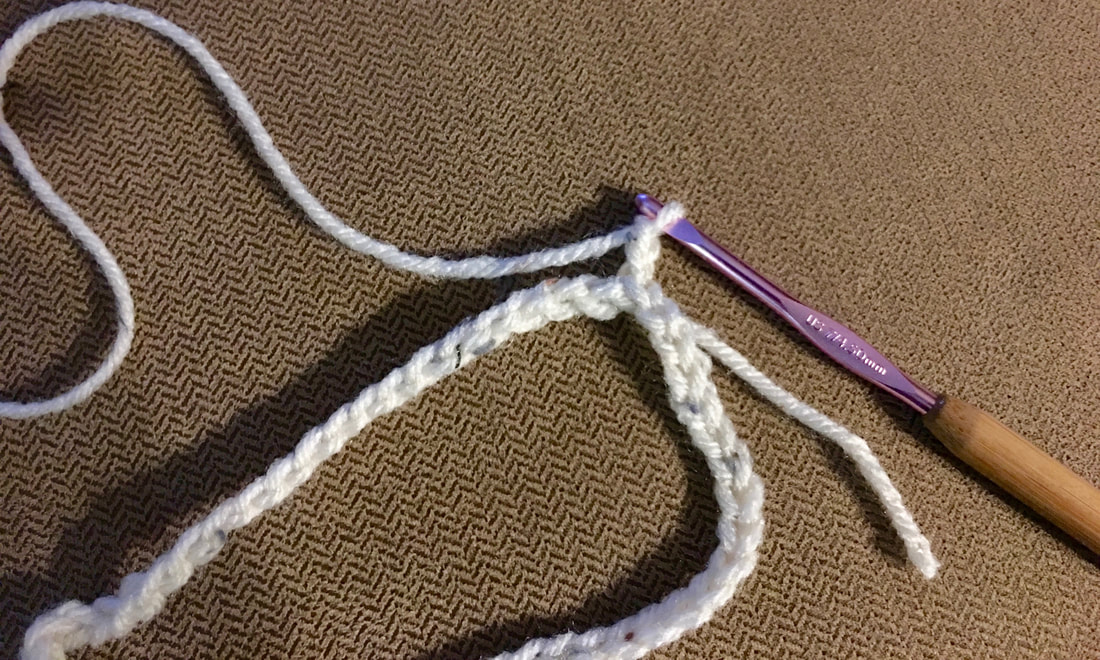
Chain 2
Triple crochet in each chain around the loop (50 total) and slip stitch to connect.
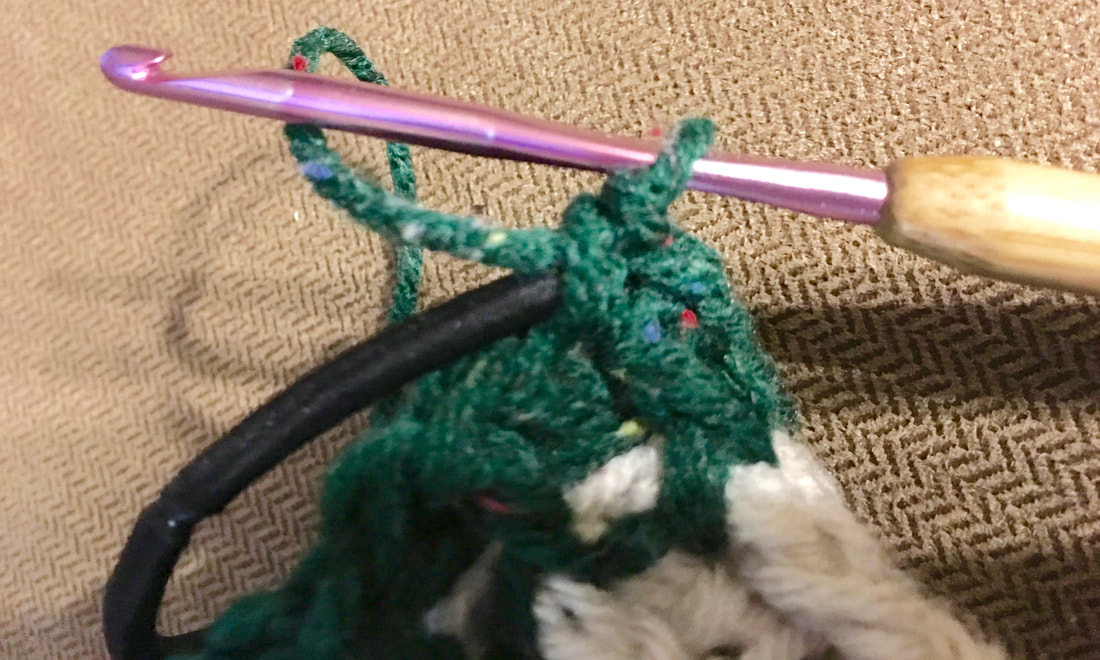
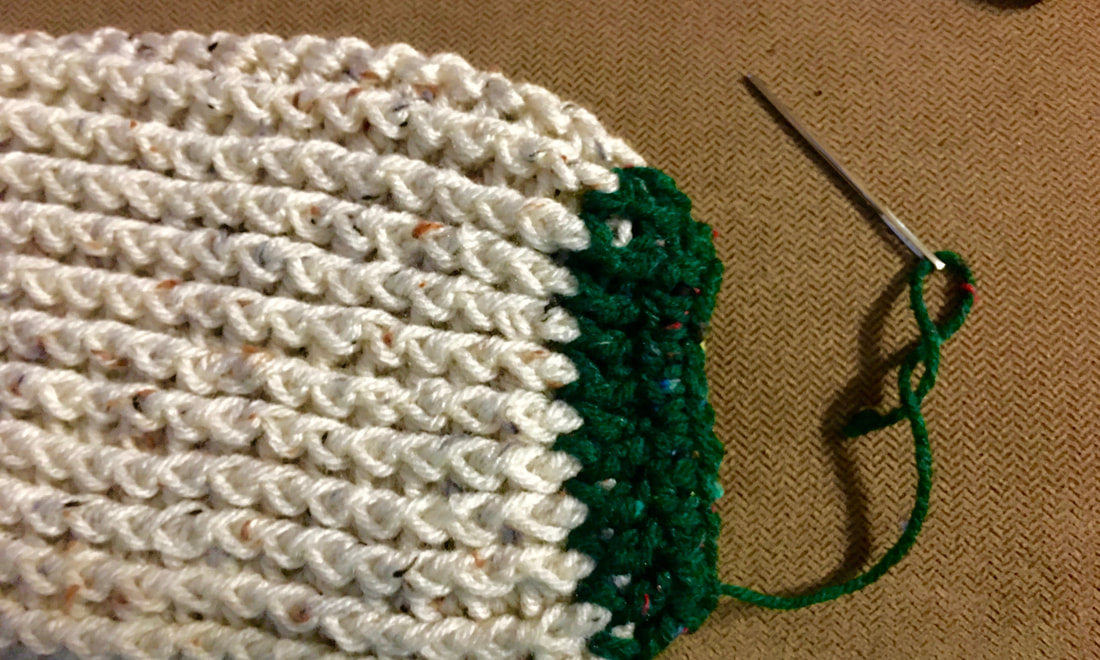
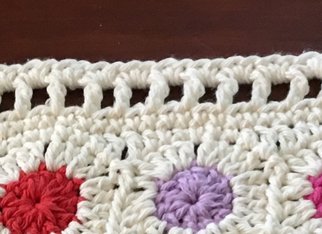
All the rows that follow (29) will be completed doing a double crochet front post, then a double crochet back post. The dc front and dc back will be repeated all the way around. Please refer to the video link above for a quick tutorial if necessary. NOTE: A front post is shown in the picture.
As rows are completed you will begin to see the ridges that are created.
Complete 30 total rows (one regular dc and 29 post dc's) and slip stitch knot at the end.
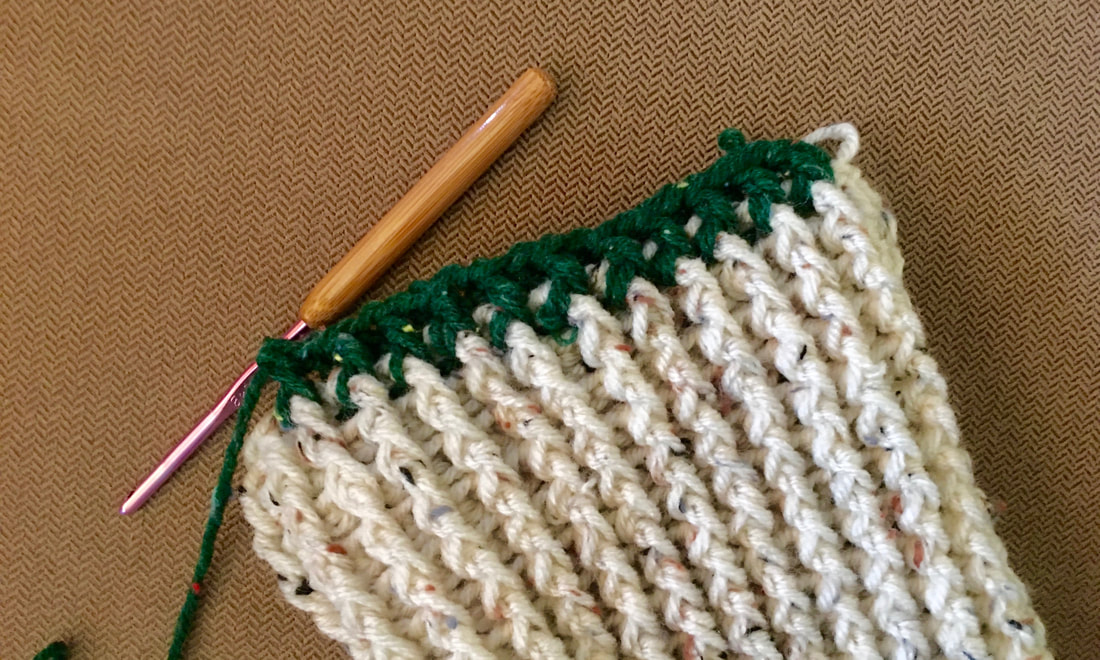
Connect the green to the top of the holder with a slip stitch and complete one full row of dc front post, back post. Slip stitch to connect.
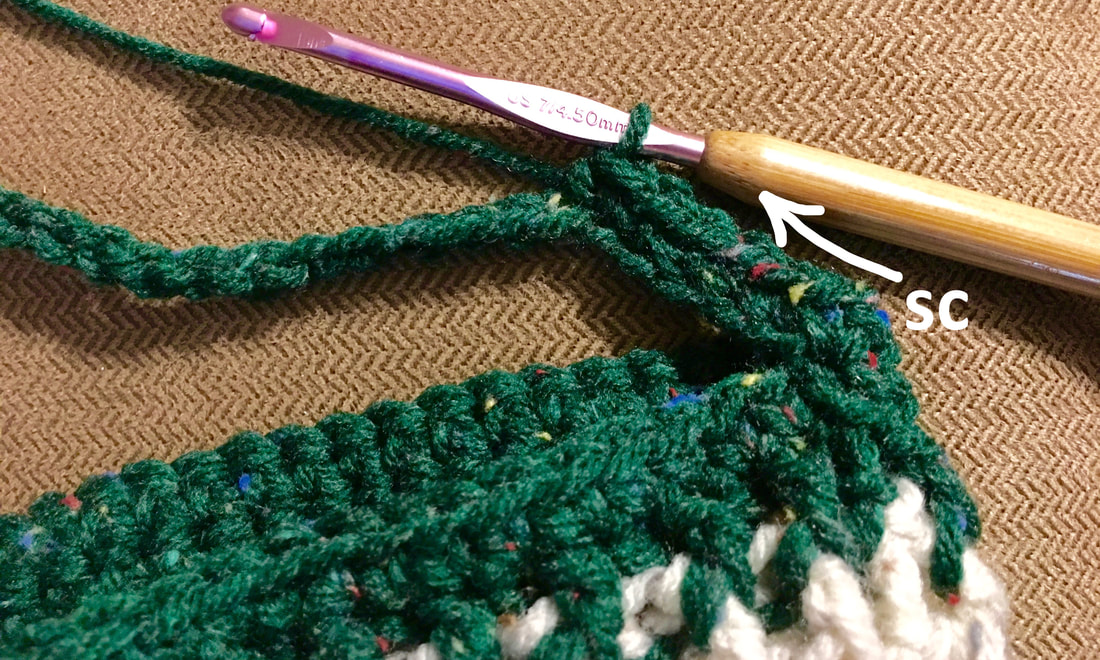
Chain 1 and sc in each stitch around. Slip stitch to connect.
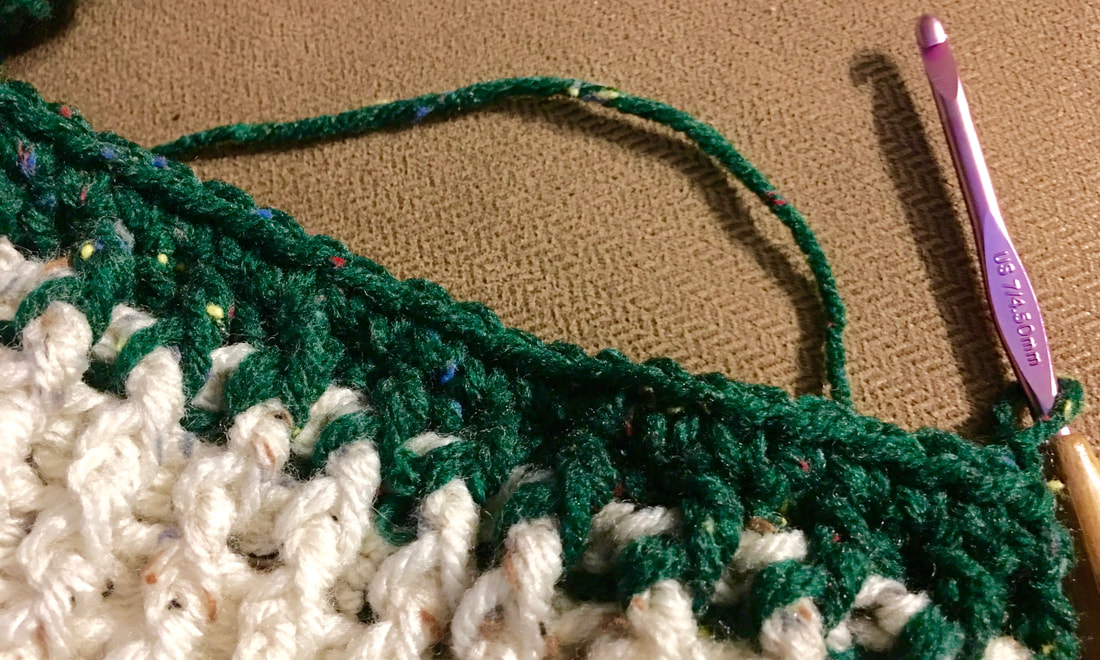
Chain 35 and slip stitch to connect on the opposite side (25 stitches away).
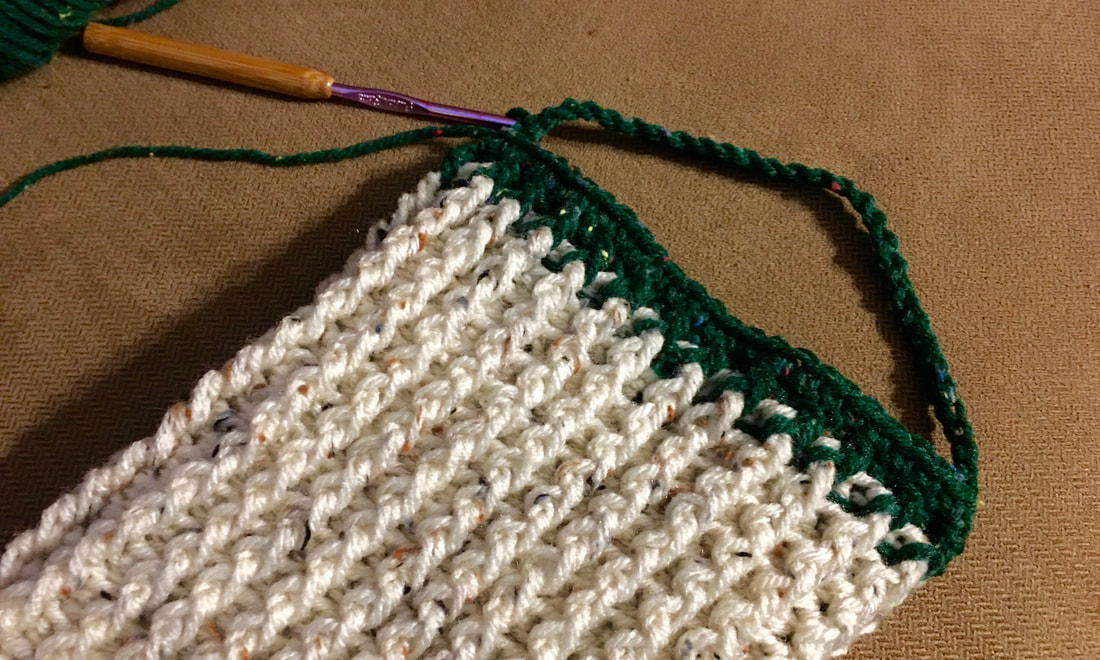
Turn your work so that it is facing you and sc along the top of the holder until you reach the handle on the other side (note you are only doing half of the top right now)
Single crochet in each stitch along the entire handle to the other side
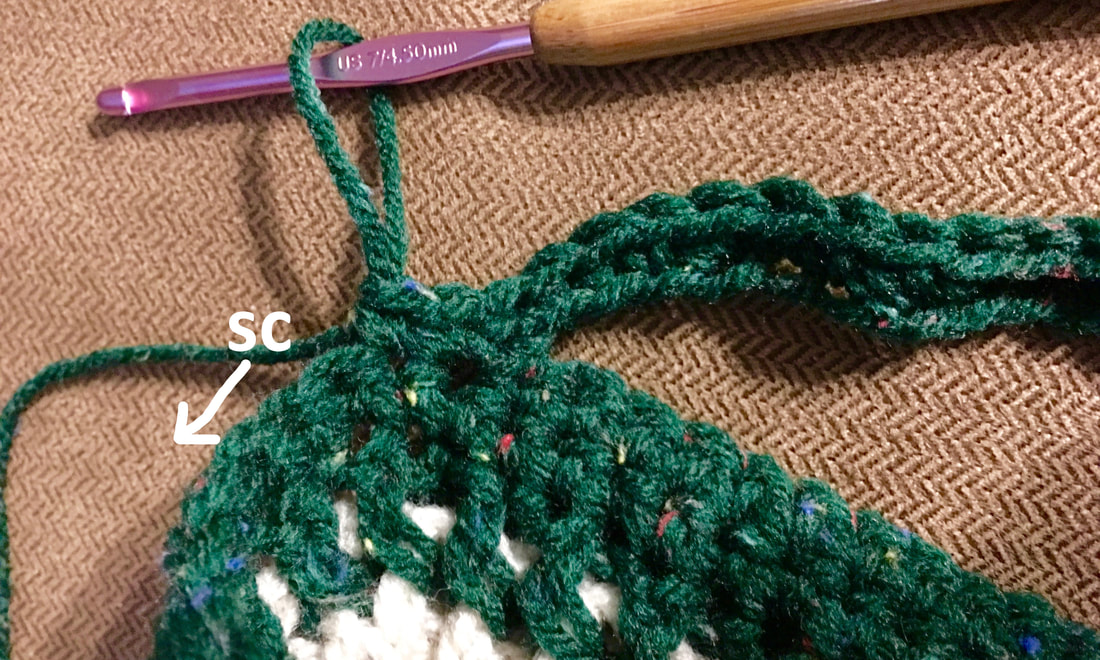
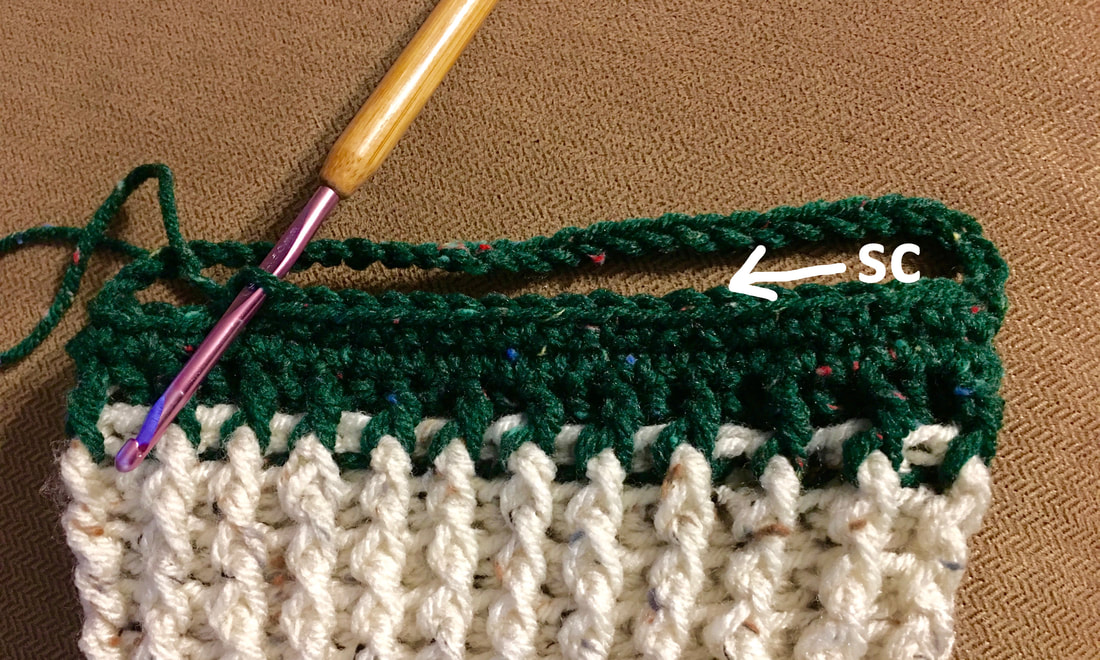
Then you will single crochet along the other side of the top until you reach the handle again.

When you reach the handle on the other side, you will now single crochet in each stitch along the handle again, however this time you will work along the bottom of each original chain.
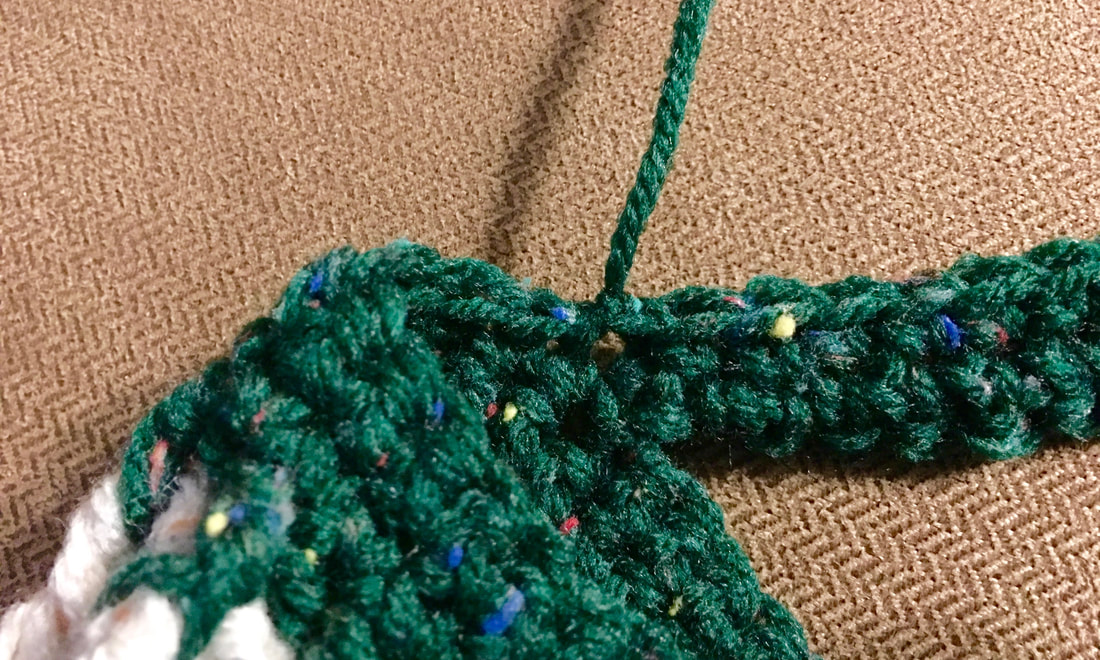
When you get to the other side of the handle connect with a slip stitch and knot off.
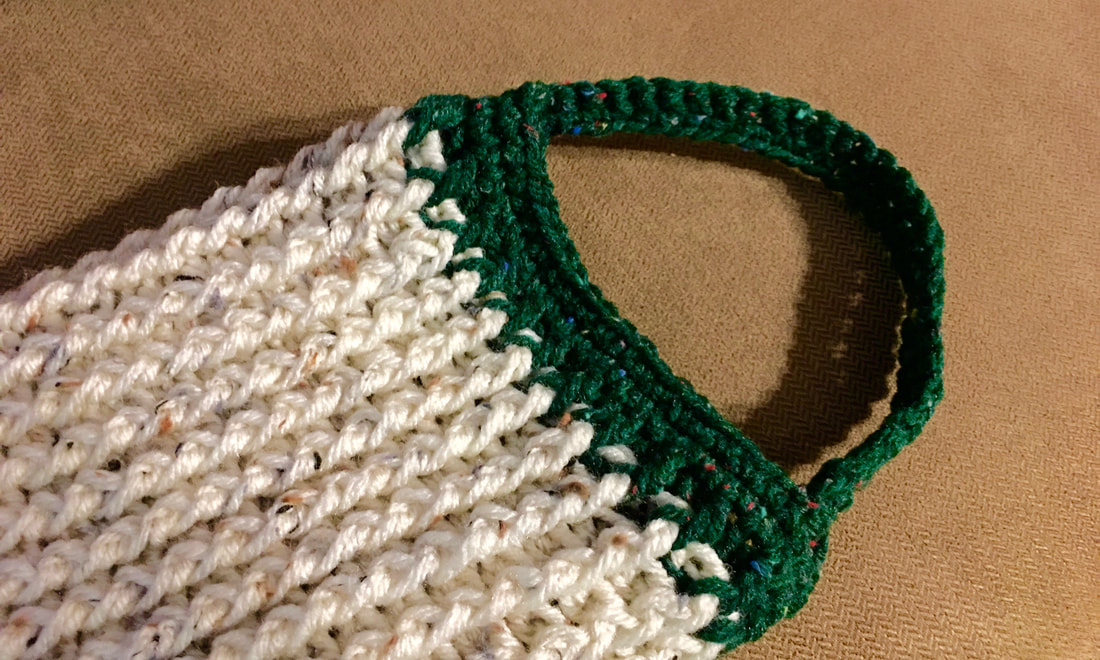
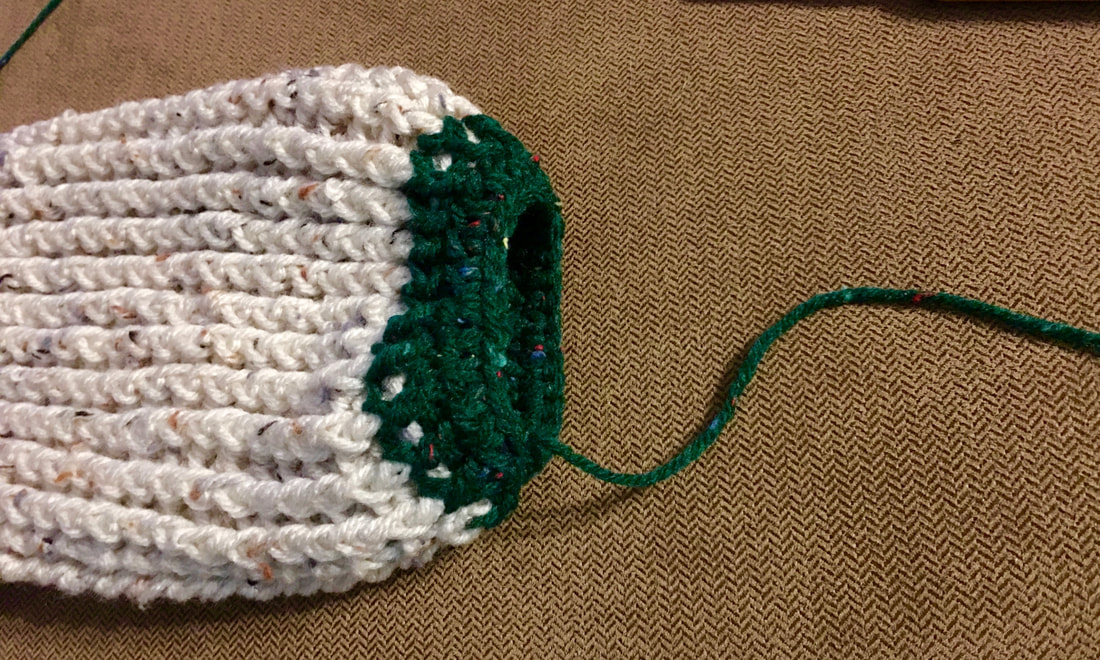
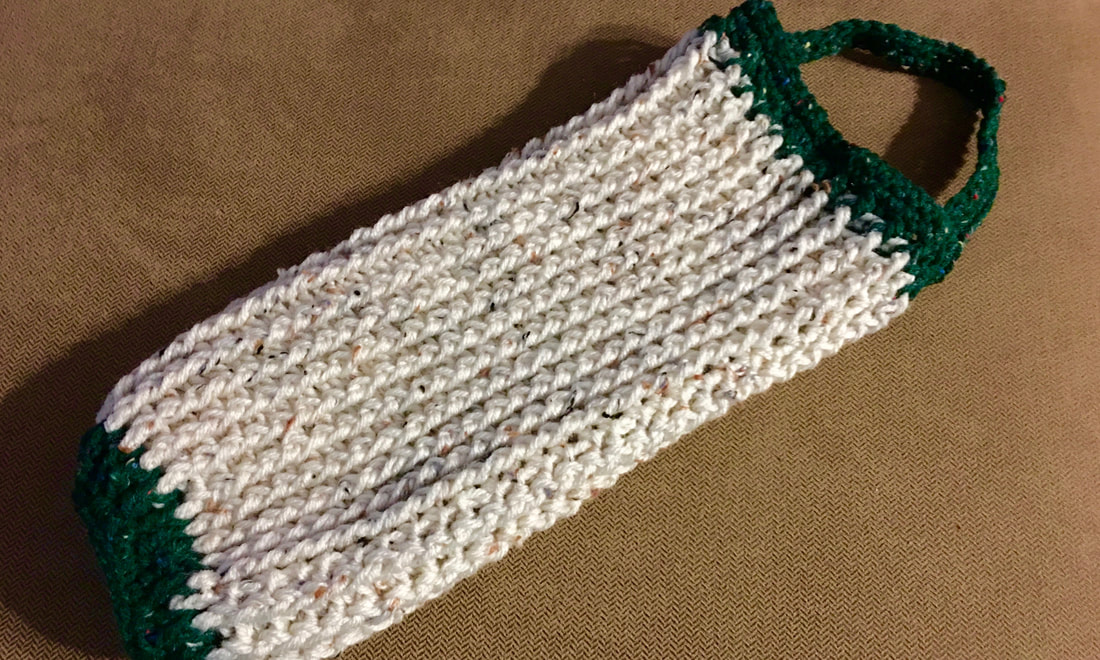
Top is done!
Connect with green to the bottom of the holder. Chain 2 and double crochet in the front and back posts (alternating) all the way around. Slip stitch to connect.

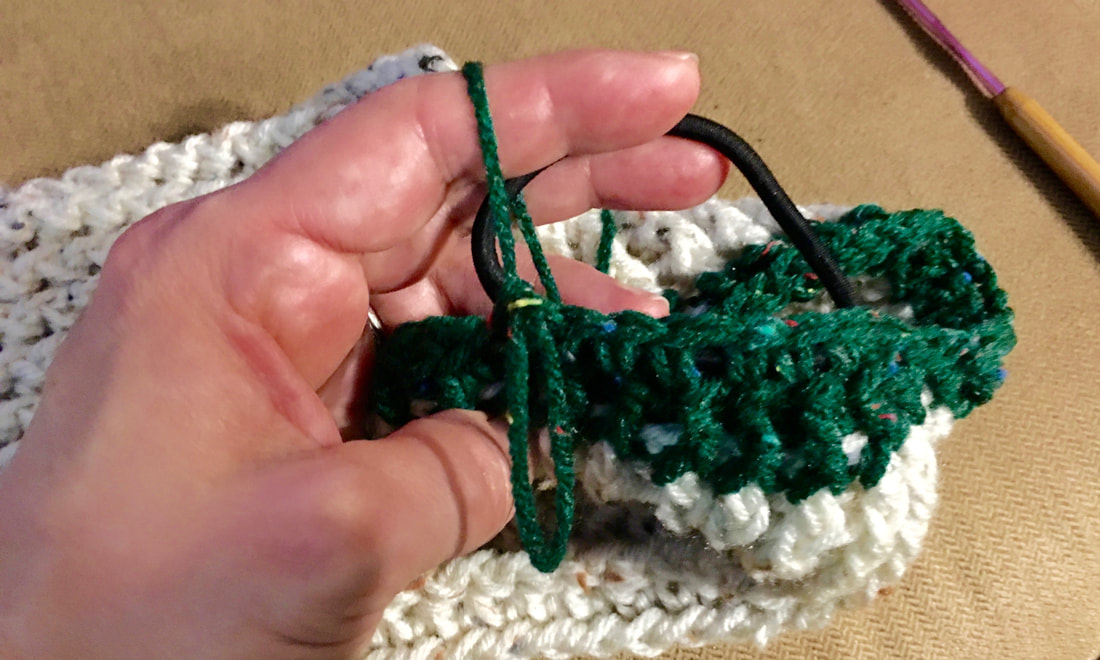
Use one hair band....
Chain 1 and begin using the single crochet stitches to incorporate the hair band. Place hook through the band, put yarn over the band, and pull through to complete the single crochet. Skip every other stitch all the way around for a total of 25 stitches.

Slip stitch to connect and knot off to finish.
Use a yarn needle to weave in all loose ends.
Done!
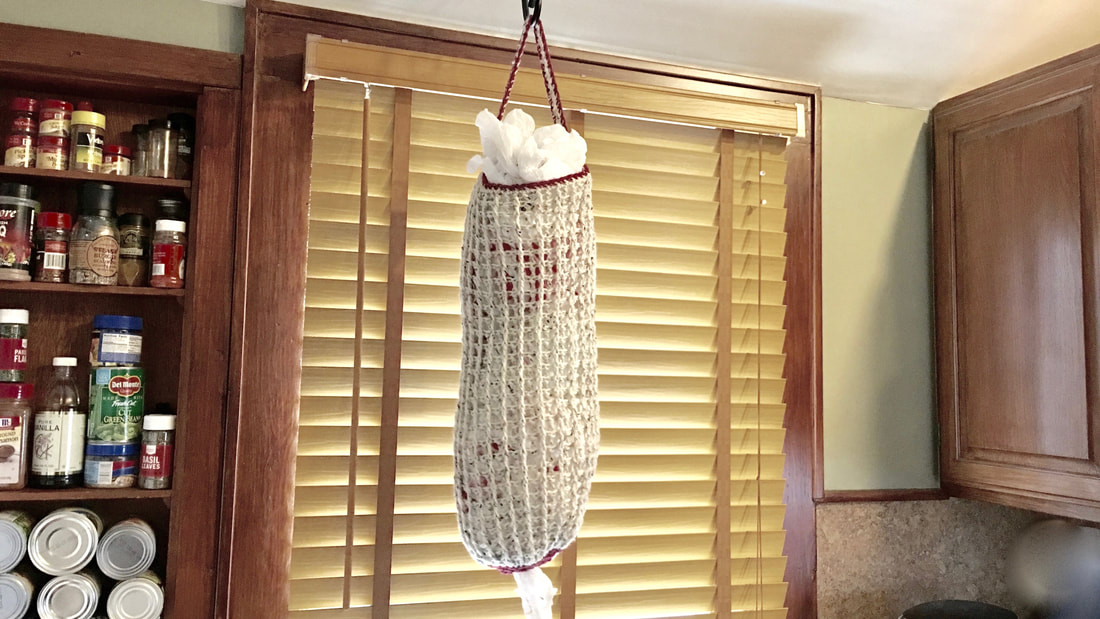
A similar holder I made with maroon trim. Note, it is not exactly the same as I only did sc trim in maroon - the last row of post stitch at the top and bottom was done in the same color as the rest of the holder.
It will hold a lot of bags!!
Check out all of our other
FREE crochet patterns here! and check out our YouTube channel too! Sincerely,
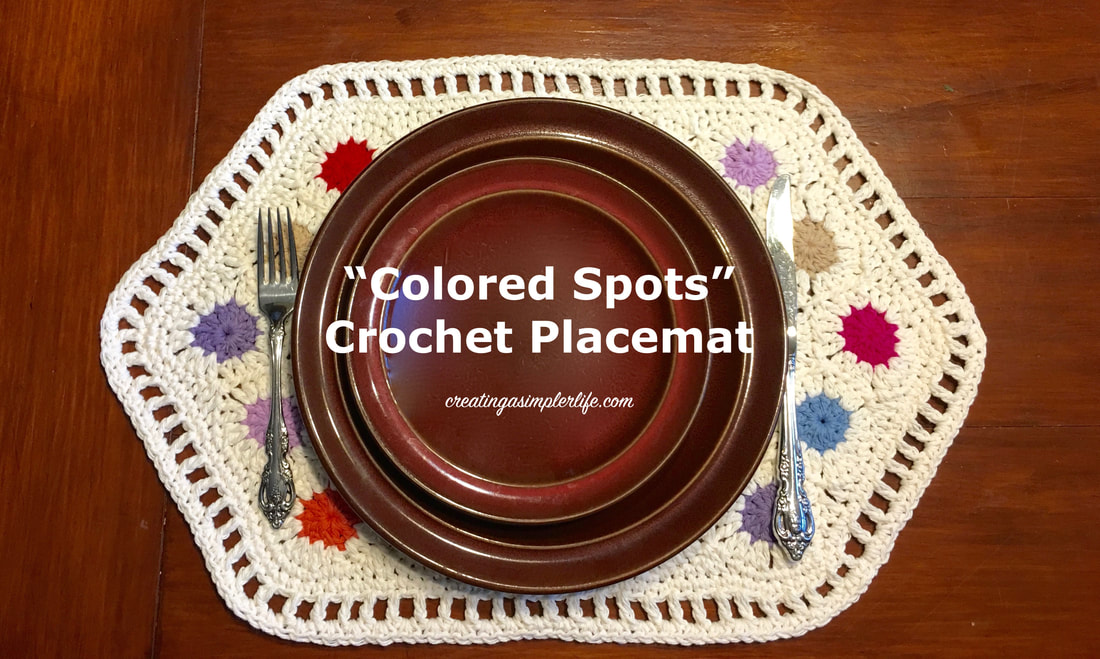
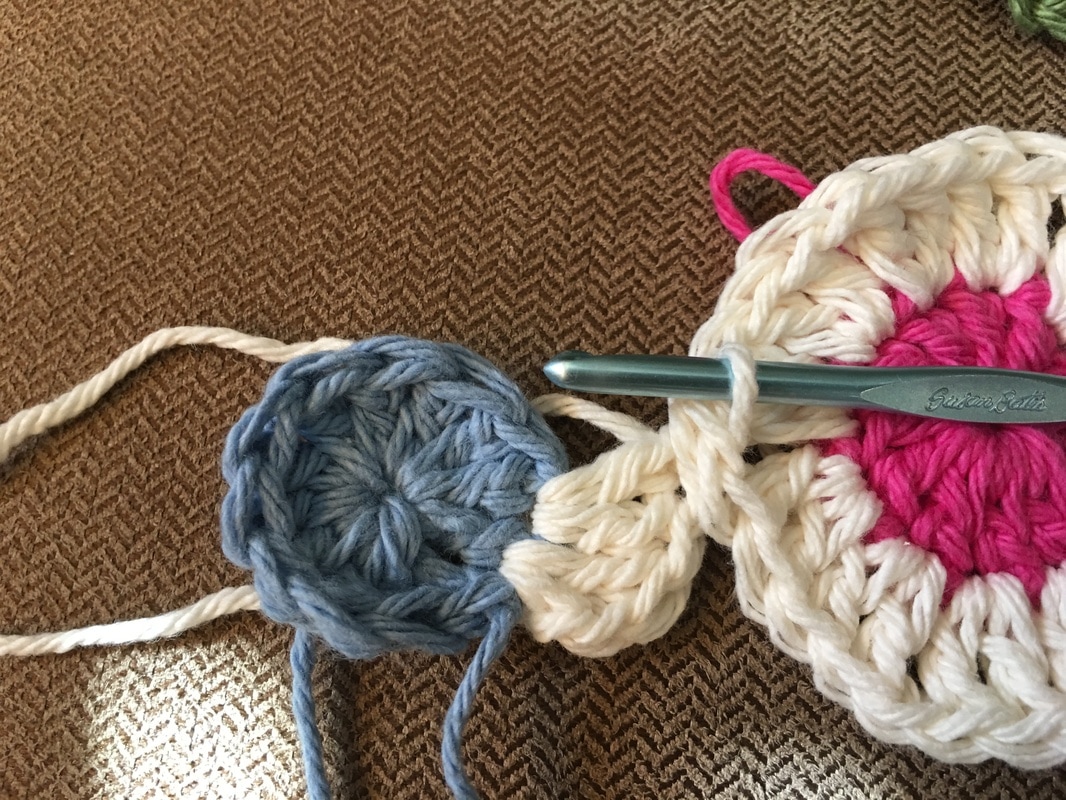
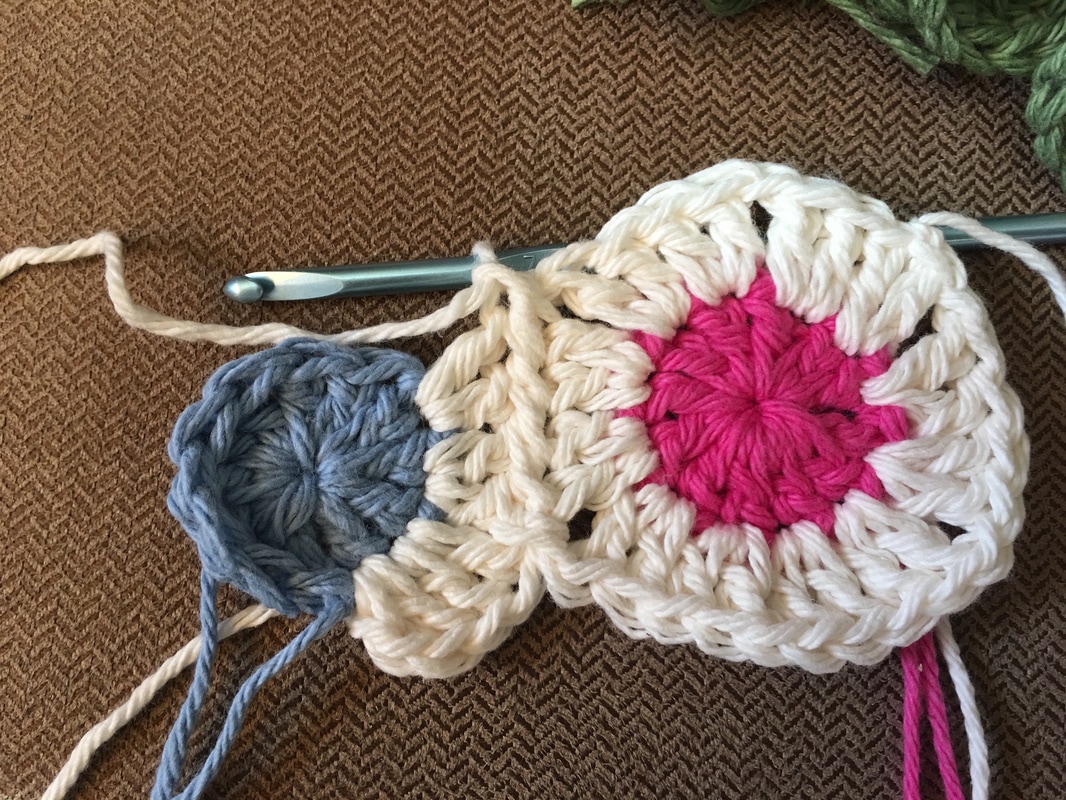
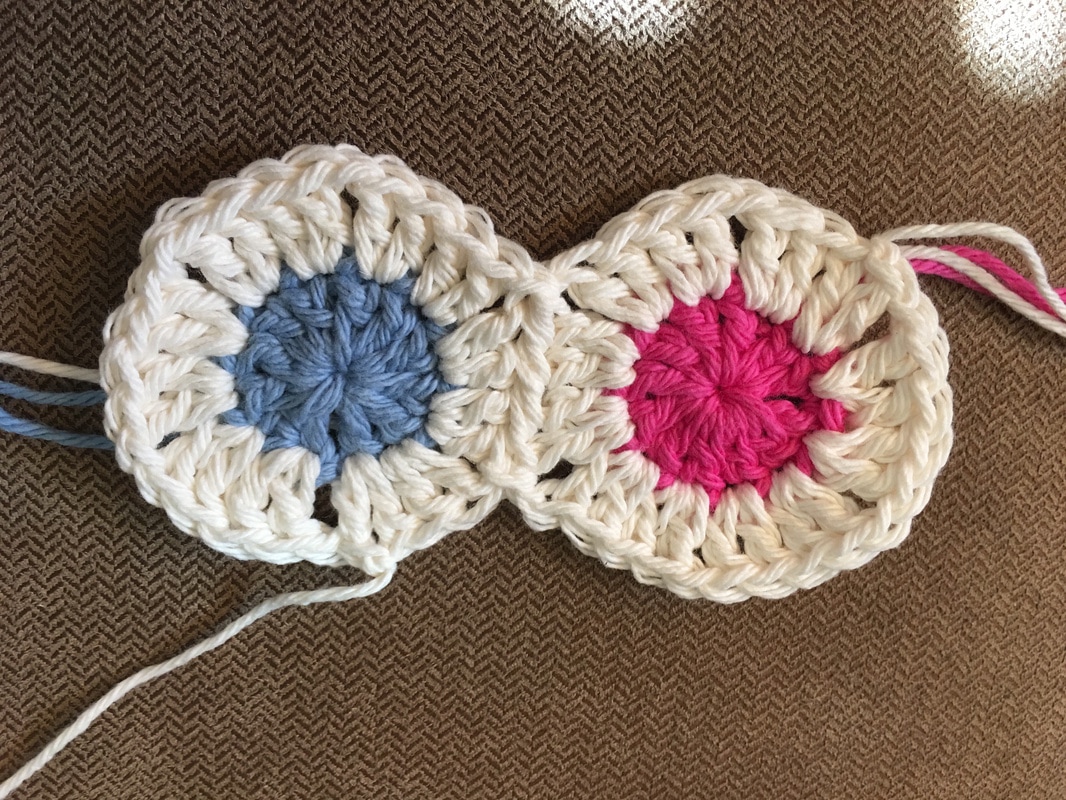
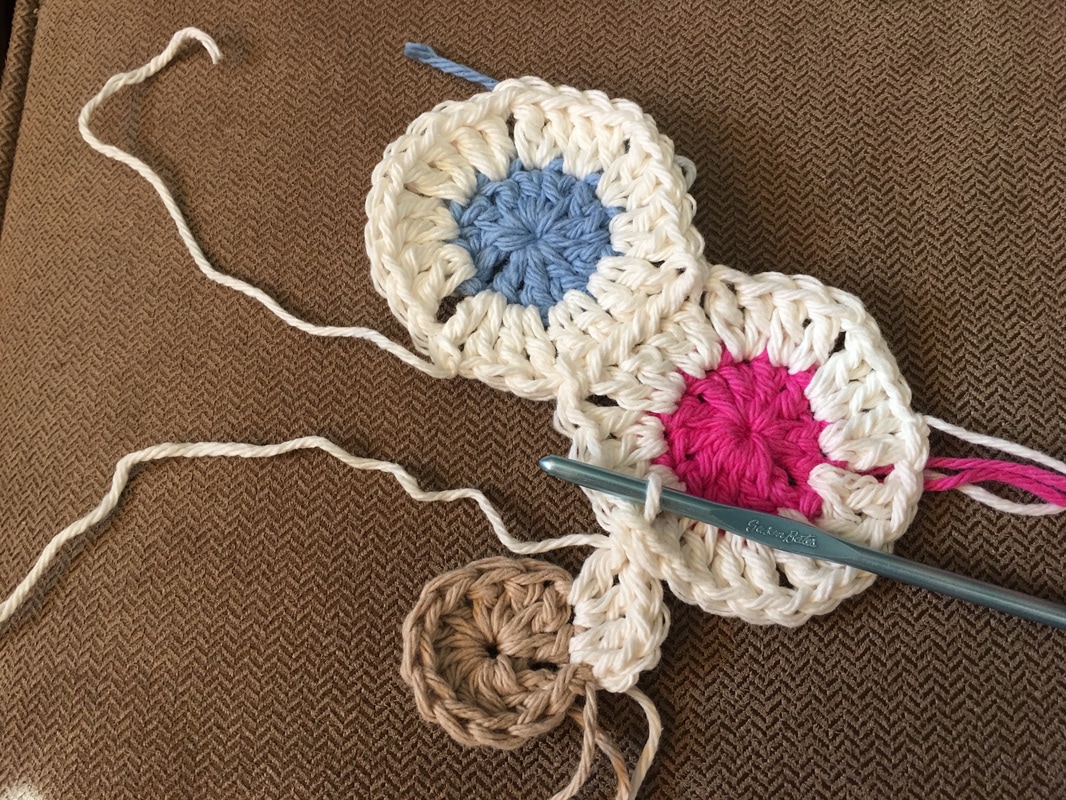
This is a great way to use up those leftover pieces of yarn that aren't big enough to do anything else with!
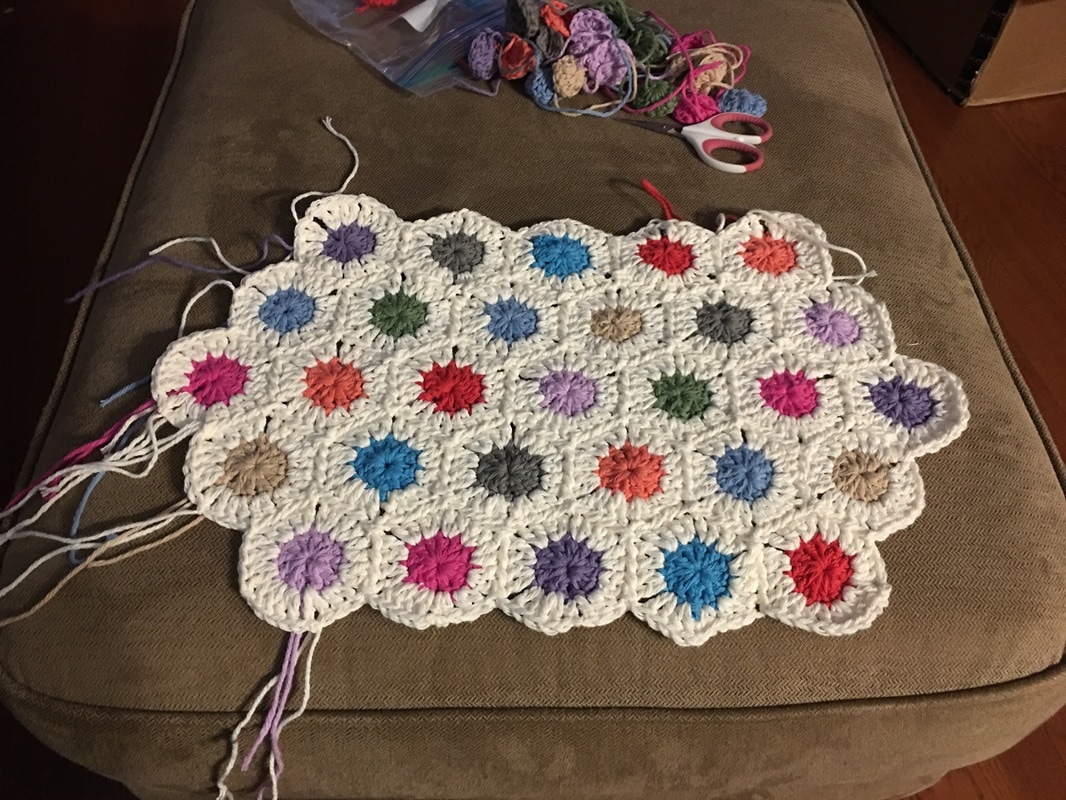
The beauty of this pattern is that the second row is basically the connecting row. There is no special connecting stitch to be done later on! I got the idea for this project from Atty's Blog Spot. She does it a little differently and she makes a blanket instead, but there are pictures that can help you get the idea if you are having any trouble. I kind of simplified the basic pattern, but it is generally the same only I make a placemat and add a border. Enjoy!
Supplies Needed:
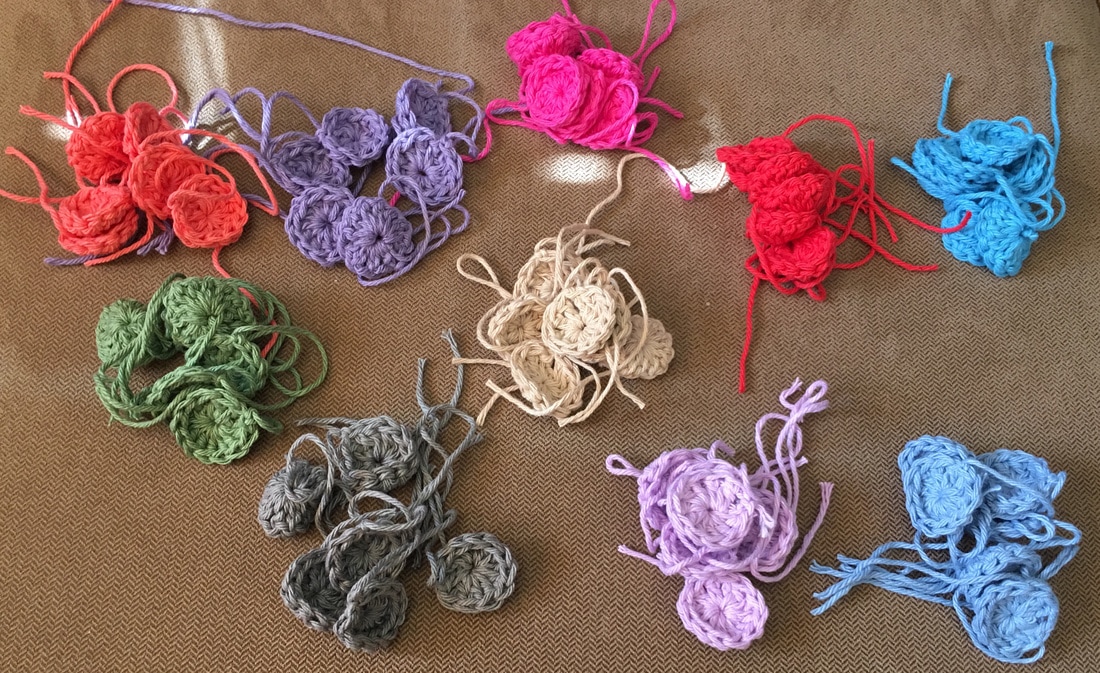
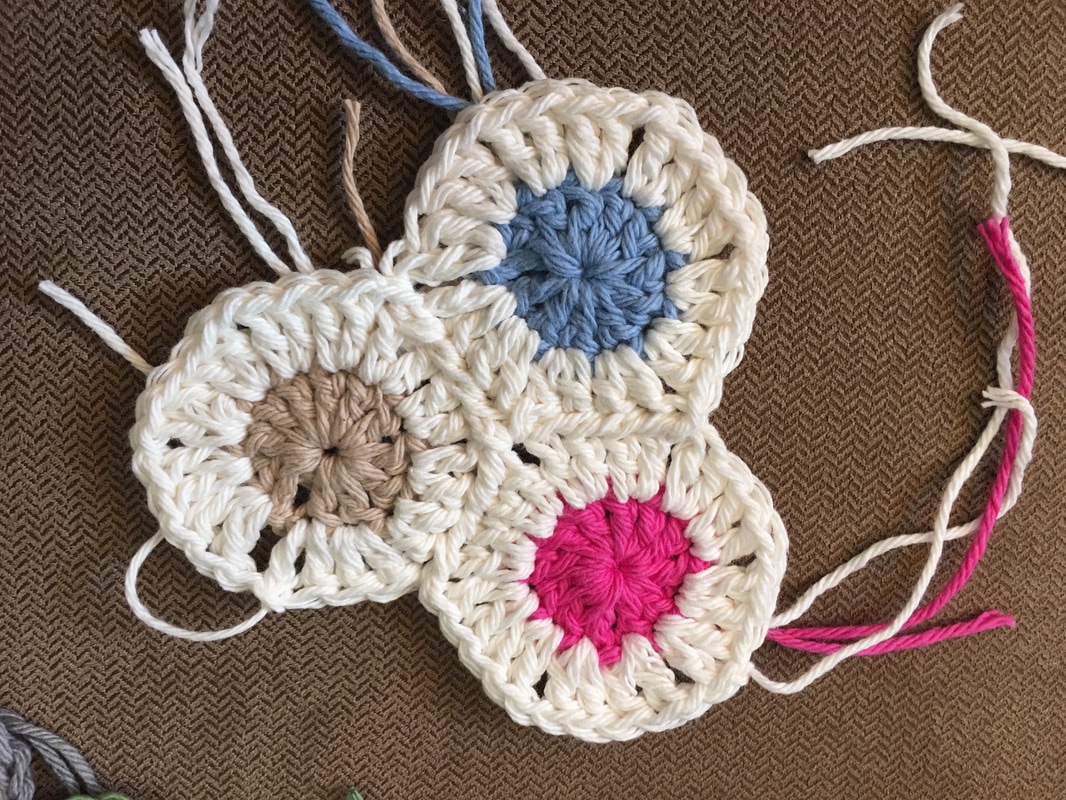
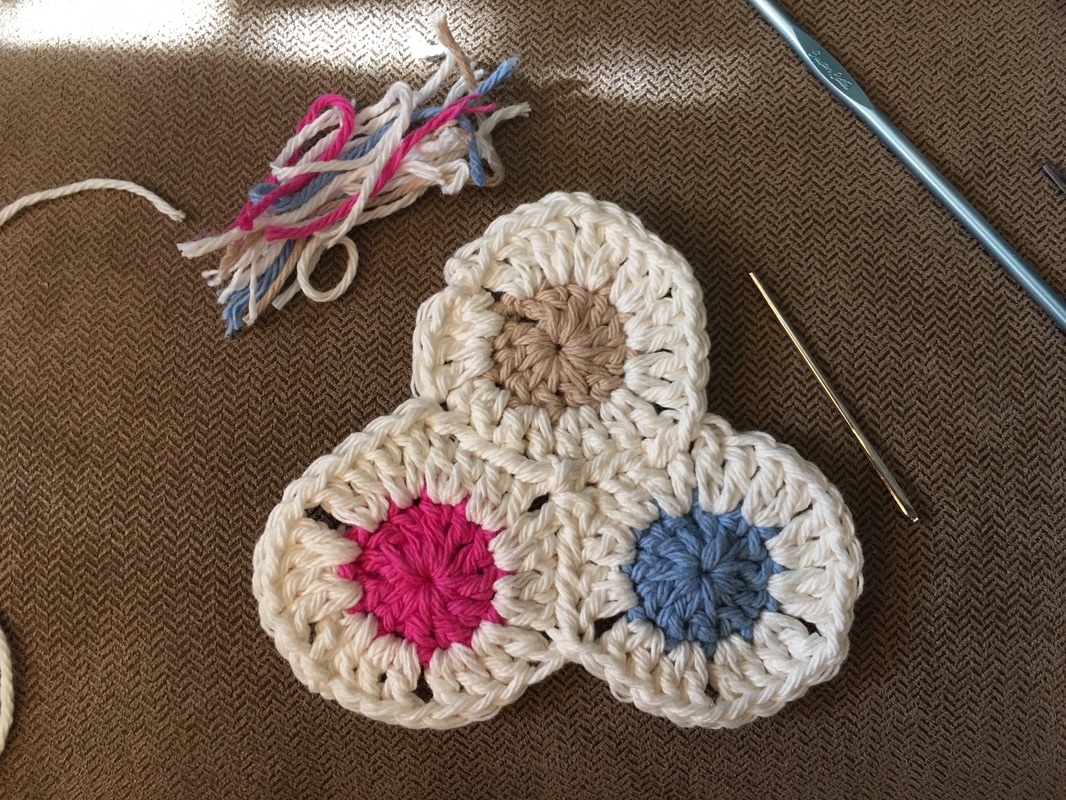
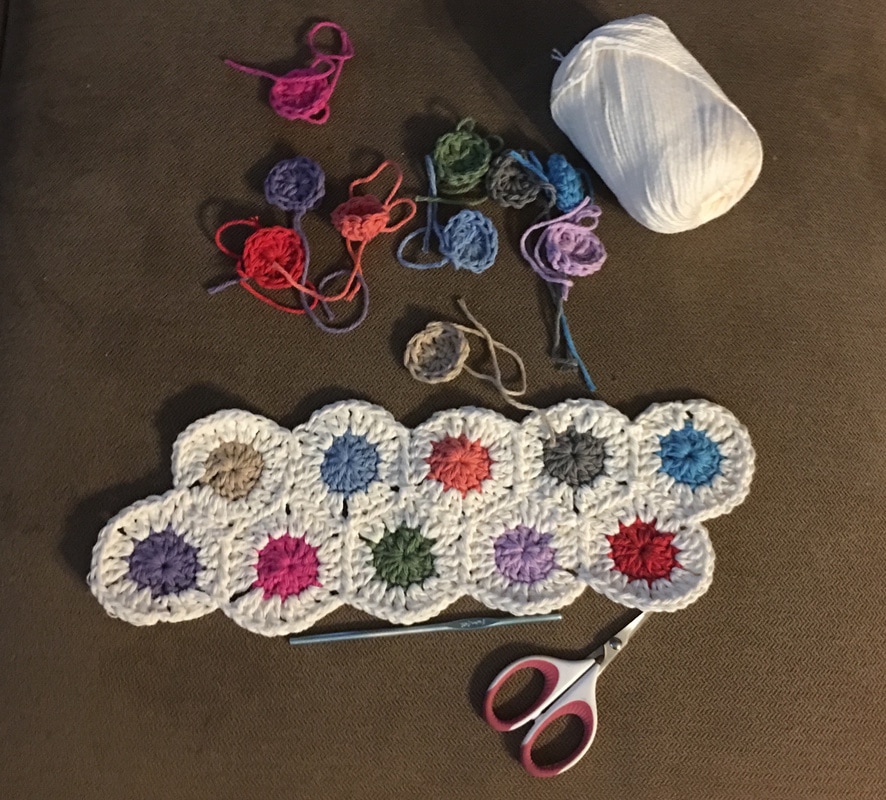
Make the Spots:
You need a total of 29 spots for each placemat Using scrap yarn...
**HINT: I just make 6 of every color this is enough to make 2 placemats with a couple left over.
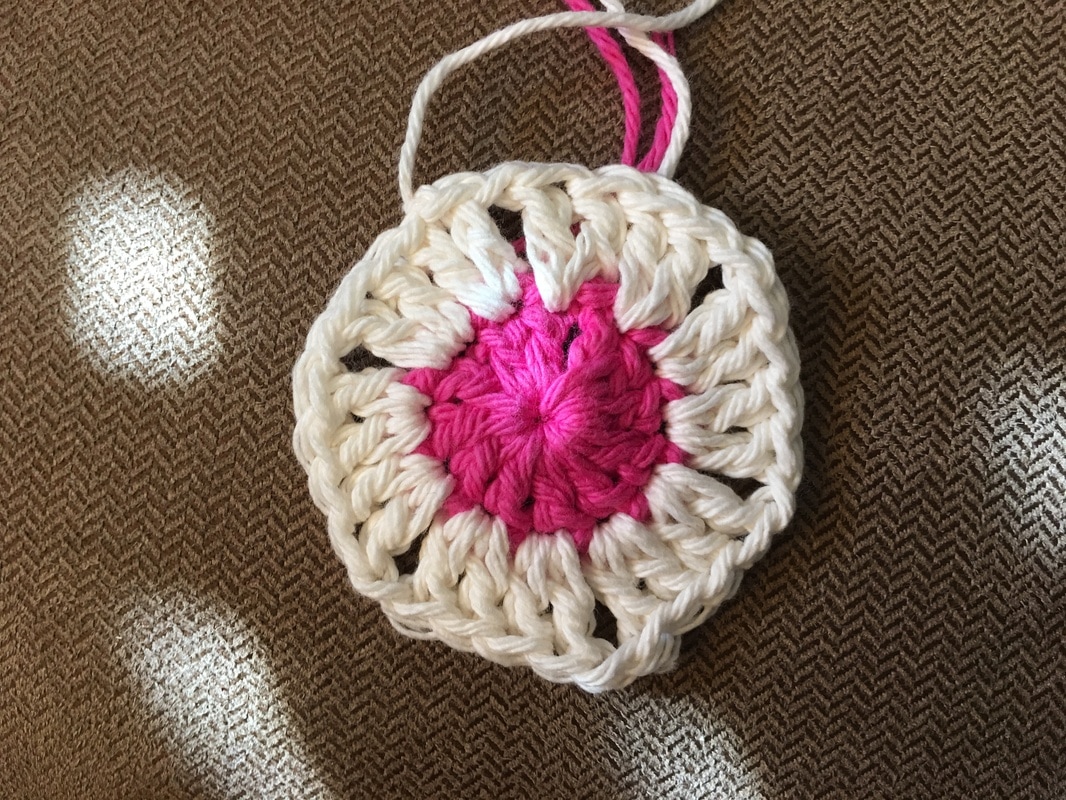
Complete First Spot:
Using your background yarn....
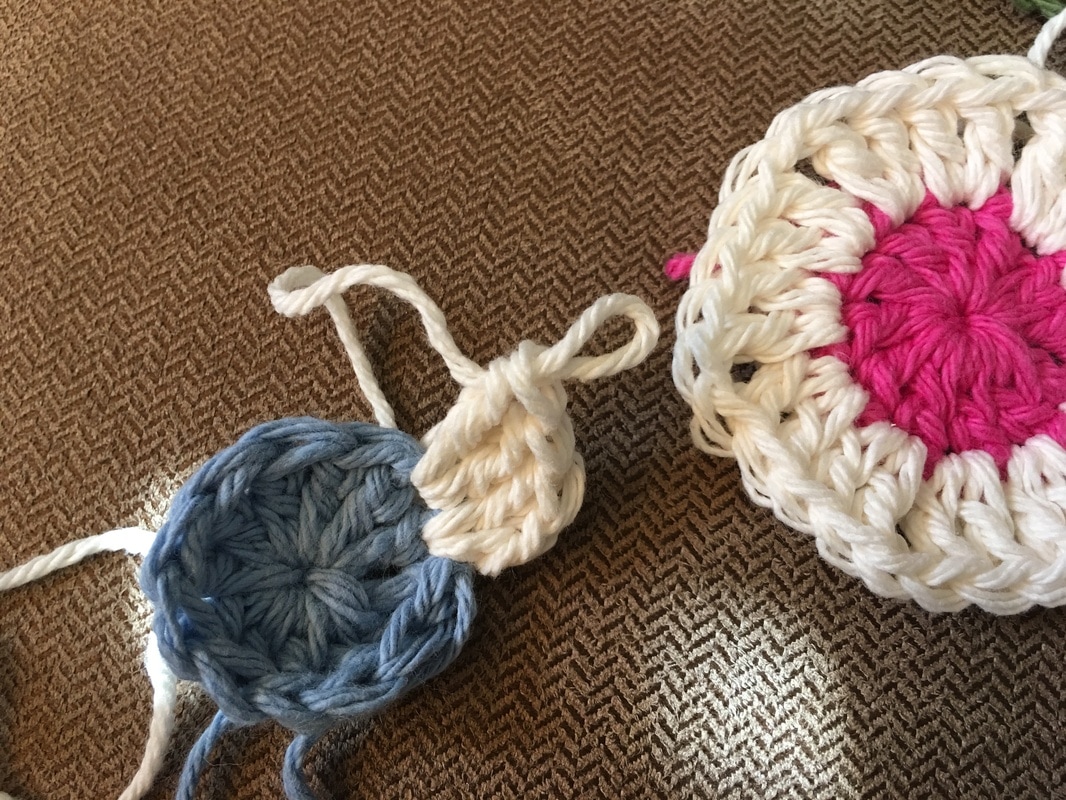
Add Second Spot:
Using background colored yarn...
Add Third Spot:
Continue to connect more spots..
Crochet the Border:
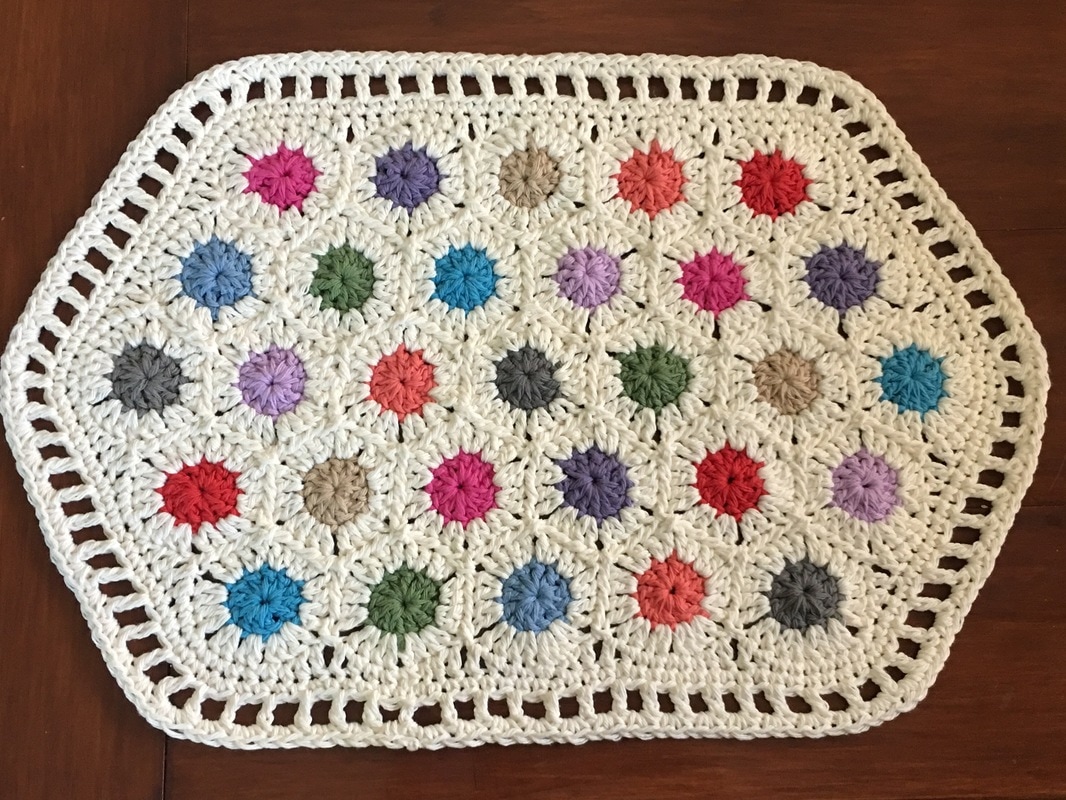
Add the border!
It's beautiful! And it is for me...yes, I have finally made something for myself. Well, it is made with leftover scraps of yarn after all :-) How could I possibly give it away?
Thanks for visiting! Follow me on social media or sign up for e-mail to stay connected. Sincerely,
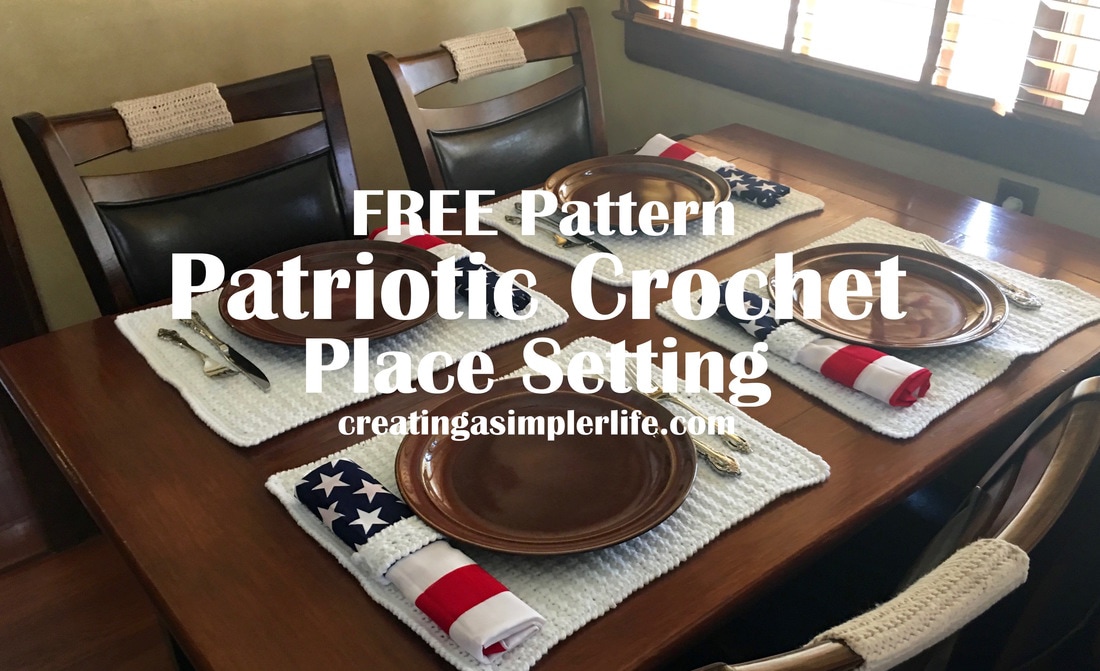
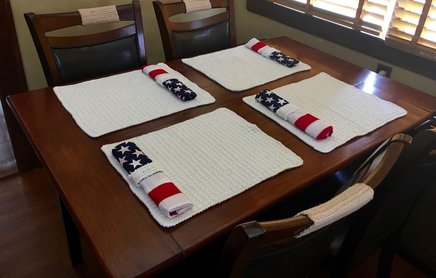
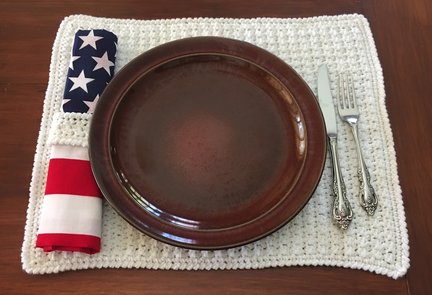
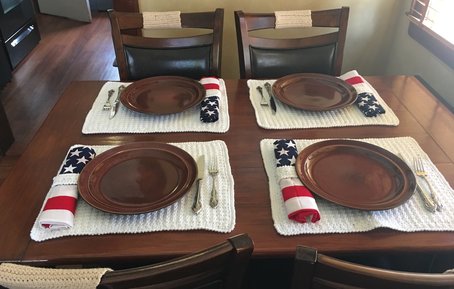
Fourth of July is fast approaching so why not celebrate your love for our country by setting your table with this simple crochet patriotic place setting?
This setting was a promise made to my cousin Peggy during last years annual Family Fourth of July Barbecue up at my parents place on Schroon Lake in the Adirondacks. I made a promise I would make her a set, and I kept it! Oh yeah, they were exactly what she wanted and she loved them!
Supplies:
Makes 4 Placemats and 4 Napkin Rings *Affiliate links
Directions for Placemat:
Placemat Border:
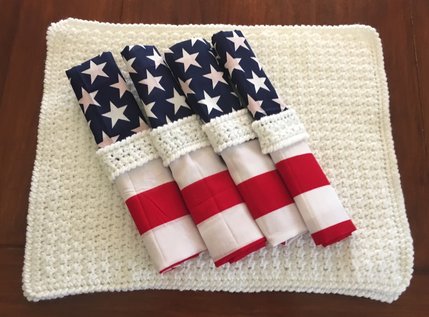
Directions for Napkin Rings (4):
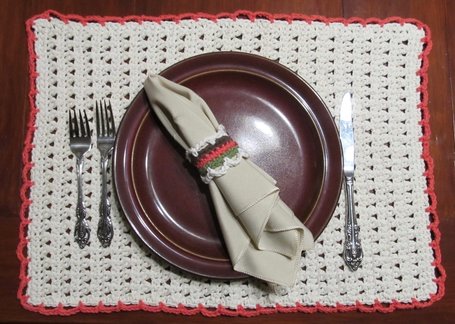
Check out our other FREE placemat and napkin ring pattern here! See picture below.
Thanks for visiting!
Check out our other FREE crochet patterns available on this site and greats ideas and patterns on our Pinterest page at Crochet Only and Crochet for the Kids and Grandkids. Sincerely,
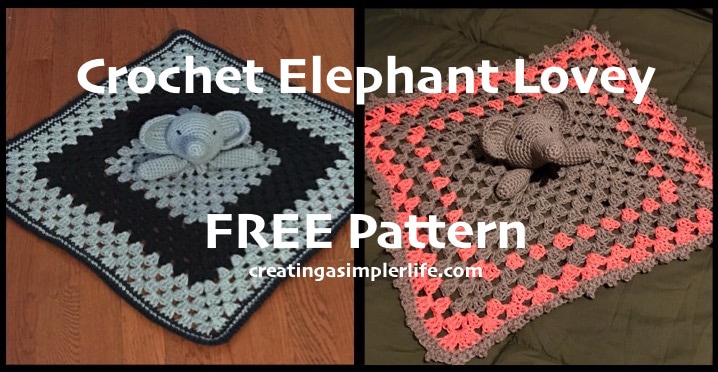
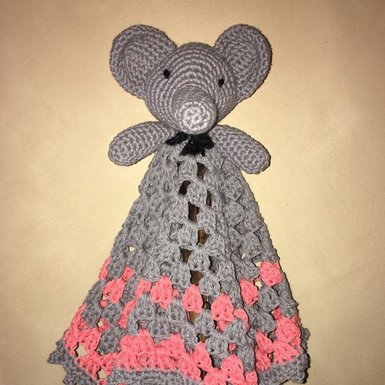
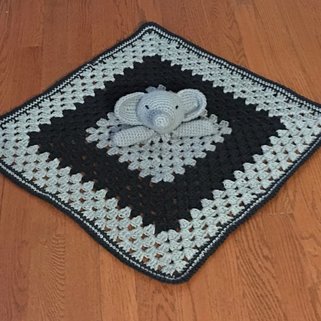
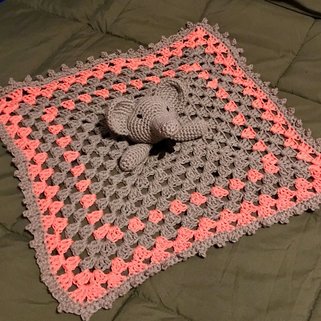
We have previously shared our FREE Elephant Lovey pattern and it has been one of our most pinned pins on Pinterest! We continue to use the same basic pattern but we are sharing it again because we have changed up the blanket a little! T's the same ole' head, ears, and arms, with two new and different blanket options! I don't know which one I love more!
Supplies Needed:
*Best price I can find for the Sugar'n Cream yarn is $1.99 for a 2.5 oz skein at Michaels Craft Stores. Even better if you print out and use their coupons each week - I print two coupons and bring my husband (They almost always have a 40% or 50% off one regular priced item!). 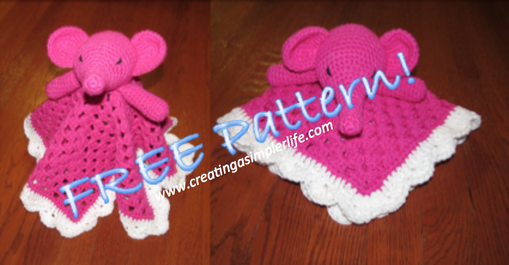
Picture of our Original elephant Lovey is a link to the FREE pattern!
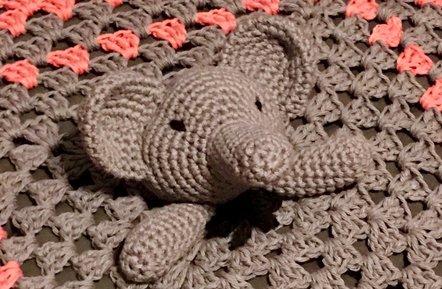
Make the Head and Nose:
(I strongly suggest reading all the directions first and then watching the video tutorial if this is your first time making a ball shape). YOU WILL BE MAKING THE NOSE FIRST:
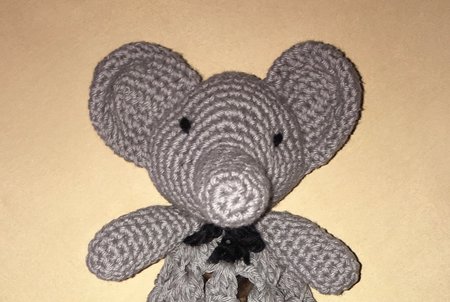
Make the Ears:
The ears are worked from the outside of the ear toward the head in sort of a double layer that will be sewn together at the end....look at the picture to get a better idea if you do not understand. If you still need help check out the Elephant Ear Crochet Tutorial Video I made on You Tube. It's not the best but hopefully it will help!
This was my first time making a crochet video so it's not the best but I tried!
Sew on Eyes:
Make the Arms (optional):
Make the Blanket:
This is a basic granny square blanket. If my directions are confusing, check out this granny square video tutorial. The final blanket is approximately 18" x 18".
Adorable!
Finishing:
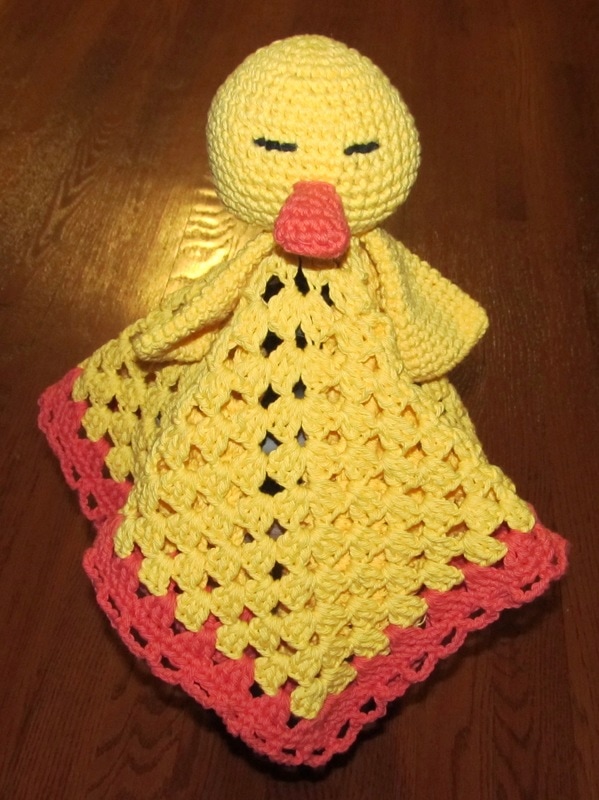
More FREE Lovey Blanket Patterns!
Click on each picture - they are links to patterns :-)
Check out the our other FREE crochet patterns here!
Also check out the many crochet project patterns on our Pinterest Boards Crochet ONLY and Crochet for the Kids! Thanks for visiting! Sincerely,
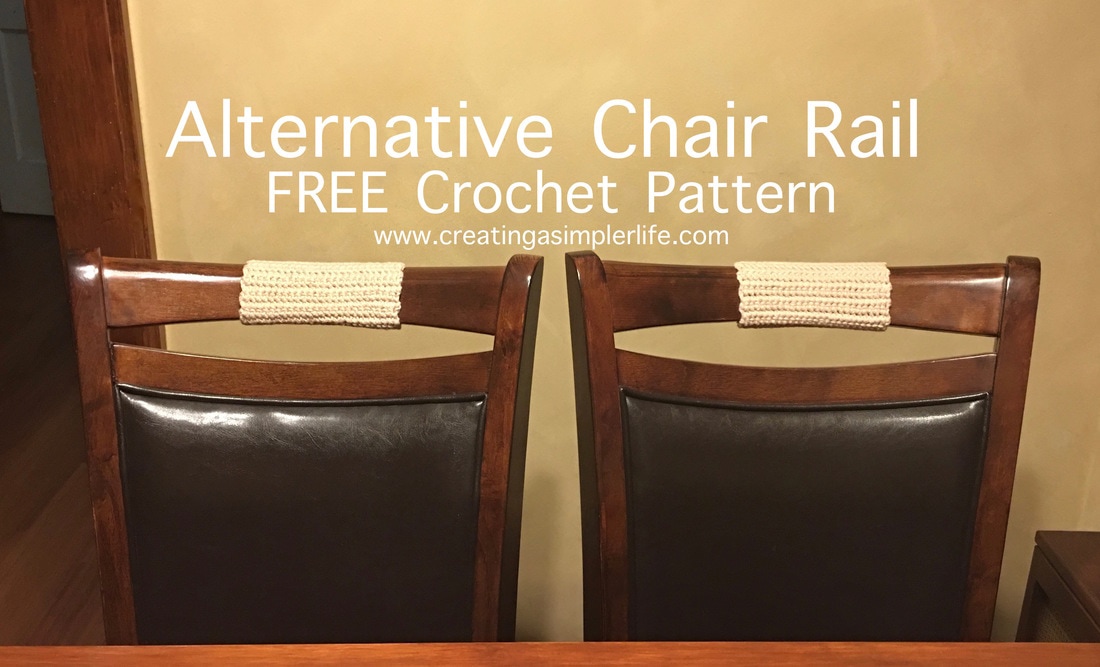
Our new chairs were ruining the walls behind them. We have a very small eating area and it was inevitable that the chairs would hit the walls no matter how careful we were. Since it is such a small and awkward area we knew it would take some effort and expense to actually put up nice matching wood chair rails so we needed something else that would work almost as good in the mean time. Hence my crochet chair rail alternative!
It is simply a crochet piece that is sewn directly onto the upper part of the chair back. Of course this won't work for all chairs, there has to be a way to secure it. For my chairs pictured I simply used the same yarn with a needle and sewed them right onto the chair. Super simple and they are working out great! Goal of protecting walls achieved :-)
Supplies:
Directions:
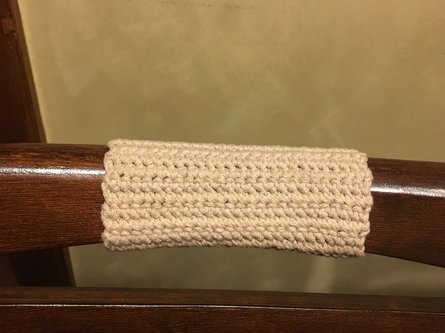
Close up view!
Super simple and serves it's purpose well.
I also really like the way they look! Please follow us on social media! Sincerely,
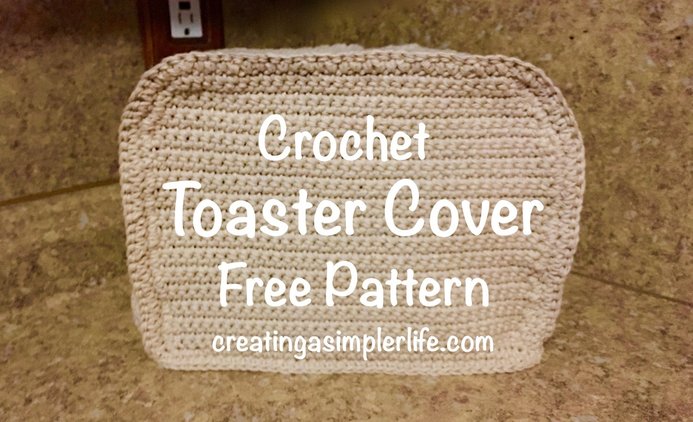
I was cleaning the kitchen last Sunday and noticed how yucky the toaster looked on the counter. Of course I immediately decided to put a cover on it, I just didn't know what kind. After some searching Amazon for something that I liked, I decided to just use some of my leftover yarn and make my own. I tried to find a pattern online, but I didn't find anything simple enough and you know that if it's not simple then it's not for me! I know this picture doesn't do the cover justice, but believe me it is a major improvement over simply having a toaster sitting on the counter and it absolutely looks better than the toaster alone collecting dust in the corner.
This pattern depends upon the size of your toaster, but mine is a two slice Oster (see affiliate link at bottom of post). The cover is a little larger than necessary but this is because I plant on getting a bigger toaster with 2 slide wide mouth and longer slots to fit Rye bread some day. Nothing like planning ahead! Supplies Needed:
Directions for Center Piece
Directions for Sides - Make 2
Joining
Is it perfect? No...but it's exactly what I wanted :-)
Simple to make and looks much better in person! I promise :-) Check out our other FREE crochet patterns! We also have several boards on our Pinterest page. Thanks for visiting. Sincerely,

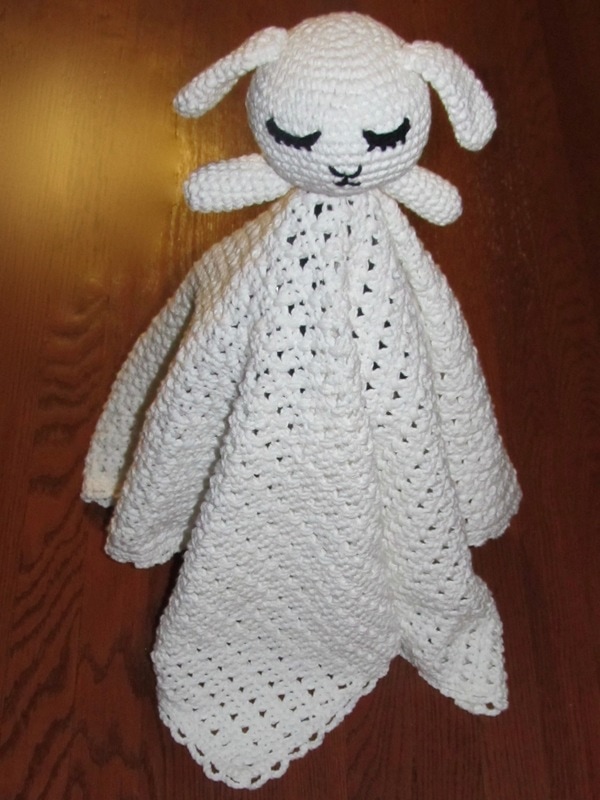
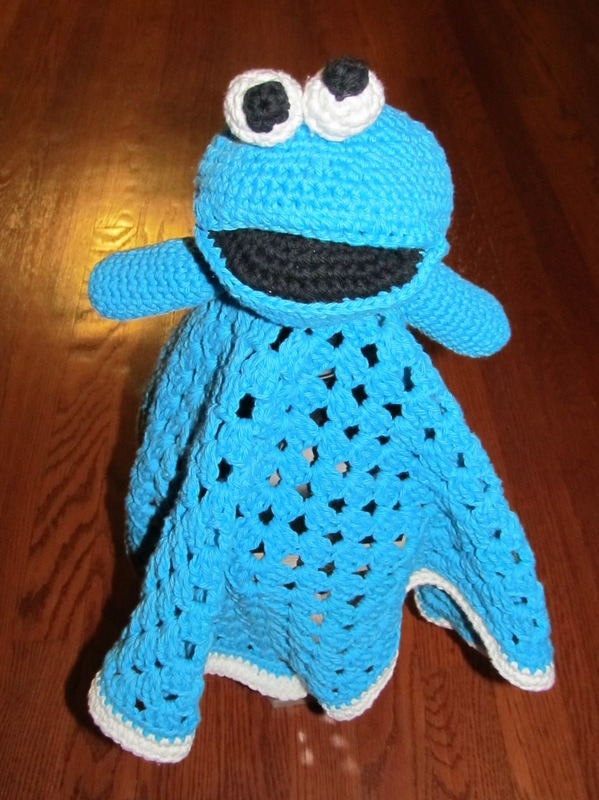
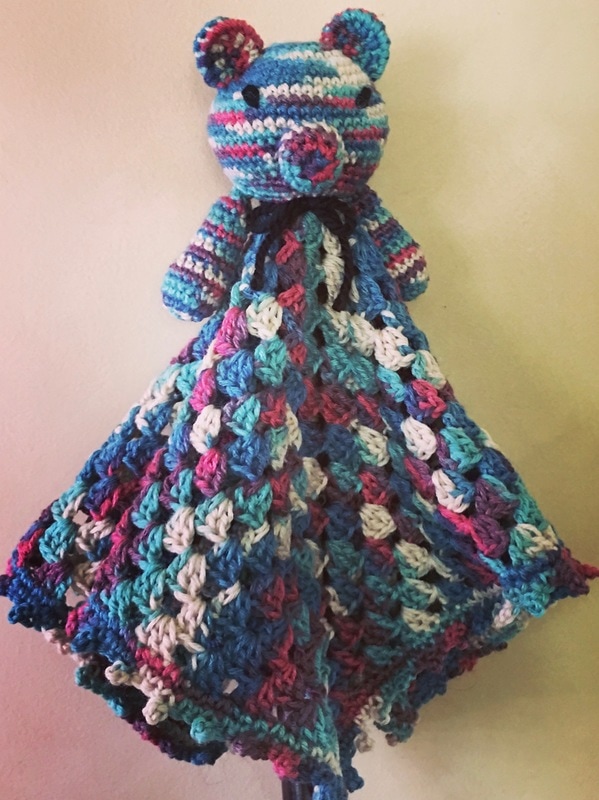
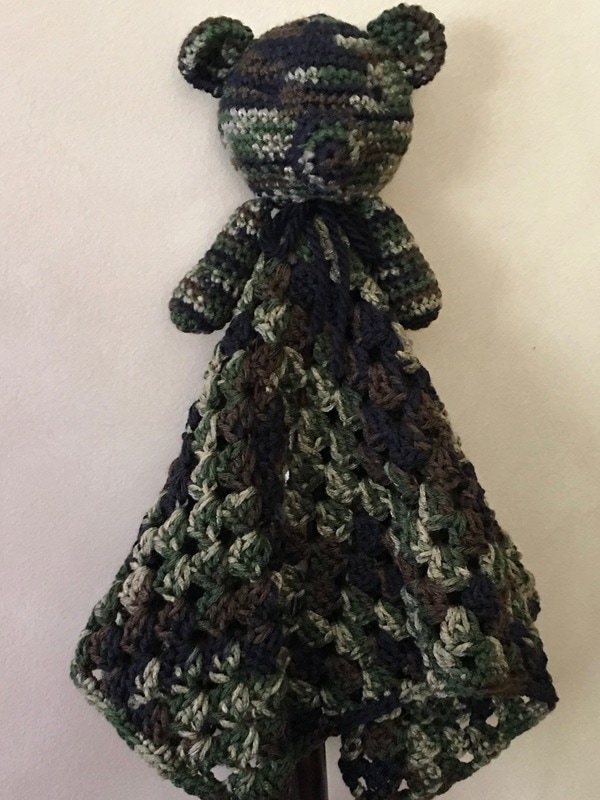
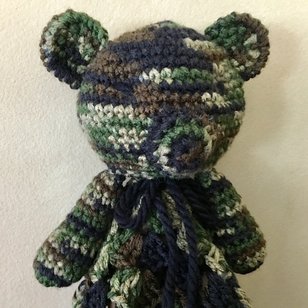
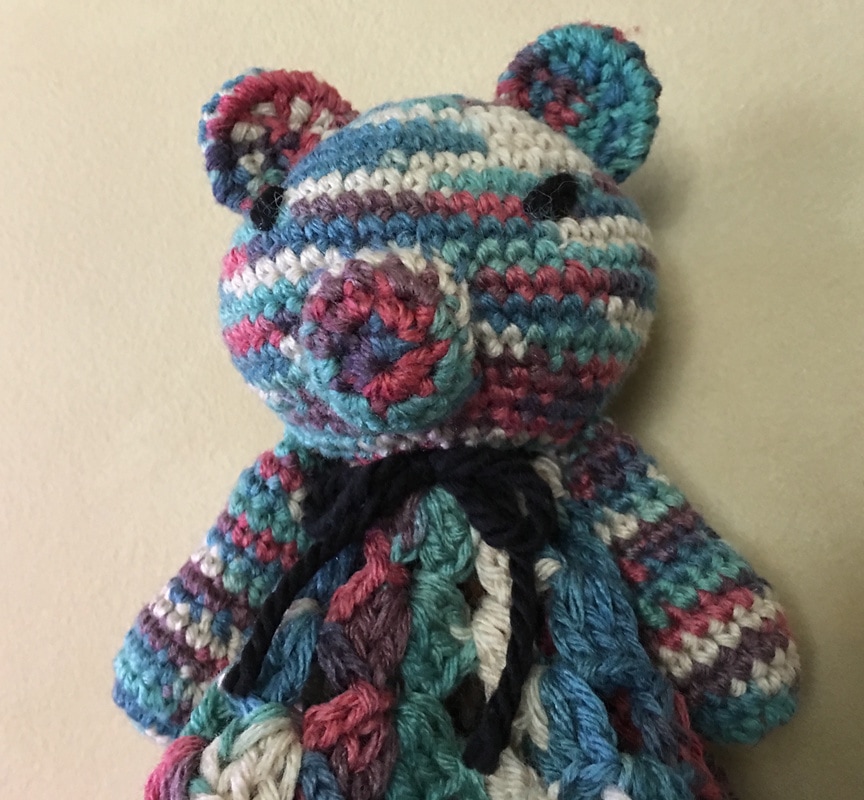
Who doesn't love a lovey blanket? They make great gifts for newborns and are sure to be their absolute favorite!
This little lovey was inspired by my niece who 'was' expecting - and just recently gave birth to - my first great nephew! After making an adorable crochet camo infant bear hat (free pattern here) for her I decided to make a matching bear lovey (I had so much leftover yarn!). And then since I had some different leftover yarn from another project I decided to make one out of that too!
Supplies:
Make the Head: (I strongly suggest reading all the directions first and then watching the video tutorial if this is your first time making a ball shape).
Make the Nose:
Make the Ears:
Make the Arms:
Sew on Eyes:
Make the Blanket:
This is a basic granny square blanket. If my directions are confusing, check out this granny square video tutorial. The final blanket is approximately 18" x 18".
Finishing:
Thanks for visiting :-) Check out the our other FREE crochet patterns here! Also check out the many crochet project patterns on our Pinterest Boards Crochet ONLY and Crochet for the Kids! Sincerely,
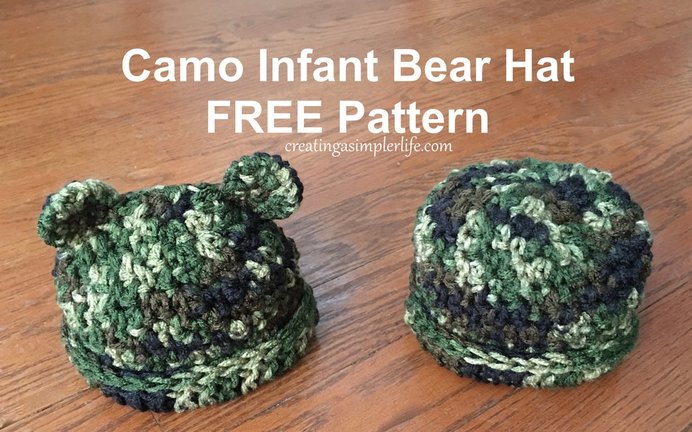
My niece is expecting! I couldn't be happier to become a great aunt! Little Bobby should be arriving this April and everyone in our family is so excited. As with most young mothers to be, my niece is already planning on having his newborn pictures taken by a professional. This is such a special event that it is planned out well in advance. In fact, the photographer has everything except the hat! And that brings us to this extra special FREE crochet pattern.
My niece texted me a picture of what she wanted the other day, asking if I could possibly make one for her. Of course I said yes and after several attempts at crocheting a cute little camo infant hat I finally settled on the pattern you see above (my other attempts are in the photo at the bottom of the page). I liked this one the most because you can't easily see the crochet rows making it look more like camouflage. This however does make the pattern a little more difficult. You really have to pay attention and count the number of rows as you crochet because going back and figuring out where you are is too difficult. The good news though is that you can finish the whole hat pretty fast! Definitely under an hour and it looks great with or without the ears :-) I look forward to adding a picture of my new great nephew wearing the hat after he is born!
Supplies:
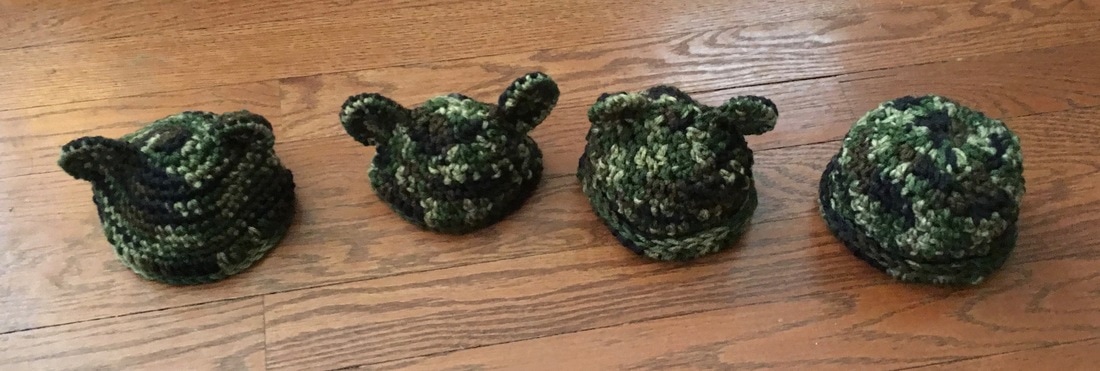
Trial and error until I came up with a pattern I liked!

The hat is perfect on my sweet nephew :-)
Enjoy and thanks for visiting!
Check out all our other FREE Crochet Patterns and follow us on social media :-) Sincerely,
|

Hi there! I'm Kathie, the author behind Creating A Simpler Life blog. I'm excited to share our longterm projects (and planning) toward building our future retirement homestead in the Adirondack Mountains of New York. In the meantime I will be sharing all the other little things we do that are part of creating our simpler life!
Categories
All
Archives
July 2020
|


 RSS Feed