Blog
A little bit of anything and everything that's part of
creating, enjoying, and living a simpler life!
creating, enjoying, and living a simpler life!


Both recipes are oh so simple...seriously.
For dinner on a work day I will simply throw three to four chicken breasts into the crockpot and pour some barbeque sauce on top. Turn it on slow cook and when I get home from work it smells delicious and is nearly ready! All I have to do is pull the chicken apart using two forks, throw it back in the pot and serve it with some fresh rolls and coleslaw (check out my recipe here). It's delicious, stress free, and can be eaten for days on end ... if there is any left! And the dump cake has been around since, well, forever. I think there are even recipe books that go back to the 70's. The ingredients last a long time in the closet so once you buy them so they can always be there if you need a simple last minute desert! And did I say delicious? Of course I did. The 'cake' can be made using apple pie filling, cherry pie filling, or any other kind of pie filling you can think of! It's also simple to split the recipe in half as I did recently for Christmas. I used one can of cherry pie filling and added about two handfuls of frozen blueberries. I used half the box of cake mix and half a stick of butter and it was a perfect desert for four people! A scoop of vanilla icecream on top makes it even better! Click on the button below the recipes to download the pdf file and print one sheet of 8 1/2 x 11 cardstock paper. Then cut out each of the 4 x 6 inch recipe cards. They always come two recipes per sheet in an effort to not waste paper! Visit my Recipes Page to view or print out previous recipes (pdf files) or to download a FREE 4 x 6 Recipe Card Template (.dox file) for your own recipes! You can also check out my past Recipe Blog Posts here or visit my our Recipes Pinterest Board. Enjoy! 
FYI: there are always two recipes because I do not want to waste paper!
Thank you for visiting! Please 'like' us on Facebook or join our mailing list so you never miss out on a blog post! Sincerely,
0 Comments
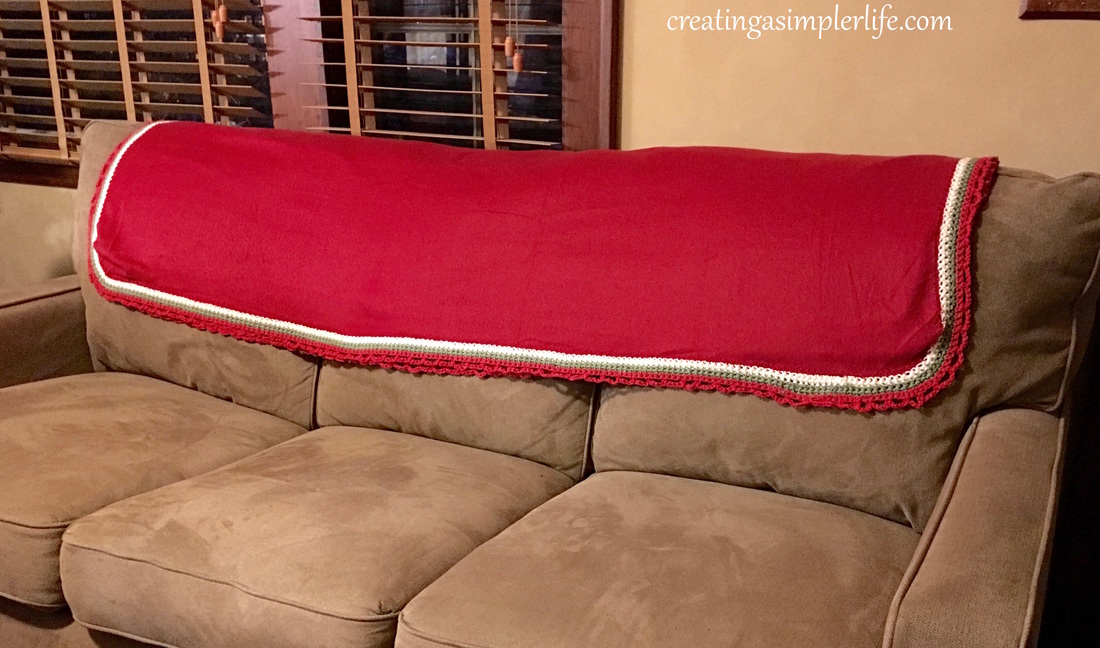
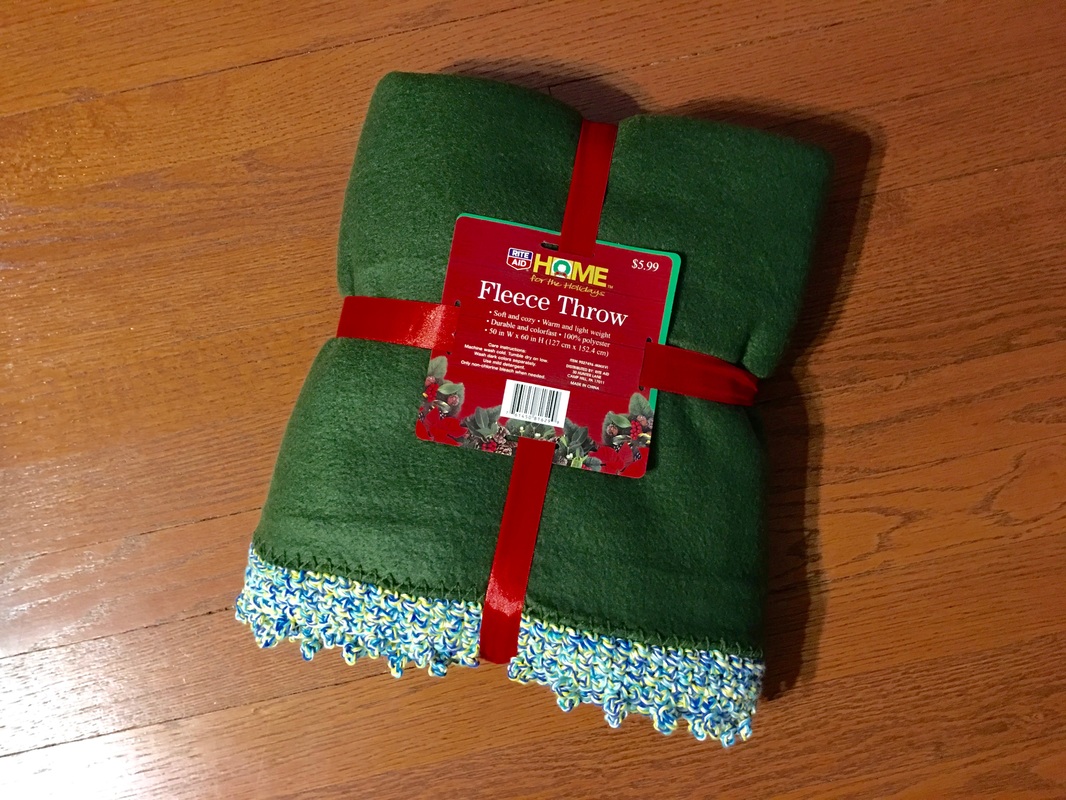
Need a simple heartfelt last minute gift? Then this is perfect! Want a nice throw for the holidays? Then this is perfect too! The fleece blanket is sold by Rite Aid and is very reasonably priced. And of course, if you are like me, you don't buy anything for the marked price....you wait until it is on sale! These fleece blankets were not only perfect to crochet a border on, but they were a great deal at 50% off!
What makes them even better is the fact that they already came with a stitched edge that was so easy to just start crocheting into and around. I simply crocheted a single crochet border around all sides, adding a few extra stitches at the corners. This blanket was 2 single crochet rows of cream colored cotton, 2 single crochet rows of green cotton, 1 single crochet row of red, and finaly the last row was 1 single crochet, chain 5, skip 2 and single crochet again. The same pattern was repeated around. So simple, and really so nice! 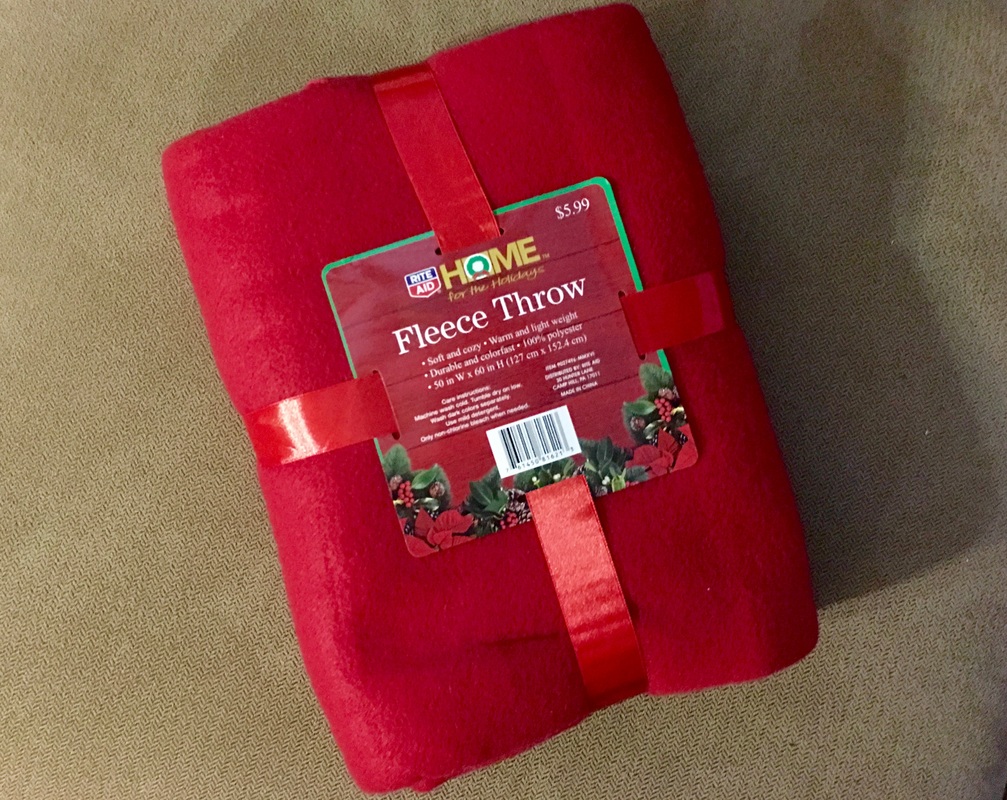
$5.99 regular price...$2.99 at 50% off!

Comes with the stitching around the edges! A huge time saver...you can just start crocheting into the stitches!
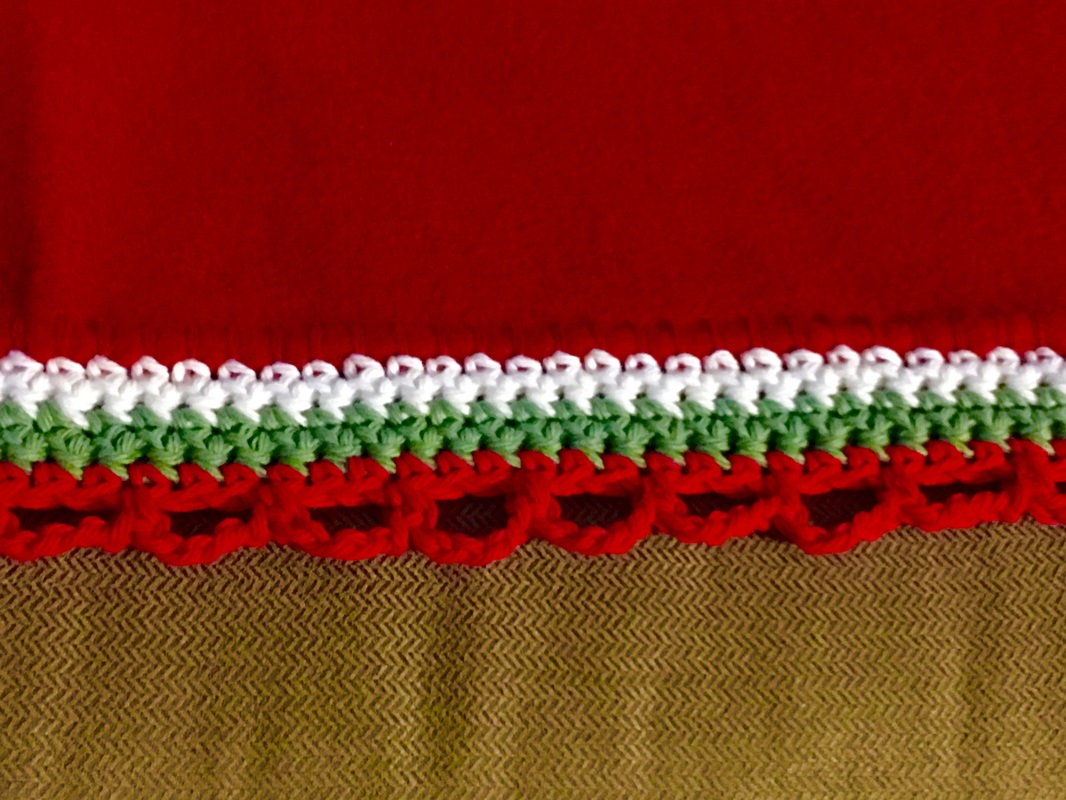
Finished edge: 5 rows of single crochet and a finished edge of 1 sc, chain 5, skip 2 and sc again.
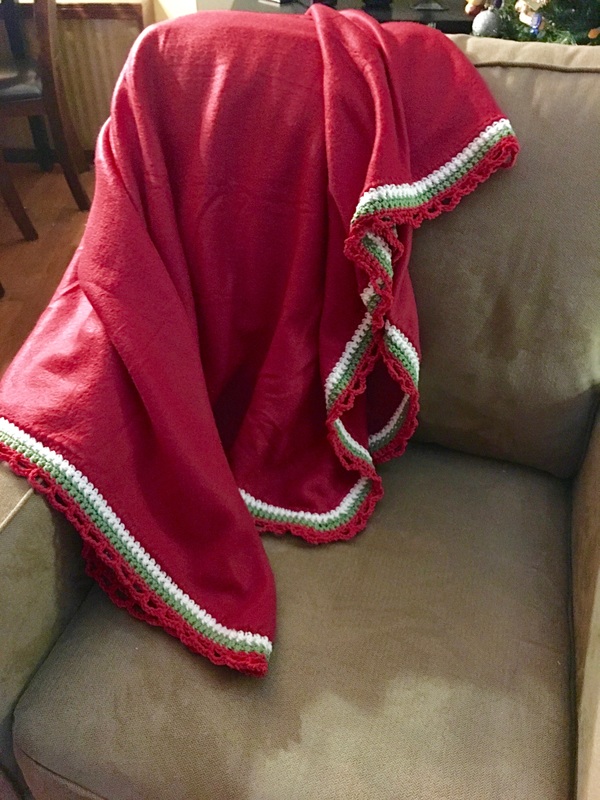
Makes a great throw for the holidays :-)
Alternate colors and repackaged to give as a gift. I want to make a new label to wrap it with that says "Hand Crocheted Border"
Merry Christmas and Happy New Year!
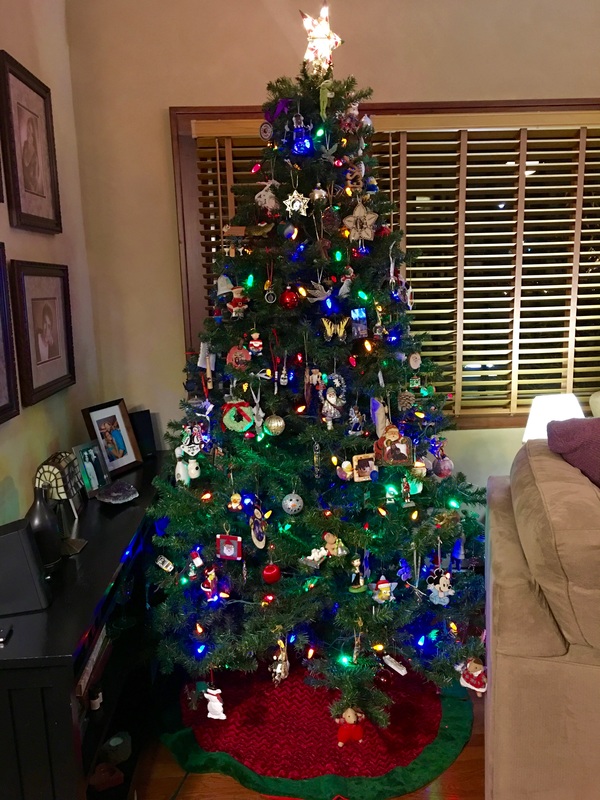
Check out our Christmas Stocking Post - they match the red throw I made for our couch above! Thanks for visiting:-) Please follow us on soical media and sign up for e-mail below! Sincerely,
Three choices for Christmas trees:
Fresh cut - as good as dead, but can be useful in some ways Balled - a living tree with balled roots that is planted after Christmas Faux - can be purchased with or without lights on & lasts practically forever 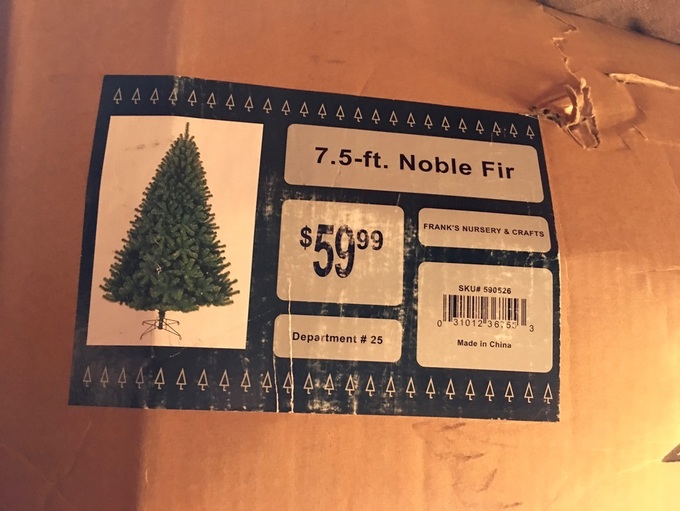
I know, theres nothing like the smell of a fresh cut Christmas tree but I don't like the idea of cutting down and killing a perfectly good tree just to throw it away after the holidays. If I had a use for it and it wasn't going to go to waste, well then I might feel differently. Or maybe not.... For many years we purchased a living tree with the root ball and all. We would plant it after Christmas and after a few years we had a nice border down the side of the yard. That was when we lived on a large piece of property and had lots of room to plant. Now we don't have the room, or need, to plant a living Christmas tree so a fake, or faux, tree it is!
After Christmas about 14 or so years ago I was checking out the holiday clearance at Franks Nursery (when it was still here) and there it was: the beautiful 'fake' tree I would own for longer than I could ever have dreamed. That day I purchased my 7.5' Christmas tree and I can't even tell you what I paid for it, but I know it was worth it! It was the only one left and I couldn't believe my luck. I have been using it ever since and figure I have easily saved close to $1,000 over the years! I really love my artifical tree and as you can see it is still in the original box!
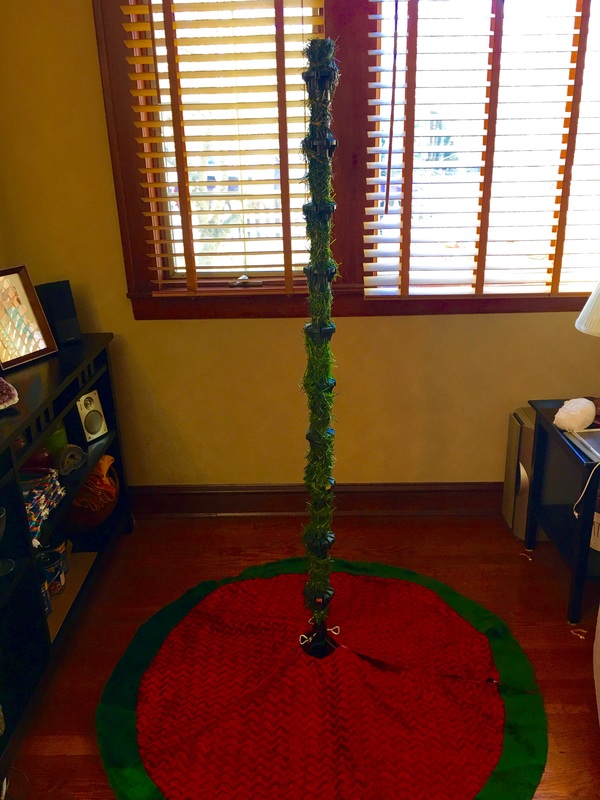
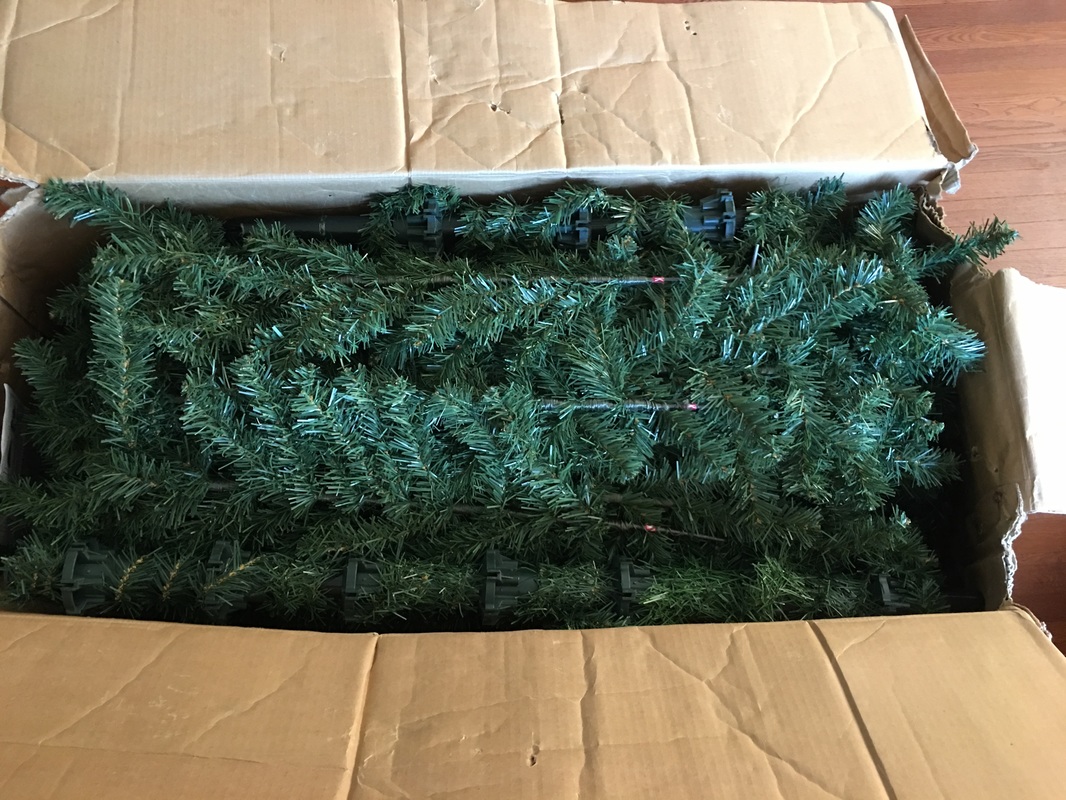
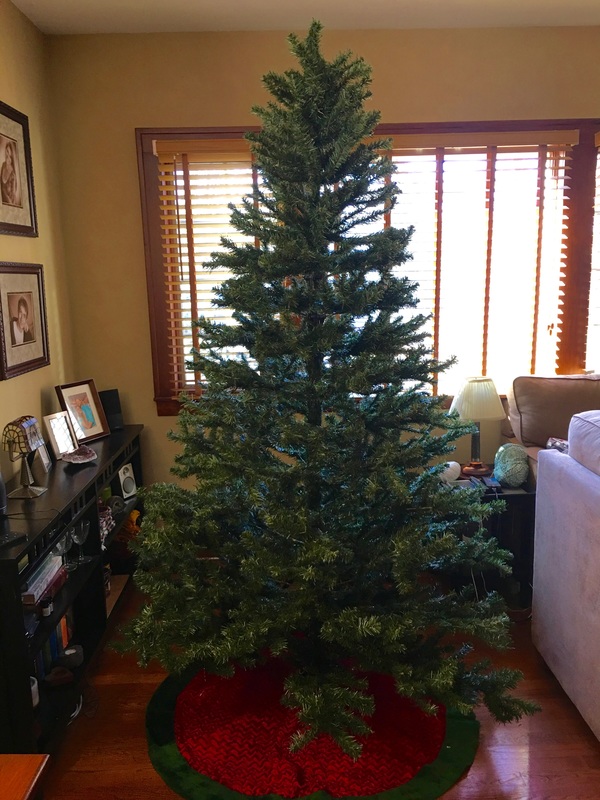
The tree is simple and has no lights on it. The center 'stem' is two parts that connect together and branches that connect around the stem working upwards. The top is a separate piece that goes on last. I fluff out the branches as I go and I think it is perfect! I have put the tree up for so many Christmas' that I don't even need the directions to assemble it anymore! It is plain, and it is simple.
I know a lot of the fake trees available today have lights on them and that this could be a huge time saver (putting on and taking off the lighs can be a hassle), however I am glad my tree doesn't. First, have you really ever changed a bulb on Christmas lights? I have and I can tell you sometimes it's a real pain. Permanent lights on a tree takes that burned out buld replacement to a new level that I am not interested in! With my simple try I like the freedom to change things up. I am not 'stuck' with the same lights year after year, especially if they're not LED's! Traditional white lights with an angel at the top of the tree this year? No problem. A colorful star at the top with multicolored with low energy LED colored lights another year? Easy peasy. I like having the the freedom to change it up every year if I want to and a simple tree with no permanent lights allows me to do this.
Best of all, it's still lookds as good as new every year :-) 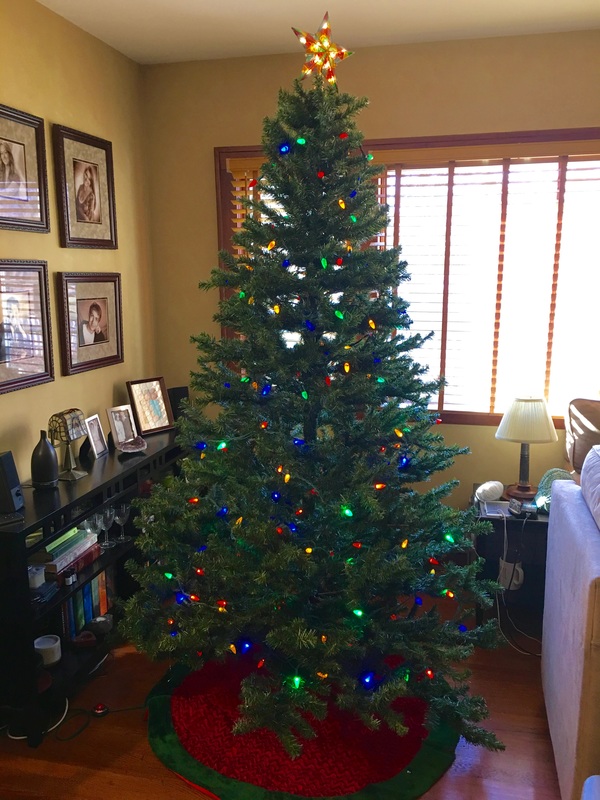
In my opinion the benefits far outweight the negatives.
Super simple, and super worth it!
Thank you for visiting :-)
Check out our social media sites through the links above! Sincerely,
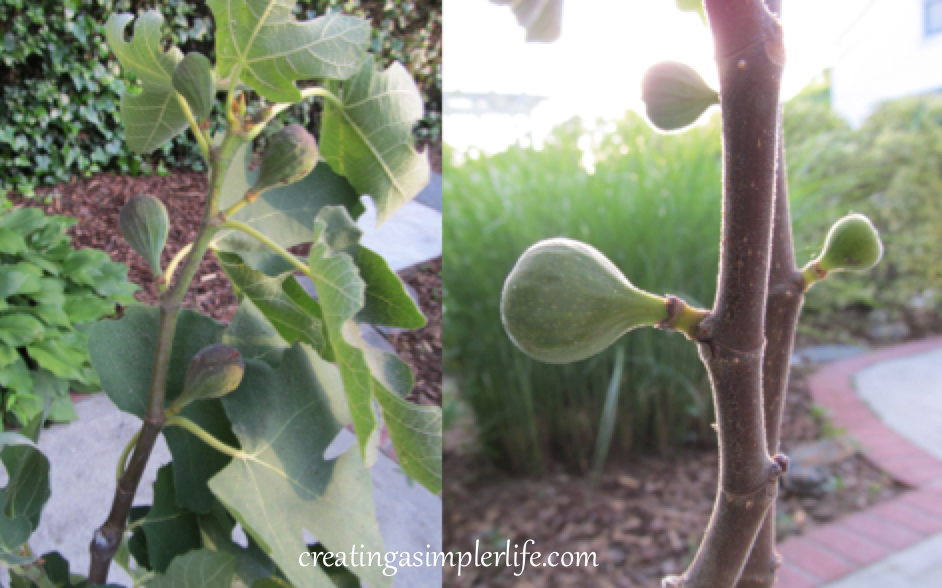
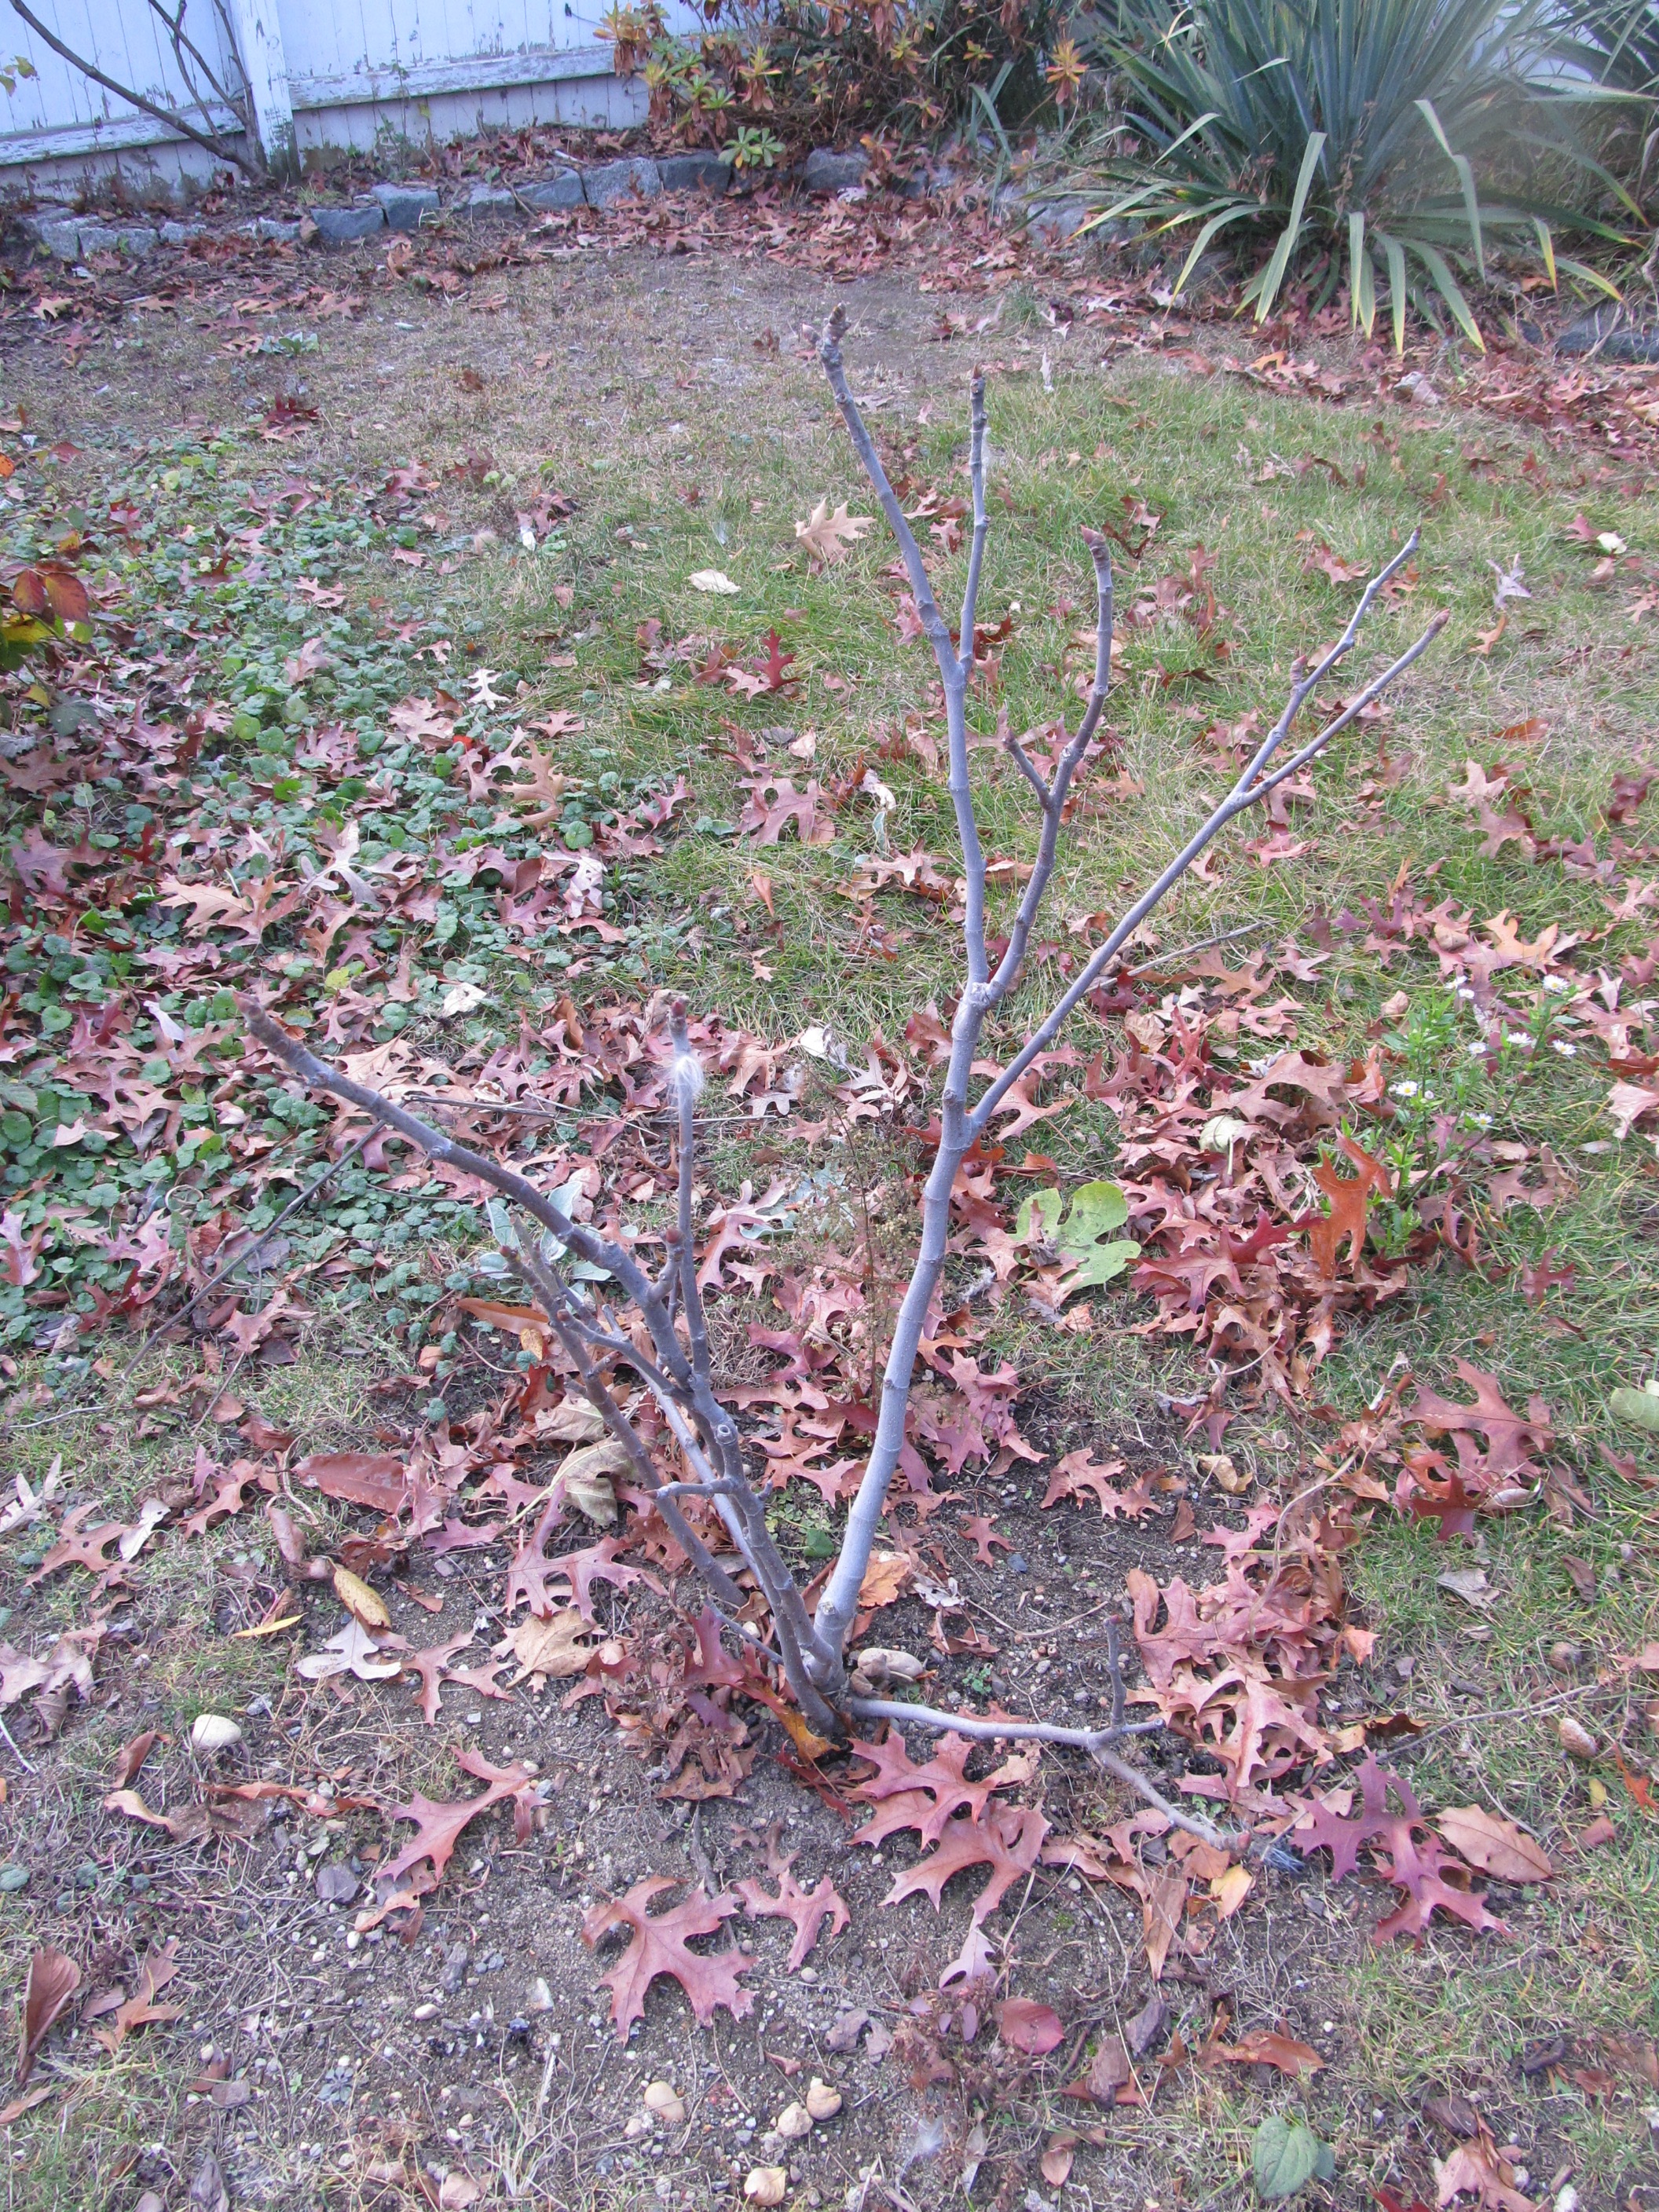
My daughter brought us home a fig tree this summer. After planting it began growing beautifully and even provided us with a few figs! We really want to see this little fig tree grow and produce over the next few years so it is necessary for us to protect it over the winter by 'wrapping' it.
Why wrap it?
What climates should wrap the tree?
When?
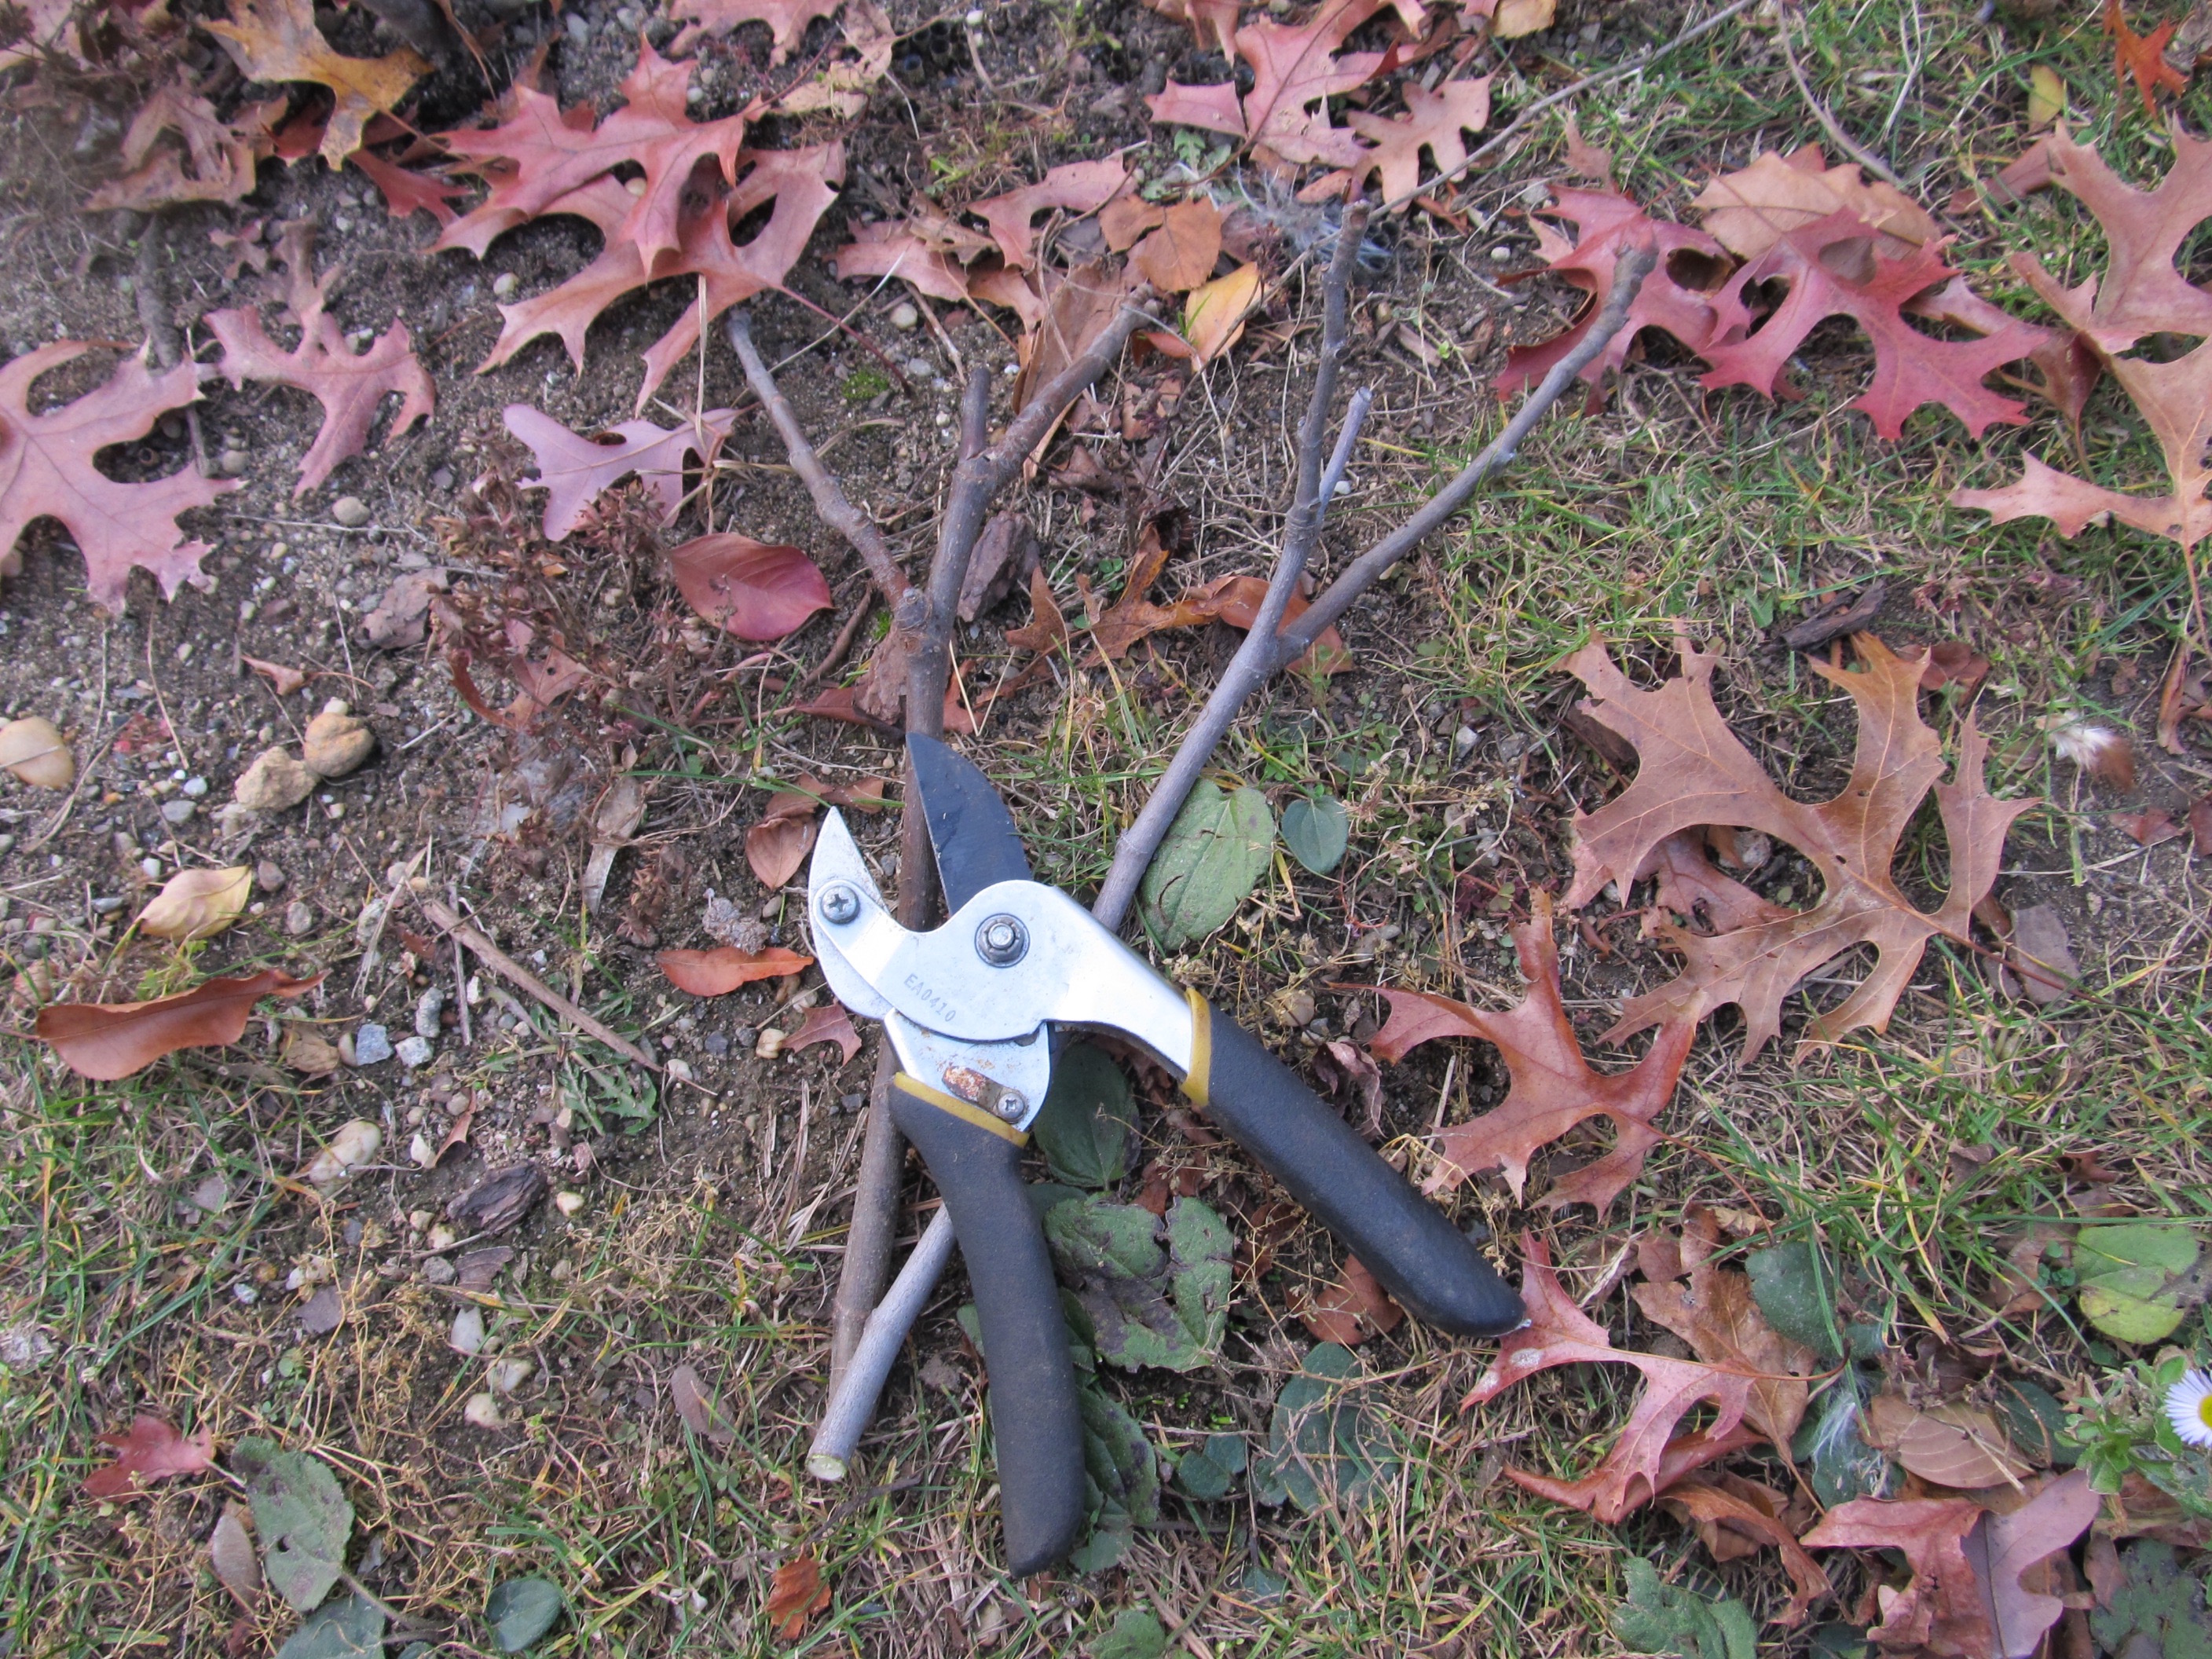
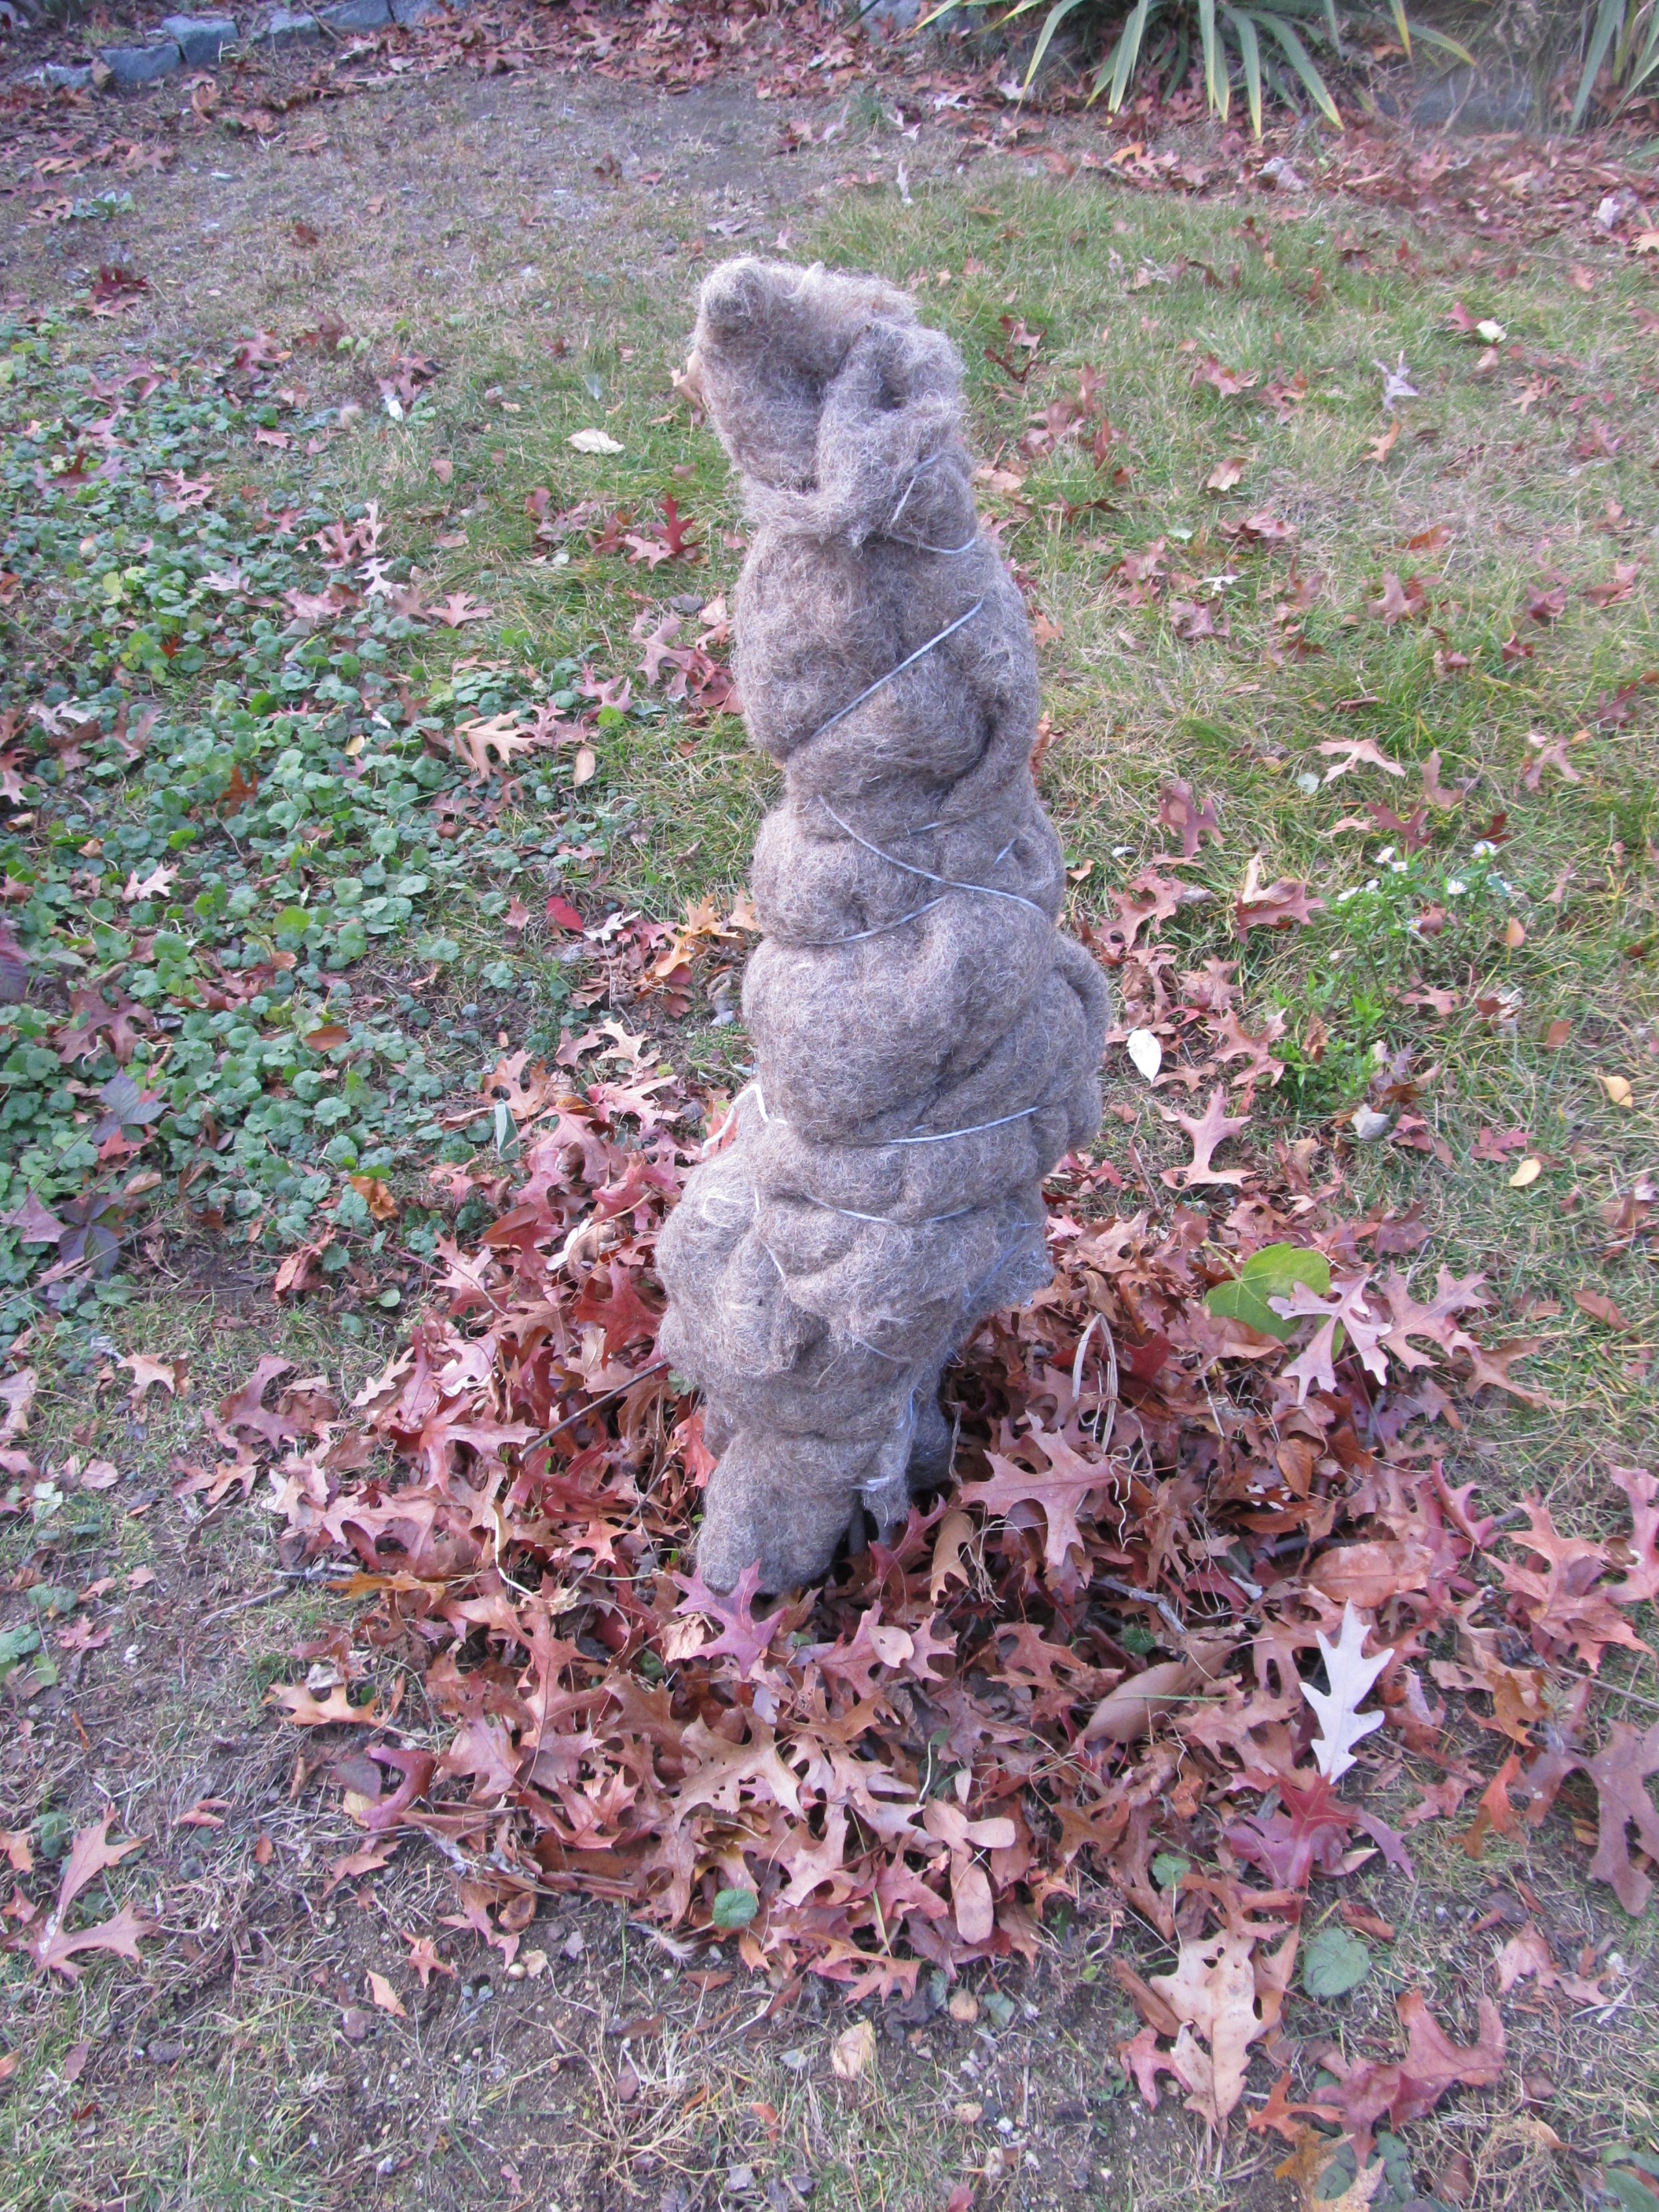
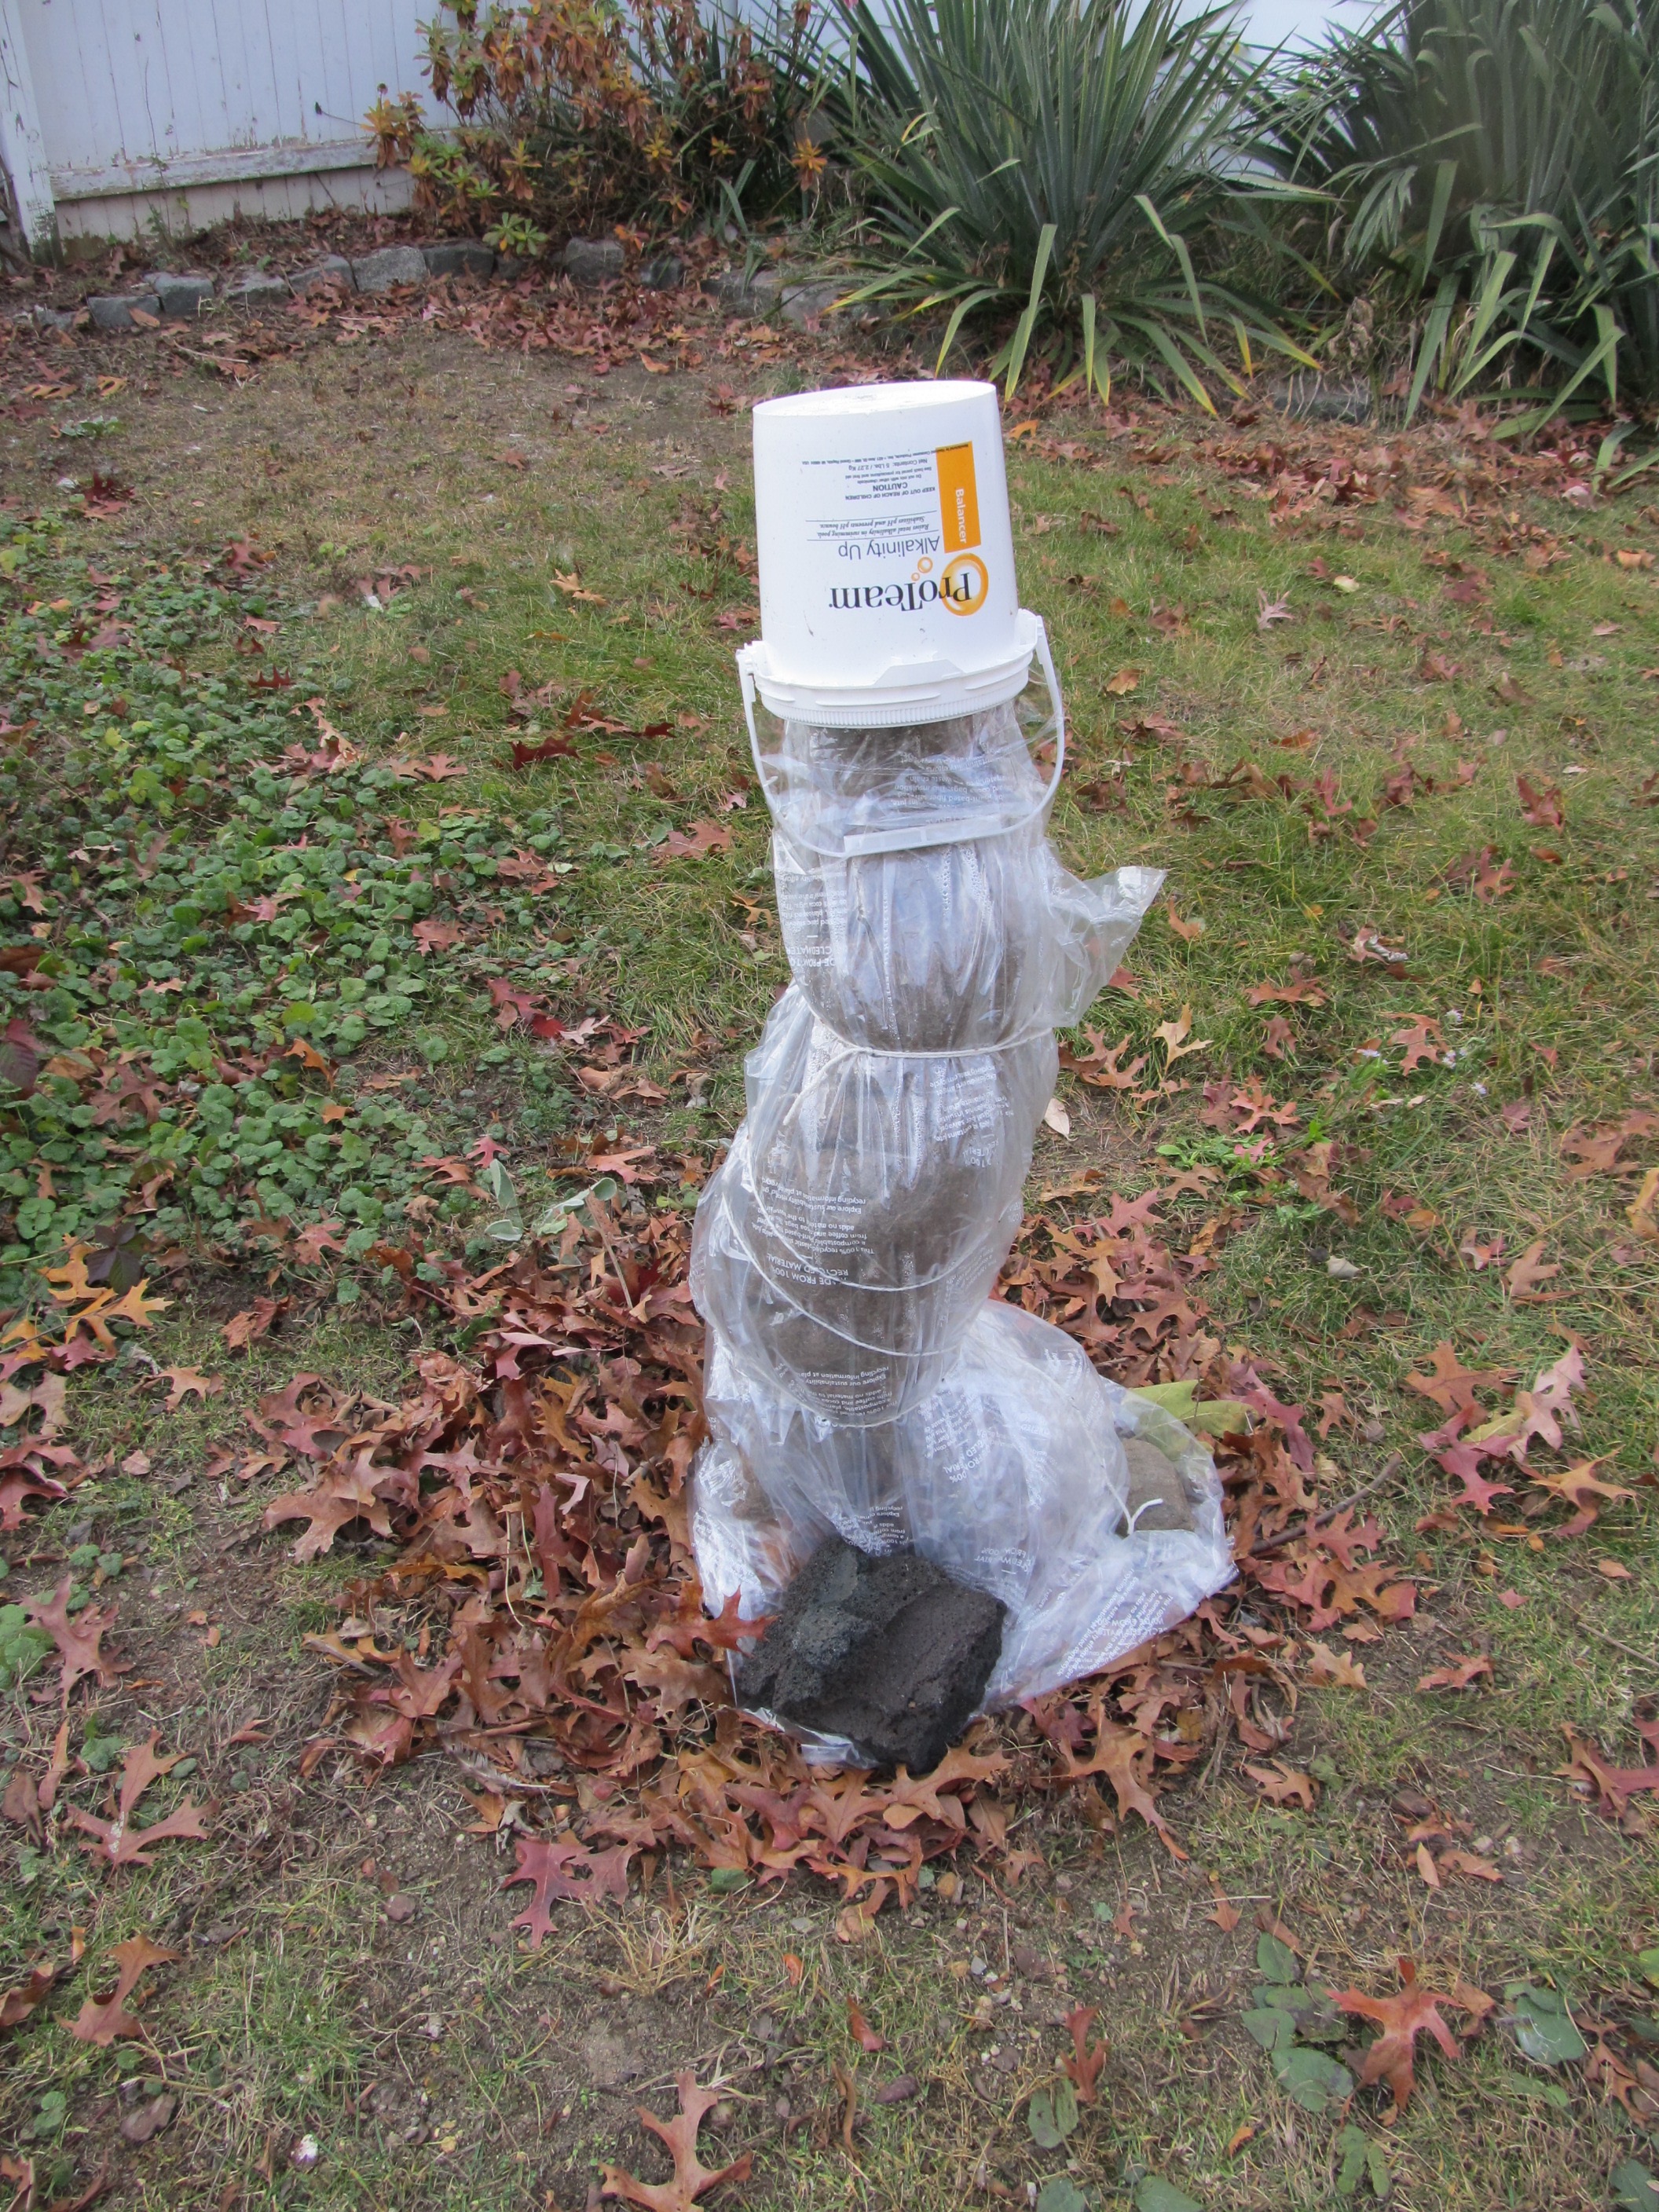
How to wrap it?
In the spring:
Here are some pictures:
Thanks for visiting!
Stay tuned for an update in the spring when we "unwrap' our fig tree. And please check out our social media links above! Sincerely,
|

Hi there! I'm Kathie, the author behind Creating A Simpler Life blog. I'm excited to share our longterm projects (and planning) toward building our future retirement homestead in the Adirondack Mountains of New York. In the meantime I will be sharing all the other little things we do that are part of creating our simpler life!
Categories
All
Archives
July 2020
|


 RSS Feed