Blog
A little bit of anything and everything that's part of
creating, enjoying, and living a simpler life!
creating, enjoying, and living a simpler life!

We have bats. I know for a fact because they have literally flown past my head. This mostly happens ad dusk when we are swimming in the pool. The bugs just love to hover right above the surface of the pool so the bats just love to swoop in and "chomp" on them! I don’t mind though. In fact, I am actually thrilled because with all the mosquito born illnesses being discussed on a daily basis in the news we certainly want to get rid of them. So we welcome the bats because, well, they eat this nasty mosquitoes right up!!!
Think about it. Have you ever heard anything good about mosquitos? I certainly haven't. I just 'googled' the question and the only good thing that came up is that they are part of the food web. Yup, they are good food for birds, fish,frogs and, of course, bats! Their purposes on Earth is to be food for other animals. Sort of the bottom of the food web. So I guess it makes sense that we (humans I mean) do everything we can to either get rid of or to minimize their presence. On a community level they spray neighborhoods regularly where we live. I don't really like this, but even with the spray the mosquitoes are horrible. On a personal level people use all kinds of sprays and lotions, burn citronella candles, buy mosquito zappers, and more. In our yard we make sure there is no standing water, we make natural DIY mosquito repellant (essential oil recipe here), and of course use citronella in lots of places. And now, we finally have a bat house that holds up to 100 bats! But we are not hanging it at our current house, we are hanging it on our future homestead! Yes, that's right, we have decided to hang the bat house on our land in the Adirondacks. We chose to do this because the summer is when the mosquitoes are the worst and last summer when we were working on the land we were literally eaten alive. So this summer we are hoping to decrease the mosquito population by luring bats in the area where we plan to build our house. Check out our video on You Tube of How NOT to Hang a Bat House:
What are the benefits of a bat house?
What are the negatives?
Check out our YouTube video about why you NEED a bat house! Please be sure to subscribe to our YouTube channel for future videos!
What next?
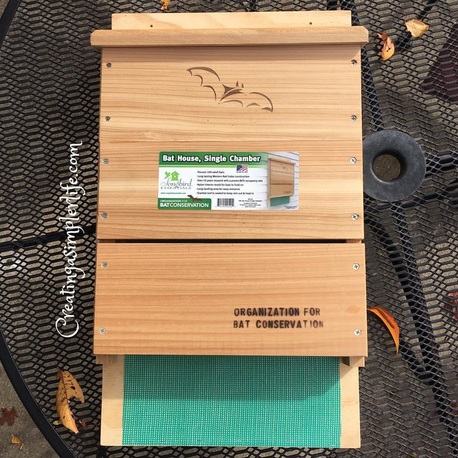
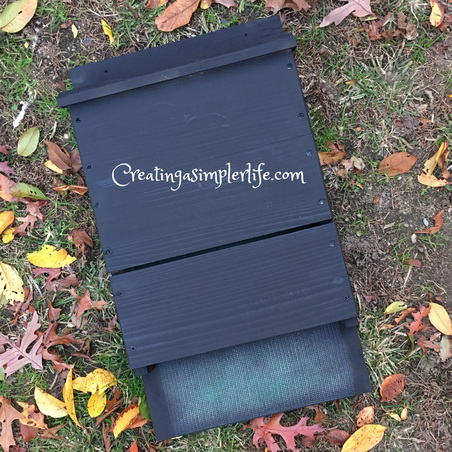
Buy or build a bat house – some links for plans and some links to buy it 1. Build a Bat house with one of these plans: - Single Chambered Bat House by Bat Conservation International - Plans, Tips and More from from the Organization for Bat Conservation 2. Buy a Bat house at this link (same one I have): - Single Chamber Bat House by Organization for Bat Conservation $49.99 Paint the Bat House: Depending upon where you live and the average temperatures, the color you paint it will vary. We painted ours black because of our location. 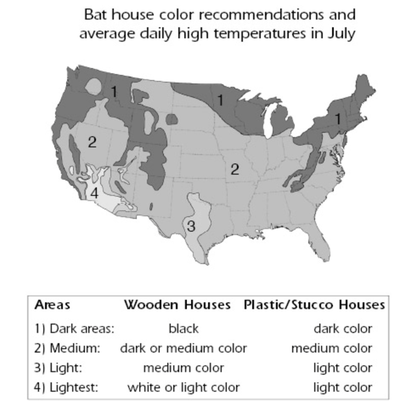
Try to use exterior water based paint or stain paint.
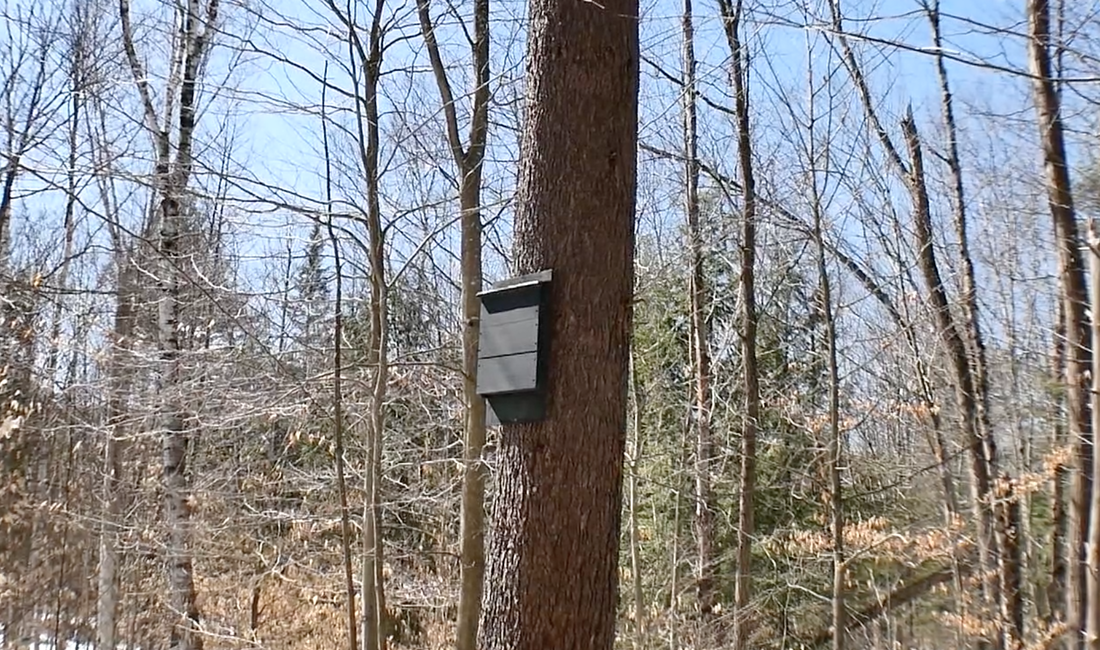
Hanging the Bat House
If You Build it They Will Come....Maybe
"What?" After all that work there is a chance that no bats will move in? This is true, thats a possibility. So here's how to increase your chances of having bats move in:
Update! We have purchased a new ladder (Gorilla Ladder 22') and relocated the bat house! Check out our new video of us using the ladder to relocate the bat house :-)
Thanks for visiting!
I would love to hear if you have a bat house and how it has worked out for you :-) Check out our Bats and Bat Houses Pinterest page for more information and tons of other plans and ideas. Sincerely,
Sources:
http://www.cdc.gov/rabies/bats/education/ www.mayoclinic.org/diseases-conditions/histoplasmosis/basics/definition/con-20026585
0 Comments

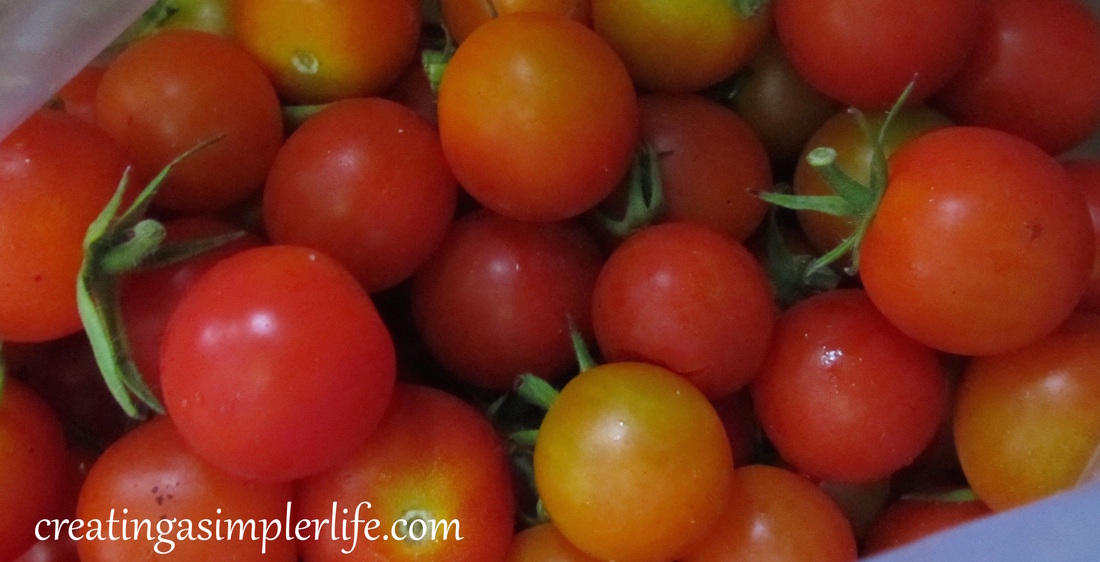
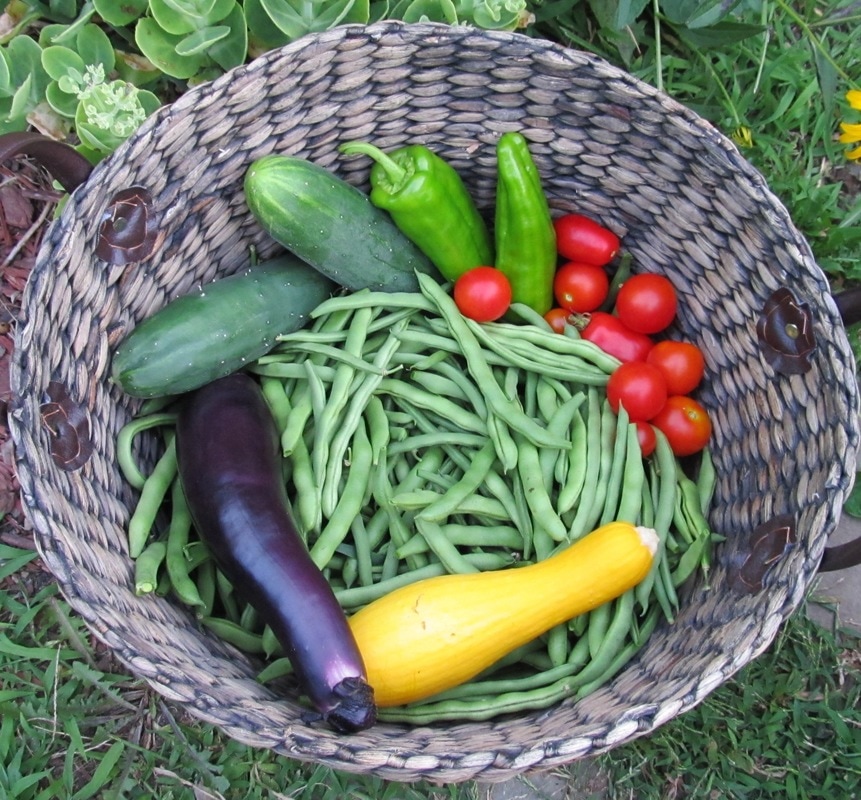
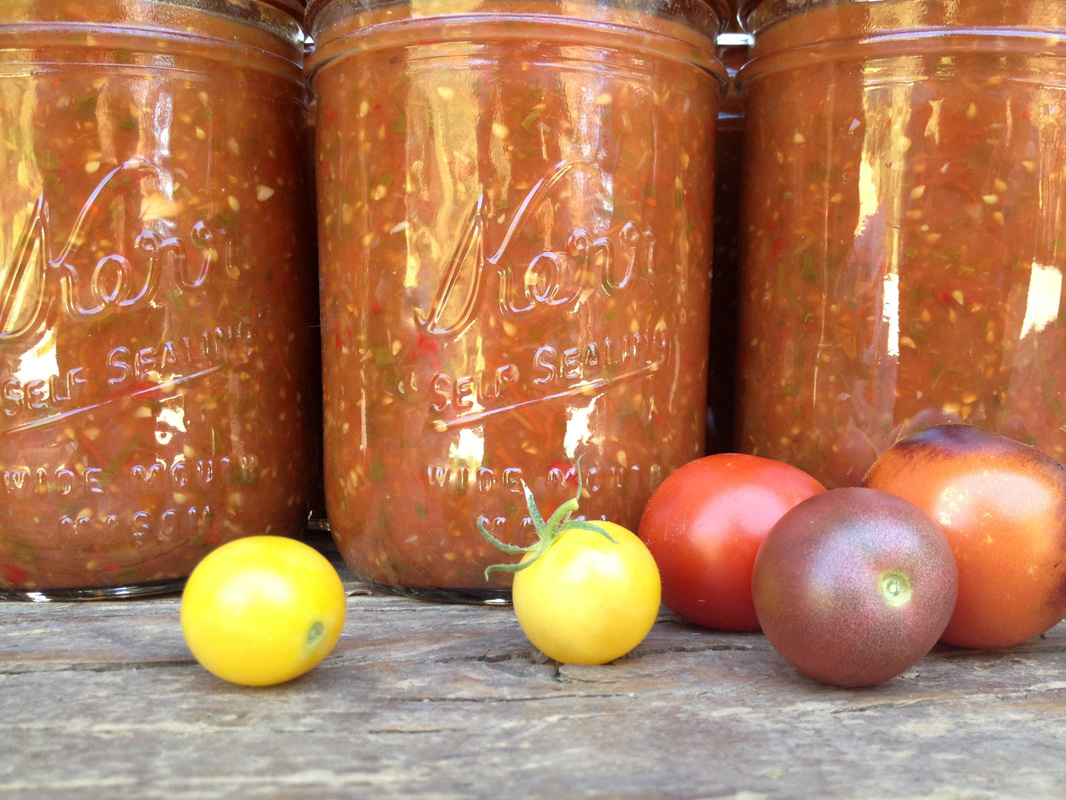
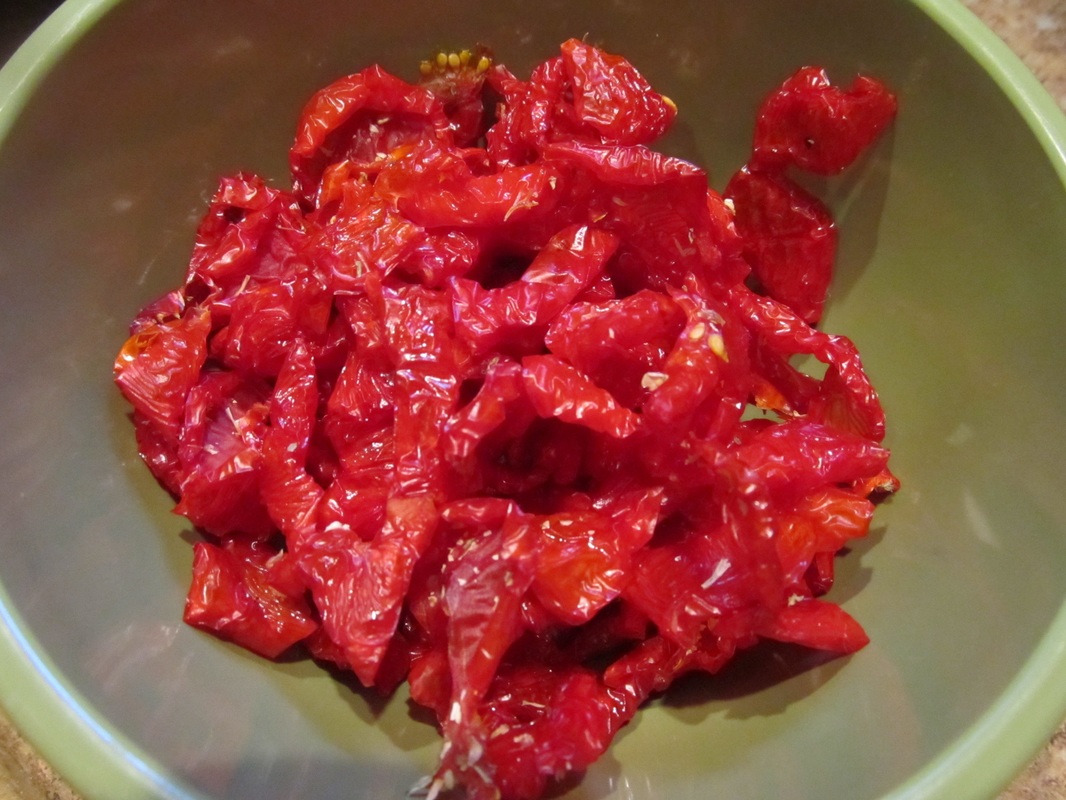
The only, and I mean only, tomato I grow is the cherry tomato. To be more specific, I only grow heirloom sweet 100's. They are the only kind of tomato I actually like, and to be more direct, I really only like them fresh direct from the vine when they are super red, and super sweet! However, the vines produce so many that I simply cannot eat them all fresh!
These sweet 100 cherry tomatoes are called indeterminate tomatoes. This means they take a little longer to start providing the fruit, but once they do, well, they simply don't stop! In fact, I had heard of so many people complaining that they just don't know what to do with all of them that I wrote a post called "Save All Those Cherry Tomatoes" for a list of ways to make sure that no surplus goes to waste. Even my over ripe cherry tomatoes that have split are a delicious treat for my hens! Though I dry some, eat some fresh, and save a few to add to my favorite Cucumber Salad Recipe, I actually choose freeze the majority of them! Why? Well, to make my favorite Super Simple Fresh Cherry Tomato Sauce with (you can watch a video of how it's made if you check out that link)! And boy is it simple :-) 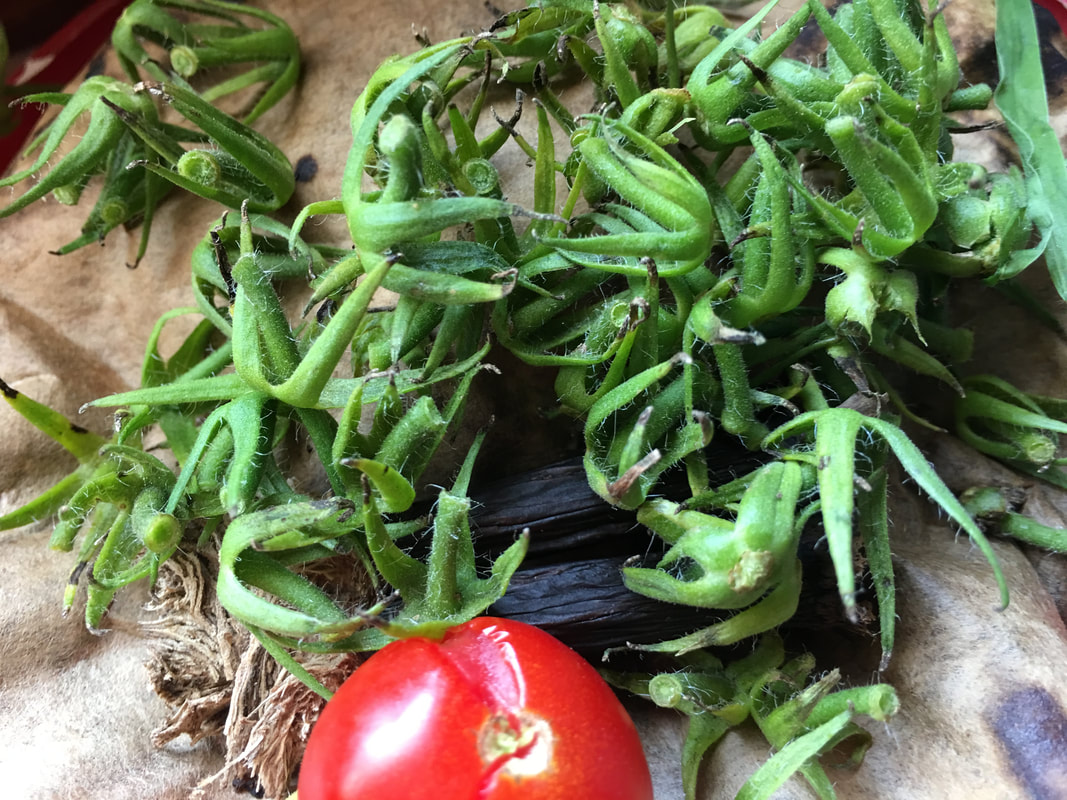
Remove stems and give over-ripe tomatoes to your chickens (if you have them)!
How I Freeze Cherry Tomatoes:
I simply continue to add cherry tomatoes to the same bag as they ripen and until the bag full. I write the date on the bag when it is filled and then I move it from the kitchen freezer to the basement freezer. This just assures that I use them in date order during the winter. Simple! 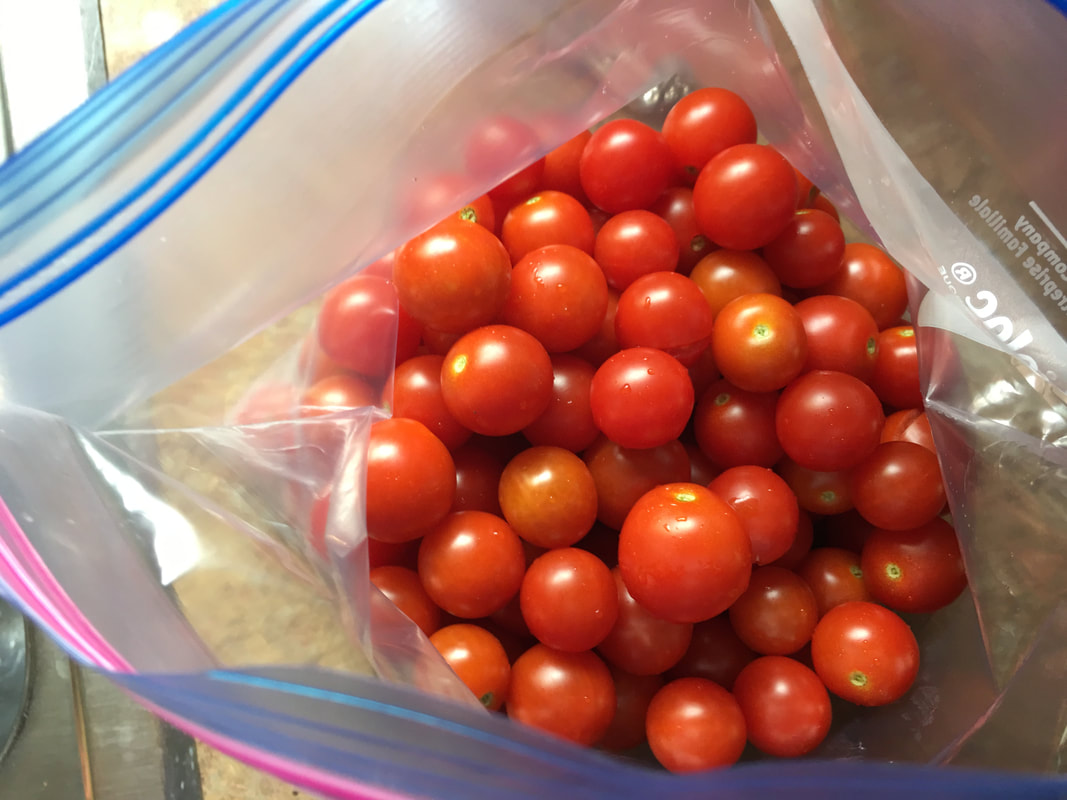
Simply put them right in a ziplock freezer bag! Only rinse if necessary.
Here's my super simple recipe:
NOTE: I use my frozen cherry tomatoes during the winter instead of the fresh. When blending the frozen tomatoes I simply and add some water so they blend better (Yes, I blend them frozen. No need to defrost so no planning is necessary!). This just means that the sauce has to be cooked a little longer, but believe me, it is just as delicious and it allows us to enjoy my fresh cooked cherry tomato sauce all winter long! YUM! 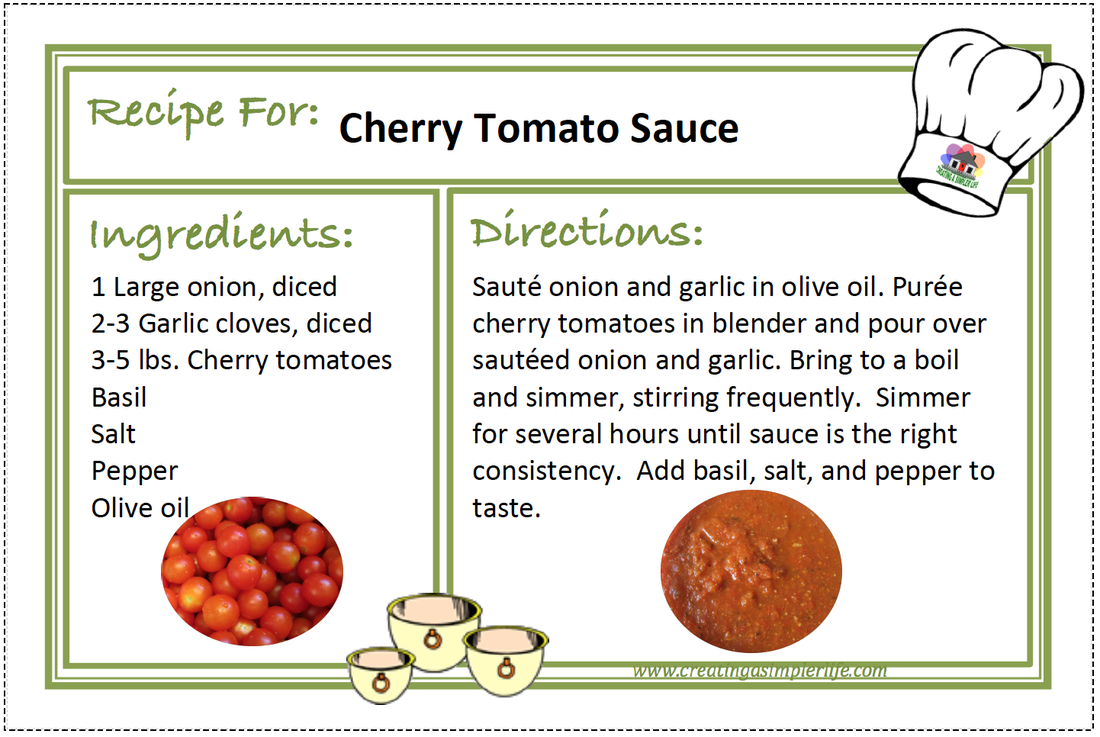
Enjoy!
Check our our other ways to preserve and save fresh fruits and vegetables and our easy recipes too! Sincerely,
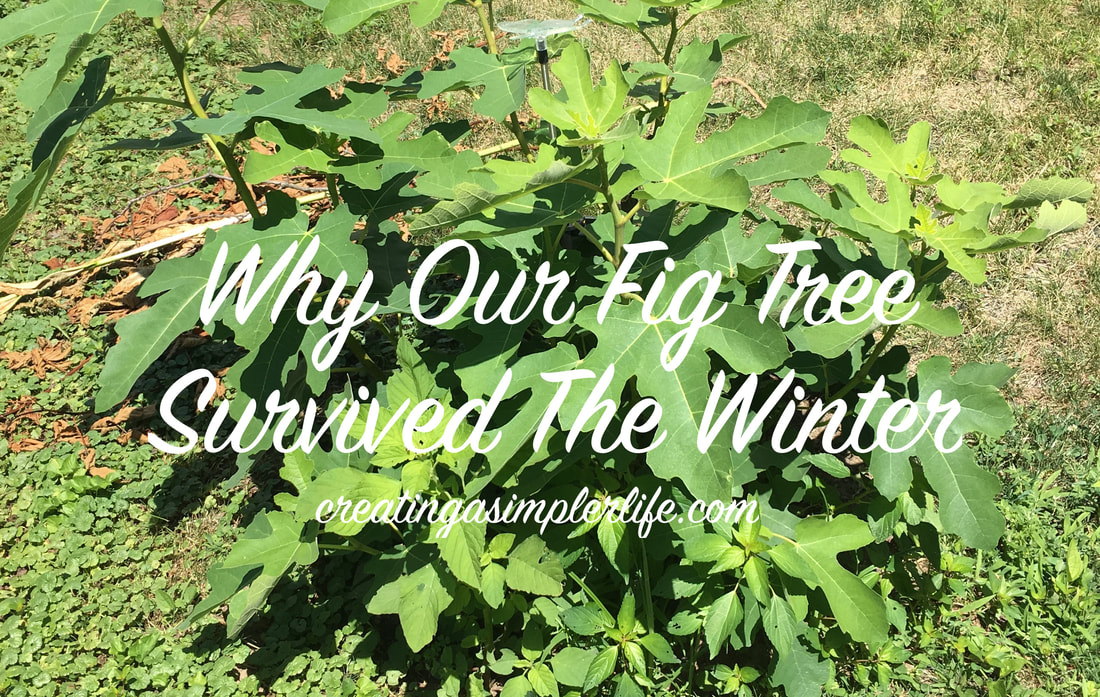
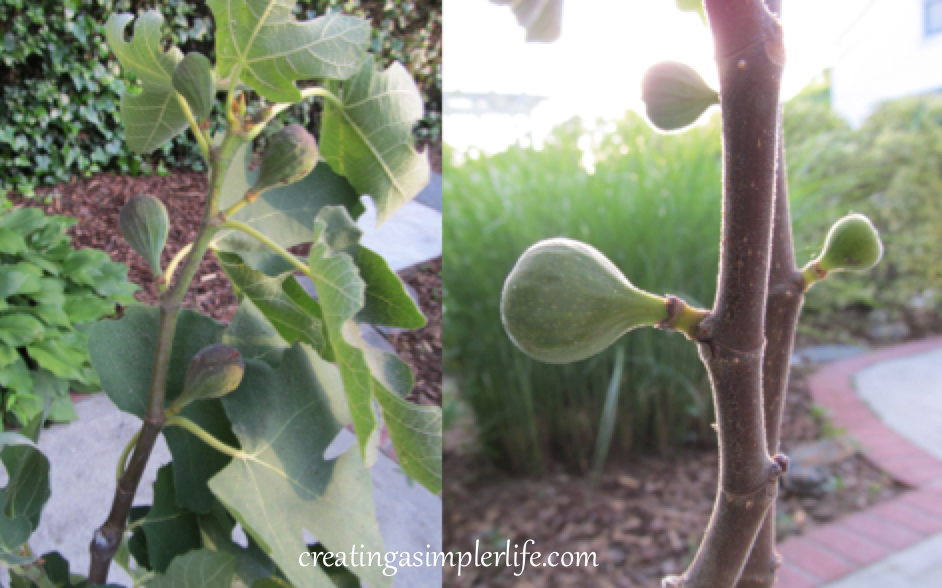
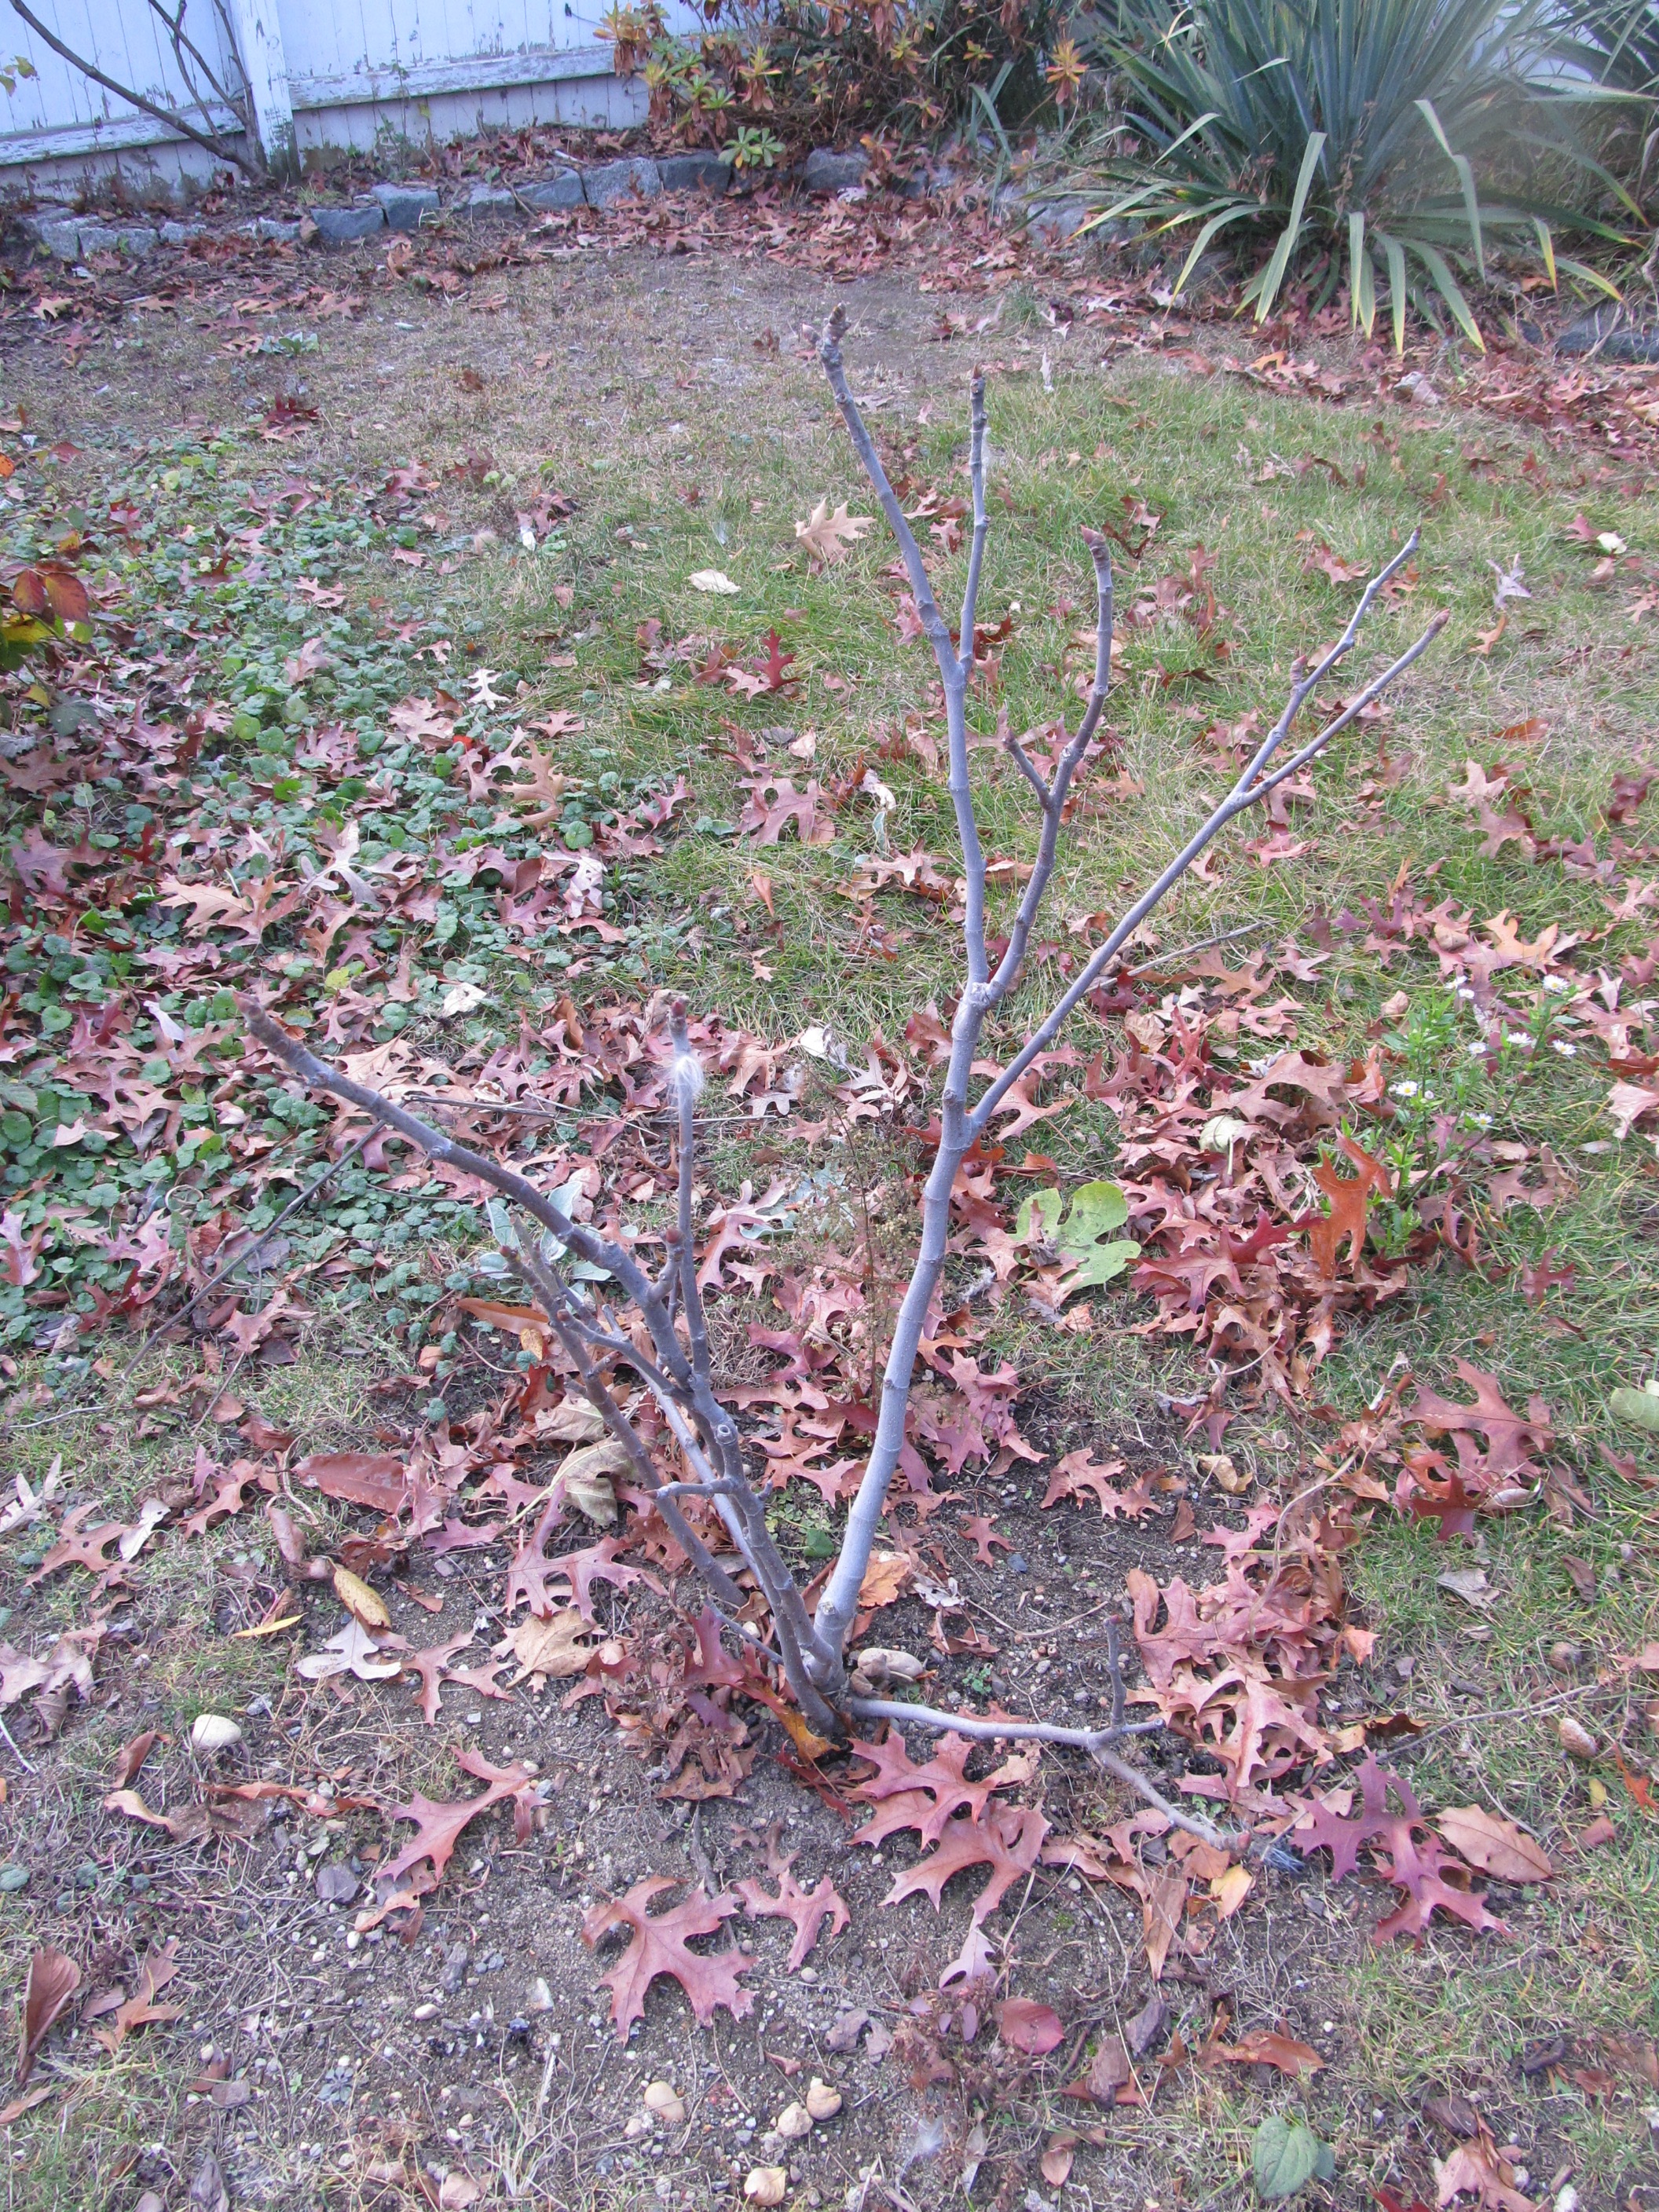
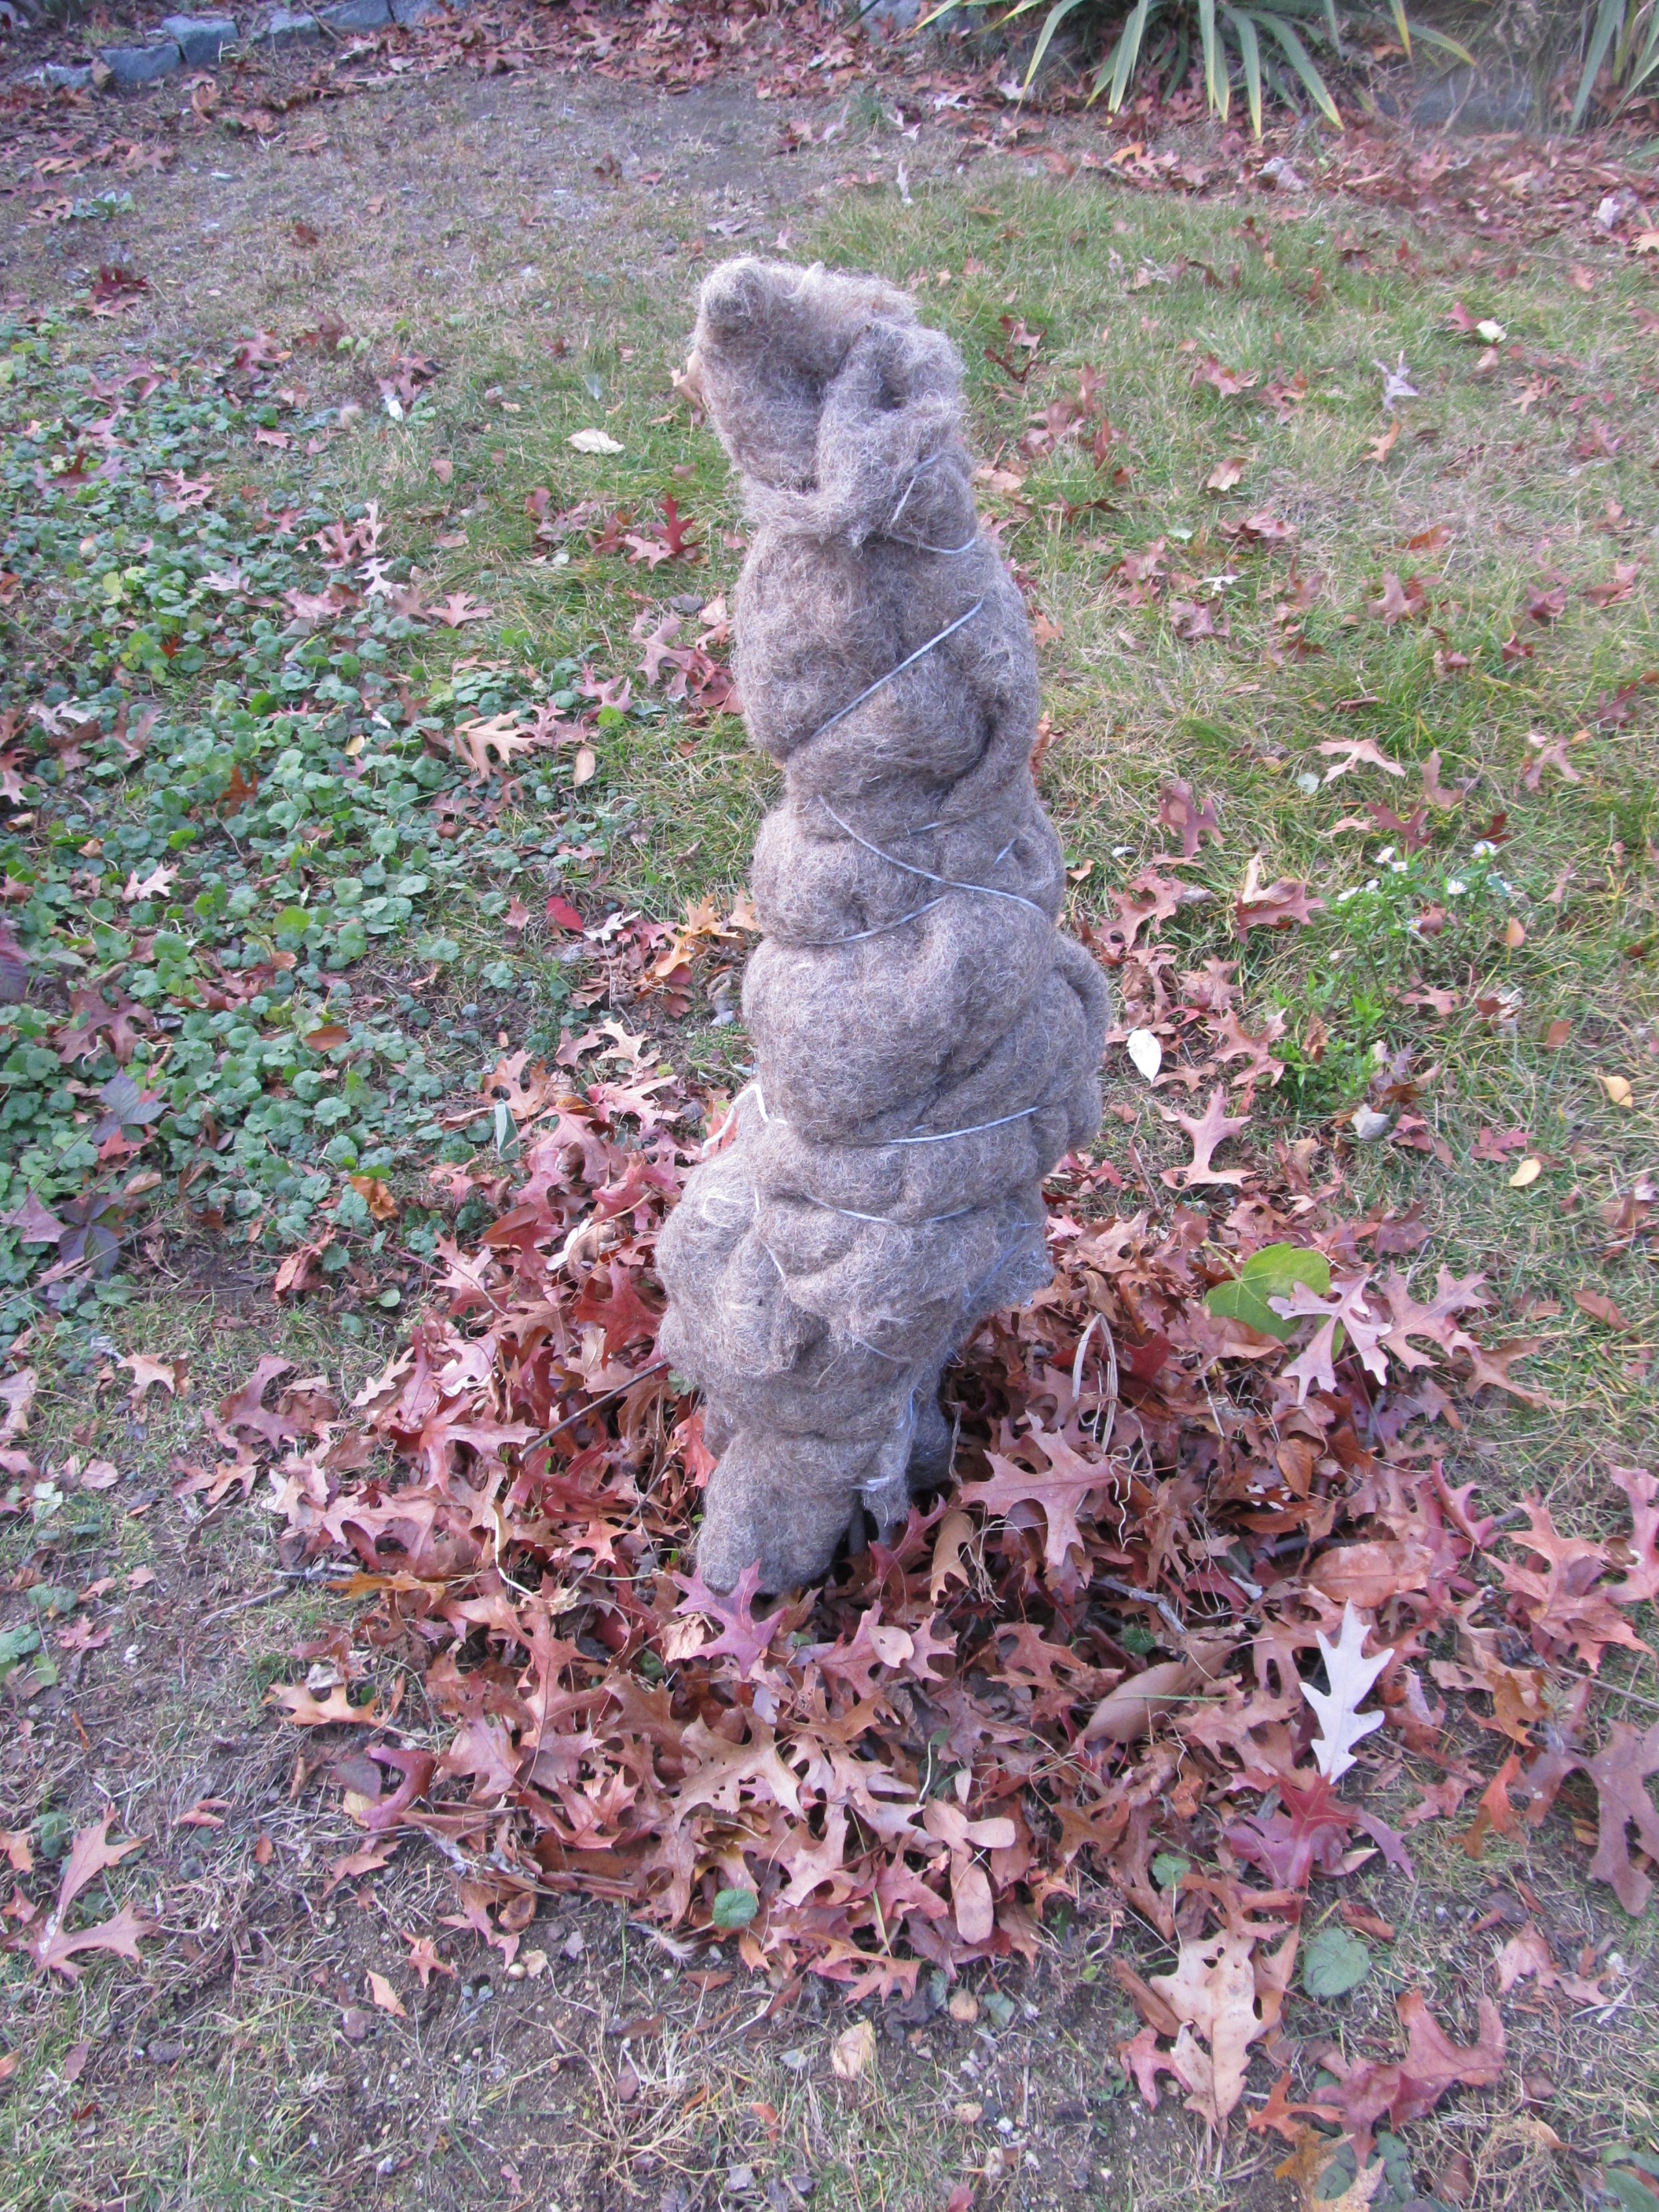
Last fall I wrapped up our newly planted fig tree for the winter not knowing if it would survive or not (but I was really trying and hoping). Read more about Winterizing our Fig Tree here. This past spring I was nervous when we opened it up, but despite losing a few branches at the top to the cold winter, lo and behold, the fig tree was alive! It had survived the winter and the proof was the little buds that were growing on the lower branches. The way we wrapped it up apparently worked out pretty well and hopefully we will get better at it each year that we own this lovely, fruit producing, edible plant! As you can see in the picture we are now into summer and it is growing really well. We are so pleased with the results we thought we would share a few pictures with you.
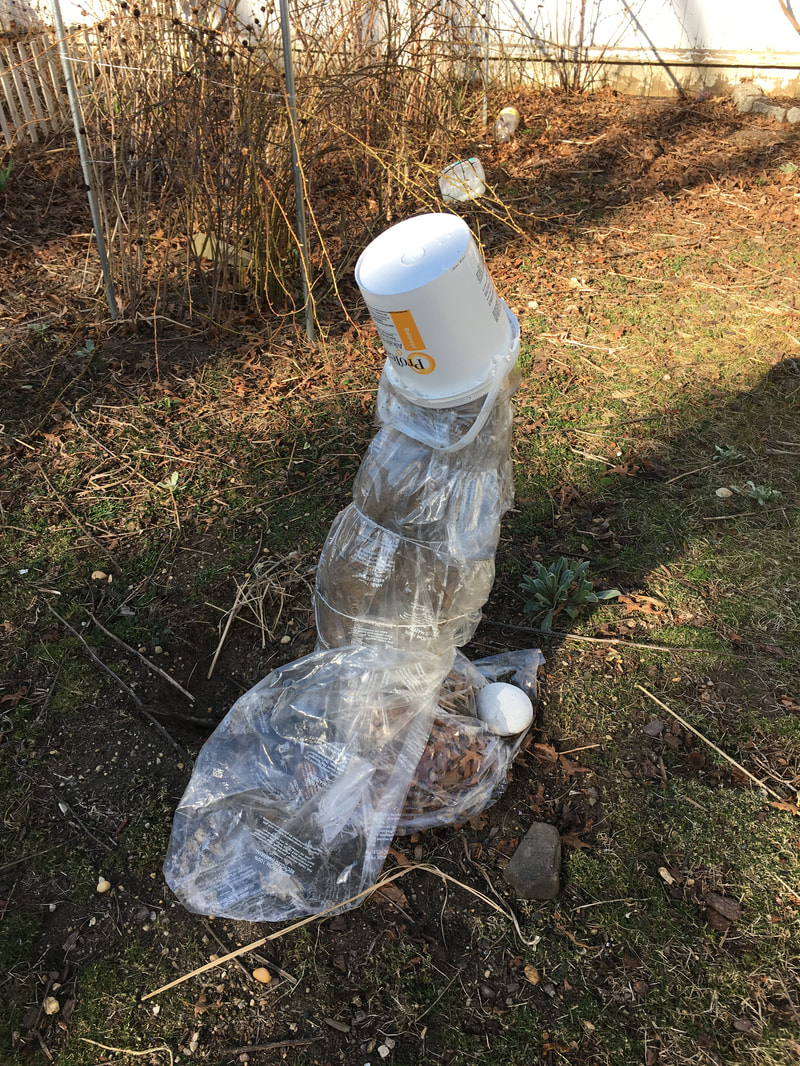
This is what the fig looked like after surviving the winter. We did not 'unveil' it until there was no more frost.
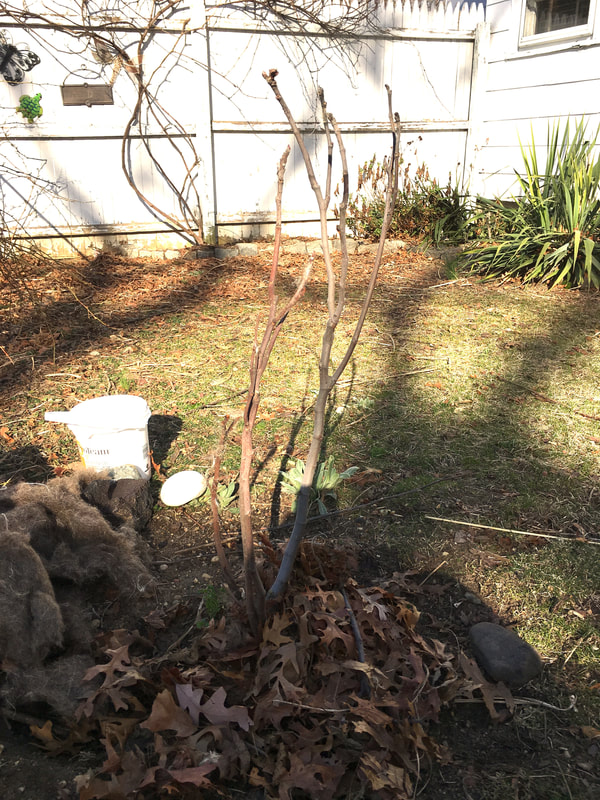
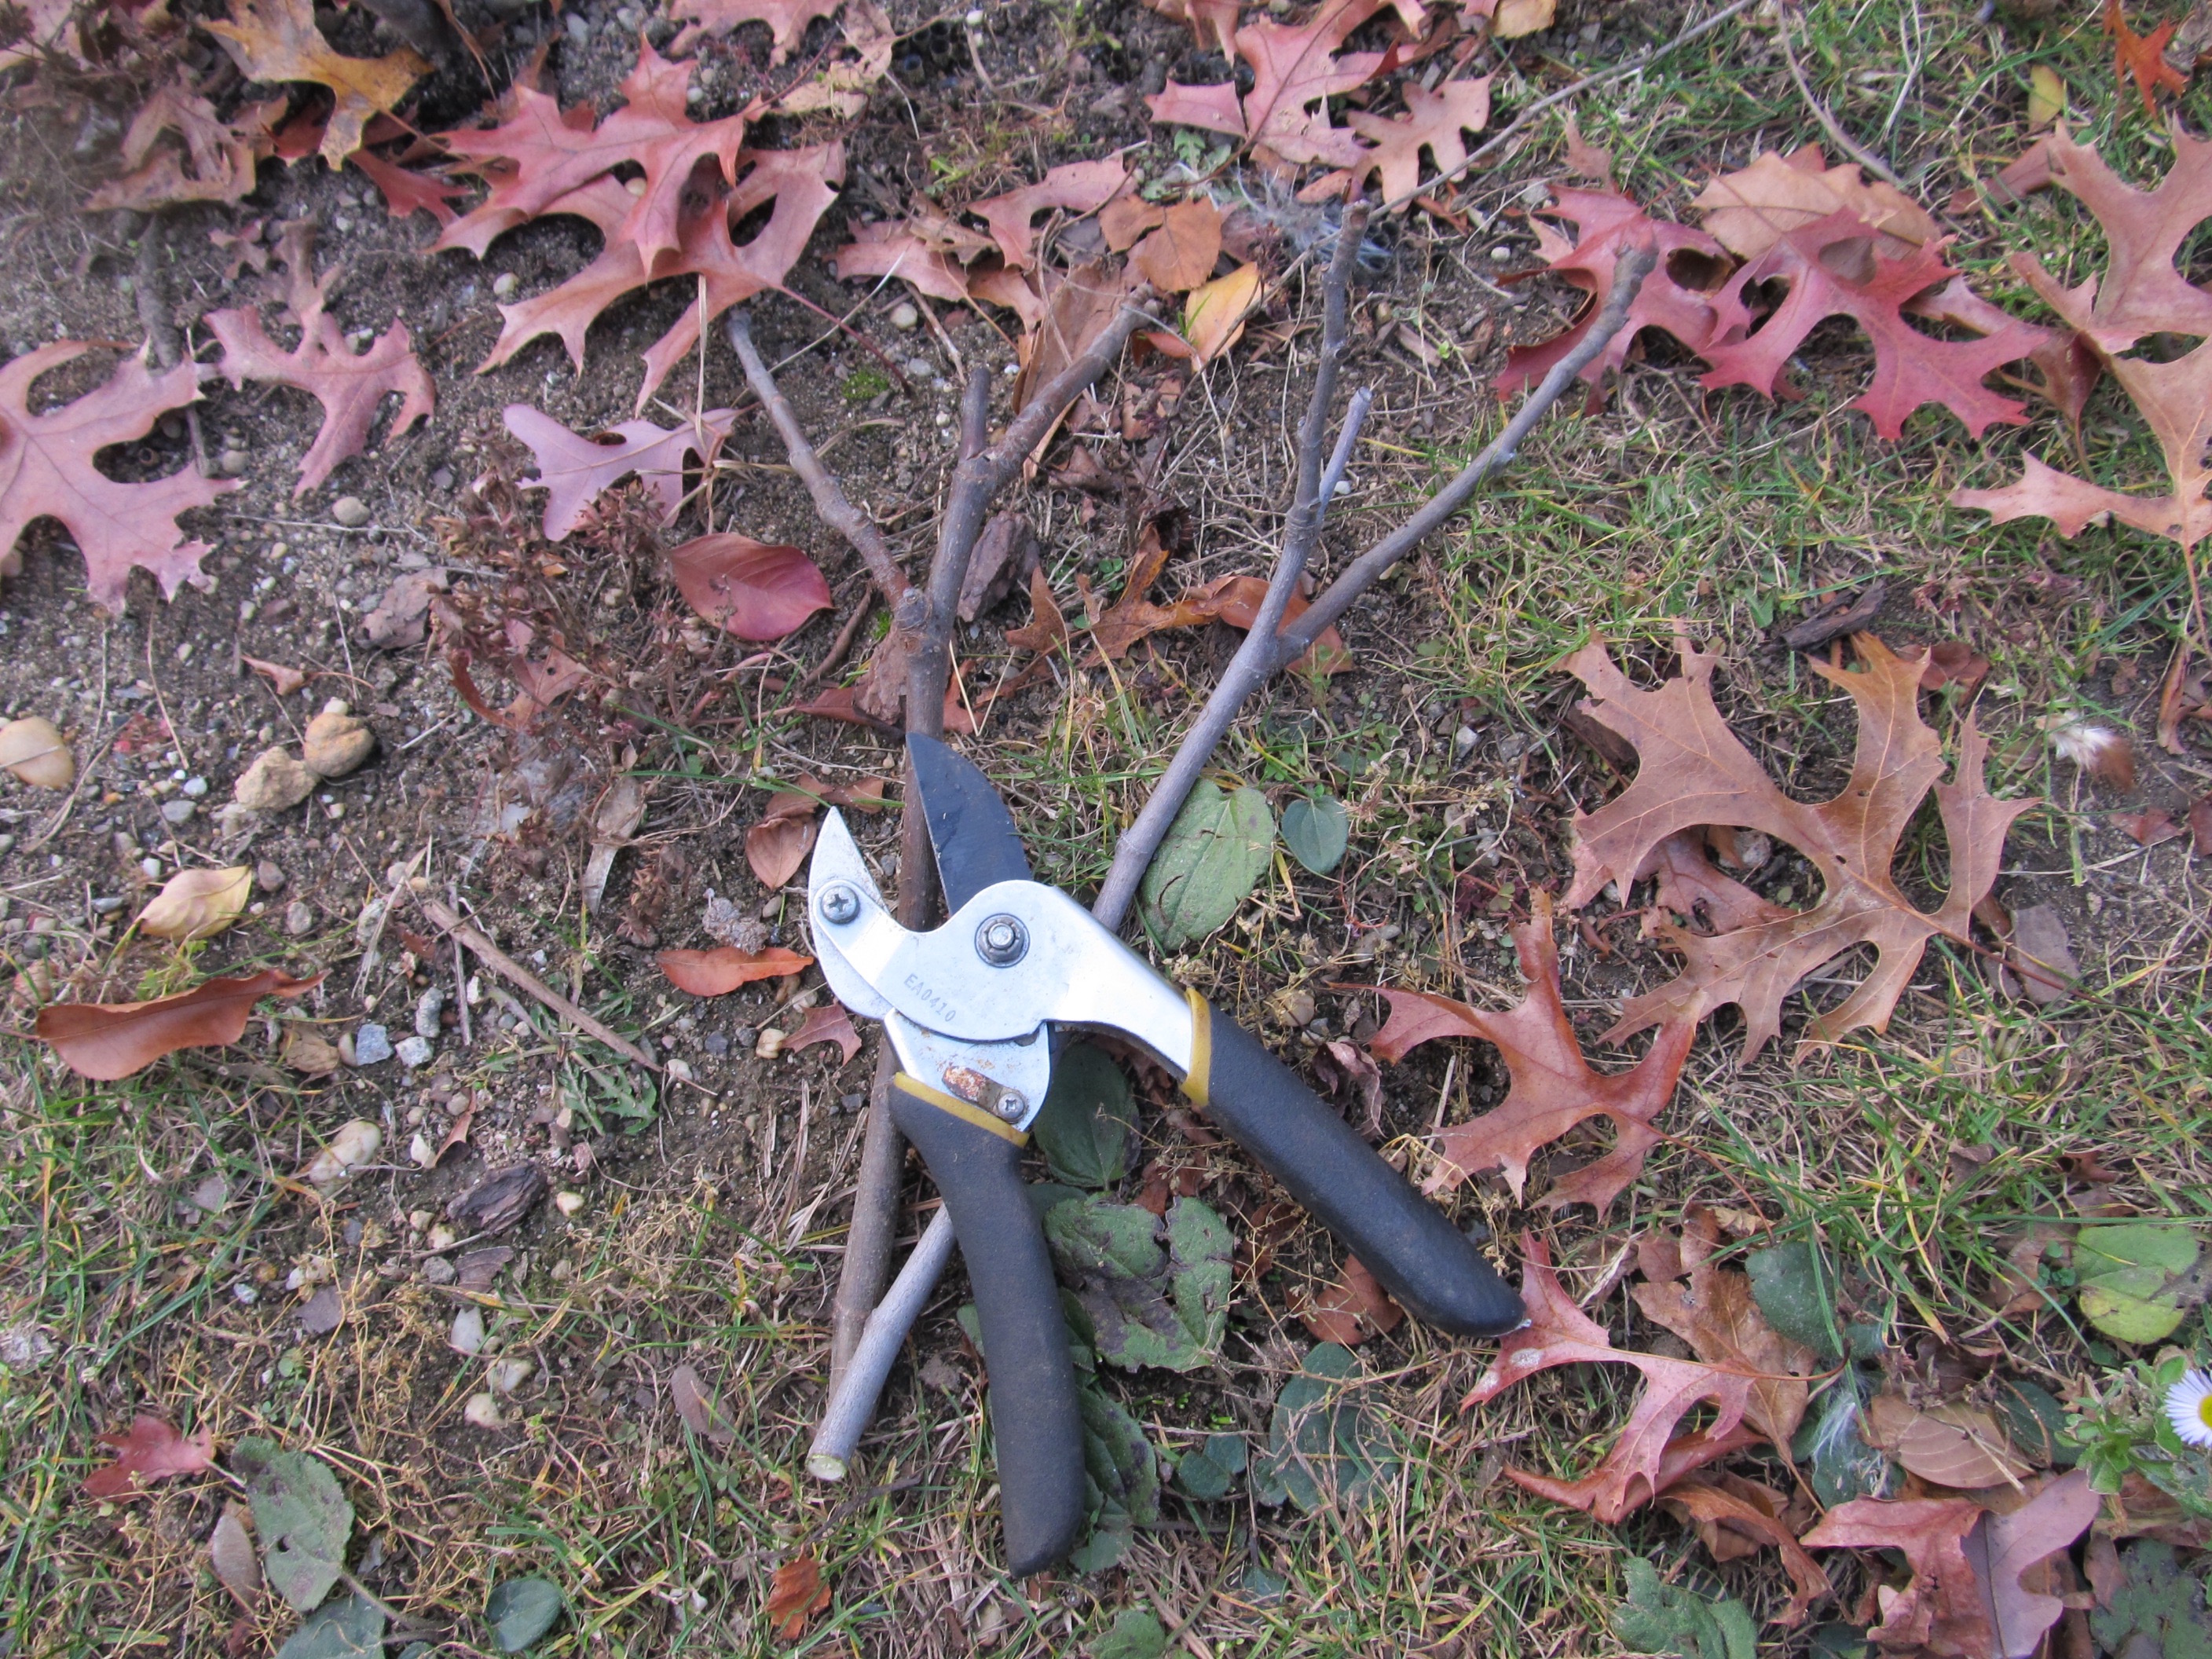
A few of the branches you see were rotted and not getting any buds so we simply cut them off.
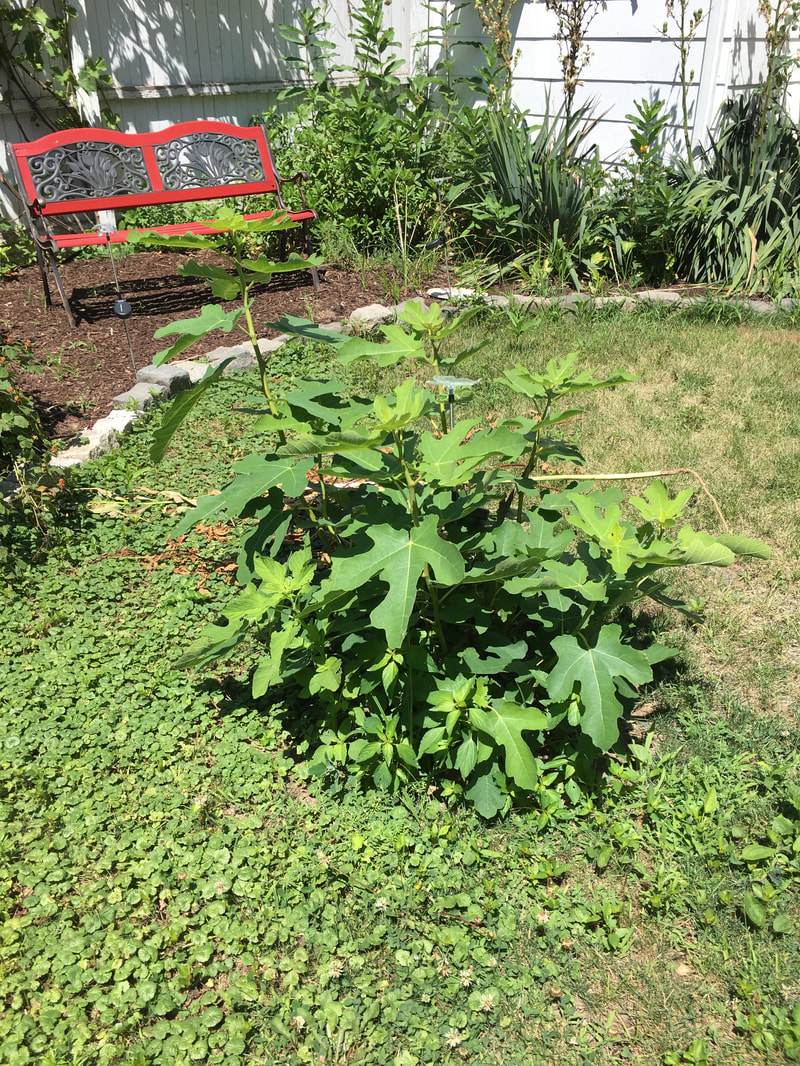
You can see that it is not as tall as it was because we had to remove some of the upper parts of the branches. But look at it! It is growing like crazy :-)
The tree had figs last year while in the pot, however we are not expecting any this year or even next year because it needs to make itself at home in it's new location. But it will provide figs down the road and we can't wait!!
Thanks for visiting!
Follow us on social media for more ideas and ways to create and live a simpler life! Sincerely,

We have a plan for our future homestead: to plant with purpose. That purpose will be edible landscaping. Basically, if the plant is edible and an easy to maintain perennial, it is in! That doesn't mean we won't be planting a few other plants for medicinal or even decorative purposes, it just means that most all of our planting on our homestead will be done with prior careful thought and purpose. That brings me to todays post.
One the years my husband and I have planted many different types of plants at our suburban house for many different reasons: pretty, suggested by friends or family, free from others, or transplanted from somewhere else. Unfortunately there was little to no research on any of these plants prior to planting, and well, we regret it now because they are impossible to get rid of and a real pain in the neck to maintain. Some of the plants actually came with the house when it was purchased, and again, we didn't think much about them at the time. Either way these plants have provided us with not only a great learning experience, but a list of plants TO NEVER PLANT on our future Homestead! Here's our list:
WISTERIA

I absolutely love how wisteria looks and smells in the spring. It is so beautiful the way it drapes down and hangs and to walk past it and smell the aroma is, well, heavenly. But...that only lasts for about a week. And. That. Is. Not. Worth. It. The rest of the year I am chasing down the runners that spread 30 feet or more all over the yard, up trees, into the neighbors yard, all over the fence, and even into my pool once while we were away! I can't even begin to describe how horrible this plant can be all for the reward of one weeks worth of beauty. It's simply not worth it. And, once it's planted you can absolutely never, ever, get rid of it! It will be a lifetime of maintenance and the plant will, literally, outlive you! if yore interested and willing to do the work you can learn more about wisteria here.
YUCCA 
The yucca plant is well, yucka! I absolutely hate it. Yeah, the flowers look kind of pretty but they attract so many ants that they become ugly really quickly! And cutting those long nasty stalks covered in ants really stinks. The leaves are pointy and sharp and can really hurt you too. And seriously, trying to get rid of the plant is impossible. It spreads too easily and seriously, the leaves need a 'hair cut" every spring! The work to pleasure ratio just isn't there for me! Oh, and I did my research and this is not the edible species of yucca. Some yucca have edible parts, but this is NOT the one so bye bye yucca! Read more about the difference between the yucca and yuca plants and their usable parts here.
BLACKBERRY 
Blackberries are delicious, but picking them really is the pits. We planted a blackberry bush a few years ago that we got on sale in Home Depot. HUGE mistake. It grows like crazy, has the nastiest and sharpest prickers, and we absolutely can't get rid of it no matter how many times we "excavated" it out of the ground. When we bought this blackberry bush we had no idea there were different kinds and that some are invasive. Apparently there are ways to tell the species apart - the invasive ones have a hexagonally shaped stem with flattish sides. Who knew? Well, now we do, but either way the thorns are terrible so unless there is a thornless variety that is not invasive, blackberries will never be planted on our homestead! Read about invasive and non-invasive blackberries here.
CLIMBING HYDRANGEA 
Where to start? Yeah, it looks pretty nice around our little front porch but it does need to be cut at least twice a year, the flowers aren't that pretty (and only grow in the sunlight so only the right side gets any flowers), and they don't even smell that good! The stems become like mini trees and literally rip the porch apart as they wrap around it and through it. They are also ripping the rain gutters off the roof! Finally they have these little tiny roots on all the shoots that literally grab onto anything so they can climb. Pretty interesting, but this means you literally have to rip it off sometimes. Again, too much maintenance for relatively minor return. Not worth it in my opinion. Here's more info on climbing hydrangeas if you are interested.
TRUMPET VINE 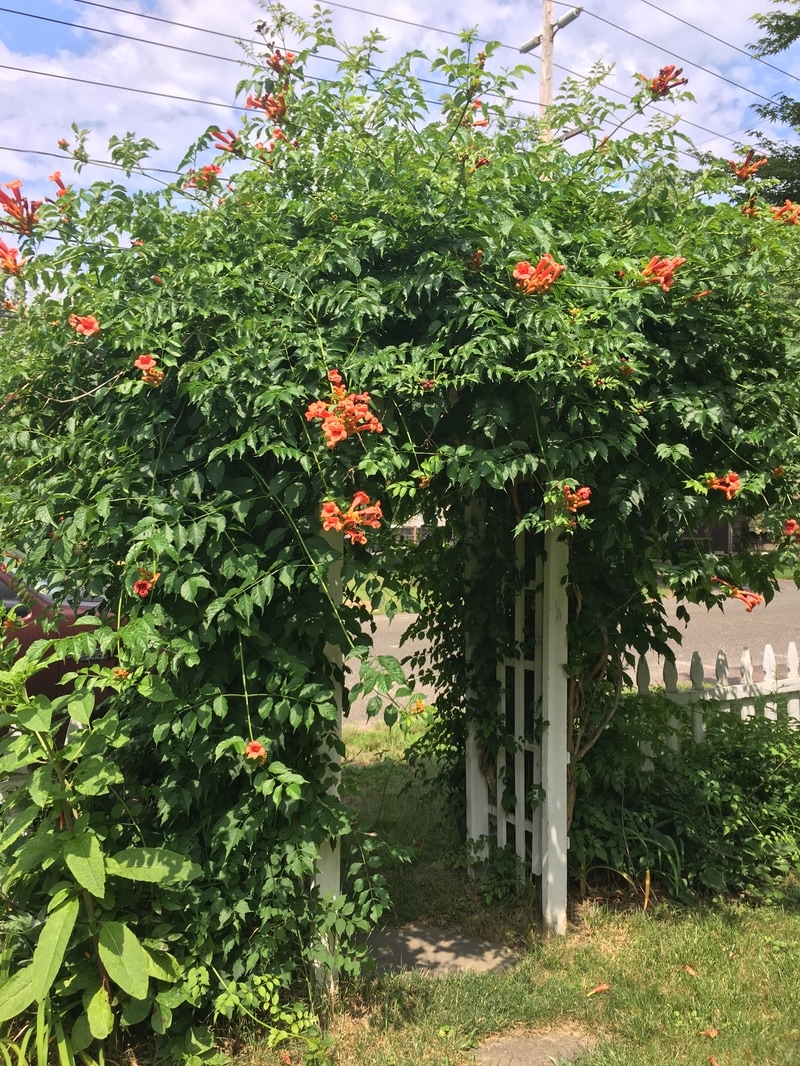
What. A. Nightmare. As pretty as this looks, it is a real pain to maintain. It can send runners out up to 10 feet (or ore) away that literally pop out in the middle of the lawn! This would literally take over my entire front yard if I let it. The flowers are pretty but they attract a lot of ants and other critters and it constantly needs to be 'trimmed.' Way too much work to simply keep it under control. Read more about trumpet vines here.
PRIVET HEDGES 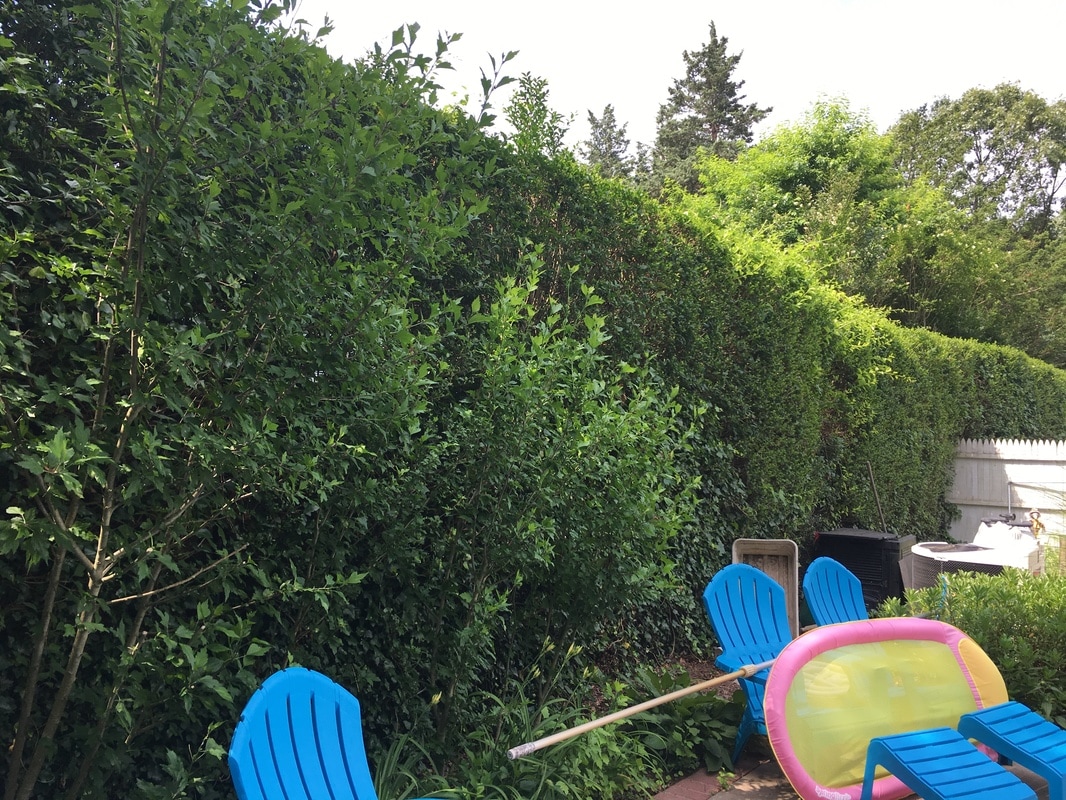
I have a love-hate relationship with my privet hedges. Here in the suburbs I love the privacy they provide me in my backyard (hence their name), however with 50' feet of them on one side and about 20' on the other, it is a lot of work to keep them maintained. Believe it or not I used to have about 70' of them across the front of my house too, but we ripped those out. We used to keep them trimmed ourselves but they are currently about 10 feet high and we just can't keep up with it anymore. This means we pay to keep them looking ok each season. And that is just ok because they really should be trimmed twice a year. Thankfully on our new homestead there will be no need for any privacy barriers since we will be building literally in the middle of our 30 acres! We won't have any close neighbors at all! Read more about privet hedges here.
ENGLISH IVY 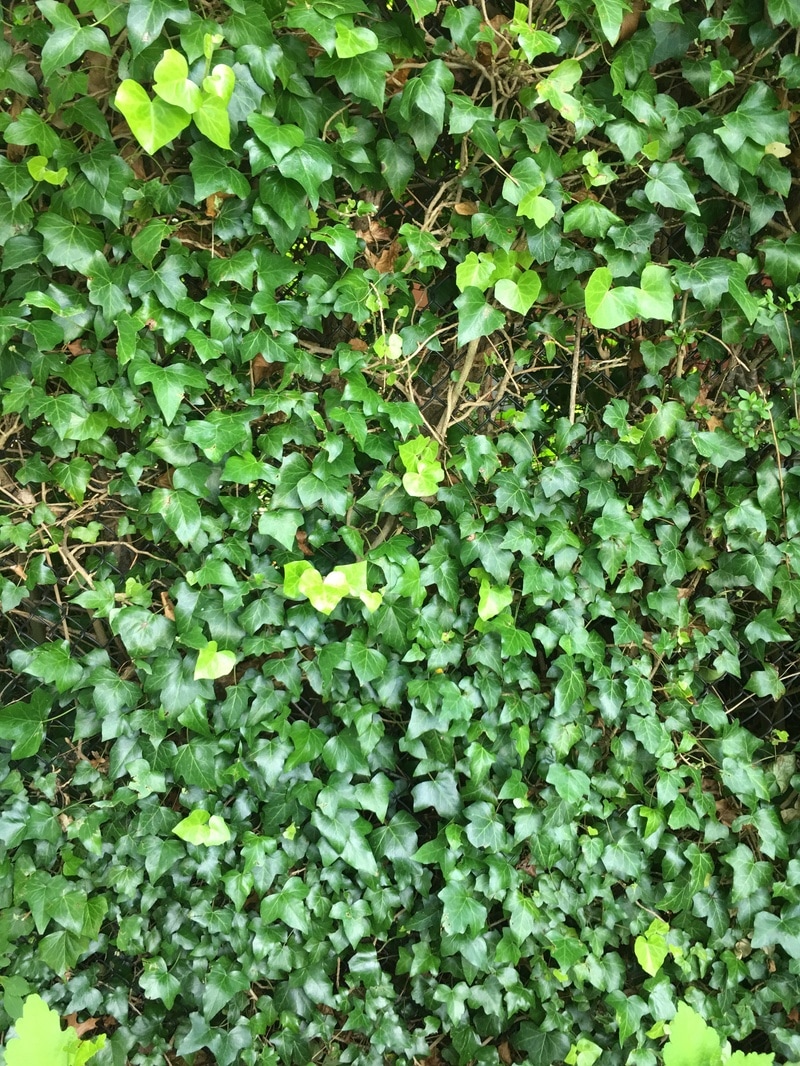
These are great for growing on fences because it looks nice by kind of hiding the fence but it spreads and grows like crazy and I find myself ripping it out every season as it reaches for all my other plants and bushes around it. There is a tree in the neighbors yard that is actually being choked to death by this ivy and we worry that it will die and fall in our pool at some point. In my opinion it just requires too much maintenance. Read more about English Ivy here.
Thanks for visiting!
Read more about our future homestead garden here and follow me on social media! Sincerely,

It's time to get the garden ready! I get so excited this time of year because I get to plant my favorite crop: string beans!
Years ago when we first started our garden we tried growing bush string beans. Unfortunately these felt like backbreaking work to bend over and pick them all. They also took up a tremendous amount of space in our small garden that we really wanted to put to better use. That led us to finally trying pole beans and that was the best decision we ever made. Here's why pole string beans are my absolute favorite vegetable to grow:
We grow two, soon to be three, pole beans varieties for different reasons:
The third type of bean will be grown for the first time this year! We are so excited because it is supposed to be a perennial. Yes, that's right, a bean we should never have to plant again because it will come back on its own year after year! We can't wait to try it! Read all about the Perennial String Beans here! Now we just need to figure out where to plant them so that they never get disturbed!
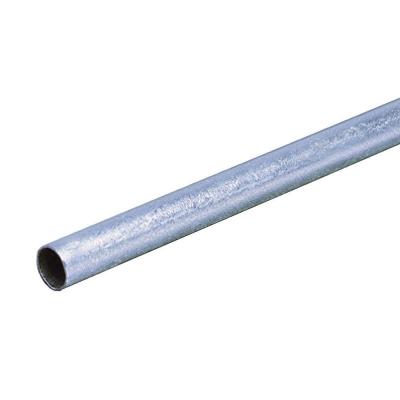
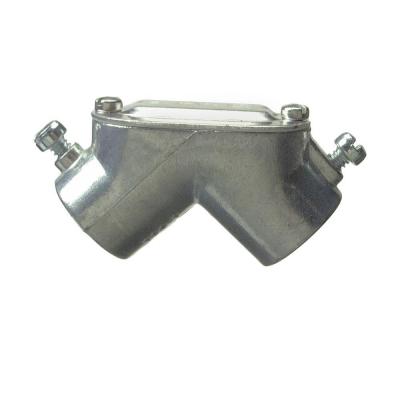
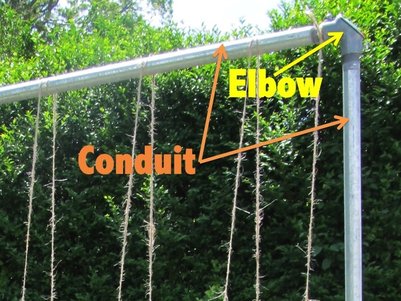
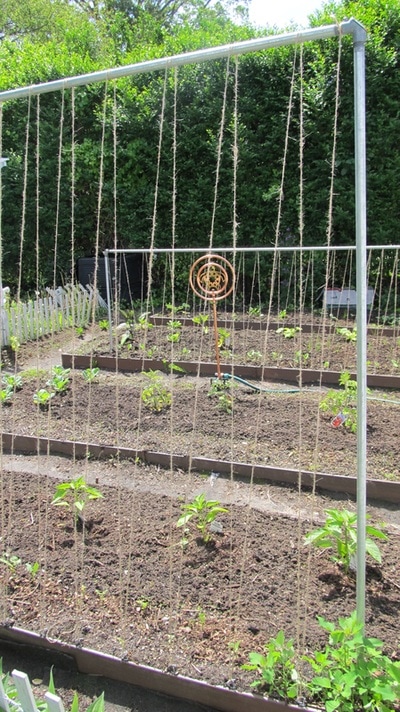
Growing pole beans is so simple that the hardest part about growing them is the poles! Yup, sounds silly, but the poles can be a pain in the neck. The beans can pull them down they can rot, etc. After years of minimal success we finally decided to make something more permanent. After a lot of research (of course) about growing pole beans, we finally decided to try building a pole built from electrical conduit, rebar, and twine. Yes, it was a small investment but the poles are still as good as the first year we built them, even with being moved around!
Supplies For 10' long by 5' high Pole Structure:
Instructions:
Thanks for visiting!
If you have time check out our other gardening ideas! We also have several gardening boards on our Pinterest Page! And of course we share lots of great ideas on Facebook too! Sincerely,
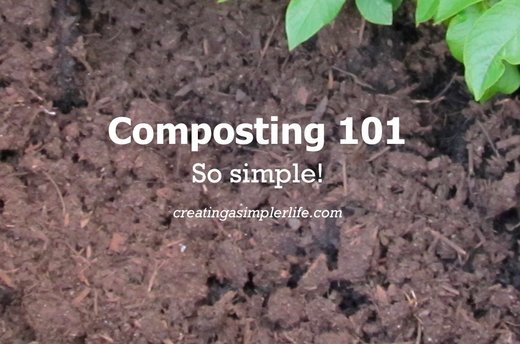
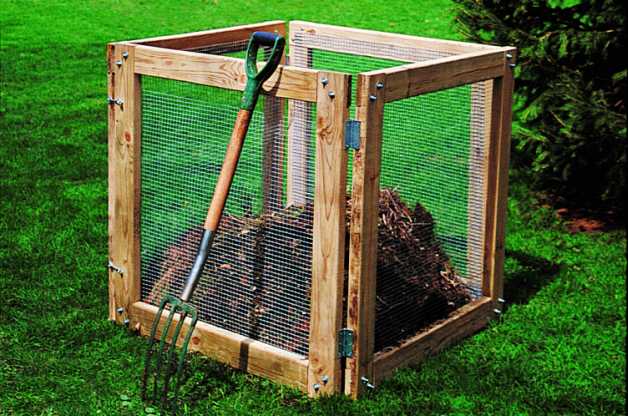
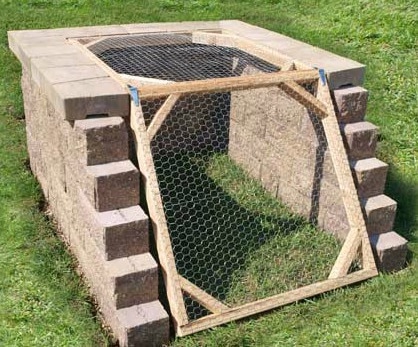
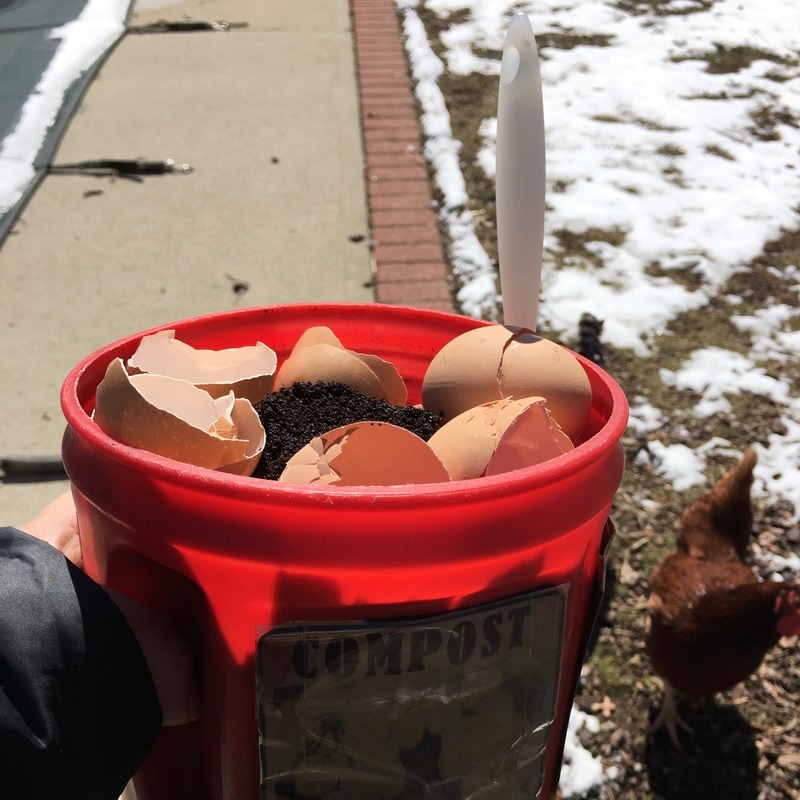
We compost here every single day. Well, the scraps go on the counter every day, not necessarily out to the bin. But the point is that we compost and we reap the rewards every spring when we use that wonderfully rich, dark, material in our gardens! We currently have an inexpensive four sided recycled plastic compost bin. It came with a removable lid on top and a front sliding door that could be opened to pull out the material. We modified it over the years by removing the top and the front door so it is always open to the elements (and because the were annoying and unnecessary). Now it is much easier to maintain but when we move to our New Future Homestead we will simply build a three sided bin from cement blocks or wood (see pictures below) that will be much easier to access and turn regularly. No matter how big or small a bin you choose or use, the reward of beautifully rich compost is well worth the effort!
Choose a question below to learn more:
What is compost?
Compost is a homemade organic material that can be added to your garden soil to help plants grow. It is a combination of three basic ingredients
Why should you compost?
How can you get started?
What can be composted?
You won't believe this list of things you can compost!
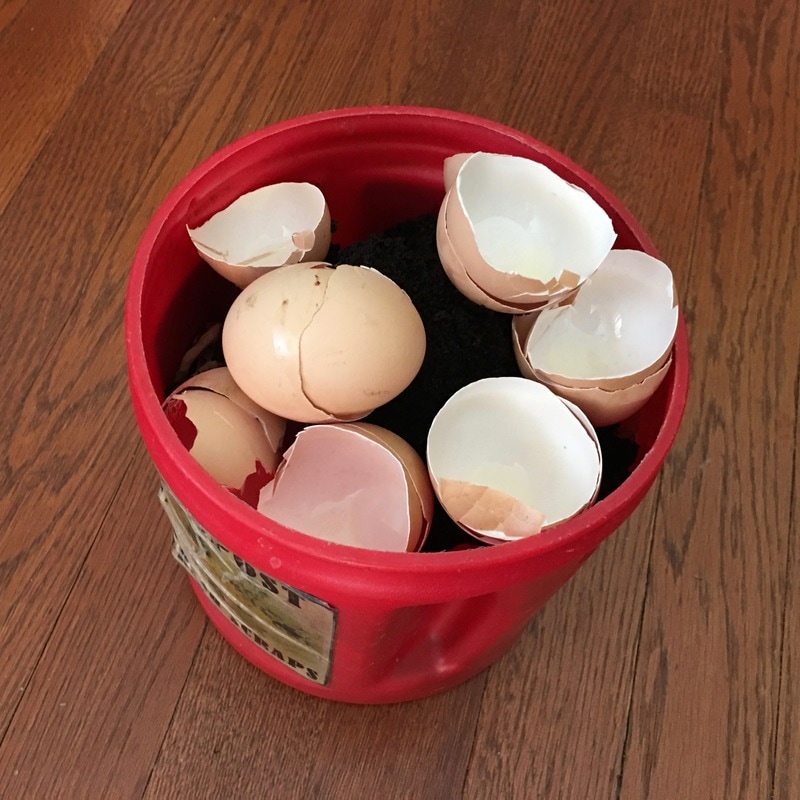
What should not be composted?
Anything that could be harmful if it gets into your food. For example, if your yard waste or grass was treated with herbicides and or pesticides then you do not want them in your compost pile. If you added processed charcoal to your fire, then do not put the ash into the compost, again, due to the harmful chemicals.
It is also said to avoid adding bones and uncooked meat from animals and fish because they attract animals (including flying buggies) and can smell over time. This is definitely good advice for small yards. However, if you have a large property then you can choose to add it anyway, or you can take it out far from your house and leave it out for the animals. I know what you might be thinking (gross), but if you are a hunter then you know this is not a big deal. If it doesn't get eaten (which it will), it will still decompose! Lastly, you should never add any prepared or cooked foods, again, for the same reasons as above. However, some of these leftovers can be saved in the freezer to add to soups and or stews or fed to your own chickens, goats, and or pigs! So basically, be smart! And when in doubt, well, just keep it out! Of the compost pile, that is :-)
You can easily purchase a bin (see some at the bottom of this page),
but DIY is even better if you can! Here are two of my favorites! Note: pictures are links to plans (actual links at the bottom of this page)
A few simple tips to help make composting simpler:
If all goes well, your compost can be usable anywhere from two (2) months to two (2) years. Ours is used once a year when we plant our garden in the spring and it is awesome!
Thanks for visiting!
Please follow us social medial and check out our other ways to Minimize Household Waste and Zero Waste Home! Sincerely,
Sources:
www.epa.gov/recycle/composting-home www.birdsandblooms.com/backyard-projects/diy-garden-projects/diy-compost-bin/ www.allanblock.com/courtyard/compost-bin.aspx
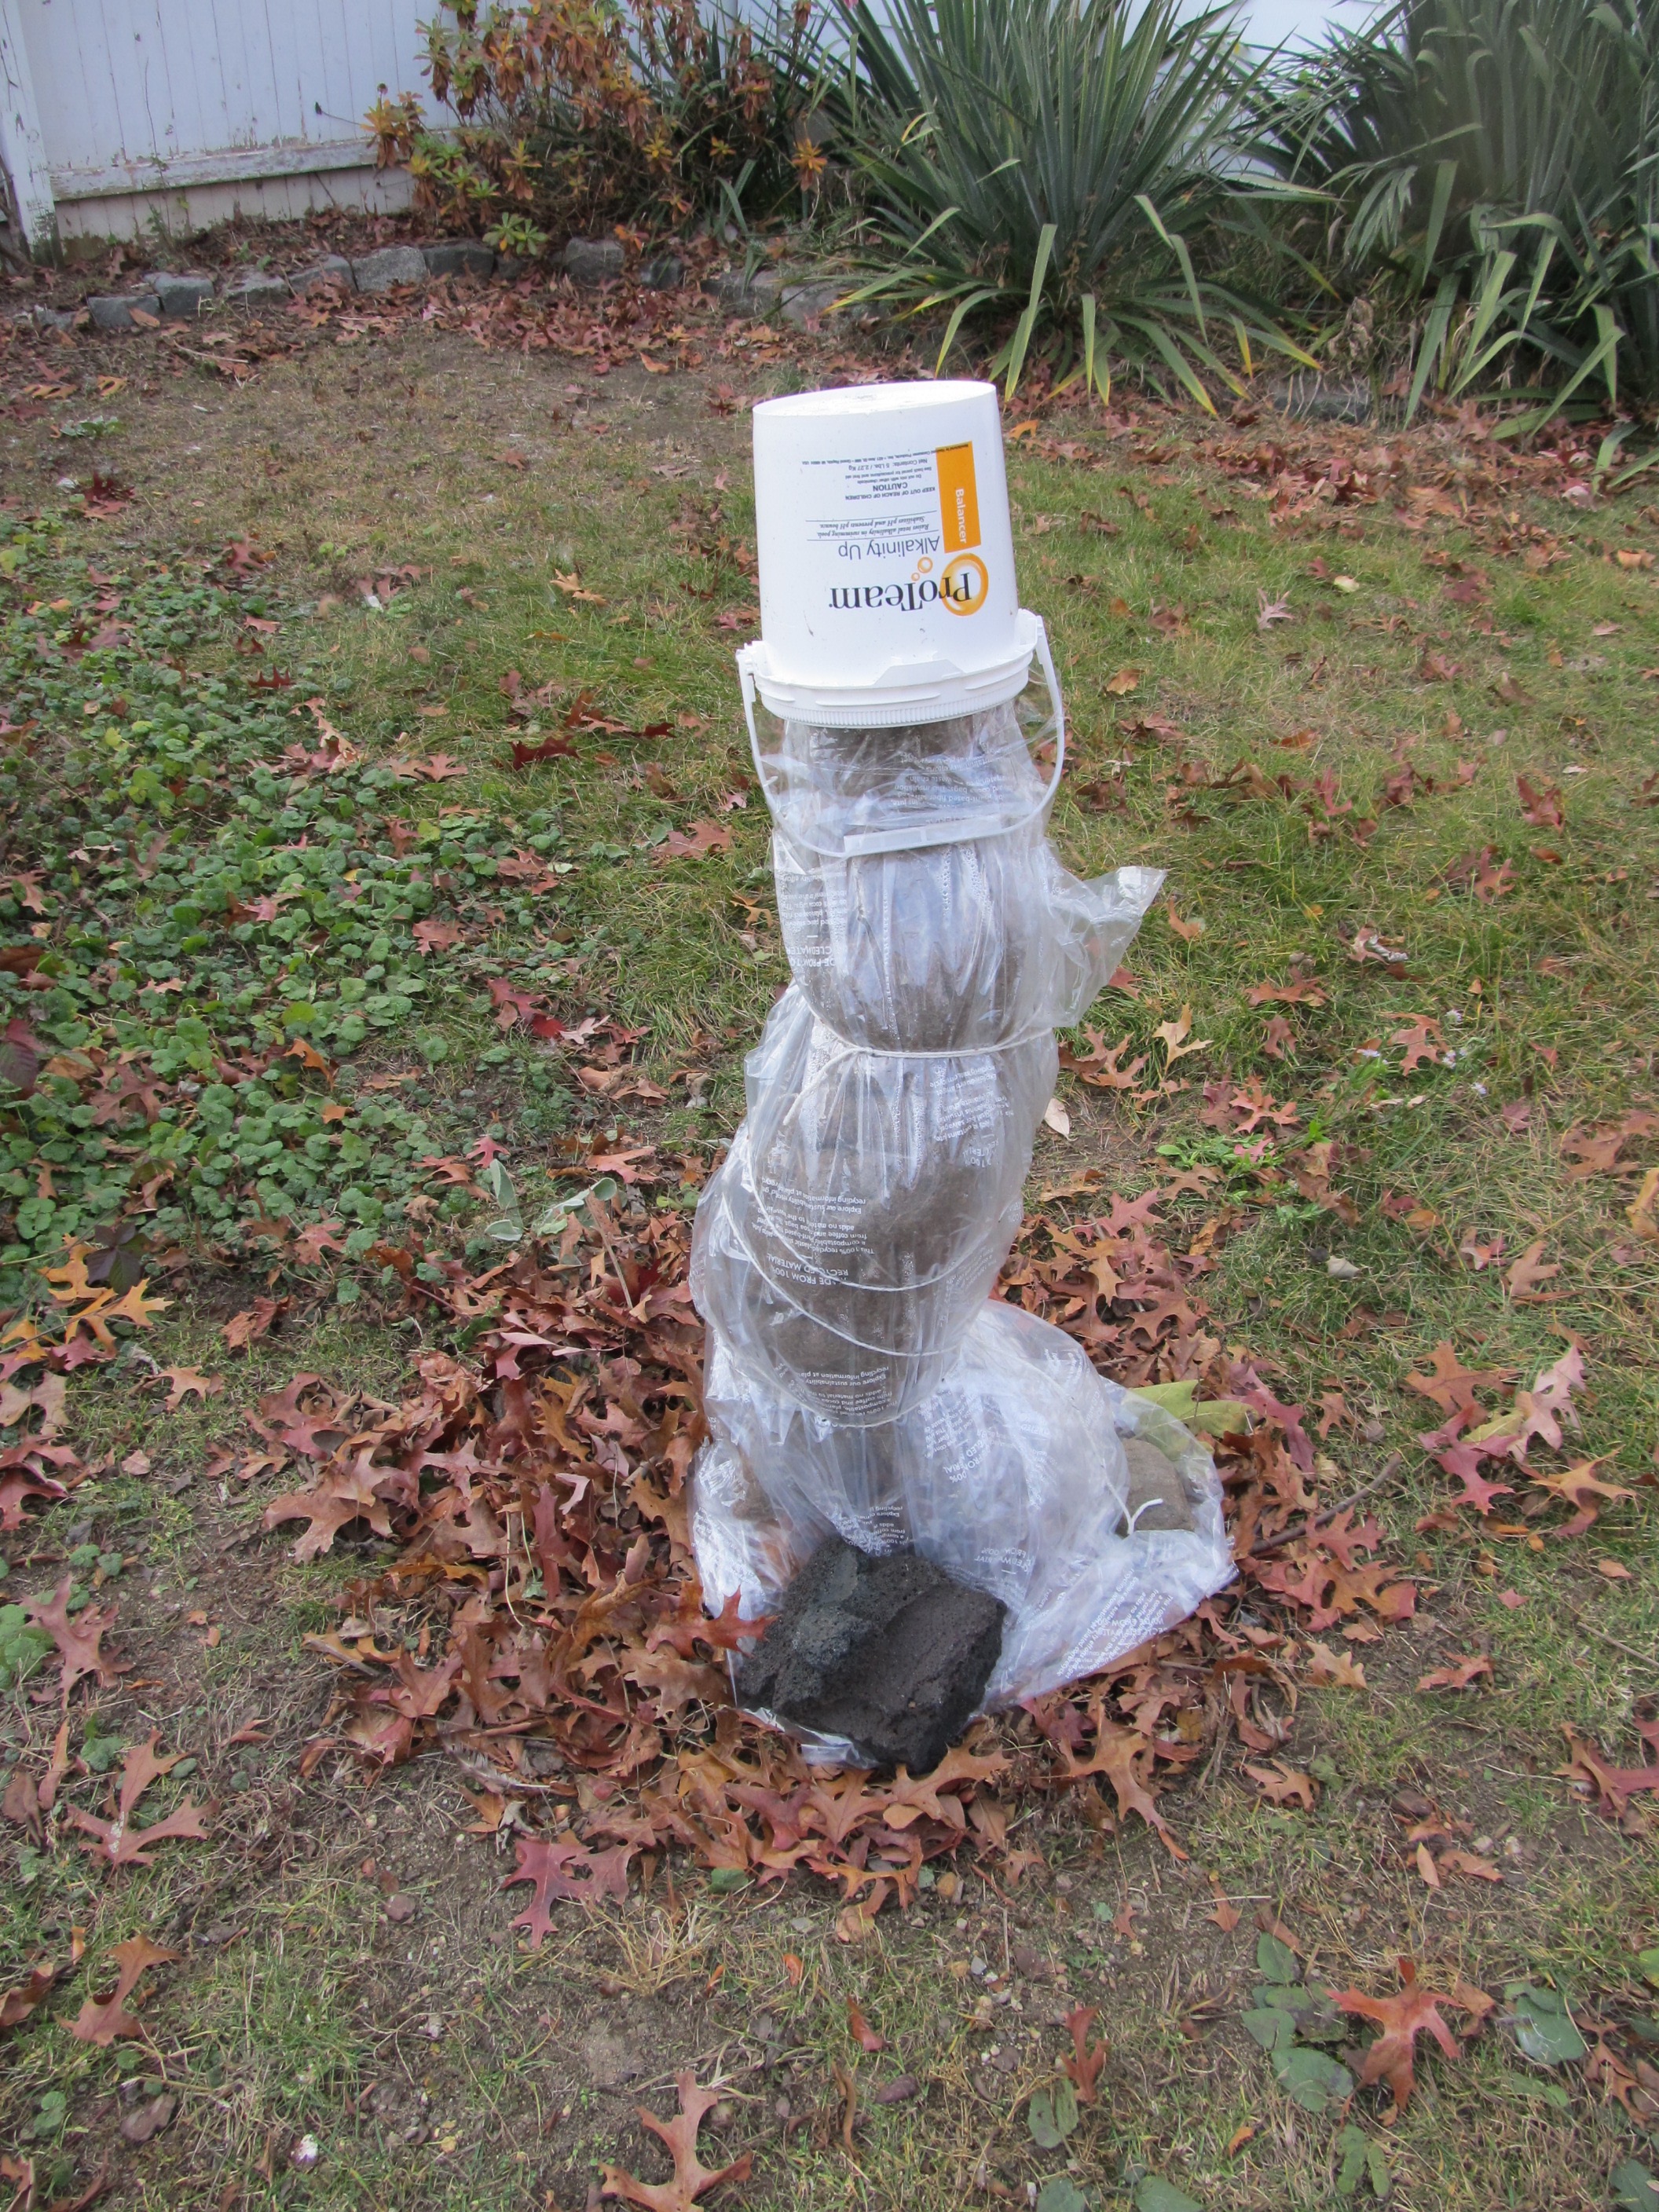
My daughter brought us home a fig tree this summer. After planting it began growing beautifully and even provided us with a few figs! We really want to see this little fig tree grow and produce over the next few years so it is necessary for us to protect it over the winter by 'wrapping' it.
Why wrap it?
What climates should wrap the tree?
When?
How to wrap it?
In the spring:
Here are some pictures:
Thanks for visiting!
Stay tuned for an update in the spring when we "unwrap' our fig tree. And please check out our social media links above! Sincerely,
Seriously, yes, sort of. They exist and I can only wonder why on Earth I didn't know sooner. Talk about simple. I am a little upset that I have wasted so much time every year clearing a planting area, fertilizing, and planting seeds to grow my beans. Why not plant something once and enjoy the benefits for years to come? This is just common sense! Well, it is common sense if it actually works out that way. I intend to try this spring though!
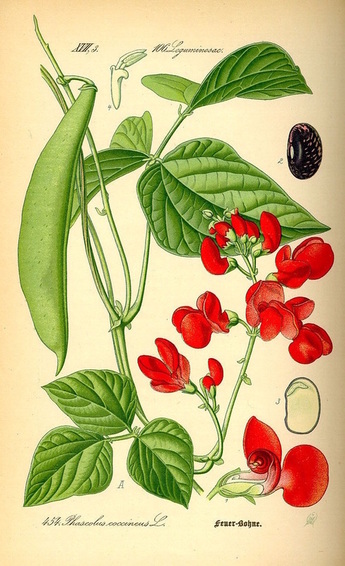
Phaseolus Coccineus
These special 'perennial' beans are called scarlet runner beans, but buyer beware! If you don't purchase the correct latin name for the perennial version you will find yourself planting every year as usual. This is exactly what I did the first time I purchased the beans. Foolish me for not doing my research first (one of the things about me I usually am very good at).
You want to buy the Phaseolus Coccineus - not Phaseolus Vulgaris - both of which are titled Scarlet Emperor Runner beans and look EXACTLY the same but aren't.
The Coccineus beans are supposed to grow back every year as a perennial. However, if you aren't careful they can die off in the winter and act like an annual anyway. I read that if you live in zone 7 or greater it's important to mulch over it in the winter to increase the chances of it surviving to come back in the spring.
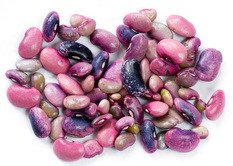
The vines grow beautiful orange flowers that many simply like as an ornamental. In fact the flowers are so lovely that they are known to attract hummingbirds! I read that the beans grow rather large and the outsides become rough so if we want to eat them like a string bean (which we do) that it is best to pick them early. However, all is not lost if they do get big because they can be harvested for the beans inside the pod which can be dried and used (eaten) in a variety of ways. I will plant them for the first time this spring in zone 7 and get back to you this time next year to let you know how they worked out! Some other basic information:
Thanks for visiting!
Any comments? I would love to hear from you so please add them below! Sincerely,
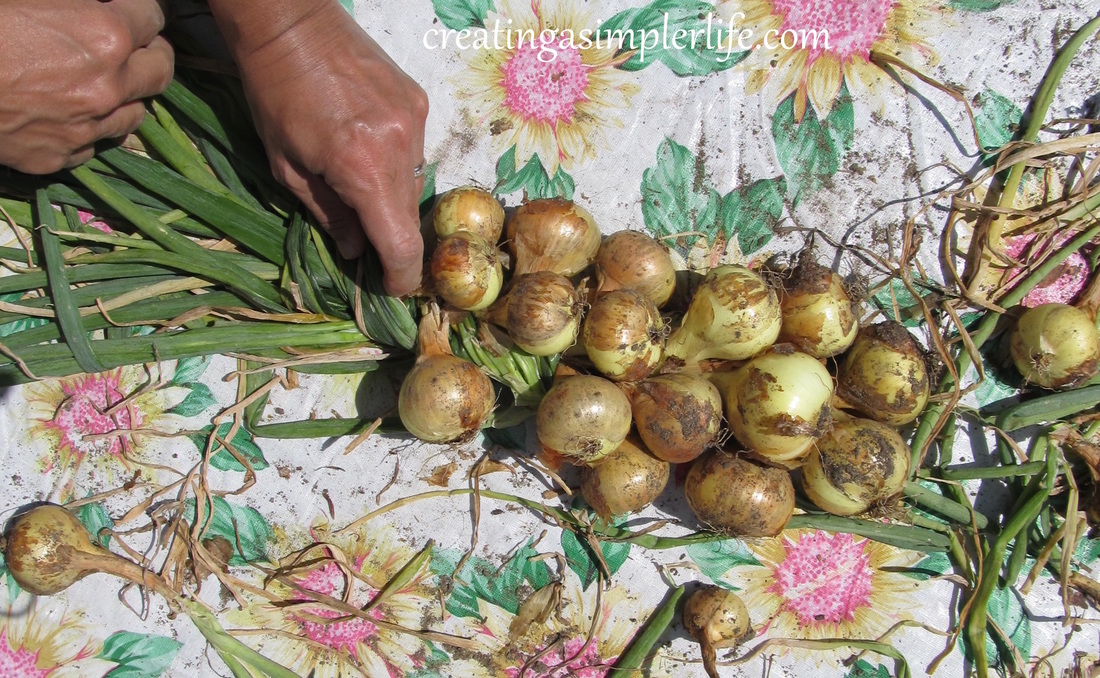
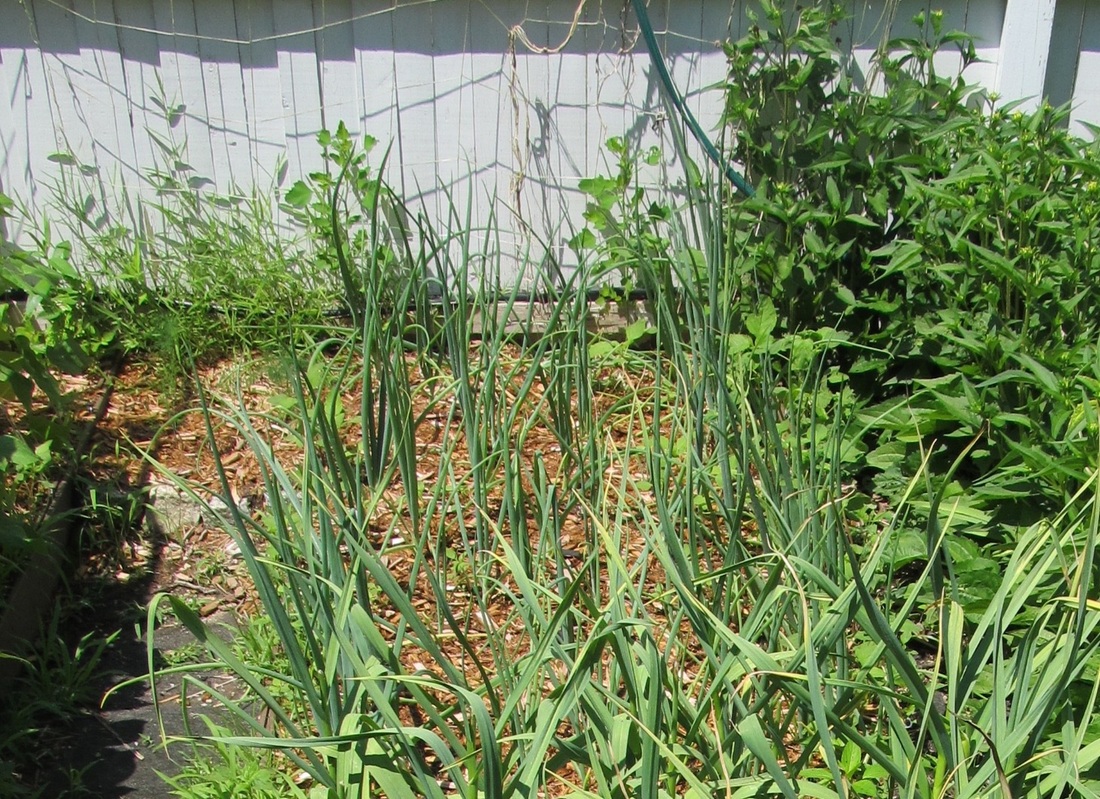
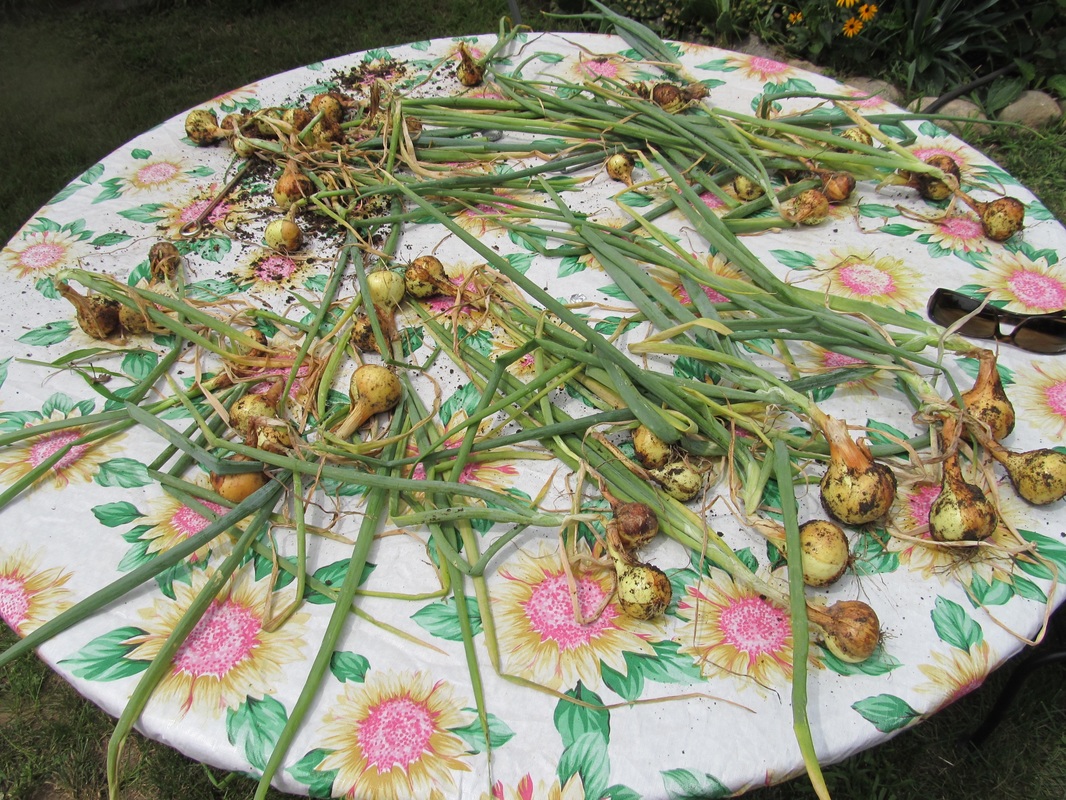
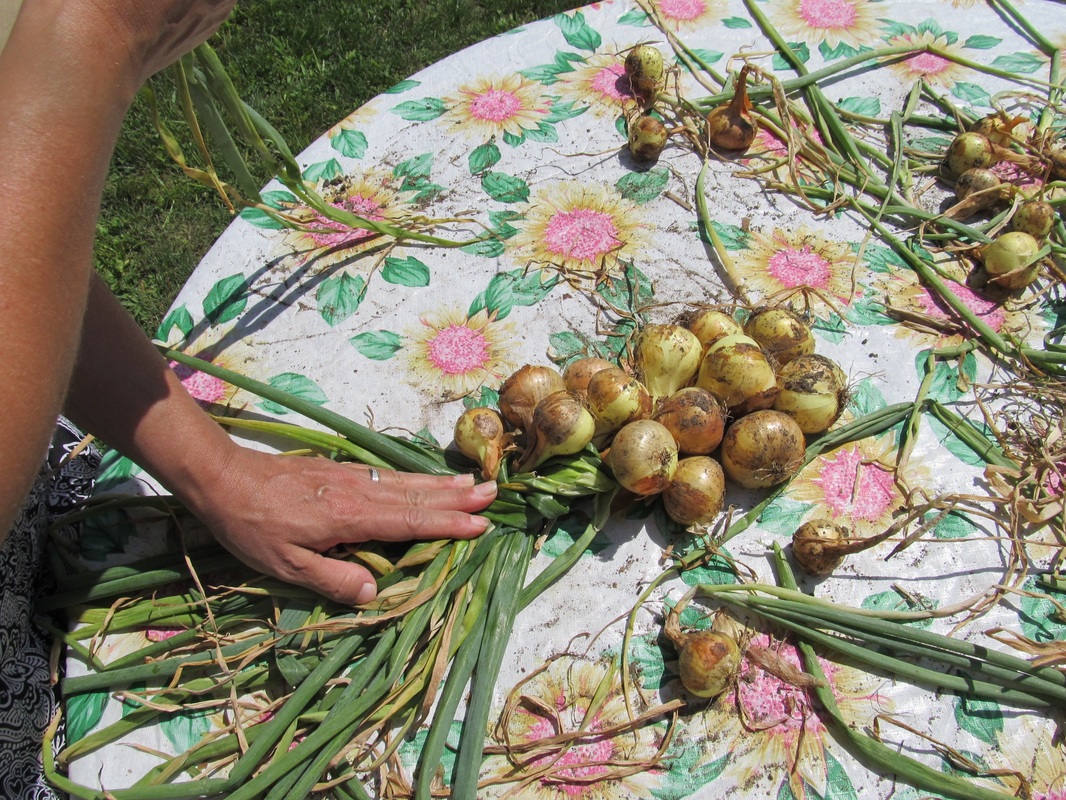
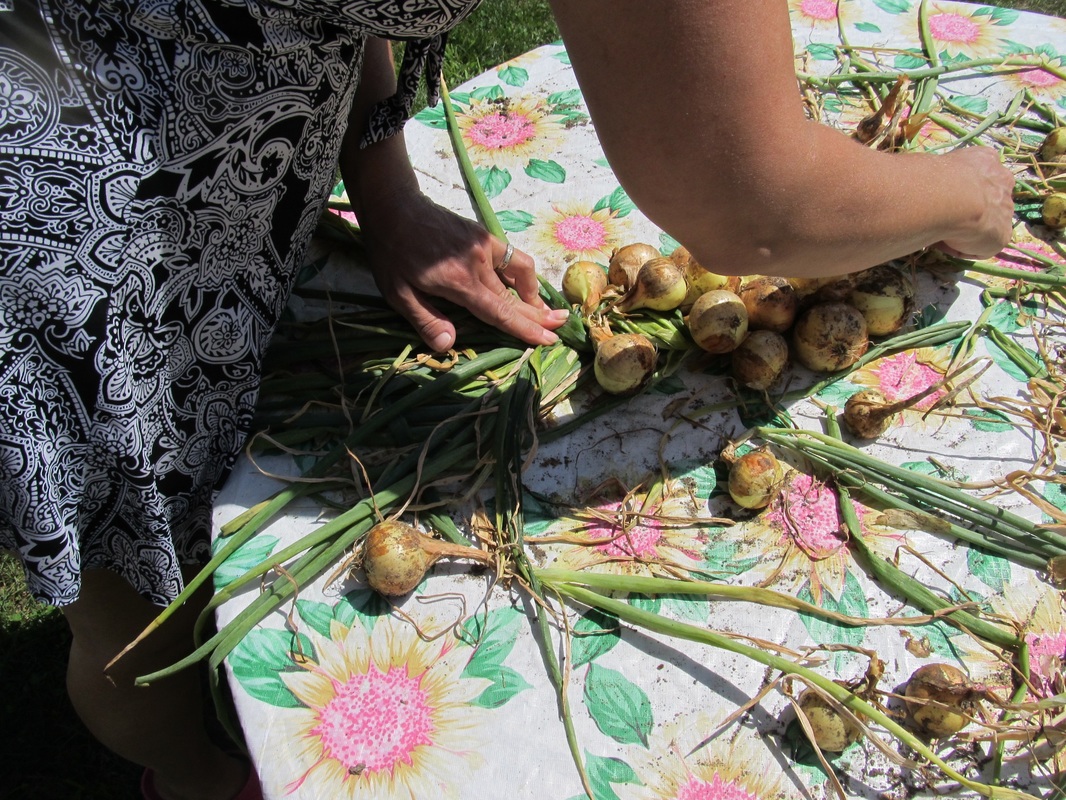
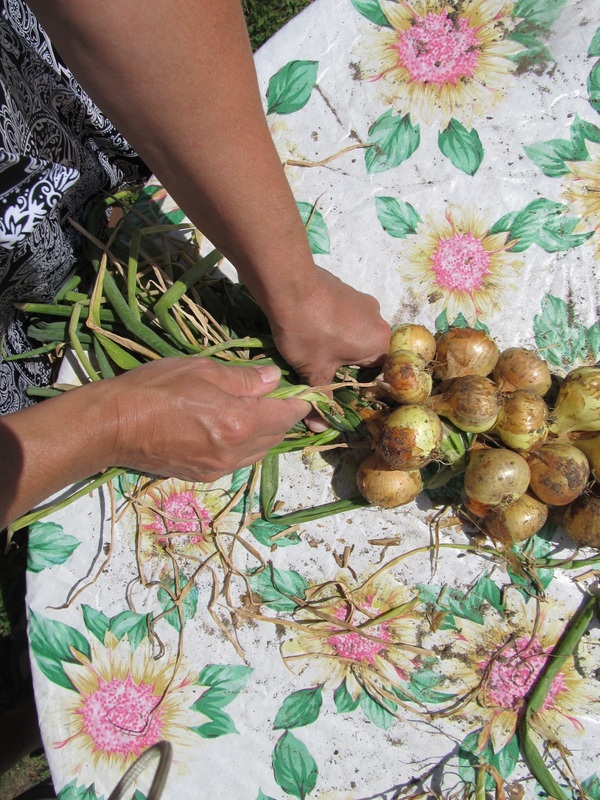
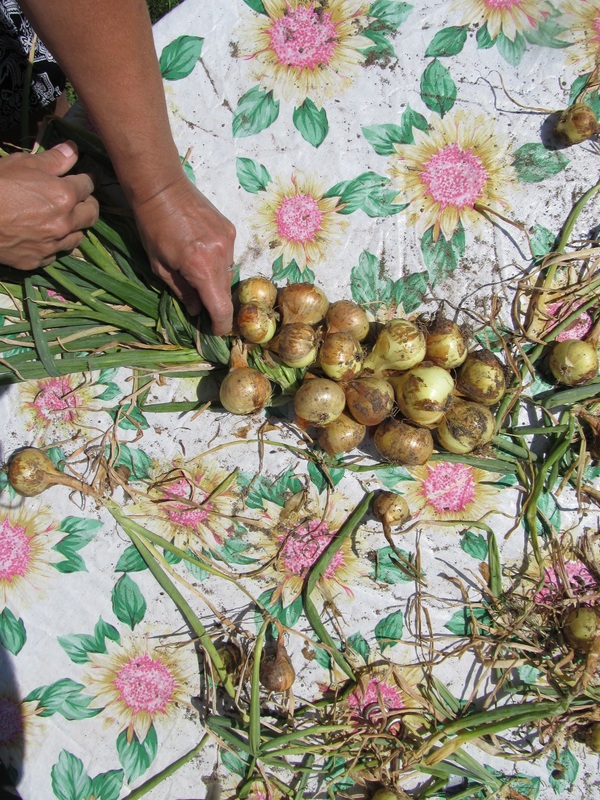
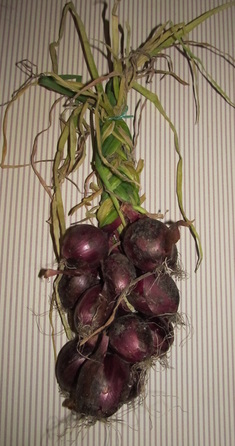
Growing onions is so simple. I kind of cheat by buying packages of 'seed' onions. These are tiny little onions you can just stick in the ground and they simply grow into bigger onions. Really super simple! I ended up with quite a few nice yellow onions this year despite the heat so I am quite happy, especially because last years crop completely died.
Anyway, the onions were recently ready so I went out and carefully removed them so the greens remained in-tact. Now they are ready for braiding! I look forward to eating them all winter long!
NOTE: we also harvested all our shallots and braided them for the winter too! I just love all the fresh onions, shallots and garlic! Check out the garlic post here!
If you have never tried growing your own onions, or shallots definitely give them a try in the spring next year!
For garlic it's actually time to plant them right now! Check out planting garlic here. Thanks for visiting! Sincerely,
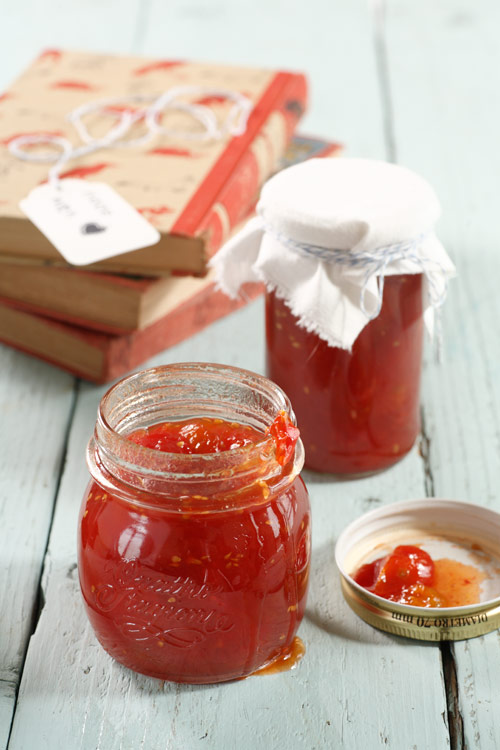
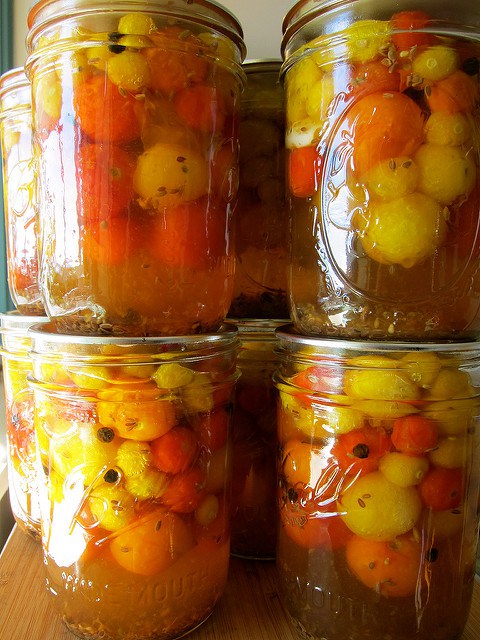
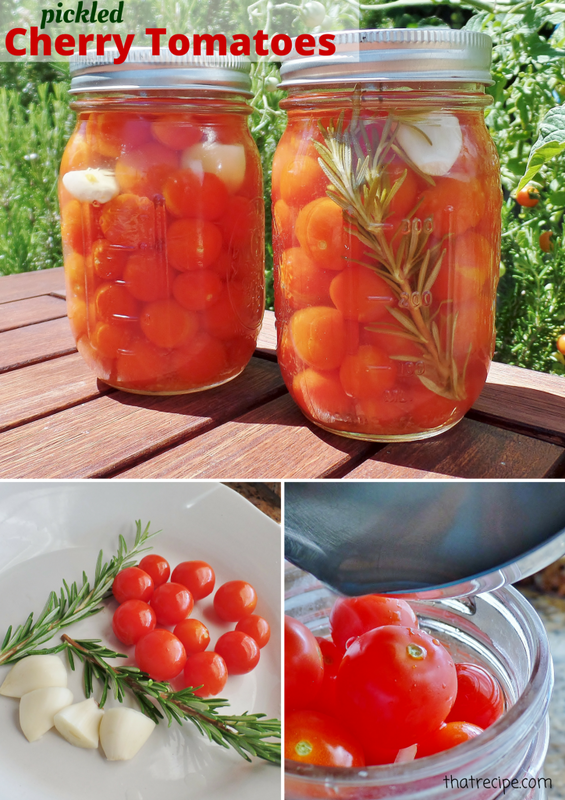
I absolutely love cherry tomatoes. In fact, they are the ONLY tomato we grow! We do not eat a lot of pasta here so tomato sauce is not rarely used, but we do eat ALOT of summer salads and cherry tomatoes go perfect in them! But seriously, we are just two people and we can't eat enough of the cherry tomatoes to keep up! Even with sharing with neighbors and feeding them to the chickens, there are just so many more! So I got to thinking - What else can I do with them? I know I can freeze them, but that's just too boring to me since they can't be eaten in a salad after being frozen so I would rather just sun-dry them and then freeze them like I've already been doing. No, I really want to try something completely different with my excess cherry tomatoes, so of course I RESEARCHED all the possibilities on Google - after all it is one of the things I am really good at - and here are a few of my favorite ideas:
Thanks for visiting!
Please consider following us on social media for more interesting ideas that help in creating and living a simpler life for you and your loved ones! Sincerely,
|

Hi there! I'm Kathie, the author behind Creating A Simpler Life blog. I'm excited to share our longterm projects (and planning) toward building our future retirement homestead in the Adirondack Mountains of New York. In the meantime I will be sharing all the other little things we do that are part of creating our simpler life!
Categories
All
Archives
July 2020
|


 RSS Feed