Blog
A little bit of anything and everything that's part of
creating, enjoying, and living a simpler life!
creating, enjoying, and living a simpler life!


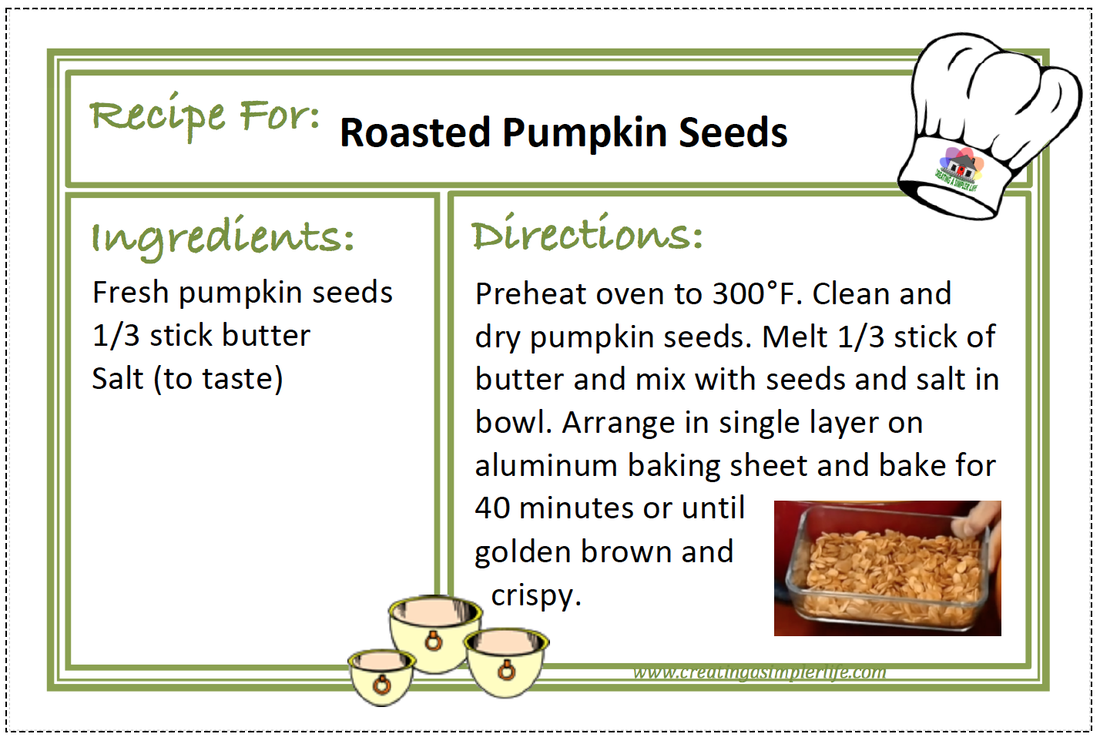
Here is a super simple recipe for a creamy delicious pumpkin soup that doesn't include any crazy spices. There is also an easy recipe for super buttery roasted pumpkin seeds!
Use the button under the recipe cards (below the video) to download the pdf file. It will print one sheet of 8 1/2 x 11 paper, preferably cardstock paper. Cut out each of the 4 x 6 inch recipe cards and put them in your recipe book! They always come two recipes per sheet in an effort to not waste paper! Visit my Recipes Page to print out previous recipes (pdf files) or to download a FREE 4 x 6 Recipe Card Template (.dox file) for your own recipes! Don't want to print them? No worries, just copy them down and enjoy! Check out my video showing how I used every part of the two sugar 'pie' pumpkins - nothing went to waste!
Recipe Cards (pdf file link button below):
Thanks for visiting!
Please like and subscribe :-) Sincerely,
0 Comments
We recently purchased two kayaks and having never kayaked before we really did not know what to expect. However, the truth is....we are absolutely hooked!
We love it and can't wait to get out there every chance we get now, and especially to get a chance to go fishing :-) The Kayaks cost a little money to start with (though these were a relatively inexpensive model), but if we take care of them they will literally last forever so they were definitely a worthy purchase that will be fun for a very long time to come. They are light-weight and can easily be transported using a small trailer or in the back of our pick up truck so we can just pick them up and go to any local lake or river we choose at any time we choose. Of course, in the Adirondack park there are so many FREE access points for people to drop in their kayaks and go that we could choose a different one every time and never run out of options. There were a lot of reviews online about these particular kayaks and we took the time to reach through each and every one before deciding that these were still the best kayaks for us. In the video we address the common complaints and show you how we either fixed them, or discuss why we didn't have an issue with it. Check out our YouTube video review and watch us paddle around for the first time ever! You won't believe how easy it really was (And how great these kayaks are too!). Oh, and did I mention the best part? THEY ARE MADE IN THE USA!
Made in the USA clip art from http://www.clker.com/clipart-418724.html
Check out our second trip as beginners!
And check out how we fixed the tracking problem!
Thanks for visiting!
Sincerely,
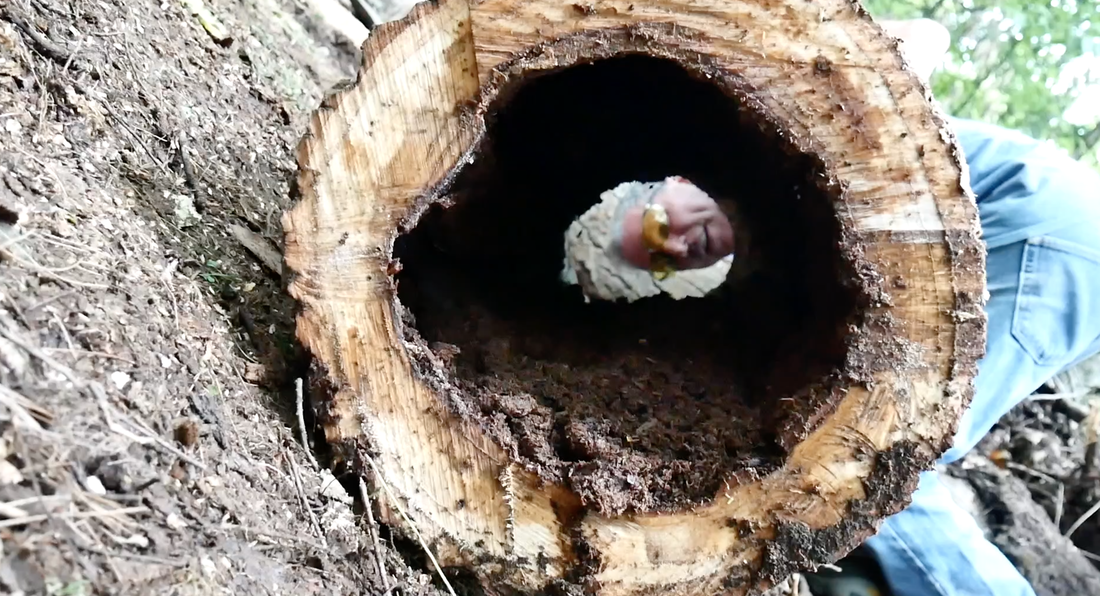
So we have hollow logs and trees on our land and this can be a real problem. We honestly had no idea that this was even a thing until we started clearing the land to put our private driveway in. Turns out this is a pretty common problem. It is also a dangerous problem, but I will get to that in a minute.
Why are the trees hollow? This is a question that I needed an answer to. I guess this is why I am a science teacher....I need reasons and answers. I not only wanted to know why, but exactly what causes it, how to prevent it if possible, and how to recognize trees that might be hollow inside and pose a danger. Ok, so the reason they are hollow is because they literally have a fungus eating them from the inside out. Yup, sounds gross. But apparently that is what it is. It is sometimes called heart rot because it is eating away at the 'heart' of the tree. There are actually different circumstances that can cause the fungus to eat away at the inside of the tree quite rapidly. For example, too much water will allow the fungus to thrive and this was one of the most common answers I was given when I asked people who live in the Adirondacks - it's caused by too much water. The answer makes sense if you have ever been in the Adirondacks in the spring. Have you ever heard of the muddy season? When the snow melts the Adirondack park becomes a giant mud puddle. It was even hard to walk around our land in the spring - only high spots could be navigated without sinking in. But the water just helps the fungus to grow, it is not the cause. 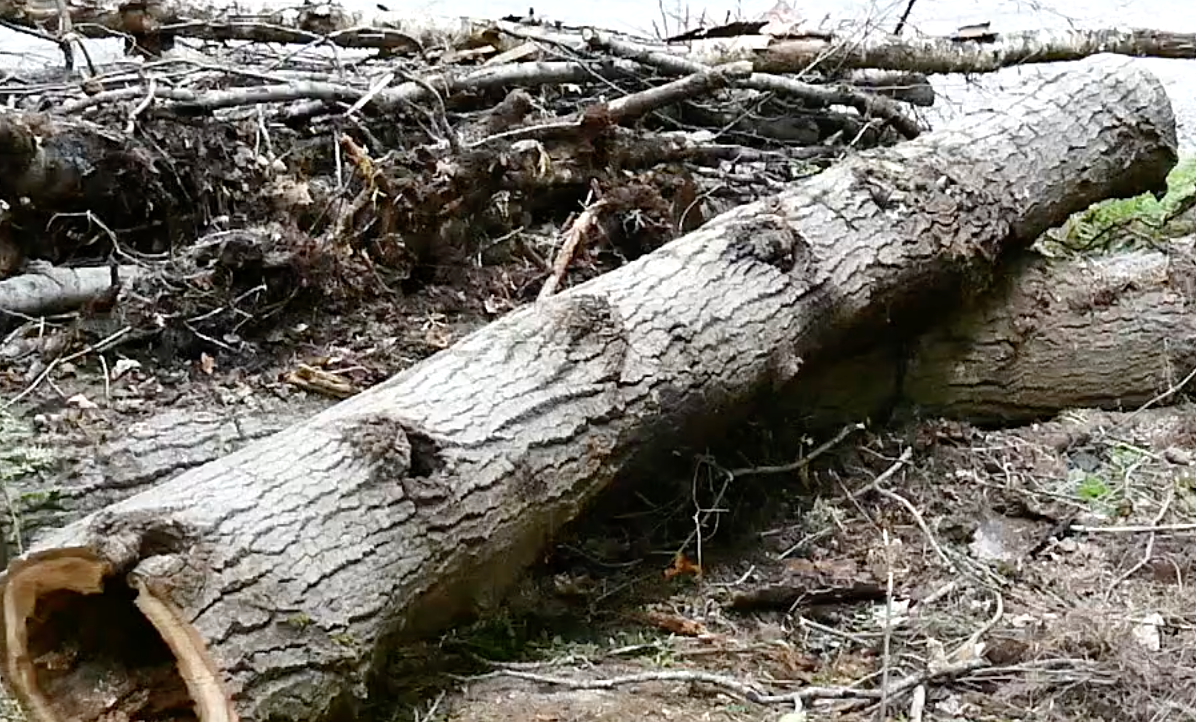
You can see the locations where branches broke off and fungus was growing at one point.
What causes the fungus?
The Adirondacks can be a pretty dangerous place when the weather suddenly changes and the winds pick up. Especially in the spring when the ground is so wet and soft. The trees tend to be very tall and the roots are not necessarily deep due to the bedrock being near the surface in a lot of areas. During this time trees can fall very easily. Seriously, I know this first hand. We were hiking around our land this past spring when this happened. I was standing in what is not our clearing listening to trees crack as they began to fall. It was one of the scariest moments in my life. I heard it, but I didn't know where it was. I just stood still urning in circles to see what was falling so I would know if I needed to run or not. Luckily it fell a good 20' away from me. I was also fortunate that it did not hit another tree and cause it to also fall (also a very common occurrence). So anyway, as we spend more and more time on our land we are learning more and more about the dangers that lurk beyond the beauty and peace of it all. So back to the fungus. When winds blow and trees fall, branches also tend to break. Trees can also be damaged by vehicles and work equipment, and even humans when clearing a path. Anywhere a branch has been broken or cut off an open wound is literally left behind for the fungus to grow and enter the tree. The fungus is always out there and is referred to as shelf fungi or fungal conks. They come in different shapes and sizes and can also be beneficial in some ways. However, the conks are how we are going to be able to identify the trees that are most probably hollow. All we have to do is identify the trees with a lot of conks going up it and that would be the one we want to cut down because it is not healthy and has the potential to fall easily in the next storm. 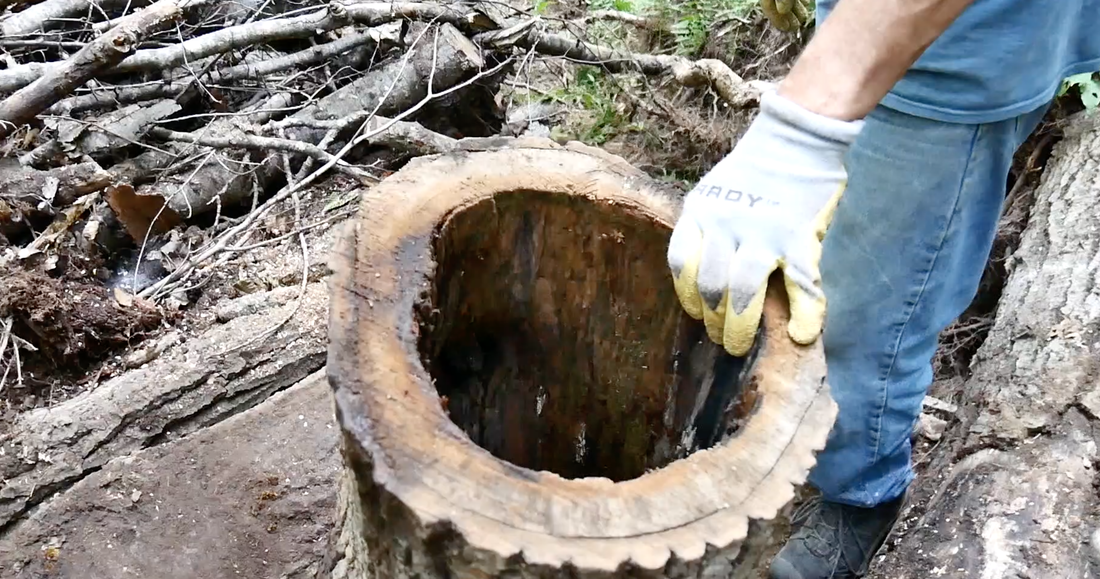
What to do?
Well, we will begin harvesting the trees that we believe to be hollow or damaged and we will use the wood! It could simply be burned, but we prefer to be more creative. I have already made some beautiful picture frames (video and post coming soon) and we have plans to make some end tables and maybe even a coffee table. Nothing goes to waste! Even the soft material inside is great for the garden! Check out the video we made of us harvesting the wood, laying it out to dry, and even cutting a few slices to make picture frames and please subscribe to our YouTube channel! It would help us out a lot :-)
Here is a video of the photo frames I made with some of the slices my husband cut:
Thanks for visiting!
Sincerely,
Sources:
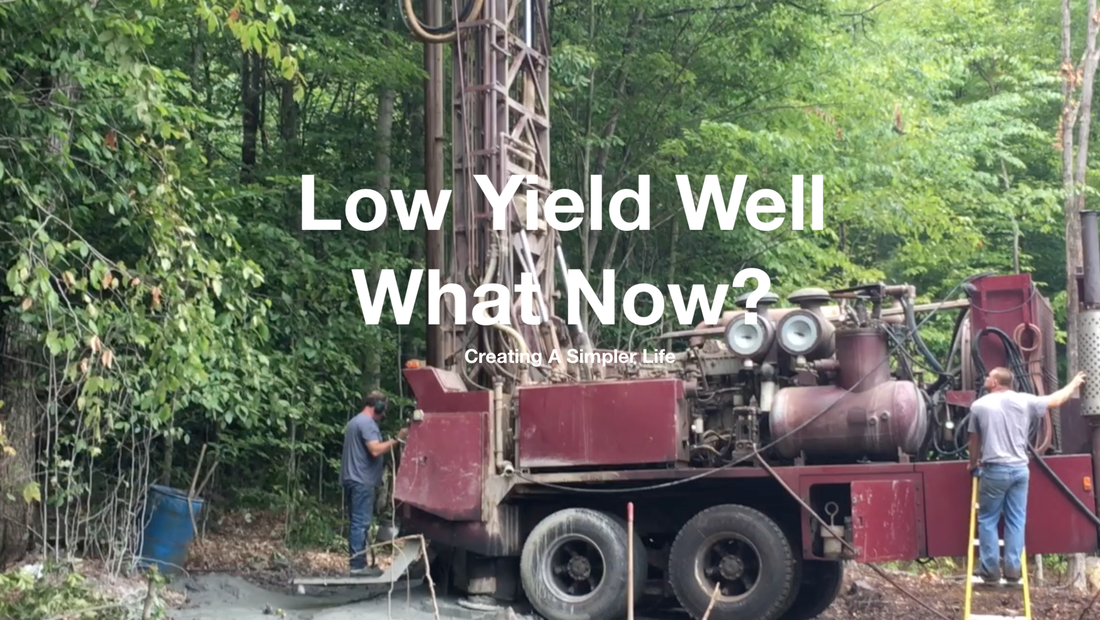
So we recently had a new well drilled on the homestead we are building from scratch and despite going down 680', we are only yielding about 1/2 gallon per minute. Ideally a well should get 5 gallons per minute or more so we are not anywhere close to what we really want, or need for that matter. So now what?
This leaves us with a couple of options.
Here is a video we made about the process so far:
And our decision....
Thanks for visiting!
Please remember to follow us on social media! Sincerely,
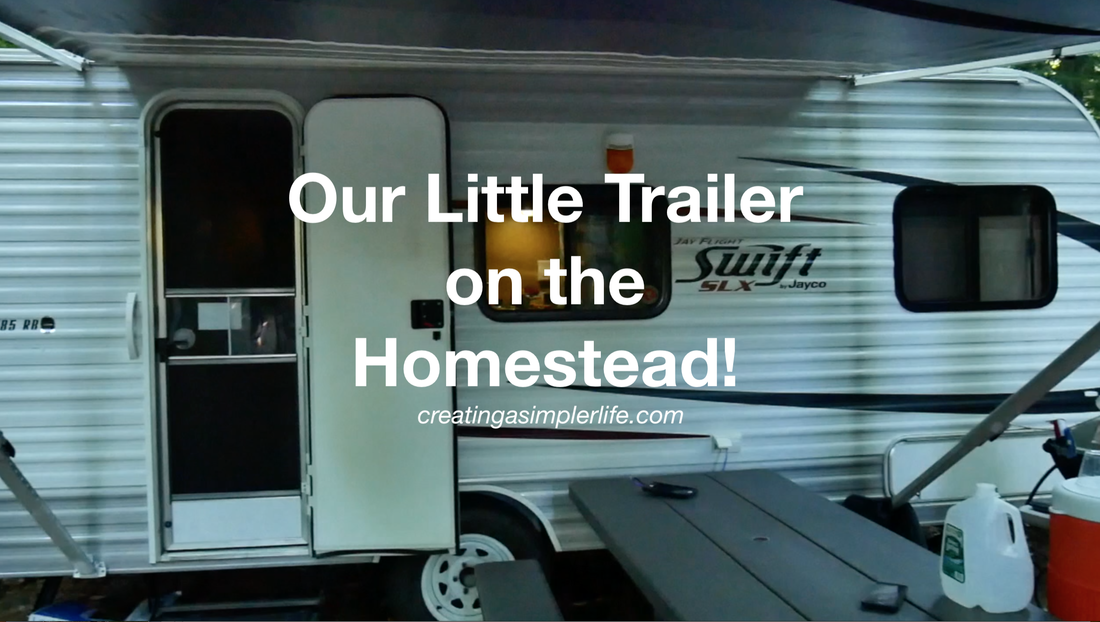
Now that the road is done we were finally able to put our trailer on our land for the duration of summer and fall. We will be bringing it back to Long Island for the winter because we have it set up on the snowmobile trails that pass through our land and we want to make sure that is open and running for our local community to use!
We absolutely love this little Jayco trailer and are very happy with it. We have had it (and been using it) for several years now and have not had any problems at all with it. Be sure to check out the video tour of our little trailer at the bottom of this post! It is not an expensive trailer to start with, but since purchased it as a left over from a dealership we were able to get it for just under $10,000. Now I know that we could have purchased a used one for half of that but at the time were were looking we only had the Jeep liberty to pull it with. That limited us to finding a very small and very light trailer. We used the Jeep to pull it for several years and mostly that was fine. There was a bit of a struggle pulling it uphill (The mountain roads in upstate NY can be brutal!) so we were really careful about how much we filled it up (water, etc.). But that's all changed now. This past fall we purchased ourused Chevy truck and well, honestly, you hardly know the trailer is behind it! Now we like the trailer even better and we have absolutely no intention of upgrading to a larger one. We just don't see the need at all. So, let's talk about the positive's and negatives!
Negatives first:
Now the Positives:
Upgrades We Made (affiliate links for some):
**NOTE - No modifications were made to any outside wall - any holes drilled were only on inside walls (between bathroom and closet) or through the sides of cabinets (TV Mount and shelving unit).
Other Items We Use For Our Off the Grid RV (affiliate links):
Thanks for visiting!
Please go to our YouTube Channel and subscribe! This is the way we will be communicating most of what we do as we move forward with building our homestead :-) Sincerely,
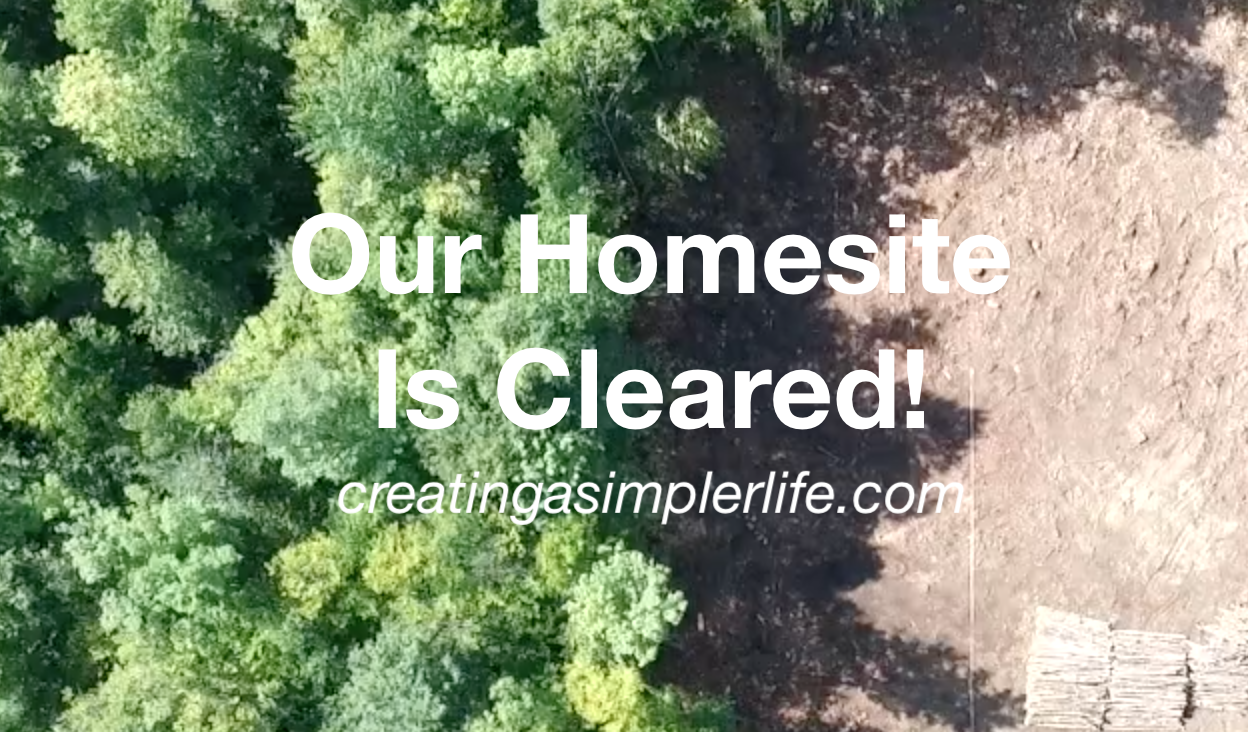
Well, it's official. Our land is cleared for building! The road has been completed and now we have about a 1.25 acre clearing to begin building our future homestead.
There is still a lot to do though. We are meeting with the well drilling company this weekend and we are still waiting to meet with an engineer to design our septic system. Yes, this is a new thing as per the New York State Board of Health. Everyone needs a system designed by a specially licensed (NYS) engineer. Of course that means that you can't hire any ole' engineer. Only an engineer that has taken a special septic design certification in New York State. Ugh...very annoying. Anyhoo....the engineer we want is so backed up they can't even come until mid August or later! So we will just have to wait. We have also made our application to National Grid to have underground electric, but of course this is on hold because of the septic. We didn't know it originally, but if we have three out of four things (foundation, road, well, and/or septic), National Grid will cover a nice chunk of the cost of underground installation including the transformer, and a cost equal to 100 feet of above ground wire connection. That totals a few thousand dollars (And an additional savings of the $800 fee we would have had to pay for temporary service.). So, bottom line, the electric is on hold! No brainer there. But either way, we are off to a great start. We have a road. We have a clearing. And we put our little trailer on the land so we can now enjoy it even more! Check out our latest YouTube video showing the land clearing and please, subscribe to our channel to stay up to date on all future videos!
Sincerely,
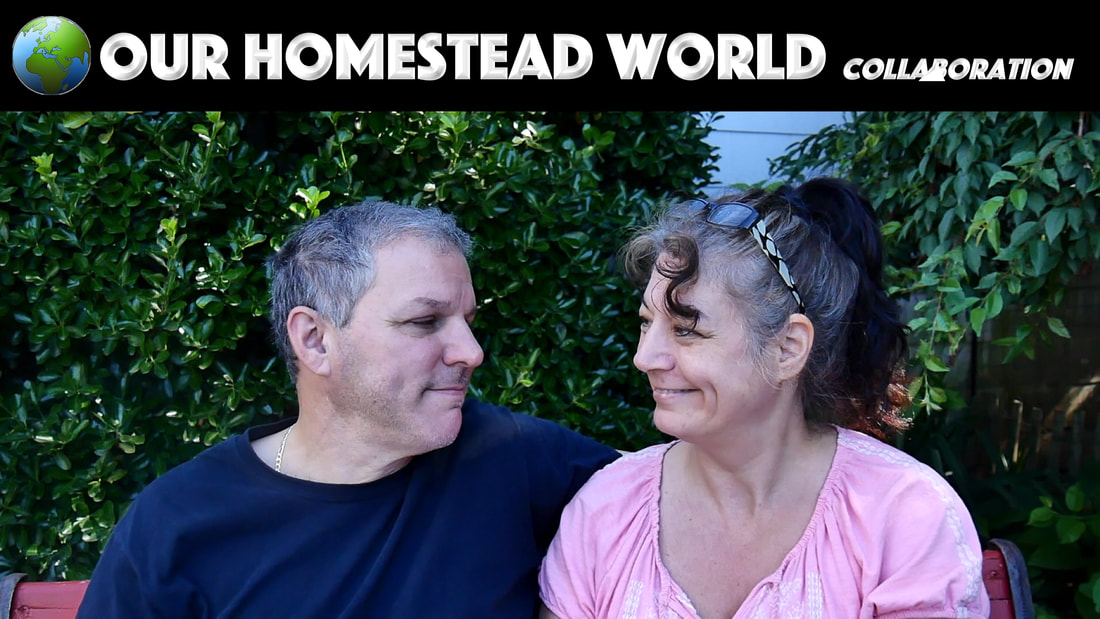
So, we joined a collaboration on YouTube for the first time. This is very exciting for us because it is the first time that we have connected with other homesteads around the world. It is really fascinating to see all the different ways of homesteading there are today. From small homesteads like ours here on Long Island, to really large homesteads with hundreds of acres, everyone is different, but the common theme is the same: they all want to be self sustainable. This is a really big deal today because there is so much dependence upon the world for basic survival that to do it like the pioneers did has become really important to individuals, couples, and families, that only want to depend upon themselves.
In our video below we talk about the homestead we currently live on that is located on Long Island in New York, USA and we talk about the homestead we are currently building in the Adirondack Park of New York for our retirement in a few years!
If you enjoy it and are interested in upcoming videos please subscribe to our YouTube channel "Creating A Simpler Life."
About The Collaboration:
The collaboration was started by two homesteads as a way to connect with other homesteads so that everyone can share what it is like to homestead where they are located because who knows, maybe someone else might want to try homesteading there too! Check out there YouTube channels and their videos below and subscribe if you like what you see!
The collaboration is open to any homestead around the world that wants to make a video and join the playlist. They really want participation from different countries and different states. The more the better! No matter how big or small your homestead is, you can join. You simply need to answer a series of 15 questions (see below) and upload a video to your YouTube account. There are particular ways of titling the video and you will need to reach out to Danny and Wanda and/or Liz to have them share your video on their playlist. You will also need to create your own playlist and add all the other videos that have already been contributed.
Questions To Answer:
No experience making videos? Nobody cares! You can use a cell phone, a camera, or even set up your computer to record. It doesn't matter and it's never too late to try!
Thanks for visiting!
We hope you click the like button and join us on our journey to creating a simpler life now, and for our future retirement in the Adirondacks! Sincerely,
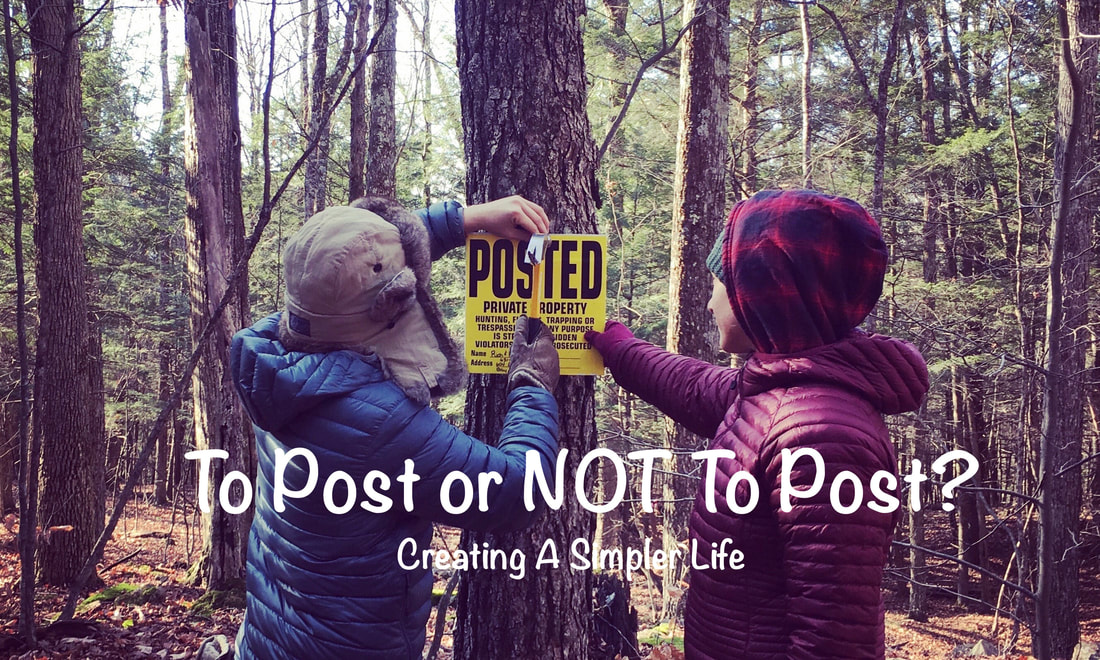
Now that we own 30 acres in a somewhat remote location in the Adirondack Park we started to think about the "what if's." What if someone is on it and gets hurt. What if a snowmobiler goes off the trail. What if someone hunts on it. What if someone goes on it without us knowing.....ugh. There were just too many things to think about so I started to do some research about the laws regarding vacant land, ownership, and trespassing in New York. Of course we wanted to be friendly with our future neighbors, and we certainly wanted the snowmobile club to continue using the trail running through our land but we just didn't know where to start or how to go about posting signs on our land properly. What I found in my research was quite interesting and not what I expected at all.
Here in New York the trespassing laws are controlled by the DEC (Department of Environmental Conservation) and this is what I discovered:
We Chose To Post...
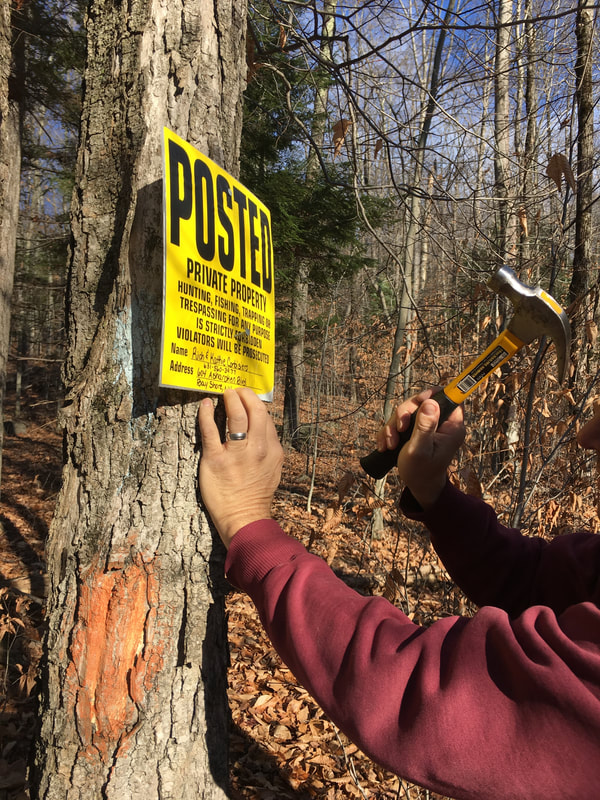
In New York State, if you choose to post your land, the signs must meet the following requirements:
Since the land was already posted with appropriate signs along the road, we just left them as is and added our name, address, and phone number to the ones we could reach without a ladder. We also purchased enough signs to post a minimum of every 100' all the way around the entire property. With a border measurement (including both sides the back and the front) of approximately 4,780 feet we purchased 48 signs (they come in 12 packs). We glued the signs to a thick plastic backing as support. It was scrap that we had laying around so that didn't cost us anything. Since there is a snowmobile trail on our land and we have an agreement with the local club, we also purchased three special signs you see to add to the locations where there are entrances onto our land and at the junction where the trail splits in three directions. We did however add that this was for the 'snowmobile trail' to the signs. Hopefully this works and people respect our property when we are not there.
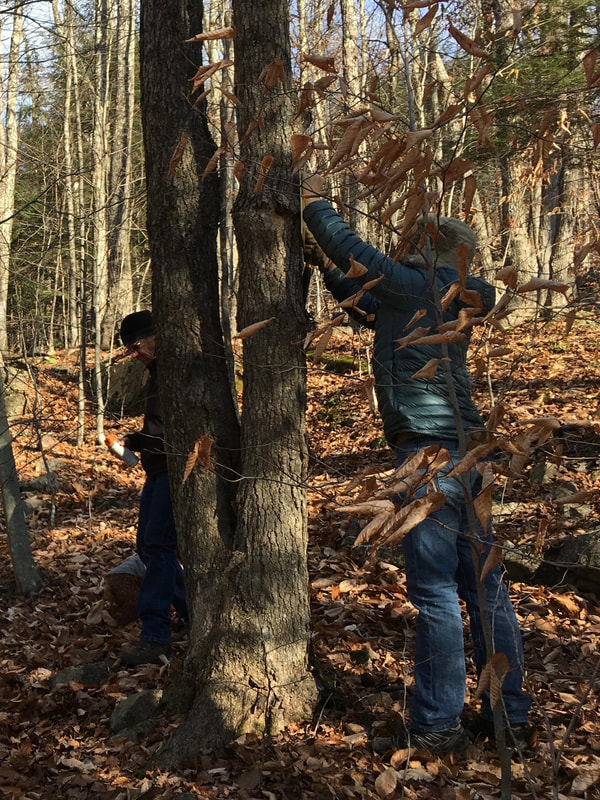
How We Posted...
We hiked the entire border of the land and posted it! The first half we did with the company of family and then Rich and I finished the rest on our own. This was a great way to get to know and become familiar with the border of our land. We chose rather large trees that looked like they would be around for a while and galvanized nails to post the signs. The signs were posted facing out, away from our property, to prevent trespassers.
Check out our update on our posted signs in the YouTube video below! Please subscribe to our channel too :-)
Products purchased through Amazon (affiliate links):
Check out our other posts about our future homestead!
Thanks for visiting and have a great day :-) Sincerely,
We have bats. I know for a fact because they have literally flown past my head. This mostly happens ad dusk when we are swimming in the pool. The bugs just love to hover right above the surface of the pool so the bats just love to swoop in and "chomp" on them! I don’t mind though. In fact, I am actually thrilled because with all the mosquito born illnesses being discussed on a daily basis in the news we certainly want to get rid of them. So we welcome the bats because, well, they eat this nasty mosquitoes right up!!!
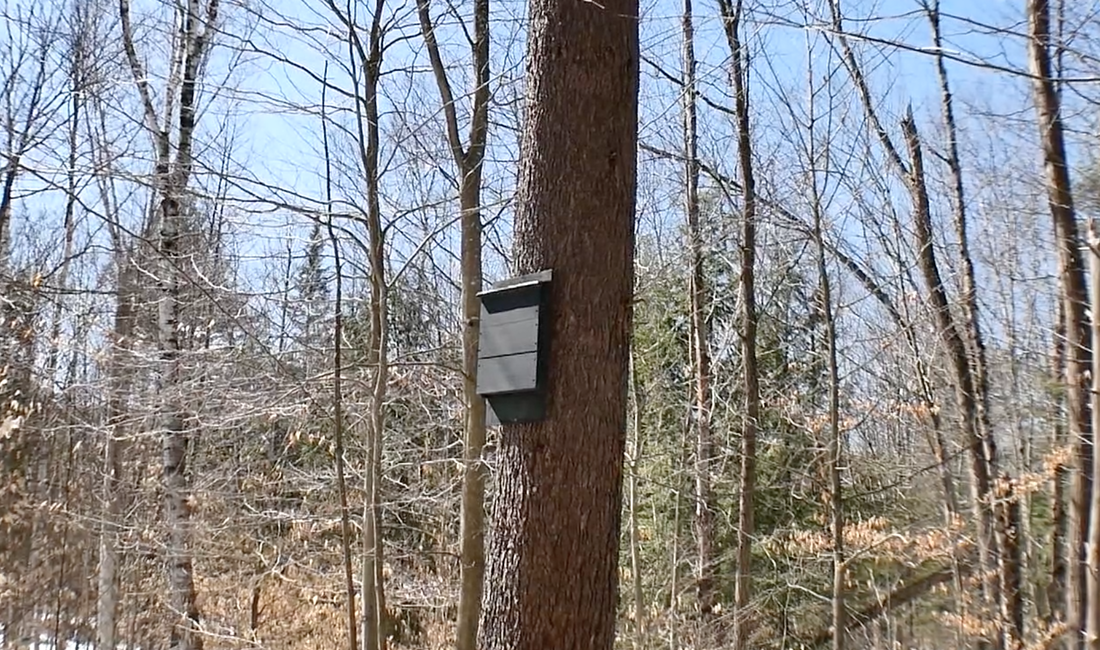
Think about it. Have you ever heard anything good about mosquitos? I certainly haven't. I just 'googled' the question and the only good thing that came up is that they are part of the food web. Yup, they are good food for birds, fish,frogs and, of course, bats! Their purposes on Earth is to be food for other animals. Sort of the bottom of the food web. So I guess it makes sense that we (humans I mean) do everything we can to either get rid of or to minimize their presence. On a community level they spray neighborhoods regularly where we live. I don't really like this, but even with the spray the mosquitoes are horrible. On a personal level people use all kinds of sprays and lotions, burn citronella candles, buy mosquito zappers, and more. In our yard we make sure there is no standing water, we make natural DIY mosquito repellant (essential oil recipe here), and of course use citronella in lots of places. And now, we finally have a bat house that holds up to 100 bats! But we are not hanging it at our current house, we are hanging it on our future homestead! Yes, that's right, we have decided to hang the bat house on our land in the Adirondacks. We chose to do this because the summer is when the mosquitoes are the worst and last summer when we were working on the land we were literally eaten alive. So this summer we are hoping to decrease the mosquito population by luring bats in the area where we plan to build our house. Check out our video on You Tube of How NOT to Hang a Bat House:
What are the benefits of a bat house?
What are the negatives?
Check out our YouTube video about why you NEED a bat house! Please be sure to subscribe to our YouTube channel for future videos!
What next?
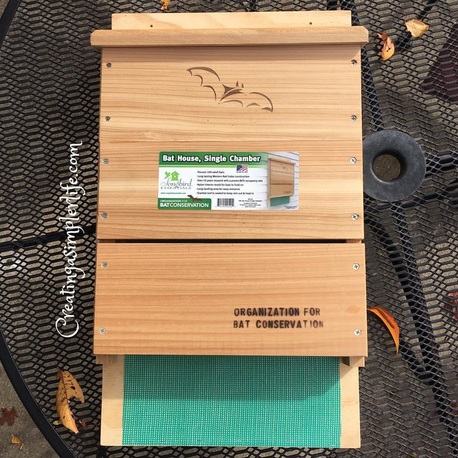
Buy or build a bat house – some links for plans and some links to buy it 1. Build a Bat house with one of these plans: - Single Chambered Bat House by Bat Conservation International - Plans, Tips and More from from the Organization for Bat Conservation 2. Buy a Bat house at this link (same one I have): - Single Chamber Bat House by Organization for Bat Conservation $49.99 Paint the Bat House: Depending upon where you live and the average temperatures, the color you paint it will vary. We painted ours black because of our location. 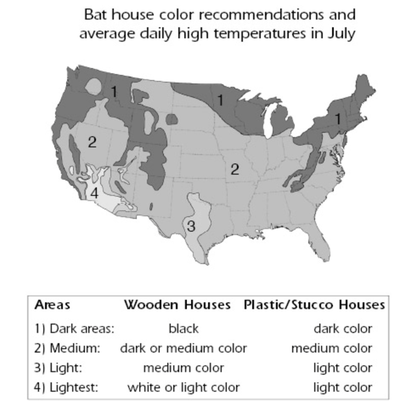
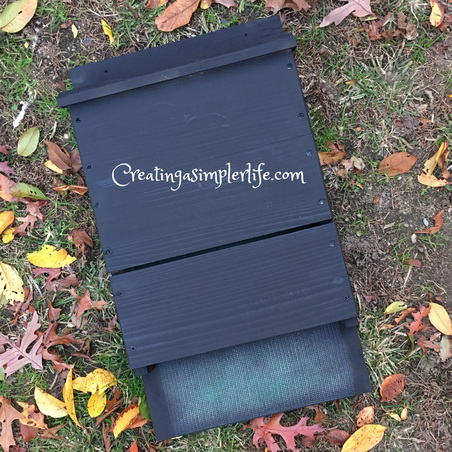
Try to use exterior water based paint or stain paint.
Hanging the Bat House
If You Build it They Will Come....Maybe
"What?" After all that work there is a chance that no bats will move in? This is true, thats a possibility. So here's how to increase your chances of having bats move in:
Update! We have purchased a new ladder (Gorilla Ladder 22') and relocated the bat house! Check out our new video of us using the ladder to relocate the bat house :-)
Thanks for visiting!
I would love to hear if you have a bat house and how it has worked out for you :-) Check out our Bats and Bat Houses Pinterest page for more information and tons of other plans and ideas. Sincerely,
Sources:
http://www.cdc.gov/rabies/bats/education/ www.mayoclinic.org/diseases-conditions/histoplasmosis/basics/definition/con-20026585
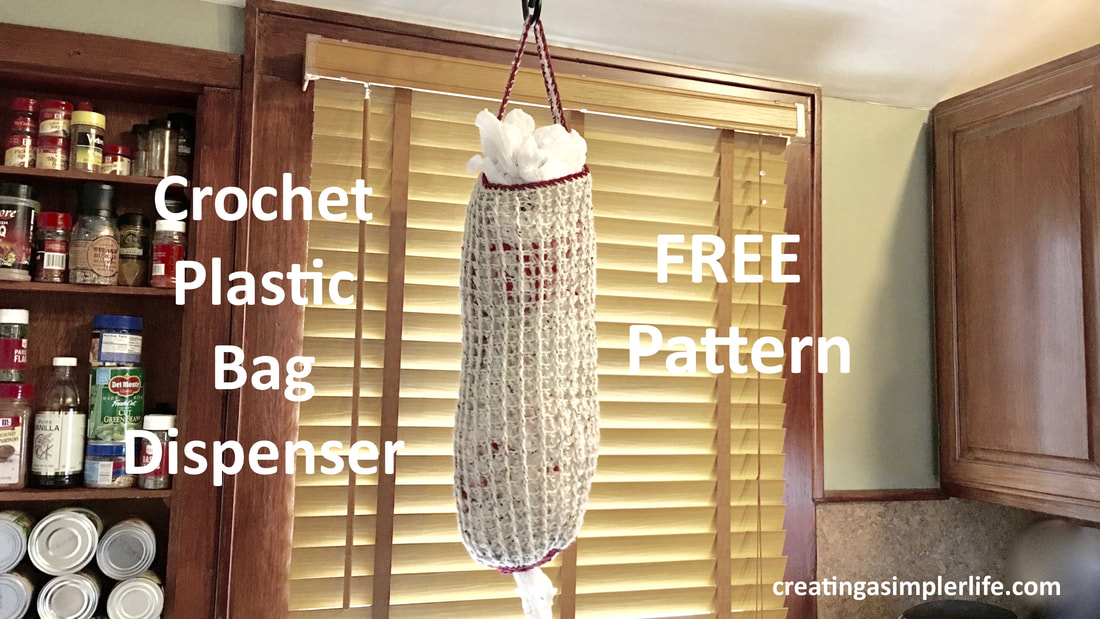
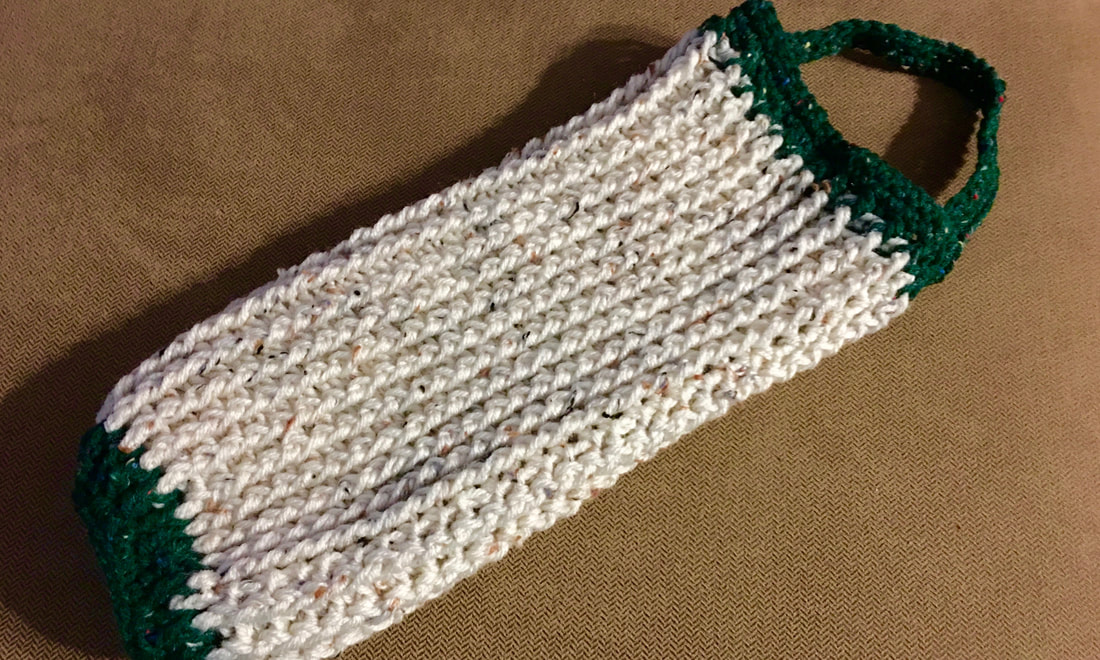
This crochet plastic bag dispenser doesn't appear jumbo to start with, but the stitch it is made with will stretch to accommodate hundreds of plastic bags! Well, maybe not hundreds, but definitely tons more than any other plastic bag holder I've ever seen. Look no further for an awesome FREE pattern!
I would consider this pattern to be of medium difficulty due to the fact that you will need to have some basic skills and knowledge to work your way through following the directions for the handle. However, to make it simpler, you could just add the handle completely separately!
Supplies (affiliate links):
Written Directions for Main body:
(pictorial directions and video below)
Finishing the top & Making the Handle:
Pictorial Directions:
Chain 50

Connect with slip stitch to create a loop.
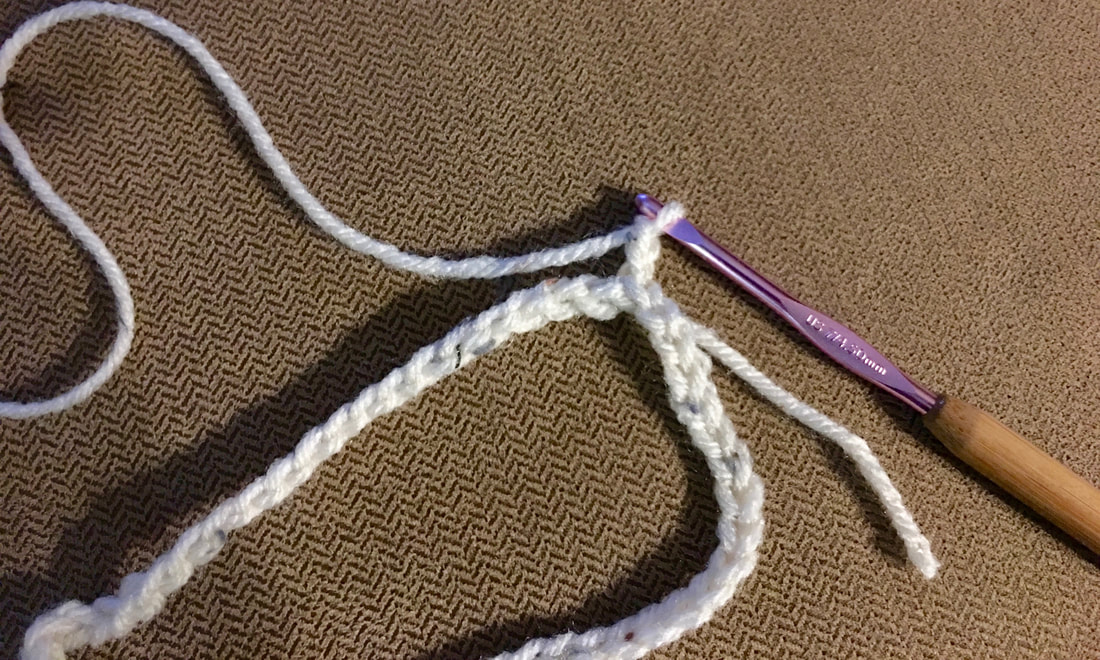
Chain 2
Triple crochet in each chain around the loop (50 total) and slip stitch to connect.
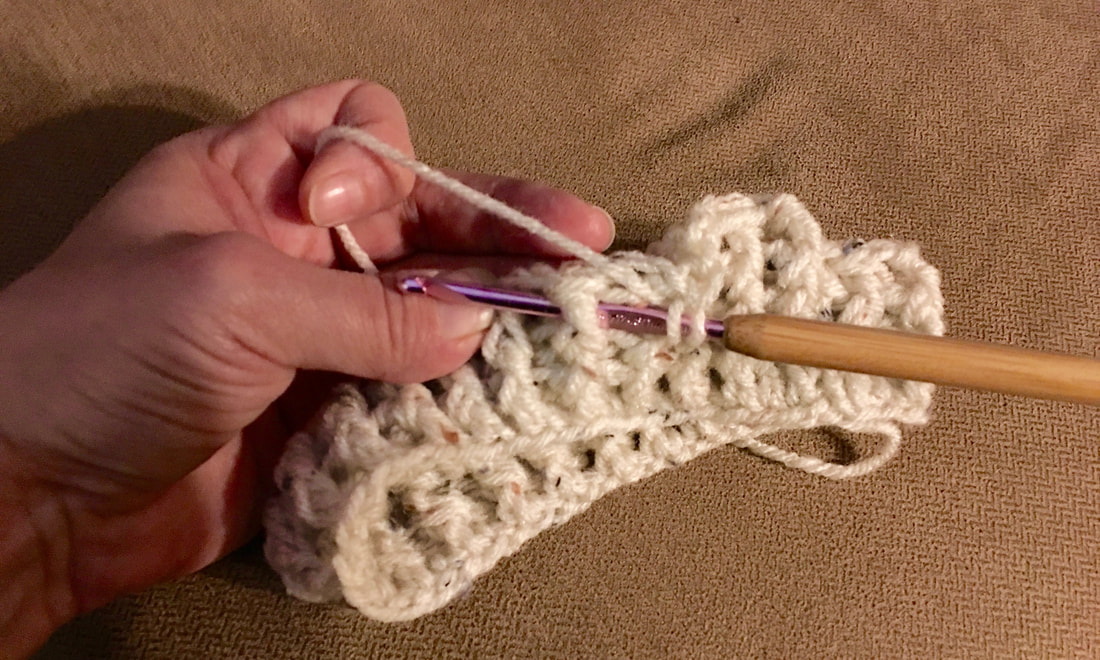
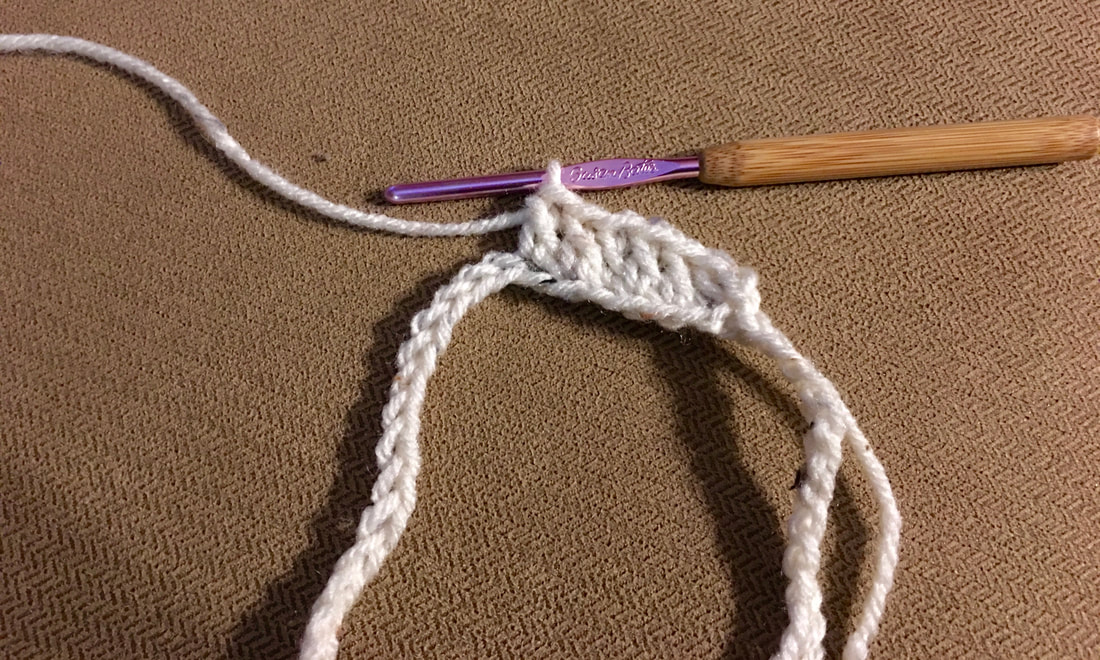
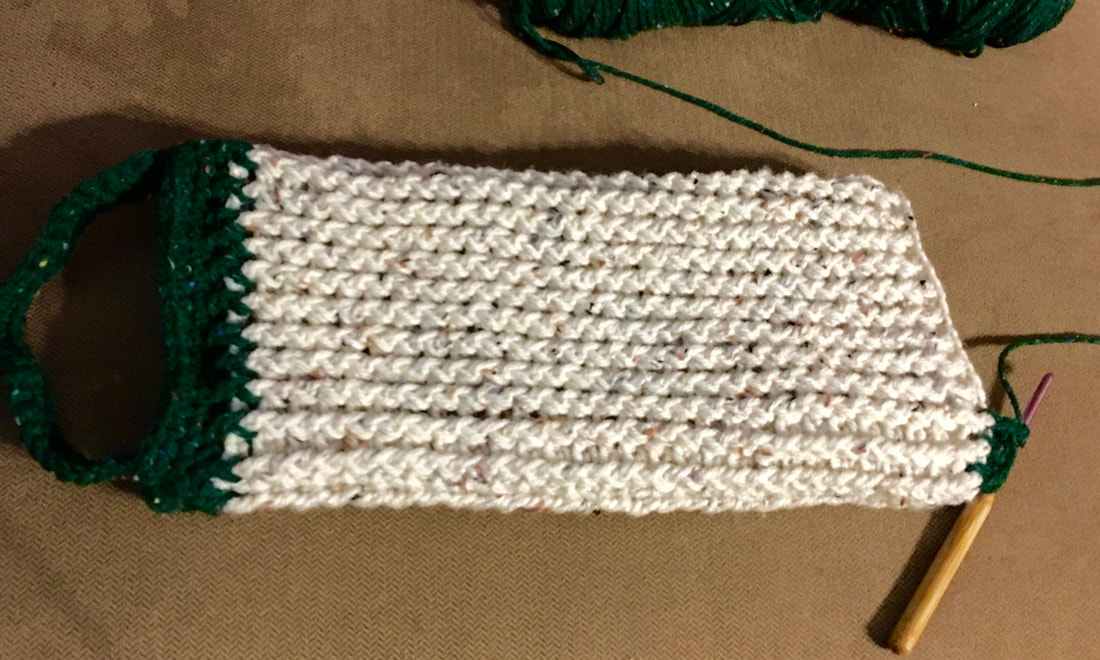
All the rows that follow (29) will be completed doing a double crochet front post, then a double crochet back post. The dc front and dc back will be repeated all the way around. Please refer to the video link above for a quick tutorial if necessary. NOTE: A front post is shown in the picture.
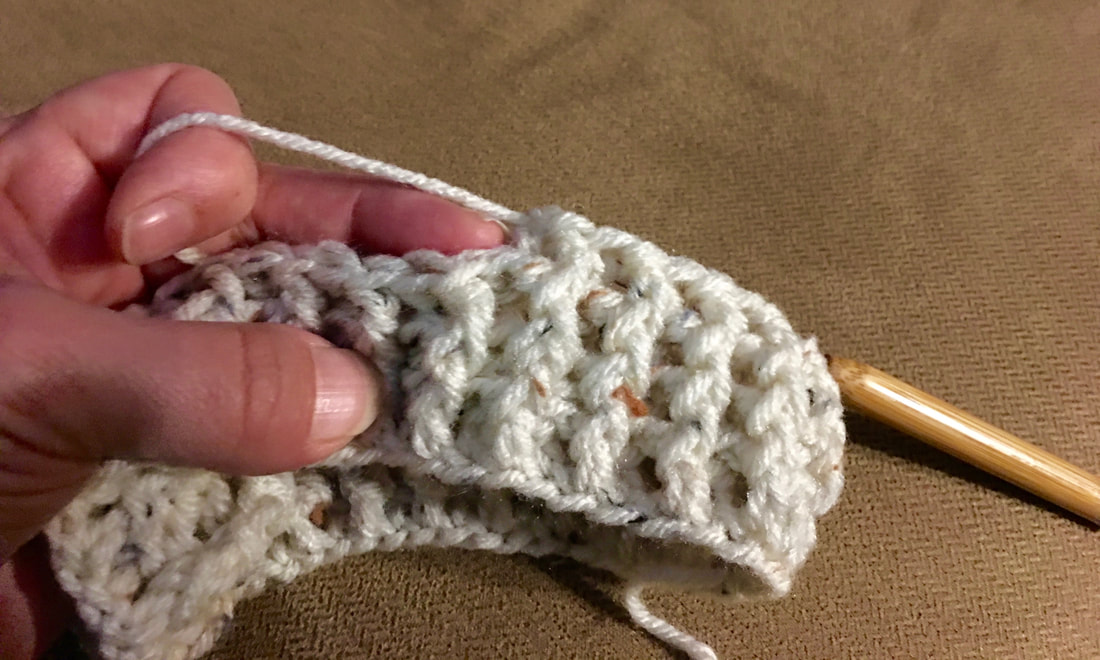
As rows are completed you will begin to see the ridges that are created.
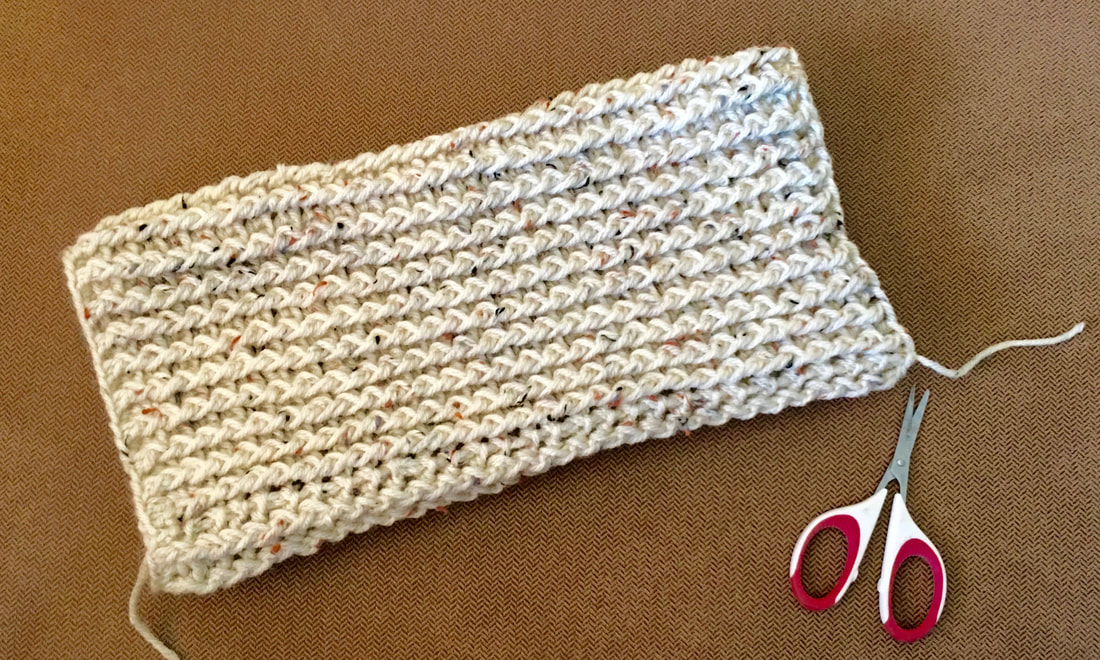
Complete 30 total rows (one regular dc and 29 post dc's) and slip stitch knot at the end.
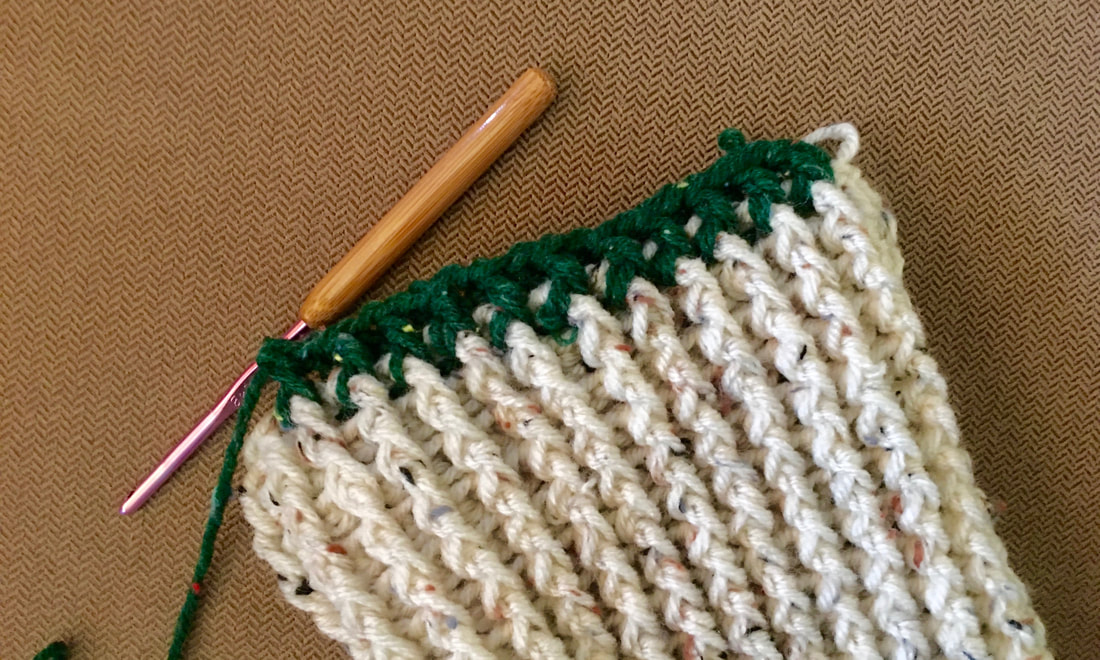
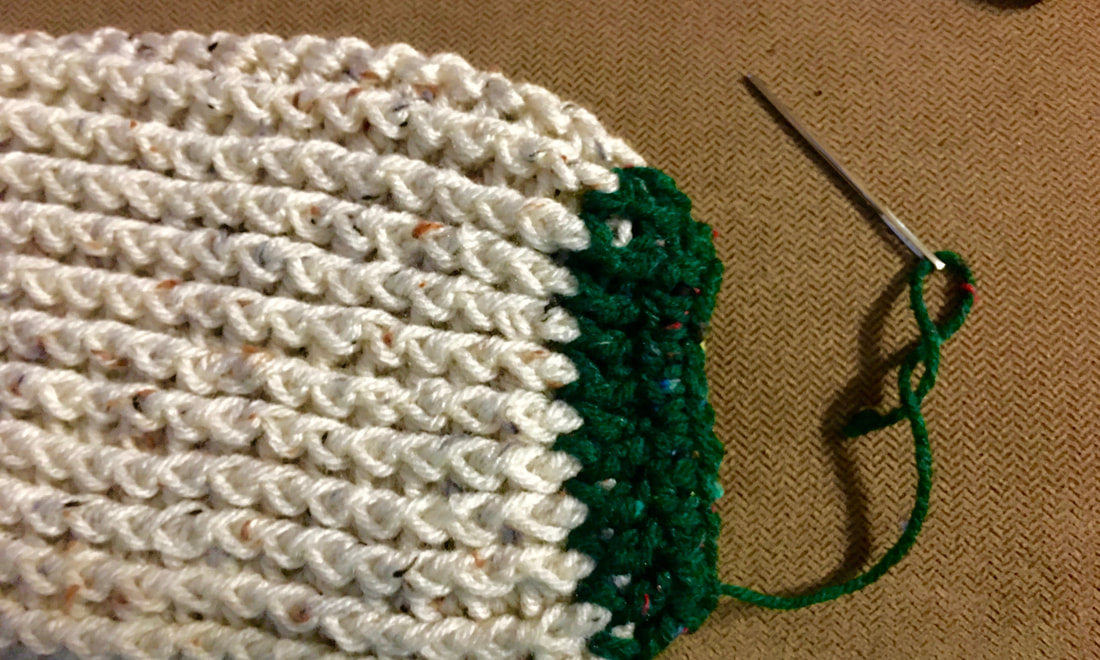
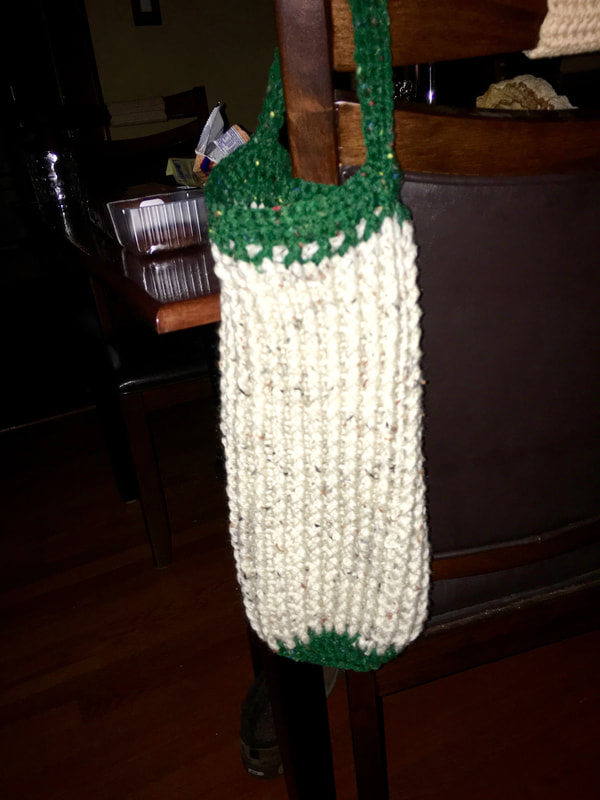
Connect the green to the top of the holder with a slip stitch and complete one full row of dc front post, back post. Slip stitch to connect.
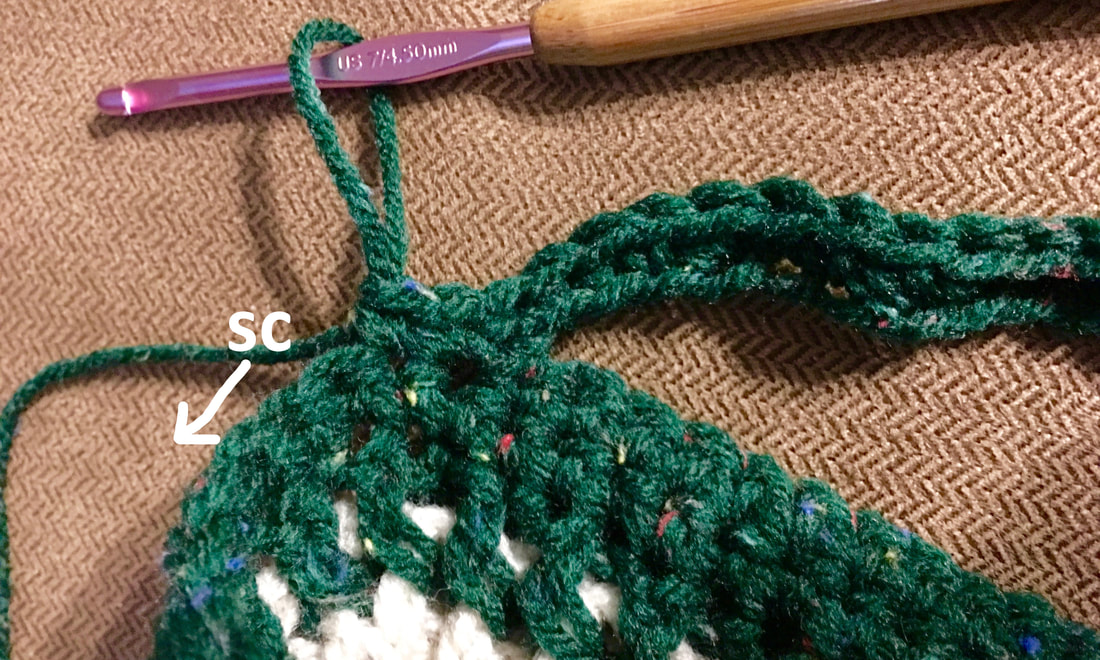
Chain 1 and sc in each stitch around. Slip stitch to connect.
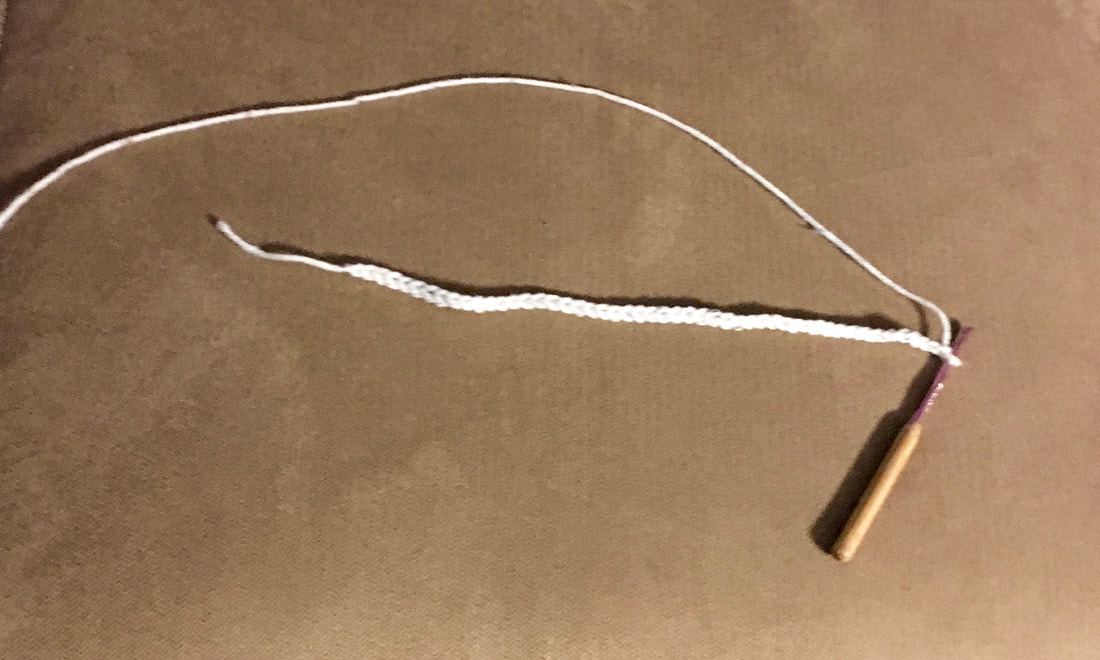
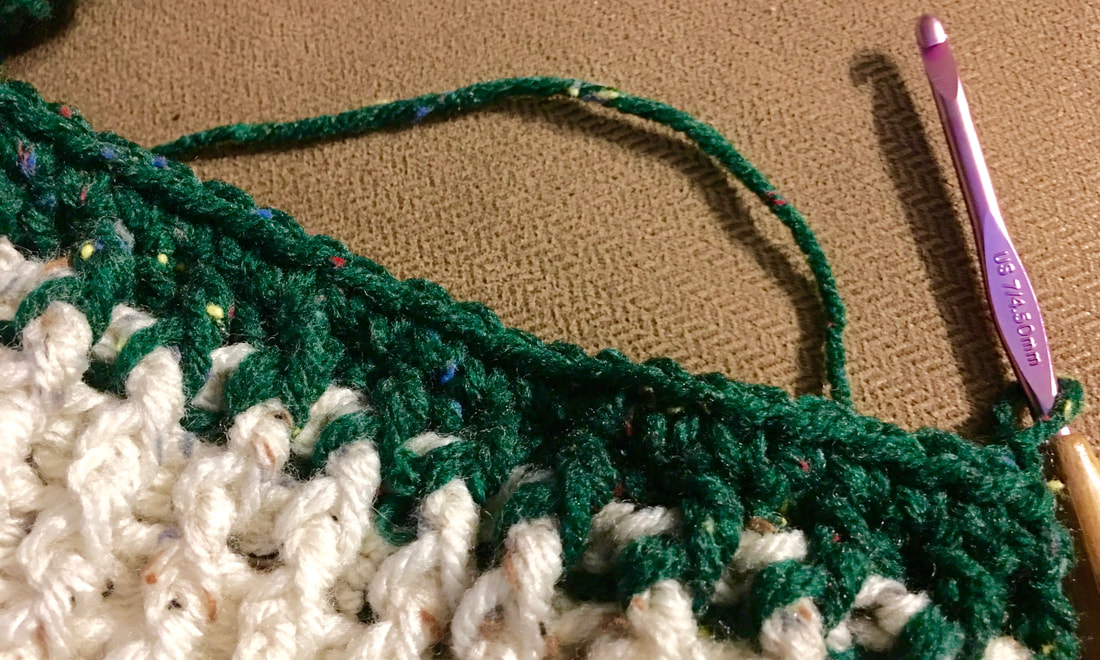
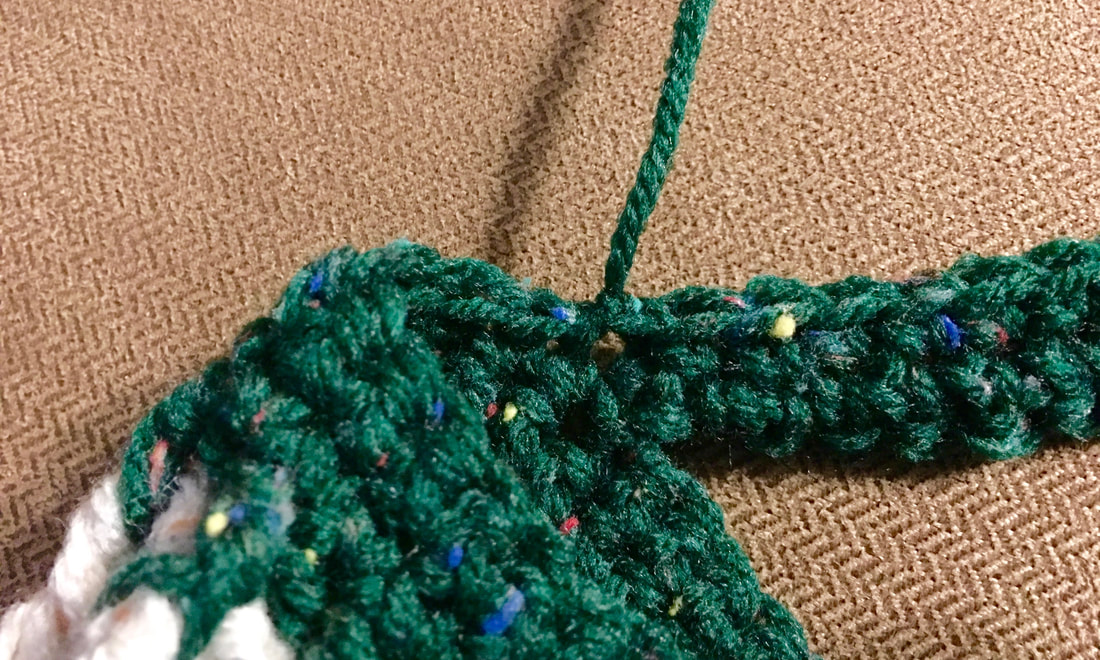
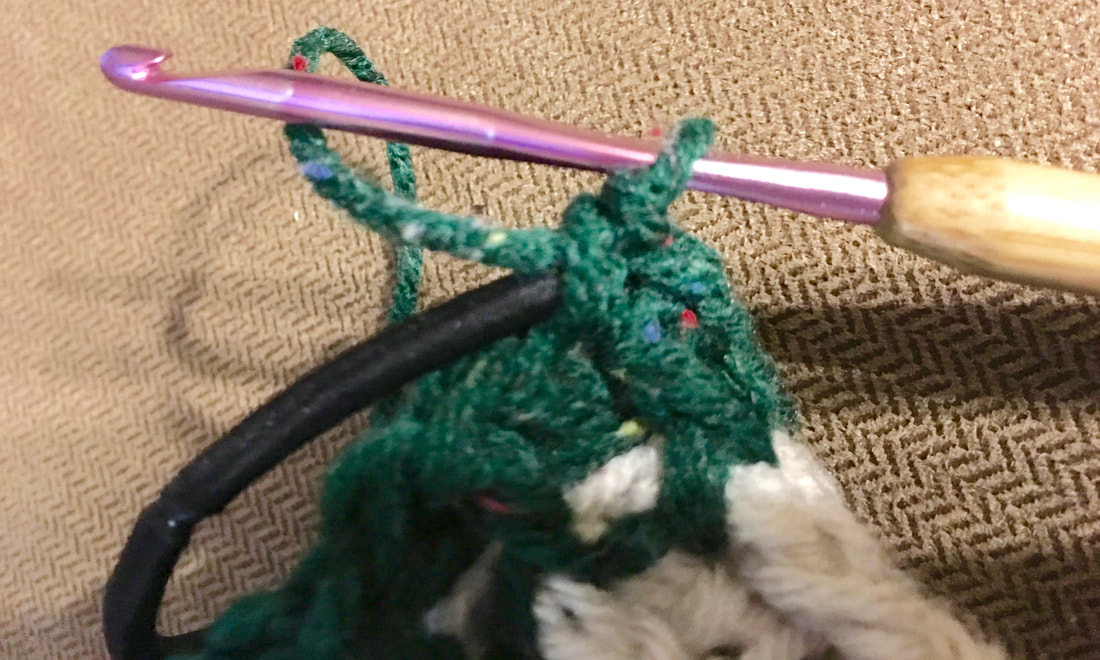
Chain 35 and slip stitch to connect on the opposite side (25 stitches away).
Turn your work so that it is facing you and sc along the top of the holder until you reach the handle on the other side (note you are only doing half of the top right now)
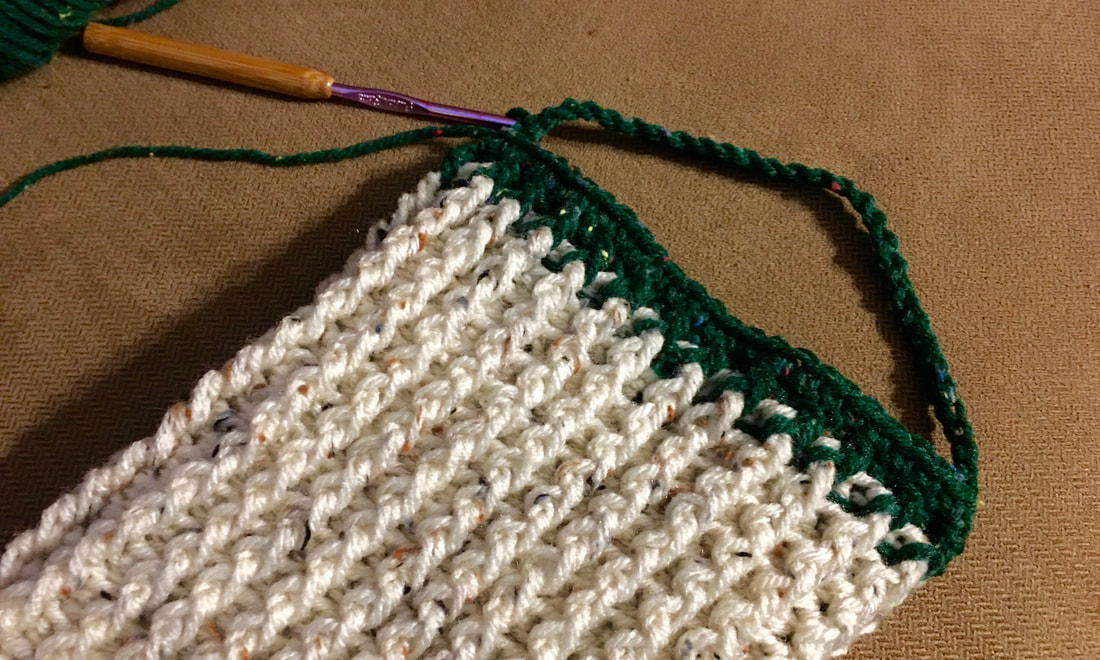
Single crochet in each stitch along the entire handle to the other side
Then you will single crochet along the other side of the top until you reach the handle again.

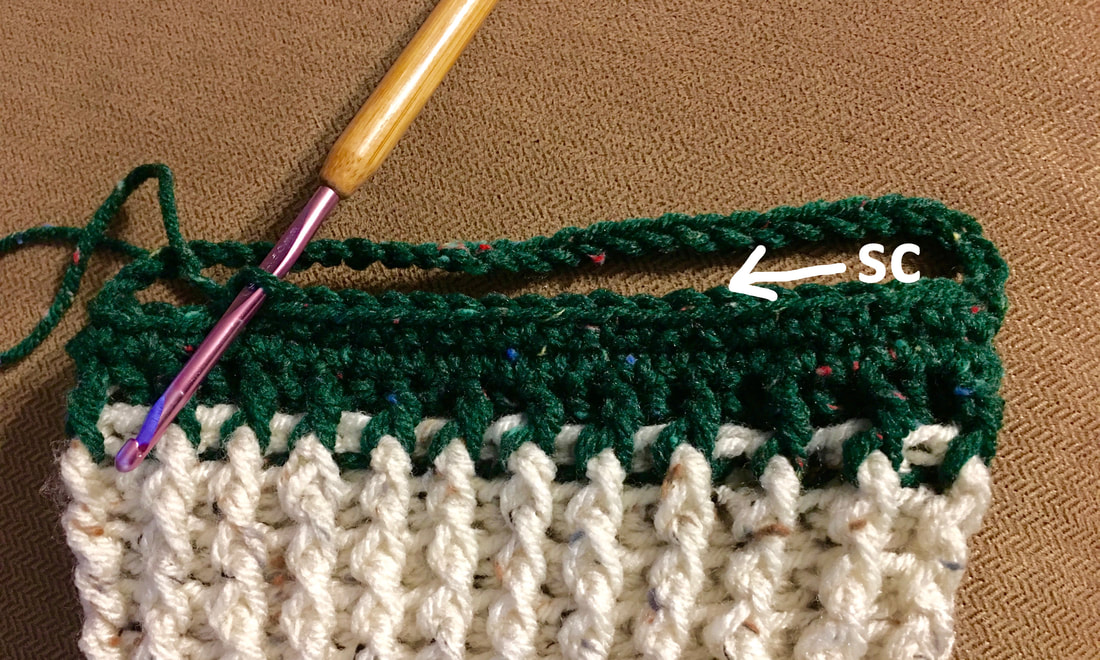
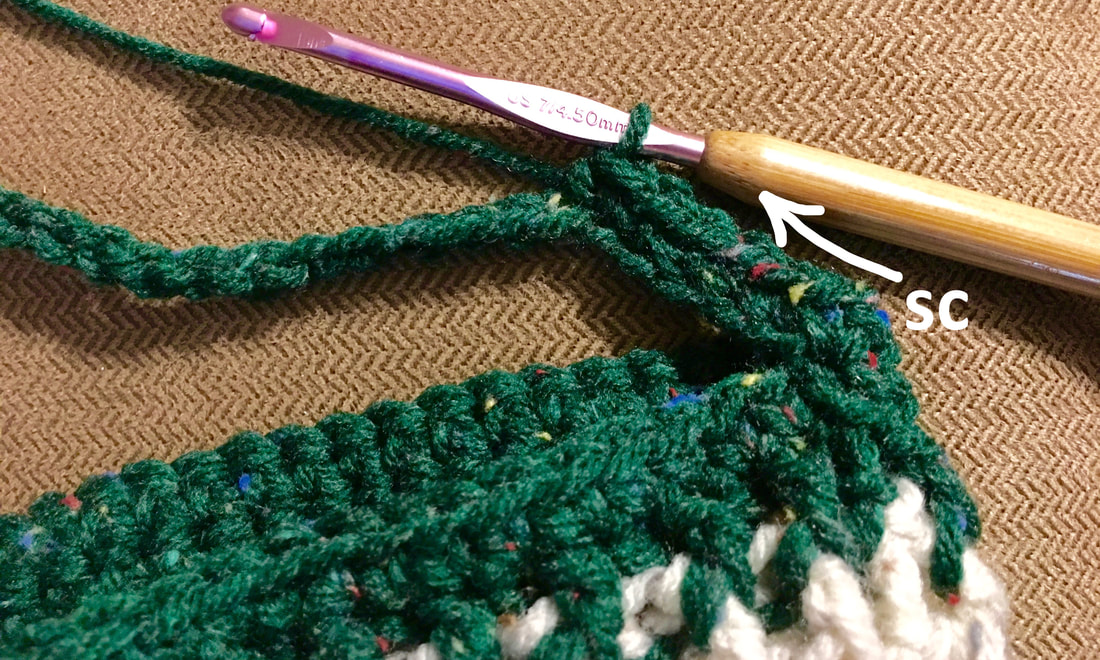
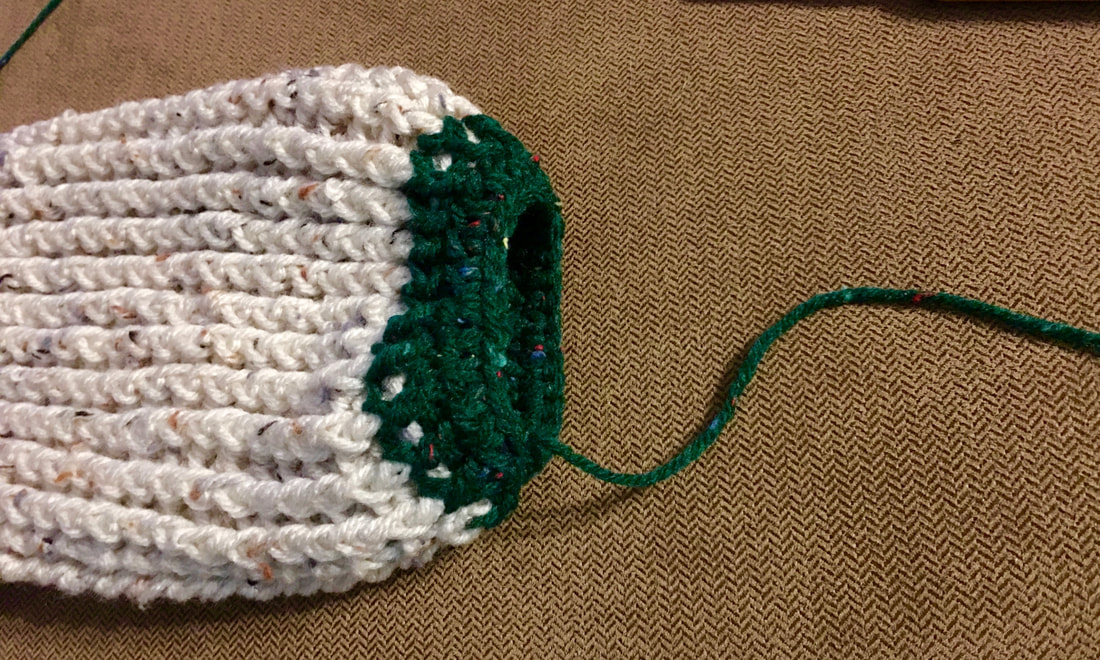
When you reach the handle on the other side, you will now single crochet in each stitch along the handle again, however this time you will work along the bottom of each original chain.
When you get to the other side of the handle connect with a slip stitch and knot off.
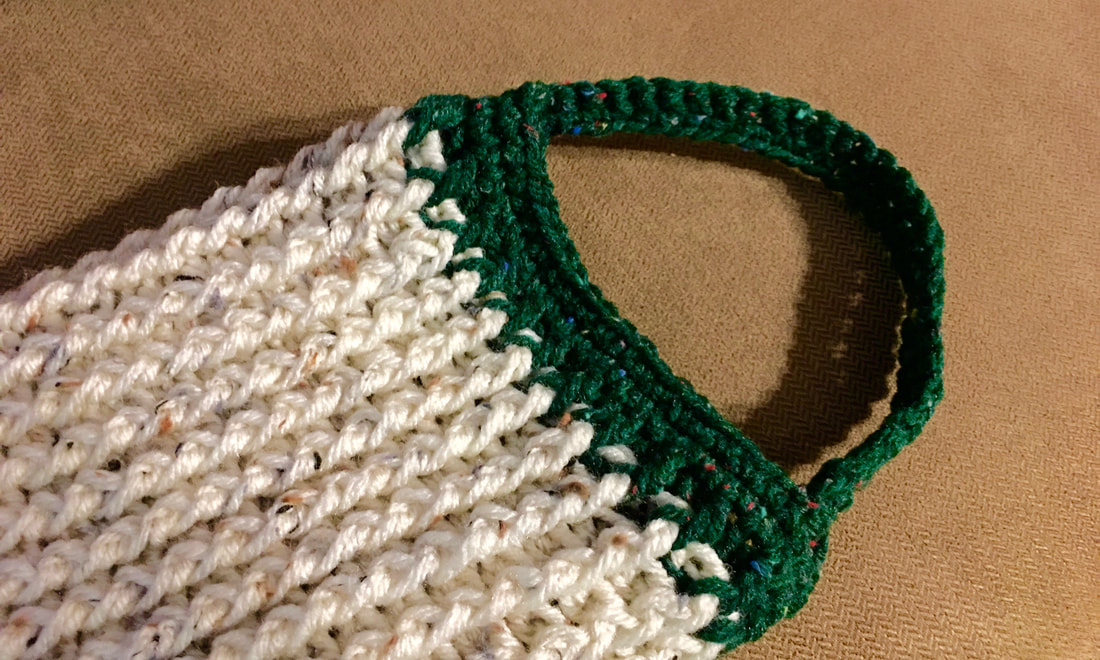
Top is done!
Connect with green to the bottom of the holder. Chain 2 and double crochet in the front and back posts (alternating) all the way around. Slip stitch to connect.

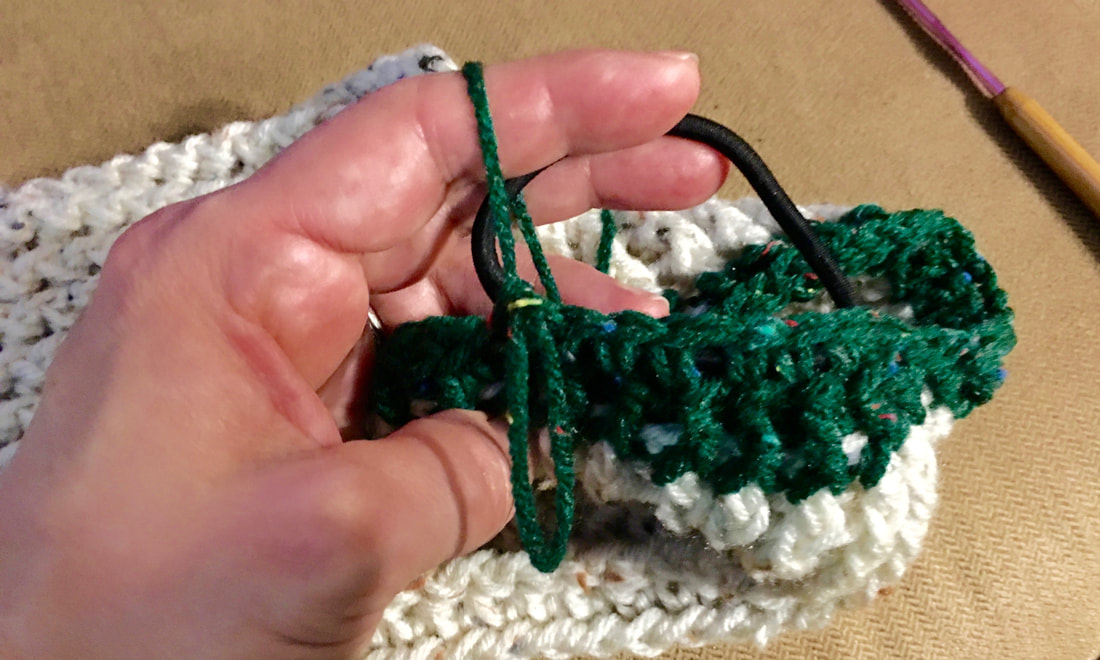
Use one hair band....
Chain 1 and begin using the single crochet stitches to incorporate the hair band. Place hook through the band, put yarn over the band, and pull through to complete the single crochet. Skip every other stitch all the way around for a total of 25 stitches.

Slip stitch to connect and knot off to finish.
Use a yarn needle to weave in all loose ends.
Done!
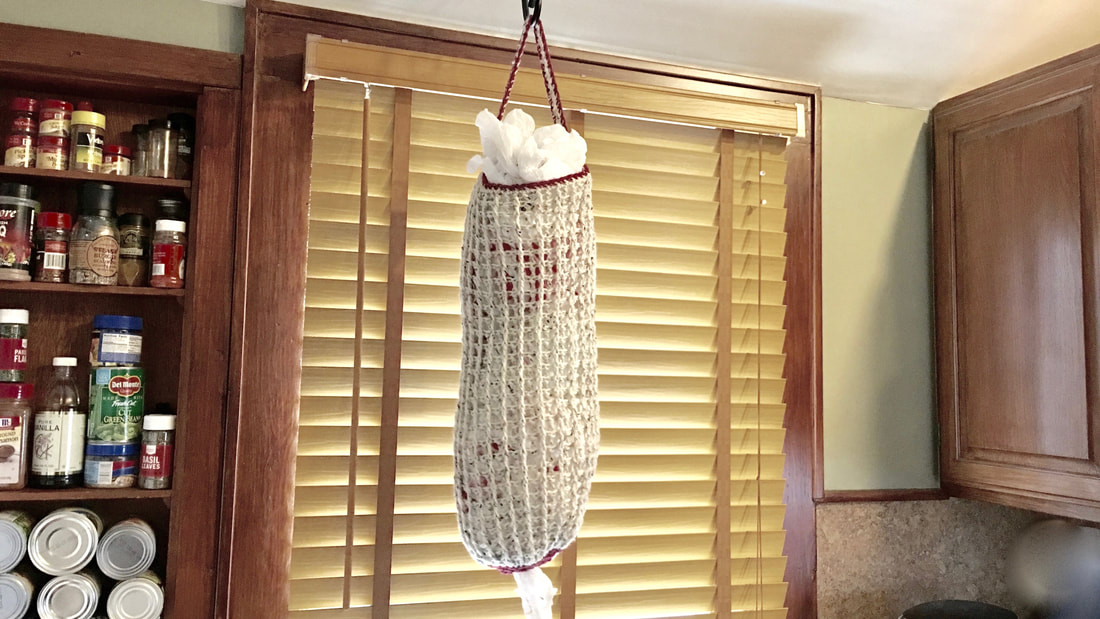
A similar holder I made with maroon trim. Note, it is not exactly the same as I only did sc trim in maroon - the last row of post stitch at the top and bottom was done in the same color as the rest of the holder.
It will hold a lot of bags!!
Check out all of our other
FREE crochet patterns here! and check out our YouTube channel too! Sincerely,
|

Hi there! I'm Kathie, the author behind Creating A Simpler Life blog. I'm excited to share our longterm projects (and planning) toward building our future retirement homestead in the Adirondack Mountains of New York. In the meantime I will be sharing all the other little things we do that are part of creating our simpler life!
Categories
All
Archives
July 2020
|


 RSS Feed