Blog
A little bit of anything and everything that's part of
creating, enjoying, and living a simpler life!
creating, enjoying, and living a simpler life!

|
http://www.creatingasimplerlife.com
What child wouldn't fall in love with this adorable 100% cotton Little Lamb Lovey Blanket? Whether it becomes their favorite sleepy time toy, or their security blanket, it is sure to be loved by whoever the special child is! 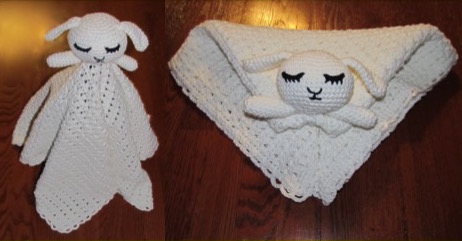 Supplies Needed:
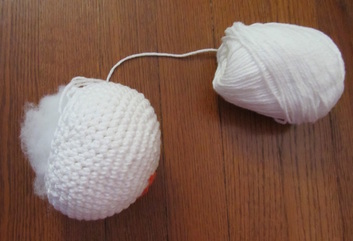
Make the Head: (I strongly suggest reading all the directions first and then watching the video tutorial below if this is your first time making a ball shape). Round 1: Start with a magic circle with 5 single crochets. Round 2: Single crochet two stitches around in each of the 5 original single crochet stitches. (at this point you should basically have a circle). Place a marker at your last stitch. Round 3: Do one single crochet in the first stitch, then two in the next, then one in the next, and then 2. Complete the pattern around. Round 4: Do one single crochet in the next two stitches, then two single crochets in the third, then one sc in each of the next two, then 2 sc in the next one. Repeat pattern around until you come to the marker. Round 5: 3 sc, then two sc in one, 3 sc, then two sc in one (repeat around to marker) Rounds 6 - 8: Basically with each round, you will increase the the number of single crochets in each stitch by one, then do two in one stitch, then repeat the same number of sc again. You can continue the pattern by adding rounds and increasing the sc by one each time until the bottom of the head is the size that you want. Rows 9 & 10: single crochet in each stitch around without increasing. Rows 11 - 18: Start decreasing by one for each round. Before you finish be sure to fill it with stuffing. NOTE: I did not close the ball at the bottom - I left an opening about 3/4" in diameter (you can see this in the picture below). Watch this excellent video tutorial to see exactly how to make the ball for the head. She shows how to increase and how to decrease. But remember not to close it up completely when done!
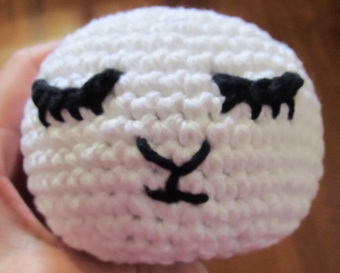
Make the Face: Cut two 24" lengths of black yarn. Using one 24 " piece, crochet 6 chains and end off. Be sure to leave a long piece on each end of the chain. This is what you will use to attach it to the face and create the lashes and mouth. Using the yarn needle and one of the long ends, sew the first chain on in a curved eye shape. Then do 4 stitches for lashes. Do the same with the other eye and then using the remaining hanging yarn stitch the nose with two 'v' shape stitches, and the mouth with one vertical and two horizontal stitches. Knot off inside the head and tuck in all loose threads.
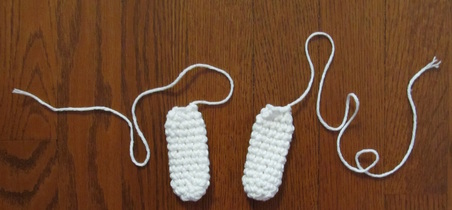
Crochet the Ears: Row 1:chain 3 and connect into circle. Crochet 5 single crochet around and connect with slip stitch. Row 2: do two single crochets in each stitch around (you could place a marker here if necessary) Rows 3 - 14: do one single crochet in each stitch around. Finish with a slip knot but cut the remaining string at least 12 inches long. Thread the hanging string onto a yarn needle, flatten out the ear and sew the bottom closed. Pull in a little tight to create a small pucker. Keep the remaining string hanging to use to sew it onto the head later. NOTE: Ears get flattened. They DO NOT get stuffed. Create the second ear the same way! 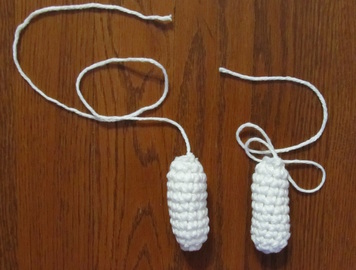 The arms get stuffed! Crochet the Arms: Repeat the same pattern as the ears up to row 10. Finish with a slip knot and cut the hanging string so there is approximately 12 inches attached to the arm. At this point stuff the arm with stuffing. Using a yarn needle, thread the hanging yarn and sew around the end of the arm. Pull it taught so that the end of the arm is closed. keep the remaining string hanging. Make s second arm. 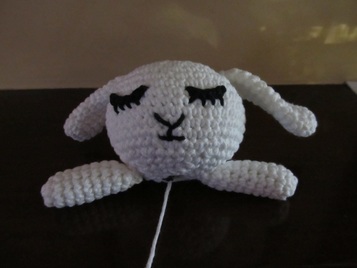 Connect Ears and Arms to Head: Use the yarn needle with the hanging string to connect the ears and arms to the head. When finished, knot and hide ends inside the head. 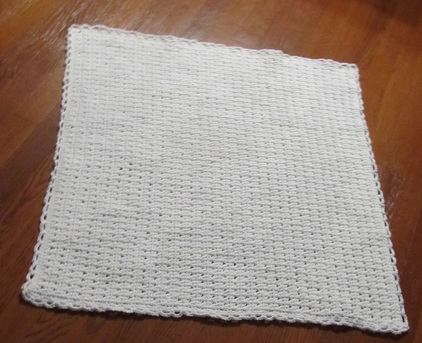 Crochet the Blanket: In the picture you see I made the blanket 30" x 30". This is the correct size for a baby blanket. However, as adorable as it is, it came out quite heavy. So heavy that it almost feels like the head of the lamb will pull off. Since the purpose is more of a toy than a blanket, I have decided that from now on I will be making the blanket smaller by at least 5" in all directions. I may even change the stitch of the blanket to a simpler pattern that requires less yarn so that it is not so heavy for a small child to carry and drag (literally!) around. The stitch is a cross over double crochet. If you don't fully understand how to do it (I know I am not good at writing directions) then watch I strongly urge you to view the video below.
30" x 30" blanket: Chain 100. Row 1: single crochet into second loop from hook. Sc into each stitch to end (99 stitches). Turn work. Row 2: chain 2, yarn over and double crochet in second stitch from hook (so skip first one). Yarn over and double crochet backwards into the stitch you skipped. Yarn over, skip stitch and double crochet into next stitch. Yarn over, and double crochet backwards into the stitch you missed. Continue this crossed double crochet to end of row. You should end the row with one last double crochet with no backstitch. Turn work (99 stitches total). Row 3 - 70: Repeat rows 1 and 2. After last row, turn work. Border: Row 1: Do one single crochet in each stitch across. Do 3 single crochet in the corner stitch. Turn and continue around the entire outside using single crochet stitches (always with three in the corners). Slip to connect to first stitch. You should end in one of the corners. Row 2: Do one single crochet into the center stitch of the corner. chain 4, skip 2 stitches and single crochet into the 3rd. Chain 4, skip 2, sc into the third stitch. Do to end of row. It should work out so that you are doing a single crochet in the center stitch of each corner group. Complete this around the entire outside of the blanket. Slip stitch connect and knot off. NOTE: To make the blanket smaller I will make it 80 chains by around 60 rows. Finishing: weave all hanging threads. 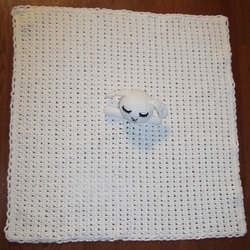 Connect the Head: Use matching yarn to sew the head to the center of the blanket using the yarn needle. Be sure to go around several times so that it is secure. Knot and weave in hanging threads. All done! 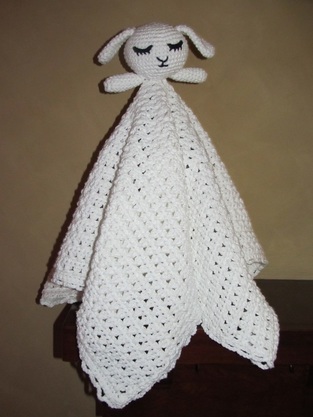 Thank you for visiting! Please like and follow on Facebook! Check out more crochet and craft ideas to make for children on our Pinterest DIY FOR THE KIDS AND GRANDKIDS!
2 Comments
|

Hi there! I'm Kathie, the author behind Creating A Simpler Life blog. I'm excited to share our longterm projects (and planning) toward building our future retirement homestead in the Adirondack Mountains of New York. In the meantime I will be sharing all the other little things we do that are part of creating our simpler life!
Categories
All
Archives
July 2020
|
 RSS Feed