Blog
A little bit of anything and everything that's part of
creating, enjoying, and living a simpler life!
creating, enjoying, and living a simpler life!

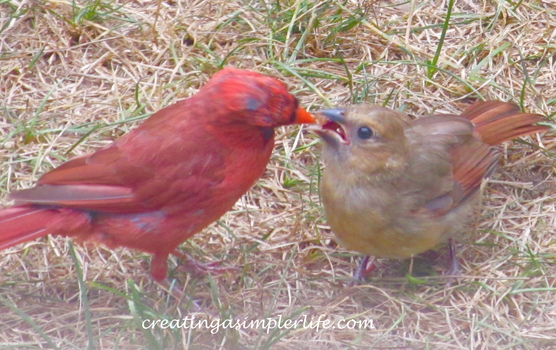 I love gardening and believe it or not, unlike many other gardeners, I love having birds of all different kinds visit all summer long! I don't mind sharing some of my fruits with them as long as they don't take too much and I get to take their picture! Every morning during the summer I would go out into my backyard before the rest of the neighborhood really came alive. This was the quiet time when the birds liked to come and visit. I loved hearing them sing to each other. I actually learned to recognize several different species by their song alone! I took pictures and some video of most of the different birds that come to visit and in honor of the end of summer, and possibly migration for some (maybe all?) of them, here they are! Hope you enjoy :-) Watch this video of our backyard birds of summer (and a few from the winter too!) and then you can scroll down to our slide show where I try to name them, but am not sure if they are all correct! I try to name them in the slideshow below but am not sure of a few... Thank you for visiting! Please like and follow us!
1 Comment
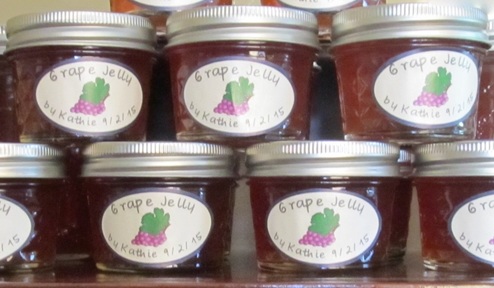
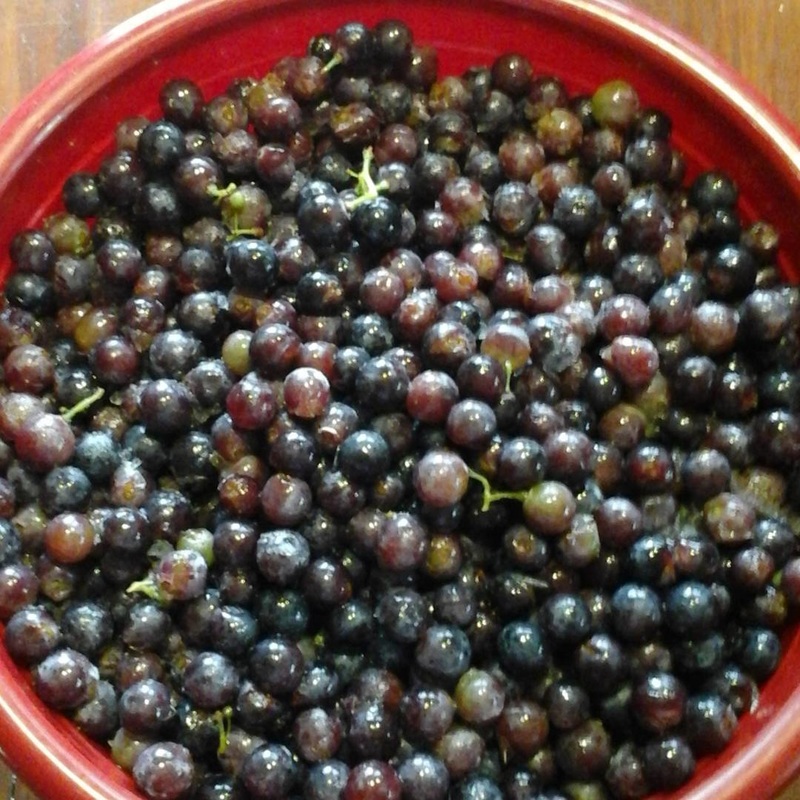
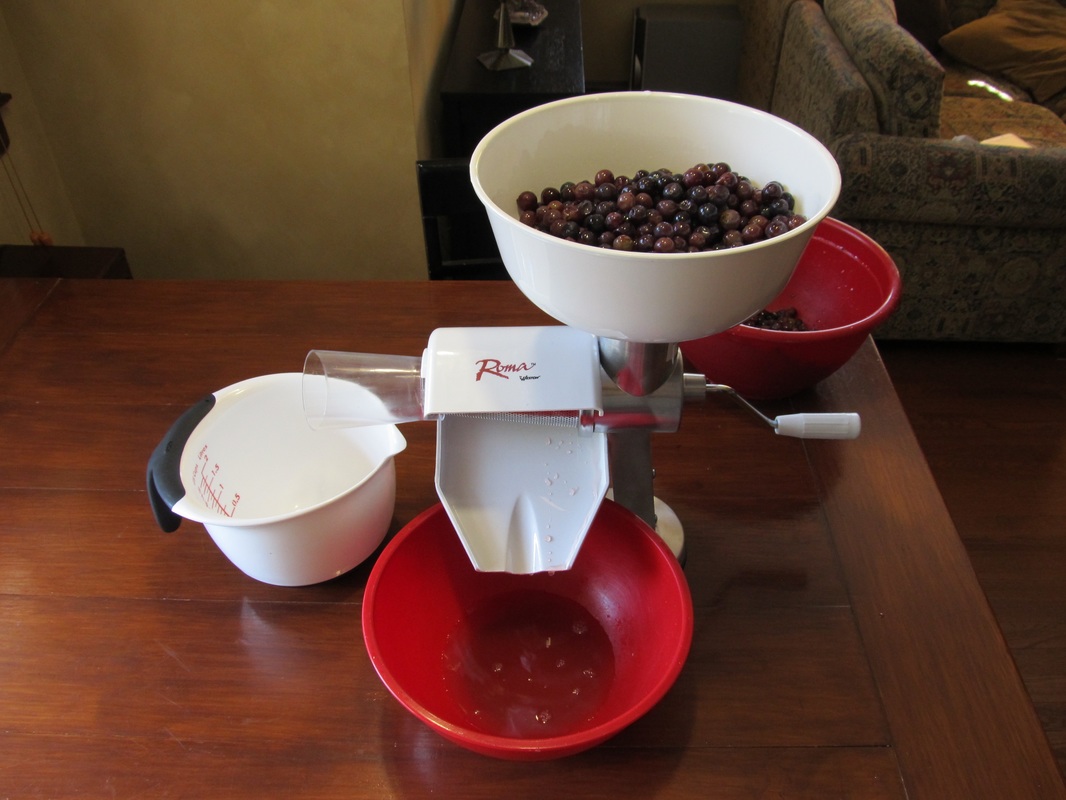
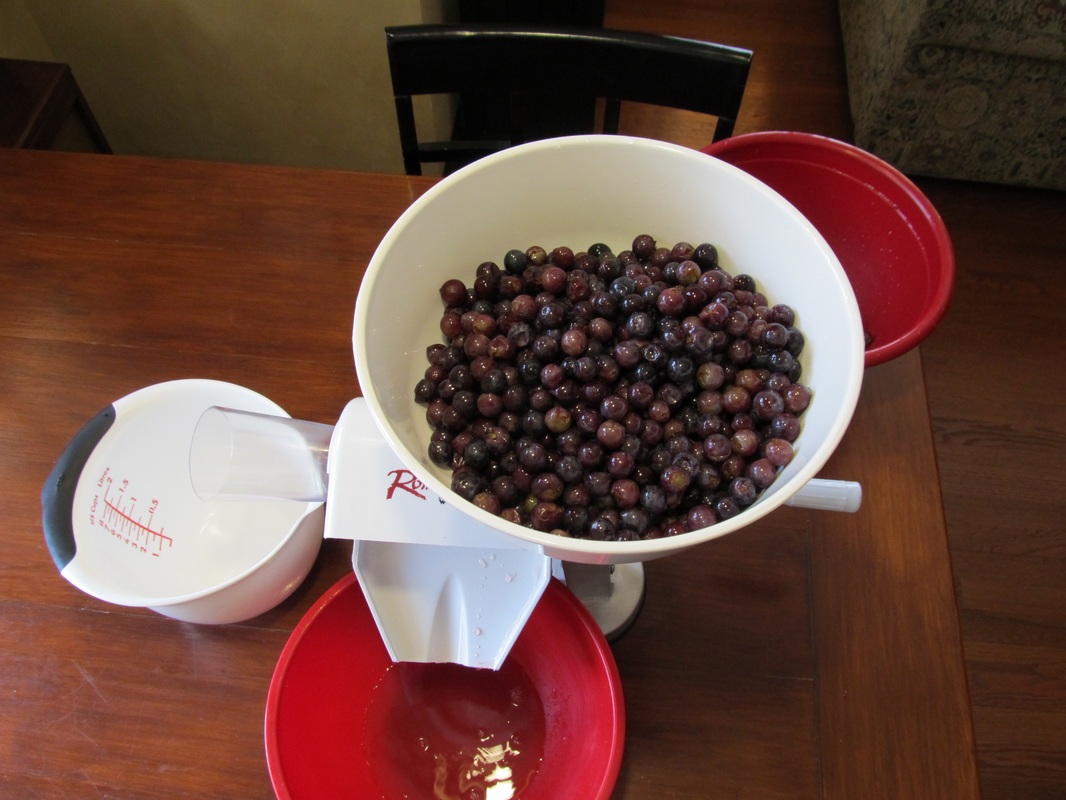
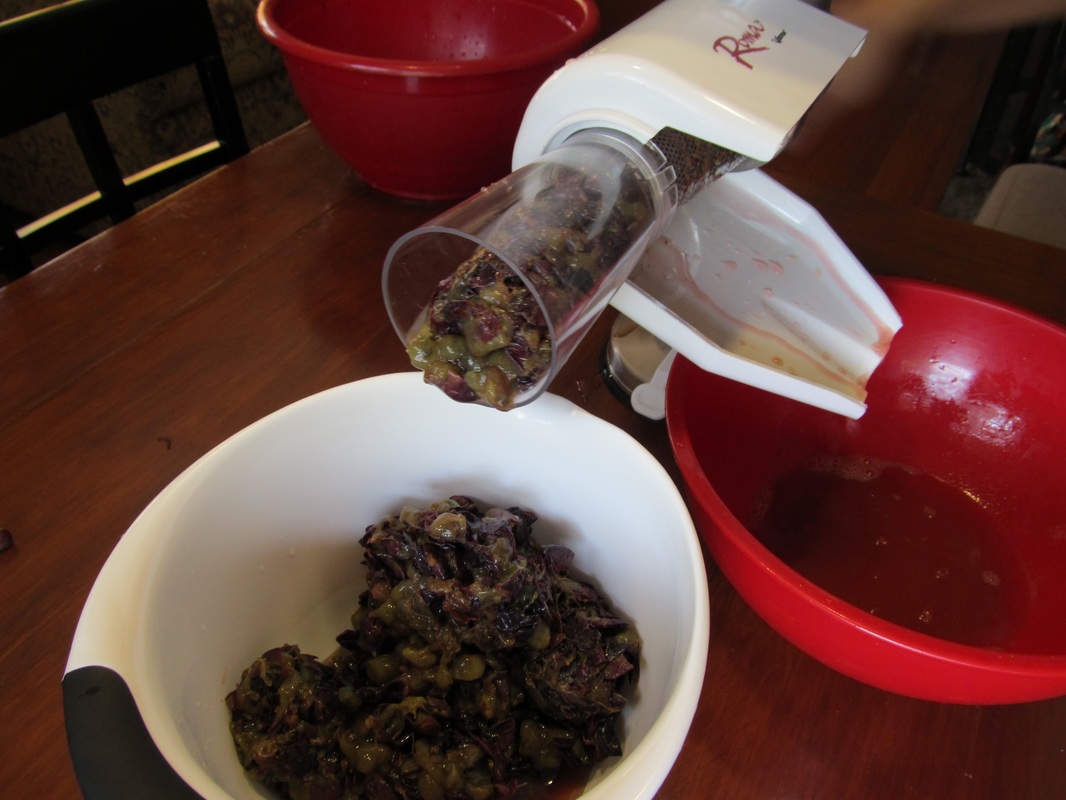
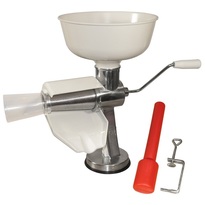
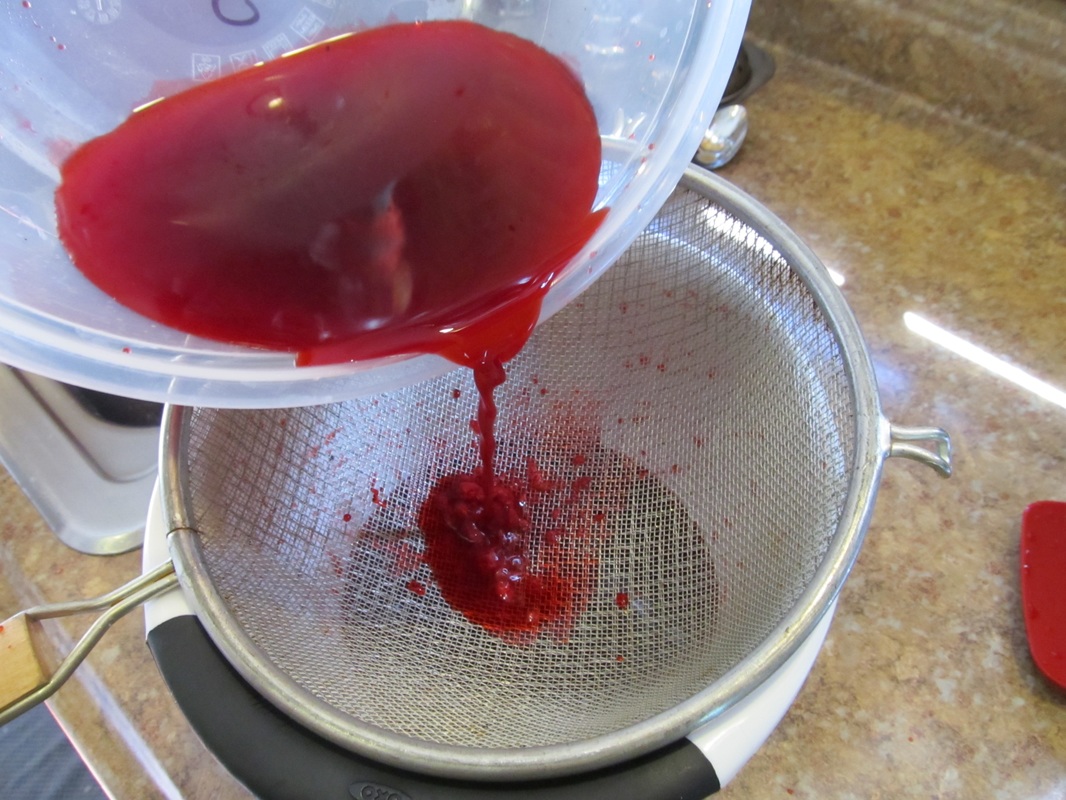
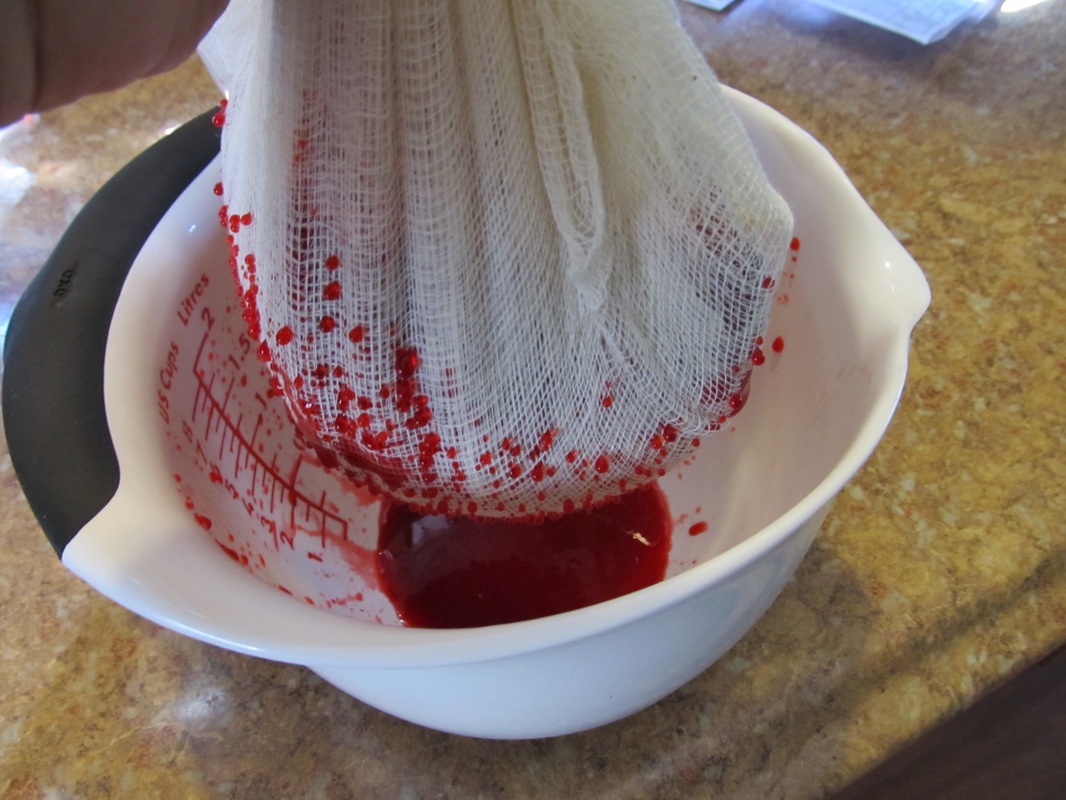
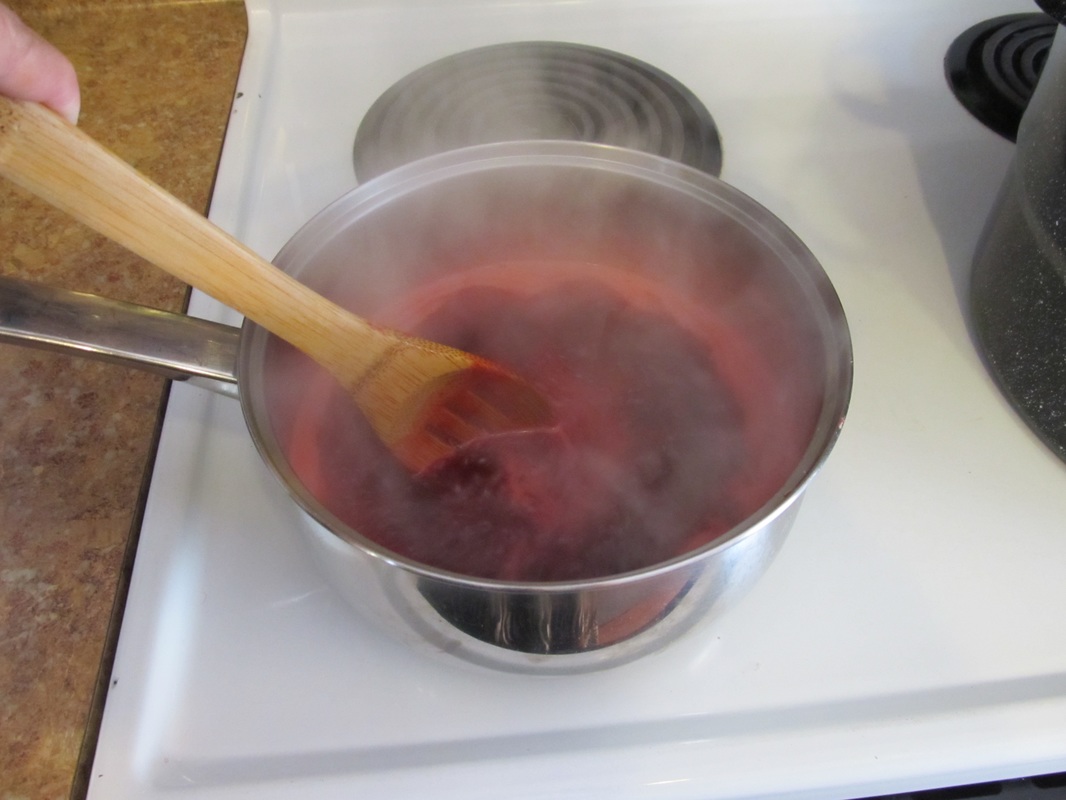
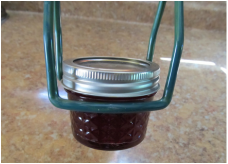
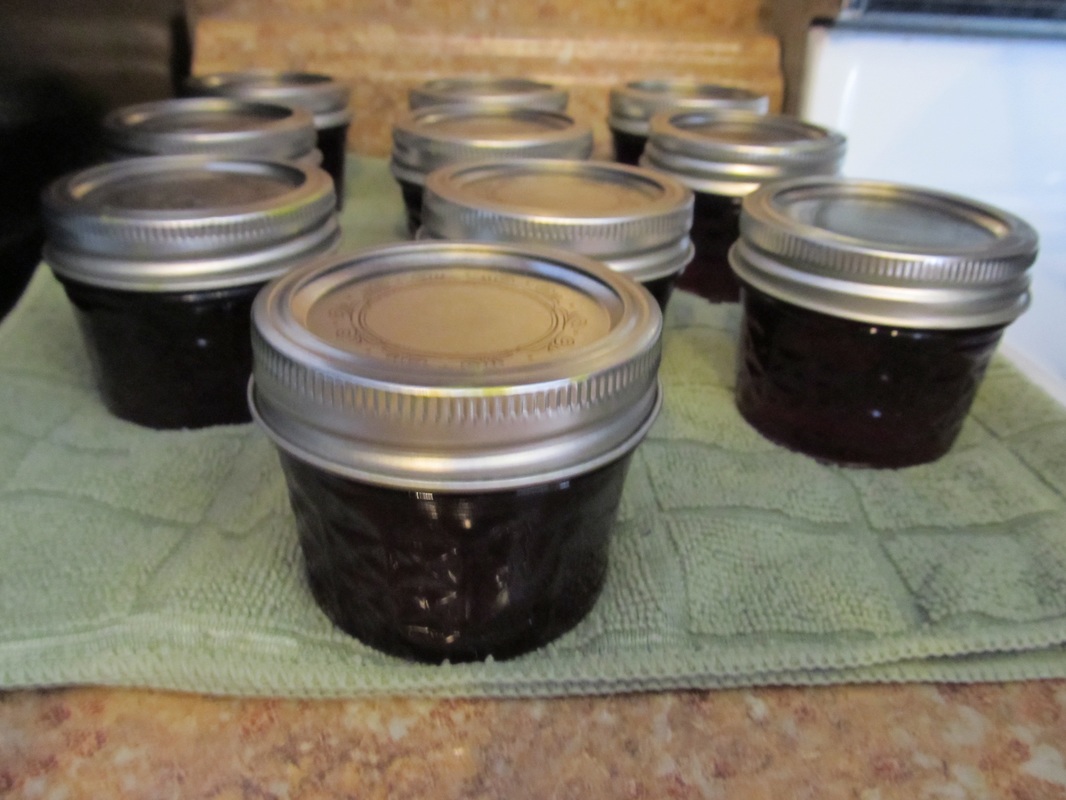
Making jelly is much easier than I thought and I find myself wondering why I waited so long. However, after having to strain all my raspberries through cheesecloth to make my raspberry jelly I decided I did not like that part of the process at all. I knew I needed some help and after a little research ended up splurging and ordering the Roma Food Strainer & Sauce Maker (And I also ordered the additional strainer attachments for berries and grapes.). Making the grape jelly is pretty much the same as making my Homemade Raspberry Jelly, the only difference being the quantities that go into the recipe and the fact that getting the juice out of the grapes was so much easier! The really big bonus for me was that the grapes were FREE! I picked them ripe off the vine in my yard :-)
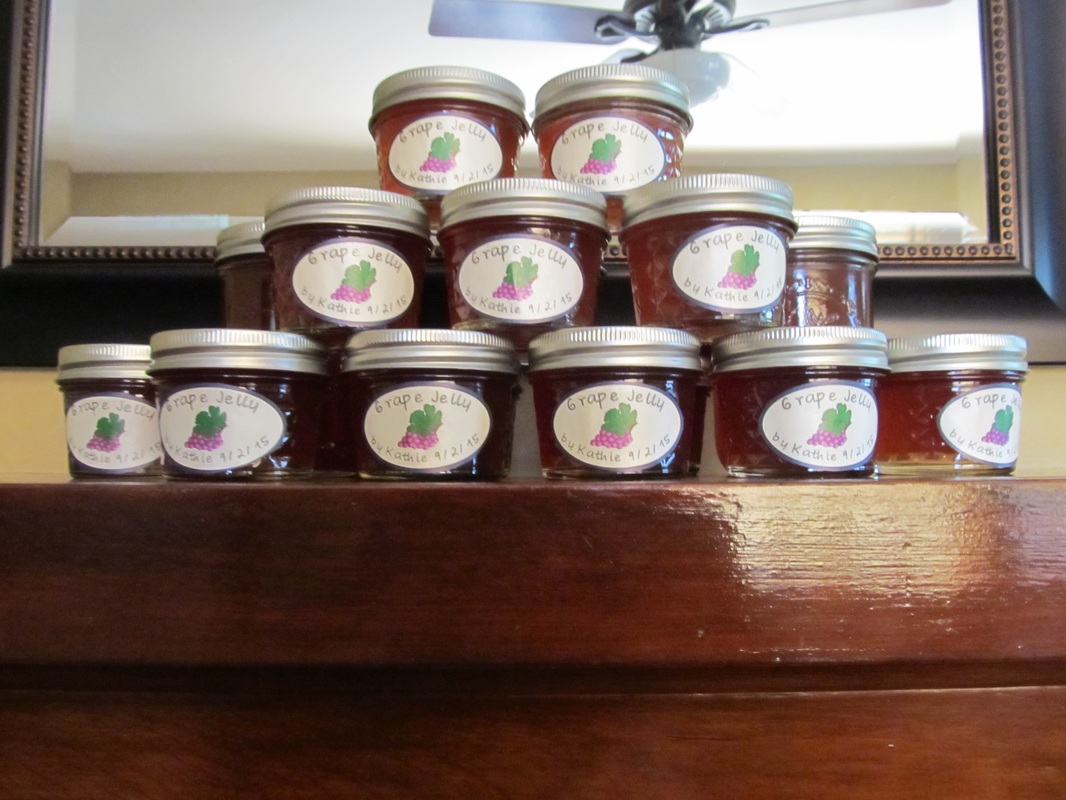
The Ball Classic Pectin recipe on the label does not give the amounts required for making grape jelly so I had to use their Pectin Calculator. It's a very simple and helpful way to get the exact ratio of juice/pectin/sugar that is necessary for any fruit you want to do. They also have a lot of other recipes available if you are combining fruits or are making herb jellies (mint for example). FYI the jelly does NOT come out purple! My husband was a little upset at first, but after he tasted it he realized it tasted just like the regular grape jelly from the store. It's funny how we get used to things being a certain way. Check out the Free Grape Jelly Labels at the bottom of this post! How to Video (written instructions and pictures are below)
Grape Jelly Recipe:
Directions:
Problems, Questions, or Want to Learn More?
Check out Simply Canning for help with Water Bath Canning. Check out The National Center For Home Food Preservation.
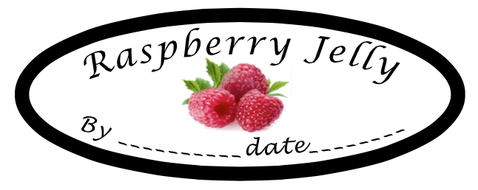
Free 4 ounce Jar Printable labels!
This is a pdf file that is designed to be used with Avery White Address Labels 5160/8160 size 1" x 2 5/8". Print a full sheet of labels, write in your name and the date, and choose to cut it out on the line or not! Click on the pictures or button below to download the pdf file.
I am really glad I purchased the products above and can vouch for them 100%! They made the process so much easier and in turn more pleasant. Check them out by clicking on one of the two pictures above or one of these two links: Roma Food Strainer or Roma Strainer Accessory Kit at Amazon (affiliate links).
Please like us on Facebook, follow us on Pinterest and Instagram, and sign up to be on our Mailing List so you never miss a post! Thank you for your support :-)
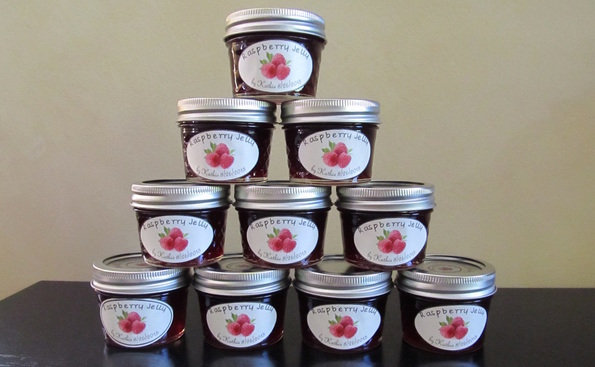
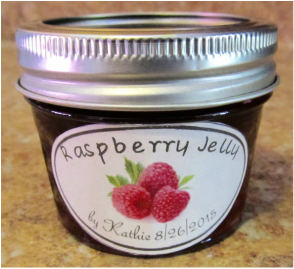
Making homemade jelly is something that has been on my to-do list for so long it is not even funny. Years ago I made an attempt to can pickled cauliflower and it was an epic failure so I was not in any rush to give canning another try. Until now that is, and finally, SUCCESS! I made homemade raspberry jelly using my very own homegrown raspberries (See Grow Your Own Raspberries) that I had stored in the freezer (See Freezing Raspberries) until I was ready. What could be better than that?
Thank you to Simply Canning for their excellent water bath canning instructions! The information they shared was extremely helpful :-) Check out the FREE Printable Jelly Jar Labels below! Canning Jelly
Jelly not fully set?
Jelly is a little runny (doesn't fully set): Depending upon how 'runny' it is you can choose to do different things. If it's not too runny you can try putting it in the refrigerator and see if this helps it to set. If so, great, nothing else to do. If it doesn't set after that and you are not ok with calling it and using it as a jelly the way it is, you can either use it as a sauce (like for pancakes) or re-process it using more pectin. Just know that there is nothing wrong with it even if it is runny. It is completely edible and will last just as long as 'set' jelly if the seals are good! For other questions, concerns or problems check out the wealth of information available at The National Center For Home Food Preservation. 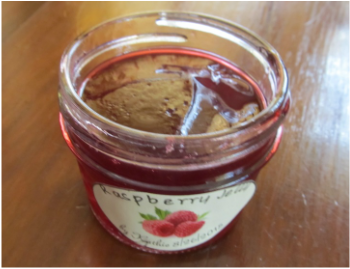
YUMMY!
Free 4 ounce Jar Printable labels!
This is a pdf file that is designed to be used with Avery White Address Labels 5160/8160 size 1" x 2 5/8". Print a full sheet of labels, write in your name and the date, and choose to cut it out on the line or not! Click on the picture or button below to download the pdf file.
Click here for FREE printable 4 x 6 recipe card! Check out my post Grow Your Own Raspberries! Check out my post Freezing Raspberries!
Please like us on Facebook, follow us on Pinterest and Instagram, and sign up to be on our Mailing List so you never miss a post! Thank you for your support :-)
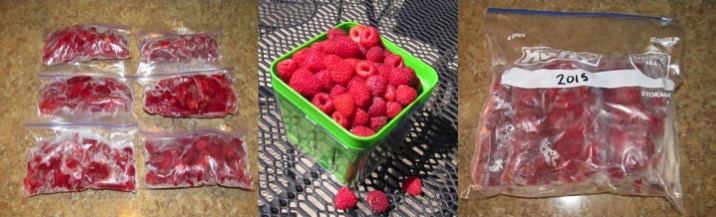 Freezing raspberries is extremely simple. After trial and error I have come up with a simple method that works for me that is based on how I will be using them later on. Method I simply take the raspberries, unwashed, and put them in a snack sized ziplock baggie. I get as much air out of the baggie as possible and seal it tightly. The filled snack baggies are then added to a gallon size freezer ziplock bag and labeled with the year. Why Snack Size Bags? I use snack bags because of the way I will be using them later on. I use the raspberries later for smoothies, sauces, and jellies. The small snack size bag is the perfect amount for making a smoothie (I chop the frozen raspberries up and add them without defrosting). If I need more for a sauce or jelly I simply defrost as many baggies as needed! Each baggie holds about 1/2 pint. Individual Use Raspberries Since I do not use the frozen raspberries for yogurts or cereal etc., there is no need to freeze them individually first and then add them to baggies. That just adds an extra unnecessary step based on how I will use them later on (Remember, I like to keep it simple!). However, if you want the option for using individual berries later on check out How to Freeze Raspberries Whole. 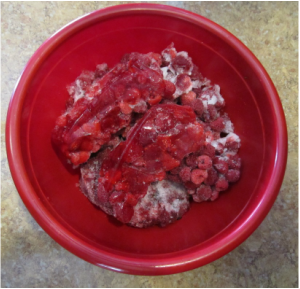 These are frozen raspberries in the process of being defrosted to make jelly with. A DIY Raspberry Jelly and Recipe Card will be coming soon! Please remember to like us on Facebook and or sign up for our mailing list! We appreciate your support :-)
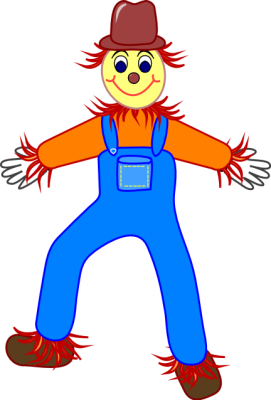
 For as long as humans have been planting and growing their own crops they have been battling to keep the birds away. Scarecrows, at one time found in just about every garden, are now more common around Halloween. Why? Well, frankly, they just don't work that well.
Are there alternatives? Classic scarecrows can be built with arms that will move in the wind. This is pretty creative and probably works better as long as there is wind to make them move. Adding sound is also helpful as it can help to scare the birds. This is definitely a step up from the classic 'stick' scarecrow. A newer technological invention is motion activated 'scarecrows.' These do not resemble 'classic' scarecrows at all. Two examples are the automatic sprinkler and an owl with a turning head. I don't know about the sprinkler (birds love when I turn mine on), but the reviews on the owl are pretty good so it's an option. Other options are 'shimmering' reflective ribbons tied to plants or fake snakes. I don't know what is best or if any of them are worth it or not but we just choose to keep it simple. We just anticipate sharing some of our crop with the local birds and if we don't want to share, we just cover those particular plants with netting. 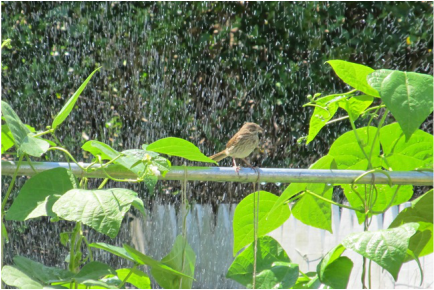 Bird enjoying our garden sprinkler! Is it worth it to have a scarecrow? Absolutely! I still love having a scarecrow in my garden whether it keeps the birds away or not. It's fun to have and, in my opinion, my garden wouldn't feel complete without it! Make your own scarecrow! Whether it is for Halloween or to keep in your garden, here are three different plans at different levels so you can build your own scarecrow. Enjoy:-)
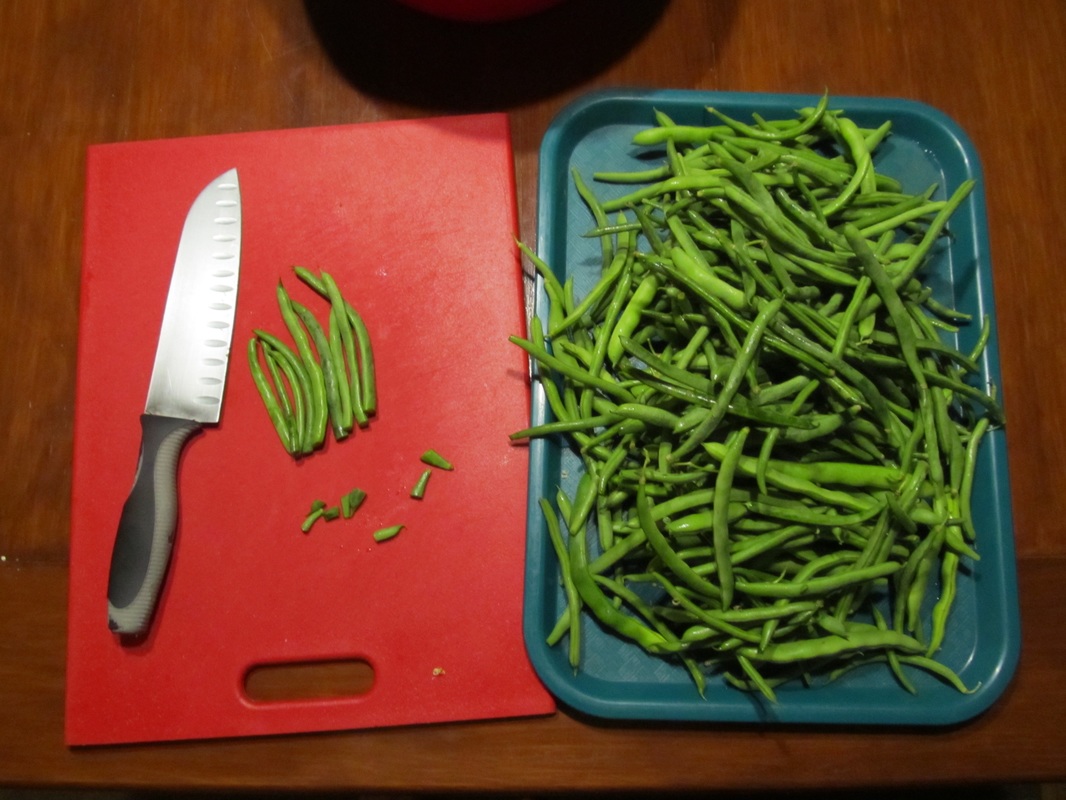
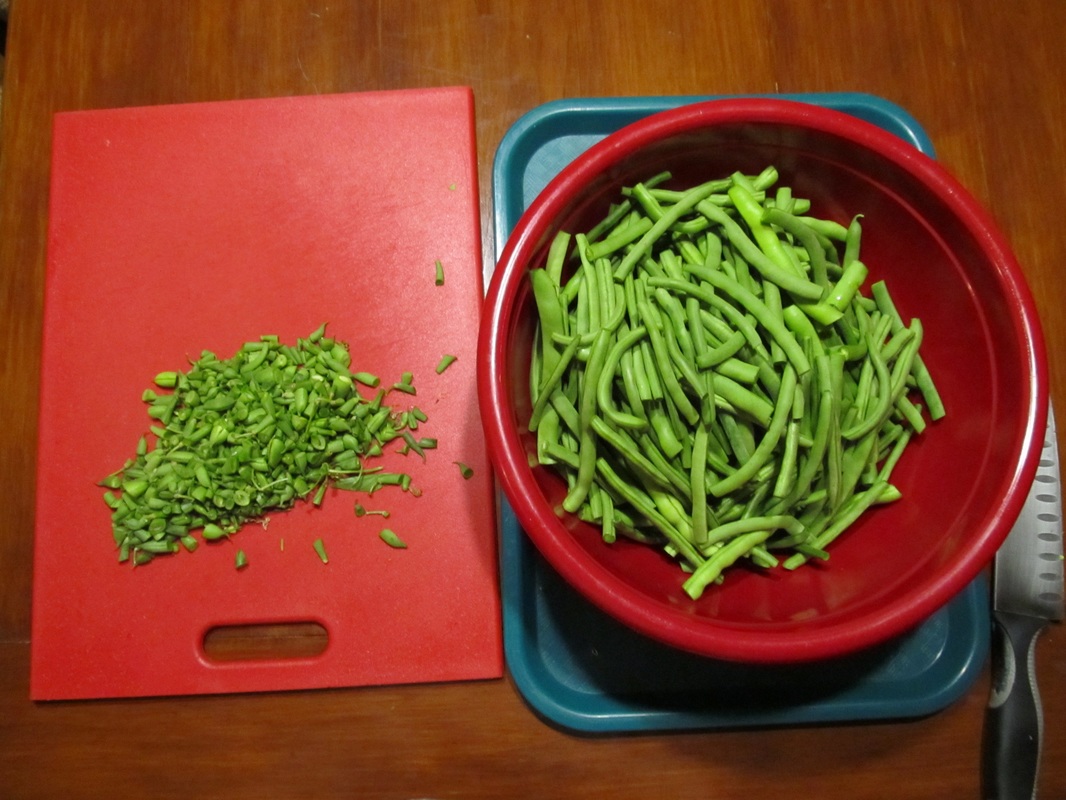
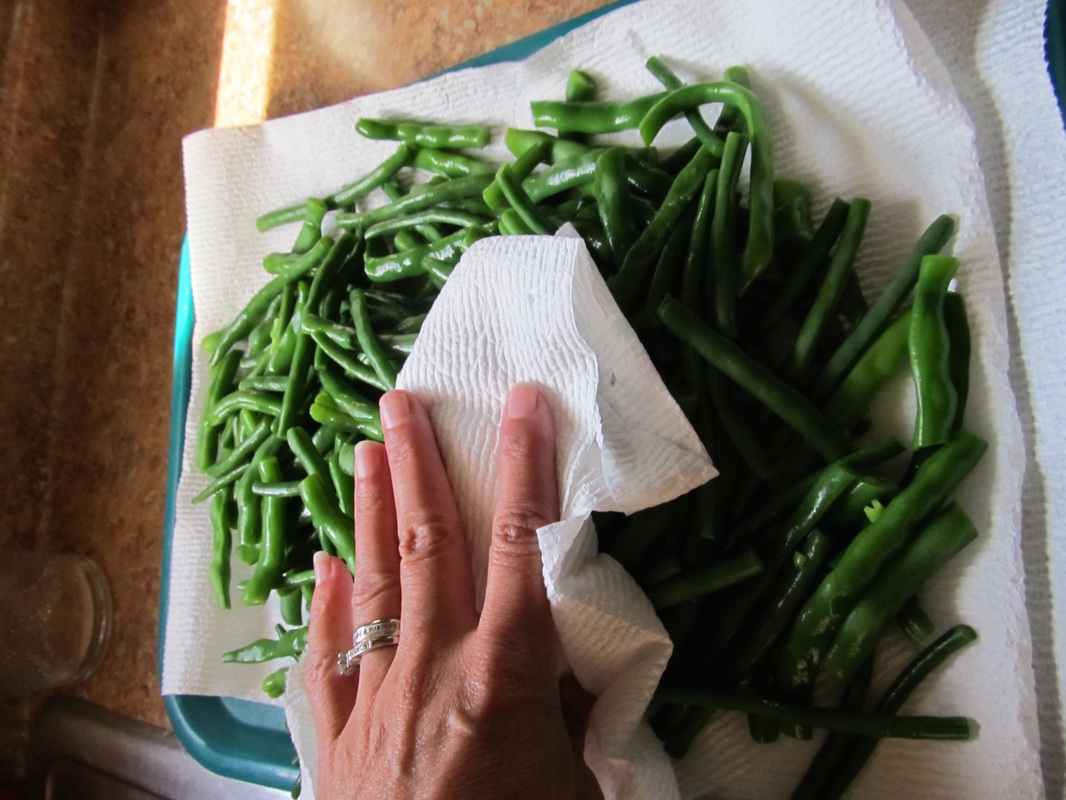
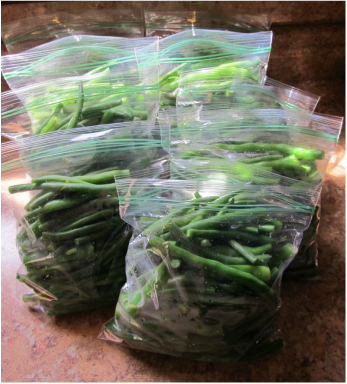
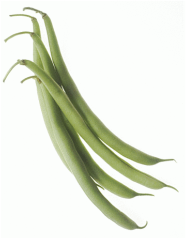
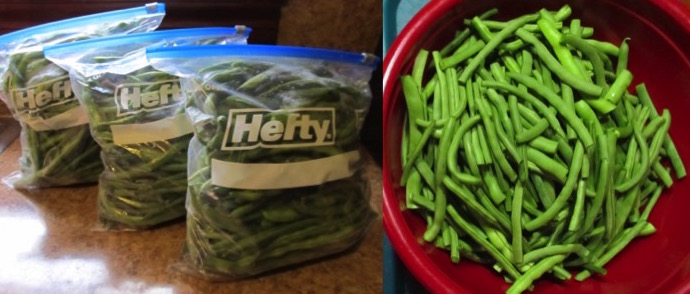 I love eating my own home grown string beans over the winter. The fact that they will taste good months from now is because of how they are prepared and stored. Today I am going to share with you how I prepared and saved 7.73 pounds of string beans in under 2 hours by myself! In my earlier post "It's Not Too Late To Grow Beans" I shared with you how easy string beans are to grow. Those easy string beans are readily producing now and over the last three days I have filled the three gallon bags you see in the photo above (And yes, they really did total 7.73 lbs!). My method of freezing them for the winter is very simple, but believe it or not it took me a few years to get it right! FIRST THINGS FIRST - PREPPING THE BEANS Last night while watching TV with my husband I sat at the table and I prepared all the beans by simply cutting the ends off and putting them back in the bag. At the same time I also pulled out any unwanted leaves and flowers and cut the larger beans in half. When all was said and done the beans weighed 6.94 pounds.
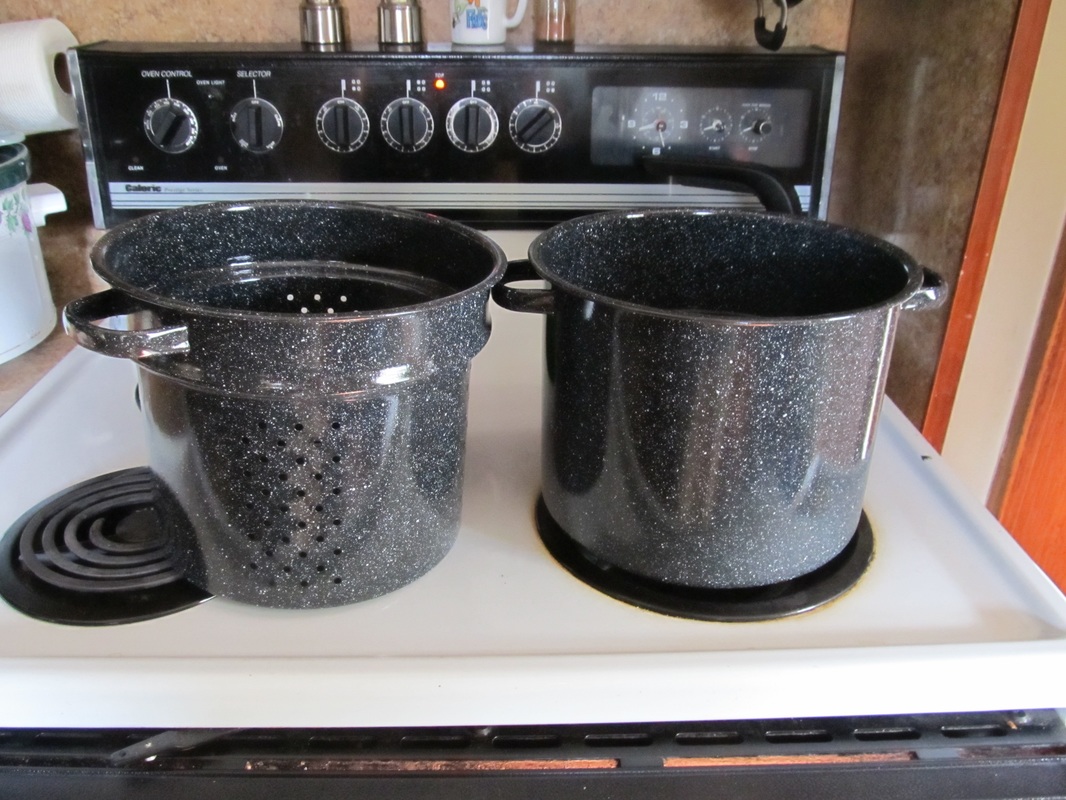
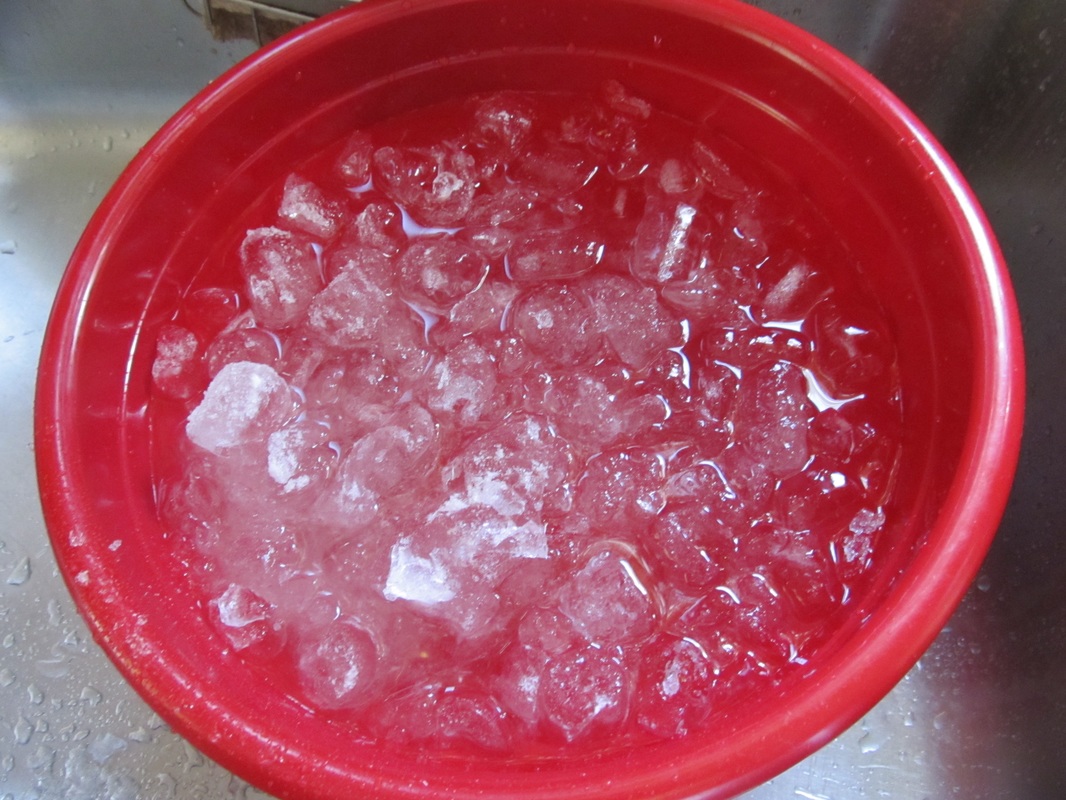
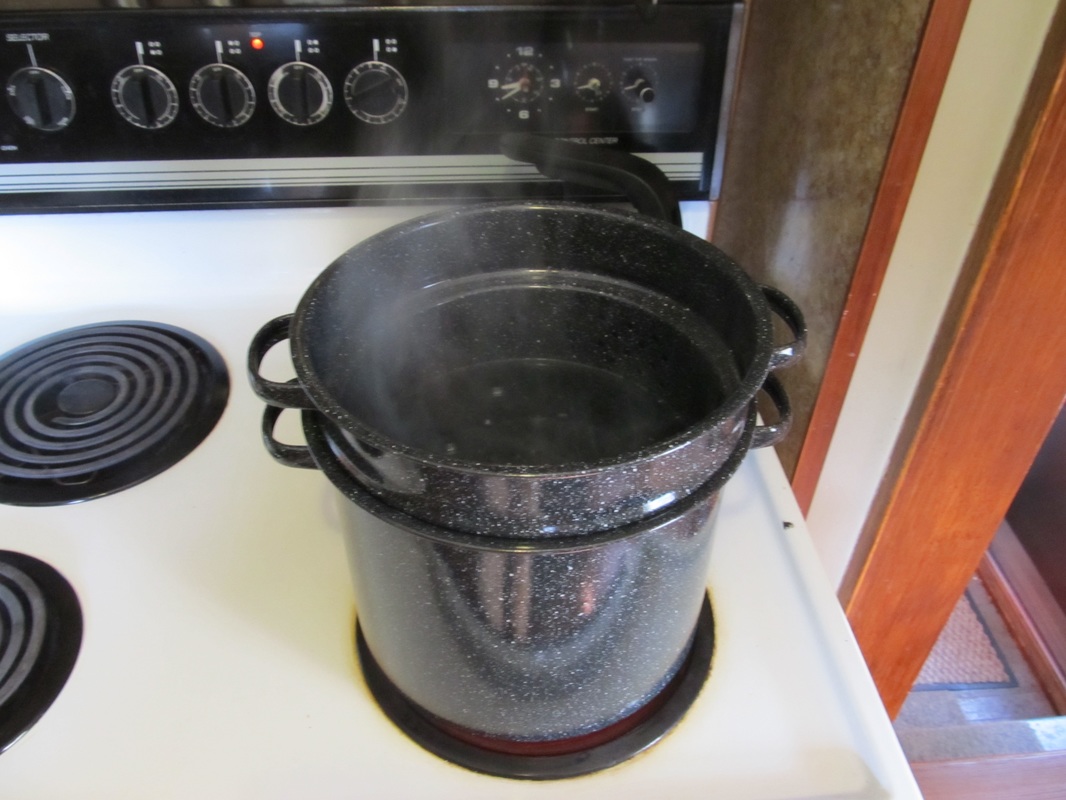
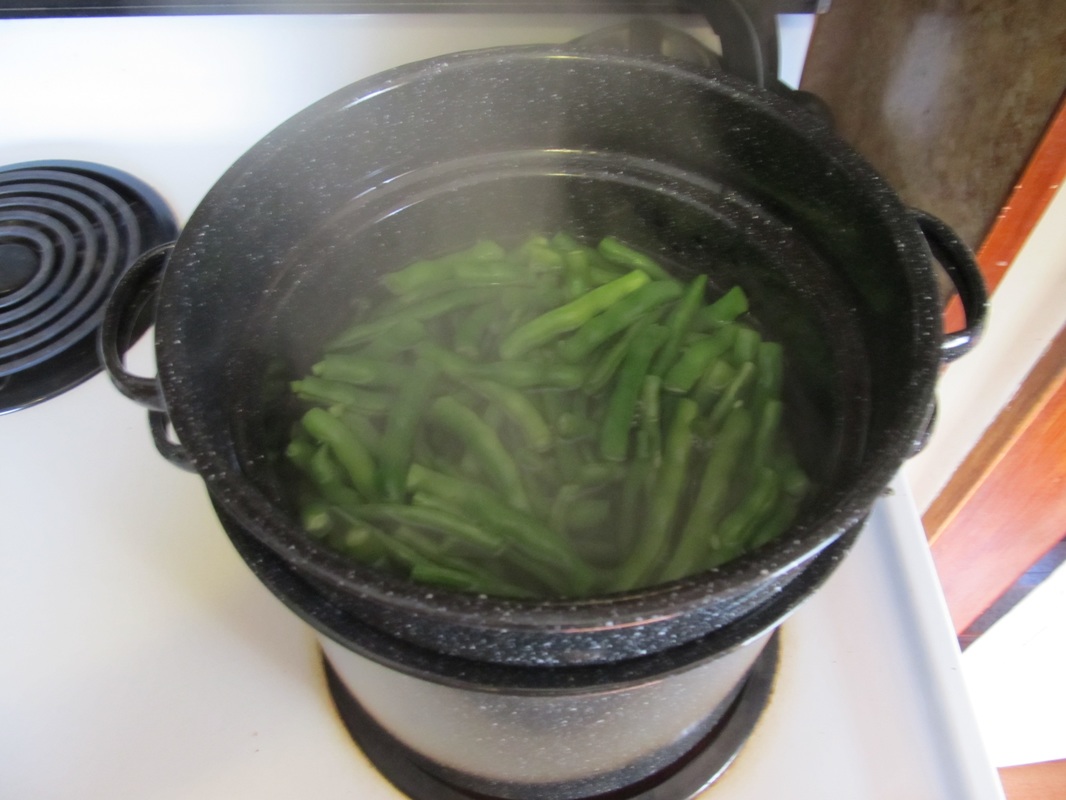
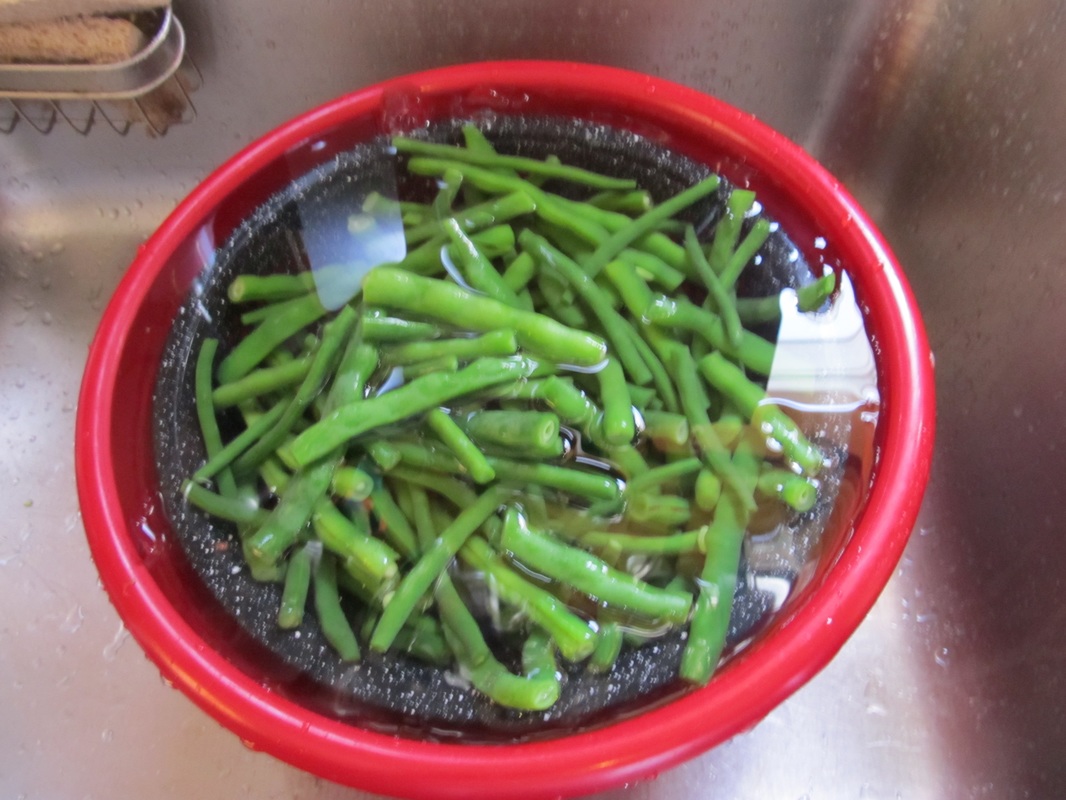
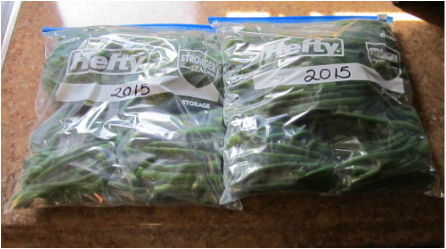
This morning it took me about an hour from beginning to end (including clean-up) to finish the beans for freezing. In the end I had 9 sandwich baggies each weighing about .77 lbs (three quarters of a pound). BLANCHING AND FREEZING THE BEANS Supplies:
Procedure:
Some questions you may have:
Please let me know if you have any additional questions about freezing string beans! Click on the picture below or the link to check out the Graniteware Blanching Pot I used! (affiliate link) 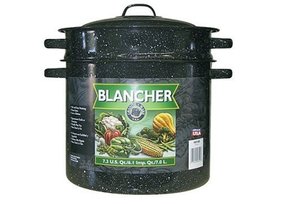
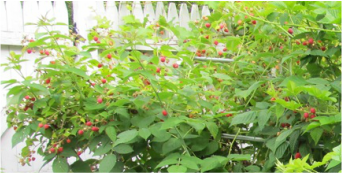
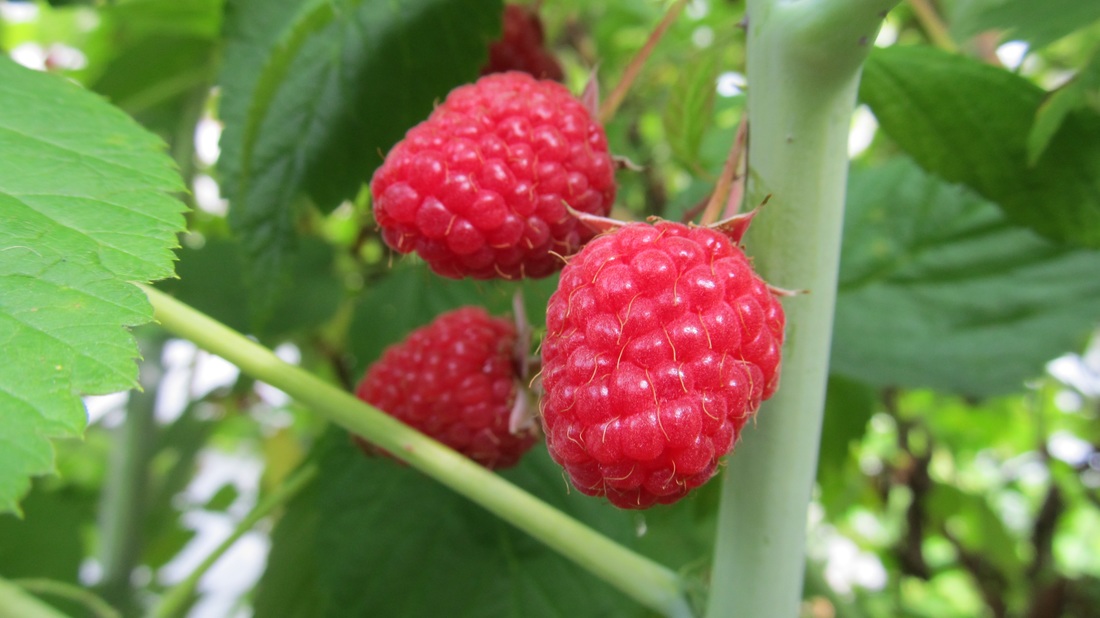
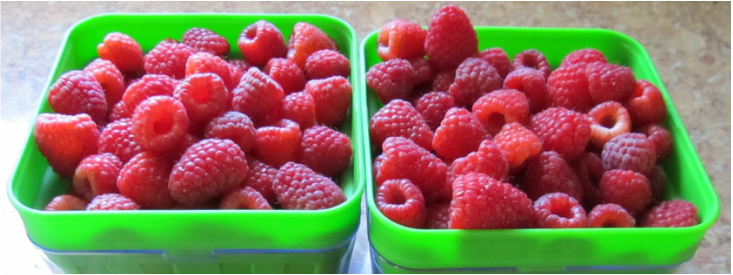 If you love eating raspberries it really is worth it to grow your own. They are simple to grow, healthy to eat and will save you money too! Three years ago we planted two small raspberry bushes. Today, we are picking about 3-4 pints of berries a week! They are so easy to grow and they produce so many berries! They are eaten right off the bush, added to salads or smoothies, frozen to be used over the winter, and even shared with our chickens (They are one of their favorite treats!).
WHEN & HOW TO PLANT THEM:
GROWING YOUR OWN SAVES MONEY!
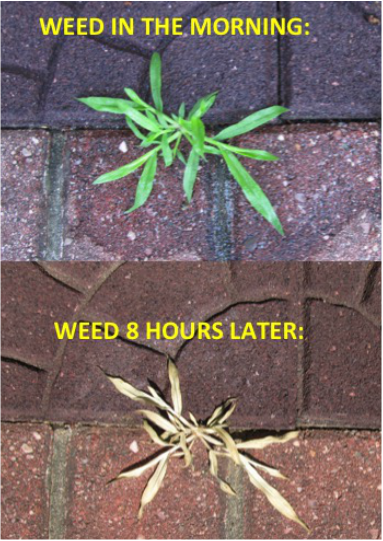
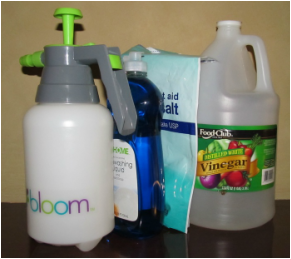
I don't even use regular dish soap in my home anymore (I use Dr. Bronners liquid castile soap instead.). However, after much research, and despite the fact that there are some concerns regarding the environment, I still think using the dish soap is the lesser of two evils when compared to the commercial brand weed killers. I would choose to have a tablespoon of Dawn dish soap infiltrate into my groundwater rather than RoundUp’s potentially carcinogenic ingredients. I have modified the recipe to work with a smaller 1-liter pump sprayer as making a gallon or more of the product seemed wasteful (I do not see myself using it that much plus the large sprayers are expensive and need to be stored somewhere.). Instead I purchased a 1-liter pump garden sprayer (50% off) at RiteAid for $3.99 plus tax. Also, after much research regarding the ingredients and their purposes, I have determined that this homemade weed killer should only be used on weeds in the patio or driveway or anywhere far away from plants and soil I do not want to harm. In my gardens I will continue to maintain the weeds by pulling them by hand or raking.
I added the ingredients to a 1-liter pump sprayer and let it sit until the next morning. Before work I sprayed the weeds on a small patio made of rubber tiles (made from recycled tires!). I returned home 8 hours later and the weeds were DEAD! Using just a strong bristle brush/broom I was able to sweep the weed away! The weed killer was a success and definitely saved me MONEY and I still have plenty of the soap left for future batches of weed killer ☺ A couple of last minute pointers:
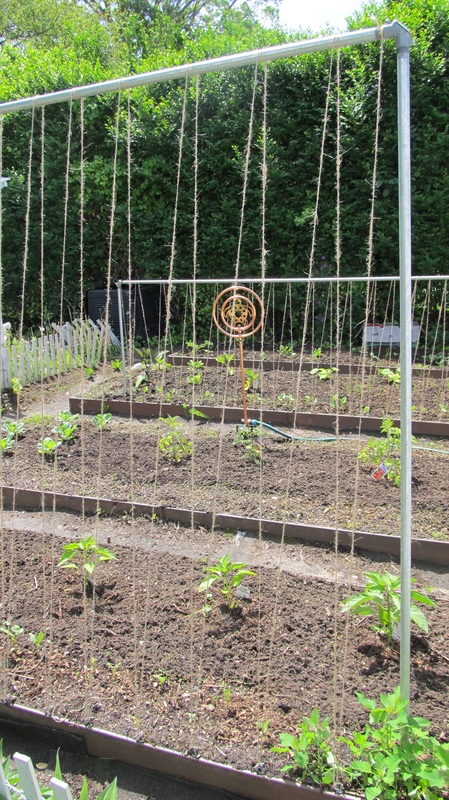
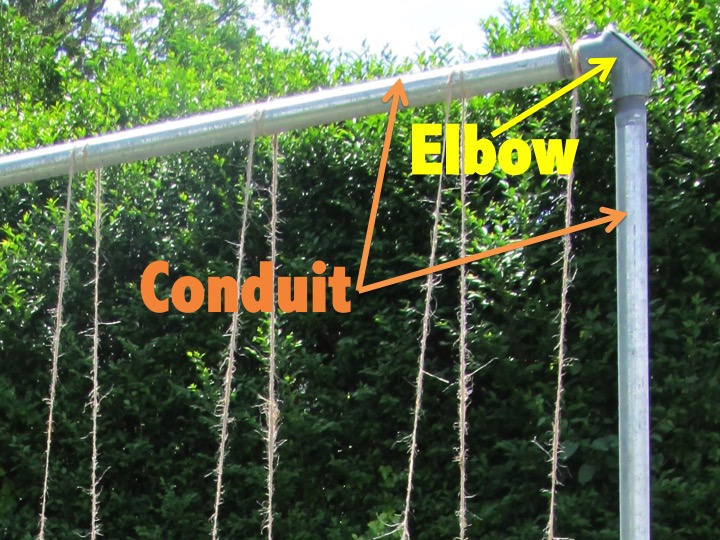
You need a place for the bean plants to grow. They can grow very high (up to 12’). Two methods that I have personally tried are the following:
Once you have the seeds and the poles or trellis, you can plant! We till the dirt along the bottom length of the pole design, mix in some sweet peat, and then plant one seed every three inches about a half-inch deep. Water every other day and reap the rewards in about 2 months!
Picking tip: Pick them when they are relatively small (3-4 inches long) – they taste better and they will actually produce more beans the more they are picked! At the end of the season, allow some beans to remain on the vine and grow larger. These will eventually be harvested to plant for next year. The longer they stay on the vine, the stronger the seeds will be for planting next year :-) |

Hi there! I'm Kathie, the author behind Creating A Simpler Life blog. I'm excited to share our longterm projects (and planning) toward building our future retirement homestead in the Adirondack Mountains of New York. In the meantime I will be sharing all the other little things we do that are part of creating our simpler life!
Categories
All
Archives
July 2020
|


 RSS Feed