CREATING A SIMPLER LIFE OFF GRID
  • Home/About
    • MINIMIZING >
      • Home Size
      • Room by Room
      • Get Organized
      • Household Waste
    • MINIMIZE DEBT, MAXIMIZE SAVINGS >
      • Bills & Other Debt
      • Saving Money
      • Shopping Tips
      • Affordable Fun
    • BACKYARD CHICKENS >
      • The Coop
      • The Chickens
      • Feeding the Chickens
      • Fresh Eggs
    • HOME GARDENING >
      • Building the Garden
      • What We Grow
      • Seeds, Weeds, & More
      • Preservation & Storage
    • DO-IT-YOURSELF >
      • Health & Wellness
      • Simple Cleaning & Tips
      • Crafts & More!
      • Printables
    • CROCHET >
      • IDEAS & MORE
      • VIDEO TUTORIALS
    • Blog
  • HOMESTEAD
    • The 5 Year Plan PLUS! >
      • 2017
      • 2018
      • 2019
      • 2020
      • 2021
      • 2022
    • WHY AN EARTH SHELTERED HOUSE?
    • OFF GRID TINY TRAILER
    • BUILD VIDEOS IN ORDER
    • HOMESTEAD MACHINERY >
      • GENERATORS
      • KUBOTA TRACTOR
      • ATV'S & UTV'S
      • WOOD CHIPPER
      • CHAINSAWS
      • LOG SPLITTER
      • POWER TOOLS
      • SNOWMOBILES
      • AUTOMOBILES
    • BUDGETING THE BUILD
    • SUSTAINABILITY >
      • WATER
      • FOOD
      • SHELTER
      • ENERGY >
        • SOLAR POWER
    • The Adirondacks >
      • Wildlife & Nature
      • Insects & Bugs
      • Things to Do
      • Water Fun
    • ADIRONDACK CRAFTS
  • VLOG
    • 2023
    • 2022
    • 2021

Blog

A little bit of anything and everything that's part of
​creating, enjoying, and living a simpler life!
Picture
http://www.creatingasimplerlife.com

DIY Giant Crochet Dreamcatcher

8/18/2017

0 Comments

 
Picture
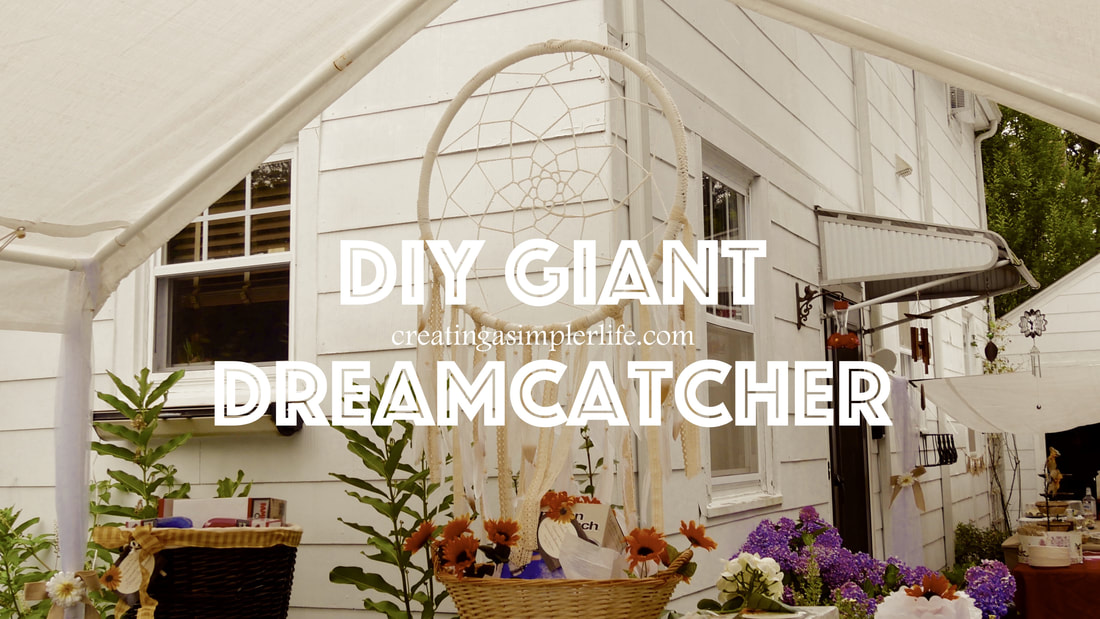
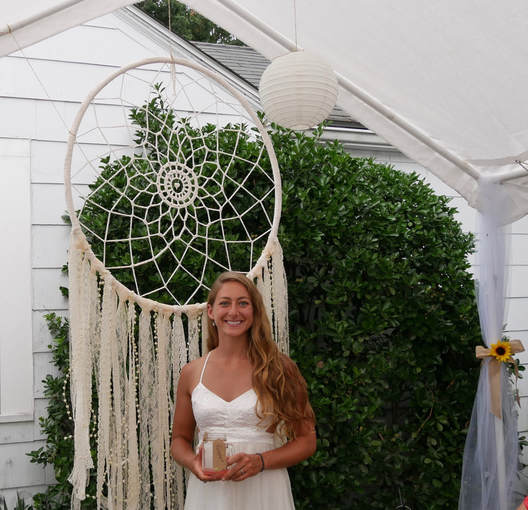
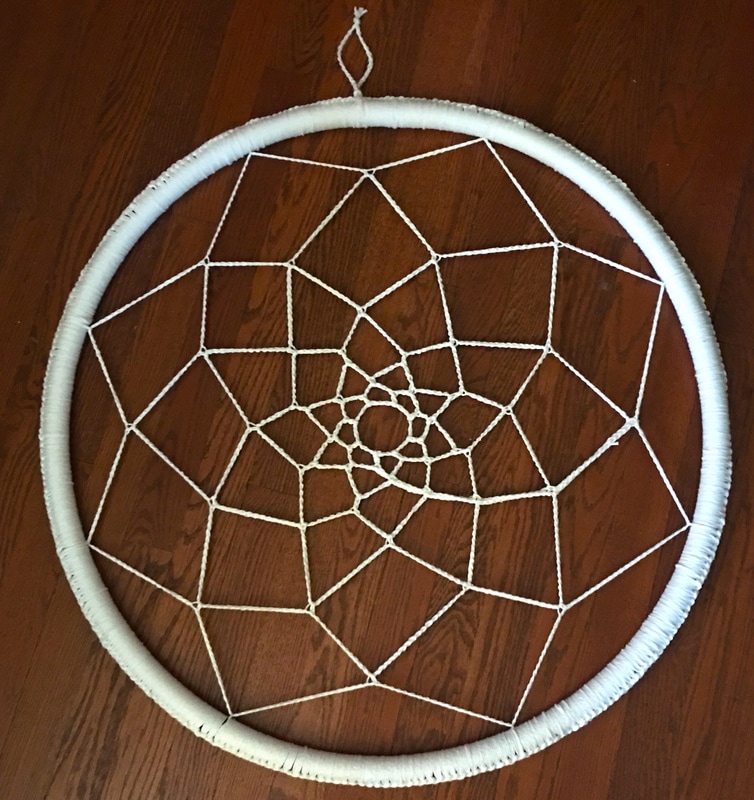
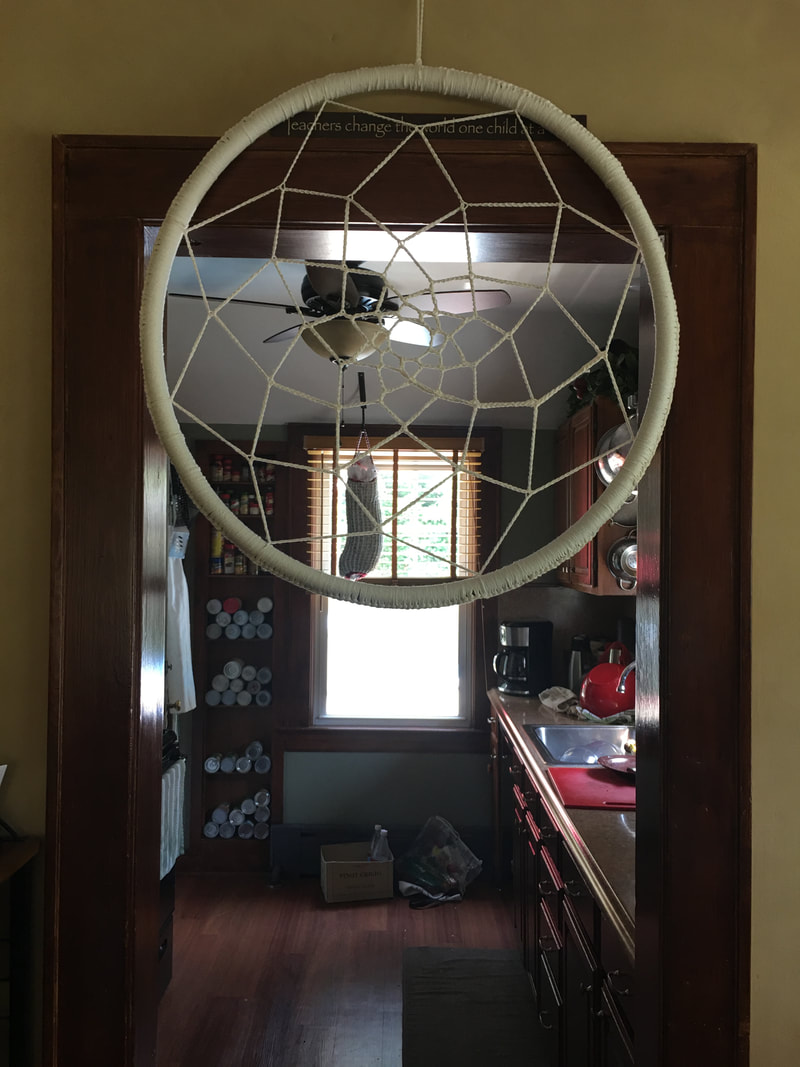
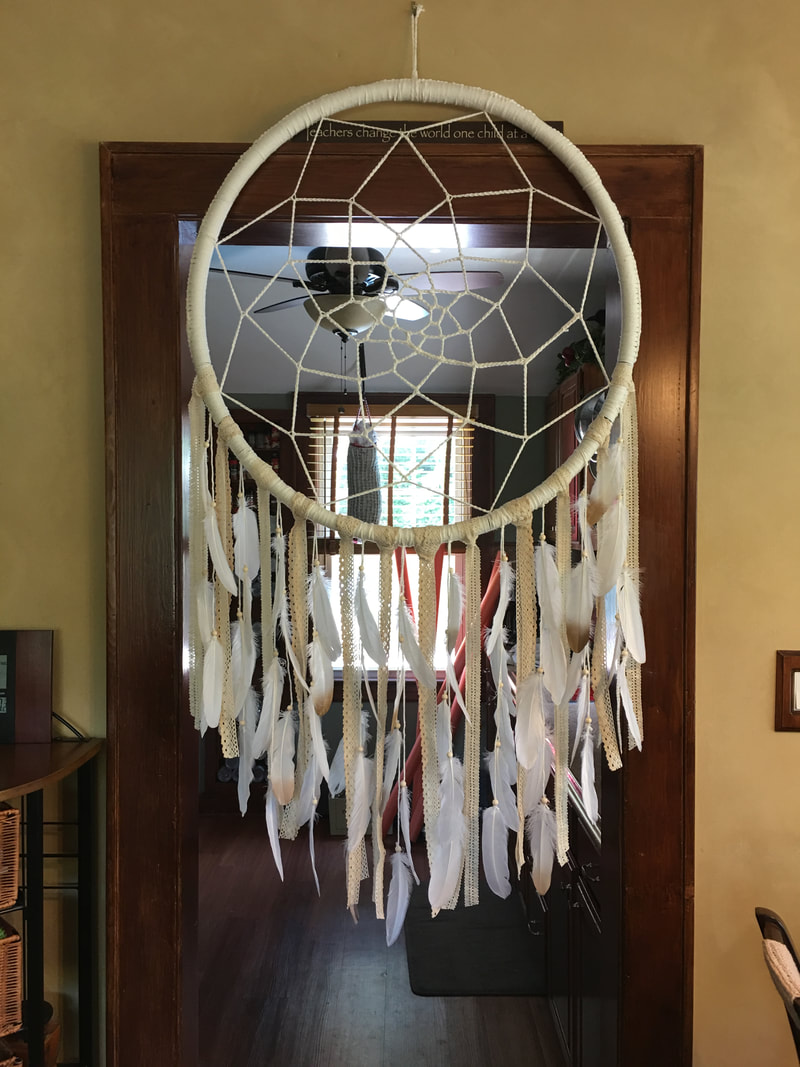
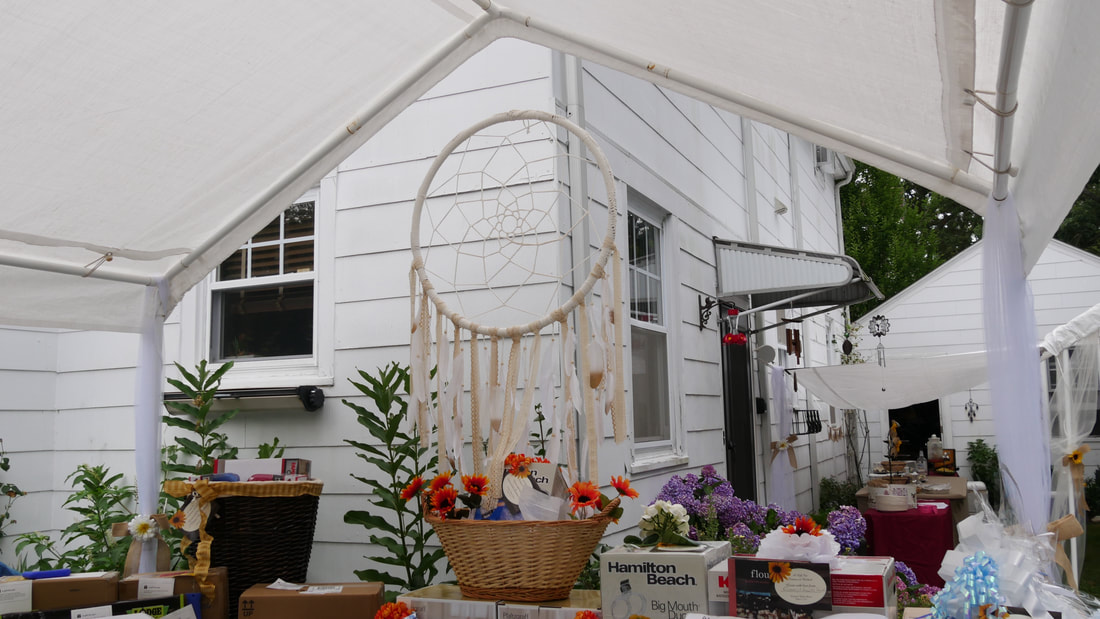
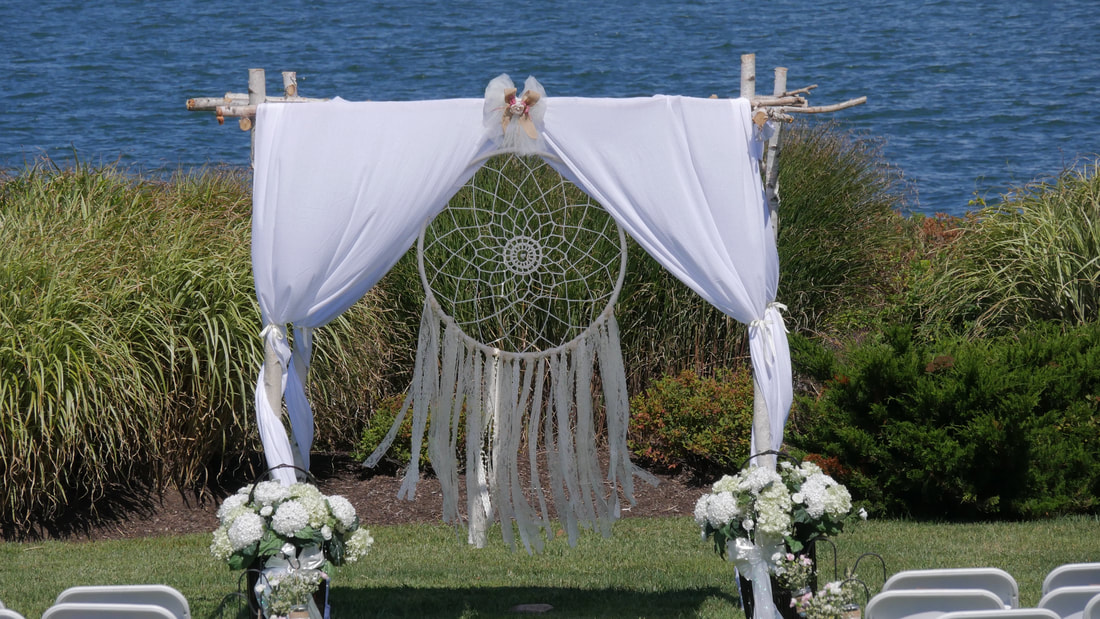
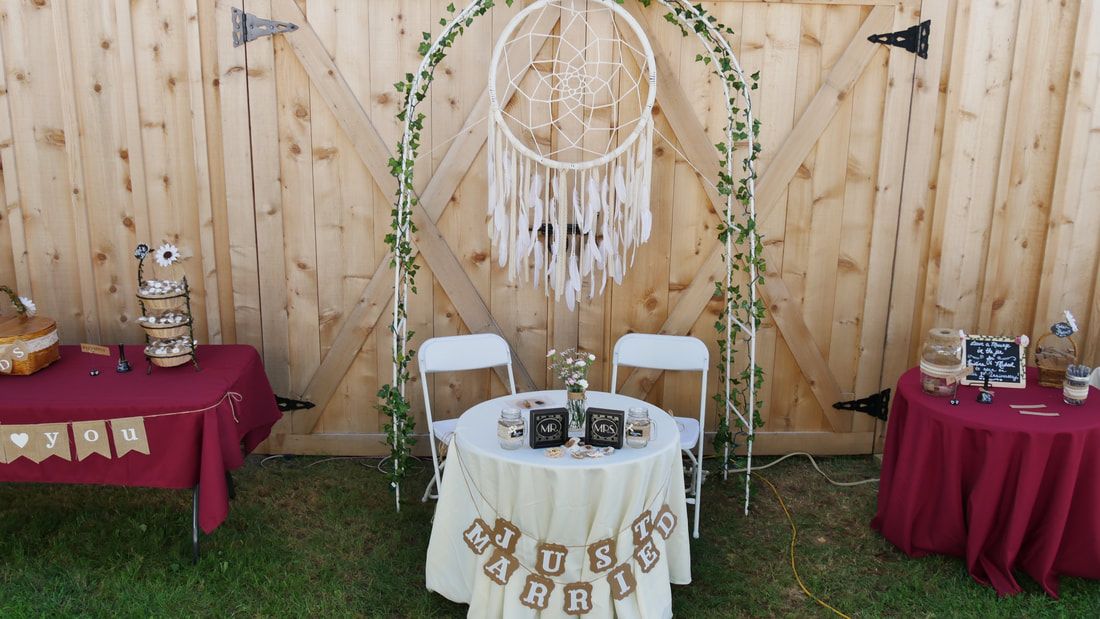
This post is dedicated to two special people: my daughter since I am making it for her wedding day and my friend Patty who recently said "I want to make one for my kids room." I will be posting another giant dreamcatcher soon, however the difference is that the center is crocheted a little different and there are no feathers so the bottom part is much simpler to make!
Picture
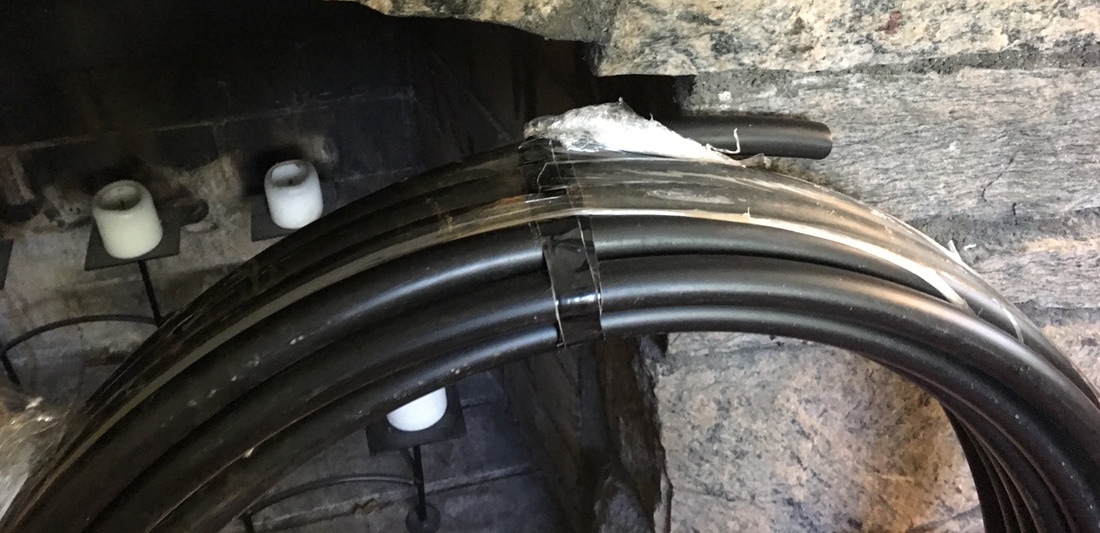
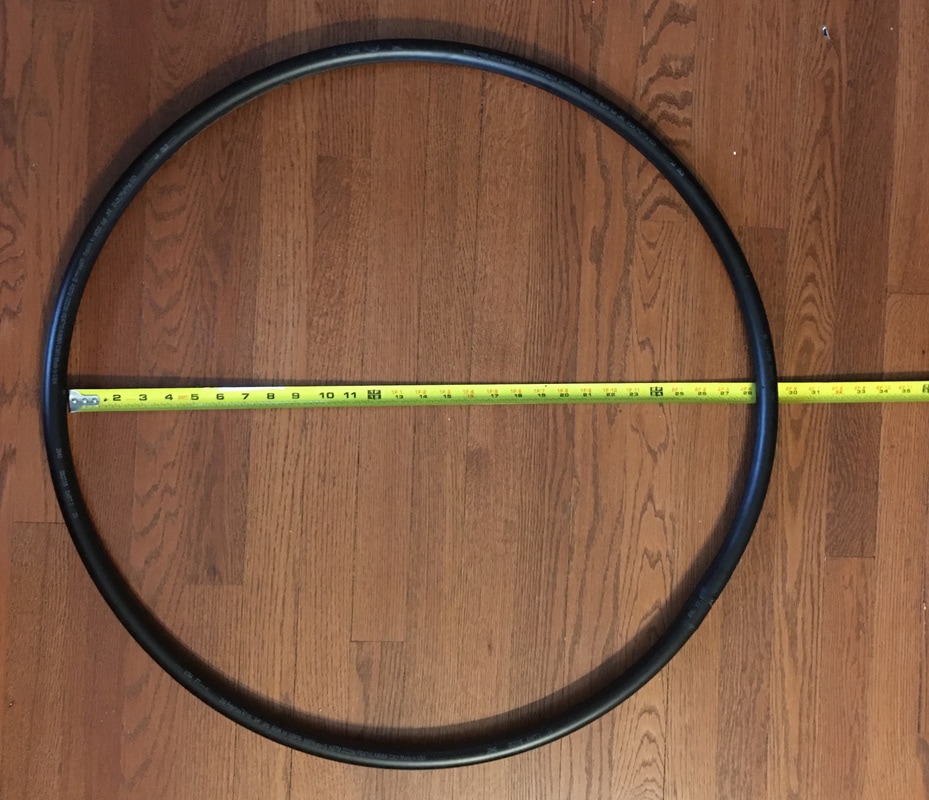
Second Giant Dreamcatcher DIY How To coming soon! See...no feathers so the bottom is simpler! It was also made with a repurposed hula hoop!!
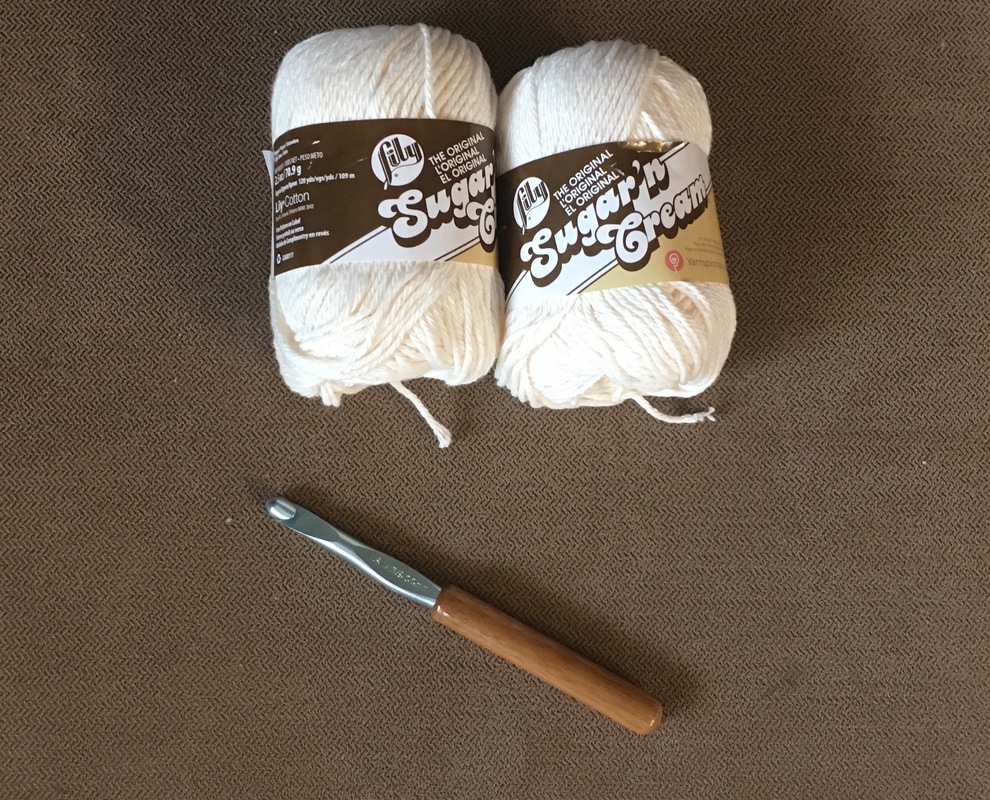
Supplies Needed:
  • Sprinkler hose - I used 3/4" but you could also use 1/2". It is the least expensive here at Lowes. It is 100 psi 3/4" polyethylene tubing. NOTE: you can also use a hula hoop (see the dreamcatcher my daughter is standing next to above!).However, if you do use a hula hoop know that the tube is much thinner (and it will use less yarn to cover) but it can lost it's round shape due to lack of strength so you will need to be careful in how it is hung.
  • Sprinkler hose coupler (connector) - not needed if you use a hula hoop.
  • Two 2.5 ounce skeins of cotton yarn in your color of choice.
  • A large crochet hook
  • A 4.5 mm crochet hook
  • Scissors
  • Yarn needle
  • Seashell or other center hanging decoration
  • Multiple laces and ribbons
  • Feathers
  • Needle and thread
Directions:
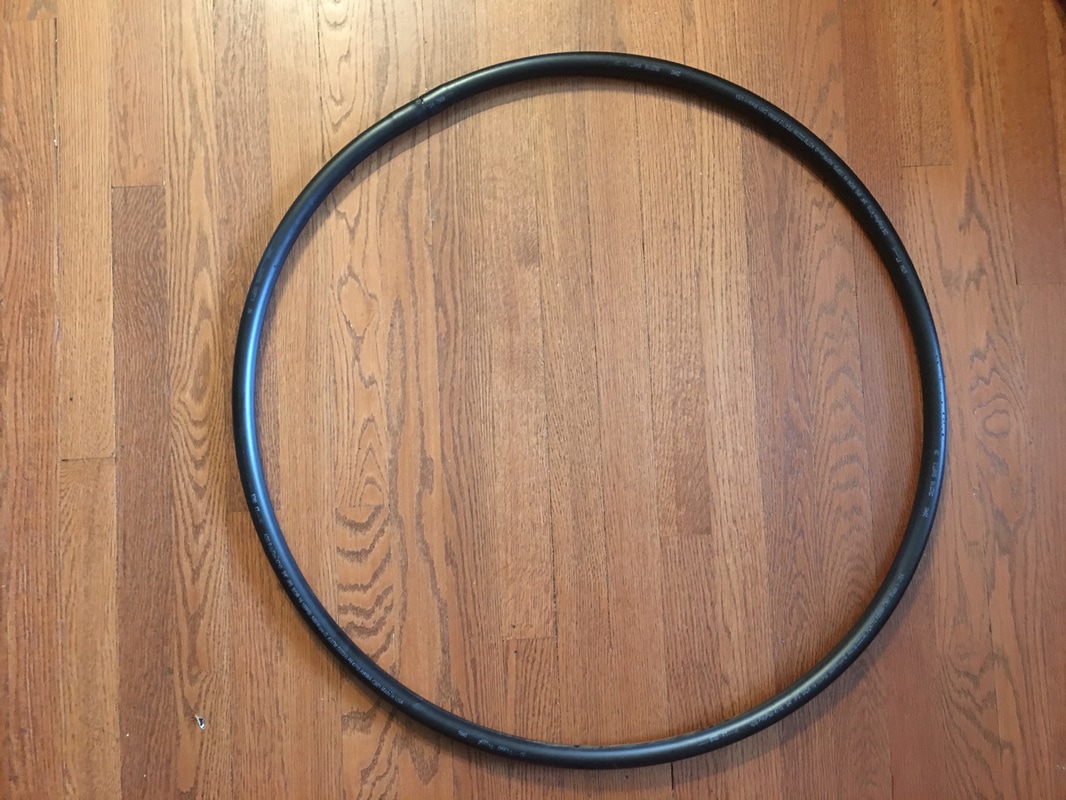
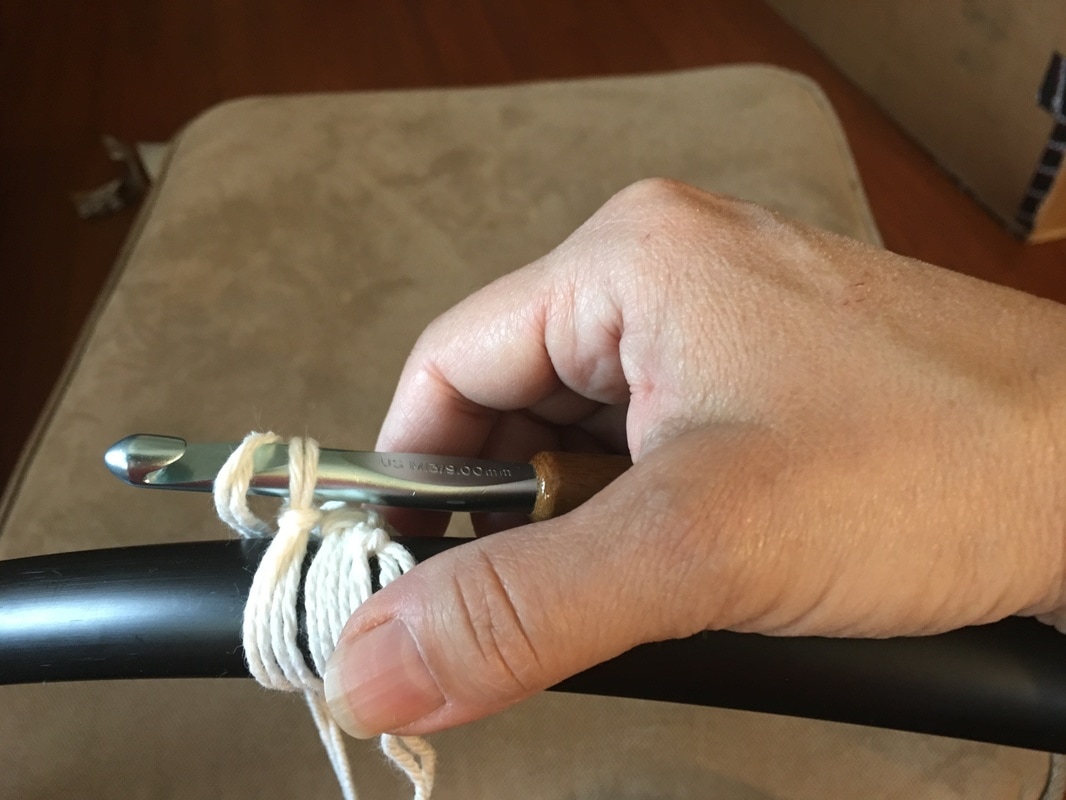
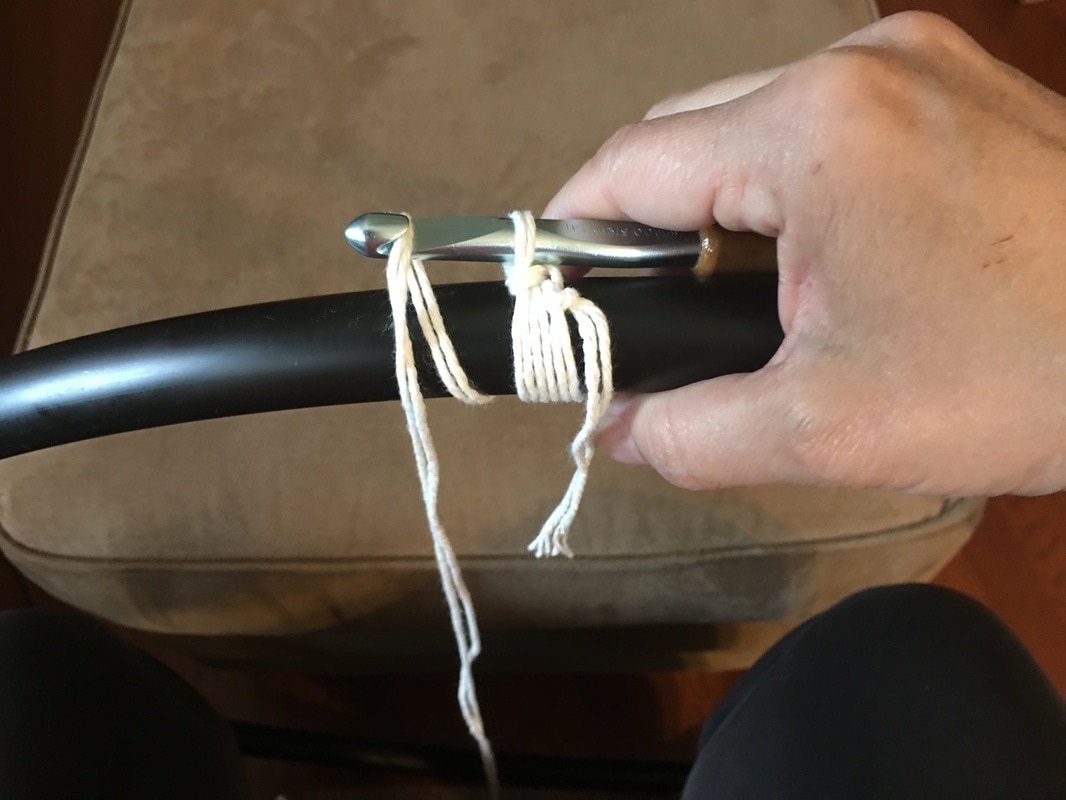
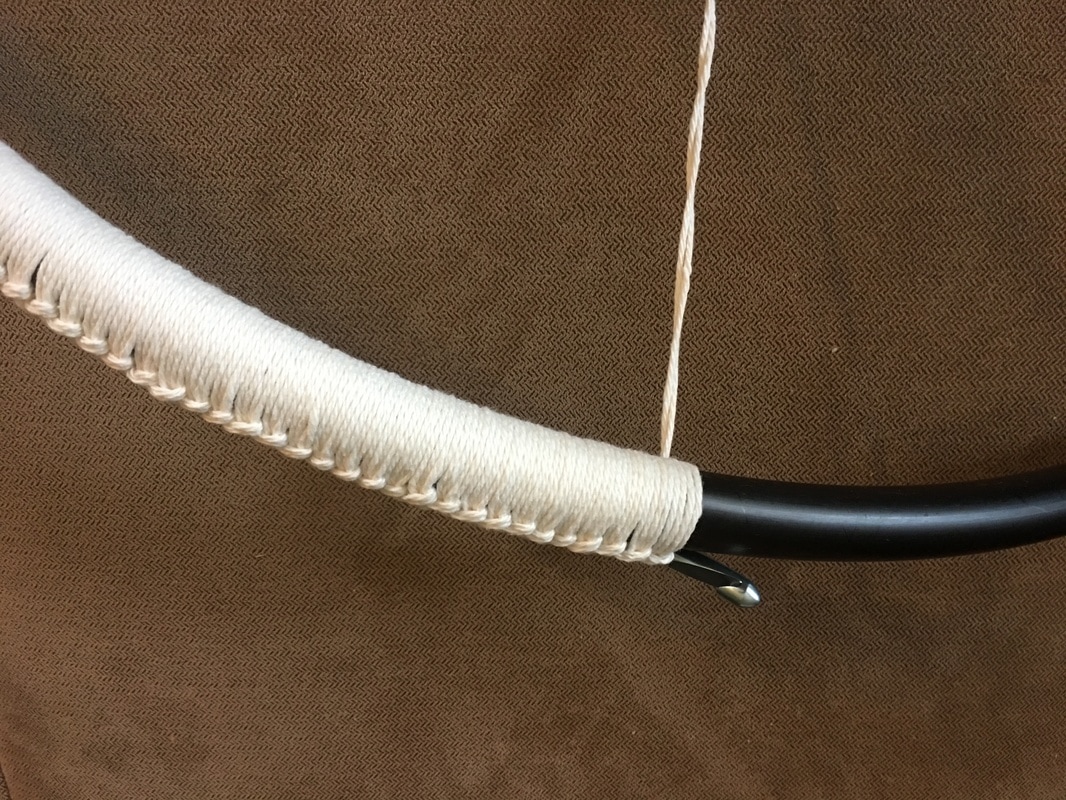
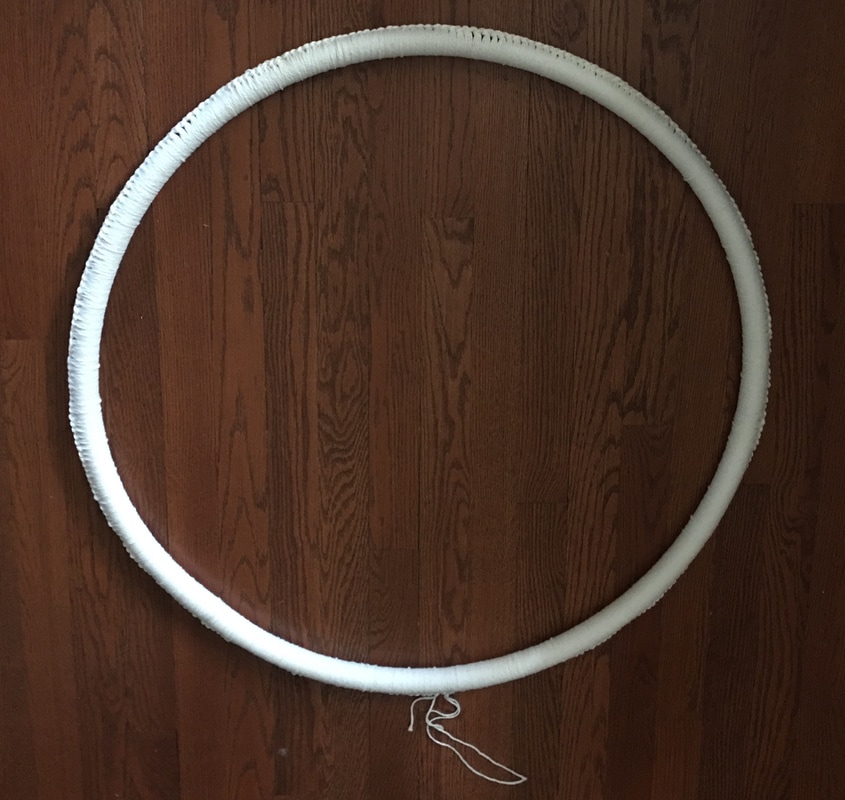
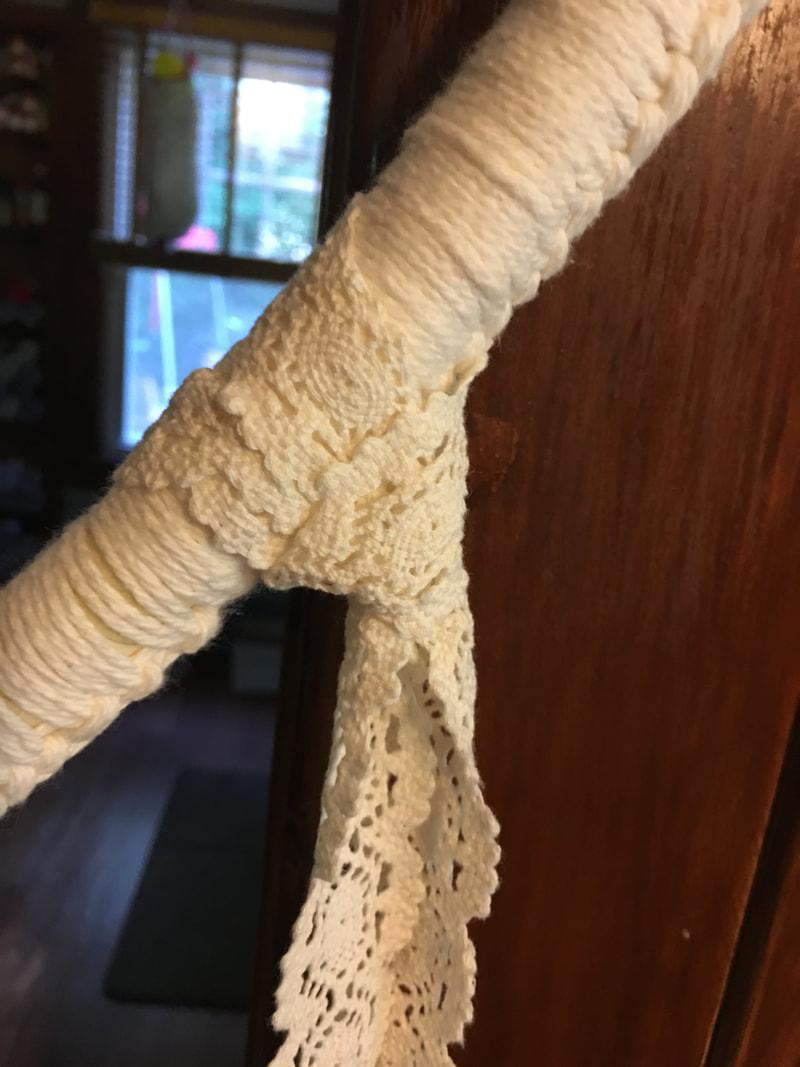
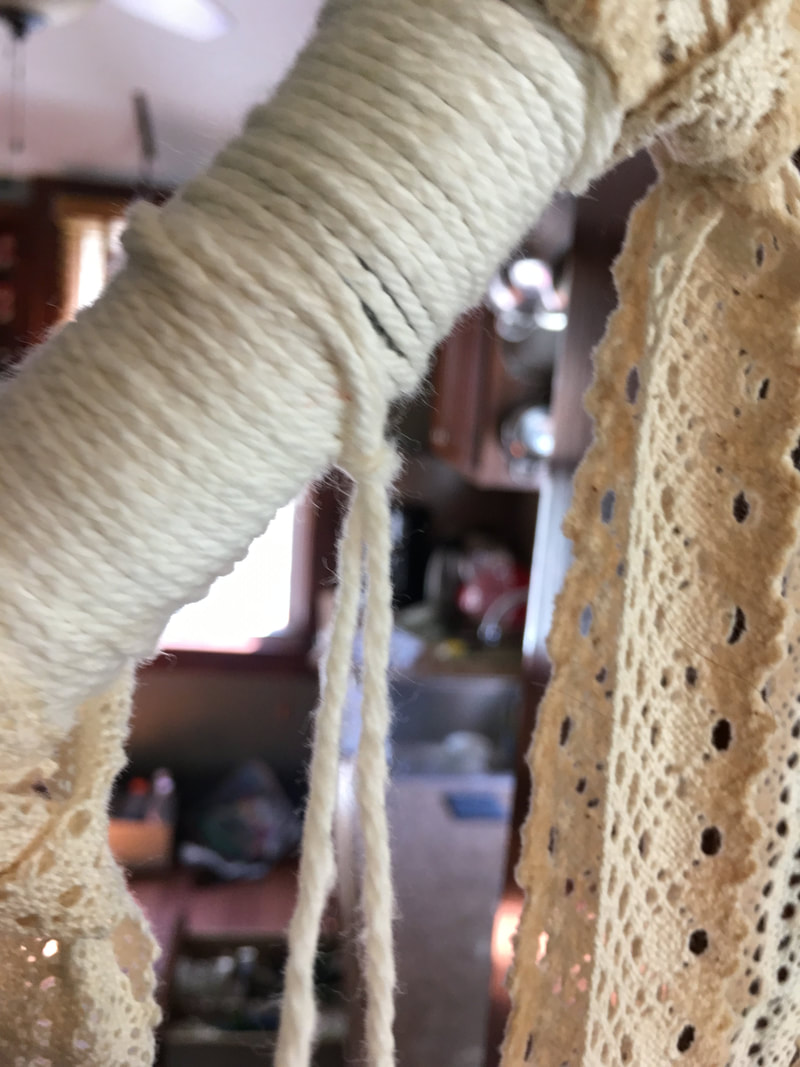
Make the hoop and wrap it with yarn.
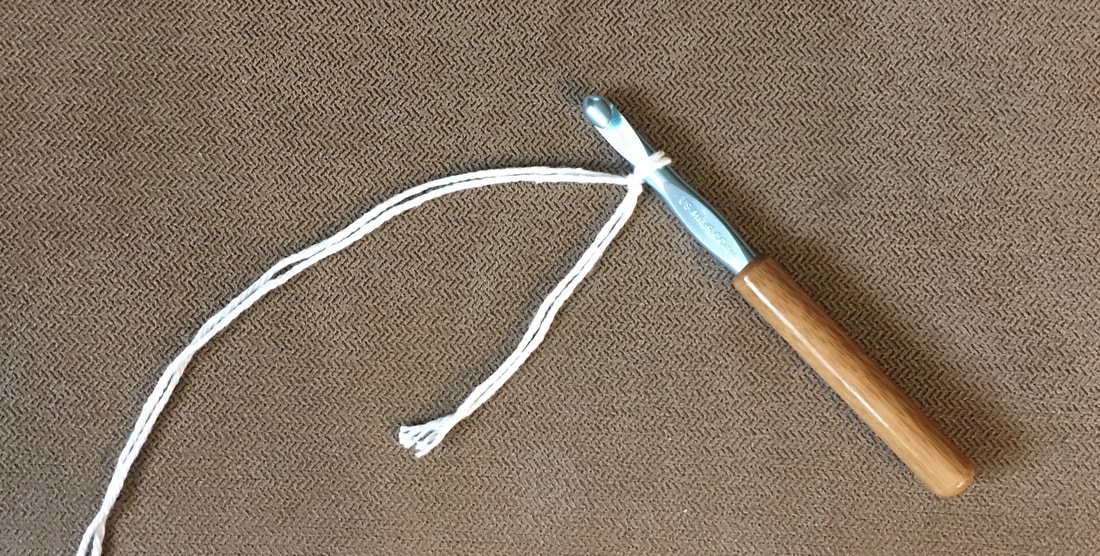
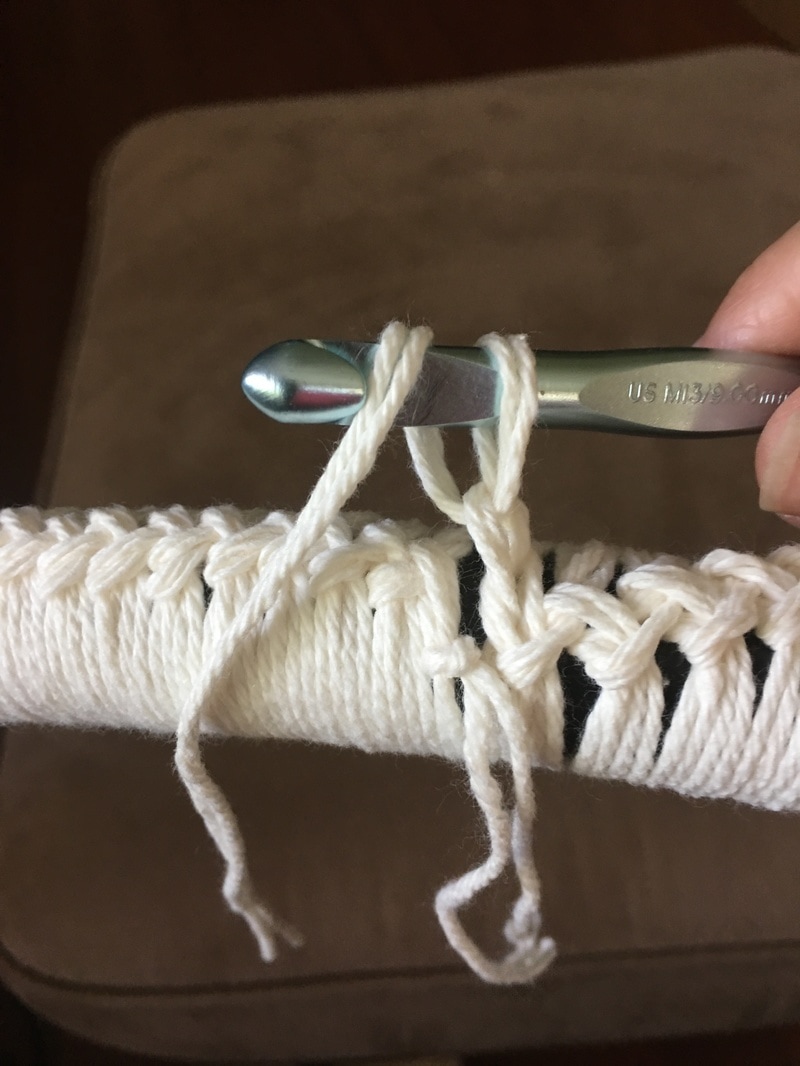
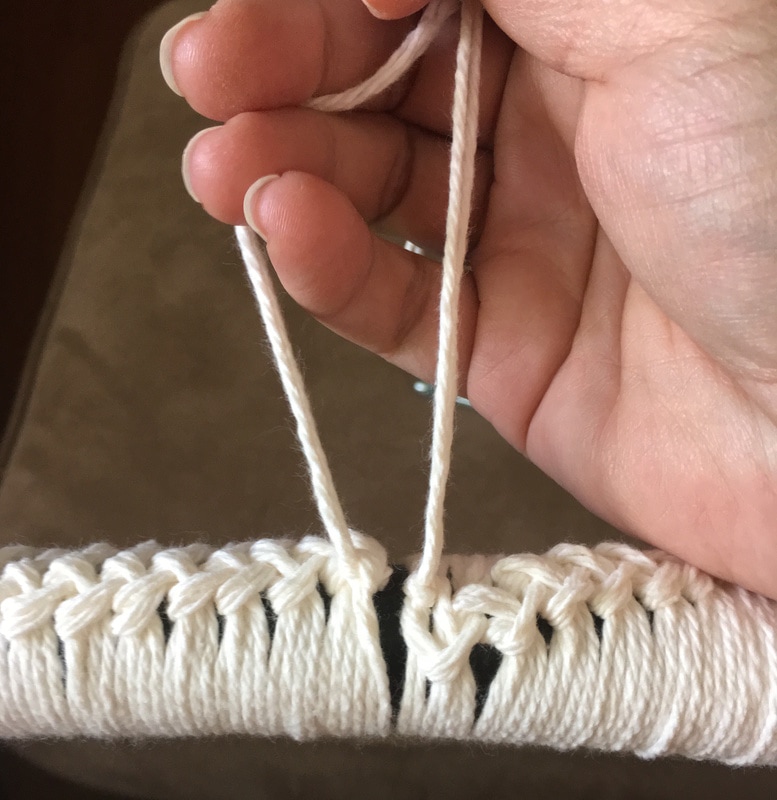
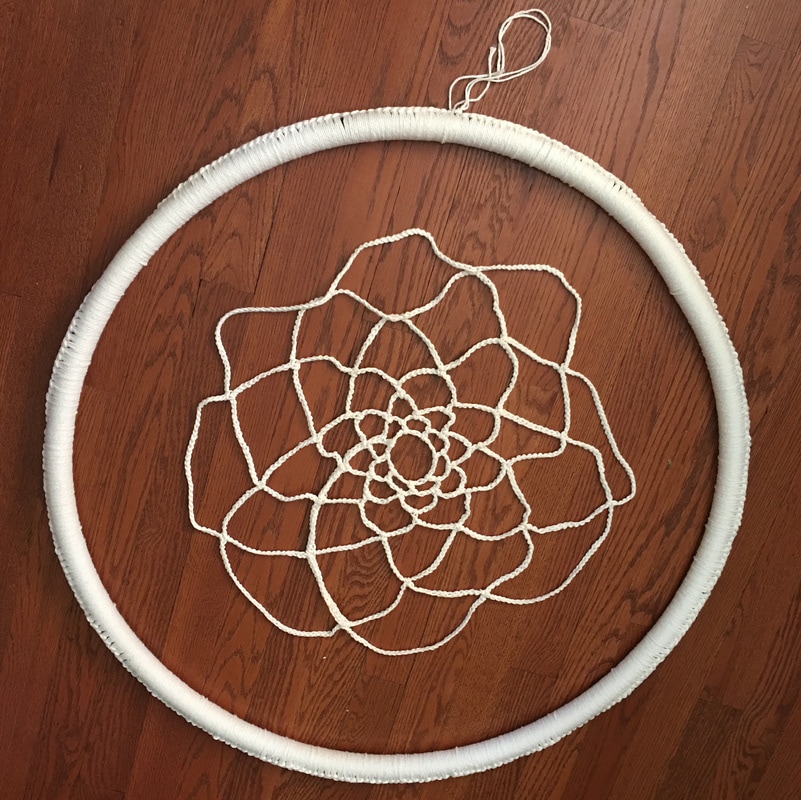
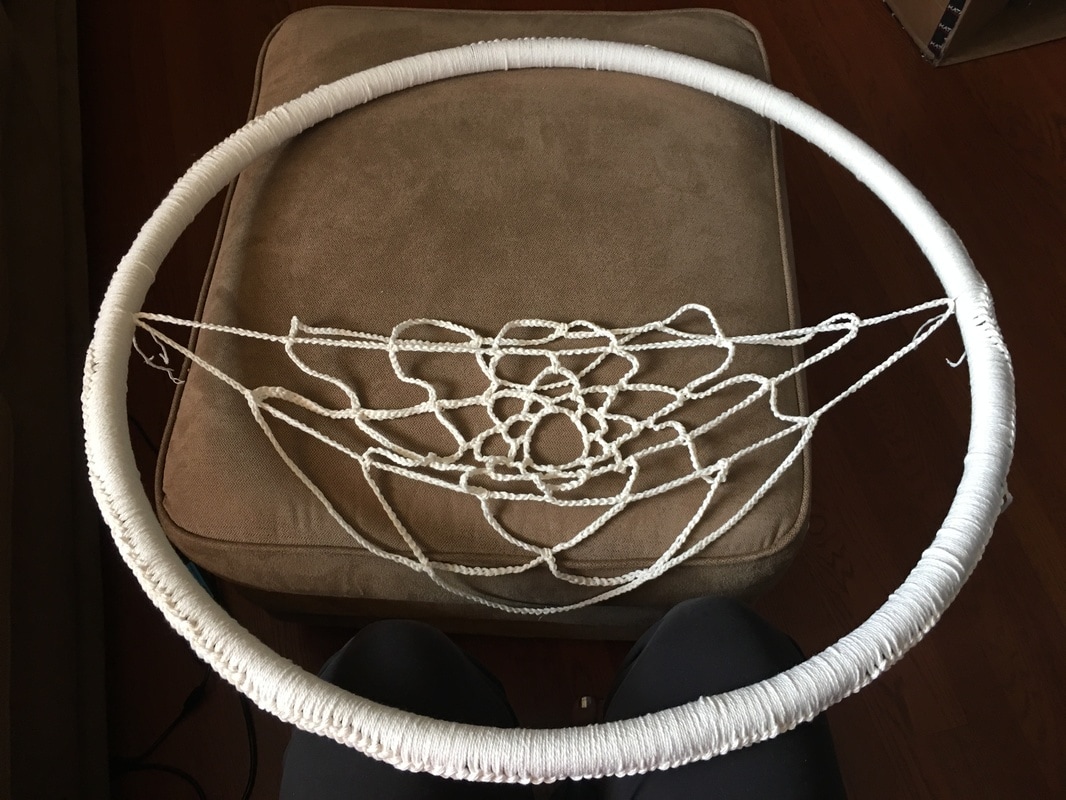
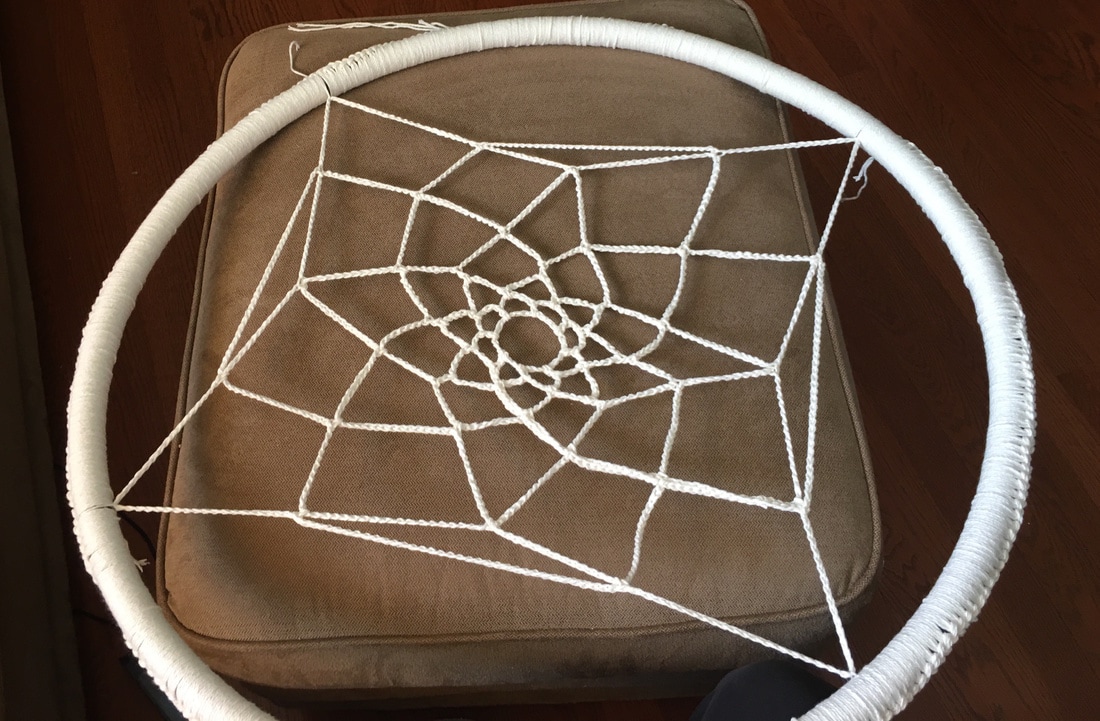
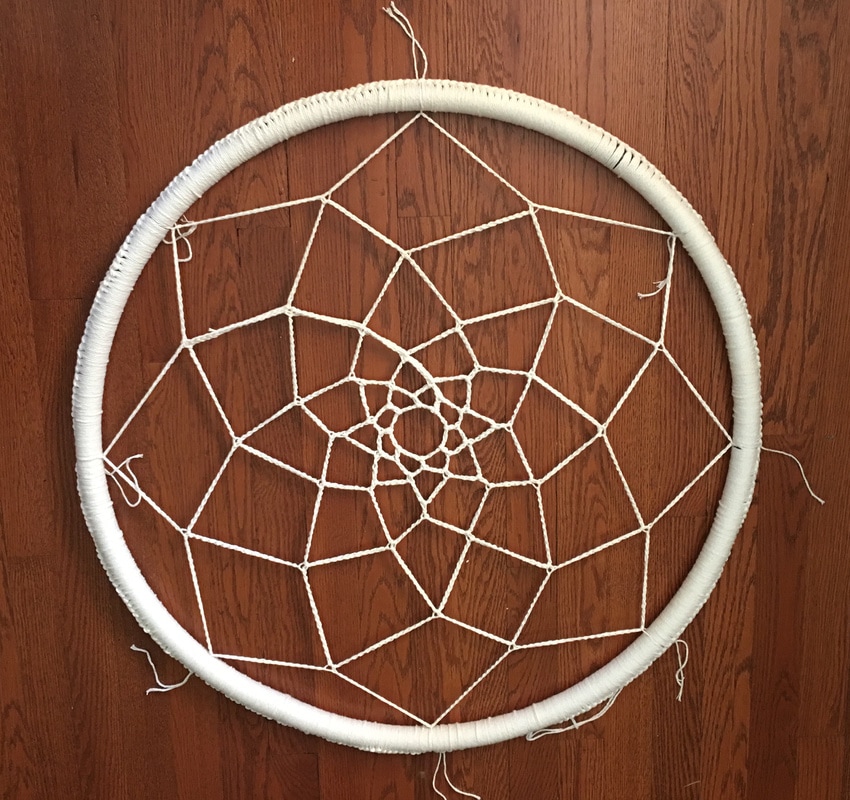
Picture
Sprinkler hose - 50 feet!!!
Picture
Cut the length you want to create the diameter you choose and connect ends with a coupler. We use a heat gun to make it easier to connect.
Picture
This one is about 2 feet 4 inches interior diameter. I also made one that is 3 feet 6 inches in diameter!
Picture
To wrap the tube I use two skeins and a large crochet hook. This makes the process go a lot faster!
Picture
Attach both skeins together to the hook (doubled up).
Picture
Wrapping the tube is more like doing macrame than crocheting. You will be going from back to front then though the loop, and then front to back and through the loop, etc. After doing it a few times it will seem natural. This picture shows from the back.
Picture
This pictures shows from the front.
Picture
Try to keep the yarn nice and neat and not overlapping each other.
Picture
After going completely around, you will cut off the end and pull the last threads tightly through the loop.
Picture
Then take the ends and tie them together in a knot.
Picture
Completed wrapped hoop!
Crochet the center:
HINT: always do an even number of loops.
  • Chain 25 and connect to create a loop.
  • Chain 8 and double crochet into center. Repeat 7 more times for a total of 8 loops around the center and connect to the base of your original loop.
  • Slip stitch up the side of the original loop until you get to the center of it, then do a single crochet into the center and chain 15, single crochet into the center of the next loop, etc. all the way around until you connect to the base of the original loop.
  • Slip stitch up the side of the loop to the center, single crochet into the center of the loop and chain 20, single crochet into the center of the next loop and chain 20, etc. all the way around until you connect to the original loop again.
  • You will continue this pattern increasing by 5 chains each round until it is approximately half the size of the hoop (see picture below). It will look way too small but it is NOT! 
Picture
Completed center! I had 5 loop levels when I was done.
Picture
Cut eight pieces of string to tie the crocheted center to the hoop.
Picture
Weave a piece of string through the macrame edge on the hoop (otherwise it will not look right) and then tie down and knot one of the crocheted loops in place.
Picture
Then tie the opposite side the same way.
Picture
Then do the next pair of opposite sides...
Picture
Until all 8 loops are tied on! Be sure to keep the spacing about equal too.
Picture
Then use the yarn needle to weave all the hanging pieces of yarn. Note I also crocheted a simple chain of about 70 and created a loop at the top to hang it from.
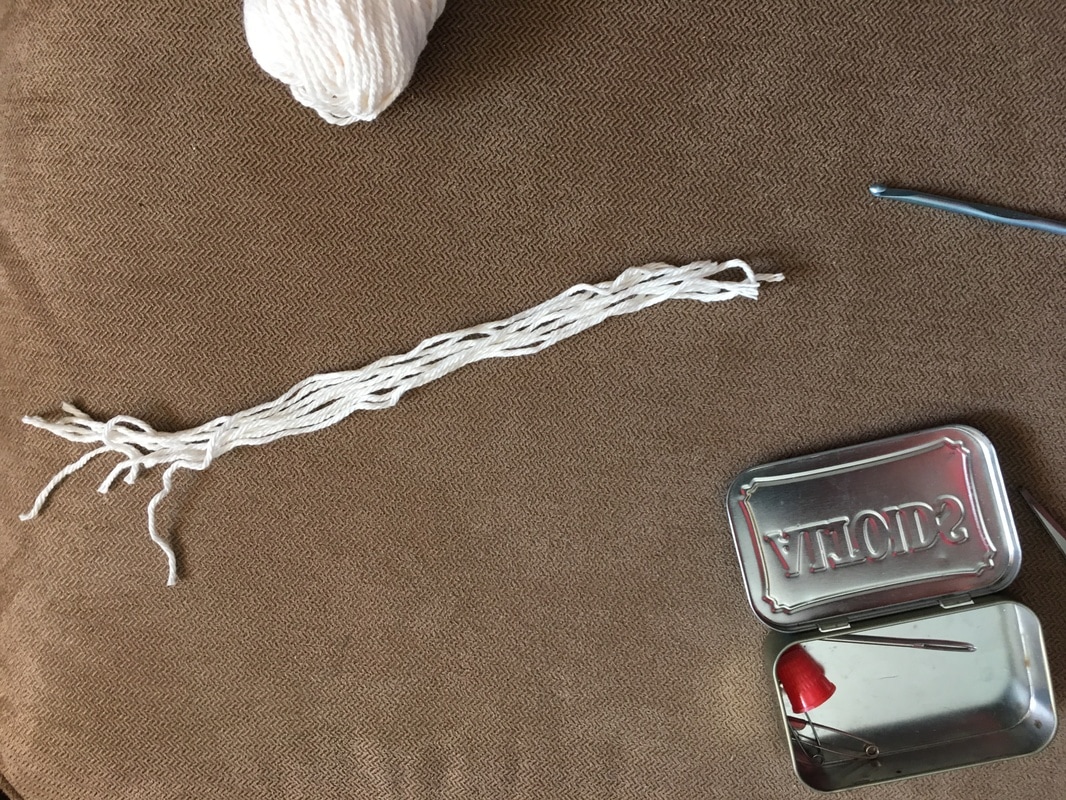
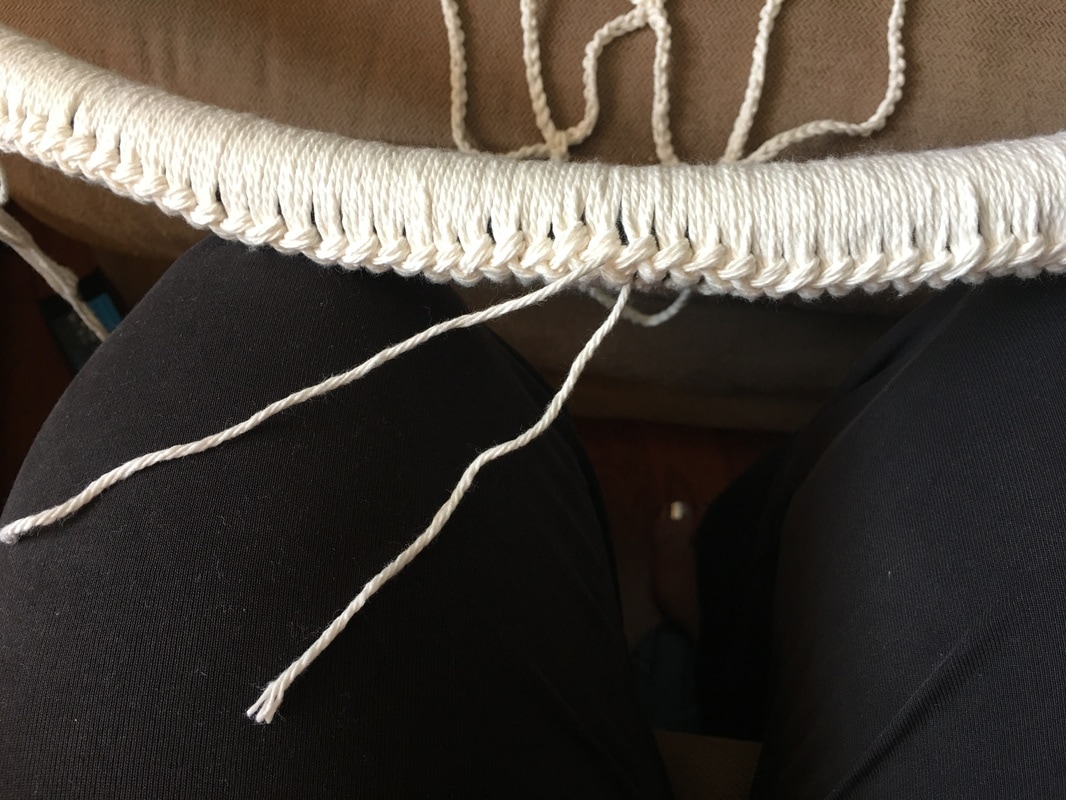
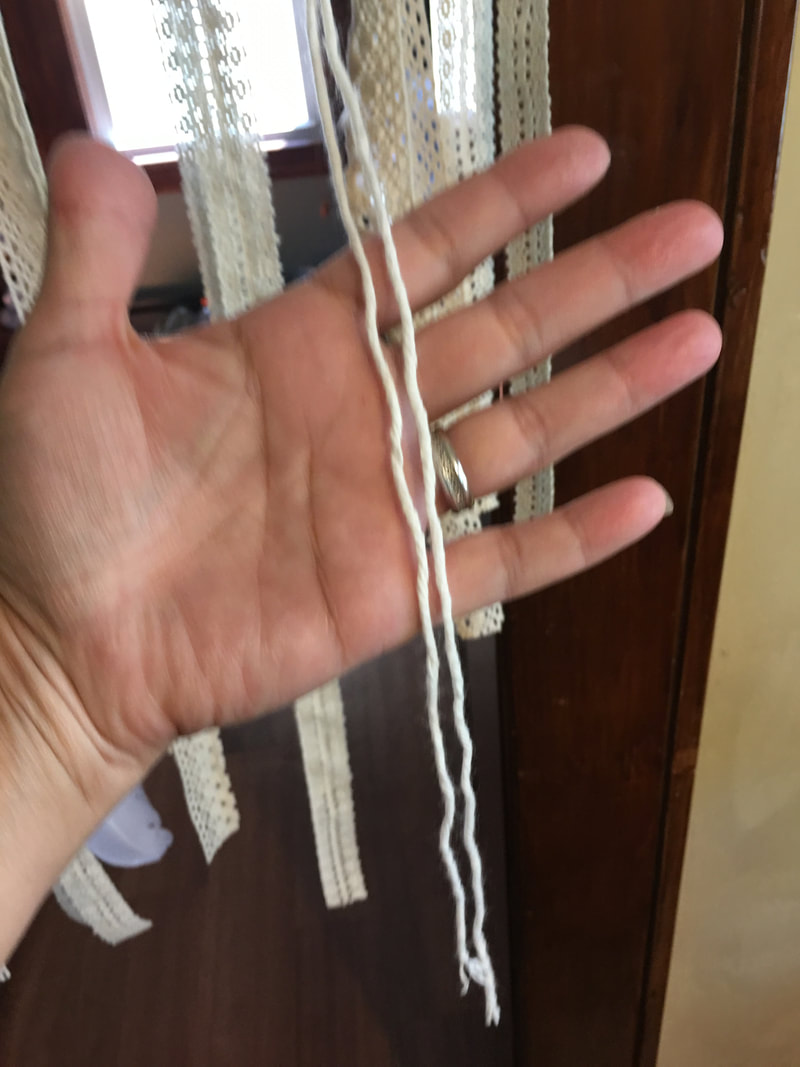
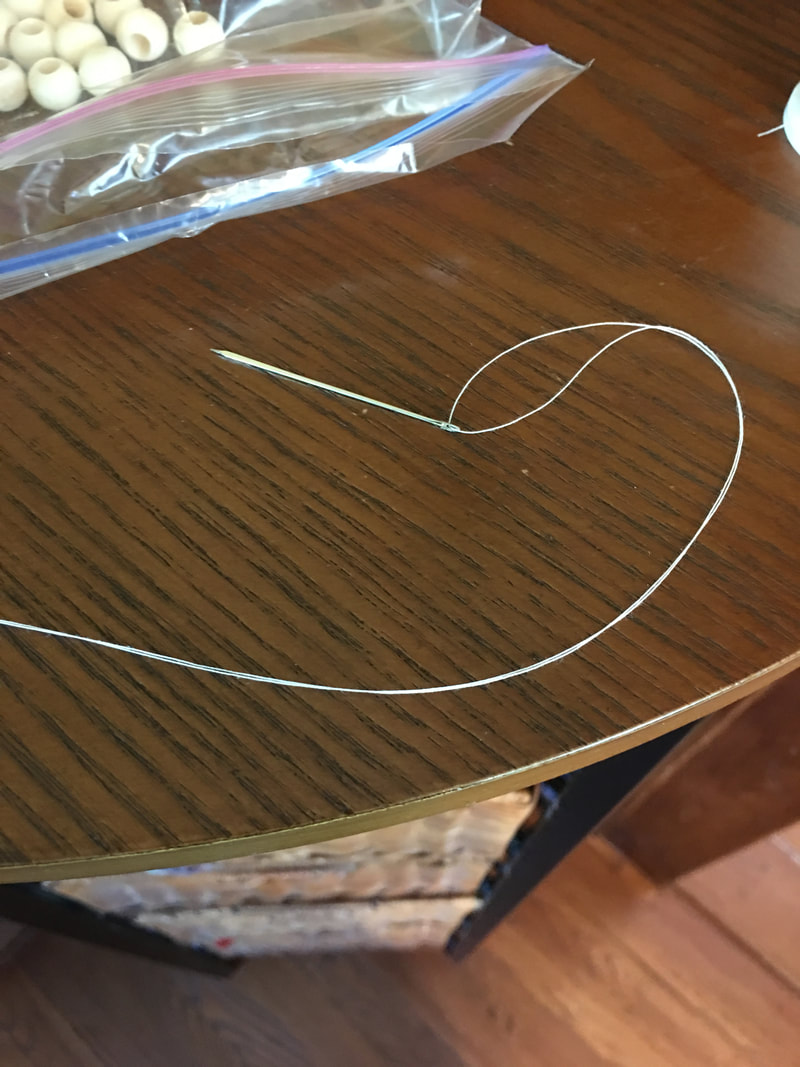
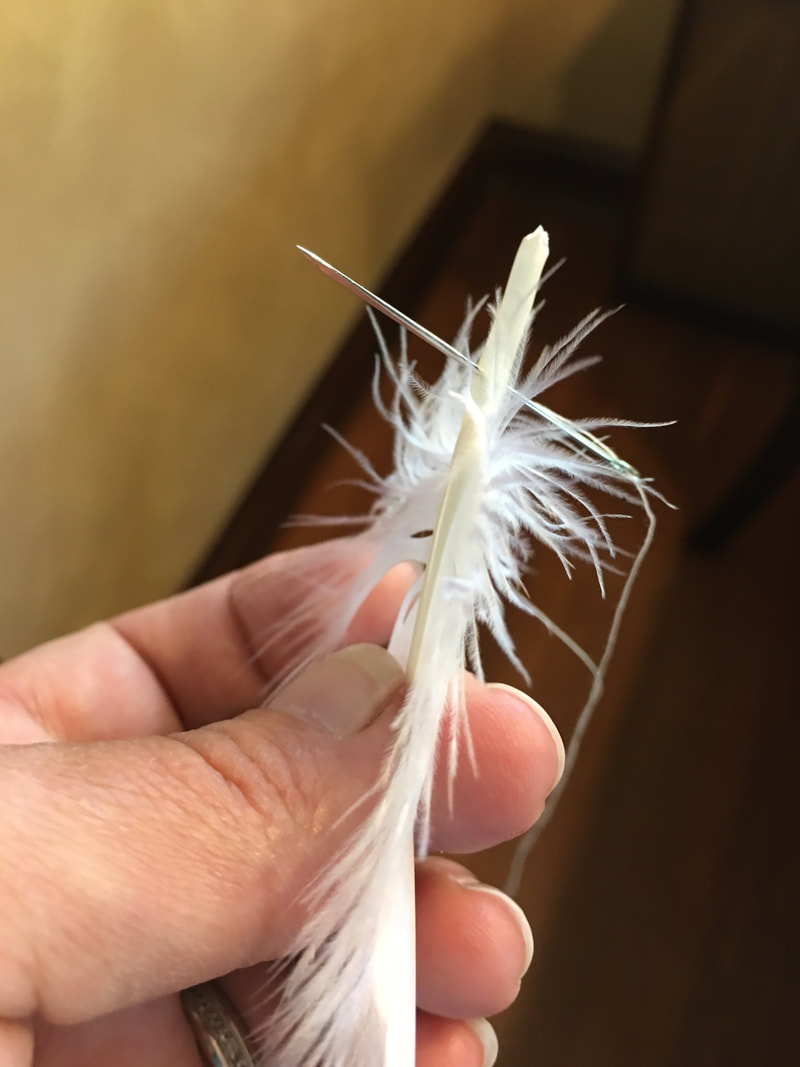
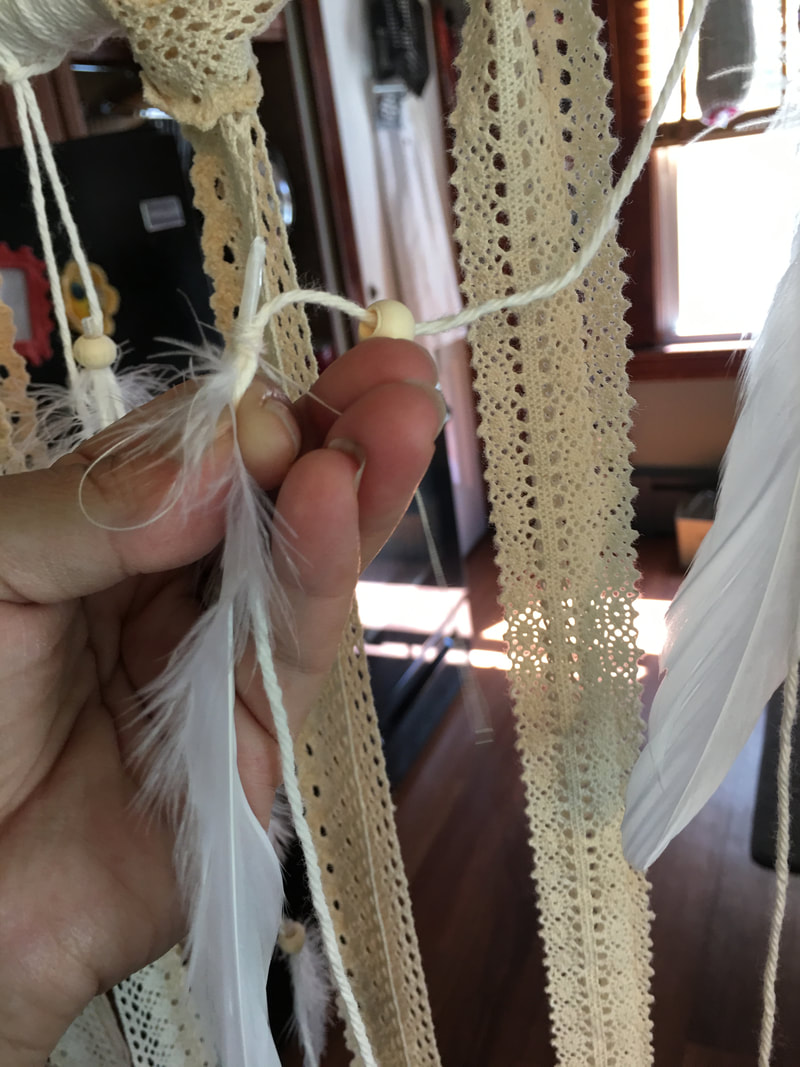
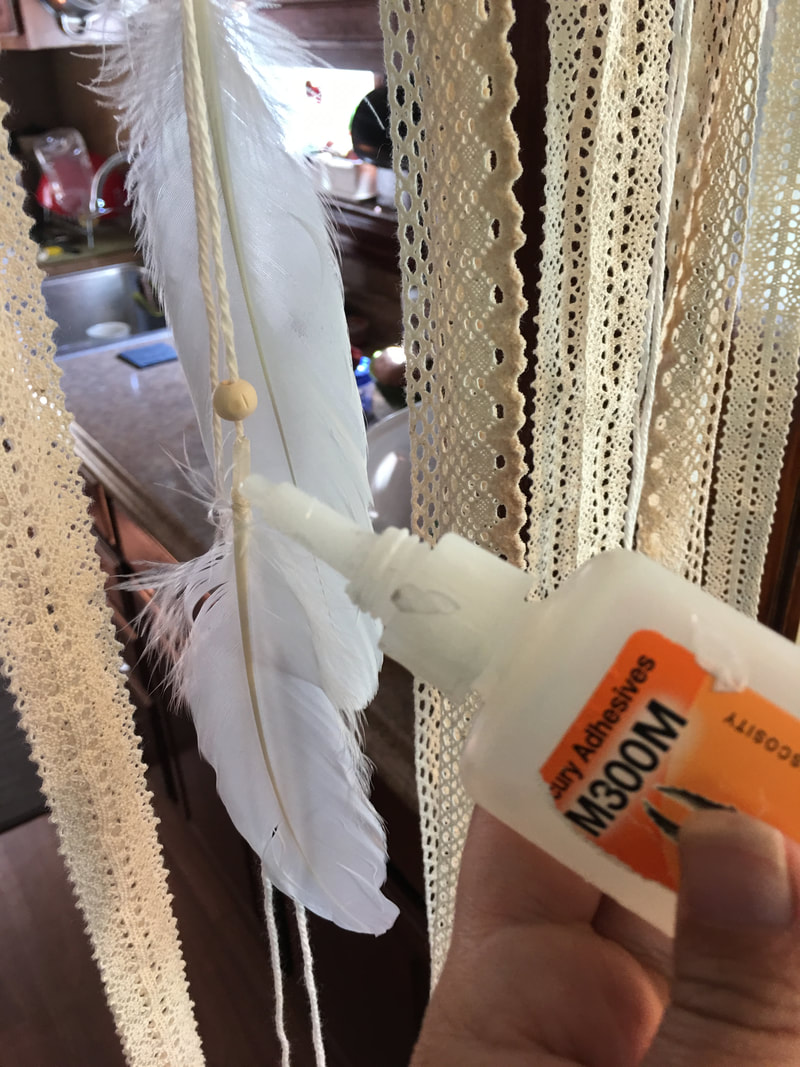
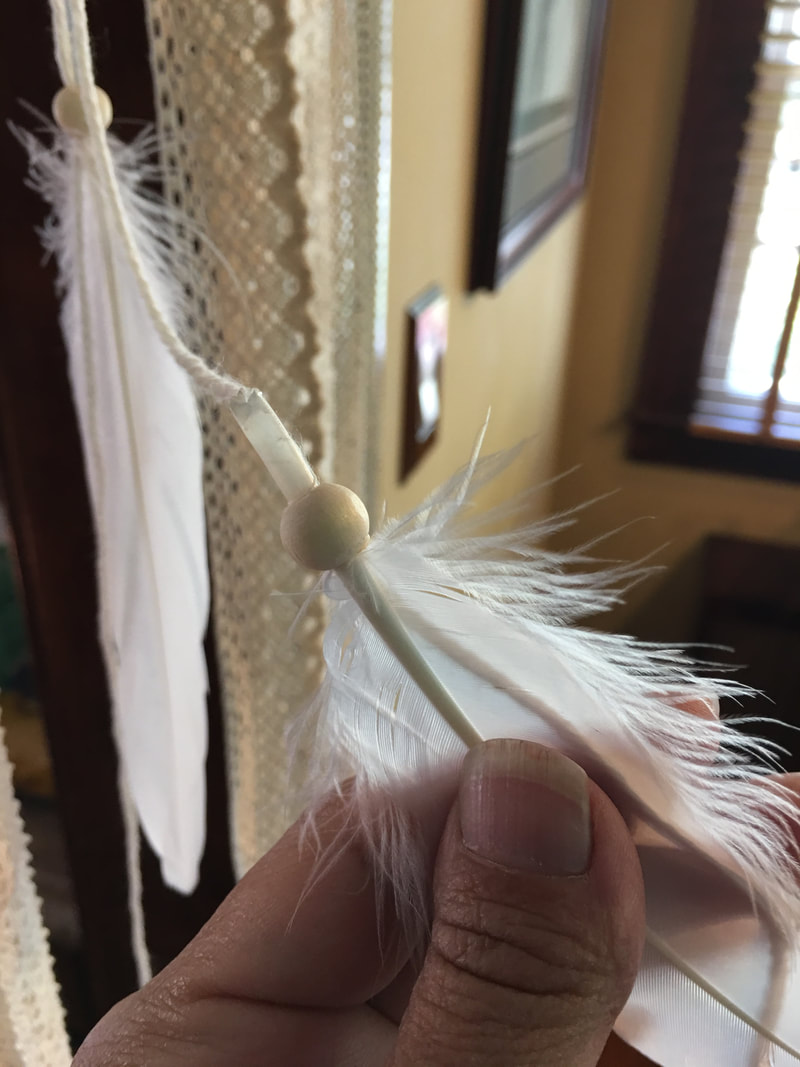
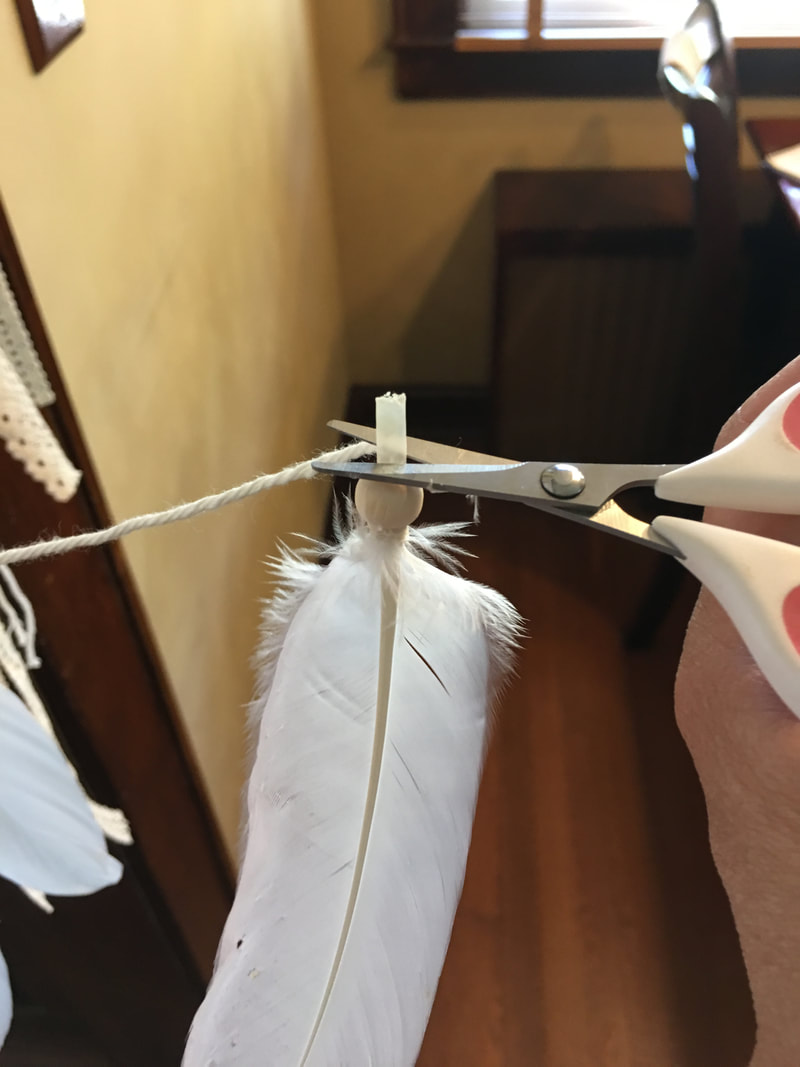
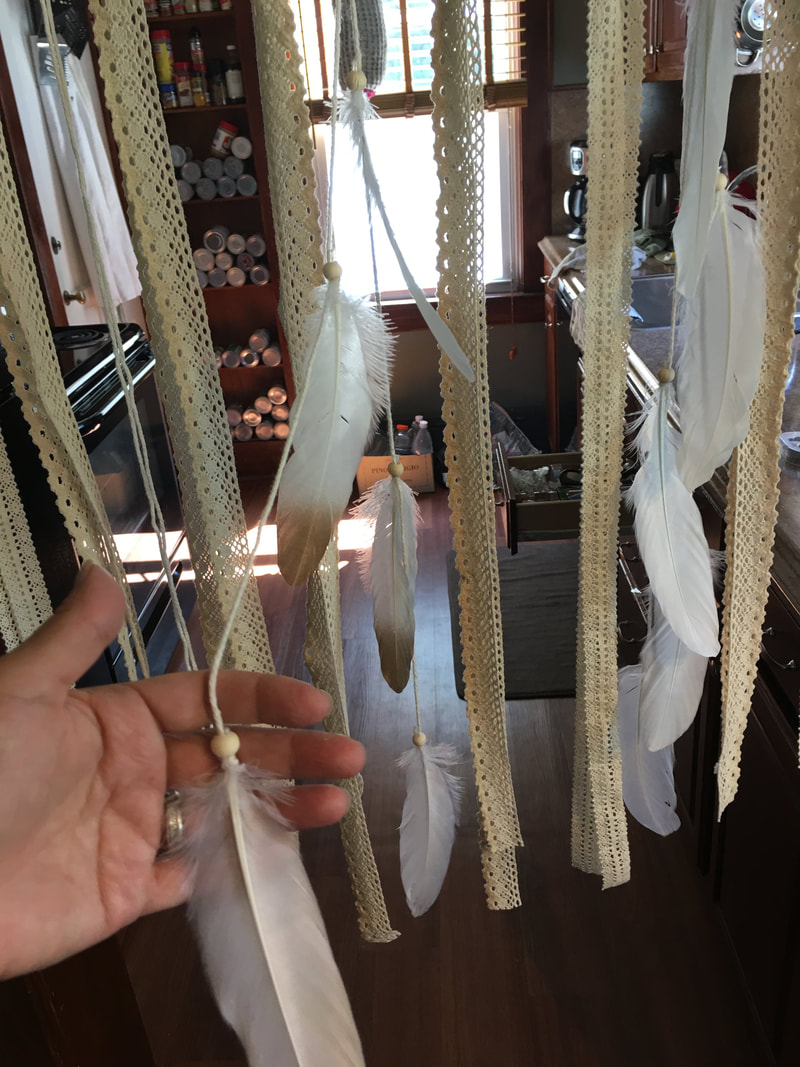
Add the fringe and feathers:
Supplies (some are affiliate links):
  • Natural Vintage Lace
  • Ivory Cotton Lace
  • ​White Gold Dipped Feathers
  • ​White Goose Feathers
  • ​Natural Beads
  • Small scissors
  • Gorilla Glue
  • Needle
  • Thread
P.S. Sorry if some of the pictures are a little blurry - it is kinda hard to be working and snapping pictures at the same time!
Picture
Hang the dream catcher in a location where you can easily work on it.
Picture
Cut lengths of lace approximately 4' long each and loop them over the dreamcatcher as shown in the picture. Do about 8 or more of them in equal intervals from the left side to the right side.
Picture
Cut 4' lengths of cotton yarn and loop onto the dream catcher in equal intervals from left to right between the cotton lace.
Picture
You will have to lengths of string hanging side by side. You will be attaching two feathers to each one in an alternating pattern so they are not all the same length.
Picture
Thread the needle with ivory string and have your beads ready!
Picture
Push the needle through the end of the feather.
Picture
Push a bead up the yarn above where you want the feather to be. Lay the feather on the yarn exactly where you want it to be and begin wrapping the the threaded needle around and around the end of the feather.
Picture
When finished wrapping push the needle through the wrapped portion and snip off the end.
Picture
Add a drop of glue on the threaded part and pull the bead all the way down into place.
Picture
Picture
Snip off the excess end of the feather.
Picture
Do two feathers per string at different intervals and also cut off excess string at the bottoms. Also remember to use a gold dipped feather every once in a while!
Picture
Continue adding feathers and lace until it is as full as you want it! Notice how the feathers and lace go up on the sides? You can also trim the lace to length when you are done.
PictureAnd here is the finished product hanging at the peak of the tent for my daughters bridal shower! We will also be using it for her upcoming wedding.
​

Here is a link to the other Giant Dreamcatcher instructions shown above!
Picture
The Giant Dream Catcher used for my daughters wedding ceremony!
Picture
This dreamcatcher used as the backdrop to their sweetheart table at the reception!
Thanks for visiting :-)
Follow me for more fun projects and ideas and check out our other DIY Shower & Wedding Ideas!
Sincerely,
Picture
0 Comments


Leave a Reply.

    Picture
    Hi there! I'm Kathie, the author behind Creating A Simpler Life blog. I'm excited to share our longterm projects (and planning) toward building our future retirement homestead in the Adirondack Mountains of New York. In the meantime I will be sharing all the other little things we do that are part of creating our simpler life!
    Creating a Simpler Life

    RSS Feed

    Visit Creating A Simpler Life's profile on Pinterest.

    Categories

    All
    Adirondack Crafts
    Chickens
    Conservation
    Crochet
    Do It Yourself
    Energy Savings
    Essential-oils
    Essential-oils
    Food-storage-preservation
    Food-storage-preservation
    Gardening
    Health
    Health-wellness
    Health-wellness
    Homemade-remedies
    Homemade-remedies
    Homesteading
    Homesteading Dreams
    Inexpensive Fun
    Minimizing
    Organization
    Products We Sell
    Recipes
    Recycling
    Saving-money
    Saving-money
    Shopping
    Wedding & Shower DIY

    Archives

    July 2020
    June 2020
    April 2020
    March 2020
    March 2019
    January 2019
    December 2018
    October 2018
    August 2018
    July 2018
    June 2018
    April 2018
    March 2018
    February 2018
    January 2018
    November 2017
    October 2017
    September 2017
    August 2017
    July 2017
    June 2017
    May 2017
    April 2017
    March 2017
    February 2017
    January 2017
    December 2016
    November 2016
    October 2016
    September 2016
    August 2016
    July 2016
    June 2016
    May 2016
    April 2016
    March 2016
    February 2016
    January 2016
    December 2015
    November 2015
    October 2015
    September 2015
    August 2015
    July 2015
    June 2015

mrandmrscorbi@gmail.com
Contact Us - Privacy Policy - Disclaimer
Copyright 2022©Creating A Simpler Life, Inc. All rights reserved. Reproduction in whole or in part without permission is prohibited.
  • Home/About
    • MINIMIZING >
      • Home Size
      • Room by Room
      • Get Organized
      • Household Waste
    • MINIMIZE DEBT, MAXIMIZE SAVINGS >
      • Bills & Other Debt
      • Saving Money
      • Shopping Tips
      • Affordable Fun
    • BACKYARD CHICKENS >
      • The Coop
      • The Chickens
      • Feeding the Chickens
      • Fresh Eggs
    • HOME GARDENING >
      • Building the Garden
      • What We Grow
      • Seeds, Weeds, & More
      • Preservation & Storage
    • DO-IT-YOURSELF >
      • Health & Wellness
      • Simple Cleaning & Tips
      • Crafts & More!
      • Printables
    • CROCHET >
      • IDEAS & MORE
      • VIDEO TUTORIALS
    • Blog
  • HOMESTEAD
    • The 5 Year Plan PLUS! >
      • 2017
      • 2018
      • 2019
      • 2020
      • 2021
      • 2022
    • WHY AN EARTH SHELTERED HOUSE?
    • OFF GRID TINY TRAILER
    • BUILD VIDEOS IN ORDER
    • HOMESTEAD MACHINERY >
      • GENERATORS
      • KUBOTA TRACTOR
      • ATV'S & UTV'S
      • WOOD CHIPPER
      • CHAINSAWS
      • LOG SPLITTER
      • POWER TOOLS
      • SNOWMOBILES
      • AUTOMOBILES
    • BUDGETING THE BUILD
    • SUSTAINABILITY >
      • WATER
      • FOOD
      • SHELTER
      • ENERGY >
        • SOLAR POWER
    • The Adirondacks >
      • Wildlife & Nature
      • Insects & Bugs
      • Things to Do
      • Water Fun
    • ADIRONDACK CRAFTS
  • VLOG
    • 2023
    • 2022
    • 2021