CREATING A SIMPLER LIFE OFF-GRID
  • Home/About
    • What does OFF-GRID mean?
    • MINIMIZING >
      • Home Size
      • Room by Room
      • Get Organized
      • Household Waste
    • MINIMIZE DEBT, MAXIMIZE SAVINGS >
      • Bills & Other Debt
      • Saving Money
      • Shopping Tips
      • Affordable Fun
    • BACKYARD CHICKENS >
      • The Coop
      • The Chickens
      • Feeding the Chickens
      • Fresh Eggs
    • HOME GARDENING >
      • Building the Garden
      • What We Grow
      • Seeds, Weeds, & More
      • Preservation & Storage
    • DO-IT-YOURSELF >
      • Health & Wellness
      • Simple Cleaning & Tips
      • Crafts & More!
      • Printables
    • CROCHET >
      • IDEAS & MORE
      • VIDEO TUTORIALS
  • HOMESTEAD
    • The 5 Year Plan PLUS! >
      • 2017
      • 2018
      • 2019
      • 2020
      • 2021
      • 2022
    • WHY AN EARTH SHELTERED HOUSE?
    • OFF GRID TINY TRAILER
    • BUILDING our HOMESTEAD from Scratch >
      • BUYING LAND & GETTING STARTED
      • BUILDING THE CONCRETE DOME
      • FROM DOME to HOME
      • SURVIVING OUR FIRST WINTER
    • HOMESTEAD MACHINERY >
      • GENERATORS
      • KUBOTA TRACTOR
      • ATV'S & UTV'S
      • WOOD CHIPPER
      • CHAINSAWS
      • LOG SPLITTER
      • POWER TOOLS
      • SNOWMOBILES
      • AUTOMOBILES
    • BUDGETING THE BUILD
    • SUSTAINABILITY >
      • WATER
      • FOOD
      • SHELTER
      • ENERGY >
        • SOLAR POWER
    • The Adirondacks >
      • Wildlife & Nature
      • Insects & Bugs
      • Things to Do
      • Water Fun
    • ADIRONDACK CRAFTS
  • VLOG
    • 2023
    • 2022
    • 2021

Blog

A little bit of anything and everything that's part of
​creating, enjoying, and living a simpler life!
Picture
http://www.creatingasimplerlife.com

Crochet Elephant Lovey

5/7/2017

5 Comments

 
Picture
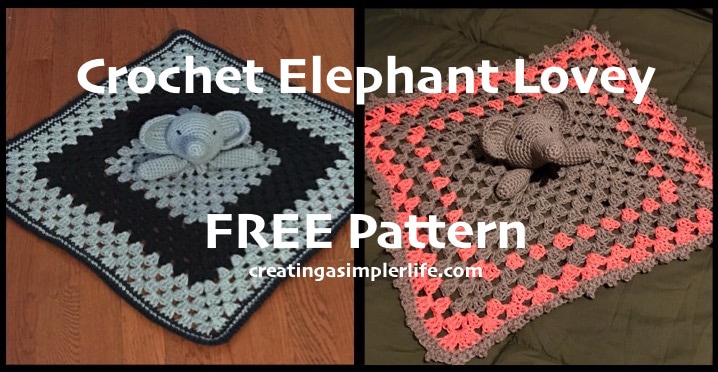
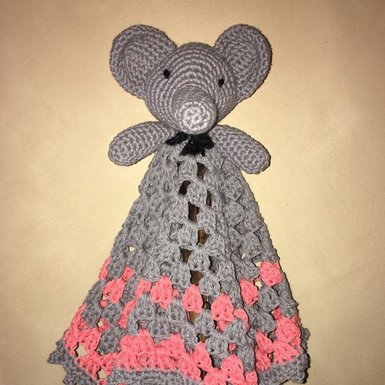
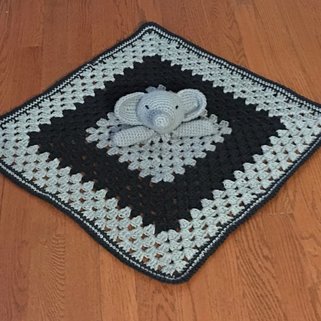
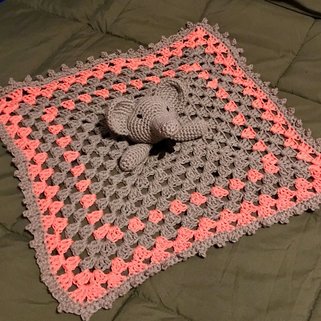
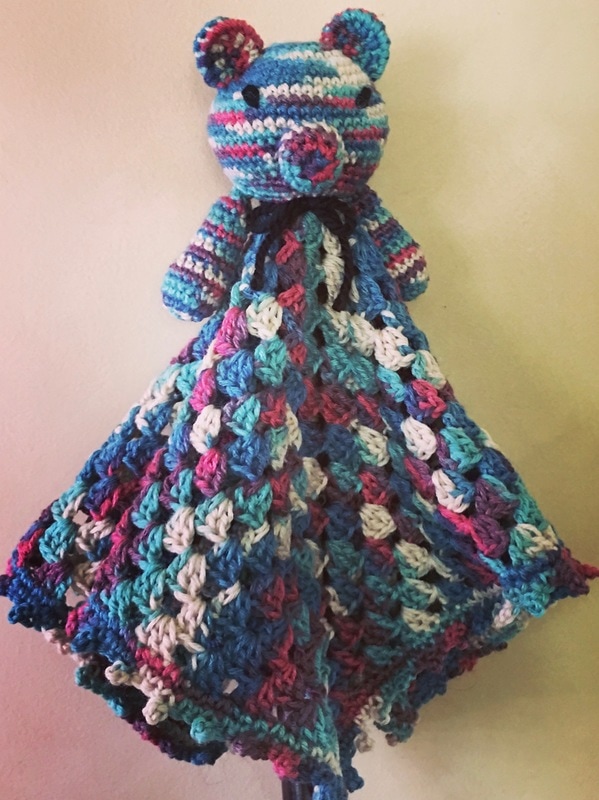
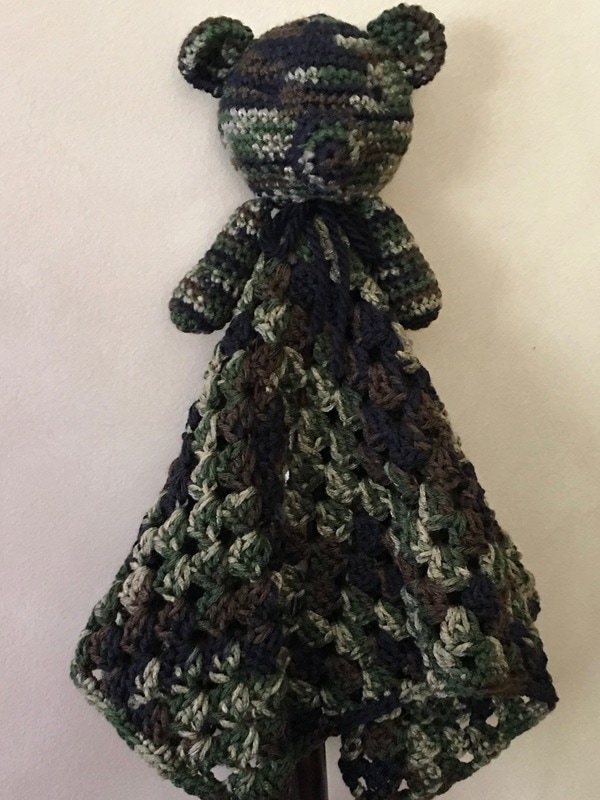
We have previously shared our FREE Elephant Lovey pattern and it has been one of our most pinned pins on Pinterest! We continue to use the same basic pattern but we are sharing it again because we have changed up the blanket a little! T's the same ole'  head, ears, and arms, with two new and different blanket options! I don't know which one I love more!

Supplies Needed:
  • *Qty. 3 - 2.5 oz. skeins of gray Lily Sugar'n Cream 100% cotton 4 ply yarn 
  • *Qty. 1 - 2.5 oz. skeins of black or coral (or any color of choice) Lily Sugar'n Cream 100% cotton 4 ply yarn 
  • Black Yarn, any type (for eyes)
  • Crochet Hook size 7 (4.5 mm)
  • Cotton or Poly Stuffing for head, eyes, and arms
  • Yarn Needle

*Best price I can find for the Sugar'n Cream yarn is $1.99 for a 2.5 oz skein at Michaels Craft Stores.  Even better if you print out and use their coupons each week - I print two coupons and bring my husband  (They almost always have a 40% or 50% off one regular priced item!).
Picture
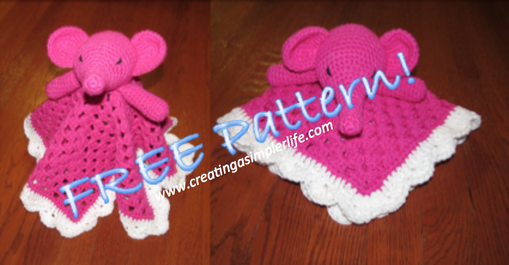
Picture of our Original elephant Lovey is a link to the FREE pattern!
Make the Head and Nose:
(I strongly suggest reading all the directions first and then watching the video tutorial if this is your first time making a ball shape).
YOU WILL BE MAKING THE NOSE FIRST:
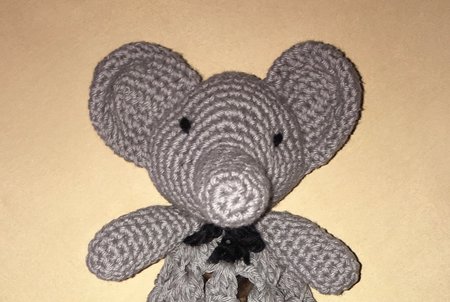
  • Round 1: Start with a magic circle with 6 single crochets. 
  • Round 2: 2 sc stitches in each stitch around.
  • Round 3: do 1 sc in each stitch around.
  • Rounds 4-9: continue 1 sc in each stitch around - you should start to see the nose forming.  You can choose to make the nose longer or shorter by adding more or less rows. PLACE MARKER HERE.
  • Round 10: At this point you will start to make the head.  Do one single crochet in the next two stitches, then two single crochets in the third, then one sc in each of the next two, then 2 sc in the next one. Repeat pattern around until you are in line with the marker.
  • Round 11: 3 sc, then two sc in one, 3 sc, then two sc in one (repeat around to marker).
  • Rounds 12-16: Basically with each round, you will increase the the number of single crochets in each stitch by one, then do two in one stitch, then repeat the same number of sc again.  You can continue the pattern by adding rounds and increasing the sc by one each time until the bottom of the head is the size that you want. By the 16th round you should be doing 8 sc in a row, then 2 sc in one stitch and repeating that pattern all the way around  to the marker.
  • Rounds 17-21: single crochet in each stitch around without increasing.
  • ​Round 22 to end: Start decreasing by one for each round as follows: sc 8 stitches, then do a double decrease stitch (see video) and continue around to marker, next round do 7 sc., then a double decrease stitch and continue pattern around to marker.  You will then do a round of 6 sc 1 dd, then a round of 5 sc 1 dd, and 4 etc. Before you finish be sure to fill it with stuffing.  Lastly, using the yarn needle, thread the yarn around the remaining hole and pull tightly closed. Leave a long tail hanging when you knot off.
Picture
Make the Ears:
The ears are worked from the outside of the ear toward the head in sort of a double layer that will be sewn together at the end....look at the picture to get a better idea if you do not understand.  If you still need help check out the Elephant Ear Crochet Tutorial Video I made on You Tube. It's not the best but hopefully it will help!
  • Chain 21 (this was updated on 8/17 from 20 to 21 chains!)
  • Round 1: sc into 19th stitch and all the way around on both the top and bottom of the chains.  Add one extra stitch at each end for a total of 42 single crochets.
  • Rounds 2-5: sc in each stitch decreasing twice on each side.  It doesn't matter where on each side you do the decrease, but it is best if they are separated by a few stitches.​
  • Bend into ear shape and use yarn to sew closed and sew onto head using a yarn needle.​​
This was my first time making a crochet video so it's not the best but I tried!
Sew on Eyes:
  • ​Using black yarn and the yarn needle, double the yarn and embroider eyes on using two stitches each.  
Picture
Make the Arms (optional):
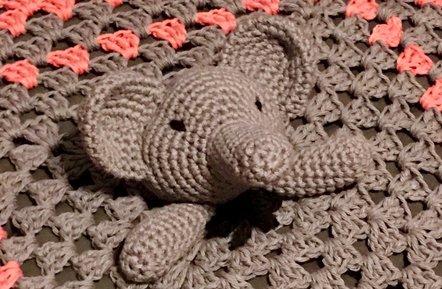
  • Round 1: make a magic circle and sc 6 stitches into it.
  • Round 2:  do two single crochets in each stitch around (you could place a marker here if necessary)
  • Rounds 3 - 10: do one single crochet in each stitch around.
  • Finish with a slip knot and cut the hanging string so there is approximately 12 inches attached to the arm.
  • At this point stuff the arm with stuffing.
  • ​Make a second arm.
  • Thread  the 12 hanging inches of yarn through the yarn needle and use it to sew each arm onto the head.  Check out this video tutorial on how to sew the arms closed and sew them on.  
Picture
Picture
Make the Blanket:
This is a basic granny square blanket. If my directions are confusing, check out this granny square video tutorial.  

The final blanket is approximately 18" x 18".
  • Chain 5 and connect to create a loop.
  • Row 1: chain 3 and double crochet 2 stitches repeating this 3 more times. Connect into the loop created by the first (original) stitch around. 
  • Row 2: chain 4 and skip the tops of the three dc (double crochet) to dc into the corner space created by the 3 single chain stitches.  Double crochet 3 total stitches into that space, chain 1, then double crochet 3 more stitches into the same corner space, chain 1 and dc 3 stitches into the next corner space, chain 3, and dc 3 more times into the same corner.  Continue around the same, but on the last corner, do 3 dc, 3 chains, and then only two dc (the original 4 chains will count as the last dc) and then slip stitch to connect to original 4 chains.  NOTE: every other row will begin and end this way.
  • Row 3: chain 3 then dc two more times into space, chain 1, then do 3 dc in the corner, chain 3, then 3 dc into same corner, chain 1, 3 dc in space, chain 1, then 3 dc in corner, chain 3, then 3 more dc in same corner and continue around the same.  Chain one after last corner and use a slip stitch to connect to original 3 chains.  NOTE: every other row will begin and end this way.
  • Rows 4 - 12: (change the color any time you choose)continue repeating rows 2 and 3.  Remember, all corners get 3 dc, 3 c, and 3 dc.  Straight runs only get 1 c in between the 3 dc's. If you are going to switch colors, slip stitch and knot off.
Edge of the Blanket:
  • For the Gray and Black: Three rows of sc in black, gray, then black.
  • For the Gray and Coral: One row of sc in gray, then one row of picot stitch around. ​
Picture
Adorable!
Finishing:
  • Sew head onto the center of the blanket.
  • Finish by using yarn needle to weave in all loose ends.
  • Lovey blanket can be washed and dried on delicate cycle!
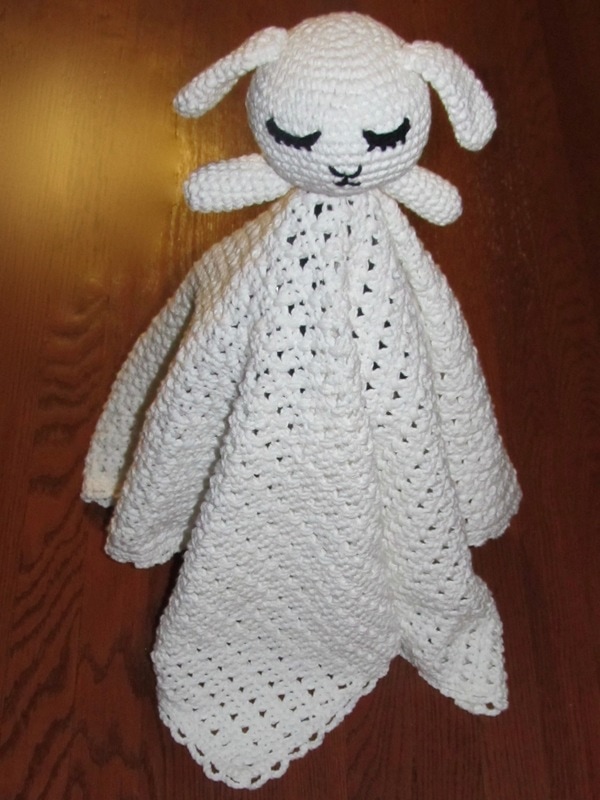
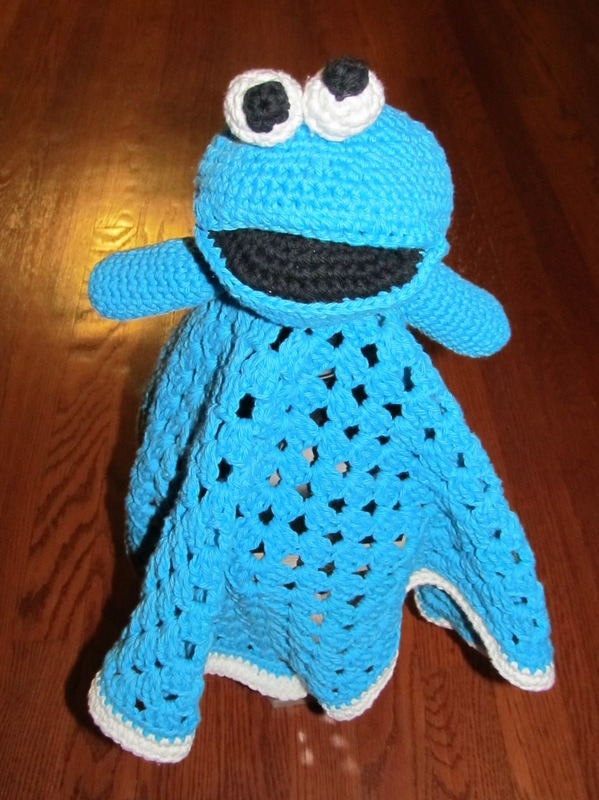
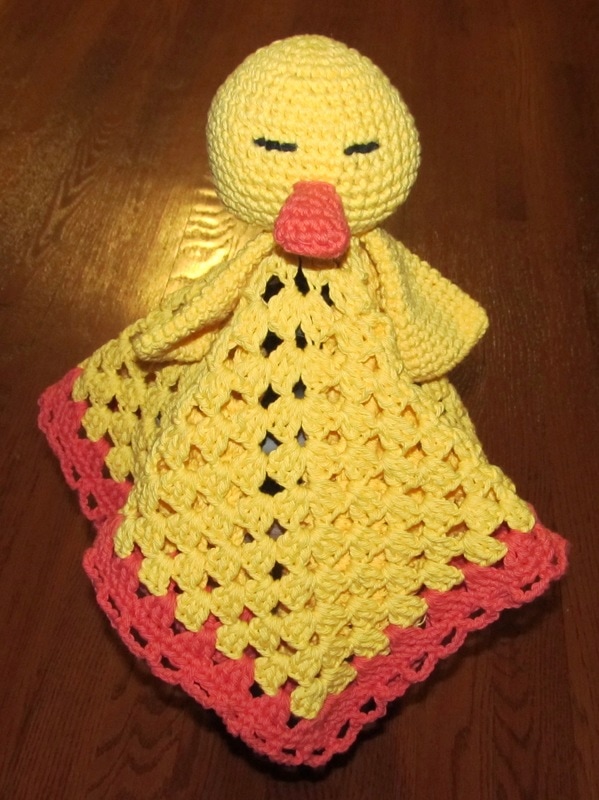
More FREE Lovey Blanket Patterns!
Click on each picture - they are links to patterns :-)
Picture
Little Lamb
Picture
"Monster"
Picture
Duck
Picture
Old Fashioned Bear
Picture
Camo Bear
Check out the our other FREE crochet patterns here!

Also check out the many crochet project patterns on our Pinterest Boards Crochet ONLY and Crochet for the Kids!

Thanks for visiting!
Sincerely,
Picture
5 Comments
Mvipanchika.
6/21/2018 10:53:05 am

I'm enjoying the patterns. Thanq for posting.

Reply
Kathie
6/23/2018 09:57:45 am

Thank you! I appreciate the feedback:-)

Reply
Dianne Earnest link
3/30/2019 08:43:07 pm

Kathie,
I made the elephant lovey and it turned out wonderfully. I am however thankful that you included the video for the ears, I had so much trouble with the instructions, I think if you put in the instructions that it will be shaped like a canoe it would help. Maybe a few pictures for folding the ear would be good for the future. Anyway, thank you, I am going to a baby shower on Sunday and the mother is using elephants and hippos as the baby boys theme.

Reply
Nicole Myles
3/28/2020 02:40:32 pm

This is my first project for my first grandchild! I unknowingly had selected melon and grey before I even decided what to make! Thank you for sharing this pattern! It's quickly becoming a favorite request among my customers!

Reply
Jery link
1/7/2021 08:11:46 am

Nice sshare

Reply


Leave a Reply.

    Picture
    Hi there! I'm Kathie, the author behind Creating A Simpler Life blog. I'm excited to share our longterm projects (and planning) toward building our future retirement homestead in the Adirondack Mountains of New York. In the meantime I will be sharing all the other little things we do that are part of creating our simpler life!
    Creating a Simpler Life

    RSS Feed

    Visit Creating A Simpler Life's profile on Pinterest.

    Categories

    All
    Adirondack Crafts
    Chickens
    Conservation
    Crochet
    Do It Yourself
    Energy Savings
    Essential-oils
    Essential-oils
    Food-storage-preservation
    Food-storage-preservation
    Gardening
    Health
    Health-wellness
    Health-wellness
    Homemade-remedies
    Homemade-remedies
    Homesteading
    Homesteading Dreams
    Inexpensive Fun
    Minimizing
    Organization
    Products We Sell
    Recipes
    Recycling
    Saving-money
    Saving-money
    Shopping
    Wedding & Shower DIY

    Archives

    July 2020
    June 2020
    April 2020
    March 2020
    March 2019
    January 2019
    December 2018
    October 2018
    August 2018
    July 2018
    June 2018
    April 2018
    March 2018
    February 2018
    January 2018
    November 2017
    October 2017
    September 2017
    August 2017
    July 2017
    June 2017
    May 2017
    April 2017
    March 2017
    February 2017
    January 2017
    December 2016
    November 2016
    October 2016
    September 2016
    August 2016
    July 2016
    June 2016
    May 2016
    April 2016
    March 2016
    February 2016
    January 2016
    December 2015
    November 2015
    October 2015
    September 2015
    August 2015
    July 2015
    June 2015

mrandmrscorbi@gmail.com
Contact Us - Privacy Policy - Disclaimer
Copyright 2022©Creating A Simpler Life, Inc. All rights reserved. Reproduction in whole or in part without permission is prohibited.
  • Home/About
    • What does OFF-GRID mean?
    • MINIMIZING >
      • Home Size
      • Room by Room
      • Get Organized
      • Household Waste
    • MINIMIZE DEBT, MAXIMIZE SAVINGS >
      • Bills & Other Debt
      • Saving Money
      • Shopping Tips
      • Affordable Fun
    • BACKYARD CHICKENS >
      • The Coop
      • The Chickens
      • Feeding the Chickens
      • Fresh Eggs
    • HOME GARDENING >
      • Building the Garden
      • What We Grow
      • Seeds, Weeds, & More
      • Preservation & Storage
    • DO-IT-YOURSELF >
      • Health & Wellness
      • Simple Cleaning & Tips
      • Crafts & More!
      • Printables
    • CROCHET >
      • IDEAS & MORE
      • VIDEO TUTORIALS
  • HOMESTEAD
    • The 5 Year Plan PLUS! >
      • 2017
      • 2018
      • 2019
      • 2020
      • 2021
      • 2022
    • WHY AN EARTH SHELTERED HOUSE?
    • OFF GRID TINY TRAILER
    • BUILDING our HOMESTEAD from Scratch >
      • BUYING LAND & GETTING STARTED
      • BUILDING THE CONCRETE DOME
      • FROM DOME to HOME
      • SURVIVING OUR FIRST WINTER
    • HOMESTEAD MACHINERY >
      • GENERATORS
      • KUBOTA TRACTOR
      • ATV'S & UTV'S
      • WOOD CHIPPER
      • CHAINSAWS
      • LOG SPLITTER
      • POWER TOOLS
      • SNOWMOBILES
      • AUTOMOBILES
    • BUDGETING THE BUILD
    • SUSTAINABILITY >
      • WATER
      • FOOD
      • SHELTER
      • ENERGY >
        • SOLAR POWER
    • The Adirondacks >
      • Wildlife & Nature
      • Insects & Bugs
      • Things to Do
      • Water Fun
    • ADIRONDACK CRAFTS
  • VLOG
    • 2023
    • 2022
    • 2021